Project 1_Comparative study of different storey buildings for Seismic forces
PROJECT - 1
OBJECT: TO know about the seismic response for a structure and how to assign the seismic force in the structure and we know about the certain properties in an ETAB models and factor influencing the dynamic characteristics of a building and time period of building and influencing mode shape of building.
PROCEDURE:
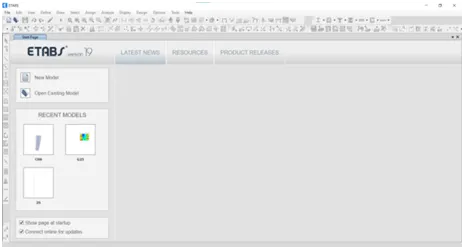
1.Open ETAB and go to the new model.
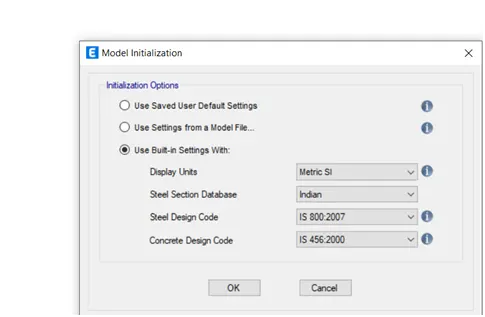
2.Use built in setting and choose the units and codes than click ok.
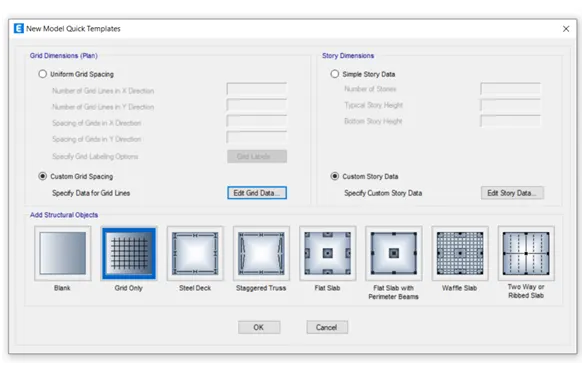
3.Choose custom grid and edit grid data.
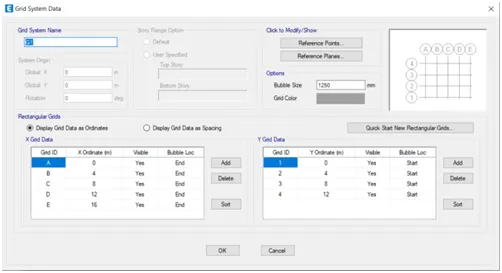
4.Than give the coordinates and ok.
5.Than choose custom story data and set the storey than ok, ok, and ok.
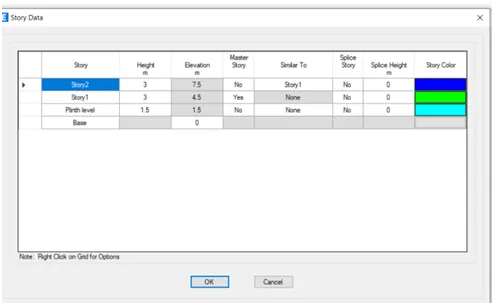
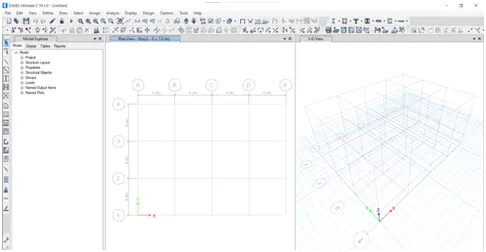
6.The model looks in window.
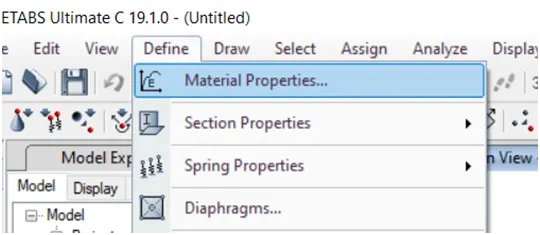
7.Create a material for the use in structure.
8.Add new material give the specifications than ok.
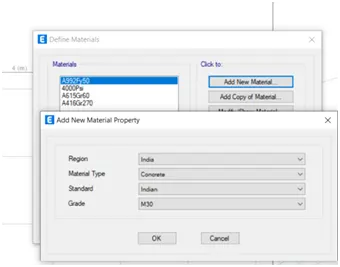
9.Than give the specification than ok.
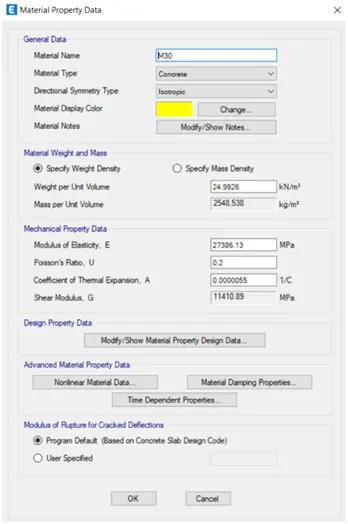
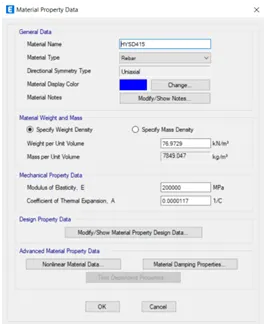
10.Again add new material and give the detail than ok.
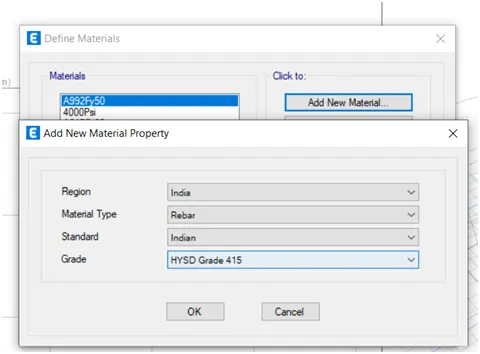
11.Than give the specification than ok,ok.
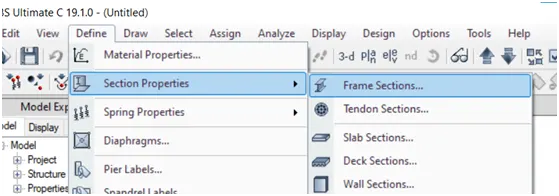
12.Go to define section properties, frame section.
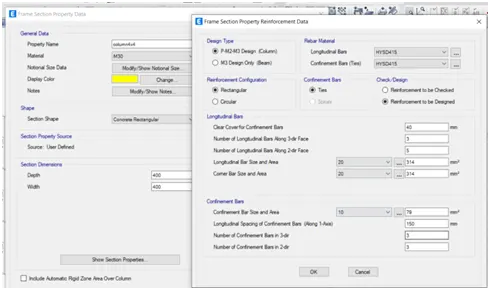
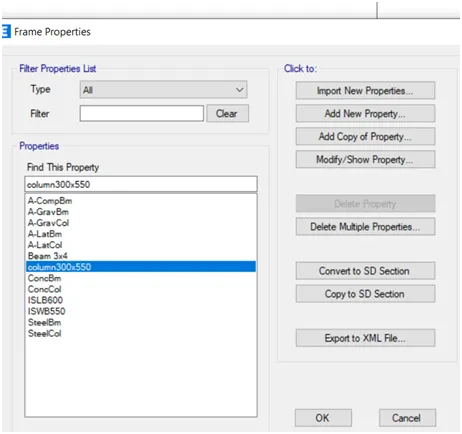
13.Add new property select concrete, rectangular section.
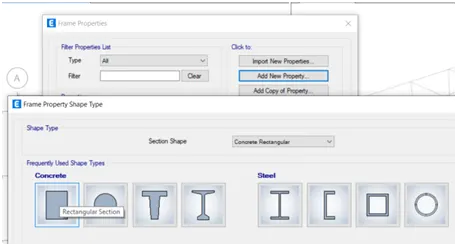
14.Give the specification of the beam.
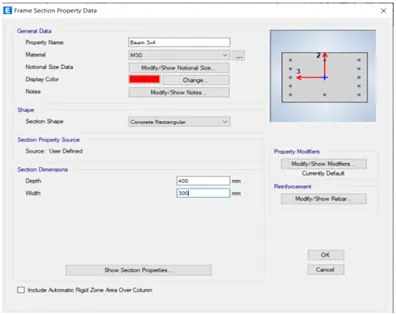
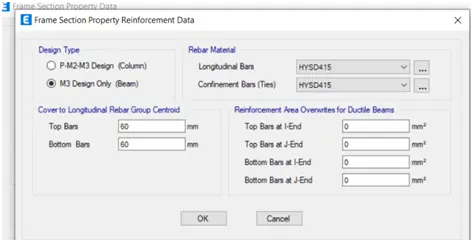
15.Than go modify rebar and select the hysd415 bar than ok
16.Again Add new property select concrete, rectangular section.
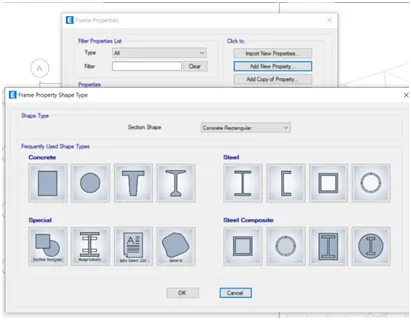
17.Give the specification of the column and modify the rebar than ok and ok.
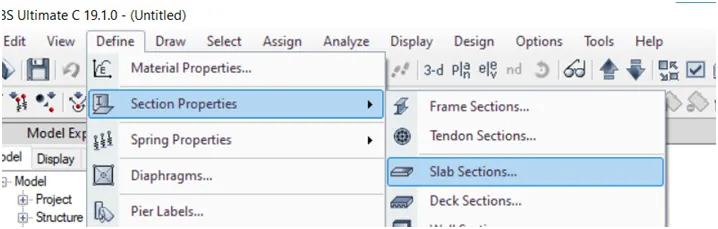
18.Go to define, section properties, slab section
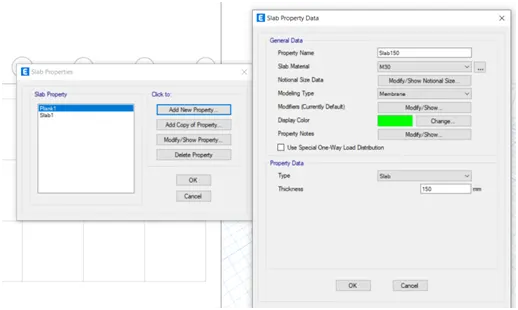
19.Add new property give the details than ok and ok.
20.Than choose the column.
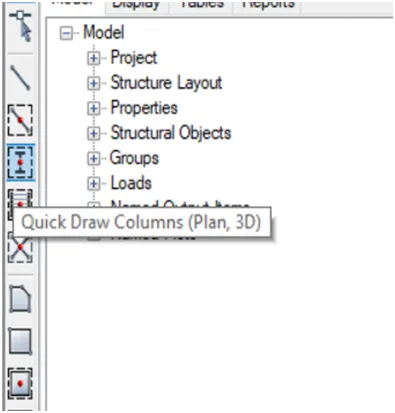
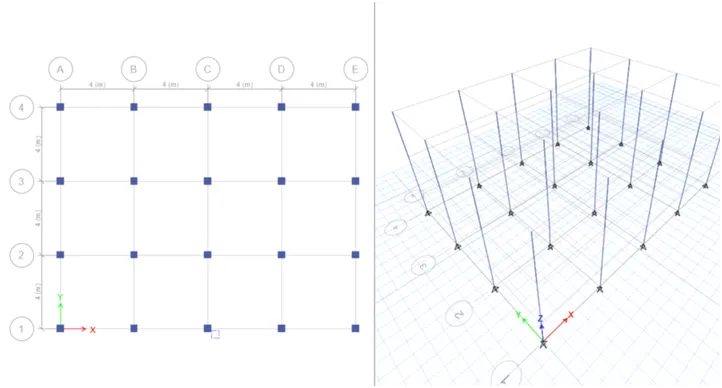
21.Than create a columns.
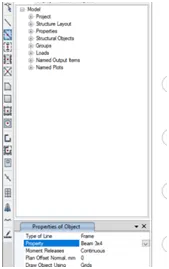
22.Than go to create a beams option.
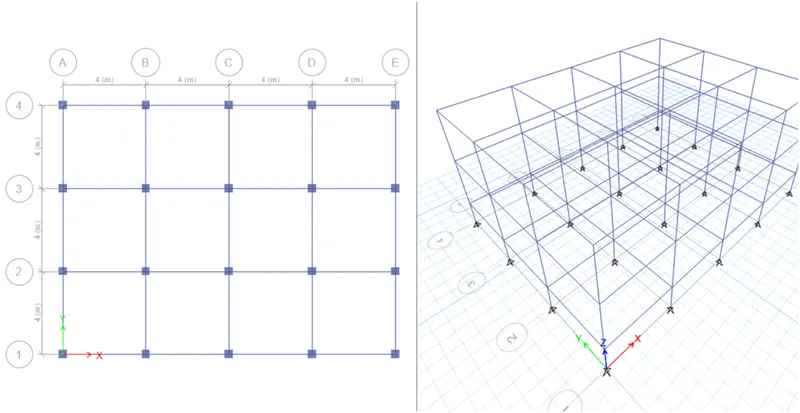
23.Than create a beams
24.Than select the quick draw floor.
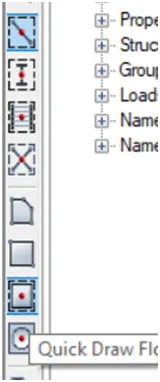
25.create a floor.
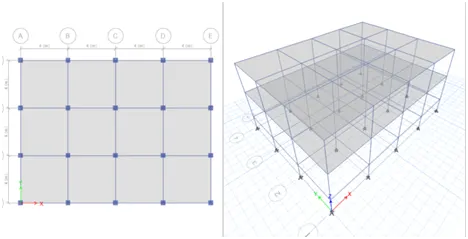
26.Than go to the load patterns.
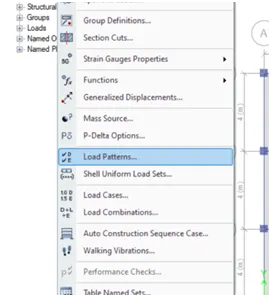
27.Add the loads and choose the IS: code
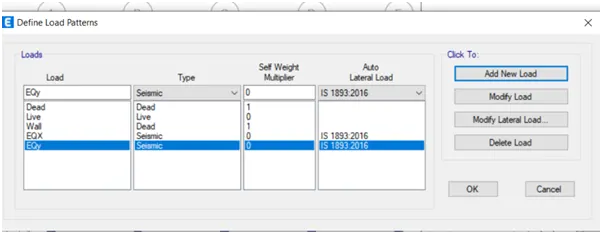
28.Than modify the seismic load choose the specifications than ok.
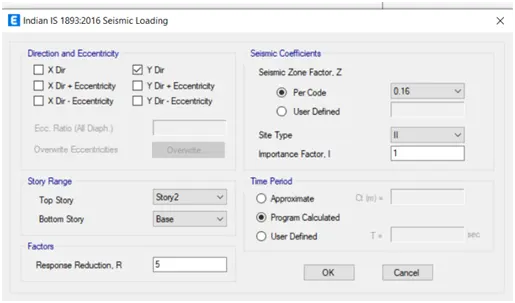
29.Again modify the another seismic load choose the specifications than ok.
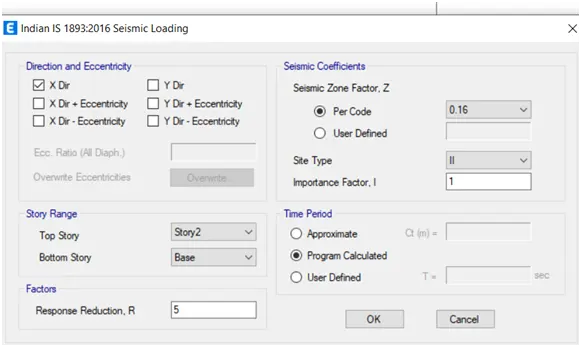
30.Than ok.
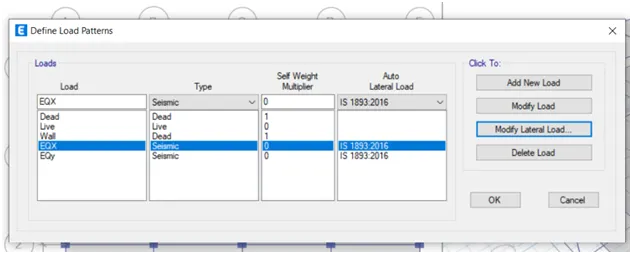
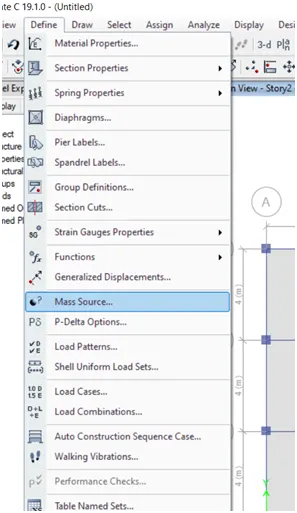
31.Select mass source
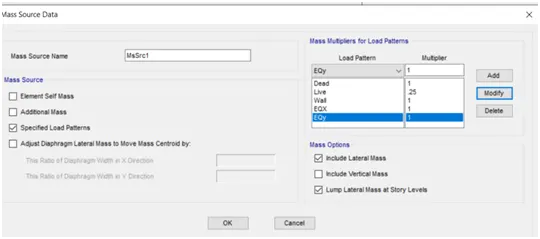
32.Than modify the mass source than ok and ok.
33.Than go for load combinations.
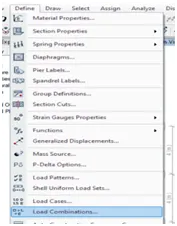
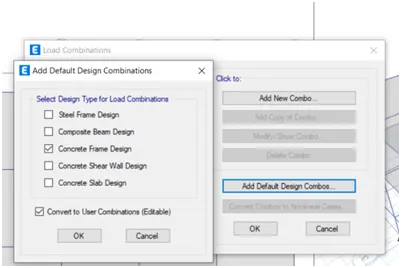
34.Than add load combinations as per the IS codes a
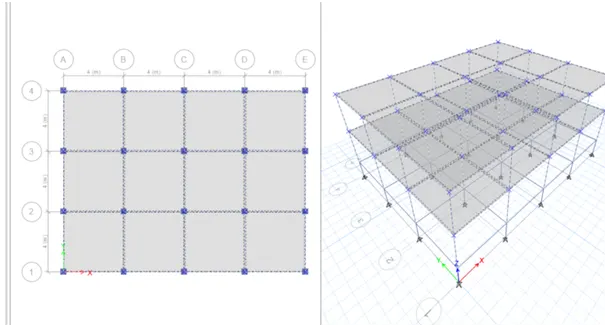
35.Than select the whole object.
36.Go to assign, joint load, force.
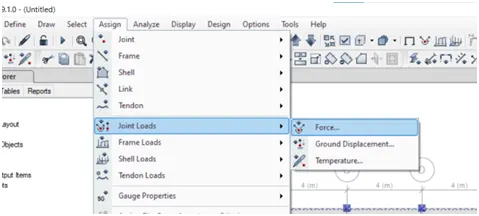
37.Choose dead load 1 KN, add exiting loads than ok
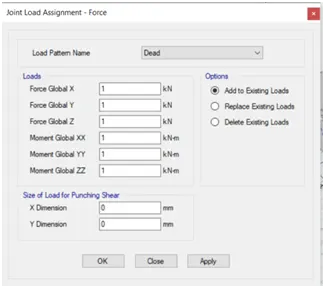
38.Than go to select, properties, frame section
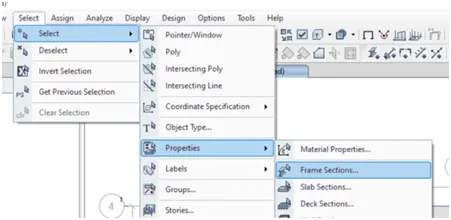
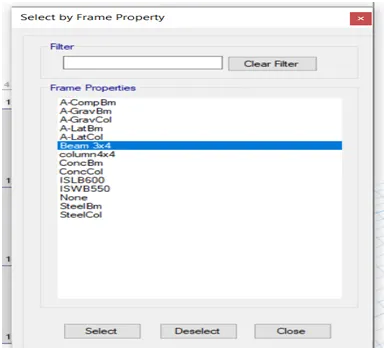
39.Beam section select.
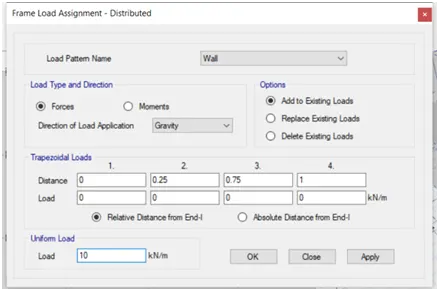
40.Go to assign, frame load, distribution load.
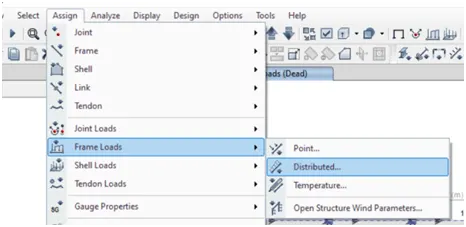
41.Choose wall, Add existing loads, 10KN ok.
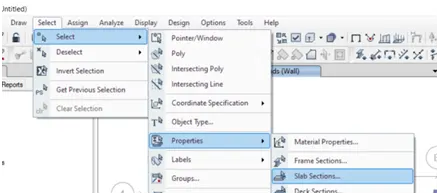
42.Again select, properties, slab section
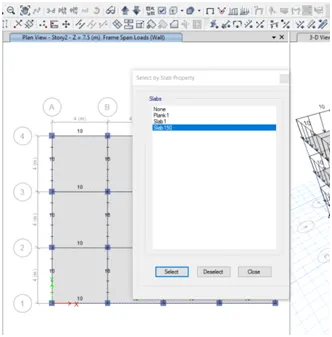
43.Choose slab select.
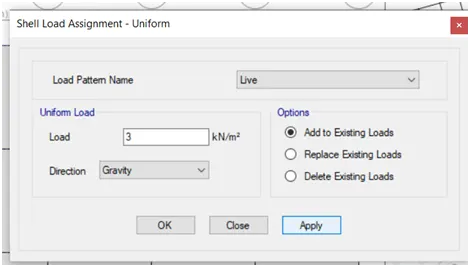
44.Go to assign, sell load, uniform.
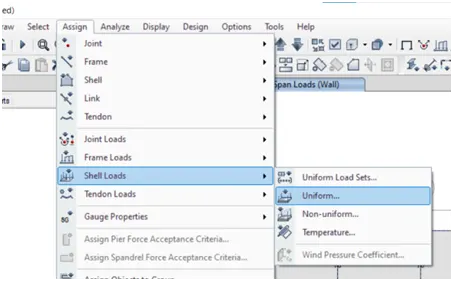
45.Choose live load, 3 KN, add to existing loads, apply, ok.
46.Go to assign, sell load, uniform.
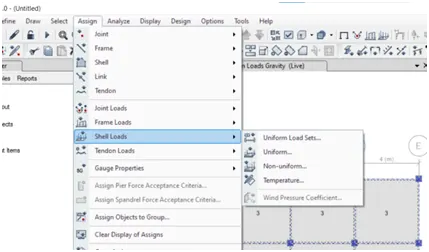
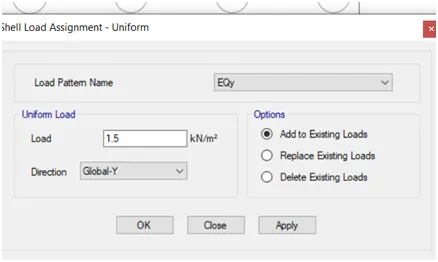
47.Choose seismic load half of the live load 1.5KN, add to existing loads, apply, ok.
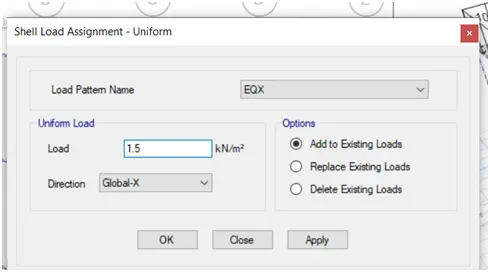
48.Go to assign, sell load, uniform.
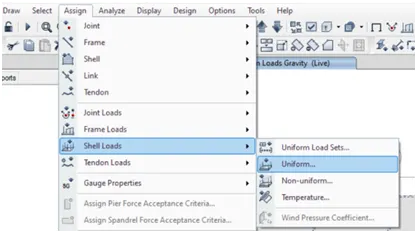
49.Again choose seismic load half of the live load 1.5KN, add to existing loads, apply, ok
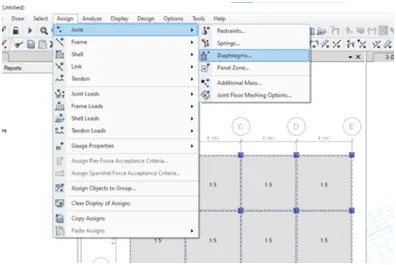
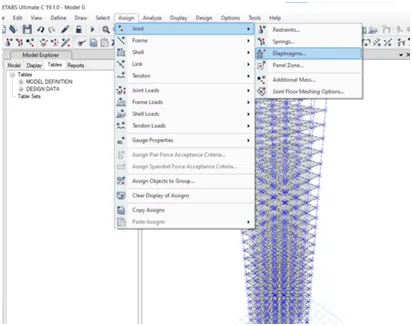
50.Select the whole structure than Go to assign, joint, diaphragms.
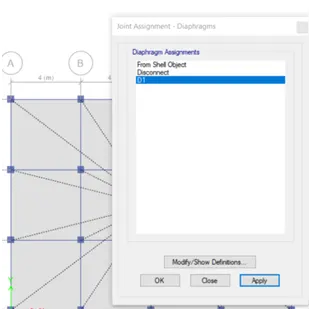
51.Choose D1, apply, ok
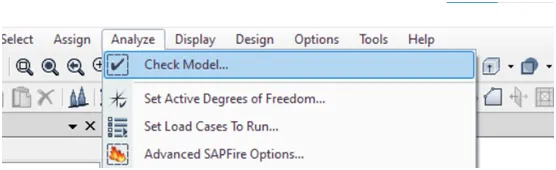
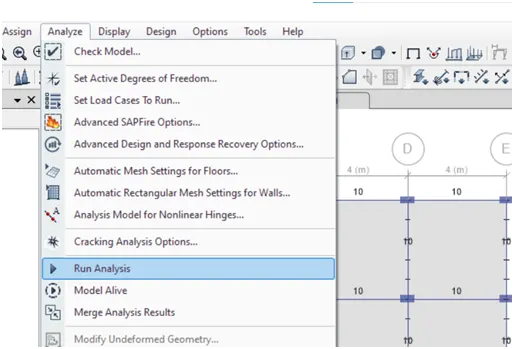
52.Analyze, check model.
53.Select the points than ok.
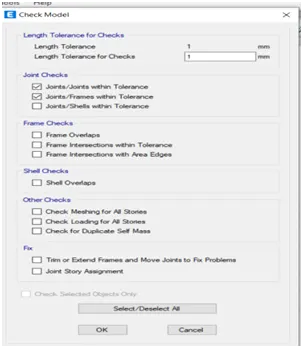
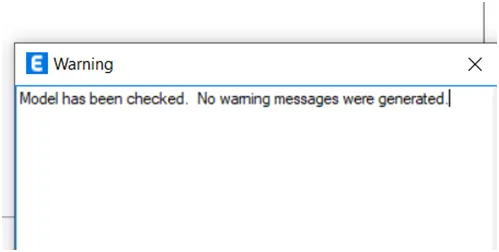
54.If no warning is available than analyze the structure or if not then re arrange the structure.
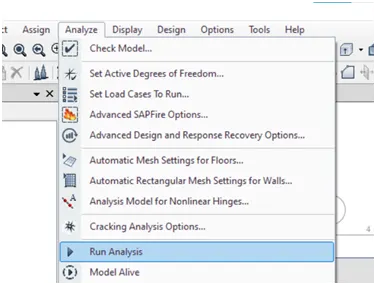
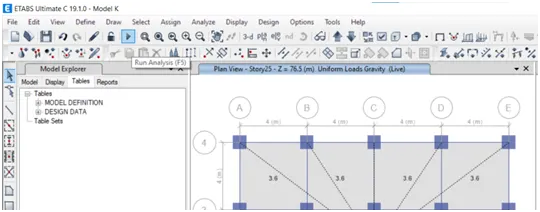
55.Than run analyze the structure.
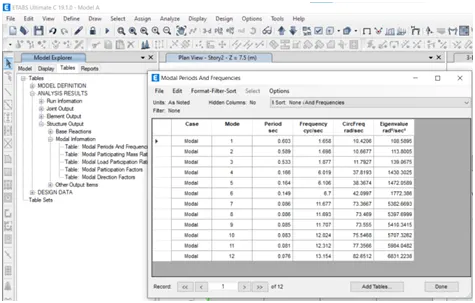
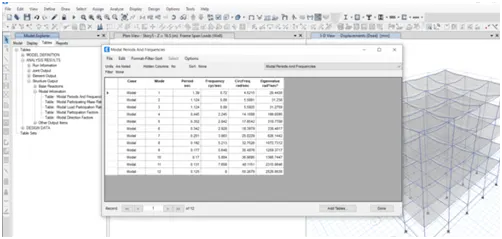
56.The structure designed result output.
57.Save as the same model.
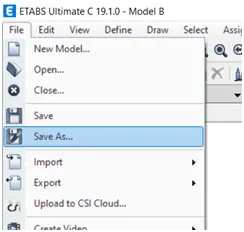
58.And choose story and grid edit system.
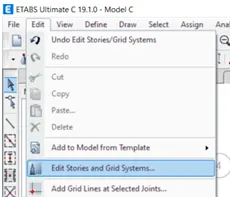
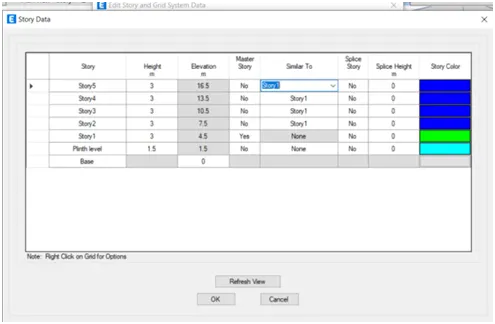
59.Edit the story, Refresh view and ok.
60.Check the loads proper apply in a structure.
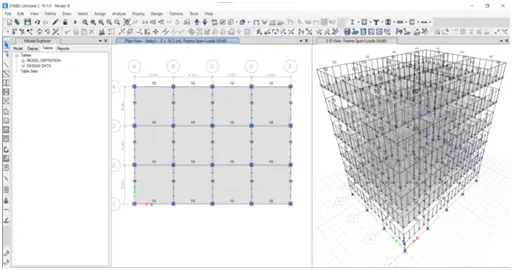
61.Than run Analysis the structure.
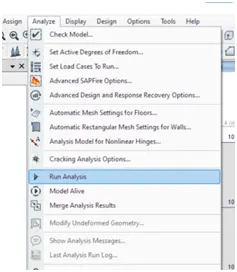
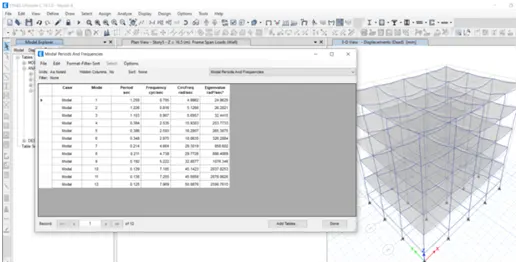
62.The structure designed result output.
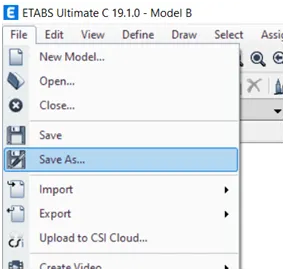
63.Save as the same model.
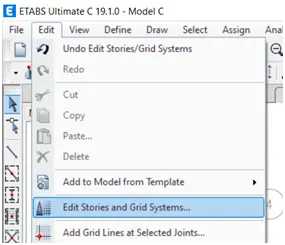
64.And choose story and grid edit system.
65.Than go to the section property
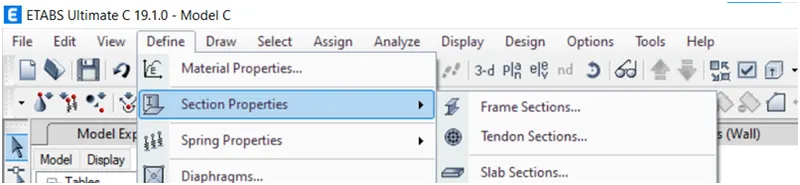
66.Than modify the property of column.
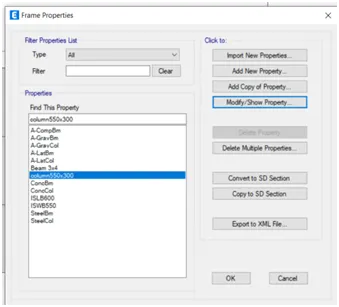
67.Modify the property and ok.
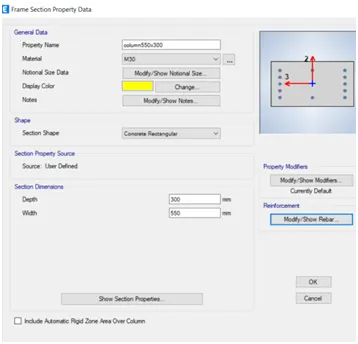
68.Run analysis the structure.
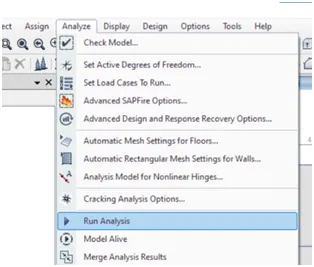
69.The structure designed result output.
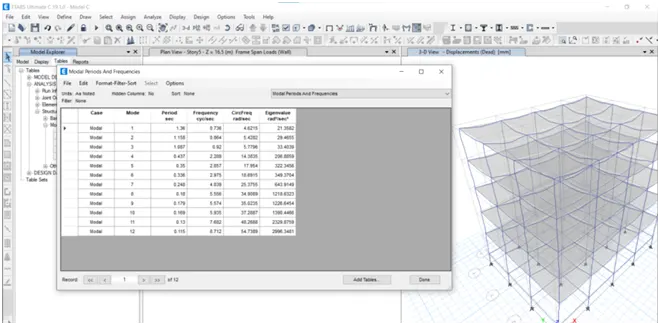
70.Save as the same model.
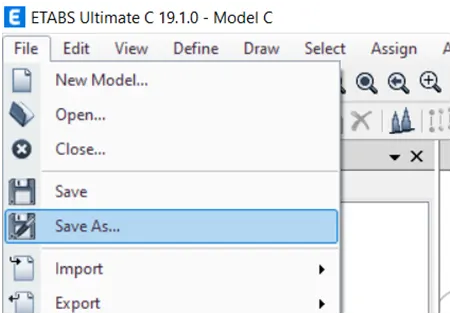
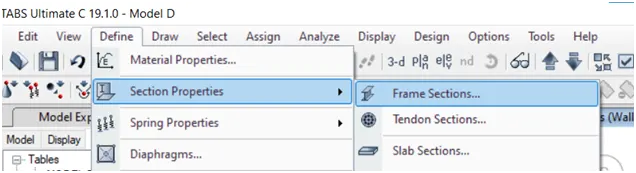
71.Than go to the section property
72.Than modify the property of column.
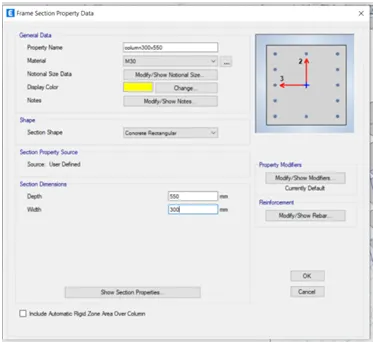
73.Than ok.
74.Run analysis the structure.
75.The structure designed result output.
76.Save as the same model.
77.And choose story and grid edit system.
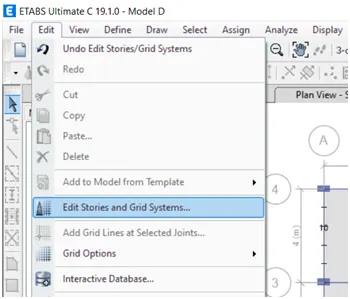
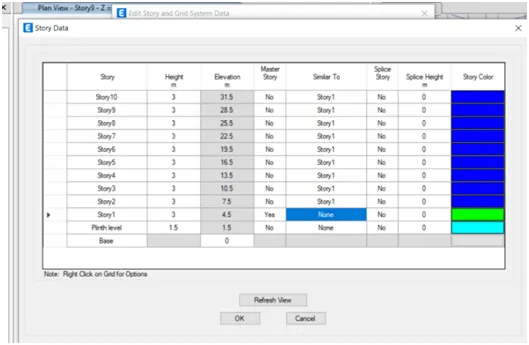
78.Modify the story.
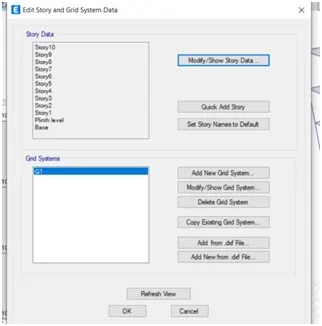
79.Add the story and ok.
80.Go to define section properties, frame section
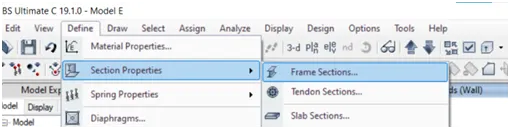
81.Add new property select concrete, rectangular section
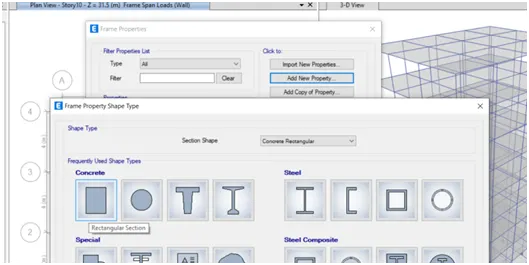
82.Give the specification of the column.
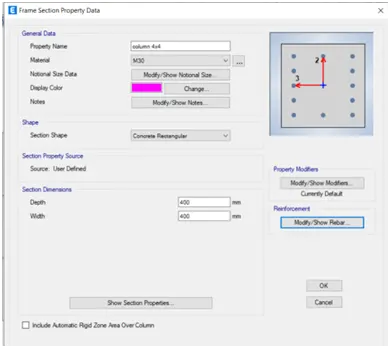
83.Than go modify rebar and select the hysd415 bar than ok
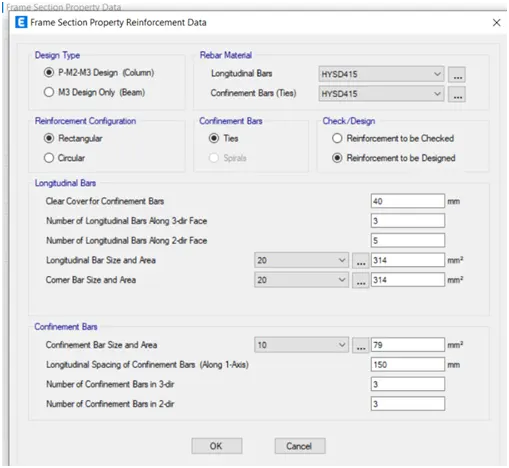
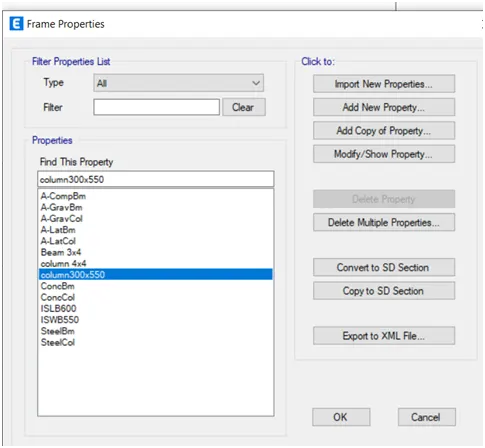
84.Than modify the previous column.
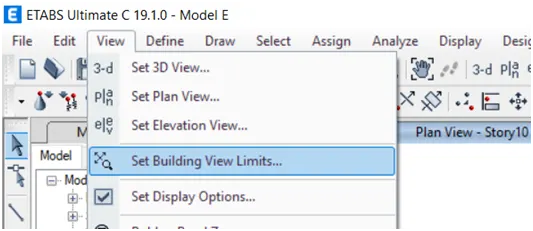
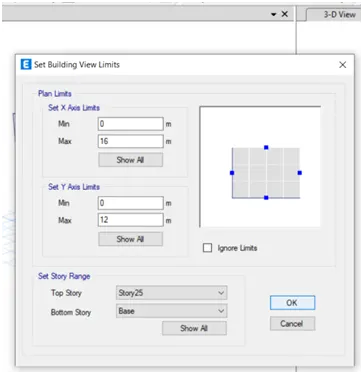
85.Set building limits
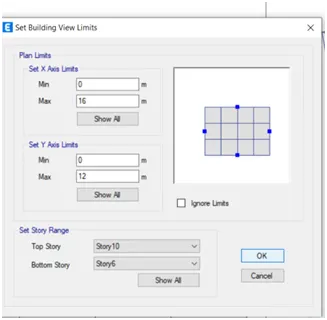
86.Set the limits
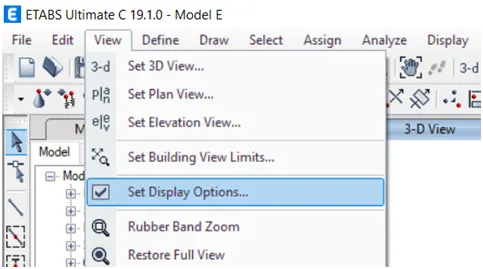
87.Choose display option.
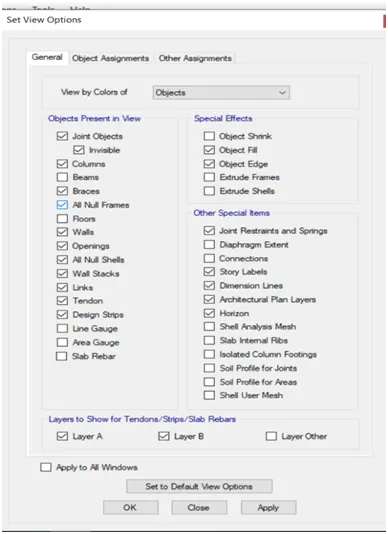
88.Choose beam and floors uncheck the box and ok.
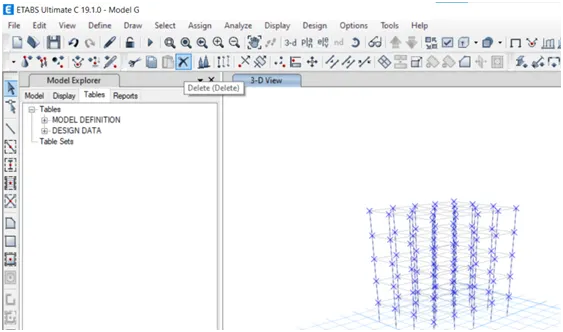
89.Slect the column and delete
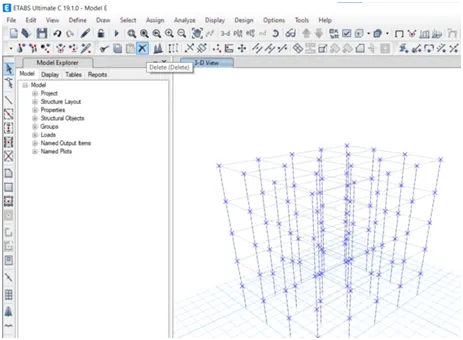
90.Than assign new column.
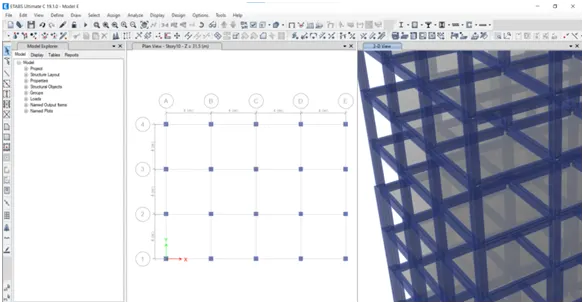
91.Than again go display option, Choose beam and floors check the box and ok
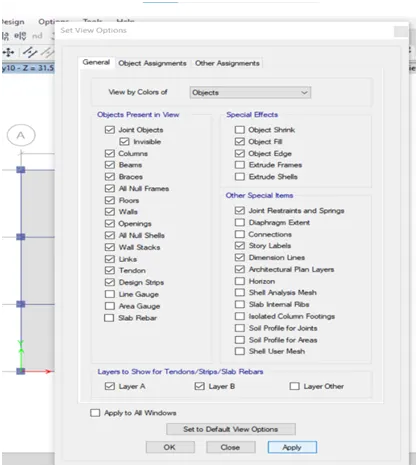
92.Run Analysis the structure.
93.The structure designed result output.
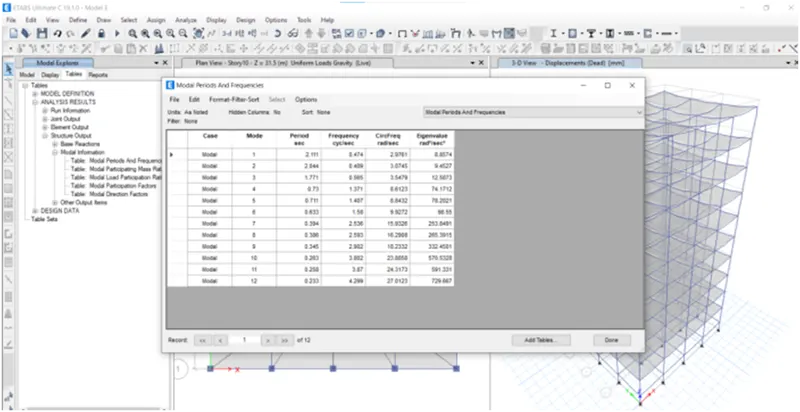
92.Than save as the model
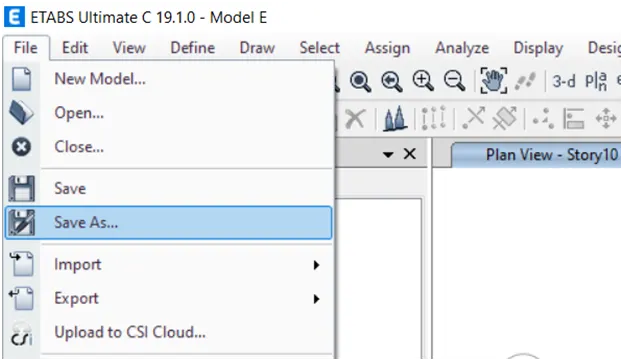
93.Set building limit
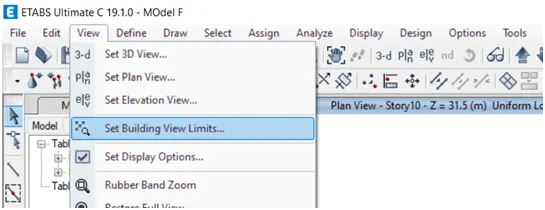
94.Than go to display option, Choose beam and floors uncheck the box and ok.
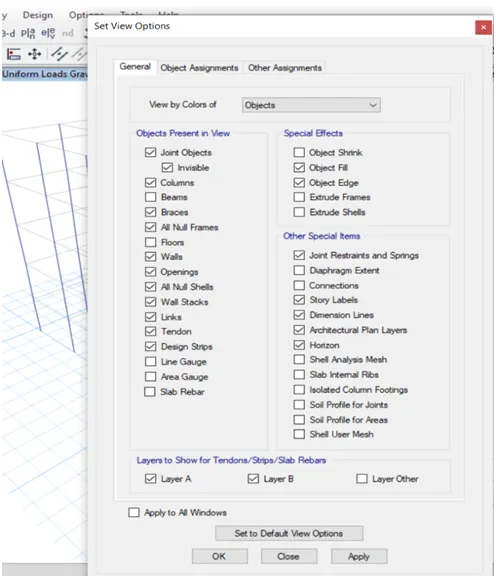
95.Select the column and delete.
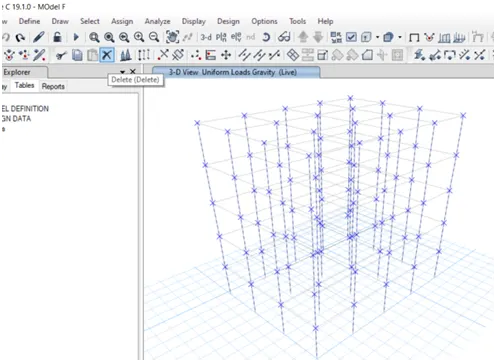
96.Draw a new column as per requirement.
97.and replicate all the floors.
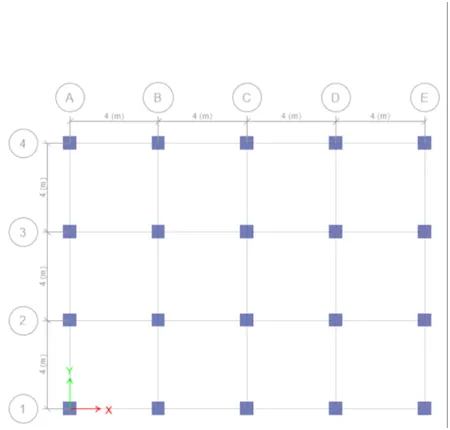
98.Than again go display option.
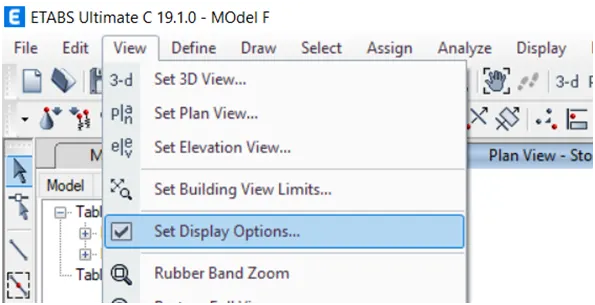
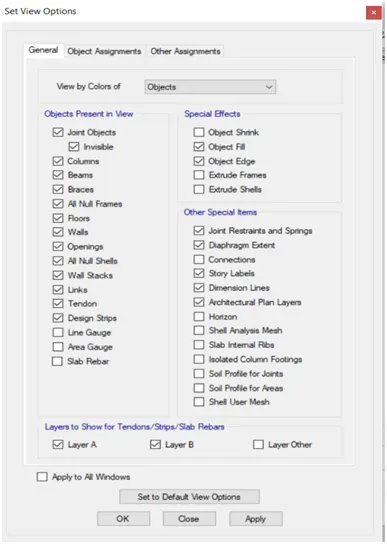
99.Choose beam and floors check the box and ok
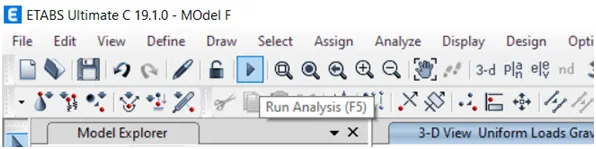
100.Run analysis the structure.
101.The structure design output.
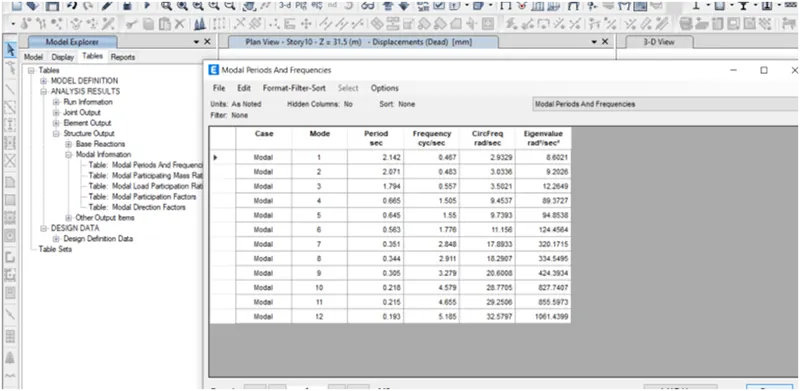
102.Save as the model
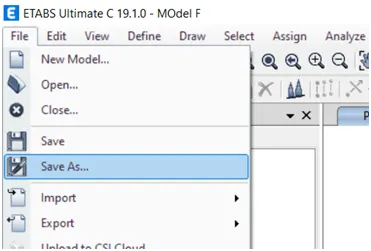
103.give the file name and save
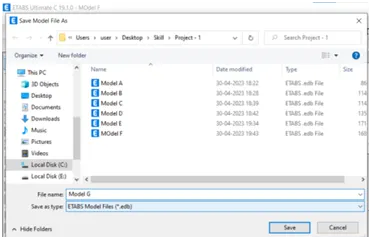
- And choose story and grid edit system.
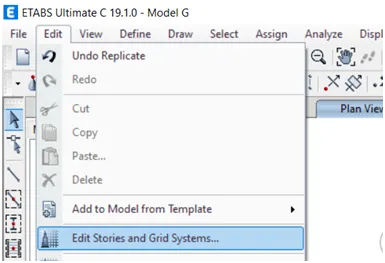
105.Adds story and ok.
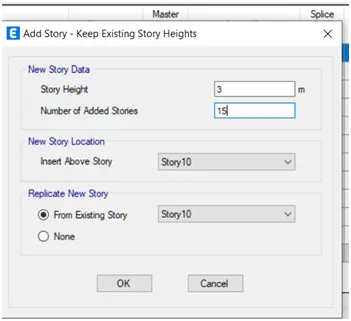
106.Than ok.
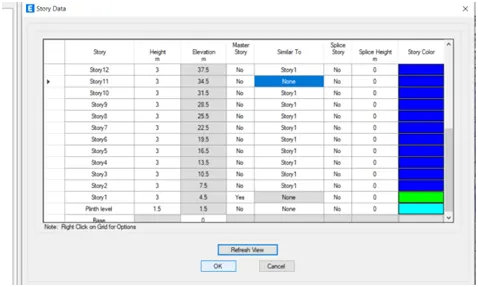
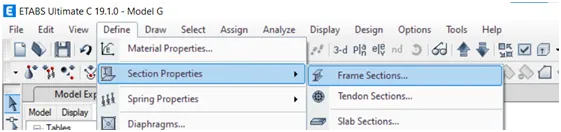
107.Go to define section properties, frame section
108.Add new property select concrete, rectangular section
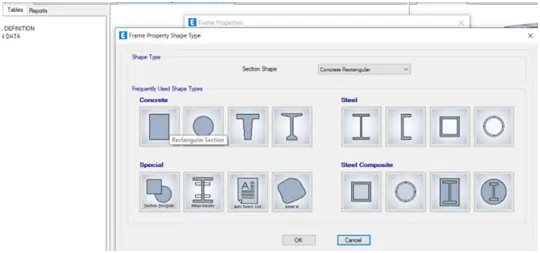
109.Give the specification of the column
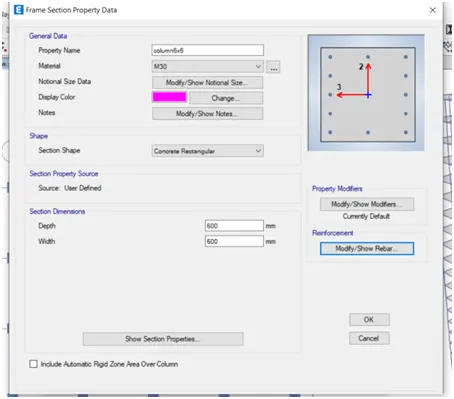
110.Than go modify column and than ok
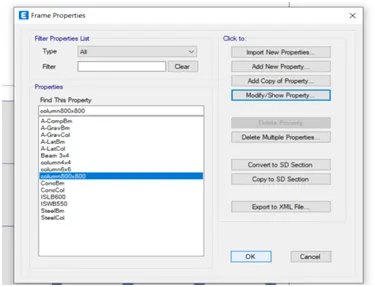
111.Set building limits
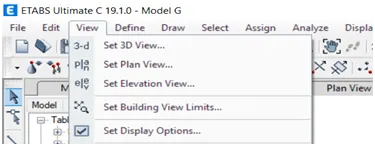
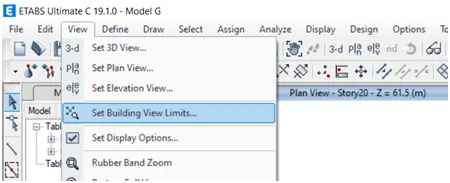
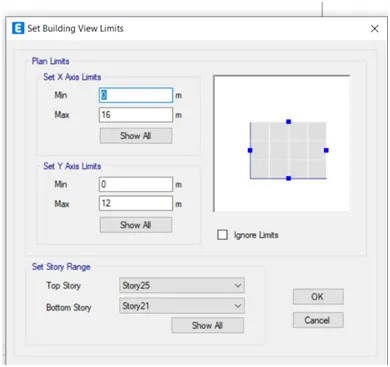
112.Set the limits and ok.
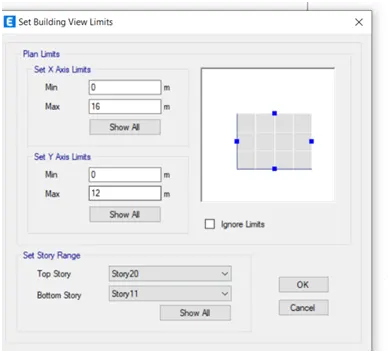
113.Go to display option
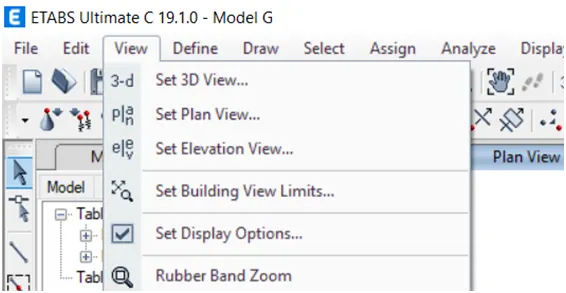
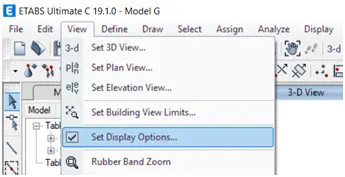
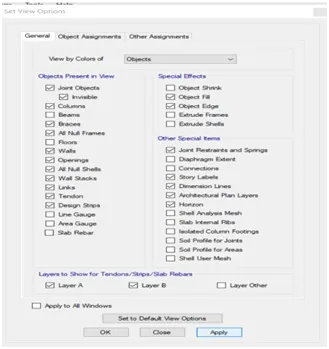
114.Choose beam and floors uncheck the box and ok.
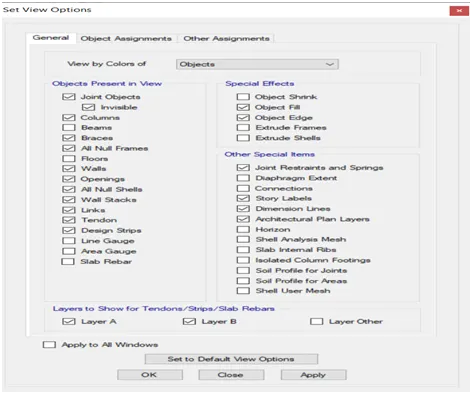
115.Select the column and delete.
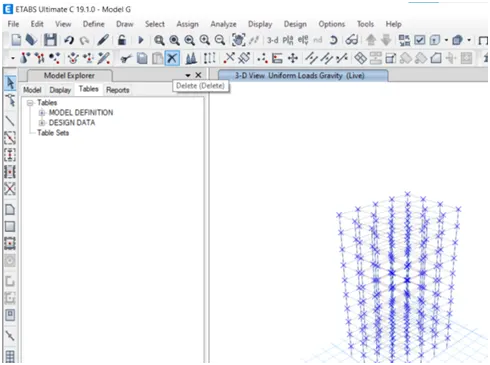
116.And draw a new column and replicate all the floors
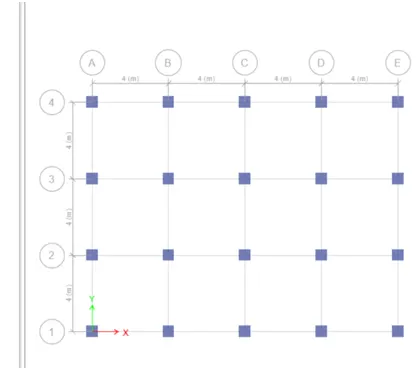
117.Again set building limits.
118.Set the limits
119.Set display option.
120.Choose beam and floors uncheck the box and ok.
121.Delete all the columns.
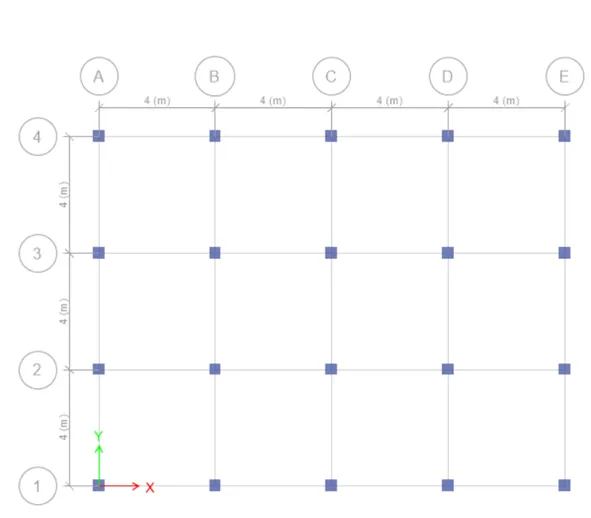
122.Draw a new columns.
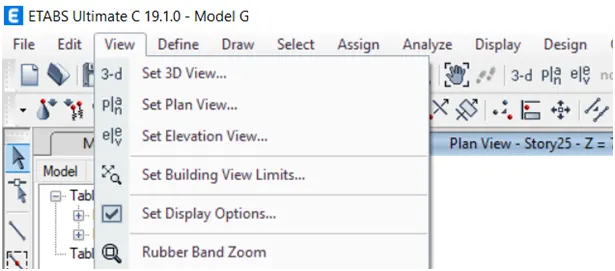
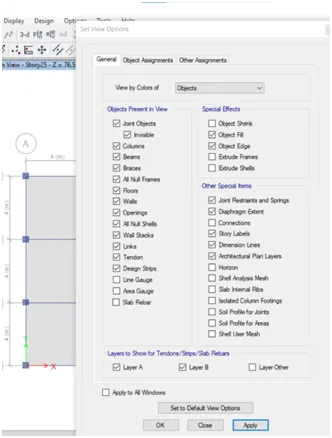
123.Set display option
124.Choose beam and floors check the box and ok.
125.Set building limit as full view
126.Select whole building and assign, joint, diaphragm
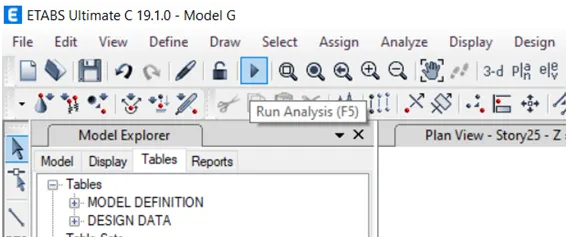
127.Run analyses the structure.
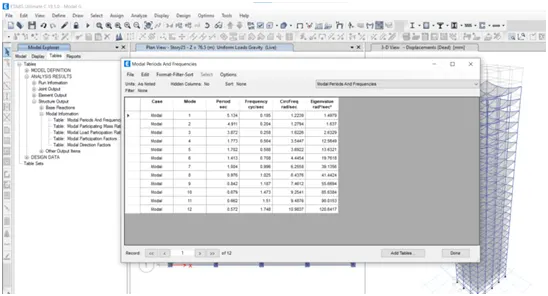
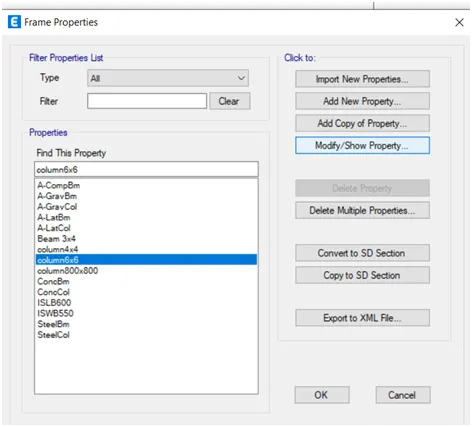
128.Go to design output of the structure.
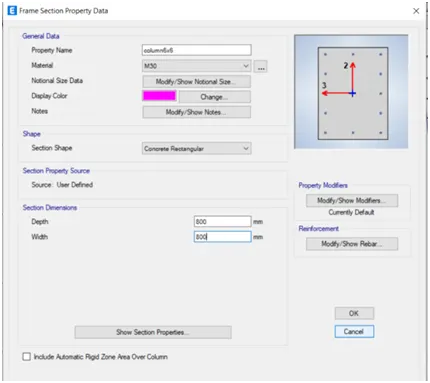
129.Save as the model.
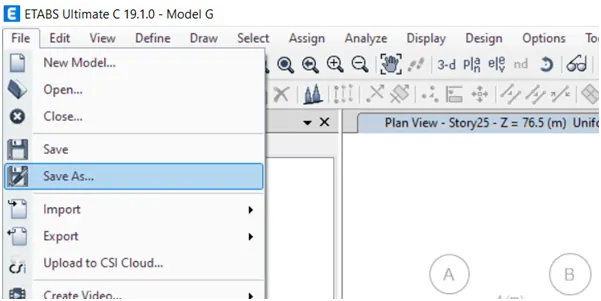
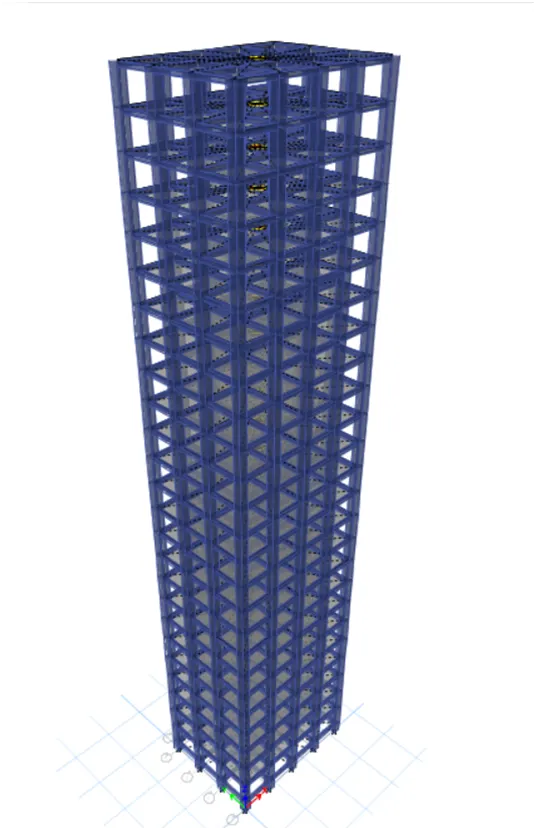
130.Go to define section properties, frame section
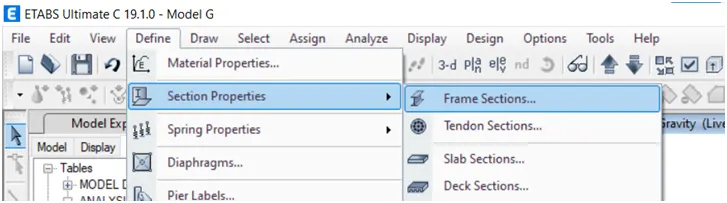
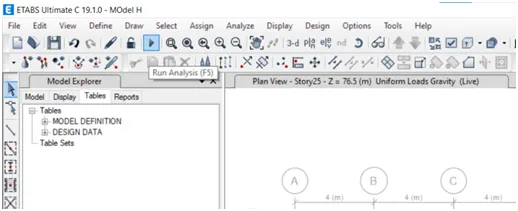
131.Modify the column property and change size.
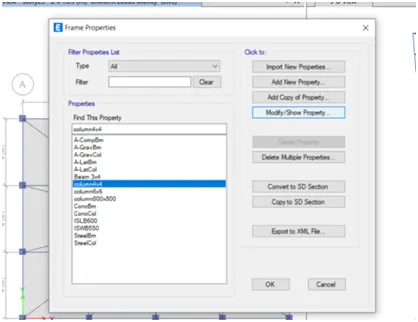
132.Modify the column property and change size.
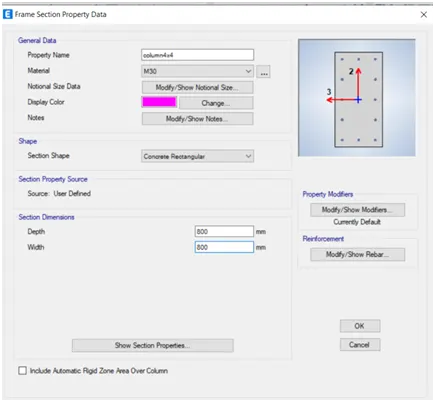
133.Modify the column property
134.Change the size.
135.The structure look like that
136.Run analyses the structure
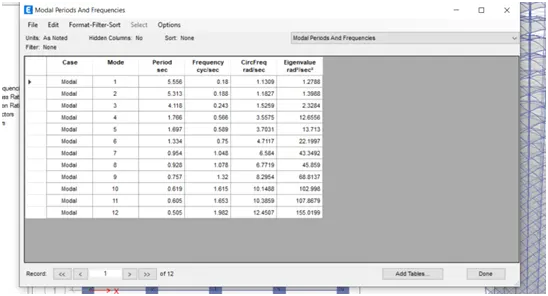
137.Design output of the structure.
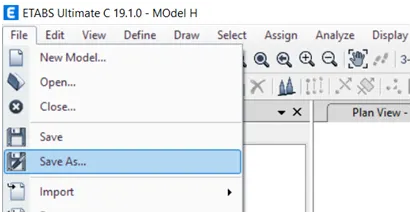
138.Save as the model
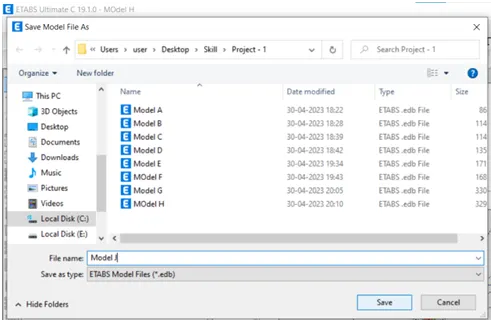
139.Give the file name and save.
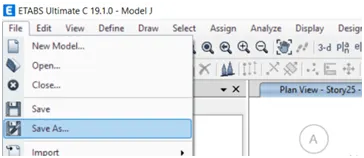
140.Select the slab
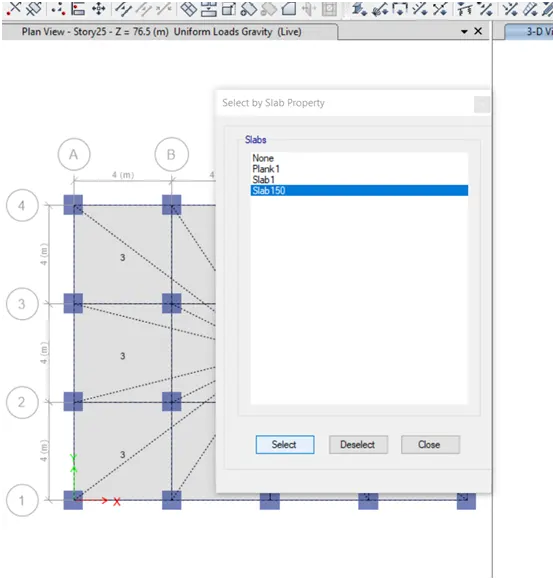
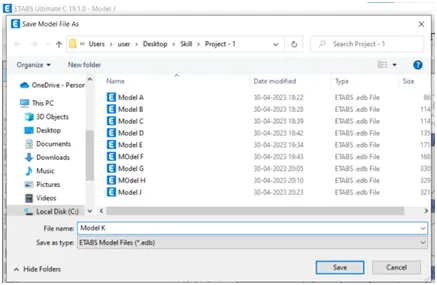
141.Assign, shell load, uniform
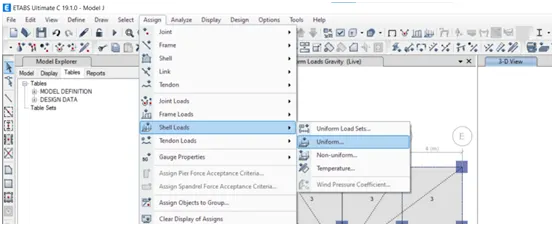
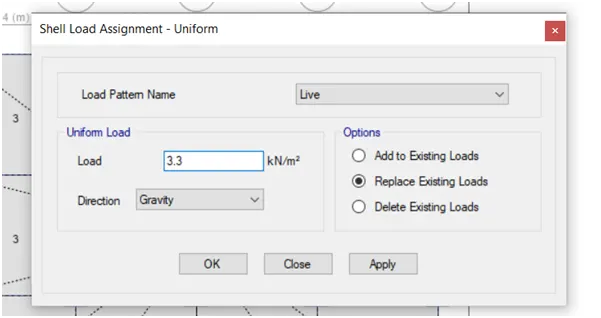
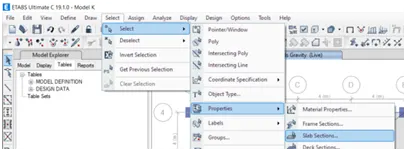
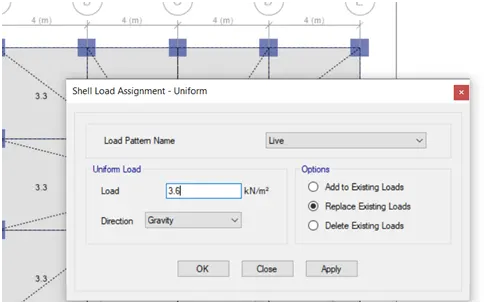
142.10% increase the live load on the structure and replace the existing load.
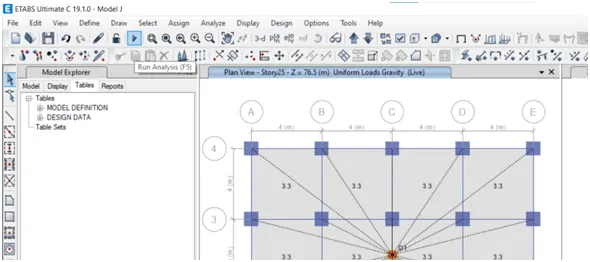
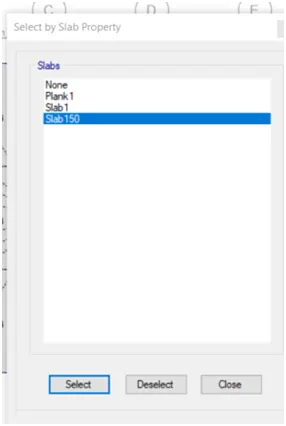
143.Run analysis the structure
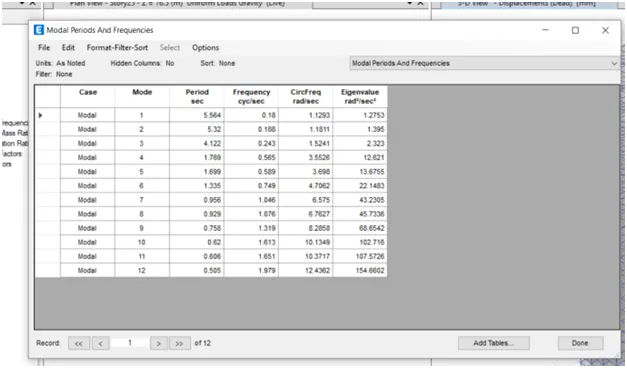
144.Go to output result.
145.Save as model
146.Give the name and save
147.Select the slab
148.choose slab and select
149.Assign the shell load, uniform
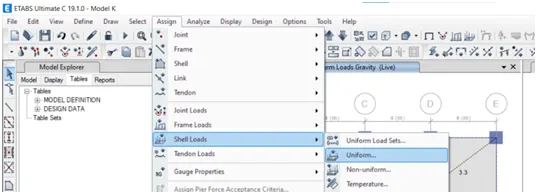
150.Increse the load 20% and replace the existing the load
151.Run analyses the structure.
152.Output result
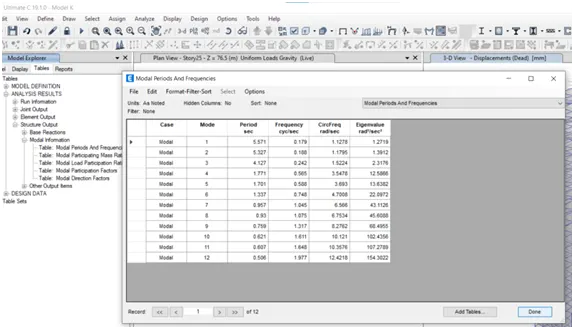
RESULT:
1.Table
|
Criteria |
Model |
Analysis result |
|
Effect stiffness on time period |
Building E (10 Storey with varying column size) |
2.11 s |
|
|
Building F (10 Storey with uniform column size) |
2.14 s |
|
Effect of stiffness on time period |
Building G (25 Storey with varying column size) |
5.13 s |
|
|
Building H (25 Storey with uniform column size) |
5.55 s |
2.Table
|
Criteria |
Model |
Analysis result |
|
Effect of mass on time period |
Building H (25 Storey with 3KN/sq.m imposed load ) |
5.55 s |
|
|
Building J (25 Storey with 3KN/sq.m imposed load ) |
5.56 s |
|
|
Building K (25 Storey with 3KN/sq.m imposed load ) |
5.57 s |
3.Table
|
Criteria |
Model |
Analysis result |
|
|
|
|
Effect of building height on time period |
Building A (2 Storey) |
0.60 s |
|||
|
|
Building B (5 Storey) |
1.25 s |
|||
|
|
Building F (10 Storey) |
2.14 s |
|||
|
|
Building H (25 Storey) |
5.55 s |
4.Table
|
Criteria |
Model |
Analysis result |
|
|
|
|
Effect of column size oriantation on time period |
Building B (2 Storey) |
1.25 s |
|||
|
|
Building C (5 Storey) |
1.36 s |
|||
|
|
Building D (10 Storey) |
1.39 s |