Project 1_Comparative study of different storey buildings for Seismic forces
Aim:
To model and analyse multiple buildings with different floor levels and design perimeter using etabs software and compare the results to understand their overall seismic behaviour
Introduction:
The structural configuration of building page of major role in determining the overall response during an earthquake. Different building geometry's behaviour directly when include by the same seismic force has it is very important to properly understand the response of the building related to their structural configuration for a safe for design approach so there he tab software comes to use
Procedure:
- For an easier approach the project is divided into two phases
- In the first phase we covered the modelling part of the building where the structure are drawn from the scratch as the preach specified geometrical and structural condition
- Moreover comparative analysis of the structure result obtain in the first half is executed in the second phase of the project and base on the comparative results various structure properties of the building retaining to their seismic response are concluded
Phase 1:
- Modelling the building and generating their respective structural outputs using e-taps software
- There are a total of 10 building included in this project to achieve a more comprehensive conclusion. The building are listed in the alphabetical order starting from A and ending at k. A complete step wise procedure to model all the buildings and generate their respective structural outputs in discussed in the detailed as follow
Building A:
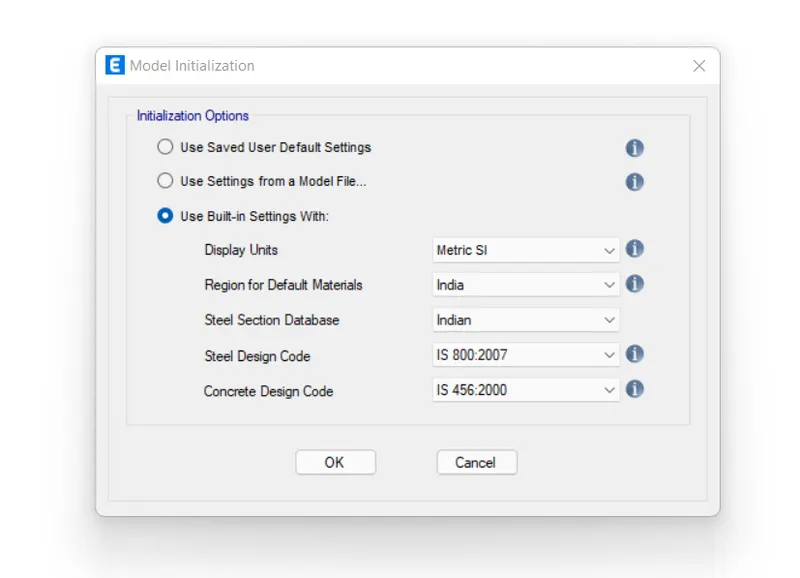
- Open the top software and setup the model then once you click on the new model a dialogue box will popup where you can set up the course and units to be used in the project
- Does do the needful settings and click on the start modelling the first building in which project
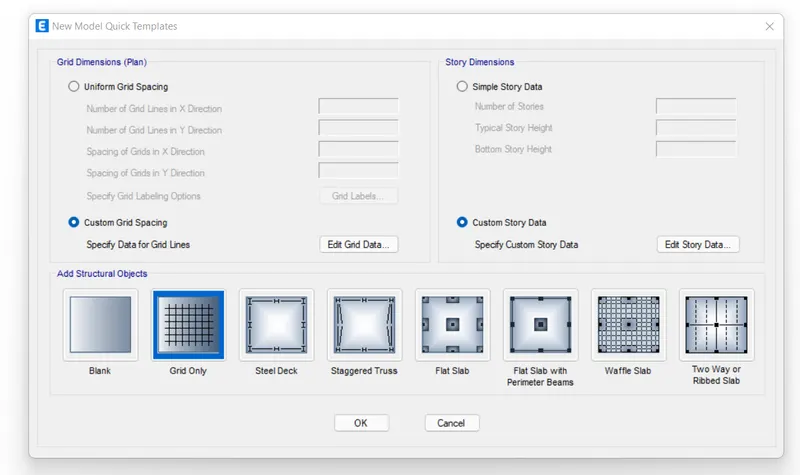
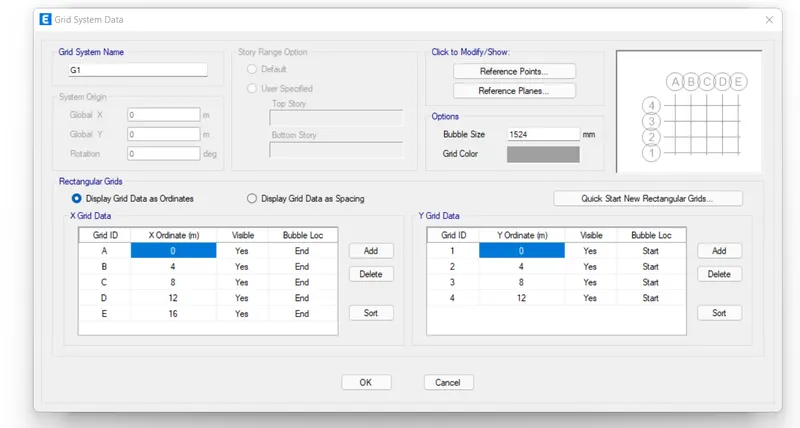
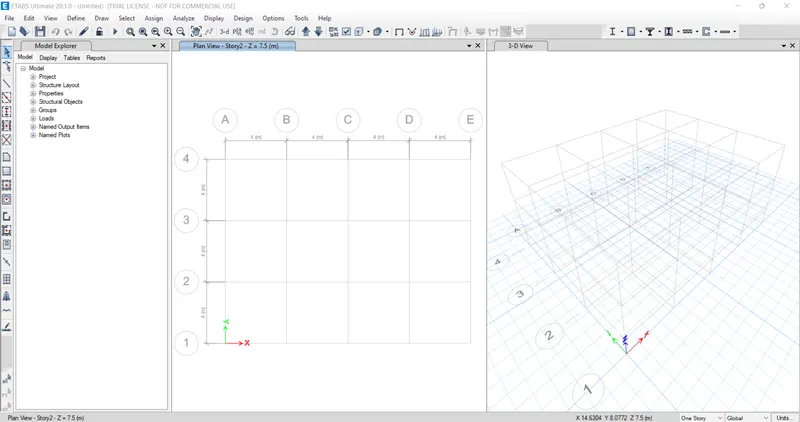
- To setup degree that you need to click on the custom rid option then once you do that a menu will with all the grids setting will open up in the same in you have to fix the length number of grades in the both of you octagonal directions facing between the vertical and horizontal grid extra
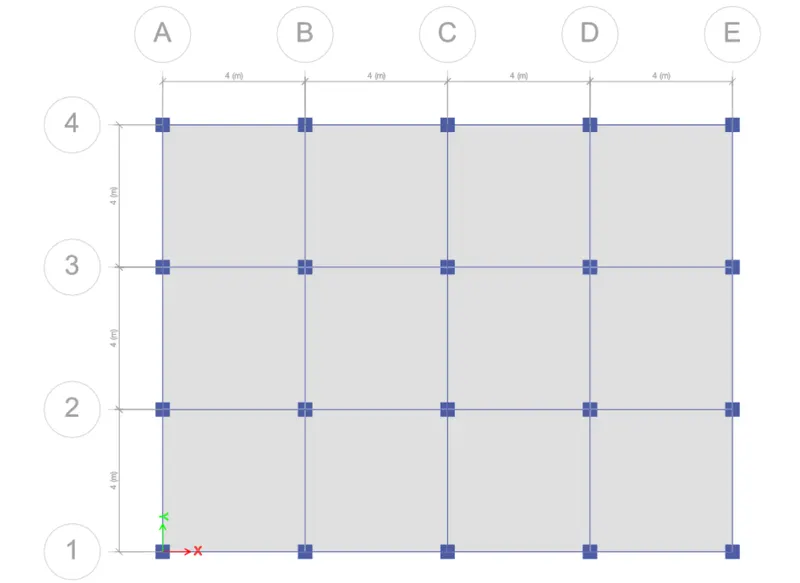
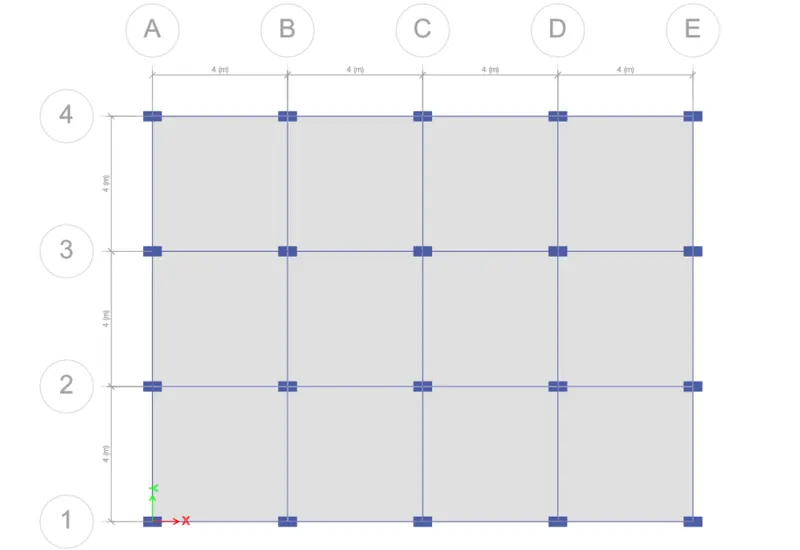
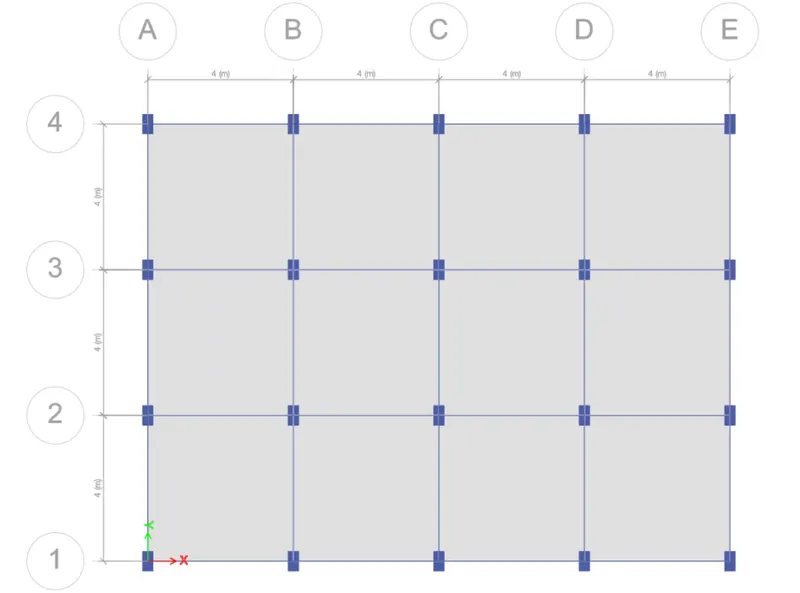
- By following the same approach we have to set up a 4x 3 bay grade with 4 m centre to centre spacing in between
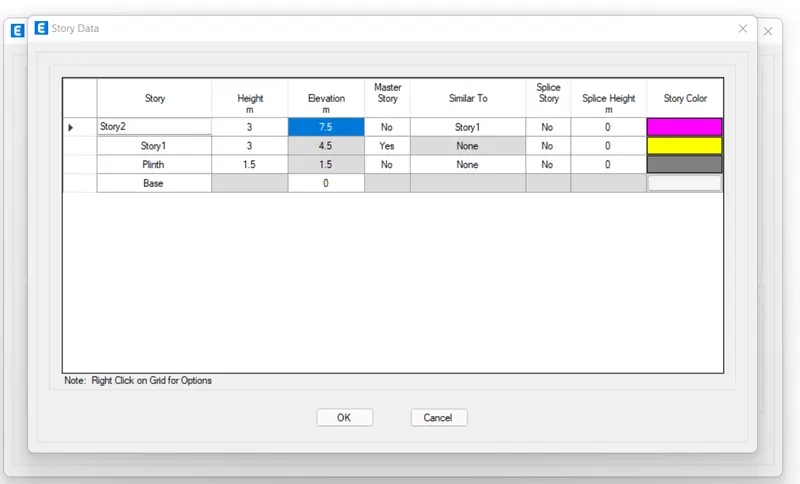
- Now we have to fix the story data for that do the settings update grid and click on the custom story that option then specify the base level plane level height of each floor and the number of floors to be included in the model
- Now we have to arrange for 8 g+ to building with 1.5 metre print heights on the days also we need to fix master story and all the shimla stories in dc menu
- For our project story one is the master and all the remaining floors are similar stories once you do this your model is said to be executed in the e-taps with the grid and story as specified
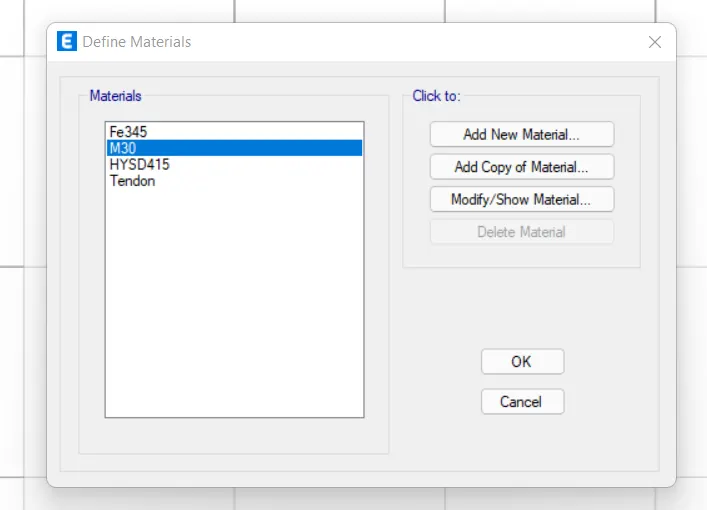
- Now we have to define the material properties for this we have to go to the project in the e-taps and are model we have to use the M 30 great concrete and fe415HYSD Steel as per the specifications
- So in the ordered to define the same go to the defined then material and then properties and then add new concrete /Steel then click on the grade and click ok
- However since we have already specified the intestine that codes of the practice there and 30 concrete and 450 steel is added by default into the project
- Now we have to define section properties
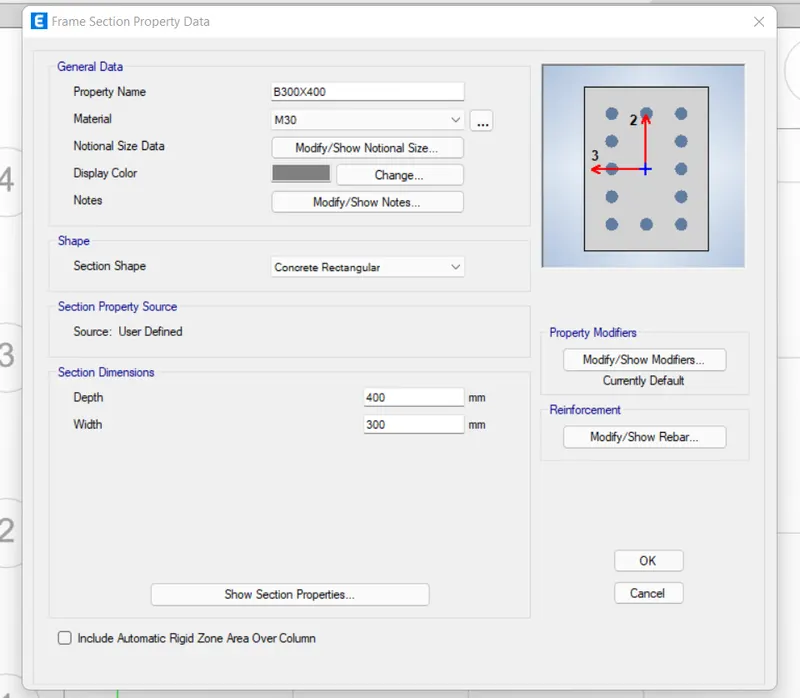
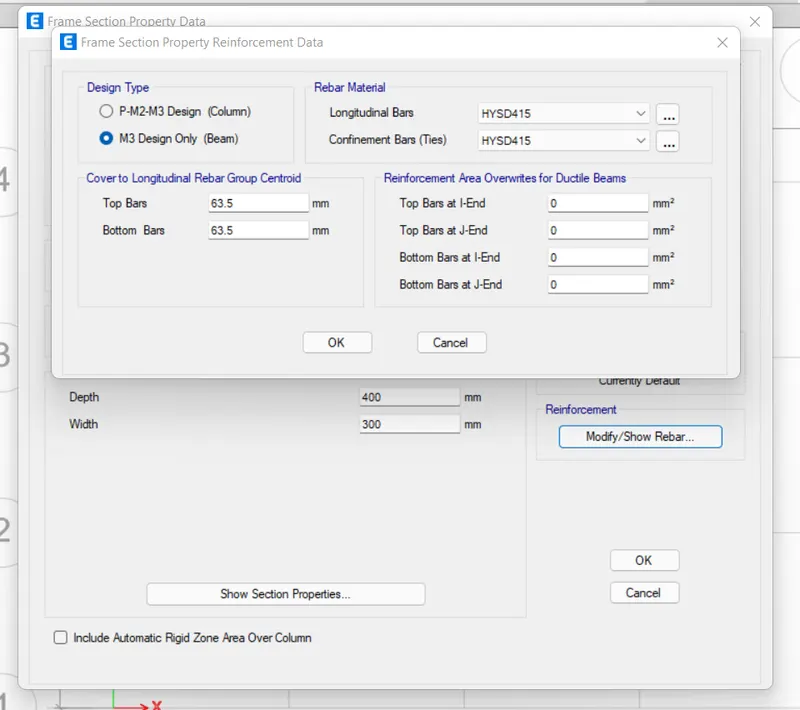
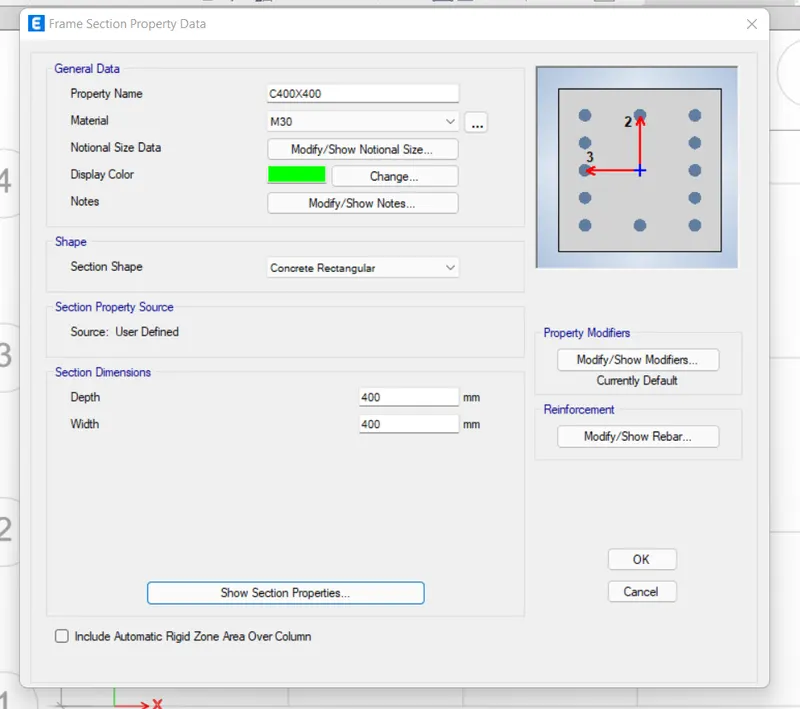
- We are using the rectangular concrete section for all these structural elements like beams columns labs so we need to define the properties in the Etab software for that we have to go to the define and then section properties and then click on the frame section and select the concrete rectangular
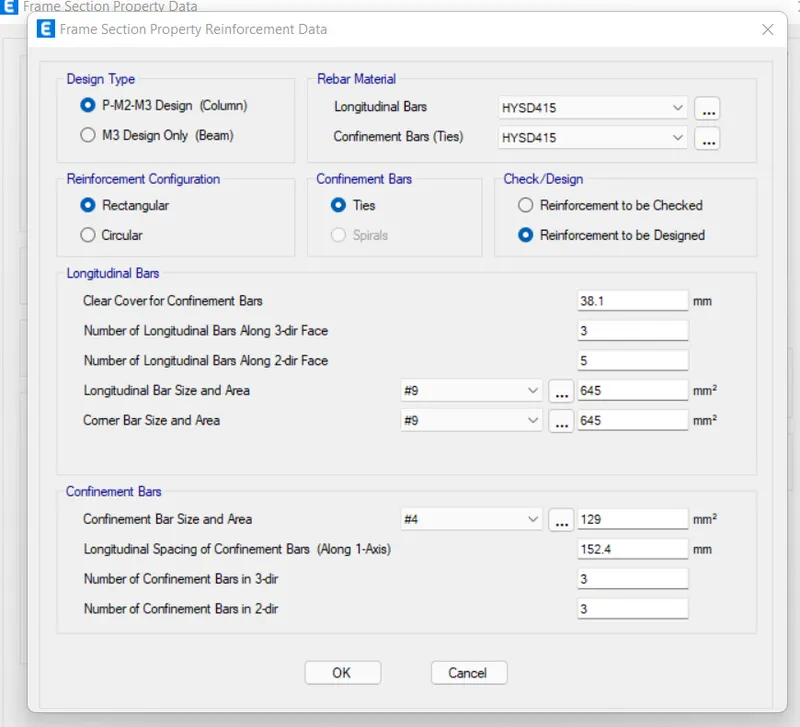
- Then a dialogue box will appear on your e-tab screen where you can specify the column / dimensions and their type of renforcement to be used in the model
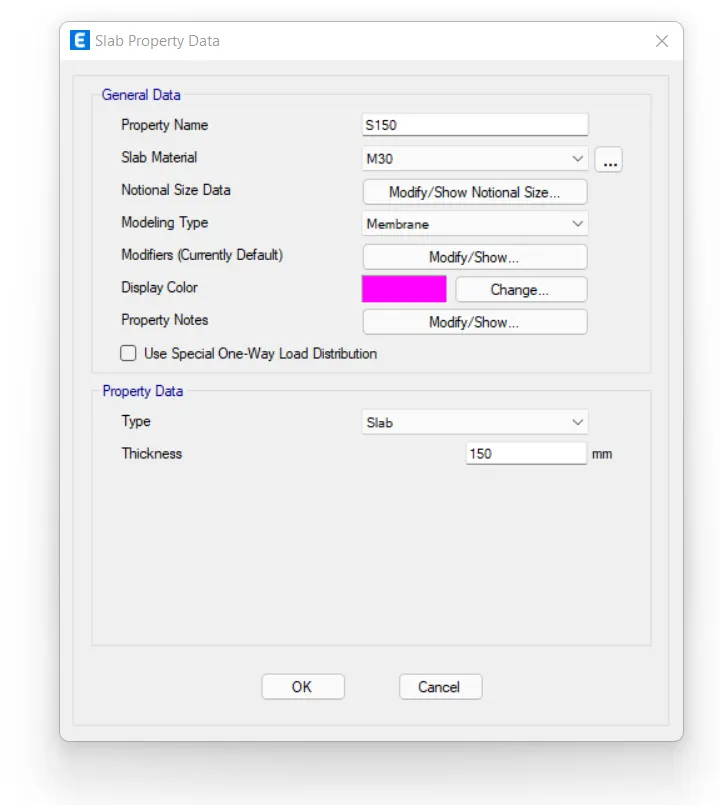
- So you can define both column and beams for the same man use now to define The slap section again define>section>slab
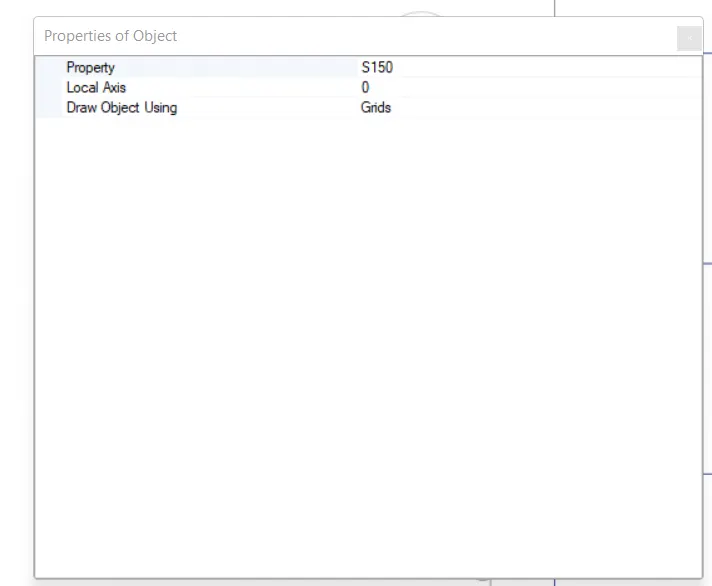
- Again a menu will open up where you need to study spanish lab specifications required for the project here need to specified slap thickness as 150 mm anti section aise membrane
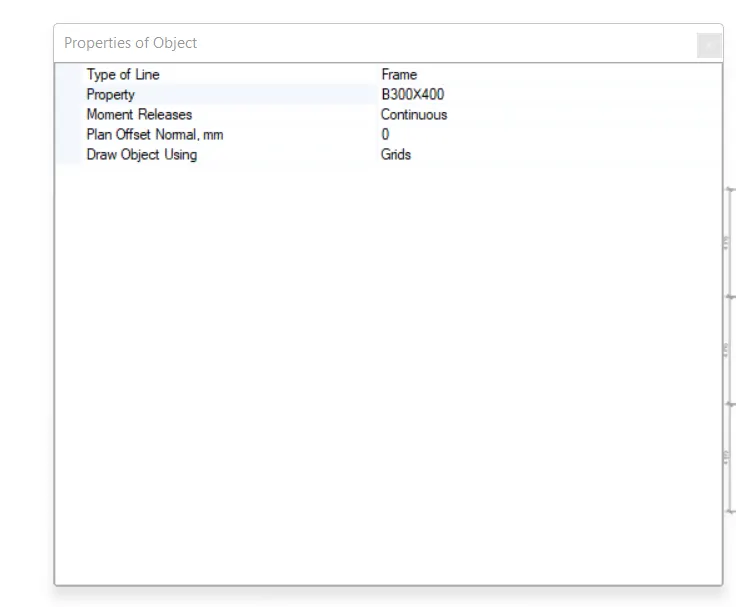
B300X400
C400X400
S150
- Now we have to execute the modelling
- Now that we have defined everything from the material to the beam Kollam, slapse to be need it for our structure we can go head and each structural element as per the specification and to do that we can use the command in the YouTube named quick draw tool
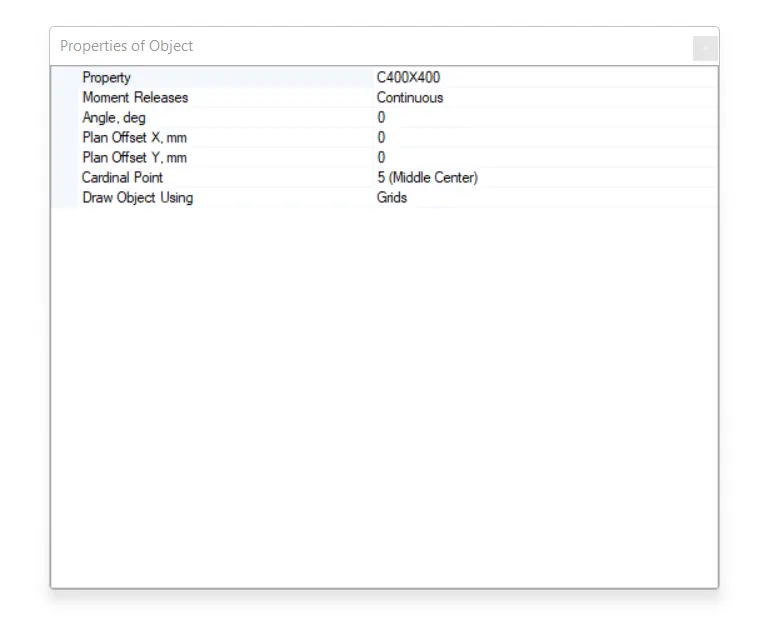
- As the name suggest you can draw all the beams lower and columns with the help of this tool and you need to do is select the relative tool that is quick draw column for drawing the columns and vice versa
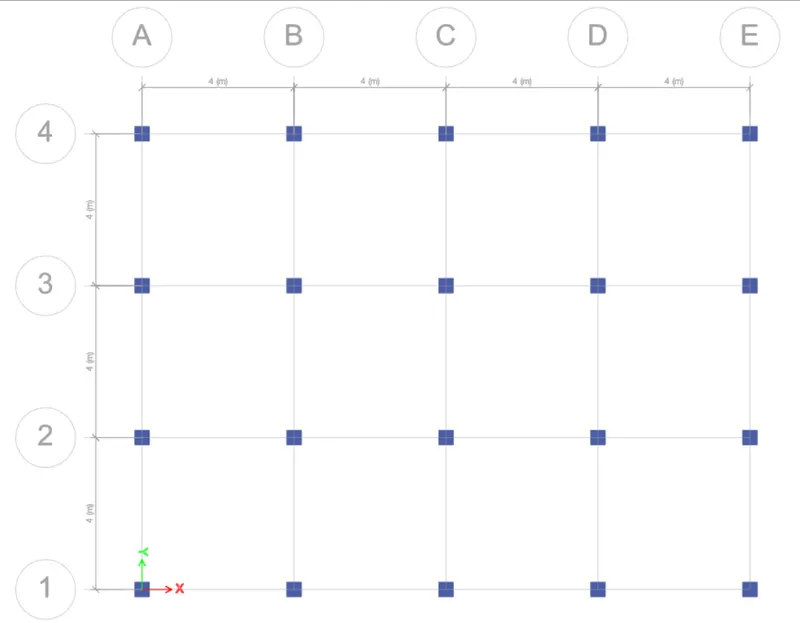
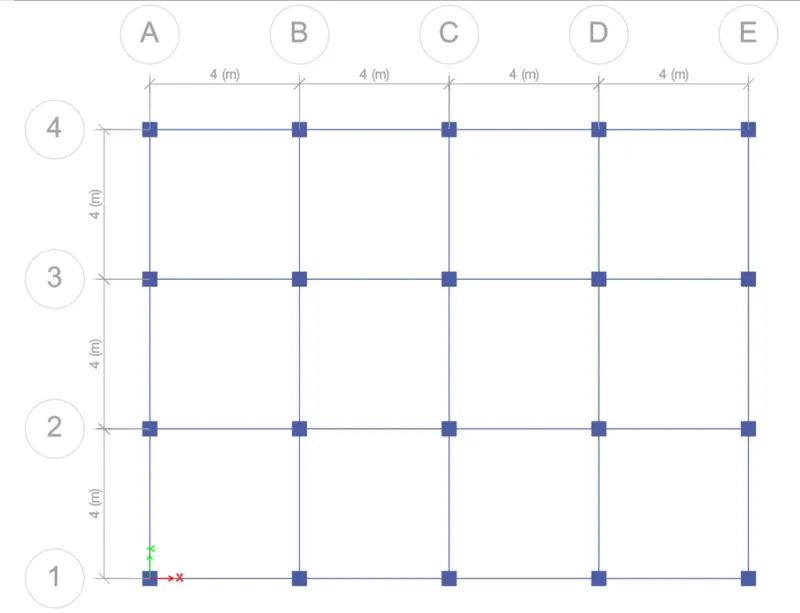
- Then we have to simply go to the great system in plan view and start clicking on the click location where you want to build the structural elements show the same approach was followed and the following beams column floor and slap for drone in our tab model
Quick Draw Columns
Quick Draw Beams
Quik Draw Floors
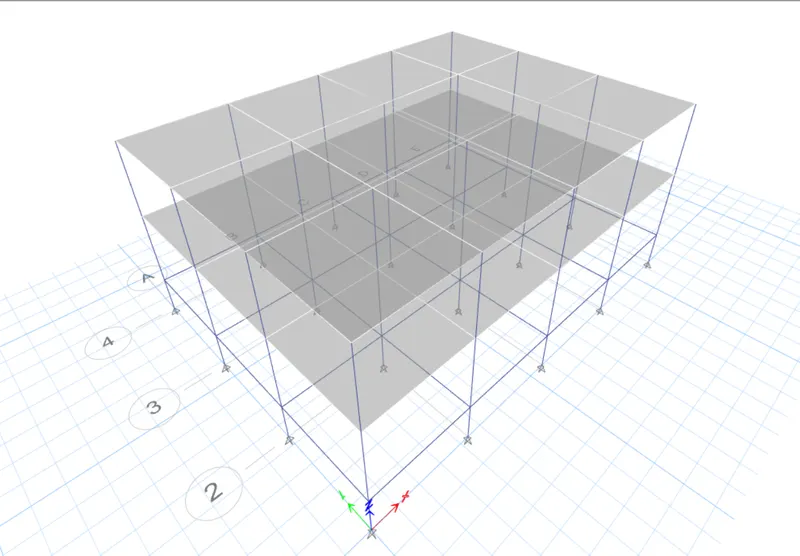
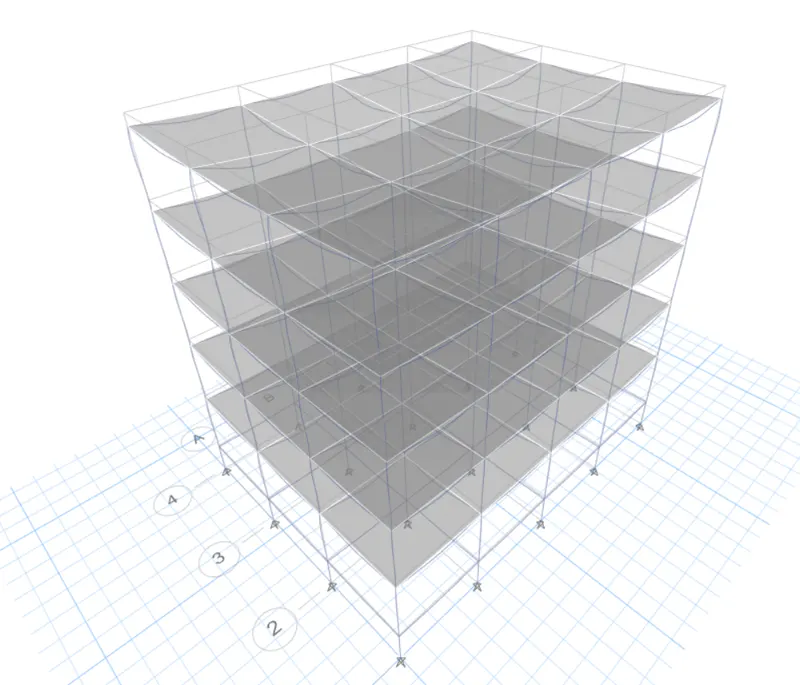
Complete Model in 3D
- Now we have to define the load parameters
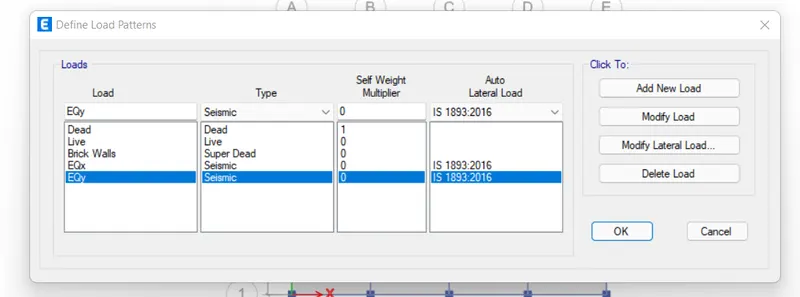
- After completing the model we have to go to the define and then load parameters and then add loads
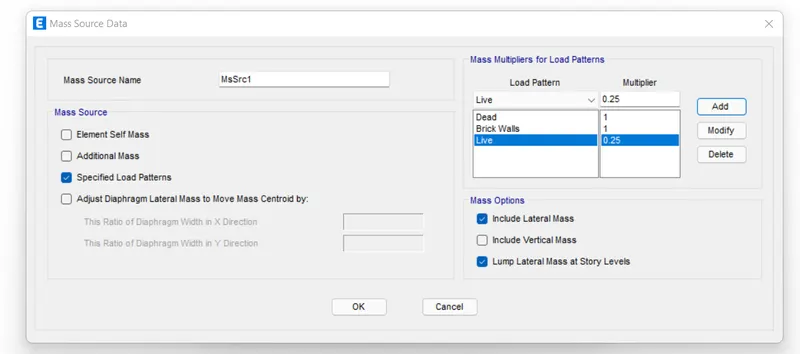
- Here you can add the loads and for our project we have the dead load, super dead load live load and the earthquake load in X and y direction also we need to define the mass source by adding 100% of dad and super dad load as well as 25% of imposed or live load
- Now we have to generate load combinations
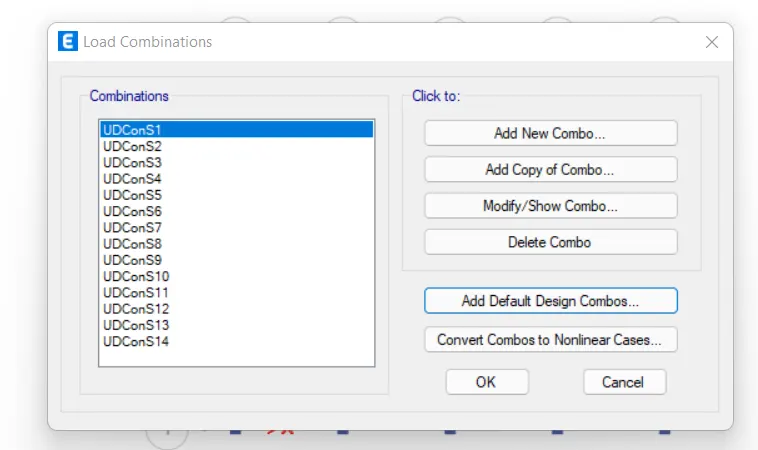
- For that go to the define then load combinations then default combinations and then click on the check the convertible options here a list of load combination will appear which you can look at and modify everything during the project if needed
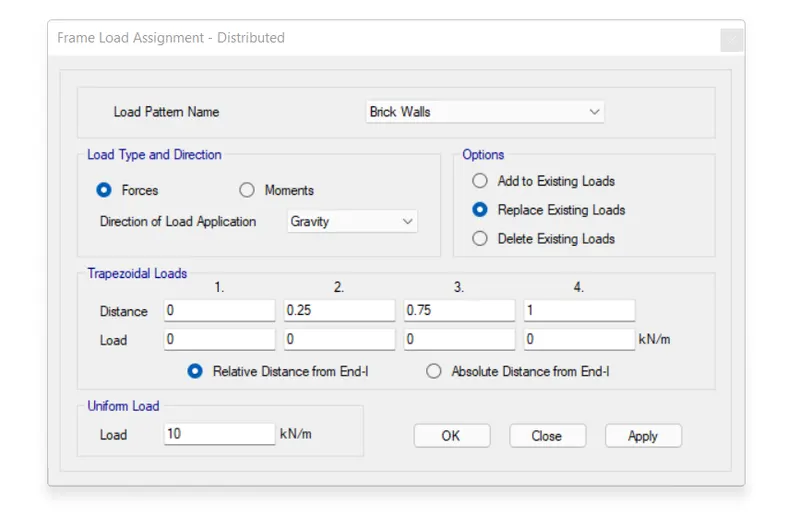
- Now we have to assign loads to the structural members
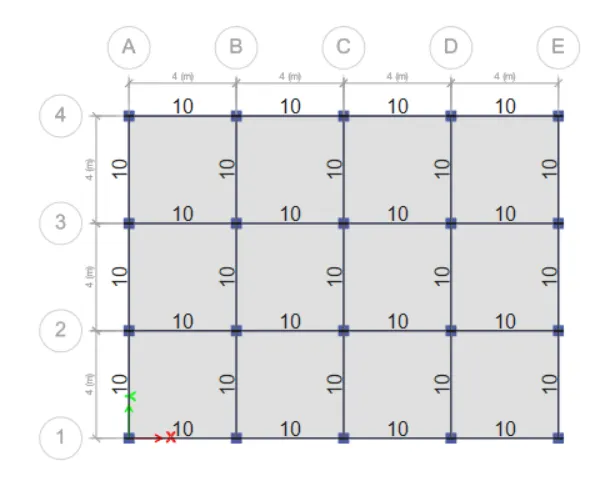
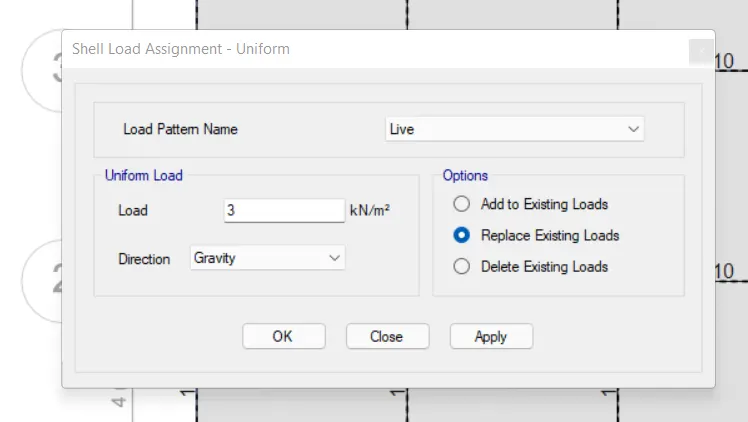
- Now you can select a particular structural member for the model and assign it the load that is imposed on it
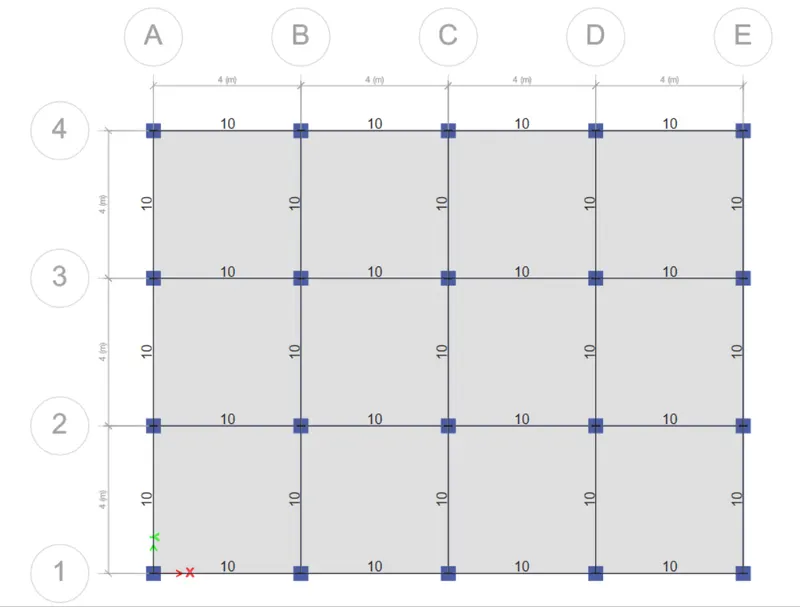
10 KN/m brick Wall Load on Beams
3 KN/m^2 Live Load on Slabs
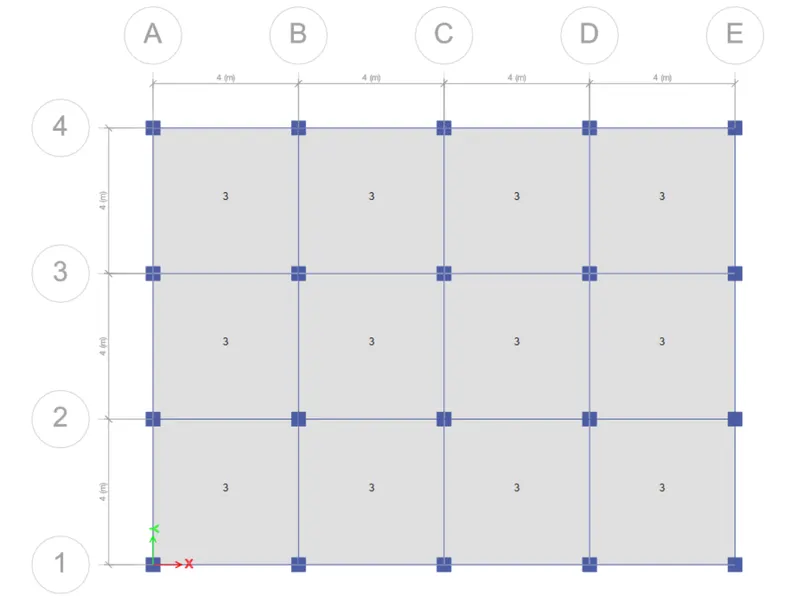
- Now we have to assign the floor diaphragm
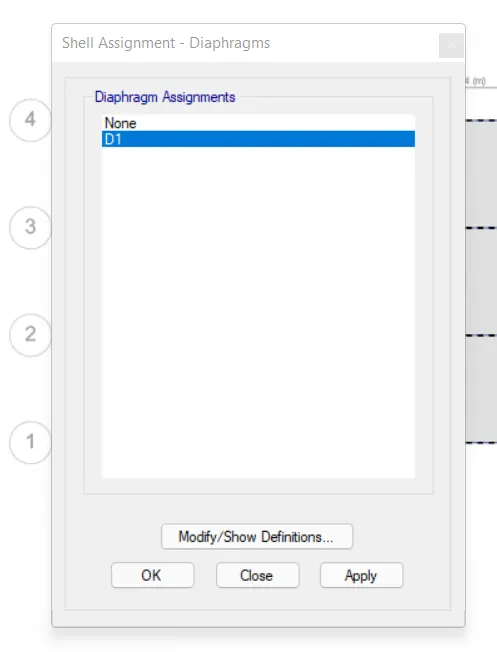
- Select the s 150 slabs section from this select option and go to the sign then shell and then select diaphragm
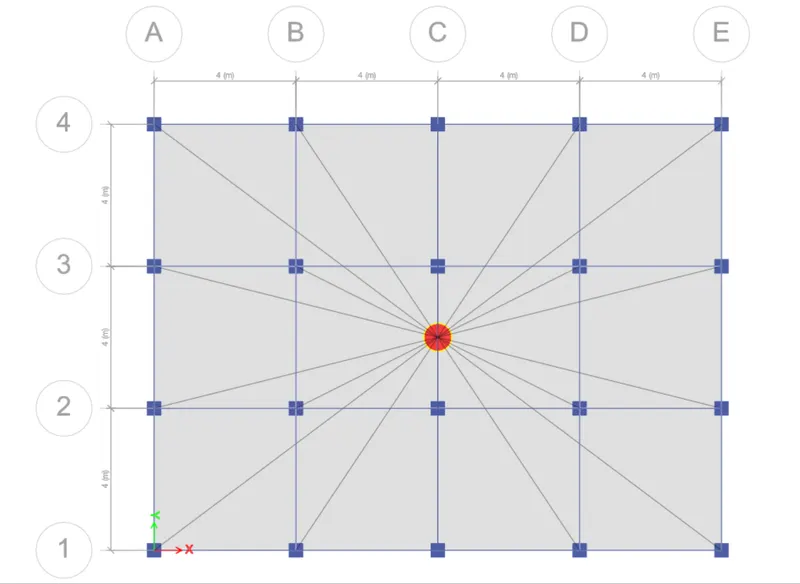
- Select d default D1 diaphragm aur lady ine cooperated in etyps and press okay and it is now done and you can see the centre of mass of a model has been automatically calculated as well as assignment the floor diaphragm
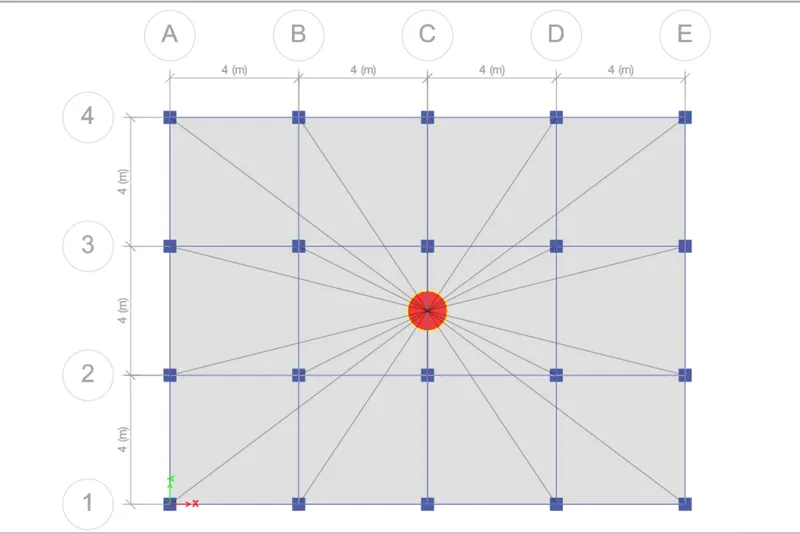
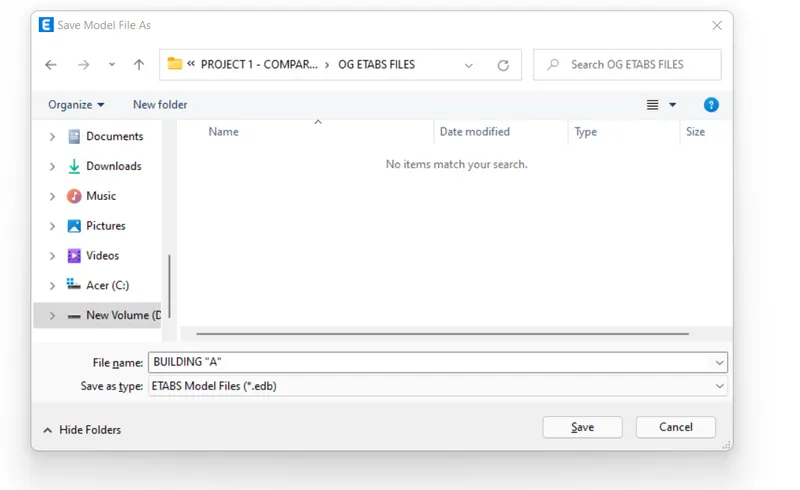
- Now we have to save the model and run analysis
- Now that everything with regard to our first model is completed we can process to run the analysis of this building
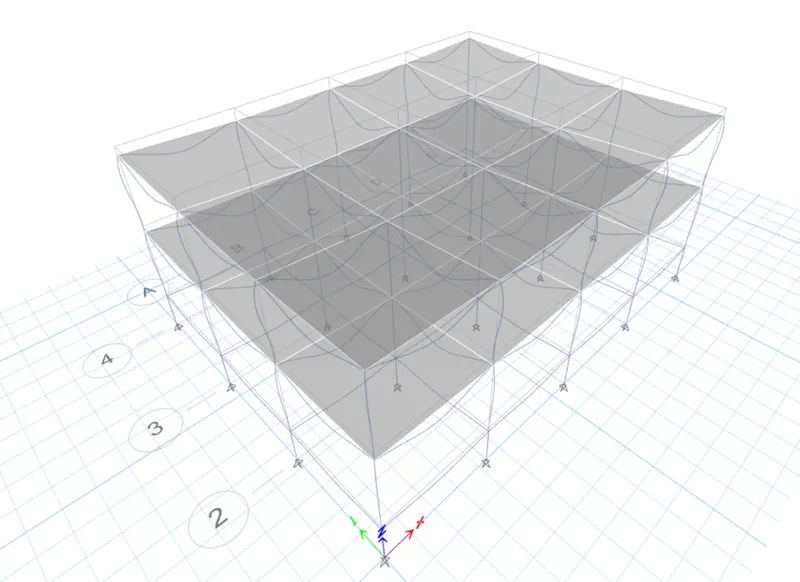
Building B:
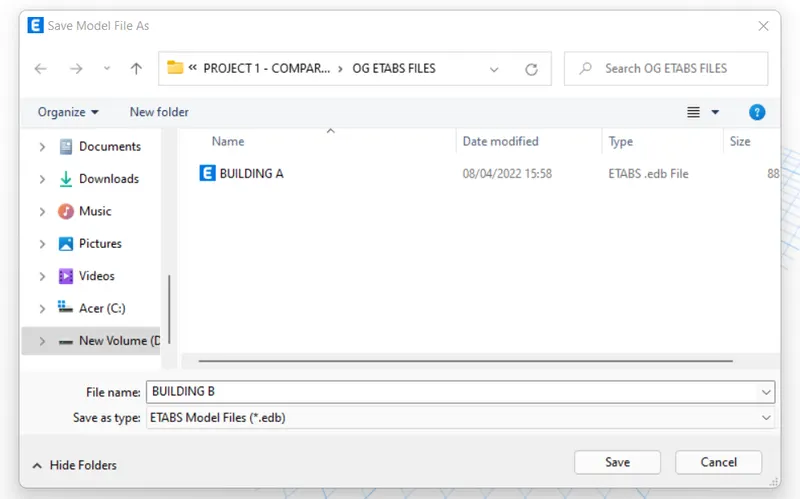
- Now we have to model B building so we do not need to create new e-tab file from scratch rather than we will save a copy of a building A file and do the alteration needed to the building B .
- No we have a copy of the building
- From model a go to the files and click on the safe as button and set the dimension folder and name the it as building B
- Now we have to edit story data
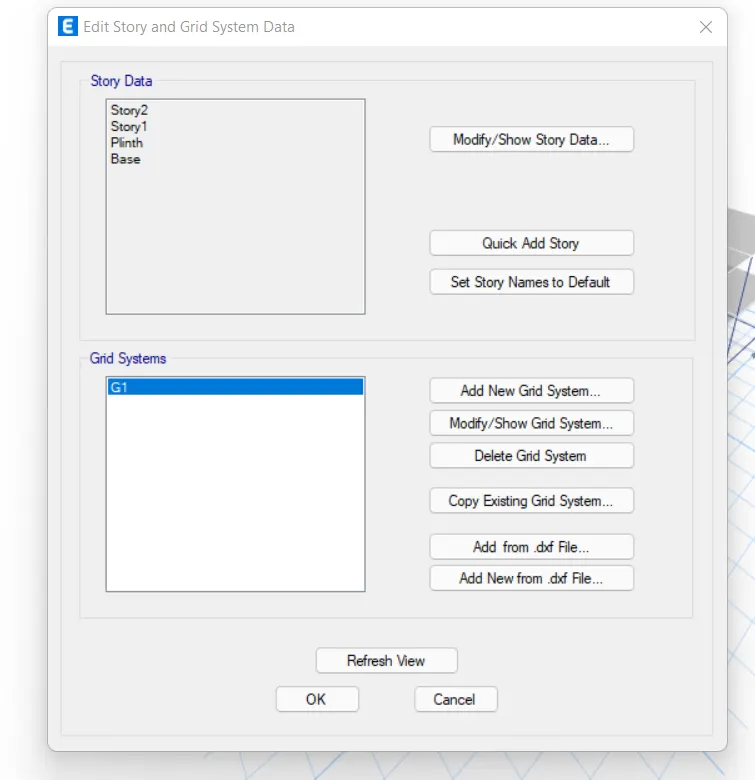
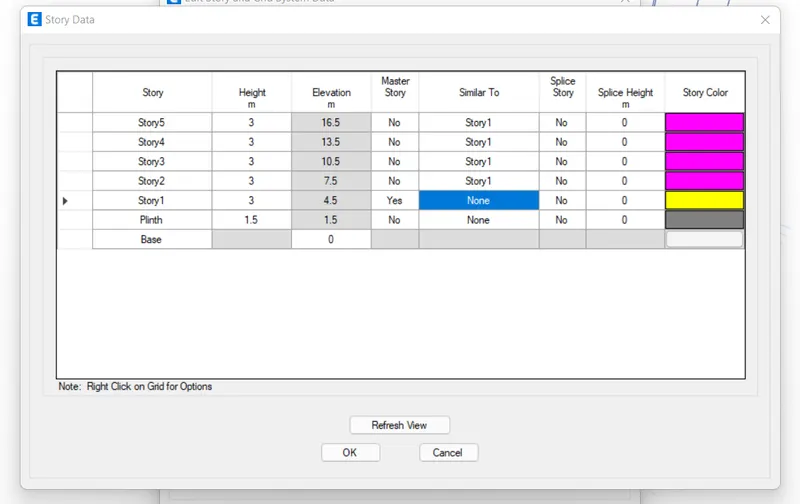
- From the new file go to the edit and then story and click on the great data and click on the modify story data option
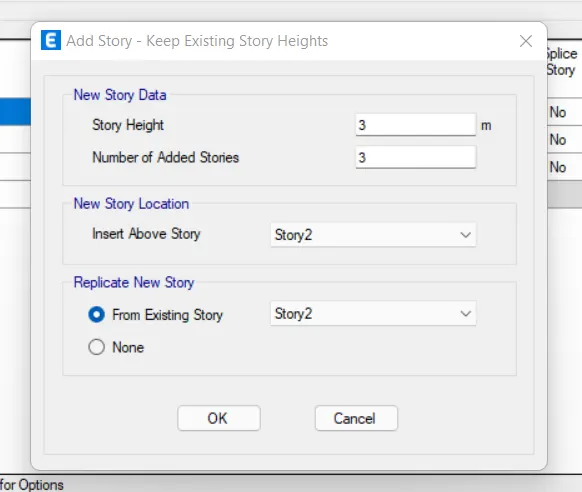
- Then right click on the top story and select the add story option and set the height and the number of stories you want to add
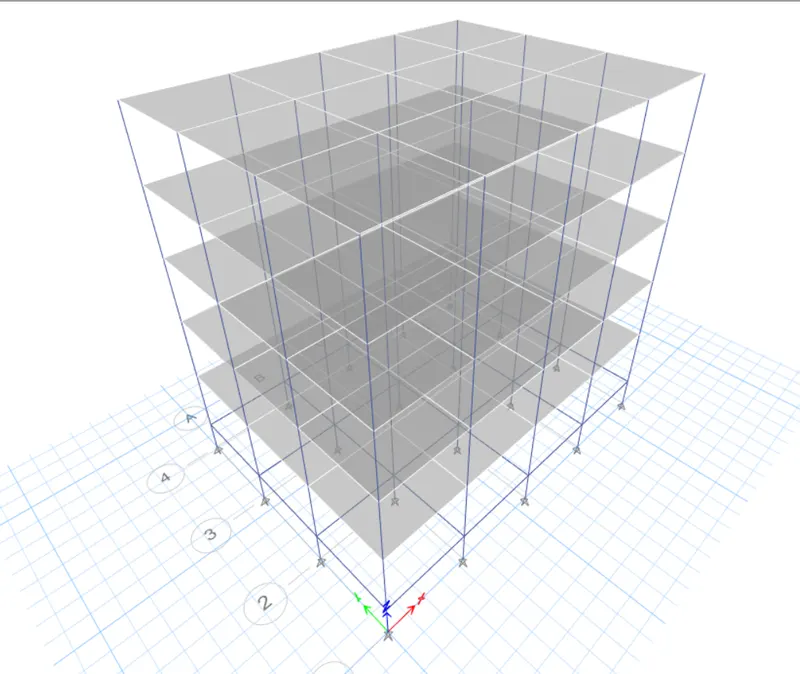
- So we need to add 3 more floors to convert a two story building into 5 story 1 and also make sure each story is similar to the master story created in model A.
Converted 5 Story Model
- Check the model before running analysis
- Now that are model is ready we need to check for 2 or 3 things before running the analysis and the thing that model period
- First we will check the load assignment for that from the bottom ribbon e tabs go to the same frame and shell load at a time this way the model will show the corresponding load and has been assign till the top floor
- Now we have to check the dive from has been assigned to the new model or not for that you are going to view the setting option and click on the dive from visibility if the diaphragm is not visible you need to select all the flows in assignty die from like with it in the first model
Check for Shell Loads
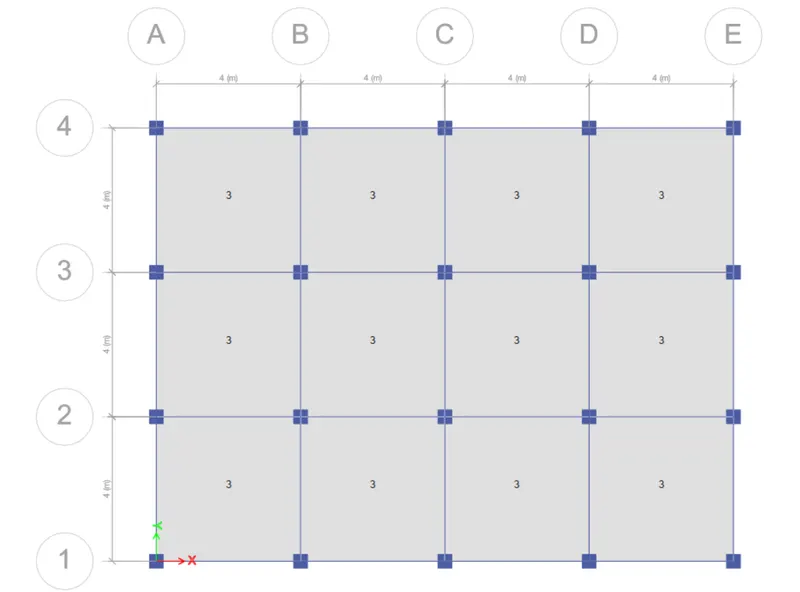
Check for the Frame Loads
Diaphragm Check
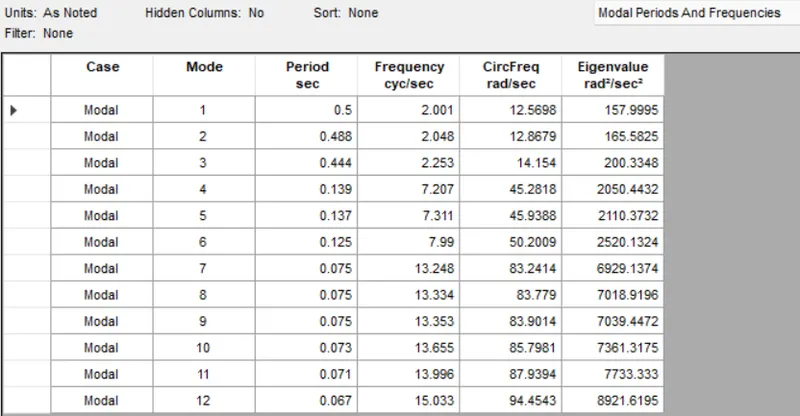
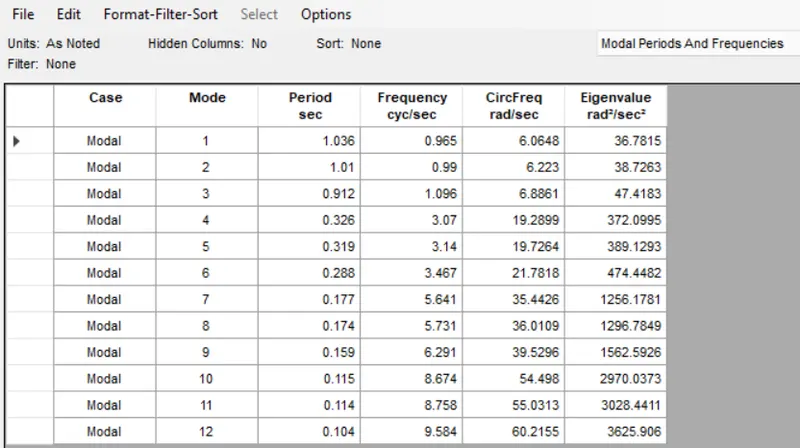
- Now we have tour and the analysis
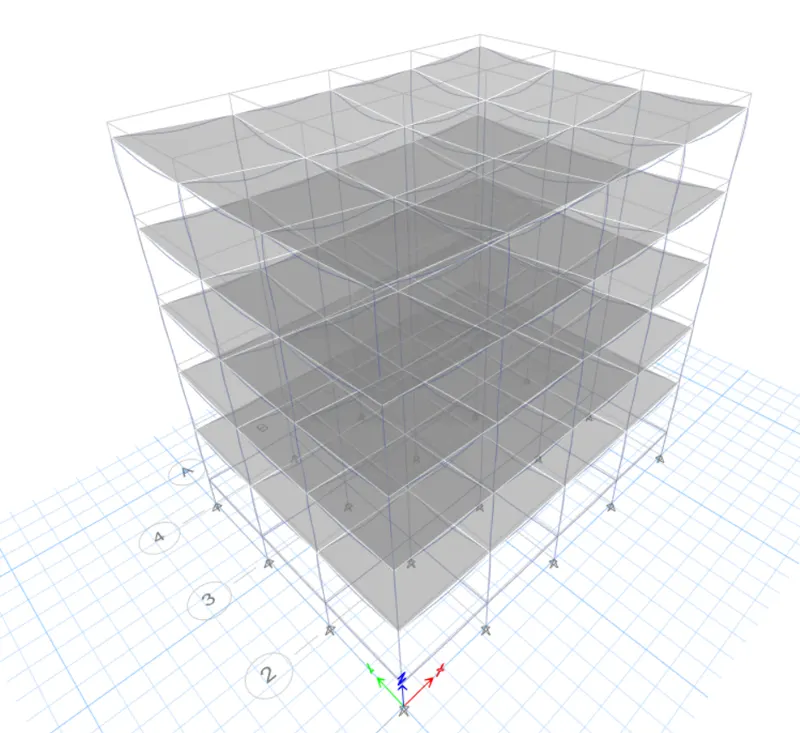
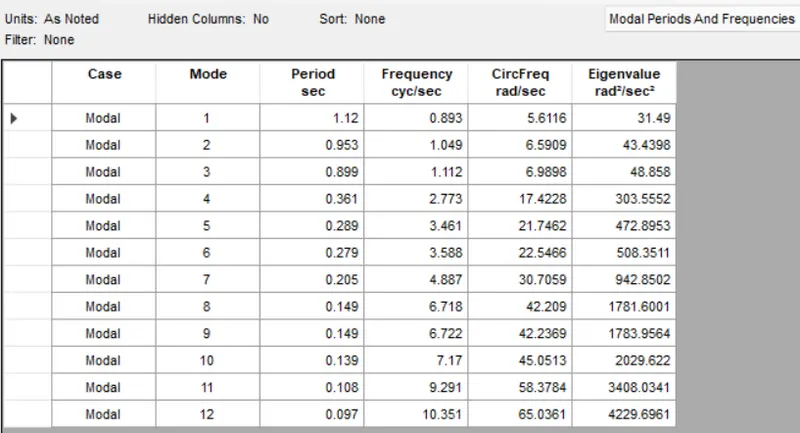
Modal Response for Building B
Building C:
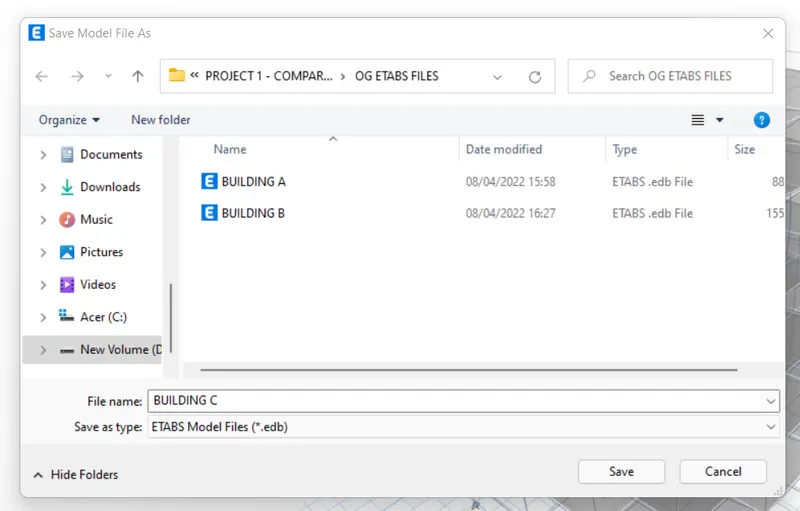
- Now we have to model C building so we do not need to create new e-tab file from scratch rather than we will save a copy of a building B file and do the alteration needed to the building C .
- Now we have to edit the column size and orientation
- To edit the column section go to define and selection properties and then click on the frame section now the previous credit column from building a and b then click on the modify and show property option then renamed the column as be need it such as 550 X 300
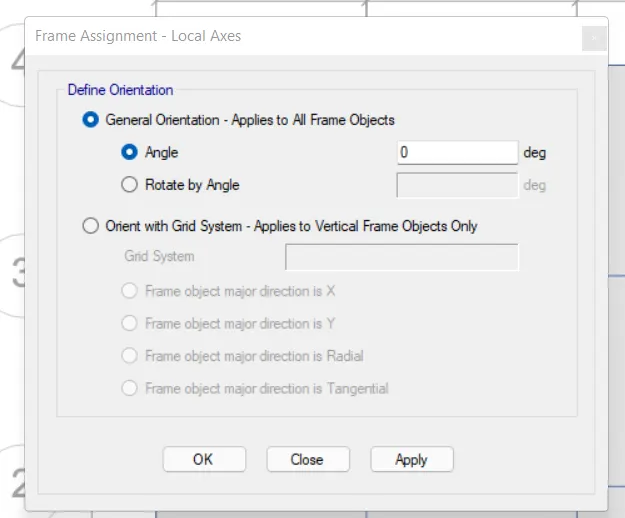
- Then edit the length and breath by entering the value in the box now we need to orient the 550 mm in the extraction so select the column sections then go to the assign then local axis and then rotate and then click on the 90 degrees
- This way all the column shell be oriented in the X direction meaning 550 mm laying down in X direction
Required Column Section
- Now we have run the analysis
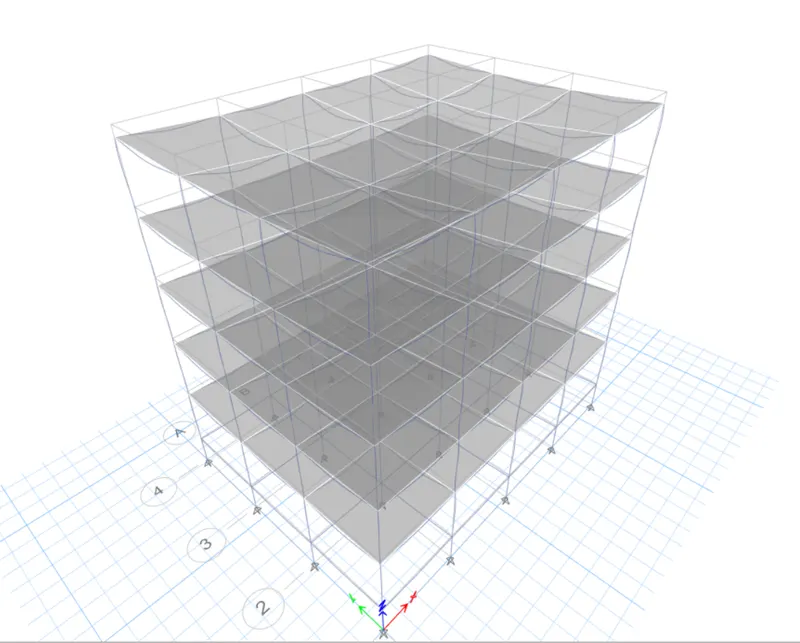
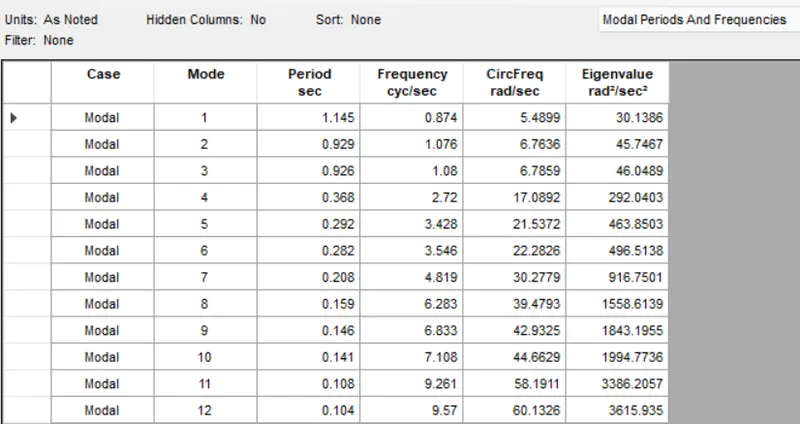
Modal Response for Building C
Building D:
- In this model we don't need to alter anything other than the column oritation. The sides of the column will remain same however we have to shift colum orientation from x to y direction and so follow the same procedure as we did in the previous model and save the file as C to D file.
- Then we have to select the column section and assign the local axis and bring the origin back 20 and this way all the column shell be oriented in the white reaction then like usual check the loads and the diet from before using the run analysis
- Select the Column Section and Bring the Orientation Back to Zero
(The detailed procedure to do it has already been discussed for the previous model)
Required Column Section
Run the Analysis
Modal Response for Building D
Building E:
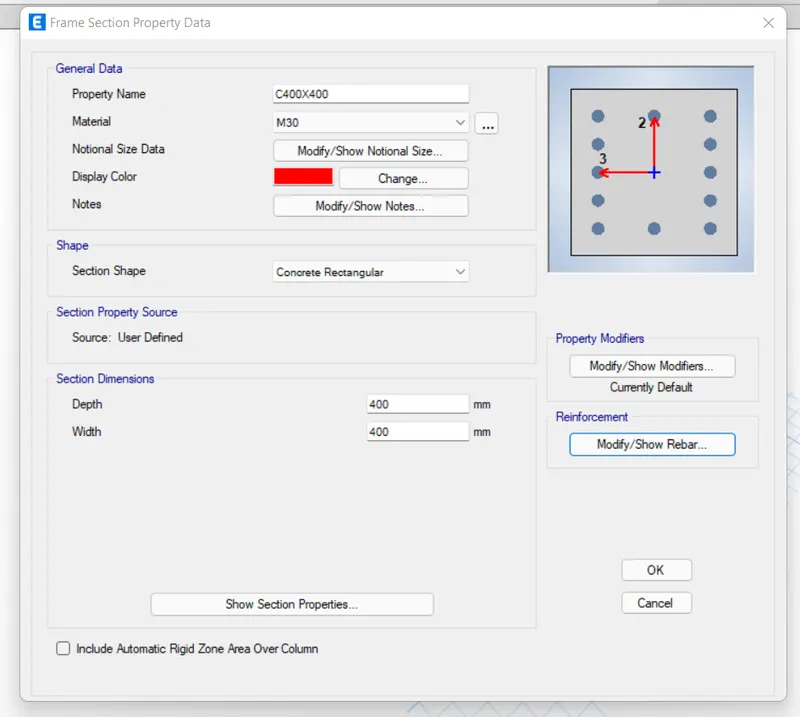
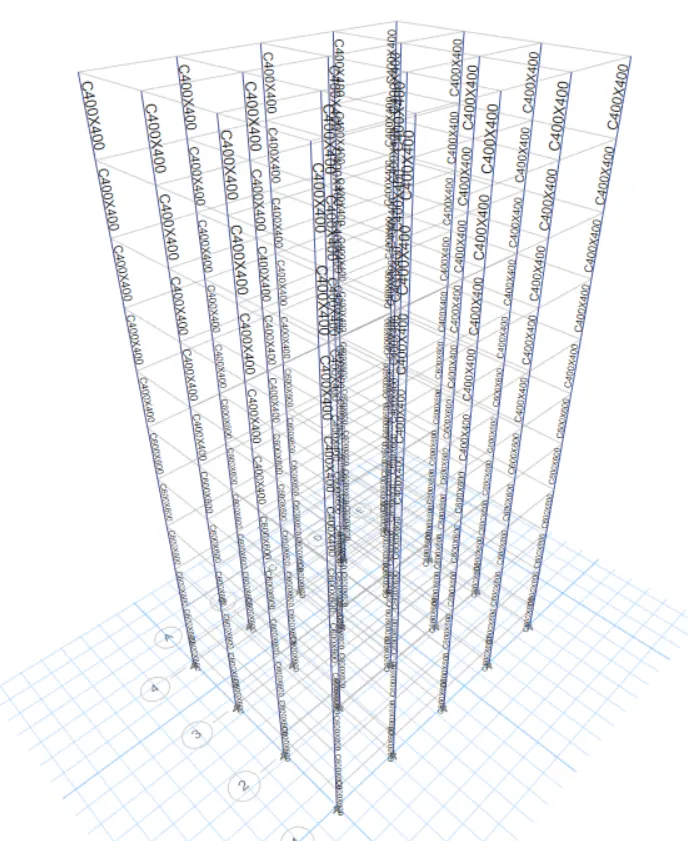
- Column sizes for top 5 stories :400x400
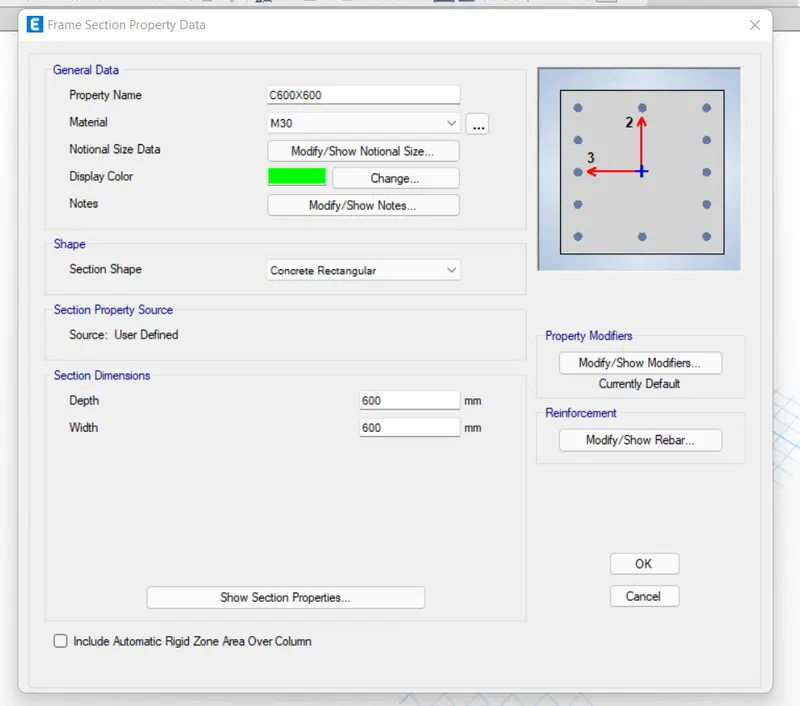
- Column sizes for bottom five stories : 600 x600
Procedure:
- Now in this model we need to add a 5 more stories to our model in addition v also need to assign different column sizes on different floors and then we do that we will first save the e-tap file building D as a new model for building E. Then edit the story that we have done for our previous model and then we need to add two new column sections which is required direction and assign them to appropriate flour in our model as specified
- Adding a 5 new stories ands select the model for building E
- Add up 5 New Stories and Set the Model for Building E
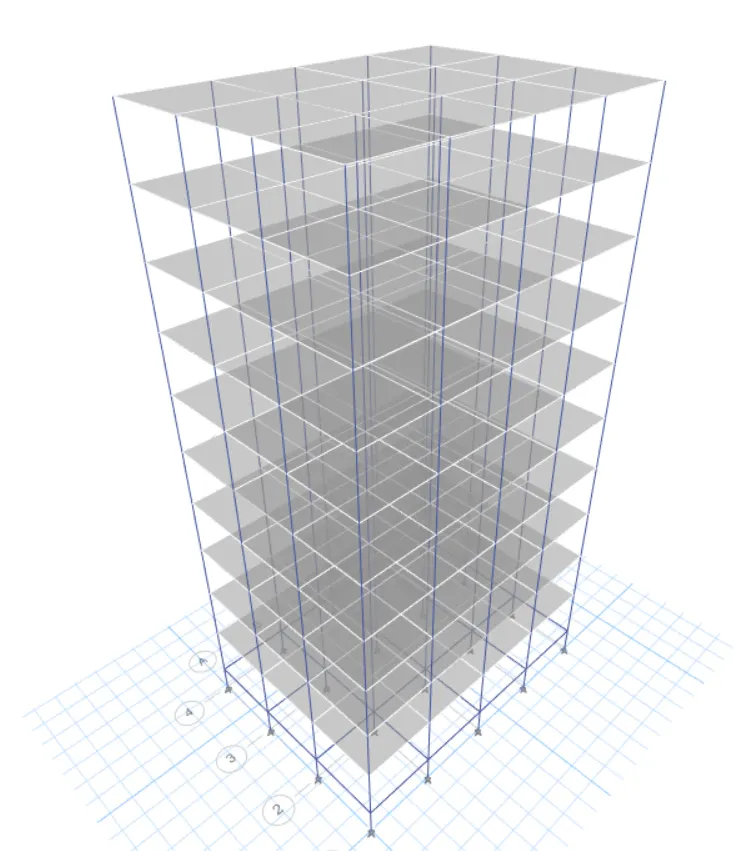
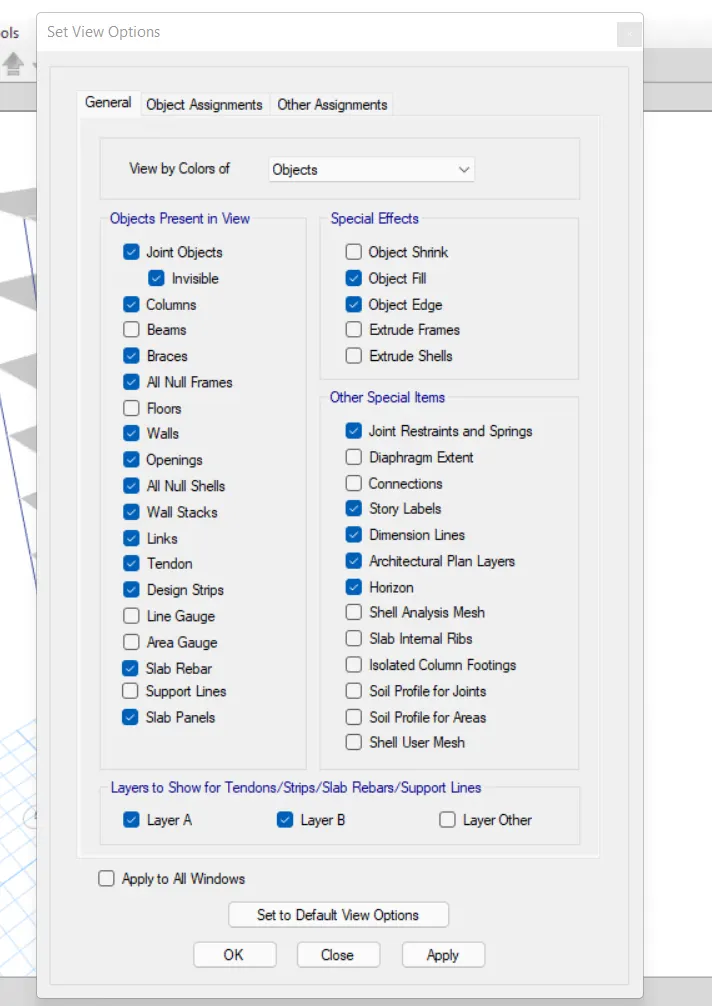
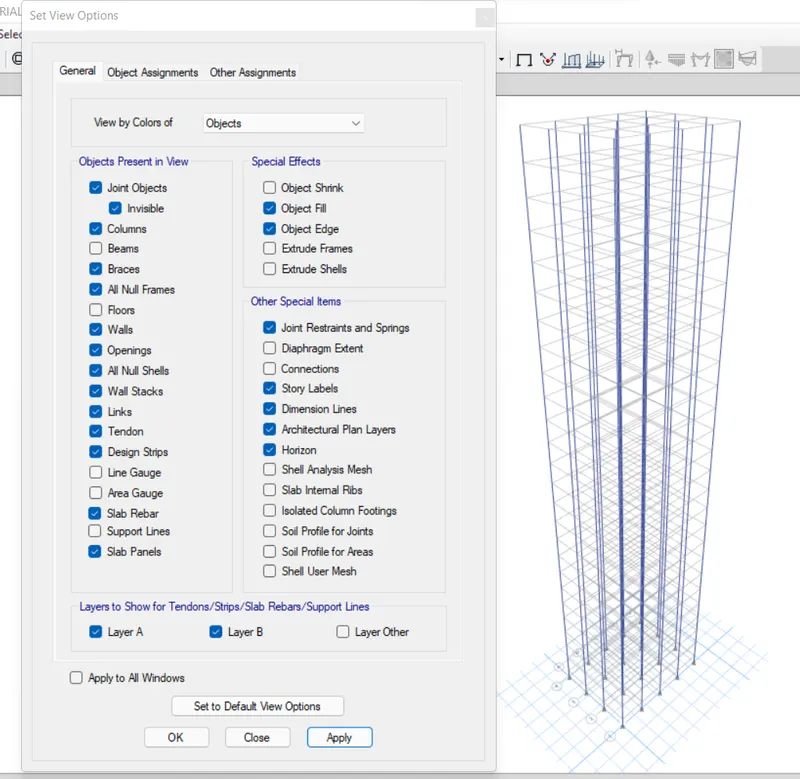
- Now we have to change the view settings of the model for that gears option in the e-tapes that allow the user to adjust the model and view the only objects that we need it to be obtained on currently
- The name of the tool is view option settings for that now we have to go to the v option settings and uncheck the structural members that you want to hide currently from the modelling purpose since we need to assign different colum size is for our model we don't need to view beams and slap currently so we go to the tools and uncheck beams and floor order to make any columns visible from editing
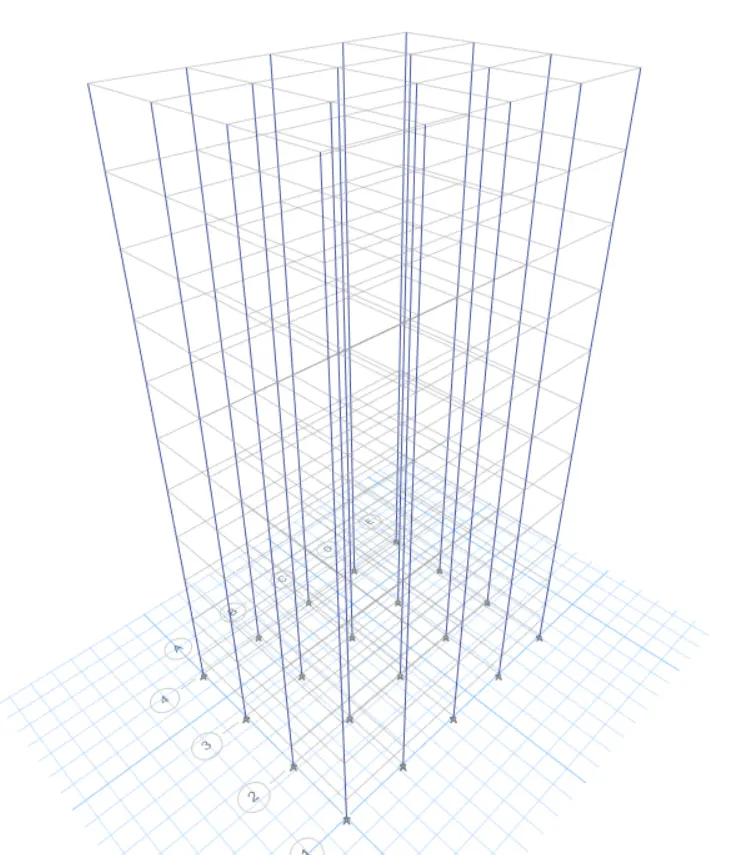
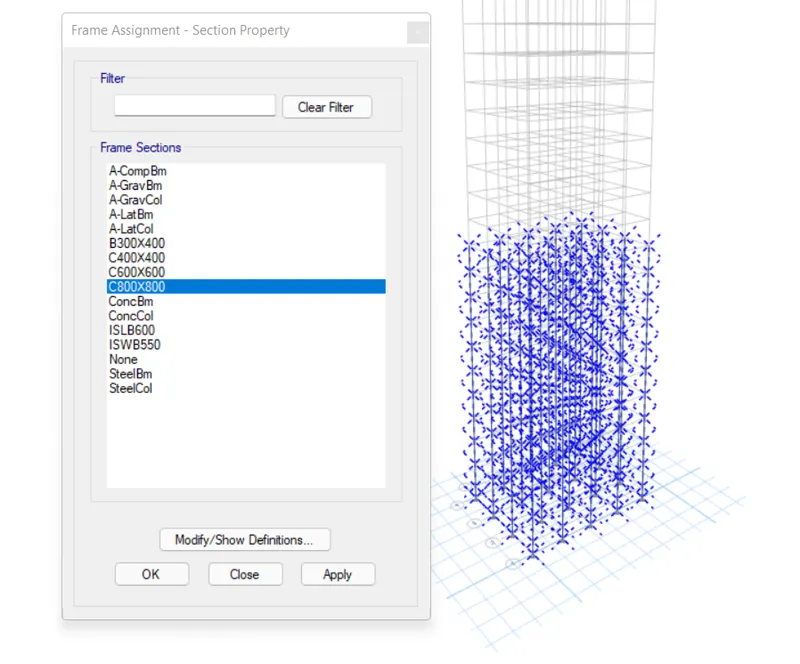
- Now we have to select the building limits select columns and assign them the required section
- Now since we need different columns for top 5 floors and different columns for bottom 5 so we need to edit top 5 and bottom five columns
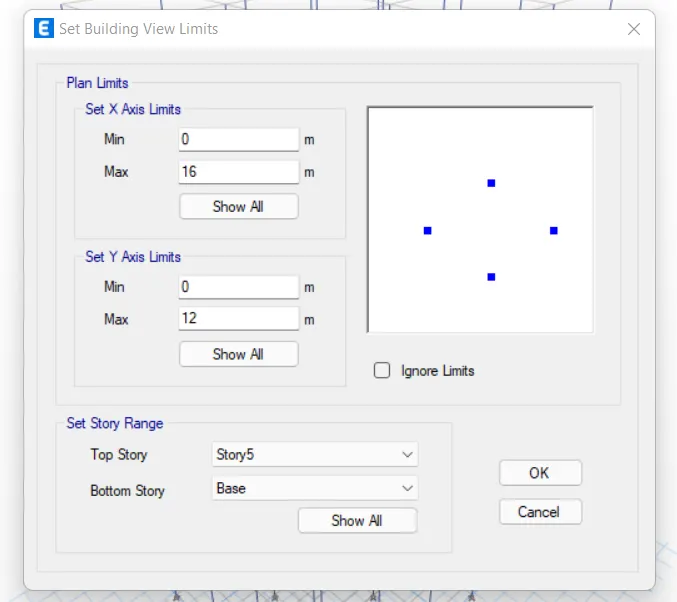
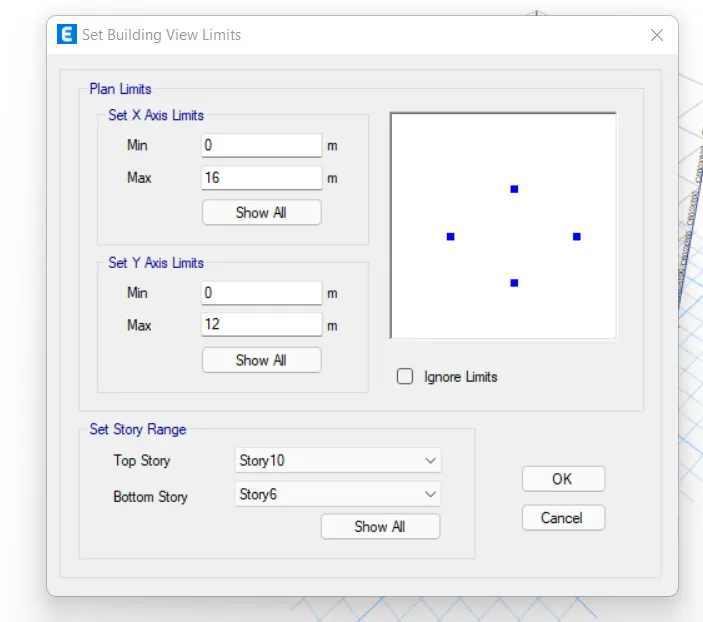
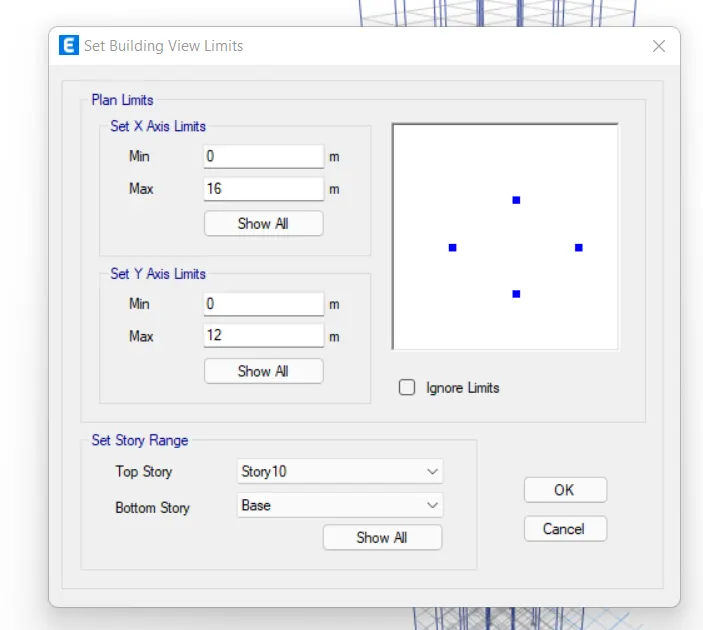
- For editing we need to set up the building limit up to the bottom 5 and then vice versa and do and to do that you can go to edit and select the building limits
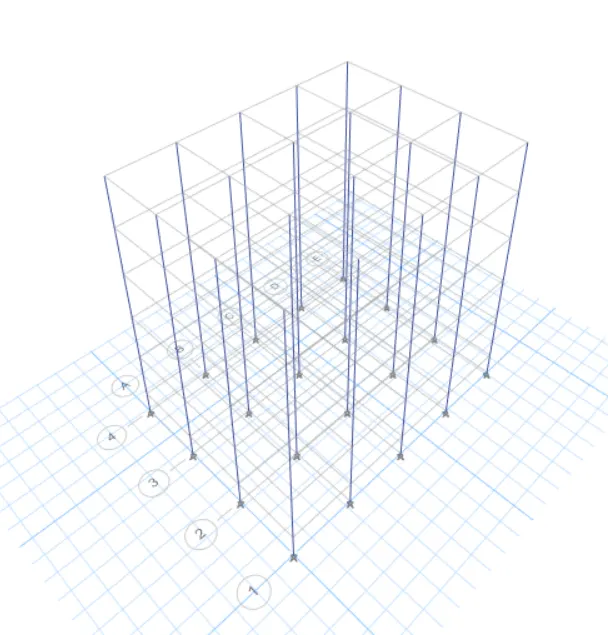
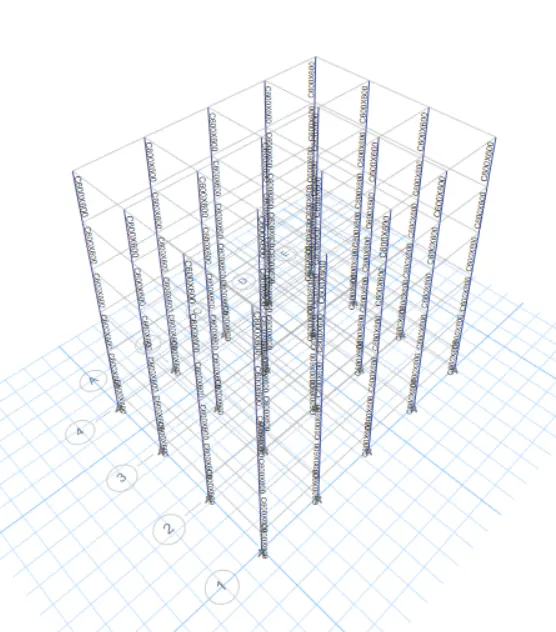
- Just set building limit option in e tabs love to view only the floors that we need to work on hands the first set of the five bottom floors is been selected
- Building Limits
- C400X400
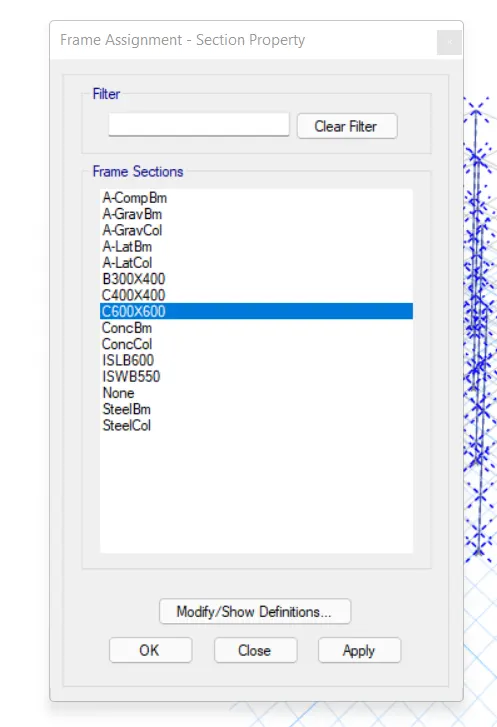
- C600X600
- Select Bottom 5 Story Columns
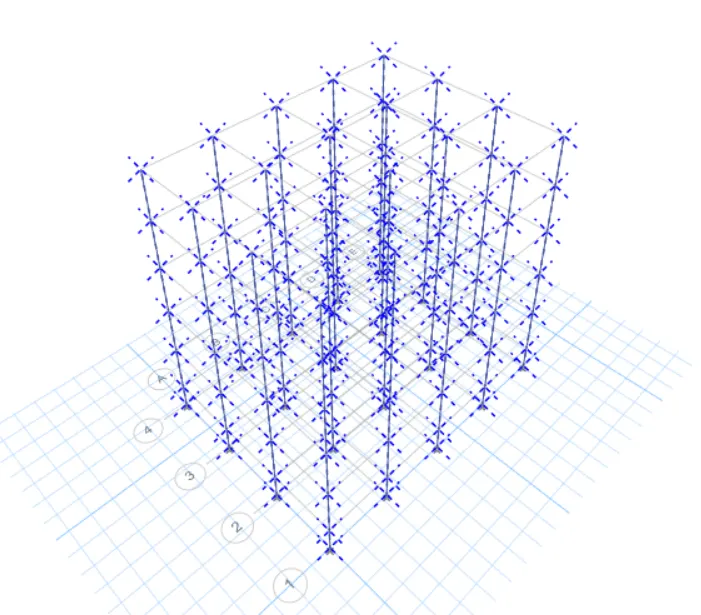
- Assign C600x600
- Building Limit for Top 5 Stories
- Select All Columns and Assign them C400x400 Section
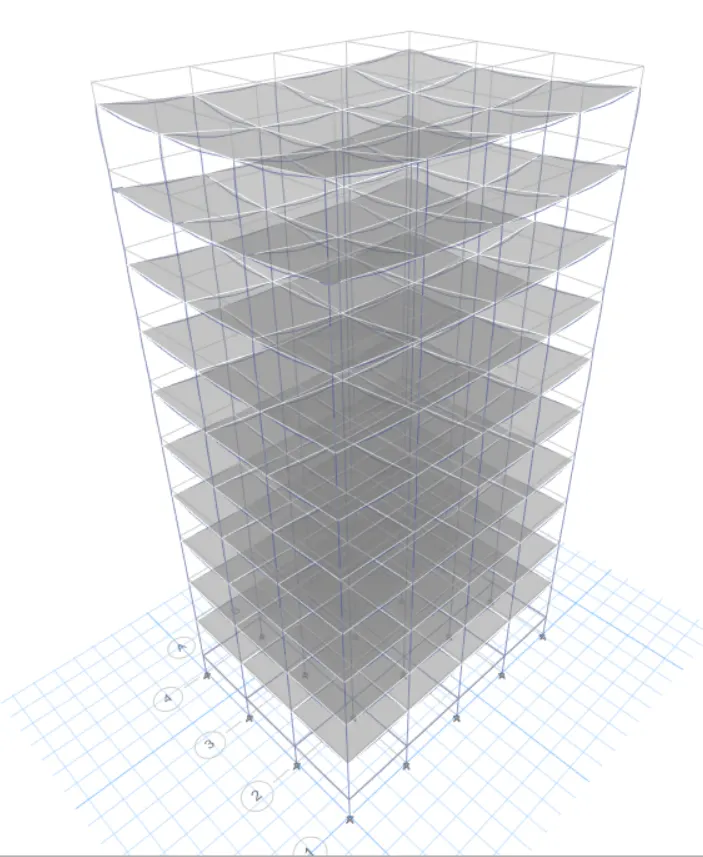
- Model After Assigning Different Columns for Different Floors
- Run the Analysis
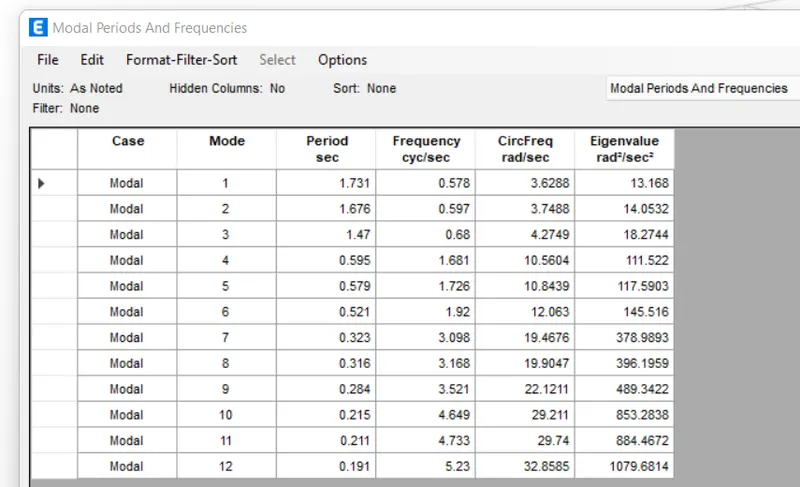
- Modal Response for Building E
Building F:
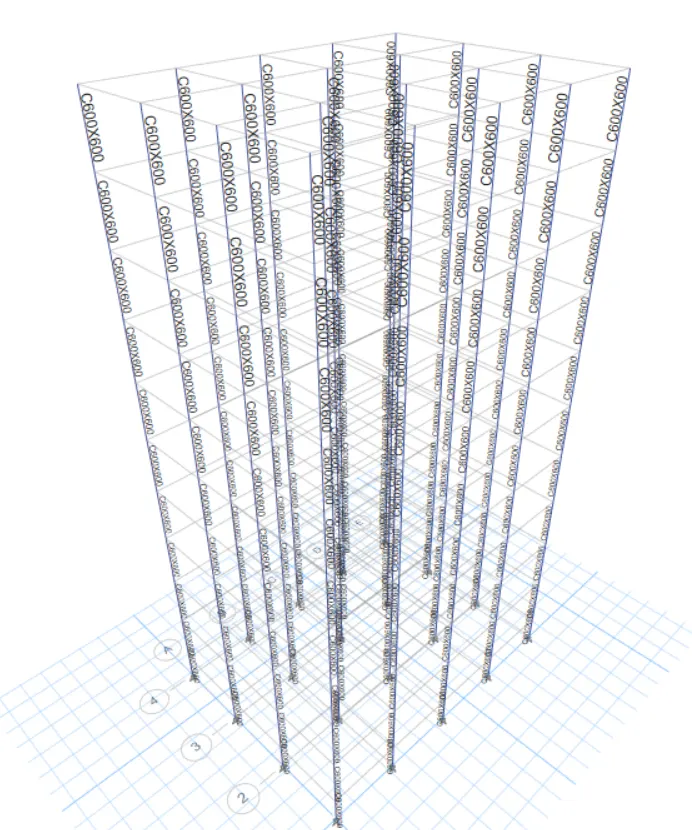
Building app consists of colum size throughout the structure of 600 X 600
Procedure:
- The building app has the same columns and for the entire structure therefore we do not need too much editing in terms of selection. We just need to adjust the view settings then hide beams and floors and select all the columns and assign them the frame section properties of colum size of 600 X 600
- Adjust View Option Settings
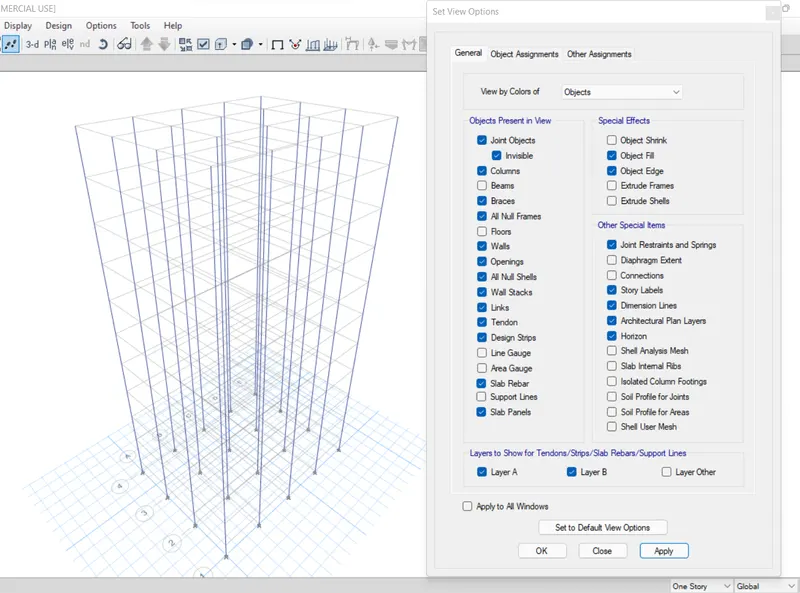
- Select all the Columns
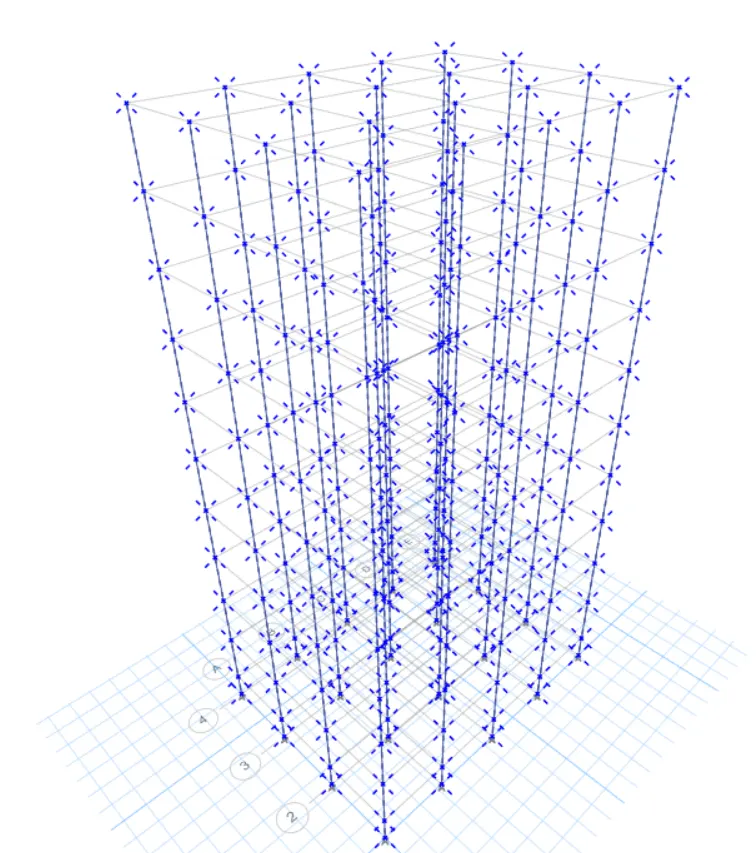
- Assign C600X600
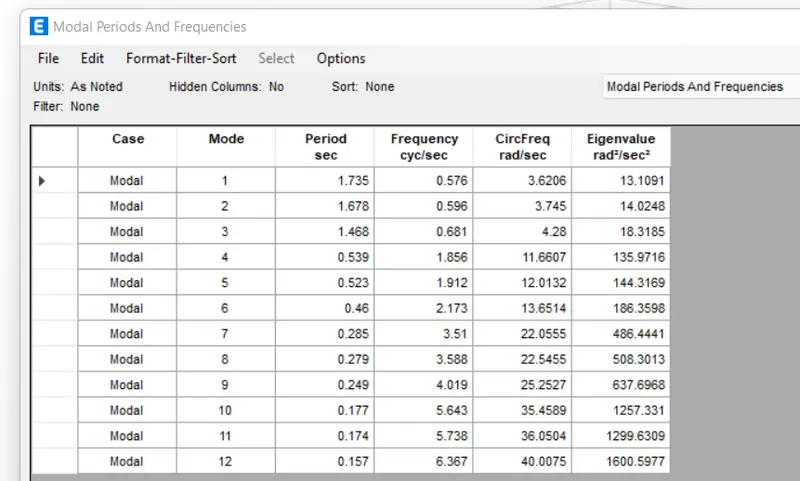
- Modal Response for Building F
Building G:
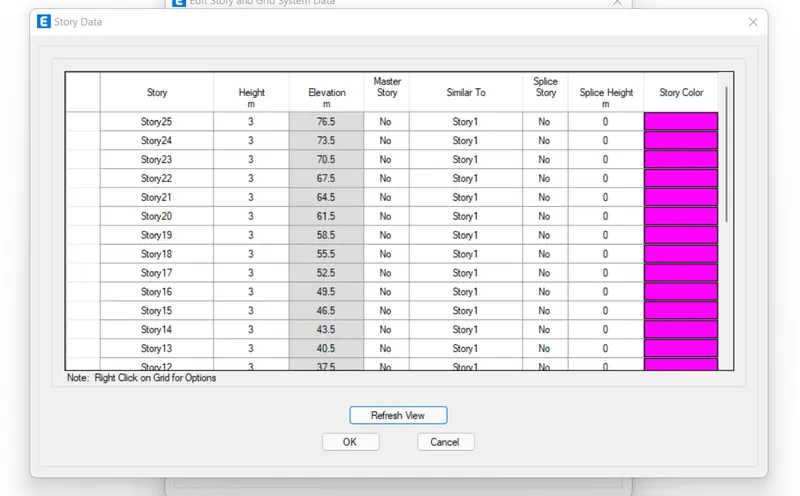
Building G has top five stories of column size 400 X 400 and middle 10 stories of column size 600 X 600 and bottom 10 stories of colum size 800 x 800
Procedure:
For the building GB need to add 15 new stories and assign different colum sizes on different floors we can follow the exact procedure that has been already been explained from the previous projects
- Edit the Story Data and Add up 15 New Stories
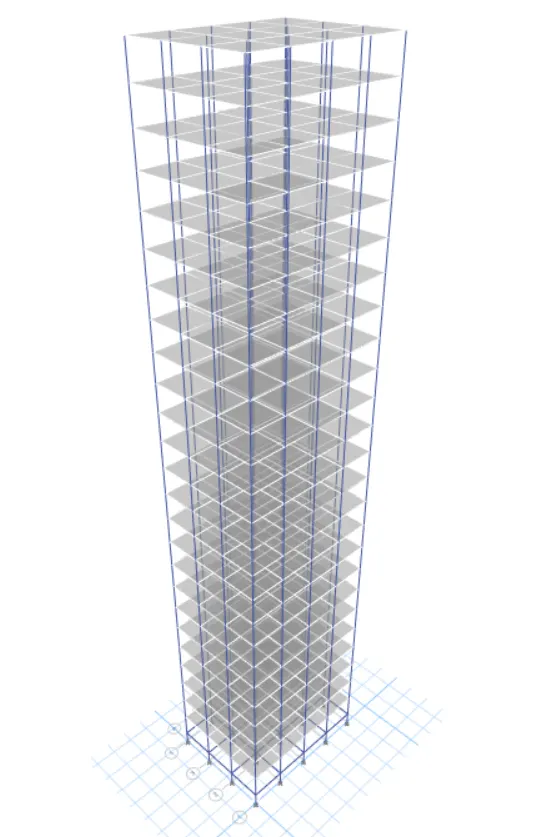
- View Settings
- Set Building Limit from 1-10
- Select all the Columns and Assign C800x800 Section
- Set Building Limit 11-20
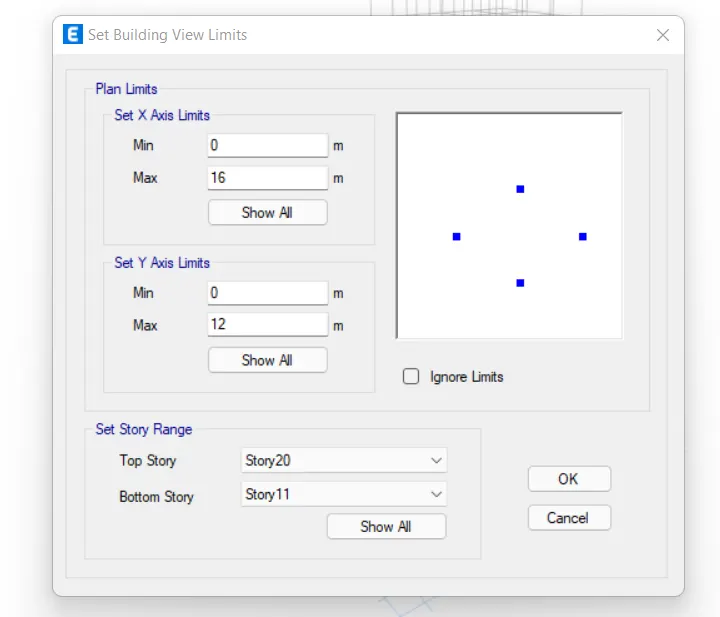
- Select all the Columns and Assign C600x600 Section
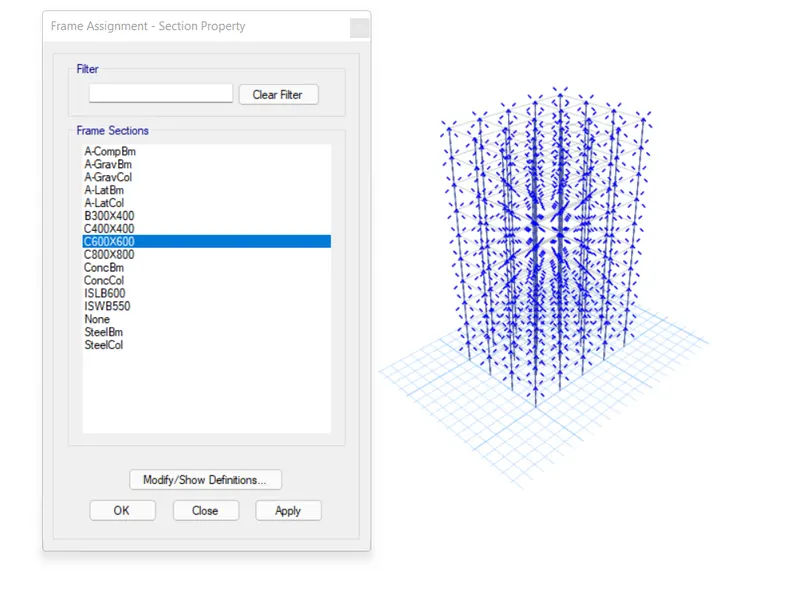
- Set Building Limit 20-25
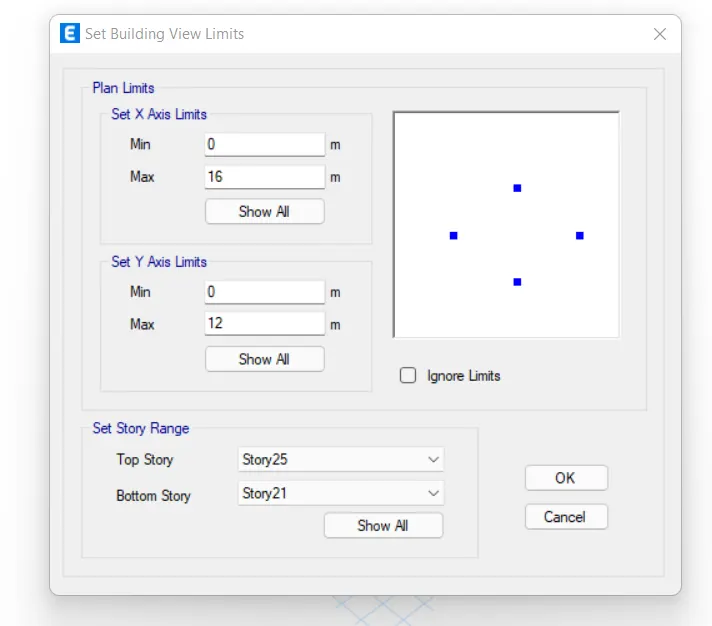
- Select all the Columns and Assign C400x400
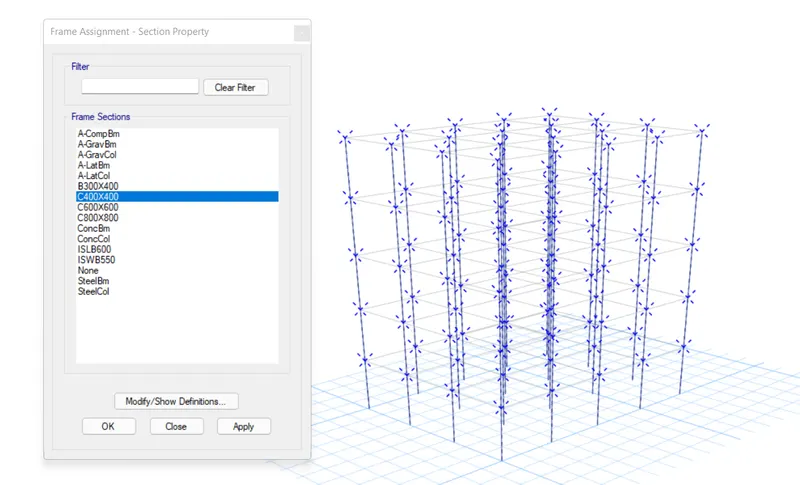
- Run the Analysis
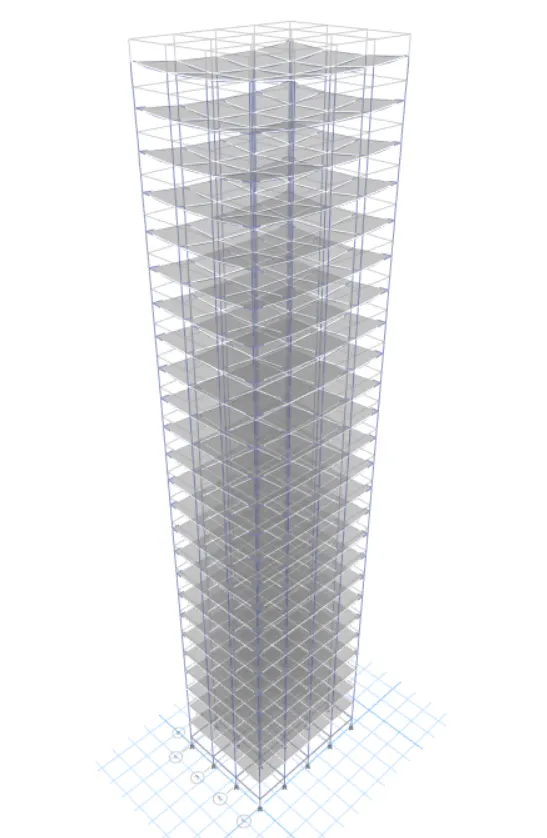
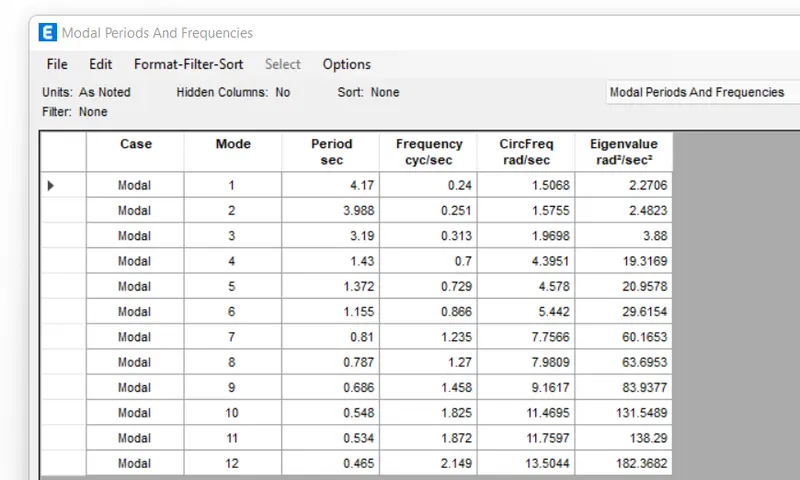
- Modal Response for Building G
Building H:
The building h has the consistent column size throughout the building of 800 x 800
Procedure:
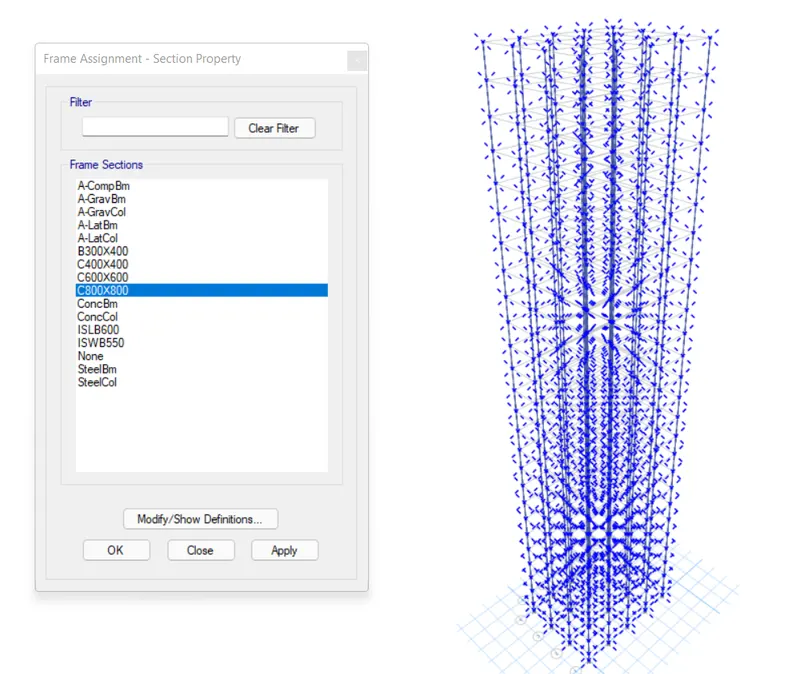
Building h is similar to the previous one so we need to assign the column section as 800 for the entire structure which can be done by simply selecting the columns and go to sign and then select the colum size of 800 x 800 and click okay and does the same procedure is listed down below the better understanding
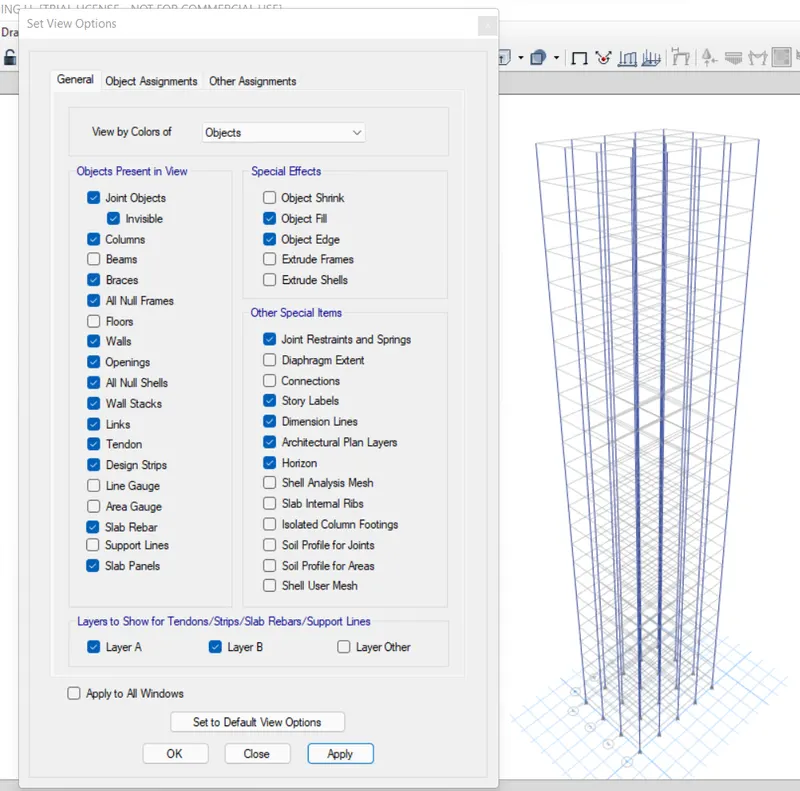
- View Settings to Hide Beams and Floors
- Select All the Columns and Assign C800x800 Section
- Run the Analysis
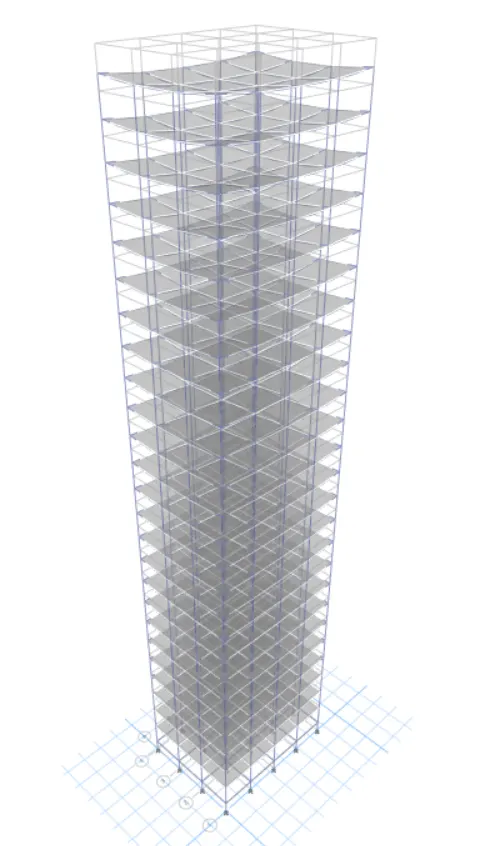
- Modal Response for Building H
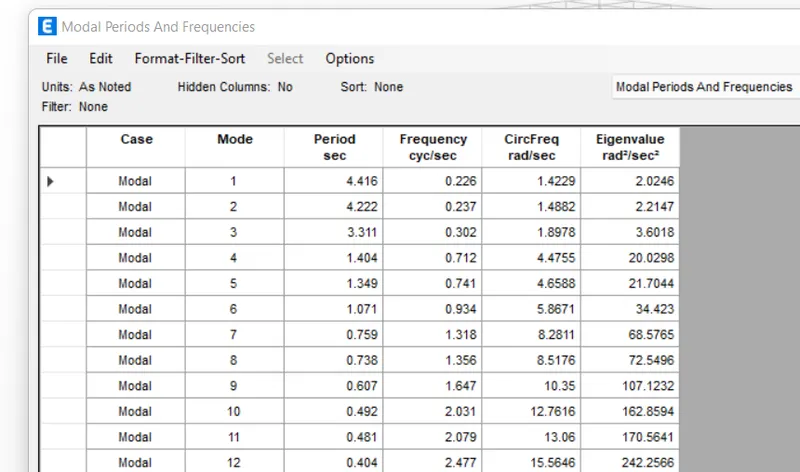
Building J:
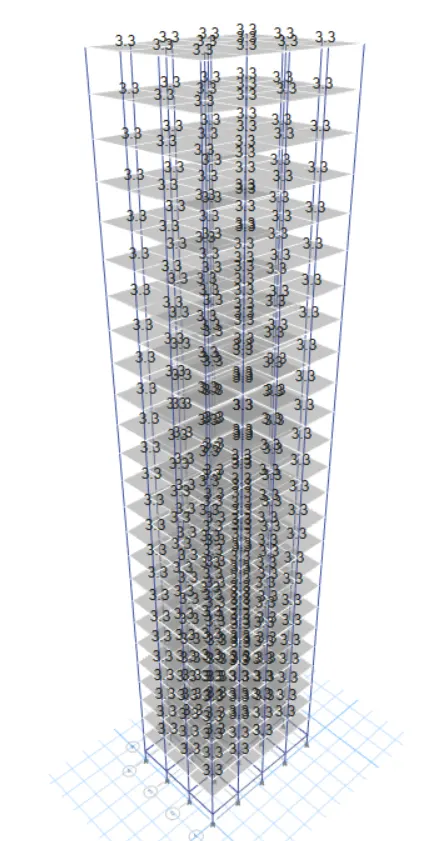
For the building J 10% increment in the imposed load is been added
Procedure:
Building J is exact copy of the above building h and do not need to order anything related to the modelling however we need to increase the imposed load on the building by 10% which is a signed as 3 km per mt square on all the slab of the building show the procedure is to do the same is listed down below
- Select the S150 Slab Section
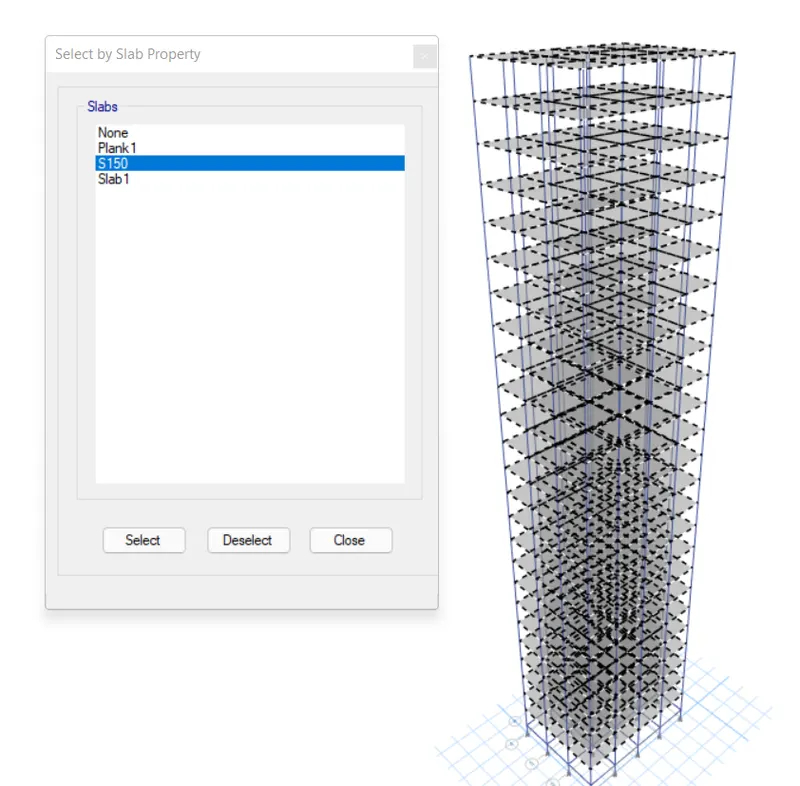
- Go to Assign>Shell loads>Uniform>increase it by 10%
- We have assigned a 3KN/m^2 imposed load on all slabs for all of our previous buildings.
- So, we need to increase that by 10% meaning we need to replace the existing imposed load with 3.3 KN/m^2
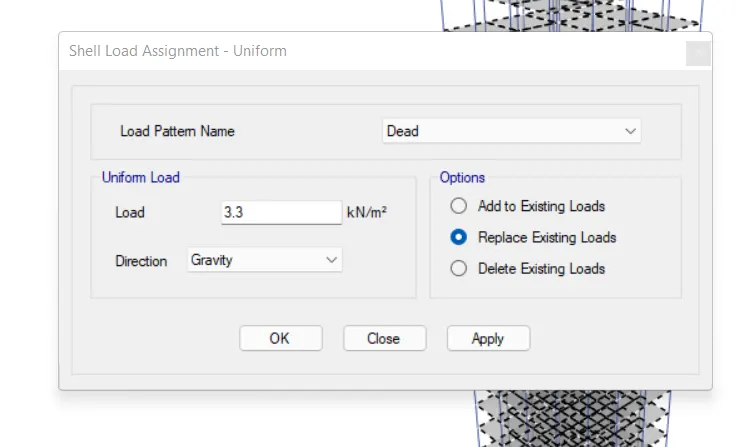
- Run the Analysis
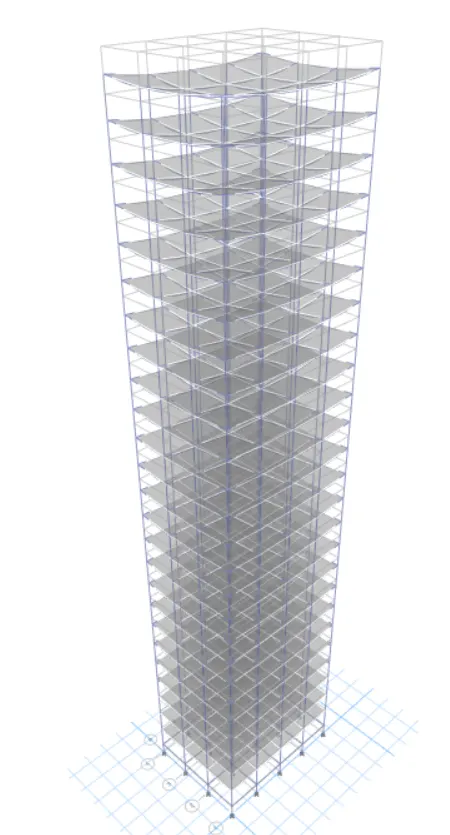
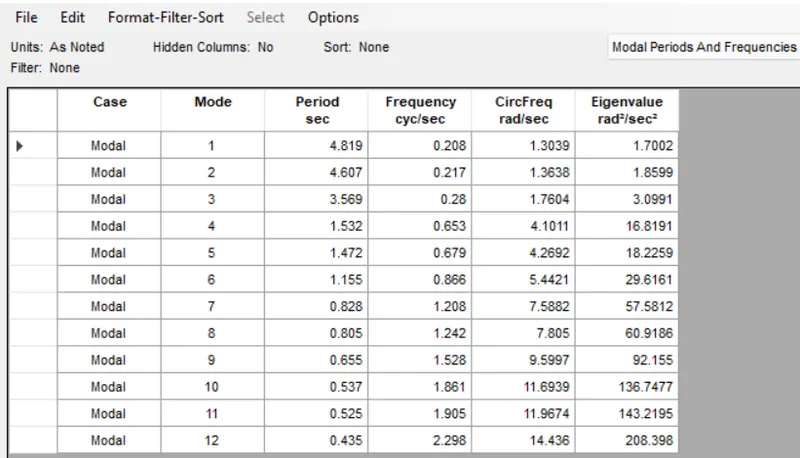
- Modal Response for Building J
Building K:
For the building K 20% increment in the imposed load is been added
Procedure:
For the building ke we just have to replace the imposed load by 20% as the building K is the copy of the building j so just replace the 10% by 20%
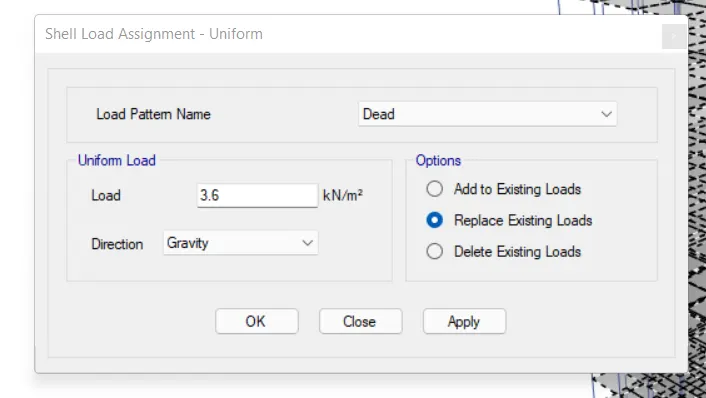
- Select the S150 Slab section
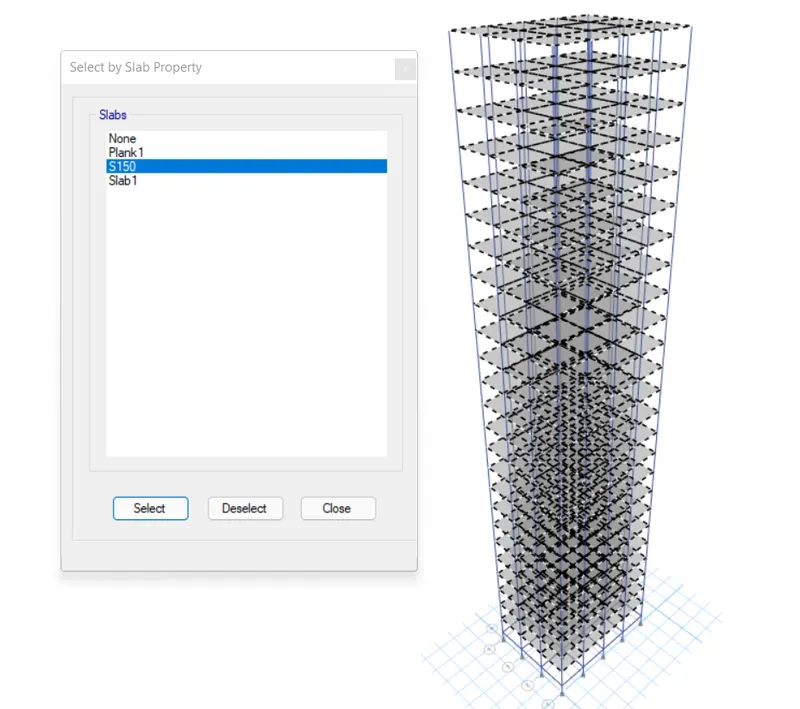
- Assign 3.6 KN/m^2 distributed shell load for a 20% increase
- Run the Analysis
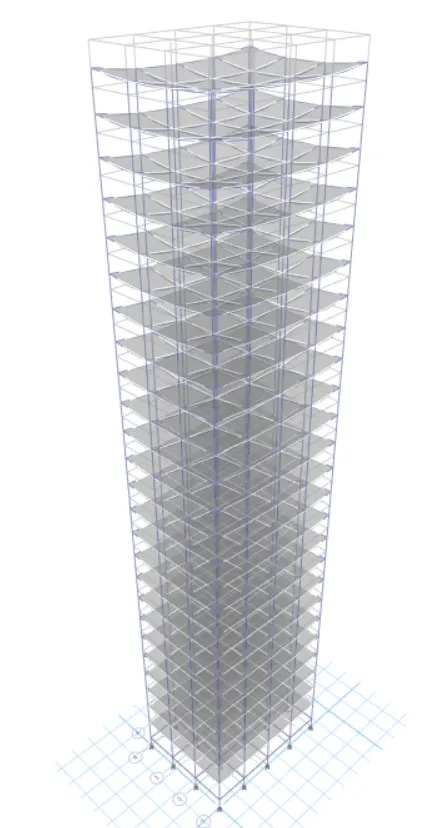
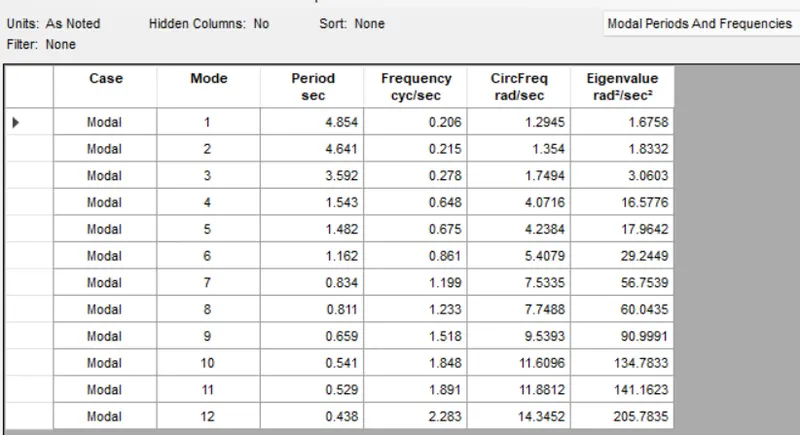
- Modal Response for Building K
Phase 2:
- Comparative analysis of building properties based on their structural outputs
- As we have completed the Modelling and analysis of the different story building in this previous phase of this project now we have to compare those results and try to understand the change in behaviour of the building faced based on the structure geometry
- So for the comparison analysis of the structural properties of the different story building where is criteria such a stiffness mass building height is been considered
Effect of stiffness on T:
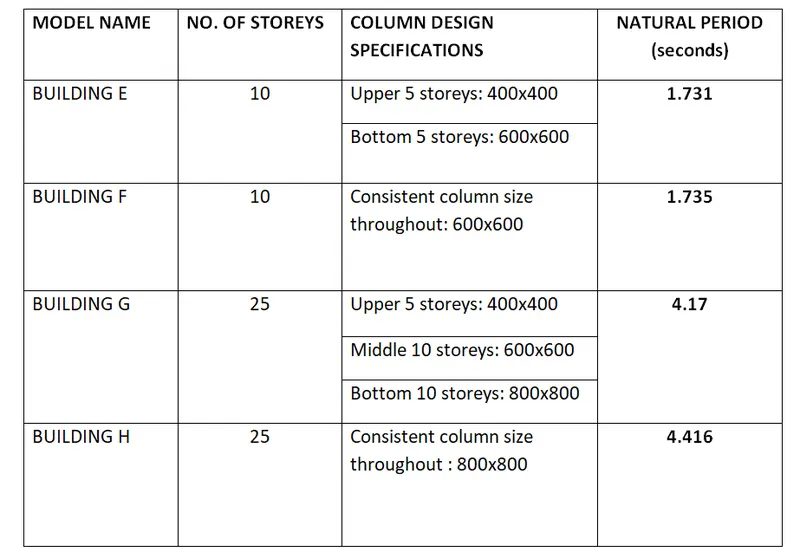
Compare fundamental natural periods of buildings E & F as well as G & H. Why is there a marginal or significant difference in the fundamental natural periods?
Comparative Table
Conclusion:
For buildings E and F, varying column design doesn't make a big difference as there are only five stories. However, we can see that for buildings G and H, the consistent column size throughout the structure causes a more natural period. Therefore, it can be concluded that providing larger columns at the base and then reducing the size on top floors helps control the natural period 'T' for tall buildings.
Effect of mass on T:
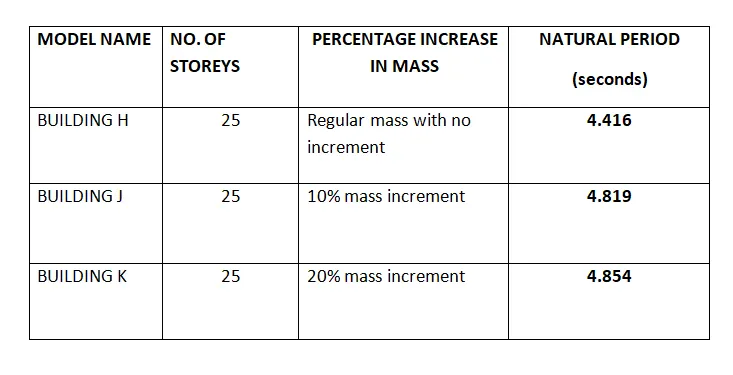
Compare fundamental natural periods of buildings H, J and K. Have the buildings become more flexible or stiff due to change in mass?
Comparative Table
Conclusion:
As seen from the table, the natural period for the tall buildings is directly proportional to the imposed mass of the building.
Effect of Building Height on T:
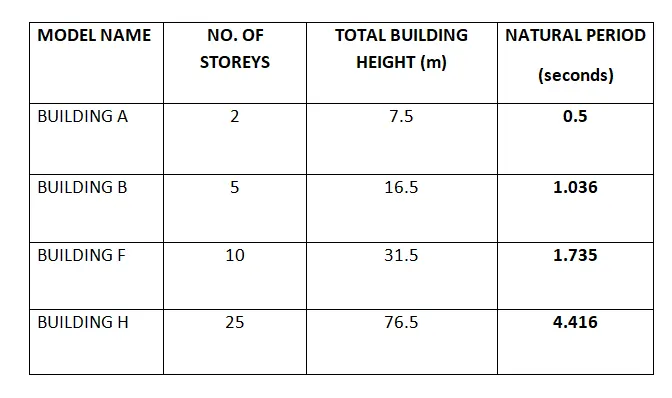
How do the fundamental natural periods of Buildings A, B, F, and H change with a change in building height?
Comparative Table
Conclusion:
As indicated in the above table, the natural period 'T' is also directly proportional to the building height.
Effect of Column Orientation on T:
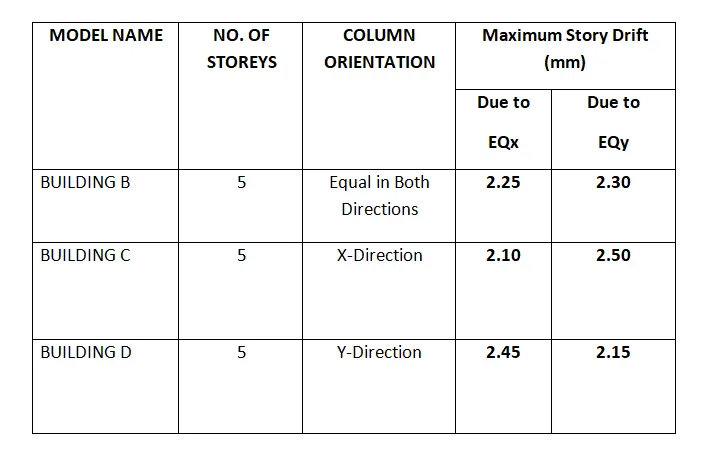
How do the fundamental natural periods of Buildings B, C, and D change with a change in column orientation?
Conclusion:
When the column cross-section is square, there's not much difference between the lateral displacement in both the orthogonal directions. However, when you orient the column in a particular direction be it X or Y, the lateral displacement in that particular direction will be less than that in the other direction which has a lesser column length.
Effect of Flexural Stiffness of Structural Elements on mode shapes:
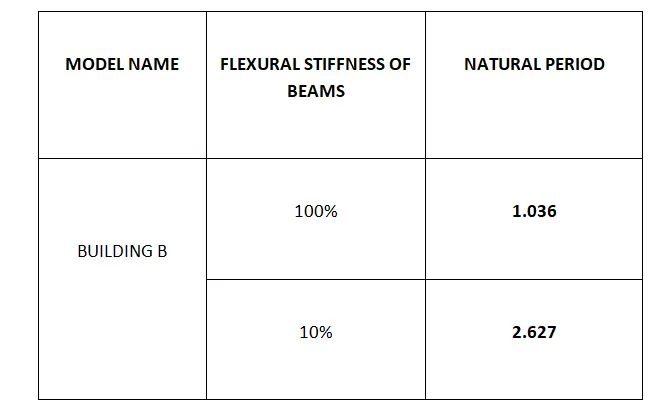
Compare fundamental mode shape of Building B in two situations when the flexural stiffness of beams relative to that of adjoining columns is very small versus when it is large.
Comparative Table
Conclusion:
It is pretty obvious that if you decrease the flexural stiffness of beams, the overall flexural strength of the beam is also going to reduce, and consequently, the fundamental natural period will shoot up.
Effect of Axial Stiffness of Vertical Members on mode shapes:
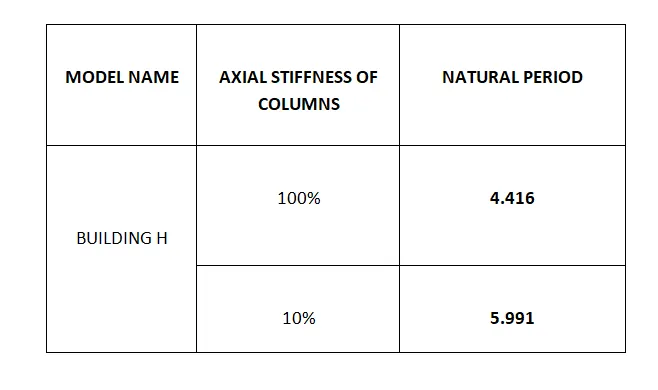
Compare the fundamental mode shape of Building H in two situations when the axial cross-sectional area of columns is very small versus when it is large.
Conclusion:
As the axial stiffness of columns decreases, the fundamental natural period of the building increases regardless of its structural geometry.
Effect of Degree of Fixity at column bases on mode shape:
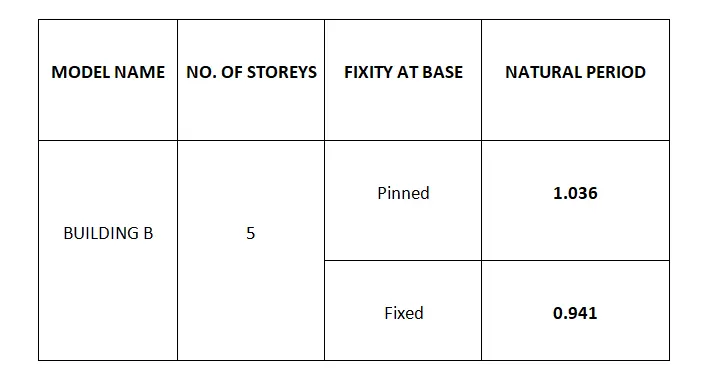
Compare the fundamental mode shape of Building B in two situations when the base of columns is pinned versus when it is fixed.
Conclusion:
It is evident that pinned support offers fewer restraints compared to the fixed one which leads to more movement and thus increased natural period. As a result, it can be concluded that the fixed support will give you better control over the fundamental natural period of buildings.