Project 1 - 2D meshing on the instrumental Panel
AIM:
For the given component, check for the geometrical errors and mesh with the given element Quality criteria. After meshing the component, the thickness has to be assigned.
Write a detailed report on your meshing process and also mention which method you used to extract the mid-surface along with the reason.
PROCEDURE:
- Download the given model from the project. Open in this model in ANSA.
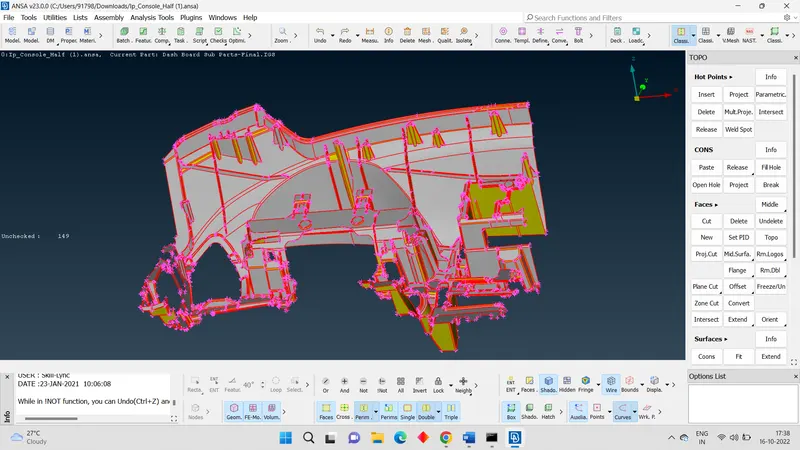
- After opening of the model in ANSA do topology.
- Now go for the geometrical check-up. In this geometrical check up we find some errors.
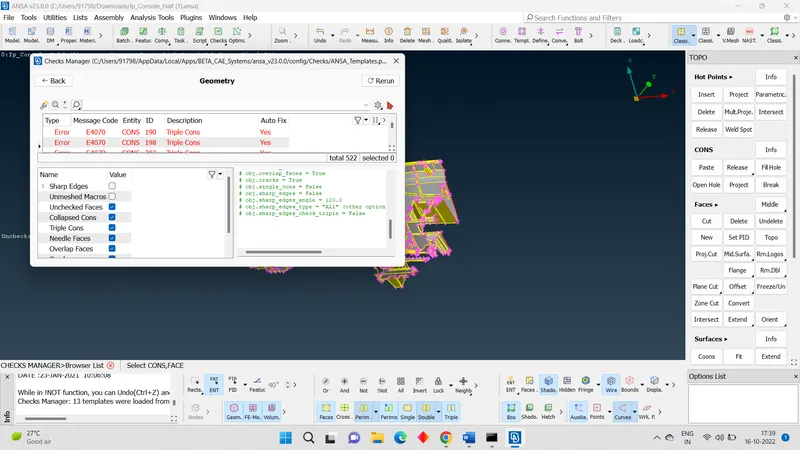
- Fix those error. And we can see that given model is not a closed volume. we have to close open volume by adding the face.
- Now we have many options to extract the mid surface from the model. CASTING AUTO- MID SURFACING.
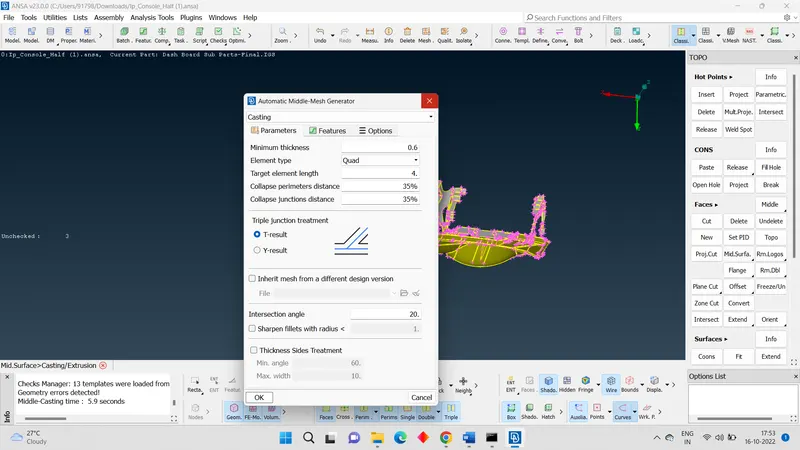
- But casting process will give many errors.it take lot time to solve those problems.
- And auto mid surfacing will place take some time and no grantee that it will give good mis surface because this model has various thickness and more complicated entities.
- So, I used here offset method.
- The main part of the body has a thickness of 0.6 mm. so, I gone with TOPO MODULE > FACES > OFFSET > SELECT THE ENTITY TO BE OFFSET > 0.6/ 2.
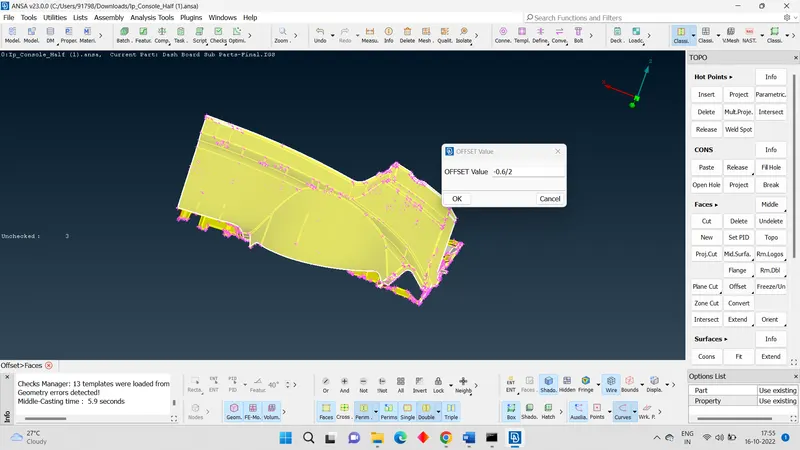
- Once the mid of main body was acquired, now we can take the mid of complicated features one by one using manual commands like Faces>Middle, Faces>offset.
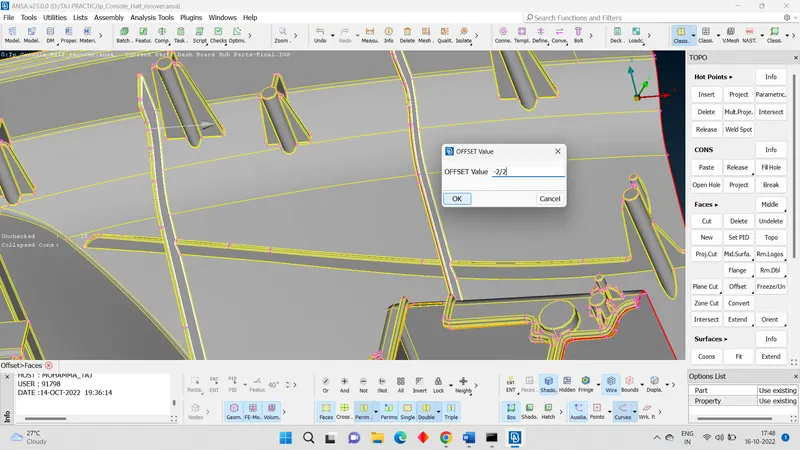
- After extracting the all-mid surfacing from the parent part. Go for geometric check-up.
- Here I found many errors. Now I go with geometry clean up by removing unwanted surfaces, providing proper surface and removing sharp edges.
- After geometry clean up, we can go for meshing
- In meshing we two options. Bach meshing and spot meshing.
- Now I am going with batch meshing. Because manual defeaturing of model takes lot of time. But in batch meshing reduce that time.
- In batch meshing we have save this mid surface model as new part. Now go to model manger name this mid surface as mid. Save as new part.
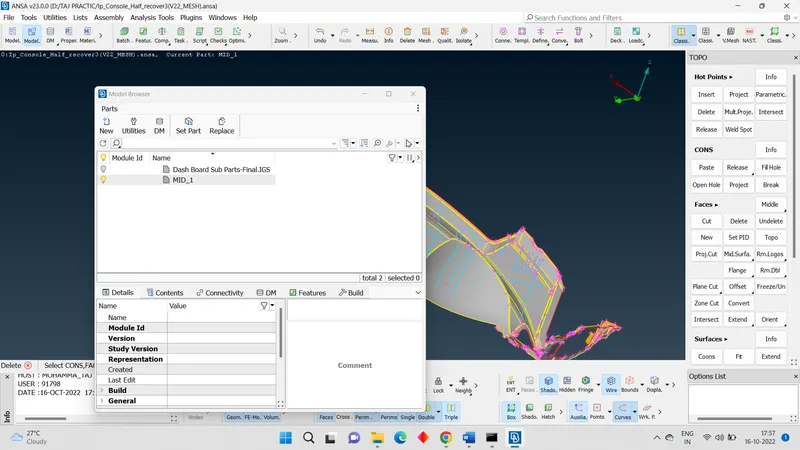
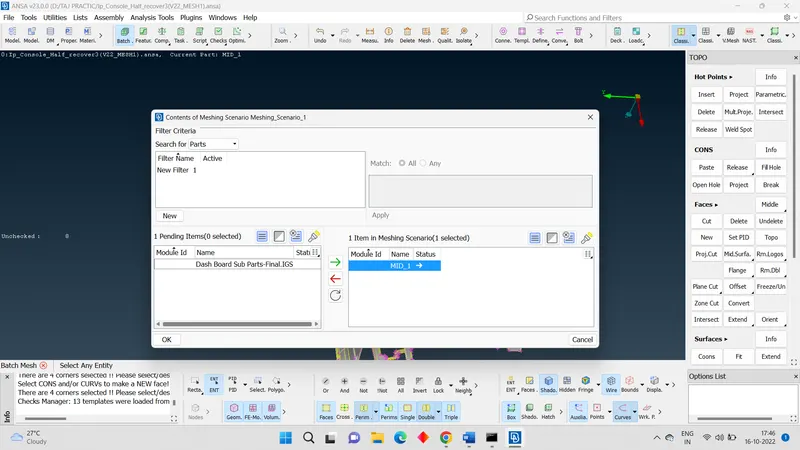
- For batch mesh TOOL BAR > BATCH MESH. Batch mesh manager dialogue box will open. There we will empty.
- Click on NEW > MESHING SCENARIO. Double click on 0 and select the model from left dialogue box click GREEN ARROW MARK > OK. That model comes into right dialogue box.
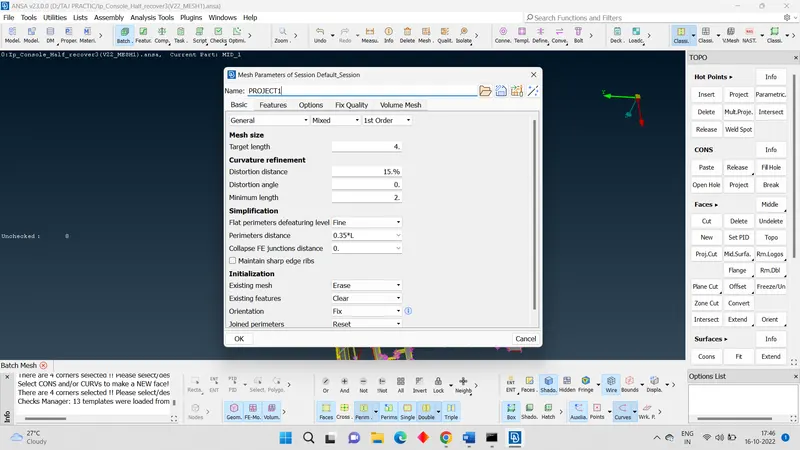
- Double click on mesh perimeter. Give the TARGET LENGTH AS 4 mm and MINIMUM LENGTH AS 2 mm. and change type mesh as MIXED, then click ok.
- Double click on quality criteria and give the values as given in question, then click ok.
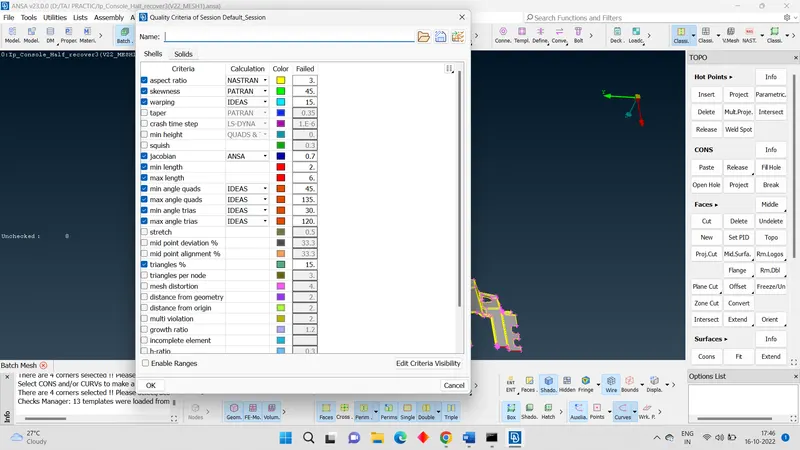
- Status shows as empty. Now run the mesh it takes some time and mesh will complete.
- Now to go for hidden mode to check weather element is failing due to element quality criteria. If any element is failing correct it using IMPROVE, RECONSTRUCTION and SMOOTH
- Now correct the mesh using options like SPLIT, SWAP, JOIN AND MOVE.
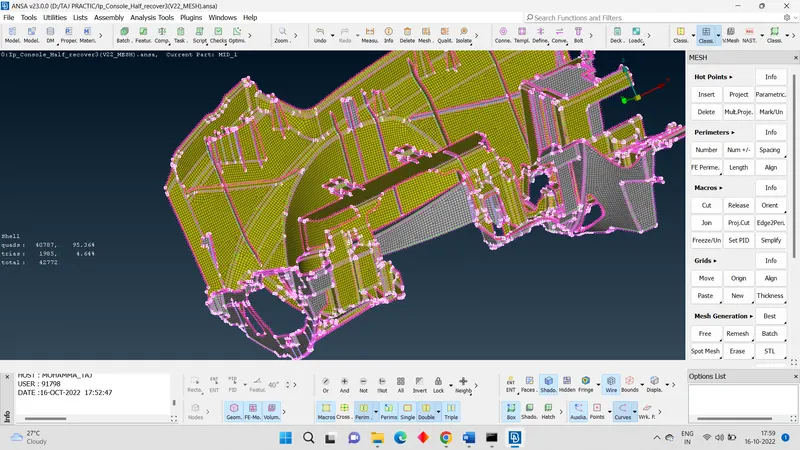
- Make off elements zero.
- Now completing the process save the file.
LEARNING OUTCOMES:
- How to perform on complicated shapes.
- Choosing of best method among the different methods.
- Picked up speed in performing different tools in ANSA.
CONCLUSION:
From this project we conclude that I can perform the mid surface and meshing for complicated shapes.
NOTE:
I have upload this file in google. I have tried to upload the file in the given link due to large size it’s not accepting the file
https://drive.google.com/file/d/14xozGKVzFJJFzd4EFdcZgZc5iHGb4se-/view?usp=sharing