Week - 4 - 2D meshing for Plastic components
AIM :
For the given Plastic Bottle Cap model, check for the geometrical errors and take the mid surface by suitable mid surfacing techniques. PID and Thickness assignment has to be done for all the mid surfaces. Mesh the given model with given element Quality criteria.
PROCEDURE:
- Download the given model and check the format of the model.
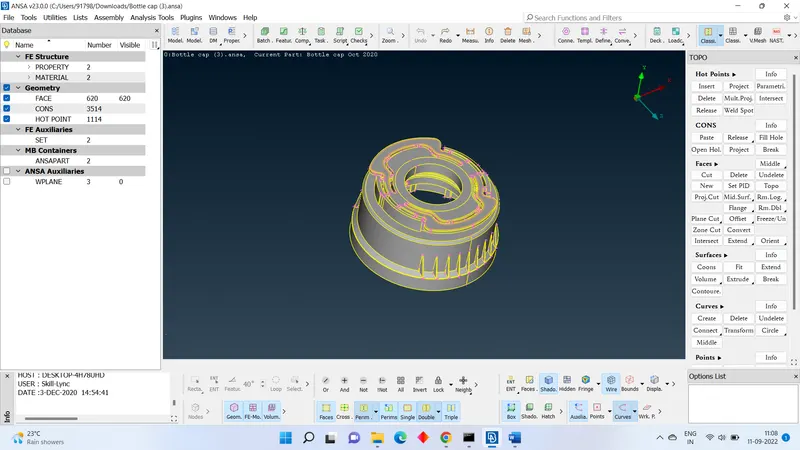
- Here the model is bottle cap in .stp format. So, we can directly open in the Ansa software.
- Before going to check mid surfacing is always check the geometry whether it is without errors.
- It is plastic model so; it has different thickness. At different positions. To avoid confusion, it always prepared to store the thickness values.
- I have followed a path that taking the mid surfacing from the bottom.
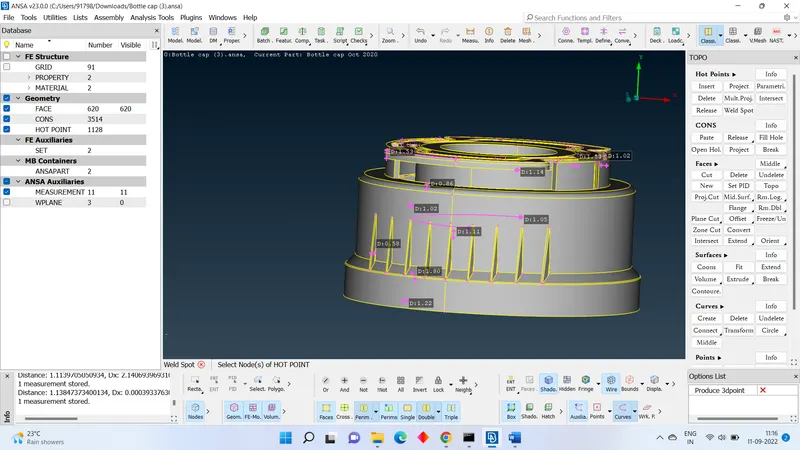
- I have given offset for some parts directly from the surface by using offset option.TOPO MODULE > FACE > OFFSET.
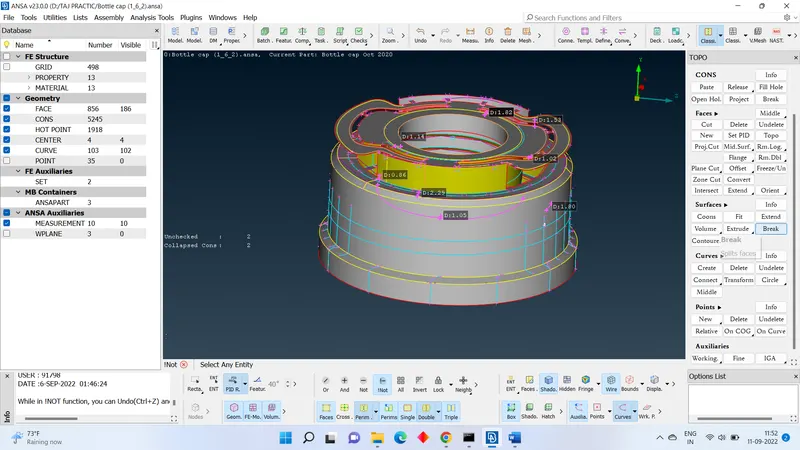
- I have also used middle option for some surface which we can’t use offset option due to tapered section.so, we used middle option. TOPO MODULE > FACE > MIDDILE. And select two surfaces where we need the mid-surface.
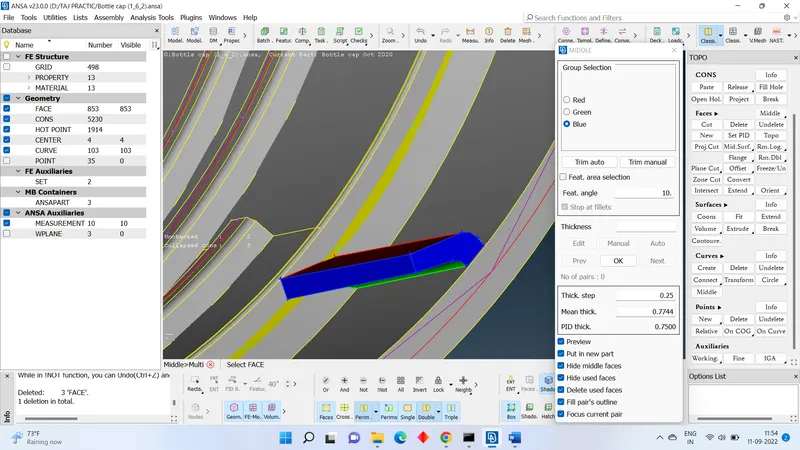
- For taking mid surface for the thread part of the cap I have used method explained in the
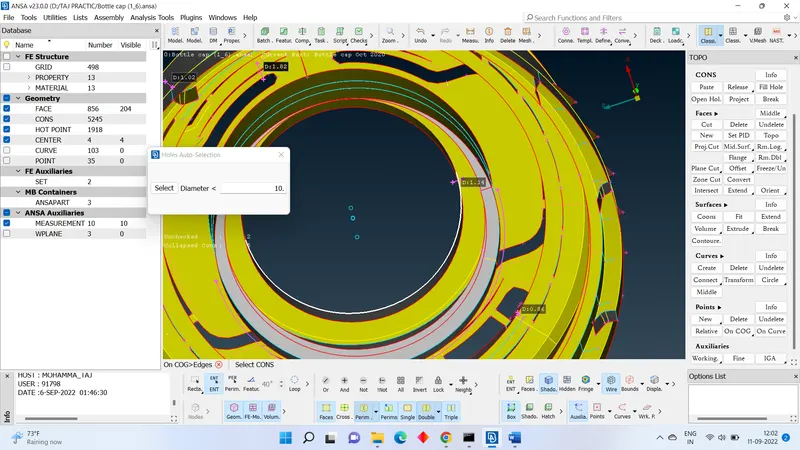
- In this cap model we can see some ENTITY in such that one part is repeated in the circumference of the circle. so, it always better to transform option reduce the time.
- Before that we need some centre points at different heights. TOPO MODULE > POINTS > ON COG > SELECT TWO CIRCLES at different hights.
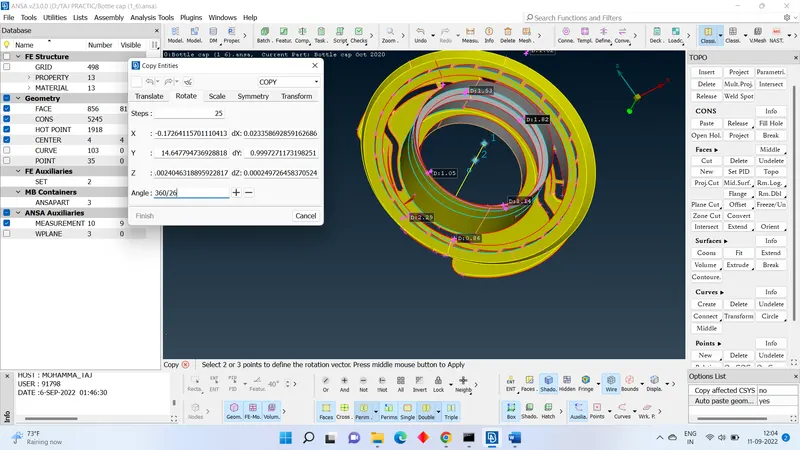
- Extract the one mid surface then from UITILITY TOOL BAR > TRANSFORM > COPY > SELECT THE ENTITY > ROTATE > STEPS(REPEATIONS) > SELECT THE TWO POINTS > ENTER
- Some times we could see that we have to take mid surface from more than two surface. In that I have used middle multi option. TOPO MODULE > FACE >MIDDILE > MULTI.
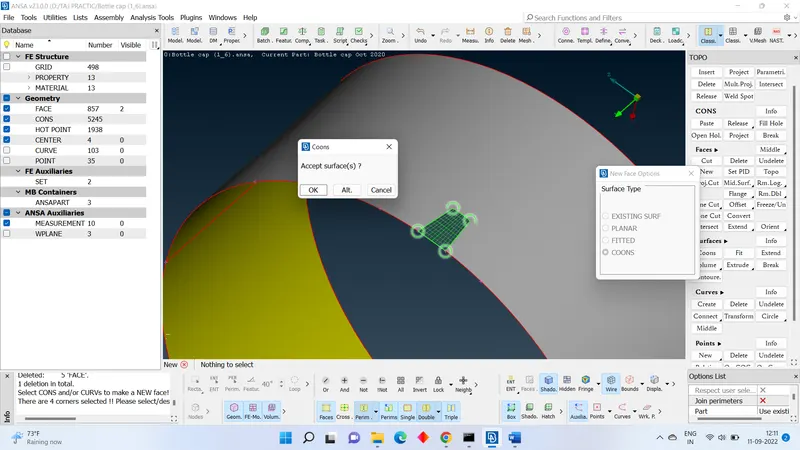
- After taking out all mid-surfacing we have fill the holes. TOPO MODULE > FACE > NEW > SELECT THE CONS. If we alter option to check how many types of face, we can form using that cons.
- We have to trim out some unnecessary areas. For that we have to delete the face.TOPO MODULE > FACE > DELETE > SELECT THE FACE.
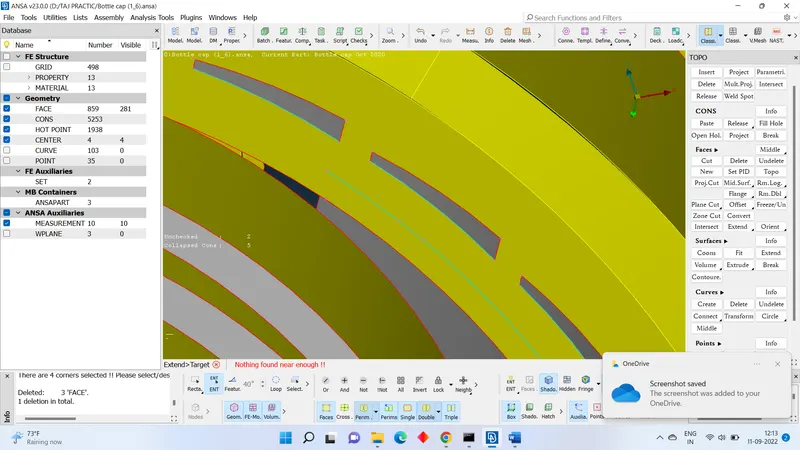
- Next step Is to be join the mid surfacing which are free from the main surface. We have to extend face up to the main mid surface. TOPO MODULE > FACE > EXTEND > SELECT SINGLE OF FACE > PRESS MIDDILE MOUSE BUTTON > SELEECT THE AREA. (Where we need to extend the surface).
- After completion of mid surfacing perfectly. We can go with the meshing part.
- Press F11 Key then meshing quality interface open. Fill the meshing quality as given in the assignment question.
- Quality parameter open from the tool bar and give the average element length and complete the other parameter according to the assignment.
- Now feed the quality criteria as given and enable the % ELEMENTS and provide fine.
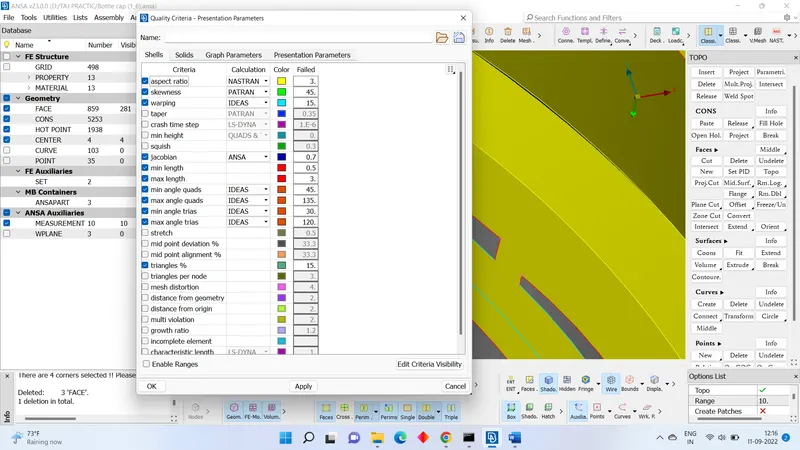
- Now we can go for mesh. Always better to use the best mesh. For that go MESH MODULE > MESH GENERATION > BEST > SELECT FACE.
- Start meshing face by face. always go for complicated shapes first then easier face.
- After meshing we cannot see meshing quality error directly on screen for that we have go to HIDDEN MODE.
- Here we can different colors of error. Each color will represent the specific quality error.
- To solve these type errors, we can use different option like RECONSTRUCTION, IMPROVE, SMOOTH FROM SHELL MESH. We can use some special types of options also to solve quality errors like SPLIT, SWAP AND JOIN FROM THE ELEMENT TAB.
- Repeat this step for all the parts in the model.
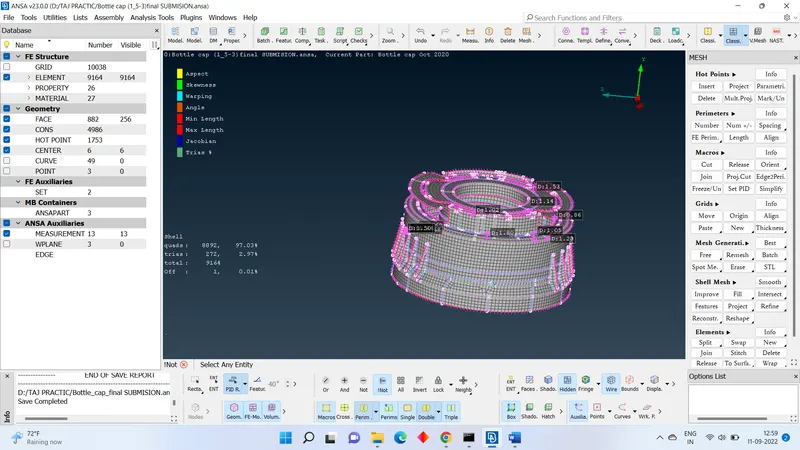
- Now we have give the proper thickness of all the parts.
- For giving property go to PSHELL from the tool bar. Pshell dialogue box will open, click on empty space in box and select NEW > PSHELL > PSHELL.
- Here we give name for midplane and give thickness of part is equal to 1.05 click on
- In PSHELL we can see new part which we given previously. Now right click on that part APPLY> SELECT THE TOTAL ENTITY.
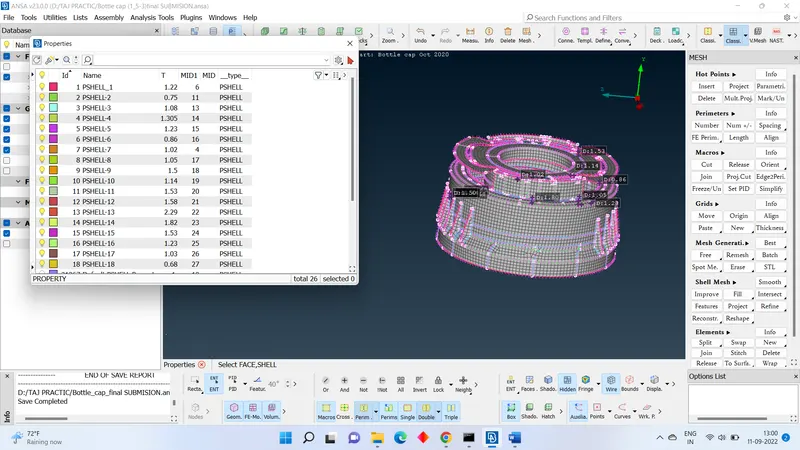
- After meshing is done we can again go to QUALITY CRITERIA > PRESENTATION PARAMETERS > DRAW SHELL AS SOLID and select it.
Learning outcomes:
- Taking midplanes for complicated areas.
- Using different commands in the topo module and mesh module like curves, middle, cons projection. And creating the areas of holes.
- Extensions of the areas of the to the base surface using extend option. Deleting the unnecessary areas in mid surfacing.
- Gain in the Speed of the uses of tools in the ANSA.
- Gained knowledge on how to deal with the plastic components.
Conclusion:
- As for this I got knowledge in dealing with the complicated regions In the plastic components. During the time of staring of this challenge I felt some difficulties but going with one-on-one section I got know the knowledge.
- Got perfection in using the different commands than previous challenge.
- With the help of this challenge, I could say that I could take mid surface very easily and in less time. And I strongly say that I can minimize my meshing errors.