Week- 5 - Solid meshing
AIM:
For the given Rear View mirror component, check for the geometrical errors and mesh the surfaces with the given 2D element quality criteria’s given below.
S.No. Quality criteria values
- Target/Average length 1
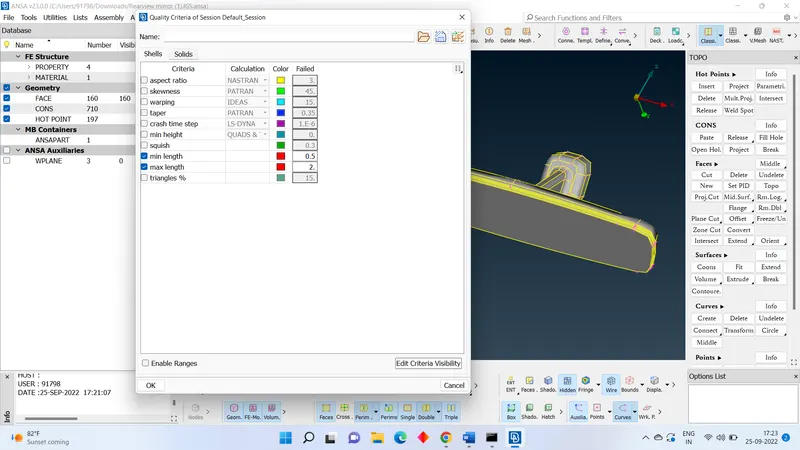
- Minimum length 0.5
- Maximum length 2
Use tetra elements to mesh the volumes defined in the model and check for the below quality after volume meshing.
S.No. Quality Criteria values
- Tet collapse 0.2
Procedure:
- Download the given from the challenge tab.
- Check weather given model in the format which accepted by ANSA software.
- Release all the cons and use the TOPO for entire model.
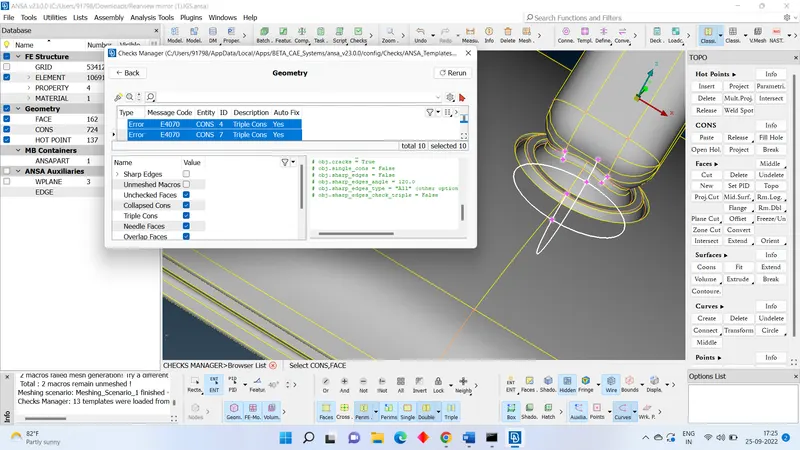
- Now we perform the geometry check to find if any errors present or not. For that go to TOOL BAR > CHECK > GEOMETRY.
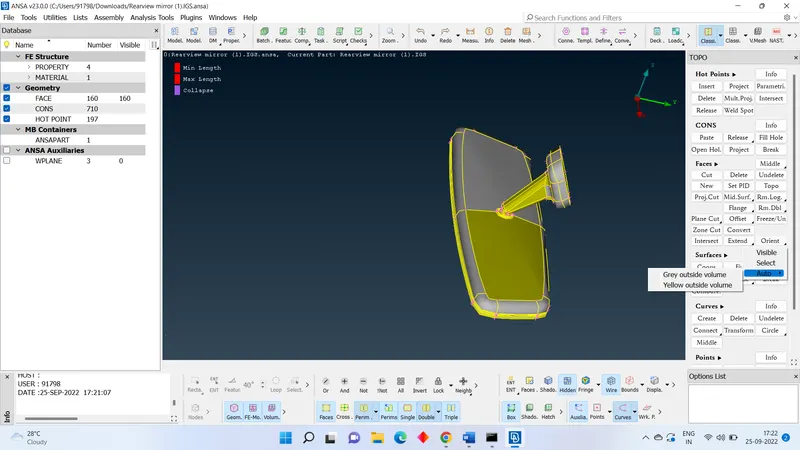
- Here we can more errors in the part geometry. We have two option to fix that error. One is select all and click on fix and next one is fix error one by one with manual fixing. According to get good experience in handling the error go with second option.
- For that select one of error and right click on it. Then click on SHOW ONLY.
- Here we can only error. We can to go with deleting the unwanted face, Cons and needle faces. Perform
- Repeat this process for every error or if we understand how to deal with the error, we can go with AUTO FIX.
- For auto fix, select all errors and right click on it, select
- Go to MESH MODULE > PERIMETER > LENGTH. And set length for both perimeter and macros as 1 mm.
- Now we go for 2D meshing, for this we can batch meshing. Generally, batch meshing is where model require more defeaturing.
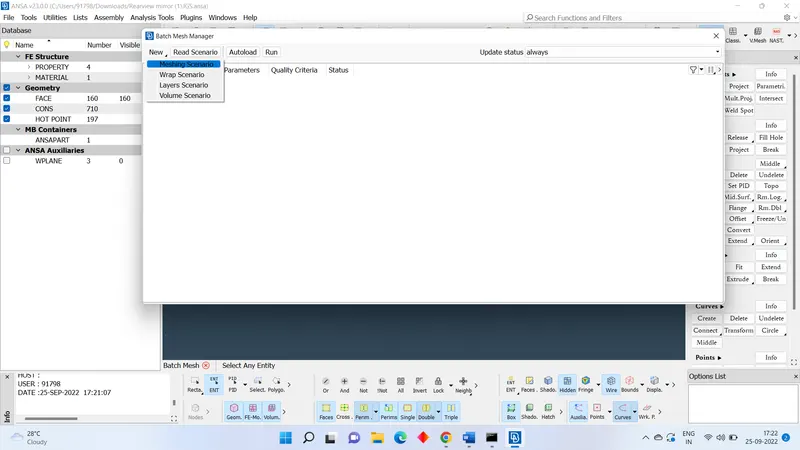
- For batch mesh TOOL BAR > BATCH MESH. Batch mesh manager dialogue box will open. There we will empty.
- Click on NEW > MESHING SCENARIO. Double click on 0 and select the model from left dialogue box click GREEN ARROW MARK > OK. That model comes into right dialogue box.
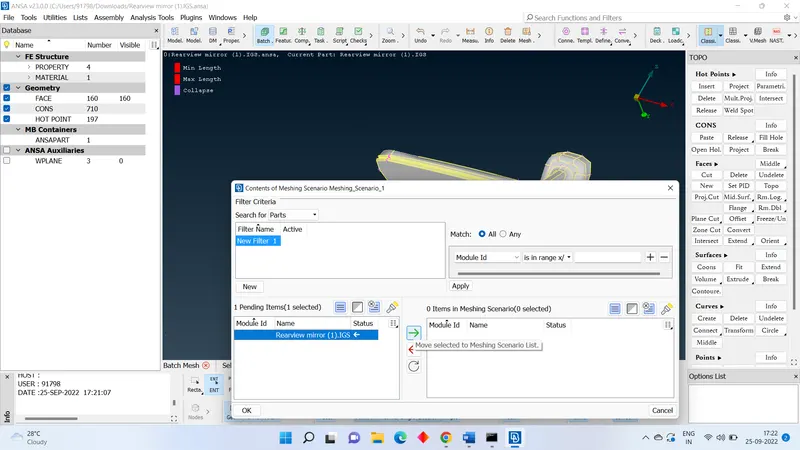
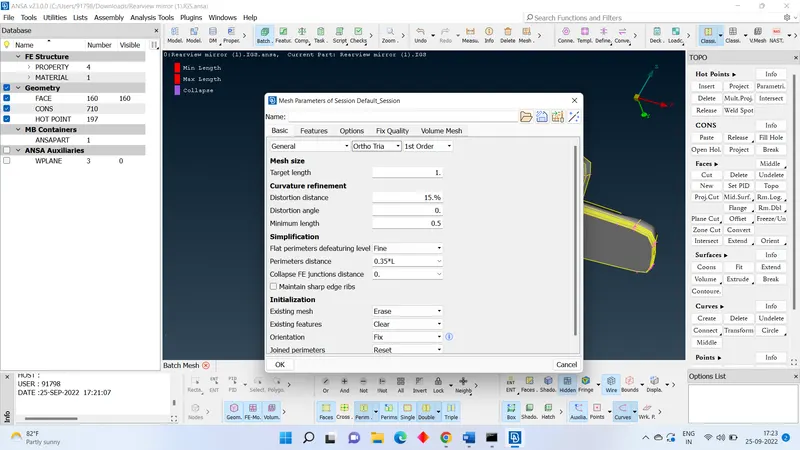
- Double click on mesh perimeter. Give the TARGET LENGTH AS 1 MM and MINIMUM LENGTH AS 0.5 MM. and change type mesh as ORTHO TRIA, Then click ok.
- Double click on QUALITY CRITERIA and give the values as given in question, then click ok.
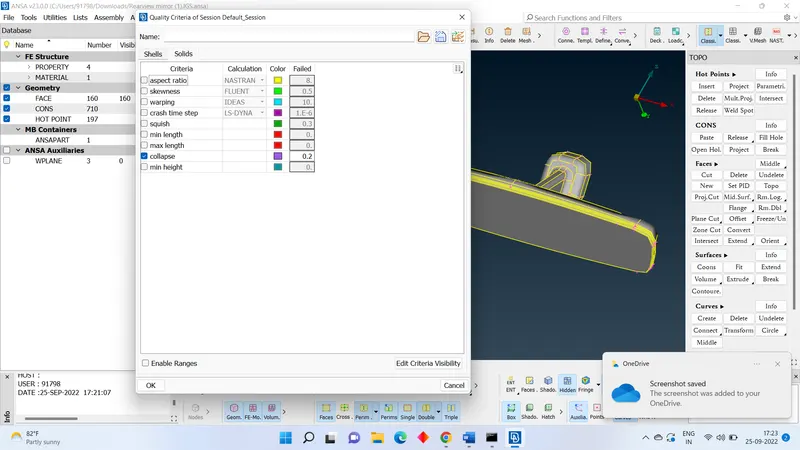
- Status shows as empty. Now run the mesh it takes some time and mesh will complete.
- Check the given mesh proper are not if we find any improper mesh pattern. Remove the mesh and use SPOT MESH .
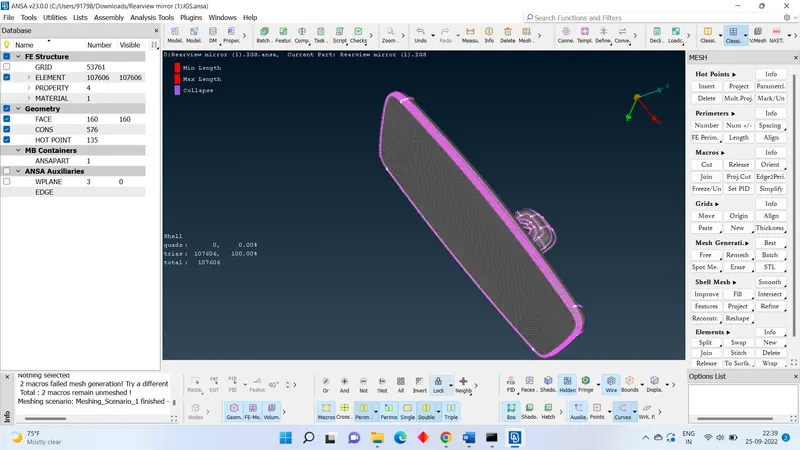
- Now go for 3D meshing for that we need to Define the volume. VOLUME MESH > VOLUMES > DEFINE.
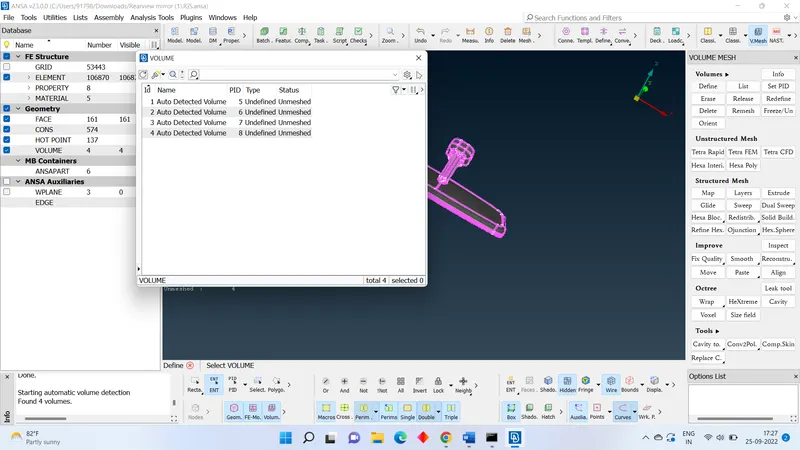
- Now we can go with the volume mesh after defining the volume. VOLUME MESH > UNSTRUCTURED MESH > TETRA RAPID/TETRA FEM > SELECT THE VOLUME.
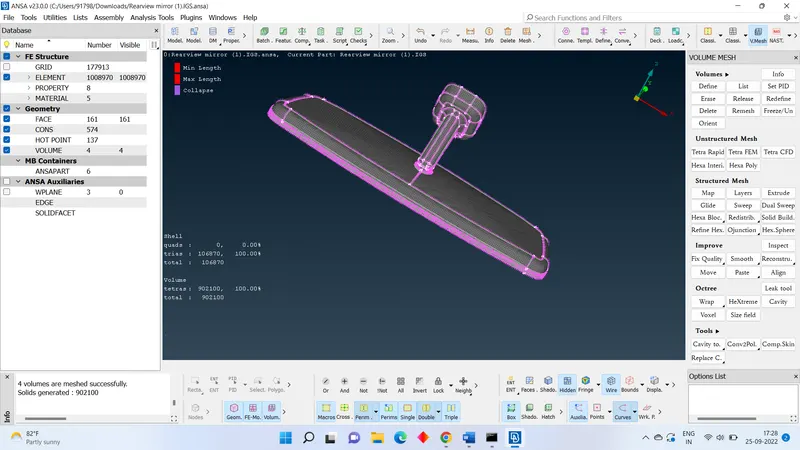
- After completing this process check any OFF ELEMENTS, ANY ERROR and DENTS are present or not. if Any present go for resolve.
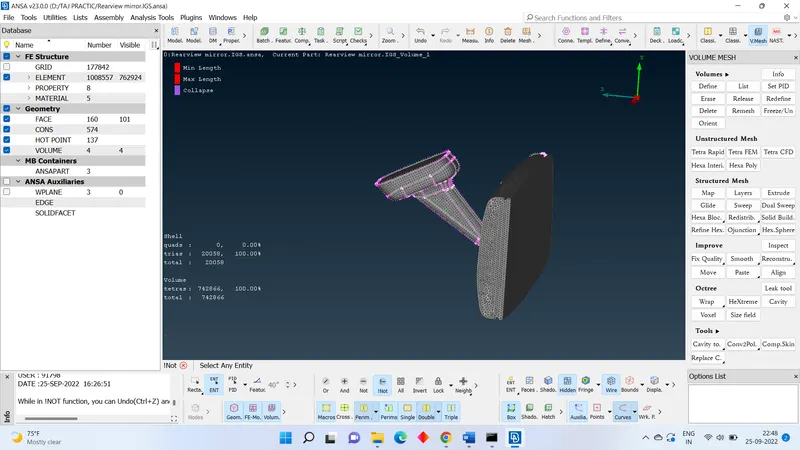
- Now the solid meshing of rear mirror is ready.
LEARNING OUTCOMESL:
- Using of batch meshing.
- How to make sloid meshing.
- Difference between ortho tria and tria. How to use, when to use them.
- Resolve the collapsed tetra elements.
CONCLUSION:
From this assessment I have learn many things like how to deal with solid meshing and as mentioned above. I can do the solid meshing for some basic parts. I have gained little experience in solid meshing. It take less time than the previous models because it take don’t require extracting mid surfacing and all.