Project 1
Aim- To route the wiring harness on given Engine and flatten view drawing in CATIA V5.
Objective- The objective of the project is to route the wiring harness on given Engine and prepare flatten view drawing in CATIA V5. All types of packaging rules have to be considered while routing the harness. Also, Industry best practices should be demonstrated in design. All the necessary details like clearance, clipping/clamping selection, harness fixing requirements, harness continuity should be provided in order to design wiring harness.
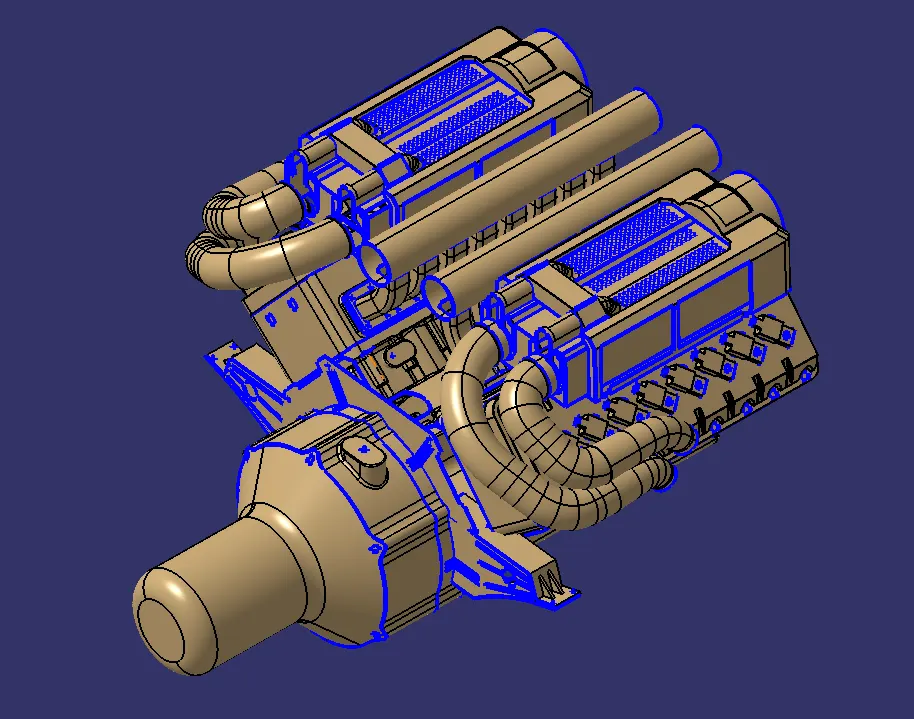
- First download the connectors and mounting clip from the given link source.
Using the geometrical parameters created,
- Define part as electrical connector.
- Define bundle connection point.
- Define connector connection point.
- Define cavity connection point.
C-1563689-1:
C-282080-1:
C-173090-2:
C-776438-4:
C-1924487-2:
Create new product file for inter connection connector and cavity assembly.
- Download and Define the plastic channel electrically
- Procedure for electrically defining the Channel.
- Create bundle entry point and exit point.
- Create a line curve between the main entry and exit points for creating the multi-branchable using external curve inside the channel
- Create 8 bundle entry points on the openings for connecting the injector connectors.
- Using the geometrical parameters, define the channel electrical using the define mounting equipment option.
- Create define bundle entry points using the define bundle connection point option.
Then create a new product assembly with channel bottom and top part assembly. And Create Channel symmetrical assembly and define the symmetry bottom channel electrically using define mounting equipment option and also create all the required geometrical parameters on it.
LH ASSY:
Channel Symmetrical Assembly RH:
- Download and define P-clamp and furr tree clip.
Creating the Main Assembly:
Context assembly is nothing but the product file which contains the engine 3D-CAD data and the engine harness geometrical bundle. Here the geometrical bundle product contains all the connectors and other mounting equipments, clips and clamps which are electrically defined for the assembly. Sheet metal L-clamp are added in the main context assembly.The we need to switch into the electrical harness assembly workbench and Geometrical bundle product file should be electrically defined using the Define Geometrical bundle option before adding any parts into it.
The Given V16 engine 3D-CAD model requires a total of 23 connectors to be placed on it and an inter connection connector for the engine wiring harness assy. The connectors used in this engine are as follows
- 8 numbers of connectors are required on the fuel injector sensors on each cylinder head, i.e.; total 16 fuel injector sensor connectors are needed.
- Total 4 numbers of cam-shaft sensor connectors are needed.
- 1 neutral position sensor connector and 1 speed sensor connector on the gear box housing.
- 1 engine coolant temperature sensor placed at the center of engine.
Creating the Main Assembly:
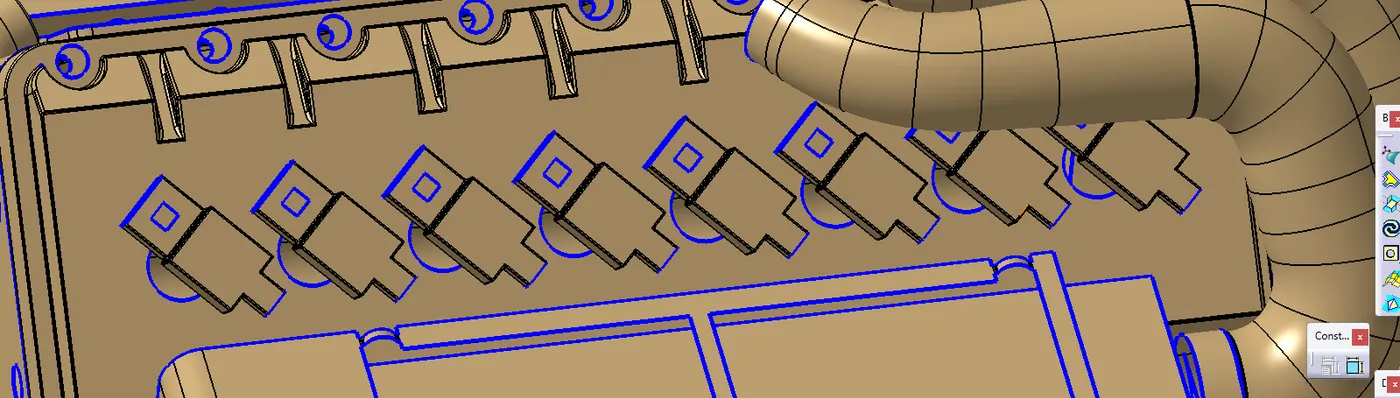
Adding 4 pole connectors to all fuel injector sensors as well as for the camshaft sensors.4 pole connectors should be added in the geometrical bundle using copy paste connector or directly import from the catalog created earlier.Connectors can be added again by copy pasting the 1st imported connector.Place the connectors on all the fuel injector sensors and cam-shaft sensors using the manipulation tools like move, smart move, snap tool and also using the compass. Adding all the other connectors for sensors like coolant heat sensor, neutral position sensor, speed sensors
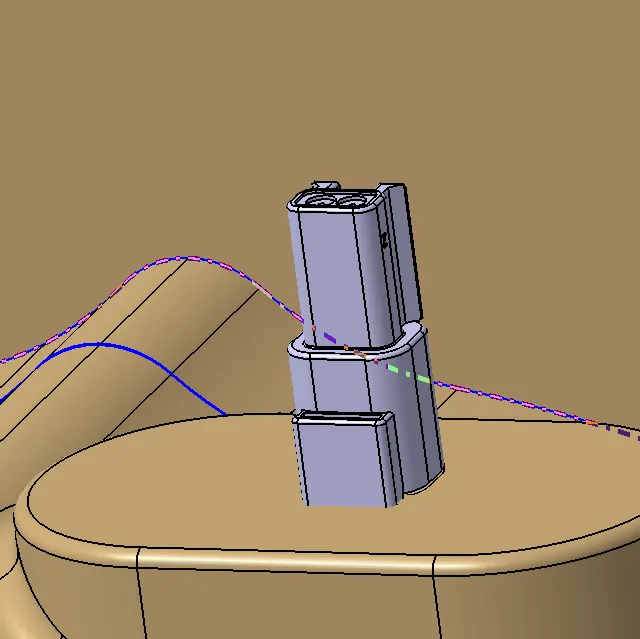
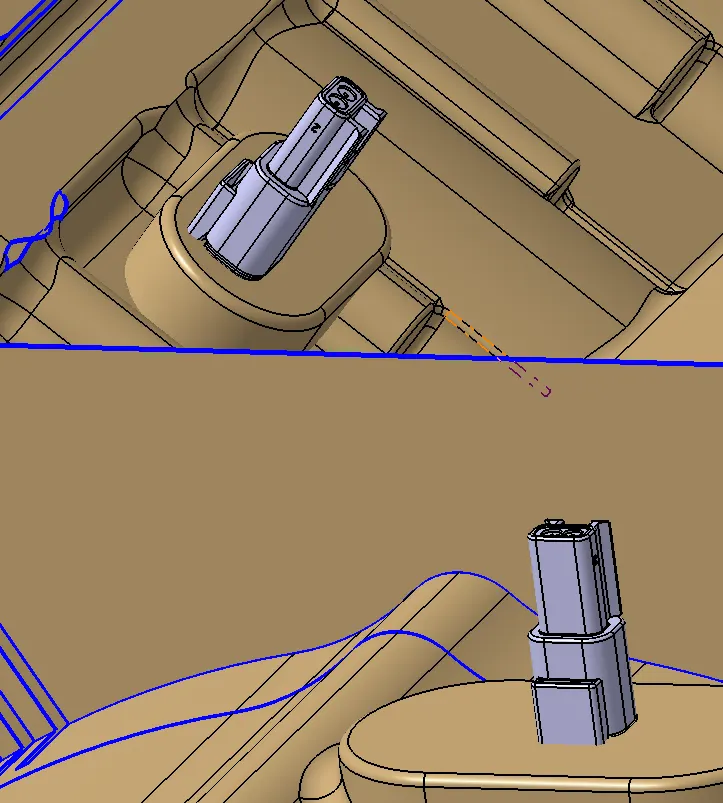
- Placing the Interconnection connector and L-clamp support
However, situation of interconnection connectors are not similar to device connectors. Interconnection connectors are not parked with any device but should be pared with the help of clips/clamps/sheet metal brackets etc. possible to the packaging conditions.
- Add P-clamps for proper Routing of the harness bundle
Adding supporting components like p-clamps and firtree clip can help the harness bundle provide proper routing and also help to prevent the harness bundles fouling from unwanted mechanical components.
- P - Clamp and the Fir Tree can be placed at required locations to ensure best possible routing for the harness bundles.
- The p – Clamps can be mounted to the holes provided on the Engine block in which the screws to tighten the Engine block.
- The Fir tree clips are positioned according to the requirement during the wire harness routing.
- After finalization of the routing, we can request the Engine design team to provide the holes for the Fir tree clips as per their location.
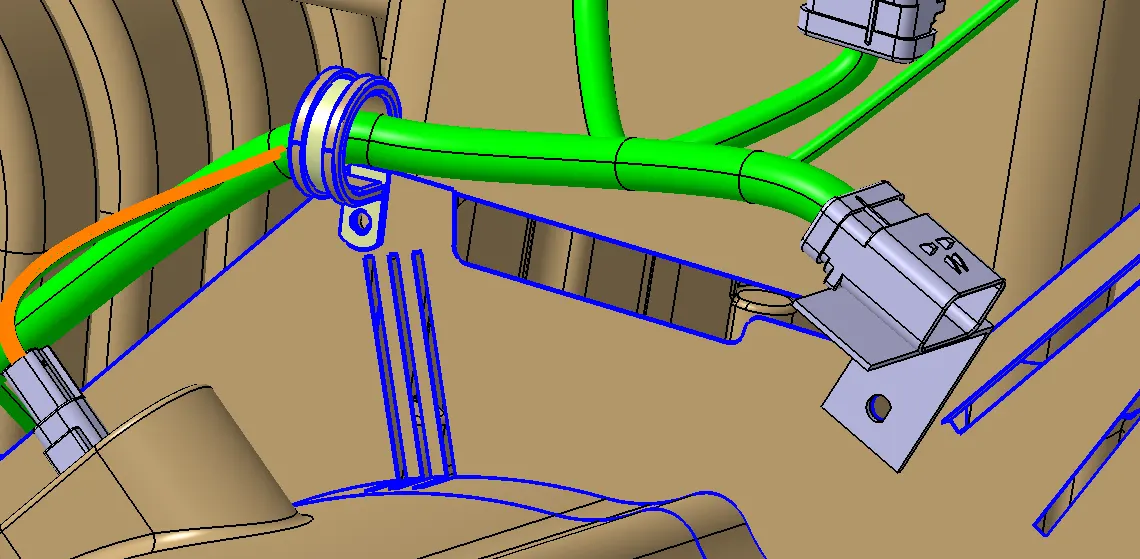
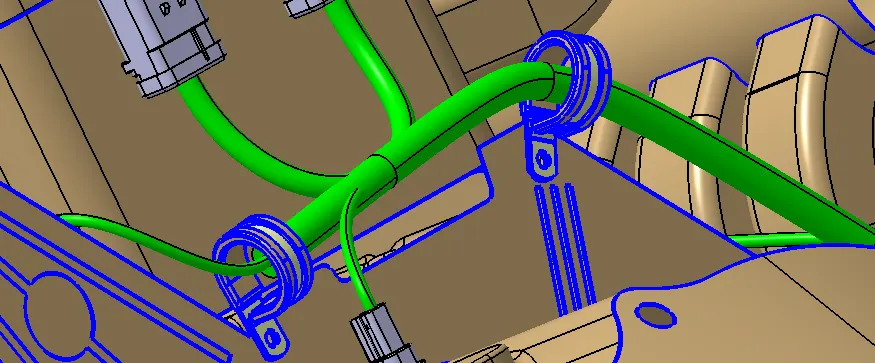
Placement of Channels at the required Locations:
Use of plastic guiding channels are recommended to meet the clearances in critical areas if it is difficult to achieve by use of clamps.
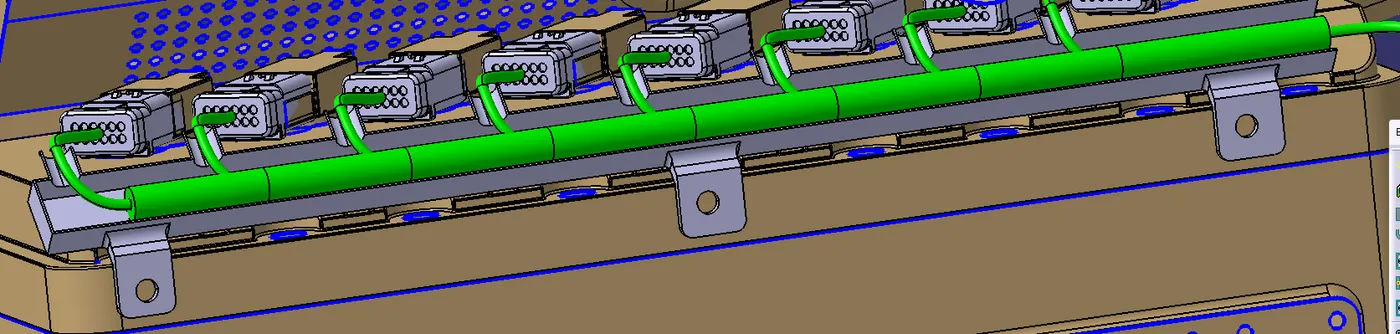
Routing the wiring harness to the connectors :
Go to electrical harness assembly workbench and select geometrical bundle command and select the geometrical bundle in the model tree. Then select the multibranchable command to start the bundle routing and go to route definition.
- .
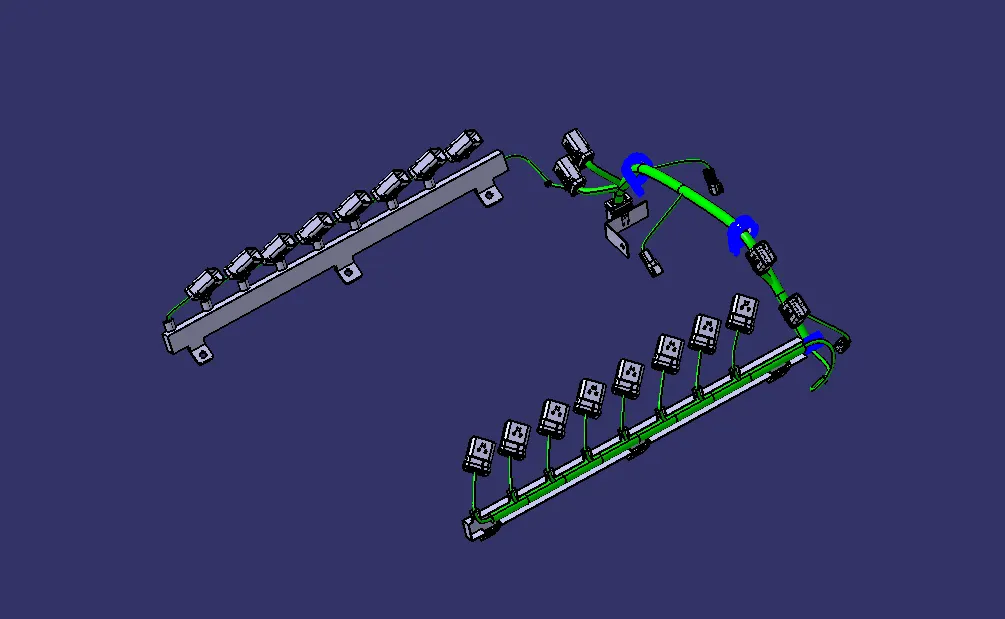
PROTECTION COVER:
Adding protective coverings and guiding channels top shell to harness bundle. Here in below figure, we have done with whole wiring harness routing for the V16 Engine. Now, we have to add protective coverings to all bundle segments and top shell of the guiding channel.
FLATTENING HARNESS:
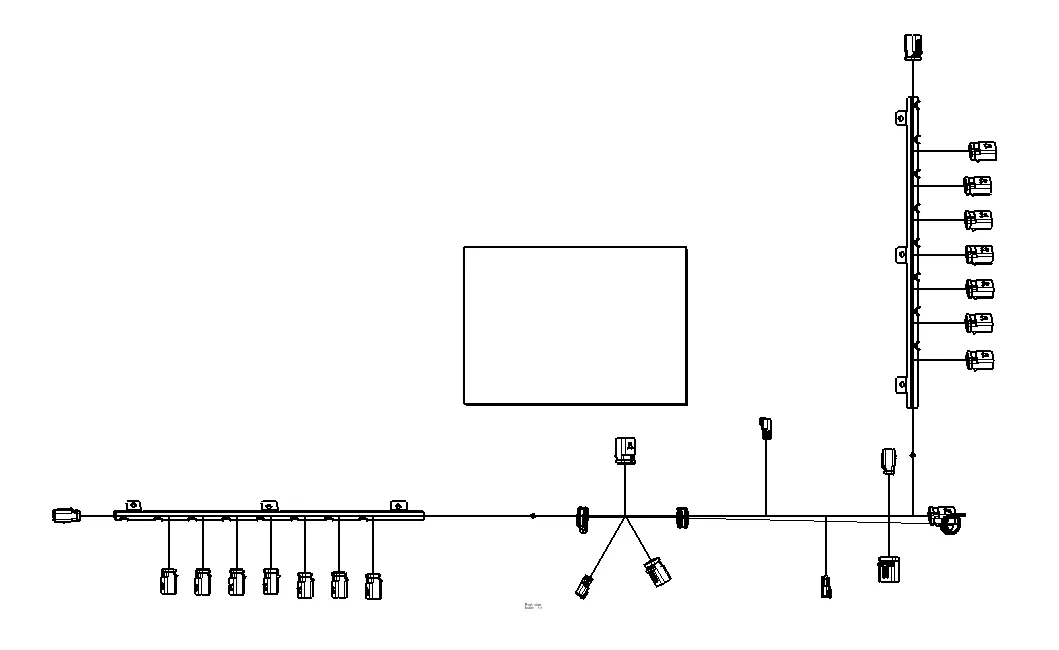
In this step, for creating flatten view we have to work in Electrical Harness Flattening workbench of Catia V5. We should also make sure that the flattening file is saved in the same folder where other files of harness assembly are saved.
- Before creating flatten view, first we have to define flattening parameters. Make sure that selecting Single line for bundle segment and 'Double' line for protective covering.
- We have extracted the bundle assembly into Engine Harness Flattening Product file and then flattened the file along face of interconnection connector as shown in above figure.
- At this stage, for clarity, we have been hidden the flattening diagram of the plastic guiding channels from the drawing view.
PLEASE FIND THE BELOW LINK FOR CAD DATA FOR REVIEW:
LINK: https://drive.google.com/file/d/1rljT5m3hQArbHSkCS53FN9a8kpj1gOL-/view?usp=sharing