Preparing Schedule & Cost Estimation for a building using REVIT
Preparing Schedule & Cost Estimation for a building using REVIT
Q1) Use the shortcut keys in Revit discussed in class to complete the following tasks and list them below
a. Using 3D model create a section box
b. To create similar doors and windows in a floor plan layout
c. To reduce the thickness of lines visible in plan views
d. To apply override settings to a floor in the model section view
e. To increase the range of visibility in a plan view
f. To select the previously selected items
g. To add annotations to the model views
h. To bring the model elements in line
i. To rotate the model elements
j. To move an object to another location
k. To copy a model element
l. To mirror an element about an axis
m. To create an array of model elements
AIM : Use the shortcut keys in Revit
Introduction: following are the shortcut key of revit
a. Using 3D model create a section box (BX)
b. To create similar doors and windows in a floor plan layout (CS)
c. To reduce the thickness of lines visible in plan views (TL)
d. To apply override settings to a floor in the model section view (VG)
e. To increase the range of visibility in a plan view (VR)
f. To select the previously selected items (ctrl<)
g. To add annotations to the model views (DI)
h. To bring the model elements in line (AL)
i. To rotate the model elements (RO)
j. To move an object to another location (MV)
k. To copy a model element (CO)
l. To mirror an element about an axis (MM)
m. To create an array of model elements (AR)
Procedure:
for a. Using 3D model create a section box(BX)
step 1 : open 3D view
open a revit software
and open architecture any old existing plan from file
with 3D view
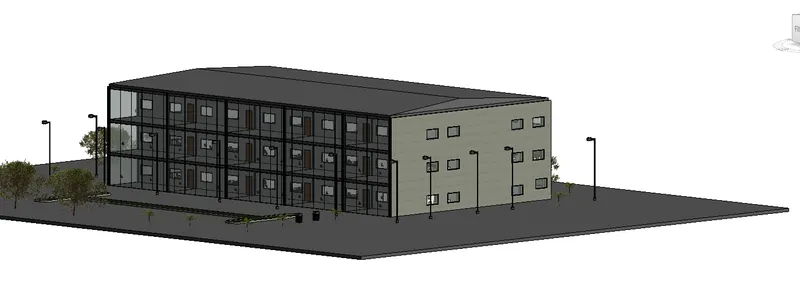
step 2 : by using BX command for section box
selct any part or sny section from section view for that u draw section box
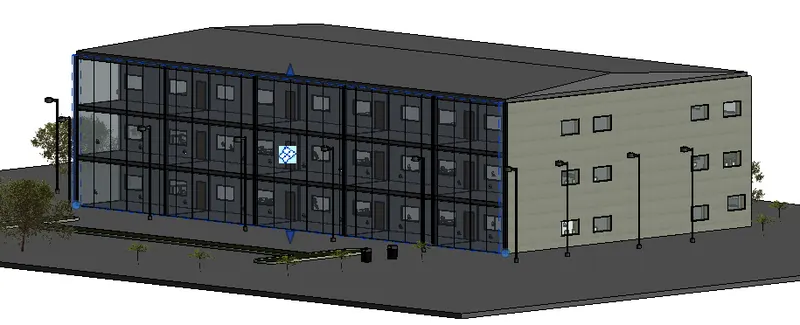
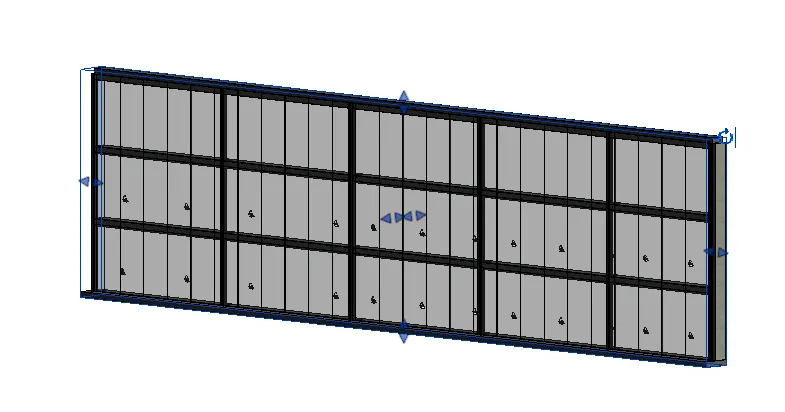
and press BX for section box
section box will apear
b. To create similar doors and windows in a floor plan layout (CS)
step 1 : open floor plan view
open a revit software
and open architecture any old existing plan from file
with floor plan
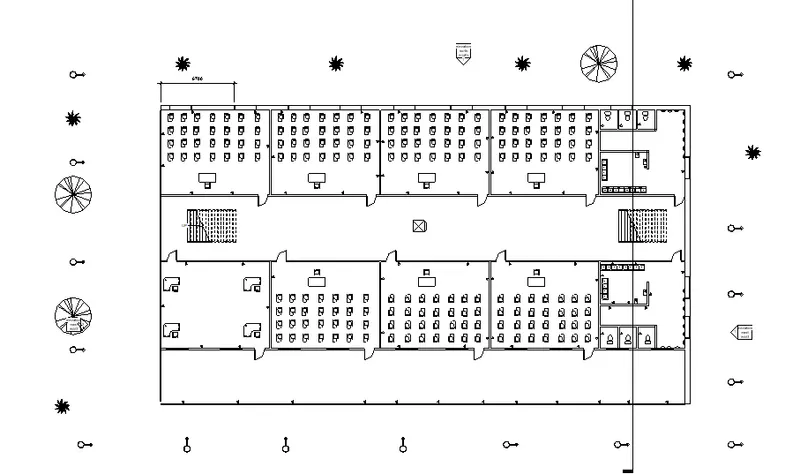
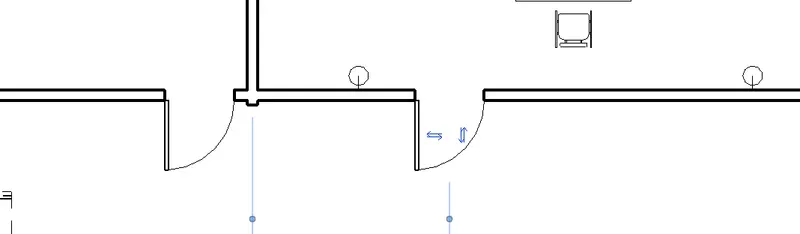
step 2 : by using CS command for similar window doors
select door or window which want to craete similar one
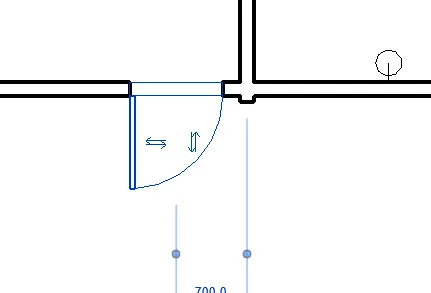
and press CS for similar
and press where we want
c. To reduce the thickness of lines visible in plan views (TL)
step 1 : open floor plan view
open a revit software
and open architecture any old existing plan from file
with floor plan
step 2 : by using TL command for reduced thickness of line
select thin line from plan view
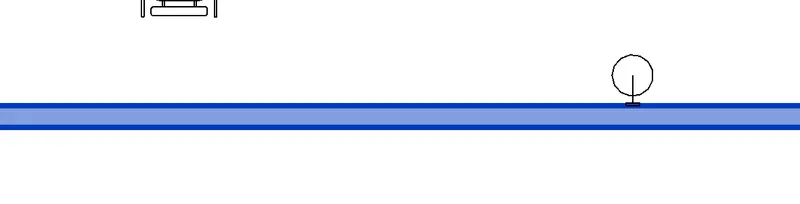
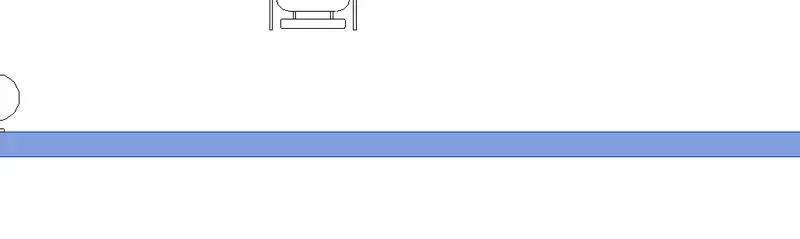
and press TL for reduced thickness of line showing in plan
immidietly result is appear
d. To apply override settings to a floor in the model section view
step 1 : open floor plan view
open a revit software
and open architecture any old existing plan from file
with floor plan
step 2 : by using VG command for override setting for floor
press VG command for vigibility graphic
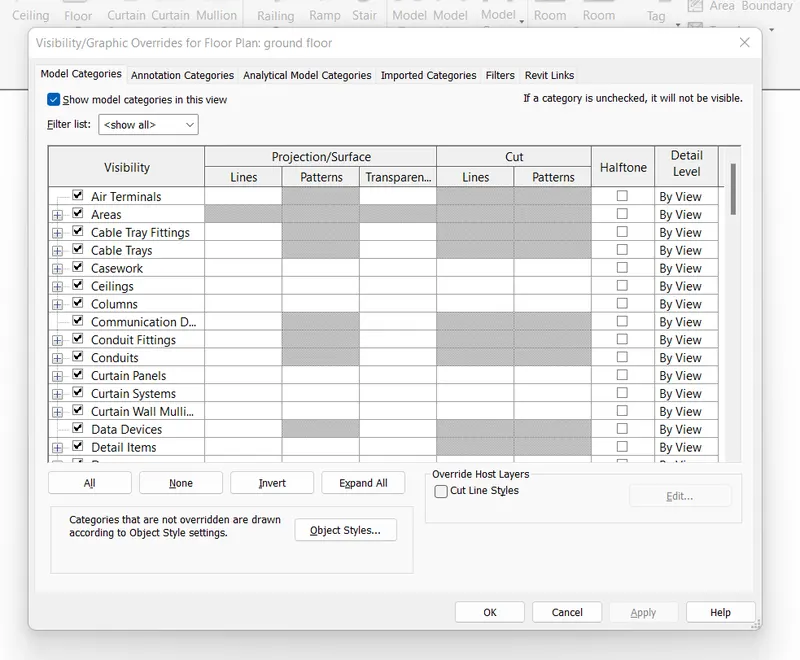
select floor option from visibility option
and click on them
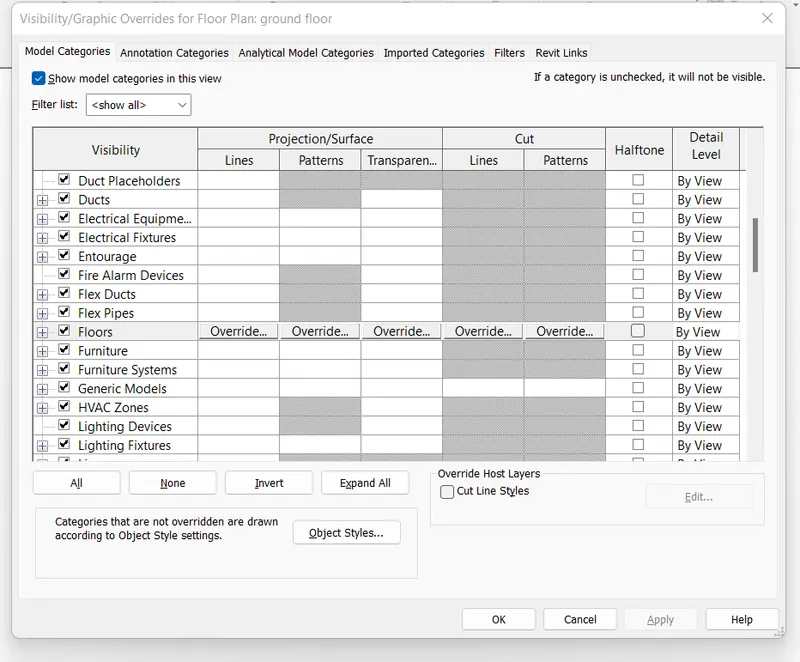
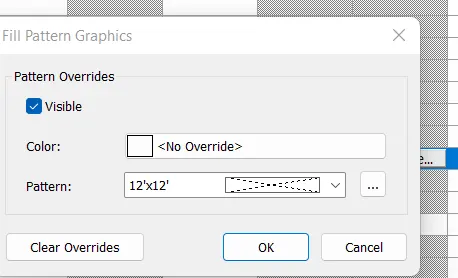
and click on patter option
and choose colour and patter for floor and press ok
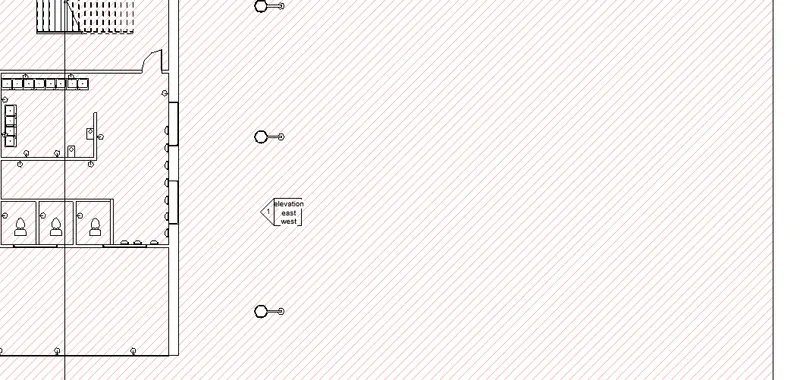
then it will be appear on floor plan
e. To increase the range of visibility in a plan view ( VR )
step 1 : open floor plan view
open a revit software
and open architecture any old existing plan from file
with floor plan
step 2 : press VR for view range option
after pressing VR option dialog box will apear
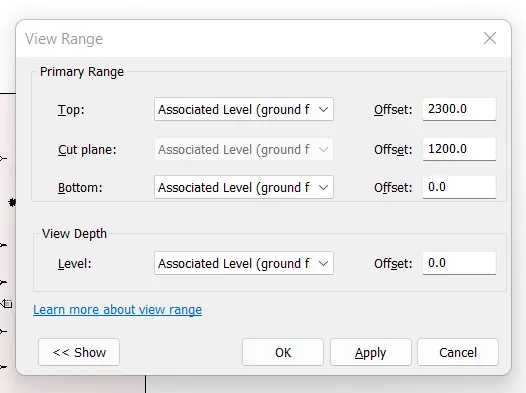
set the offset for plan
by changing number from dialog box
and press ok
f. To select the previously selected items ( Ctrl< )
step 1 : open floor plan view
open a revit software
and open architecture any old existing plan from file
with floor plan
step 2 : by using ctrl< key reselect previous select item
first we select chair and table from floor plan
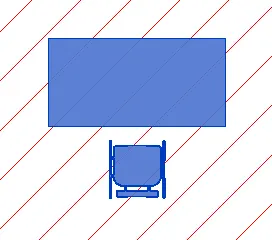
and again unselect it by clicking outside of selcted item
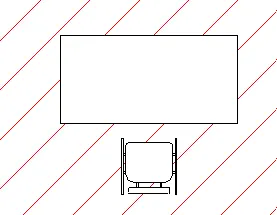
then we press ctrl < for reselctin previous selected item
reseect is done without cursor
g. To add annotations to the model views (DI)
step 1 : open floor plan view
open a revit software
and open architecture any old existing plan from file
with floor plan
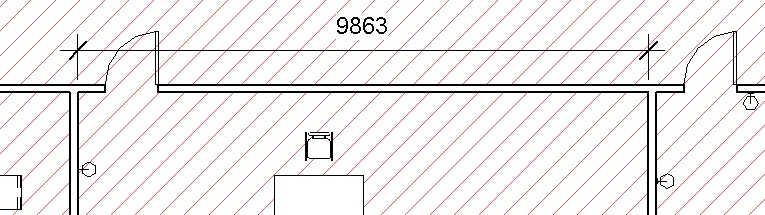
step 2 : press DI command for annotation
when we press DI command rebon will change like that

then slelect linear option from that
and select the line we want to dimensioned
h. To bring the model elements in line ( AL )
step 1 : open floor plan view
open a revit software
and open architecture any old existing plan from file
with floor plan
step 2 : for align the one element to other use AL command
first draw one small floor by using floor command
and draw rectangle floor near the floor plan
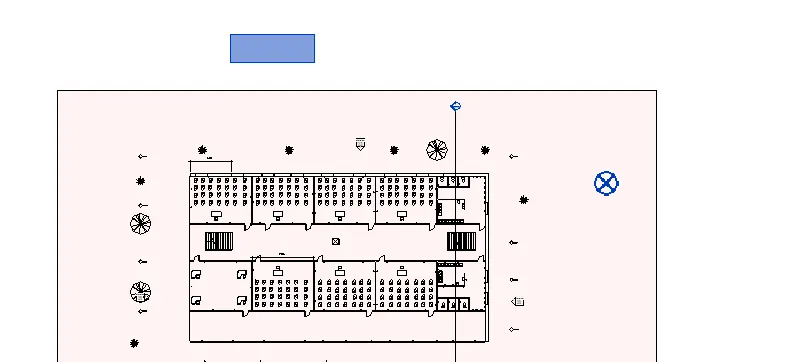
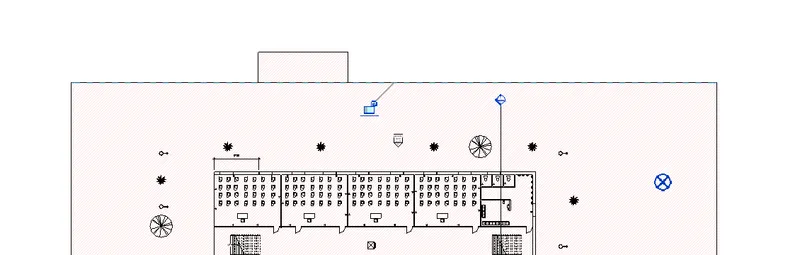
select small floor for aling to big floor
so slecet first small floor
and press AL option
and select intersect edge
then select big floor edge for align
i. To rotate the model elements ( RO )
step 1 : open floor plan view
open a revit software
and open architecture any old existing plan from file
with floor plan
step 2 : rotate any object by using RO command
selct any one componet which we want to rotate
like that
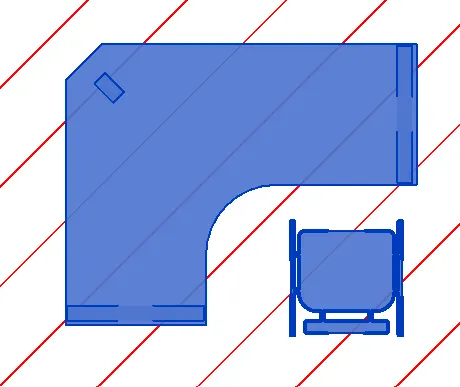
then press RO command
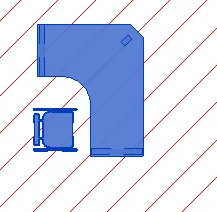
and set refrence axis and rotational axis with angle
now our object is rotated
j. To move an object to another location ( MV )
step 1 : open floor plan view
open a revit software
and open architecture any old existing plan from file
with floor plan
step 2 : move any object by using MV command
selct any one componet which we want to move
like that
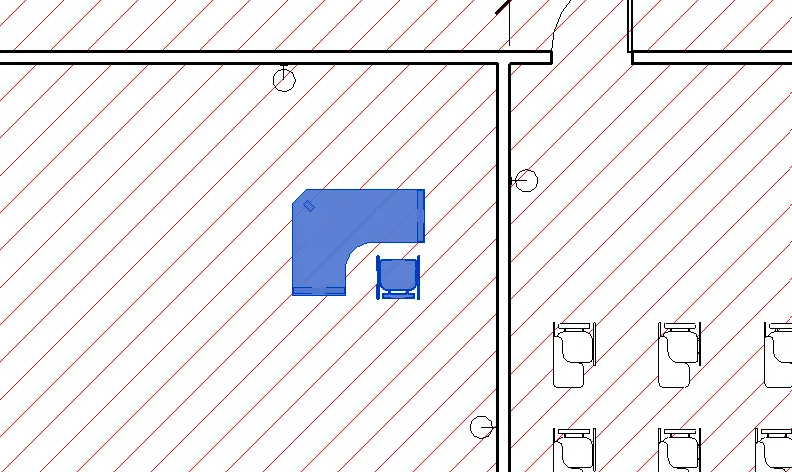
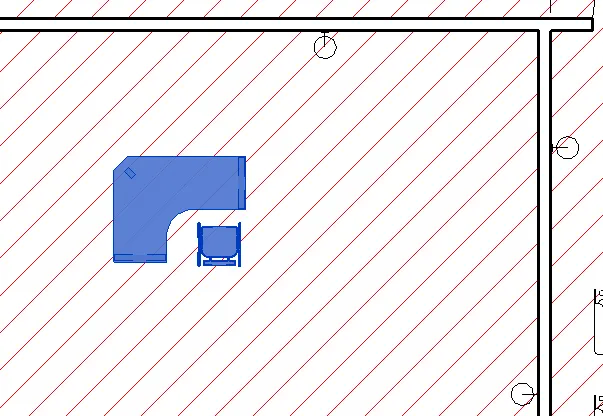
then press MV command for move object
and move using cursor drging
and click where we move
k. To copy a model element ( CO )
step 1 : open floor plan view
open a revit software
and open architecture any old existing plan from file
with floor plan
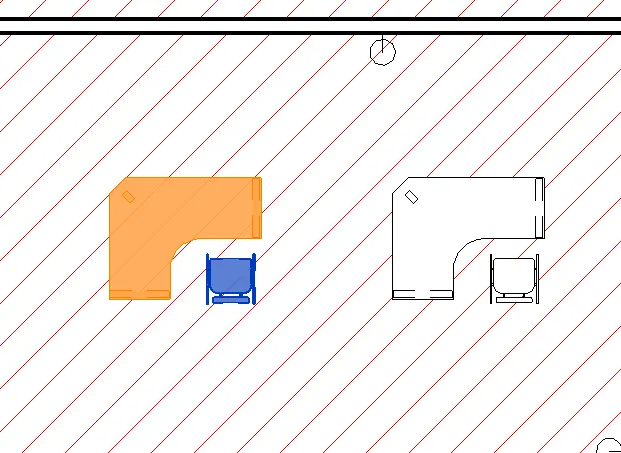
step 2 : copy any object by using CO command
selct any one componet which we want to copy
like that
then press CO command for move object
and copy where we want using cursor
drag cursor and right click
l. To mirror an element about an axis ( MM )
step 1 : open floor plan view
open a revit software
and open architecture any old existing plan from file
with floor plan
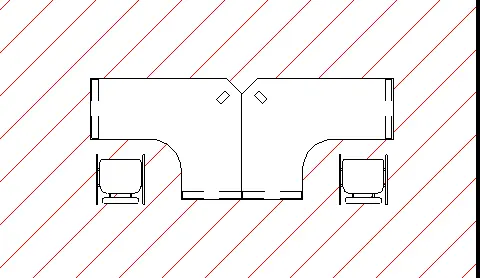
step 2 : Mirror any object by using MM command
selct any one componet which we want to mirror
like that
then press MM command for mirror object
and mirror where we want using cursor
drag cursor and right click
with refrence to any one axis of object
m. To create an array of model elements ( AR )
step 1 : open floor plan view
open a revit software
and open architecture any old existing plan from file
with floor plan
step 2 : Array any object by using AR command
selct any one componet which we want to ARRAY
like that
then press AR command for Array object
the ribbon will change

then press number how much arrey we want
suppose we press 5nos
and give direction by cursor

Result: by using shortcut key in revit we do various task in short key way
a. Using 3D model create a section box (BX)
b. To create similar doors and windows in a floor plan layout (CS)
c. To reduce the thickness of lines visible in plan views (TL)
d. To apply override settings to a floor in the model section view (VG)
e. To increase the range of visibility in a plan view (VR)
f. To select the previously selected items (ctrl<)
g. To add annotations to the model views (DI)
h. To bring the model elements in line (AL)
i. To rotate the model elements (RO)
j. To move an object to another location (MV)
k. To copy a model element (CO)
l. To mirror an element about an axis (MM)
m. To create an array of model elements (AR)
2) Using Revit and the project used from week 6 to 8 prepare a schedule for the following
a. Walls
b. Doors
c. Windows
d. Material – Concrete/Wood
AIM: Using Revit and the project used from week 6 to 8 prepare a schedule
Introduction: schedule gives tabular form, of details estimation of material
Procedure:
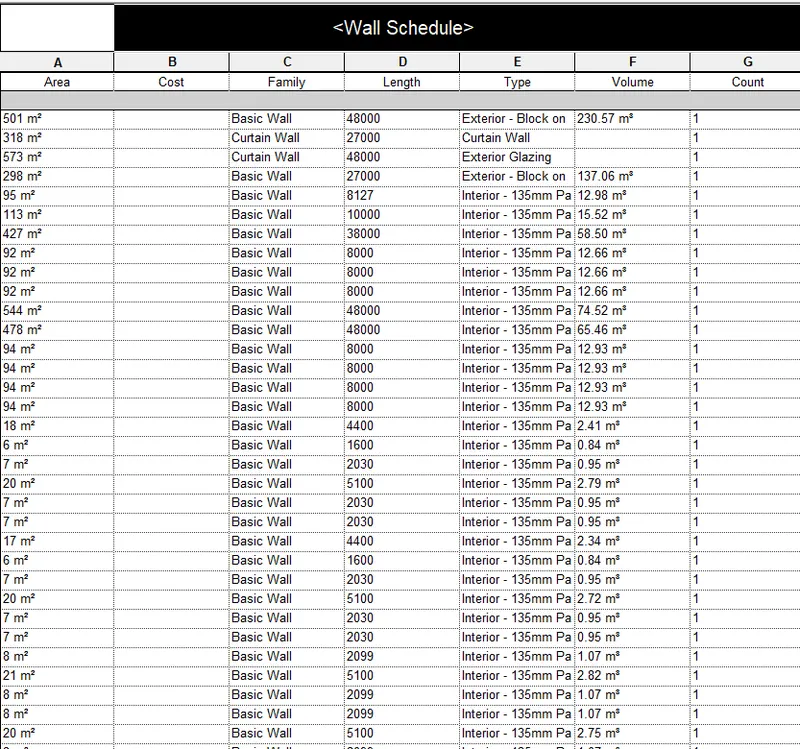
a. Walls
step 1 : open floor plan view
open a revit software
and open architecture any old existing plan from file
with floor plan
step 2 : go to view tab from menu bar
then click on schedule option from view tab
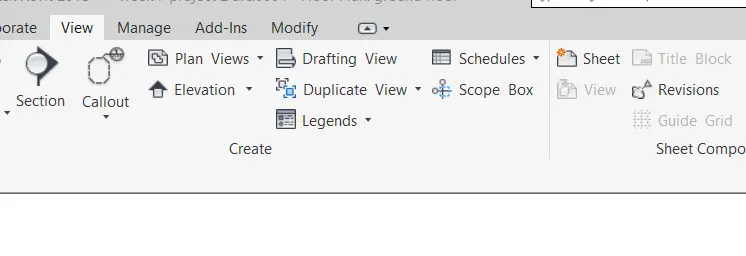
and click on schedule property option
and press ok on new schedule tab
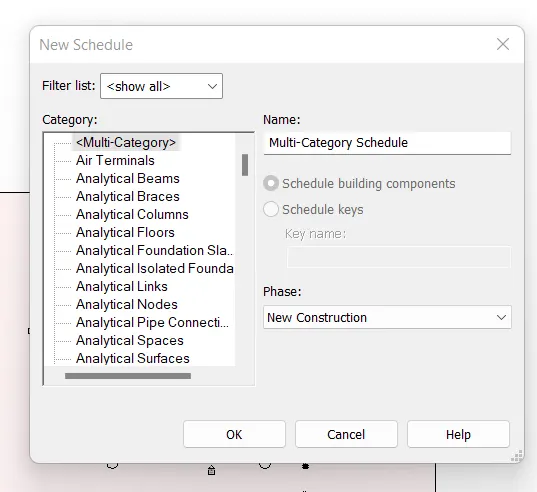
then schedule property window will open
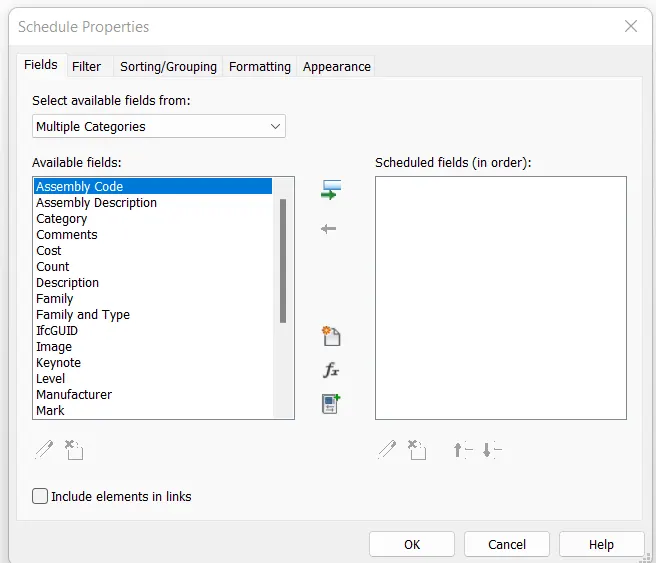
then fields schedule from available fields option
by clicking and draging cursor
like cost,volume,length, quanity etc
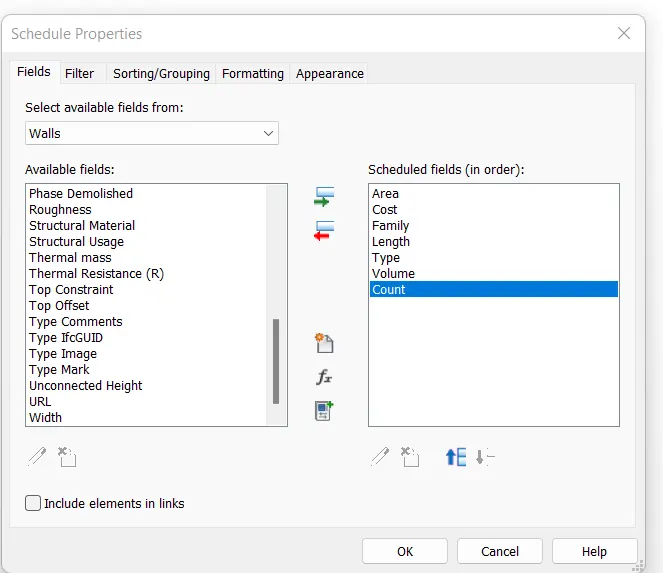
and press ok, then the schedule is prepared on screen
you can also check from schedule < property browser
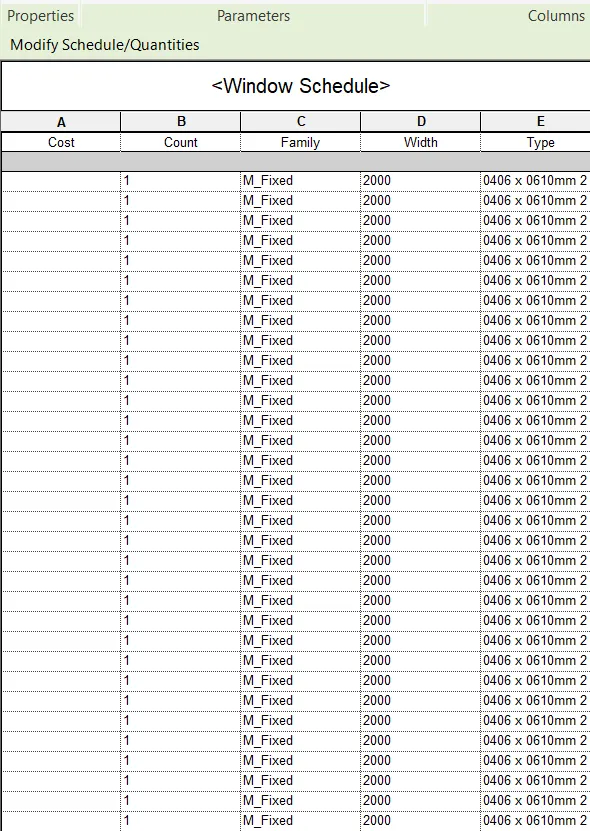
c. window
step 1 : open floor plan view
open a revit software
and open architecture any old existing plan from file
with floor plan
step 2 : go to view tab from menu bar
then click on schedule option from view tab
and click on schedule property option
select window from multi category schedule
and press ok on new schedule tab
then schedule property window will open
then fields schedule from available fields option
by clicking and draging cursor
like cost,volume,length, quanity etc
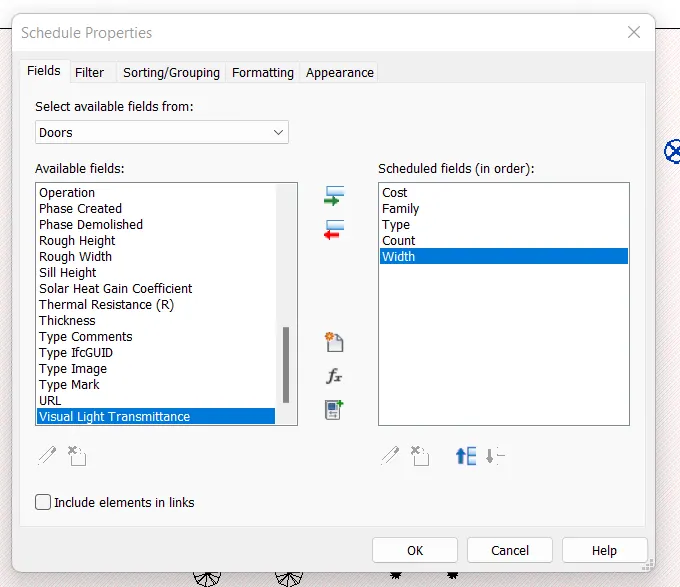
and press ok, then the schedule is prepared on screen
you can also check from schedule < property browser
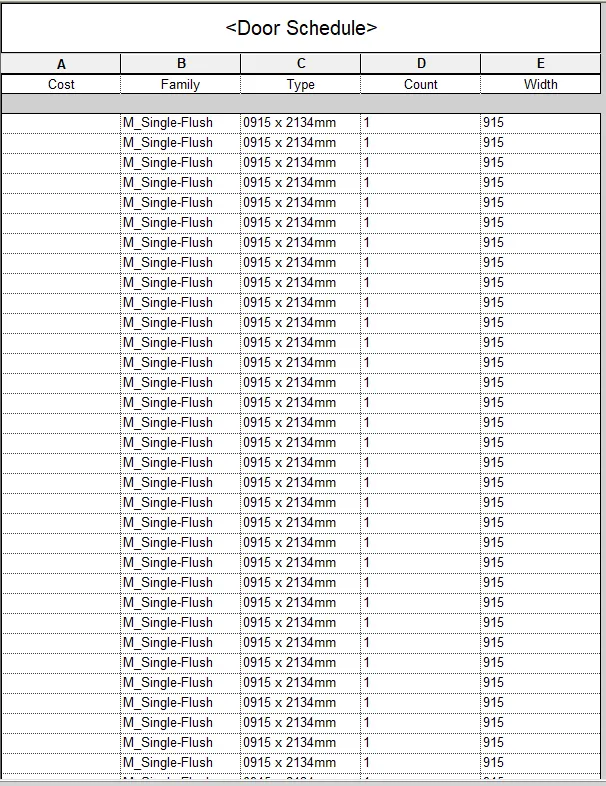
b. doors
step 1 : open floor plan view
open a revit software
and open architecture any old existing plan from file
with floor plan
step 2 : go to view tab from menu bar
then click on schedule option from view tab
and click on schedule property option
select door from multi category schedule
and press ok on new schedule tab
then schedule property window will open
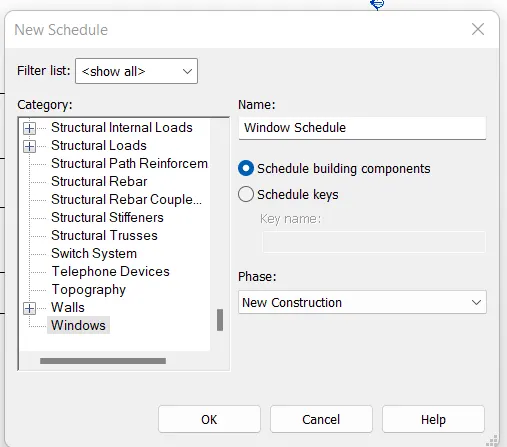
then fields schedule from available fields option
by clicking and draging cursor
like cost,volume,length, quanity etc
and press ok, then the schedule is prepared on screen
you can also check from schedule < property browser
d. Material – Concrete/Wood
step 1 : open floor plan view
open a revit software
and open architecture any old existing plan from file
with floor plan
step 2 : go to view tab from menu bar
then click on schedule option from view tab
and click on schedule property option
select floor material from multi category schedule
and press ok on new schedule tab
then schedule property window will open
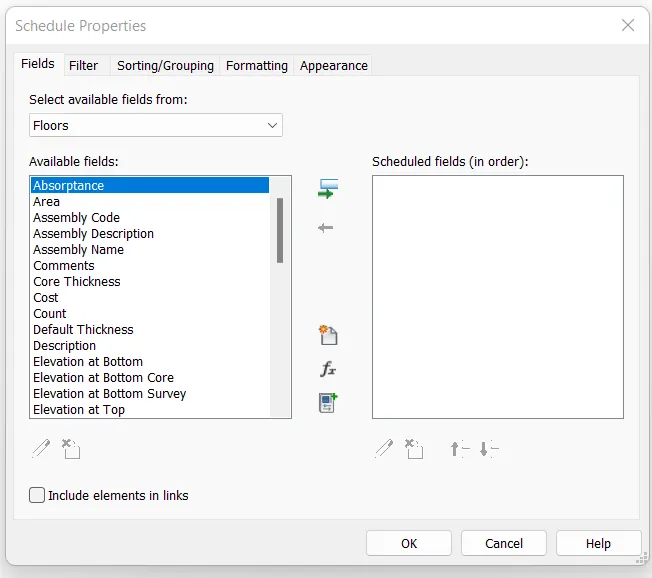
then fields schedule from available fields option
by clicking and draging cursor
like cost,volume,length, quanity etc
and press ok, then the schedule is prepared on screen
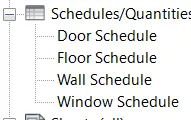
you can also check from schedule < property browser
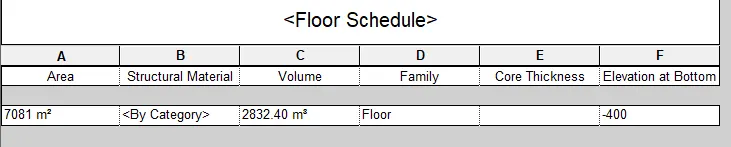
Result : we create a schedule for various material using schedule property option
3) Using Revit Calculate area and volume of each room in the model with appropriate room tags applied to each room. Prepare a schedule report for area and volume of each room
AIM: Using Revit Calculate area and volume of each room in the model with appropriate room tags applied to each room. Prepare a schedule report for area and volume of each room
Introduction: room tag helps to determine the diffrent rooms by taging indivisually on that basis we determined area and volume of room
Procedure:
step 1 : open floor plan view
open a revit software
and open architecture any old existing plan from file
with floor plan
step 2 : add approprite tag to rooms
tag each room by room tag option under annotation tab
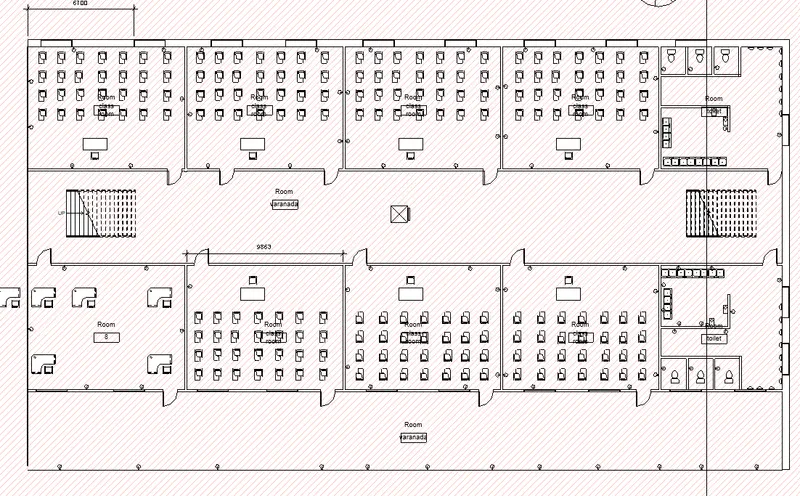
step 3 : go to view tab from menu bar
then click on schedule option from view tab
and click on schedule property option
select room from multi category schedule
and press ok on new schedule tab
then schedule property window will open
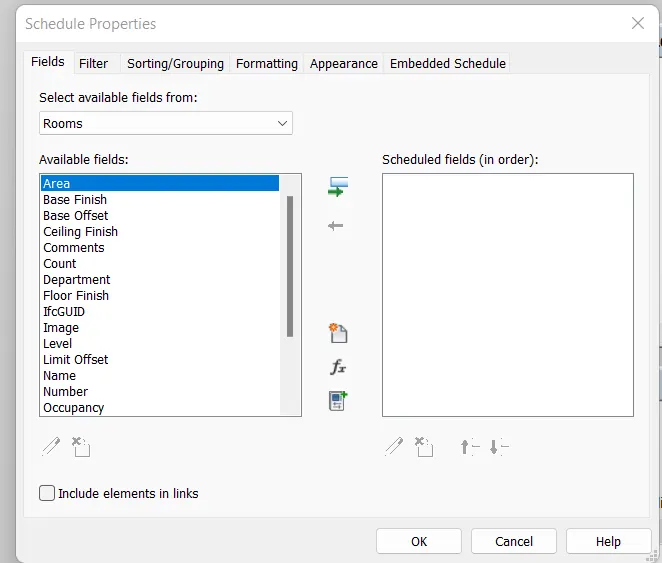
then fields schedule from available fields option
by clicking and draging cursor
like area,number,count and volume etc
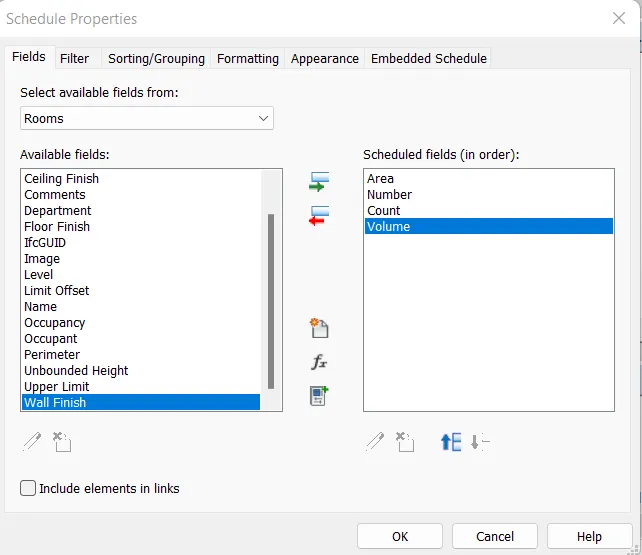
and press ok, then the schedule is prepared on screen
you can also check from schedule < property browser
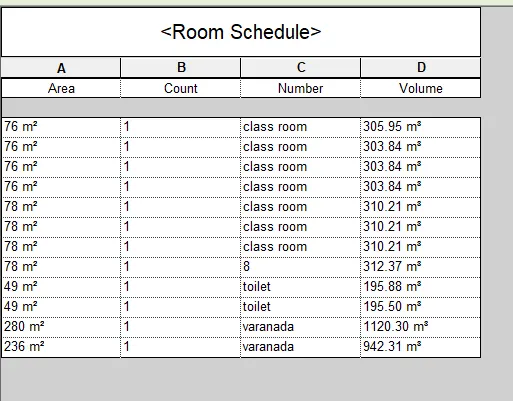
Result: rooms area volume, area and number,count schedule prepare successfully
4) Using the same schedule using the unit cost rate for materials available in the internet, prepare total cost of materials used in the project
a. Total Cost of Materials
b. Individual Material Take off
AIM: Using the same schedule using the unit cost rate for materials available in the internet, prepare total cost of materials used in the project
Introduction: material takeoff is helpfull for calculating total cost by product of cost and volume of material
Procedure:
a. Total Cost of Materials
step 1 : open floor plan view
open a revit software
and open architecture any old existing plan from file
with floor plan
step 2 : set cost of indivisual material
select a perticular material which we want to set the cost
take a example of door, we select door from floor plan view
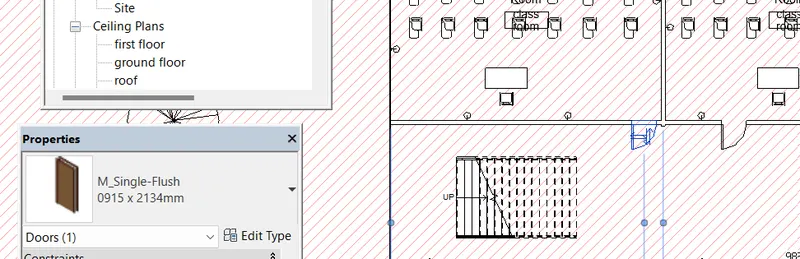
then click on edit type from property
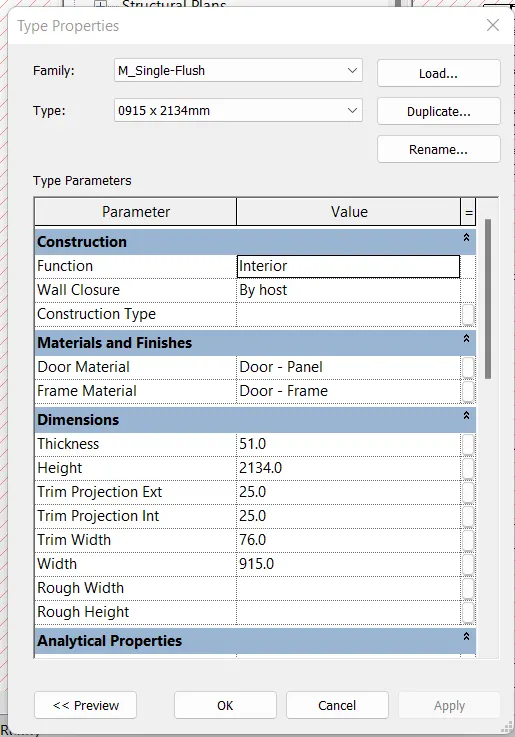
that type of window will open then scroll down for cost option
and put approprite cost value and then apply and press ok
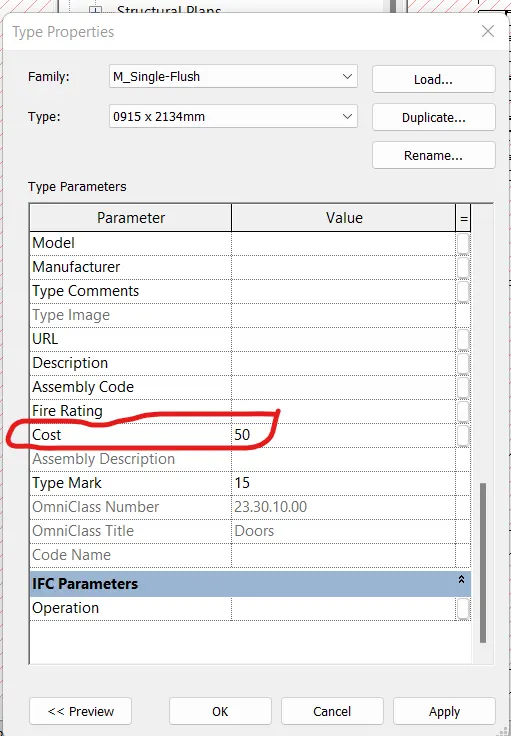
our cost will update for door
do same thing for window, floor, wall,table and chairs
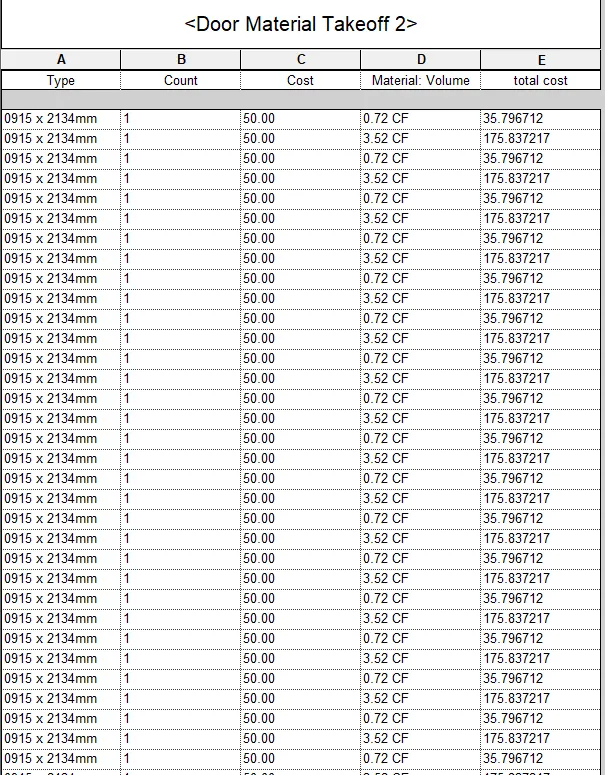
b. Individual Material Take off
step 1 : open floor plan view
open a revit software
and open architecture any old existing plan from file
with floor plan
step 2 : go to view tab from menu bar
then click on schedule option from view tab
and click on material take off option
select door from multi category schedule
and press ok on new schedule tab
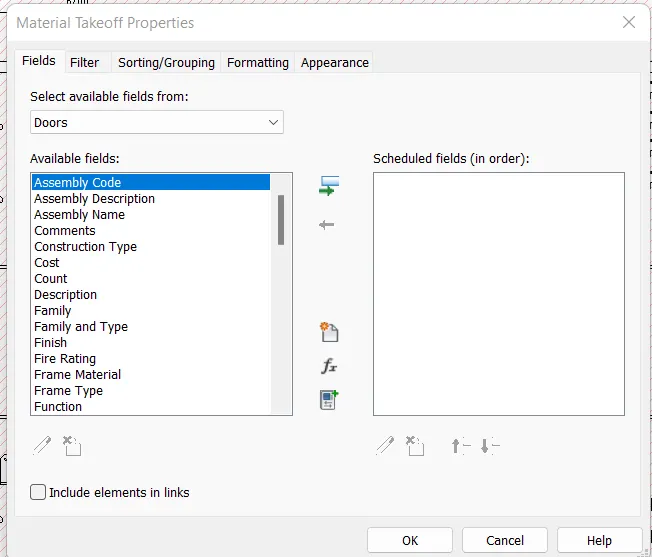
then material takeoff property window will open
then choose the parameter like cost,count,number,family and type
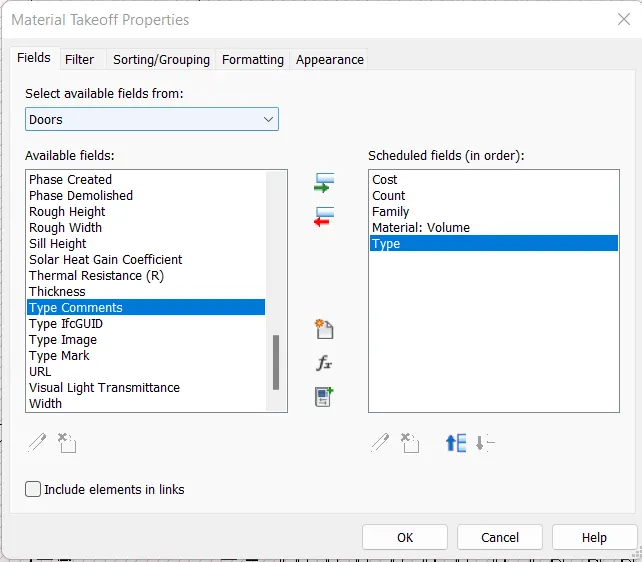
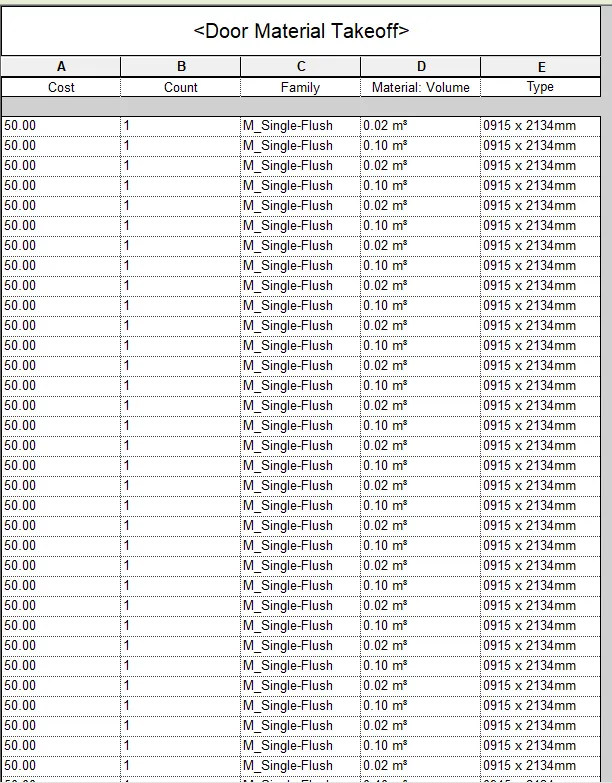
and press ok our material take off shedule is ready
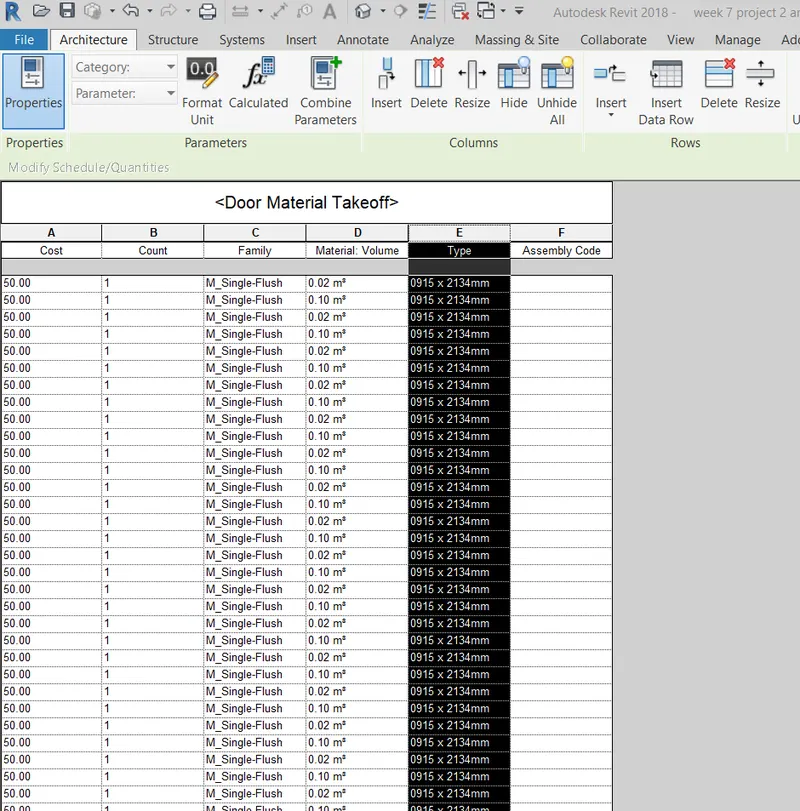
then add column from insert column option for total cost as assembly code column ( dumy column )
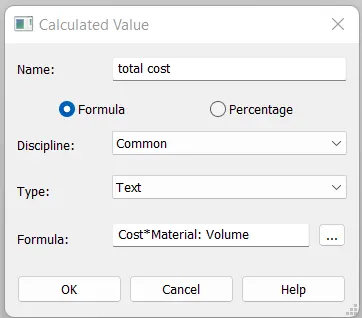
then add formula from calculate option showing on ribbon
and give name as total cost
and give formula cost*material volume
press ok
after press ok our schedule with total cost is ready
 \
\
do same process for all elements
Result: our take off material with total cost is done successfully
Q5) Using the concept of Visual Programming discussed in class, list a flowchart for the following scenario
a. How to decide framings for a structure using Dynamo ?
b. If there is no water coming from the pipes
c. If request for money from client has been declined for the project
AIM: list a flowchart for the following scenario
a. How to decide framings for a structure using Dynamo ?
b. If there is no water coming from the pipes
c. If request for money from client has been declined for the project
solution:
a. How to decide framings for a structure using Dynamo ?
step 1) we design module
step 2) then by using code box
step 3) we give input to coordinate according to design
step 4) code box gives input to line or curve which required
b. If there is no water coming from the pipes
step 1) Check the pipe connection
step 2) check the water supply
step 3) check for any leaks
step 4) Fix the problem
c. If request for money from client has been declined for the project
step 1) Explain the project to the client
step 2) provide time for clint to decide
step 2)
A) If he accept to pay. continue with the project
B) If he refuse to pay. decline the project
Q6) List the parameters associated with each model element
a. Wall
b. Floor
c. Door
d. Window
e. Table
f. Building
AIM: List the parameters associated with each model element
a. Wall
b. Floor
c. Door
d. Window
e. Table
f. Building
Solution:
a. Wall
1) Construction
a) structure
b) wrapping at inserts
c) wrapping at ends
d) width
e) function
2) Graphics
a) coarse scale fill patern
b) coarse scale fill colour
3) material and finishes
a) Structural material
4) Analytical Properties
a) heat transfer coefficient
b) thermal resistance
c) thermal mass
d) absorptance
e) roughpness
5) identify data
b. Floor
1) Construction
a) function
b) wall closure
c) construction type
2) material and finishesh
a) door material
b) frame material
3) Dimensions
a) thichness
b) height
c) trim project ext
d) trim project int
e) trim width
4) Analytical Properties
a) analytic construction
b) visual light transmittance
c) solar heat gain coefficient
d) thermal resistance
e) heat transfer coefficient
5) identify data
a) keynote
b) model
c) manufracturer
d) type comments
e) URL
f) Description
g) fire rating
h) cost
i) type mark
j) omniclassnumber
k) URL
l) assembly Description
6) IFC parameter
Operation
c. door
1) Construction
a) function
b) wall closure
c) construction type
2) material and finishesh
a) door material
b) frame material
3) Dimensions
a) thichness
b) height
c) trim project ext
d) trim project int
e) trim width
4) Analytical Properties
a) analytic construction
b) visual light transmittance
c) solar heat gain coefficient
d) thermal resistance
e) heat transfer coefficient
5) identify data
a) keynote
b) model
c) manufracturer
d) type comments
e) URL
f) Description
g) fire rating
h) cost
i) type mark
j) omniclassnumber
k) URL
l) assembly Description
6) IFC parameter
Operation
d.window
1) Construction
a) wall closure
b) construction type
2) material and finishesh
a) frame exterior material
b) frame interio material
c) glass pane material
d) sach
3) Dimensions
a) thichness
b) height
c) trim project ext
d) rough width
e) rough height
4) Analytical Properties
a) analytic construction
b) visual light transmittance
c) solar heat gain coefficient
d) thermal resistance
e) heat transfer coefficient
5) identify data
a) keynote
b) model
c) manufracturer
d) type comments
e) URL
f) Description
g) fire rating
h) cost
i) type mark
j) omniclassnumber
k) URL
l) assembly Description
6) IFC parameter
Operation
e. table
1) material and finishesh
a) body material
b) handle/leg material
c) top material
2) Dimensions
a) thichness
b) height
c) leg height
d) width
3) identify data
a) keynote
b) model
c) manufracturer
d) type comments
e) URL
f) Description
g) fire rating
h) cost
i) type mark
j) omniclassnumber
k) URL
l) assembly Description
f. building
1) Construction
a) wall closure
b) construction type
2) material and finishesh
a) frame exterior material
b) frame interio material
c) glass pane material
d) sach
3) Dimensions
a) thichness
b) height
c) trim project ext
d) rough width
e) rough height
4) Analytical Properties
a) analytic construction
b) visual light transmittance
c) solar heat gain coefficient
d) thermal resistance
e) heat transfer coefficient
5) identify data
a) keynote
b) model
c) manufracturer
d) type comments
e) URL
f) Description
g) fire rating
h) cost
i) type mark
j) omniclassnumber
k) URL
l) assembly Description
6) IFC parameter
Operation