Plastic Defects
While manufacturing a plastic component using injecting moulding process, there may arise a few defects while the plastic is injected into the mould and final part is ejected.
Some of the defects can be taken care of by making appropraite design modifications.
Types of Injection moulding defects:
- Flow lines: Flow lines appear as a wavy pattern on the surface of your plastic parts. They usually are a slightly different color than the rest of the piece, and typically occur on more narrow sections of the molded item.
Varrying wall thicknesses is a major cause of flow lines.
Flow lines are often the result of variations in the cooling speed of the plastic as it flows in different directions through the mold. They also can occur when you’re creating pieces of differing thicknesses, as the thinner areas cool before thicker areas are fully filled, causing flow lines.Molten plastic cools very quickly, and flow lines often occur as more hot plastic flows past parts that have already become cool and gummy.
Preventing Flow lines:
1) Increase injection speed, pressure or material temperature: Slow-moving molten plastic is more likely to cool quickly and cause flow lines.
2) Round the corners of the mold where wall thickness increases: Flow rate consistent to the thicker sections
3) Increase nozzle diameter: Increases flow speed and prevents early cooling.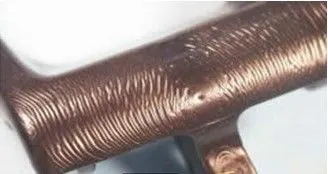
- Sink Marks: Thick components form sink marks.
Sink marks are small depressions that develop in thicker areas of the injection molded prototype when shrinkage occurs in the inner portions of the finished product.
Sink marks are often caused when the cooling time or the cooling mechanism is insufficient for the plastic to fully cool and cure while in the mold.
Thick sections of the injection molded part take longer to cool than thin ones and so are more likely to be where sink marks are located.
Preventing Sink Marks:
1) Mold temperatures should be lowered, holding pressure increased, and holding time prolonged to allow for more adequate cooling and curing.
2) Reducing the thickness of the thickest wall sections will also ensure faster cooling and help reduce the likelihood of sink marks.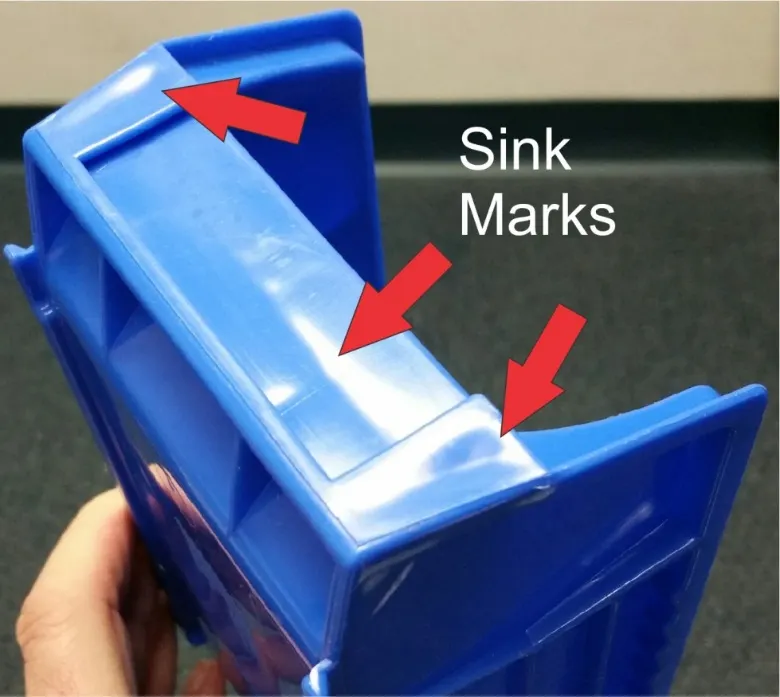
- Vaccum voids: Vacuum voids are pockets of air trapped within the surface of an injection molded prototype.
Vacuum voids are often caused by uneven solidification between the surface and the inner sections of the prototype.
Holding pressure is insufficient to condense the molten plastic, if the holding pressure was adequate the air would be forced out.
May also occur in moulds where the two halves are not properly alligned.
Preventing Vaccum Voids:
1. Locate the gate at the thickest part of the molding.
2. Switch to a less viscous plastic. This will ensure that less gas is trapped as air is able to escape more rapidly.
3. Increase holding pressure as well as holding time.
4. Ensure that mold parts are perfectly aligned.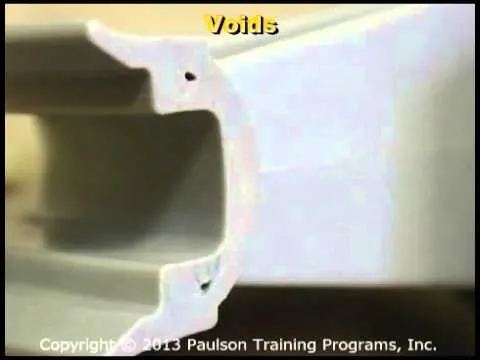
- Surface Delamination: (To delminate means to form into layers) Surface delamination is a condition where thin surface layers appear on the part due to a contaminant material.
These layers appear like coatings and can usually be peeled off.
Foreign materials that find their way into the molten plastic separate from the finished product because the contaminant and the plastic cannot bond.
It has an affect not only on the appearance of the prototype, but also on its strength.
The contaminant acts as a localized fault trapped within the plastic.
An over-dependence on mold release agents can also cause delamination.
Preventing Surface Delamination:
1) Pre-dry the plastic properly before molding.
2) Increase the mold temperature.
3) Focus more on the ejection mechanism in the mold design to reduce or eliminate the dependence on mold release agents.
4) Smooth out the corners and sharp turns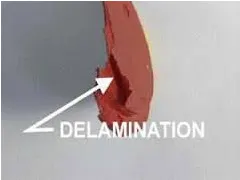
- Weld lines: Weld lines are actually more like a plane than a line that appears in a part where molten plastics meet each other as they flow from two different parts of the mold.
Weld lines are caused by the inadequate bonding of two or more flow fronts when there is partial solidification of the molten plastic.
Preventing Weld lines:
1) Raise the temperature of the mold or molten plastic.
2) Increase the injection speed.
3) Adjust the design for the flow pattern to be a single source flow.
4) Switch to a less viscous plastic or one with a lower melting temperature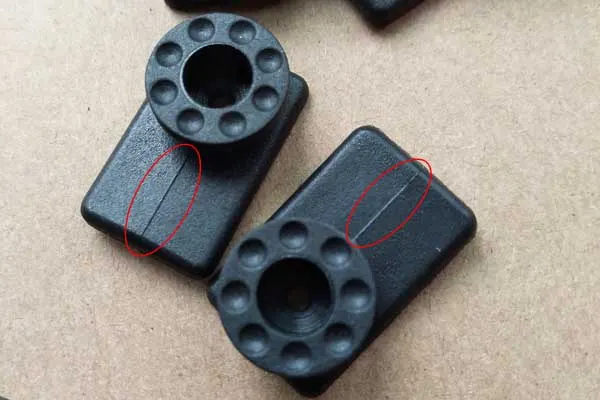
- Short shots: As the term implies, short shots can be described as a situation where a molding shot falls short. This means that the molten plastic for some reason does not fully occupy the mold cavity or cavities, resulting in a portion where there is no plastic. The finished product becomes deficient because it is incomplete.
Inadequate degassing or gas venting techniques can also result in short shots because air is trapped and has no way to escape; plastic material cannot occupy the space that air or gas is already occupying.
If the plastic is too viscous, it may solidify before fully occupying all the cavities and result in a short shot.
Preventing Short Shots:
1) Select a less viscous plastic with higher flowability. This plastic will fill the hardest-to-reach cavities.
2) Increase mold or melt temperature so as to increase flowability.
3) Account for gas generation by designing the mold so that gas is not trapped within the mold and is properly vented.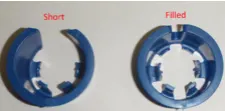
- Warping: Warping (or warpage) is the deformation that occurs when there is uneven shrinkage in the different parts of the molded component. The result is a twisted, uneven, or bent shape where one was not intended.
Warping is usually caused by non-uniform cooling of the mold material.
Different cooling rates in different parts of the mold cause the plastic to cool differently and thus create internal stresses.
These stresses, when released, lead to warping.
Also in fairly larger parts, when not adequate ribs or supports are not given it the part will bend or wrap while cooling down.
Preventing Warping:
1) Ensure that the cooling time is sufficiently long and that it is slow enough to avoid the development of residual stresses being locked into the part.
2) Design the mold with uniform wall thickness and so that the plastic flows in a single direction.
3) Select plastic materials that are less likely to shrink and deform. Semi-crystalline materials are generally more prone to warping.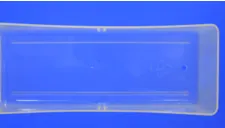
- Burn Marks: Burn marks are discolorations, usually rust colored, that appear on the surface of the injection molded prototypes.
Burn marks are caused either by the degradation of the plastic material due to excessive heating or by injection speeds that are too fast.
May also be caused due to overheating of trapped air, which etches the surface of the molded part.
Preventing Burn Marks:
1) Reduce injection speeds
2) Optimize gas venting and degassing.
3) Reduce mold and melt temperatures.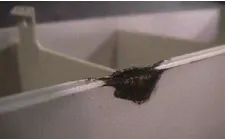
- Jetting: Jetting refers to a situation where molten plastic fails to stick to the mold surface due to the speed of injection
Being fluid, the molten plastic solidifies in a state that shows the wavy folds of the jet stream on the surface of the injection molded part.
Jetting occurs mostly when the melt temperature is too low and the viscosity of the molten plastic becomes too high, thereby increasing the resistance of its flow through the mold.
Preventing Jetting:
1) Increase mold and melt temperatures.
2) Increase the size of the gate so that the injection speed becomes slower.
3) Optimize gate design to ensure adequate contact between the molten plastic and the mold.
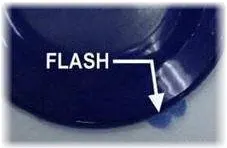
- Flash: Flash is a molding defect that occurs when some molten plastic escapes from the mold cavity. Typical routes for escape are through the parting line or ejector pin locations. This extrusion cools and remains attached to the finished product.
Flash can occur when the mold is not clamped together with enough force.
The use of molds that have exceeded their lifespan will be worn out and contribute to the possibility of flash.
Excessive injection pressure may force the plastic out through the route of least resistance
Preventing Flashes:
1) Increase the clamp pressure to ensure that the mold parts remain shut during shots.
2) Ensure that the mold is properly maintained and cleaned
3) Adopt optimal molding conditions like injection speed, injection pressure, mold temperature, and proper gas venting.