Modeling, Assembly, and Rendering of American Chopper
Objective: Following were the objective of this project.
- Learn SolidWorks.
- Modeling with the help of American Chopper Blueprints.
- 3D Modeling and appearance of different parts with the help of SolidWorks software.
- Assemble different parts under SolidWorks Assembly with the help of different mates.
- Photo realistic rendering with the help of photo view 360 and SolidWorks Visualize.
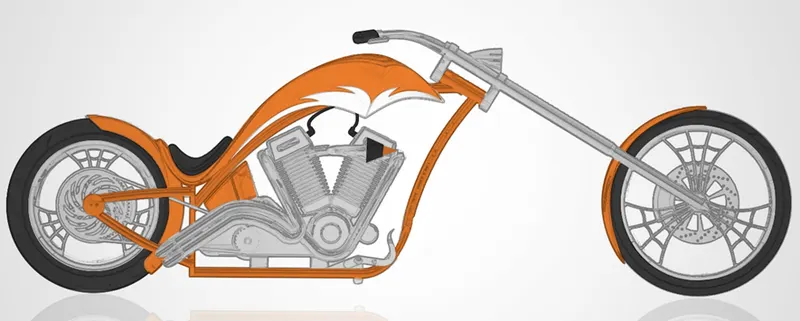
Blueprint of American Chopper
Introduction: SolidWorks is a parametric modeling software released by Dassault Systèmes in the year of 1997. It is widely used to design products both for the automotive and manufacturing sector. It is also used to perform FEA Analysis, PCB Design, and Computation Fluid Dynamics (CFD). It can also advise users on real-world weight, density, and other mechanical properties when modeling or creating parts. It is also had an added feature called Photoview 360, which can be used to perform Rendering for different designs.
Design Methodology: Following design approach was followed:
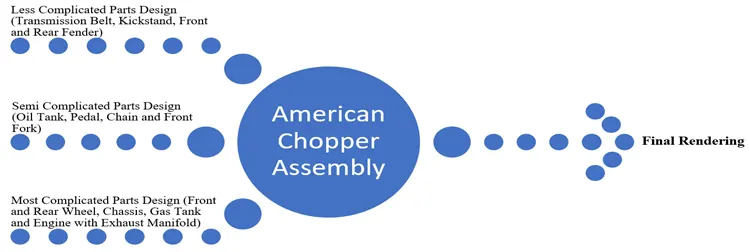
Methodology Flow Chart
Descriptions: During this project following sub-projects (Parts) design has been carried out:
Transmission Belt: During transmission belt modeling following commands are used to design it.
- Sketch- This is the first process to draw a profile. To draw the profile- Circles (R61, R71) and lines (350mm) are used.
- Offset- After that offset command is used to offset the profile outward by 3.5mm.
- Boss Extrude- This command is used to extrude the profile 88mm.
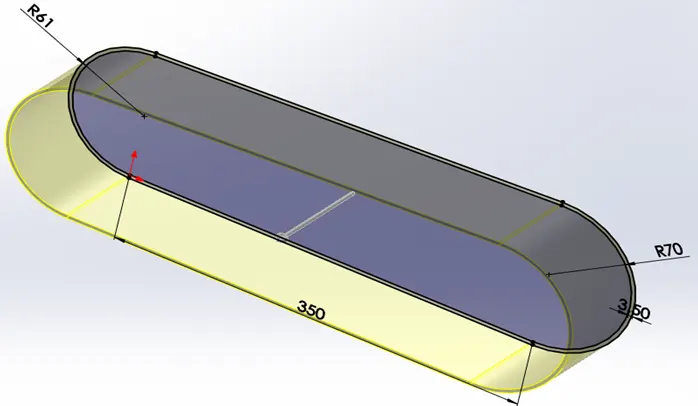
Boss Extrude
- Fillet- This command is used to create rounded internal and external edges of 1mm.
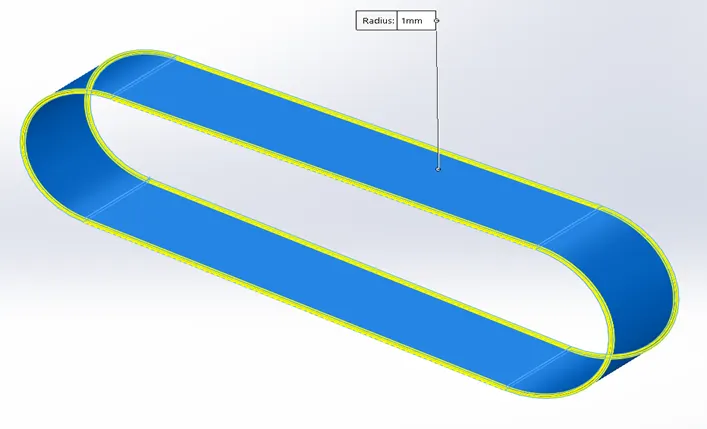
Filleted All Edges
Final Design of Transmission Belt:
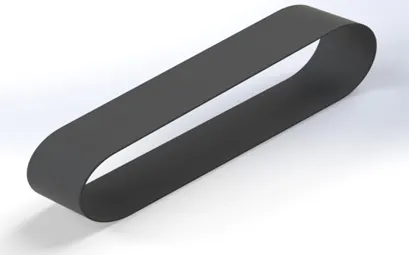
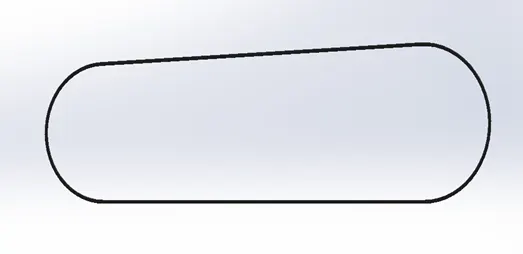
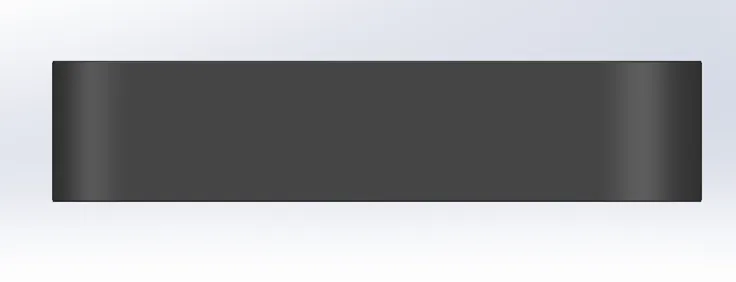

Rendered ISO View, Front View, Top View, and Side View, Respectively
Kickstand: The following commands are used to model the Kickstand.
- Sketches- To perform lofted commands first need to make Sketches with the help of the Ellipse and Spline commands as shown below.
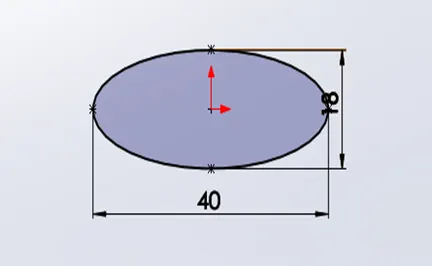
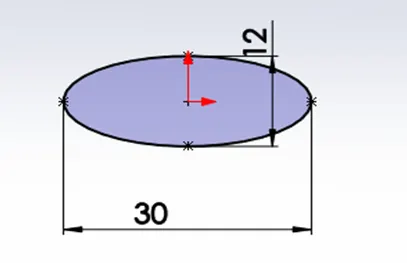
First Profile Ellipse on Front Plane LSW Second Profile Ellipse on Plane Two
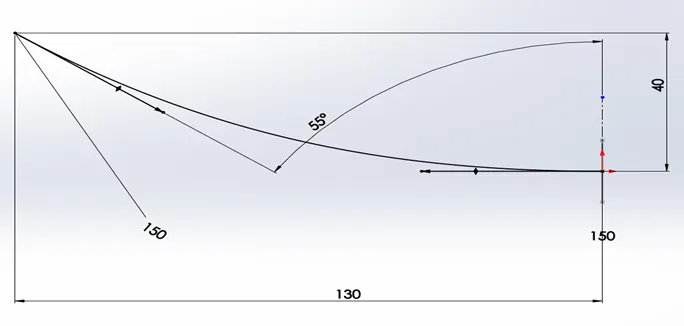
Spline used to create Guide curve for Lofted command
- Loft- As the name indicated that it is used to join two different profiles together with the help of the Guide curve. A lofted command can be used to model complex shapes very easily. Below is the lofted command performed for the kickstand.
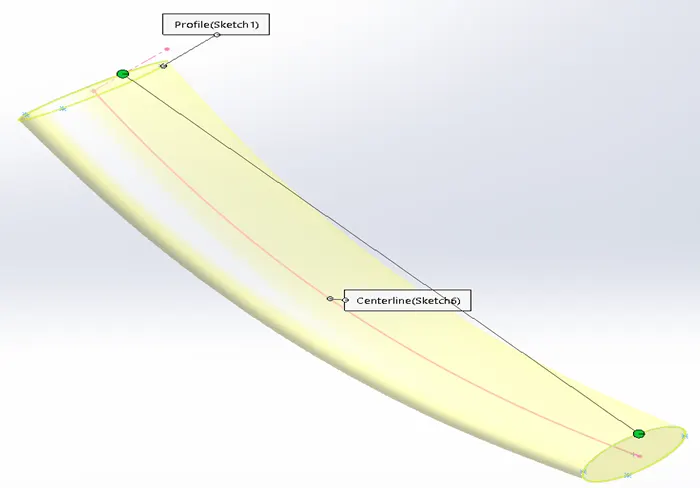
Lofted Command
- Dome- It can be used to apply a dome on faces where the centre is located outside the face.
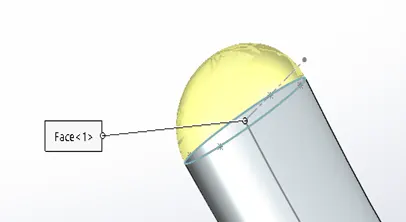
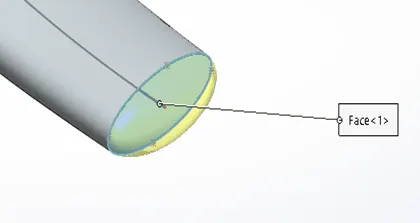
Domes on both faces
- Cut Extrude- It is used to remove material from the top side of the 3D model.
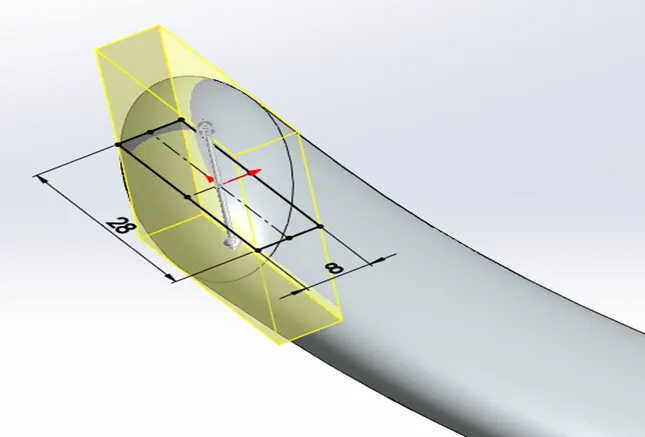
Cut Extrude
- Split Command- As the name indicated this is used to project a shape on the plane or curved faces. Split faces in multiple bodies, can also be useful.
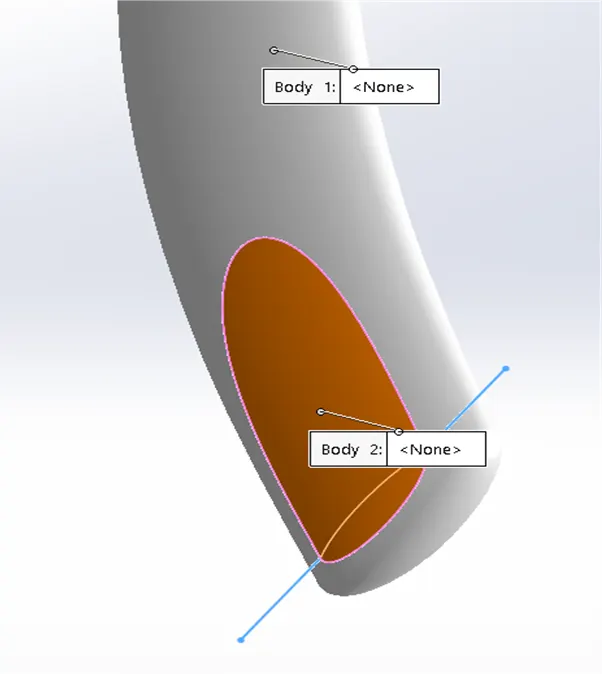
Split Command
- Boss Extrude- It is used to make the cylindrical joint between two inside faces that are generated during Cut Extrude. Later in the assembly, this can help to join Kickstand with the main Chassis at a specific location.
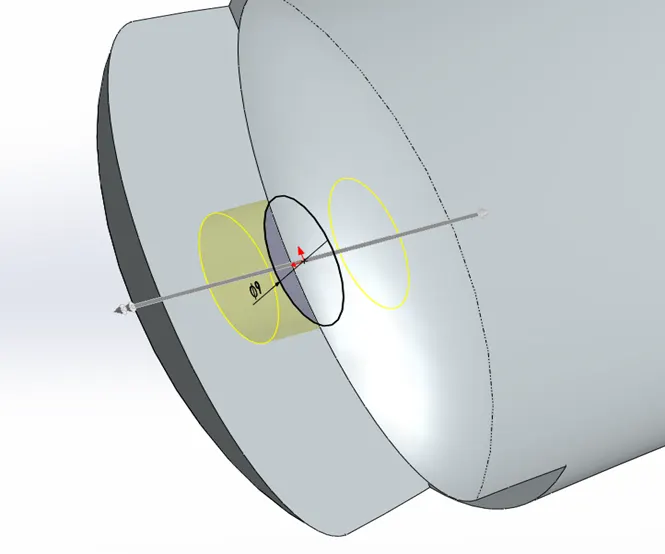
Boss Extrude
- Fillet- It is used to create rounded external and internal edges on top of the kickstand. Two different fillet commands have been performed- 2mm and 0.5mm.
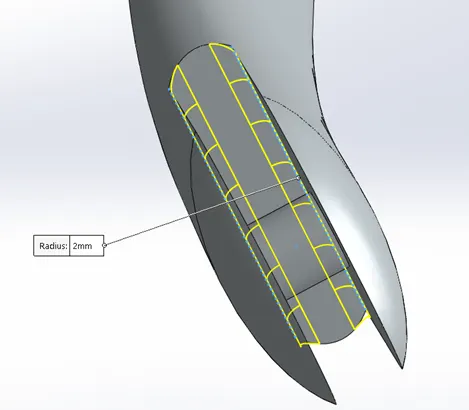
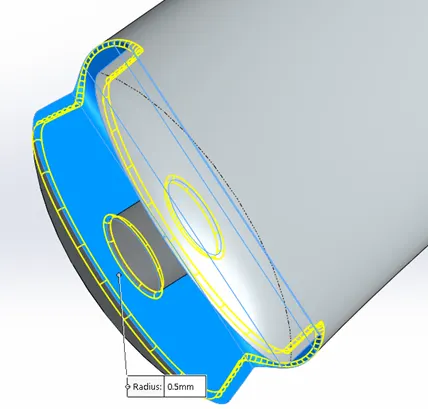
Fillets (2mm and 0.5mm)
Final Design of Kickstand:
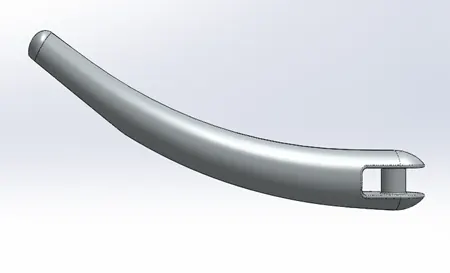
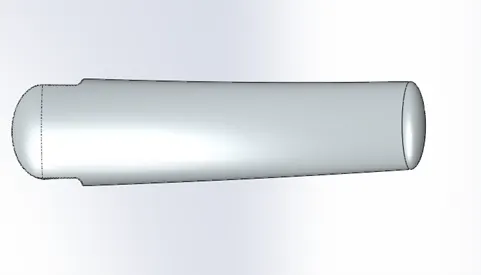
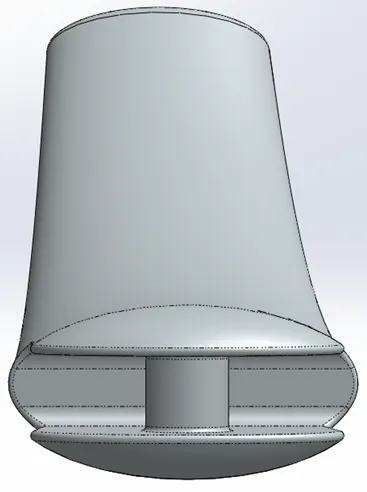
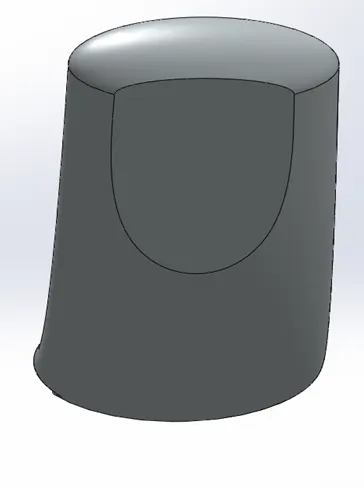
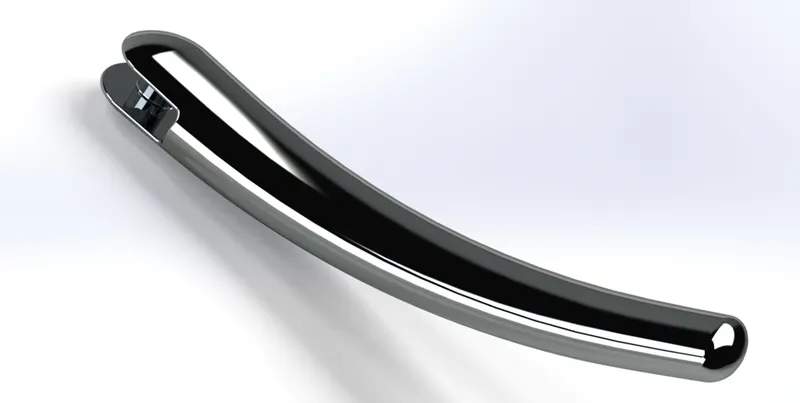
Side View, Top View, Back and Front View, and Rendered ISO View, Respectively
Front Fender: Following features are used to model Front Fender.
- Sketch (Circles, Offset Entities, Lines, Trim Entities)- To perform revolve feature, first need to make the following sketch.
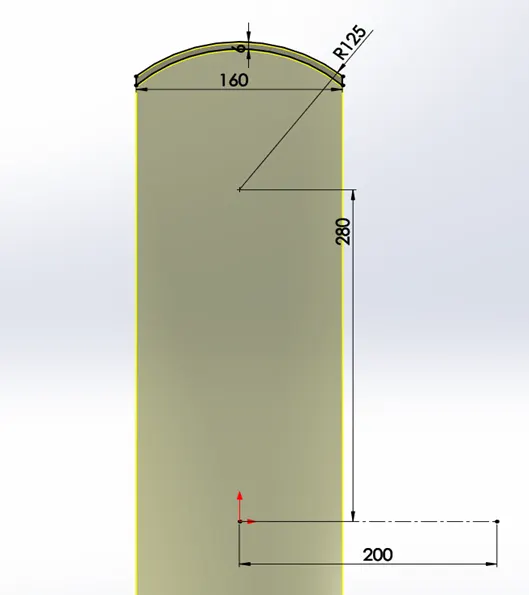
Sketch for Revolve
- Revolve- First, need to select the above sketch and construction line (Dotted) as an axis of revolution.
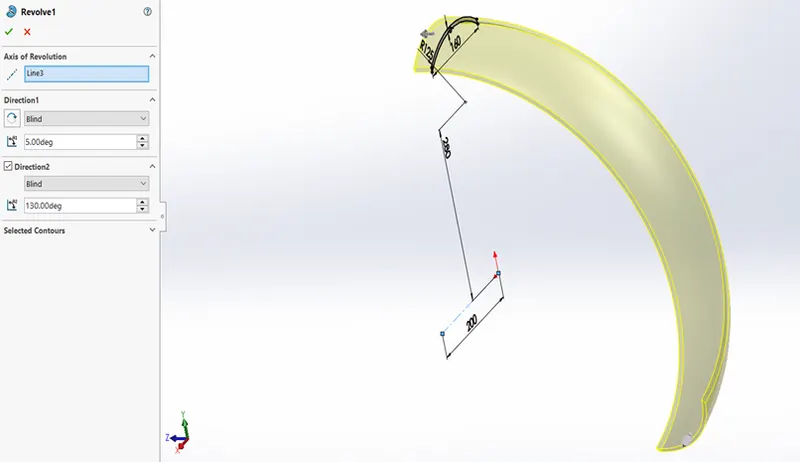
Revolve Feature
- Split- First need to make the following sketches are used to perform the split feature. These sketches construct with the help of Spline and Dynamic Mirror.
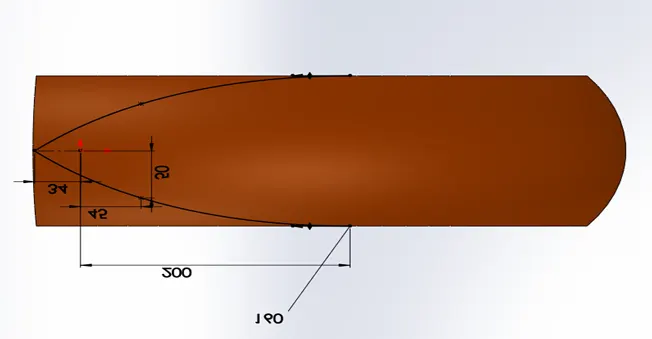
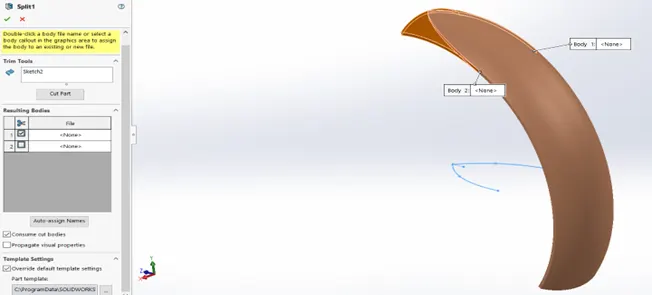
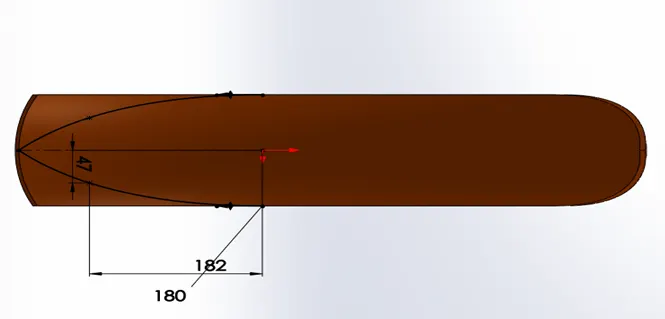
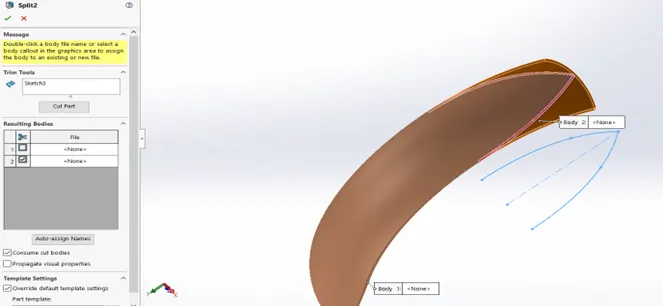
Split Features
- Fillet- It is used to create rounded edges of the Rear Fender.
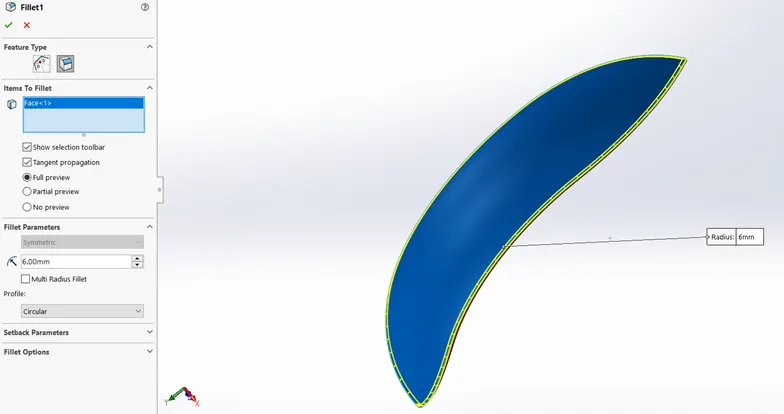
Fillet Features
Final Design of Front Fender:
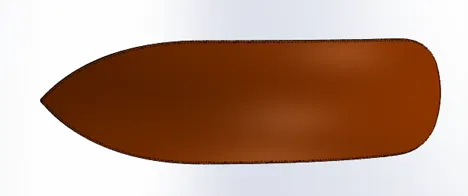
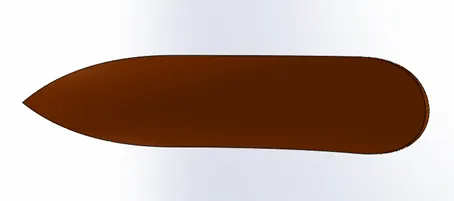
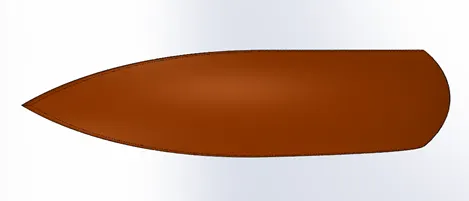
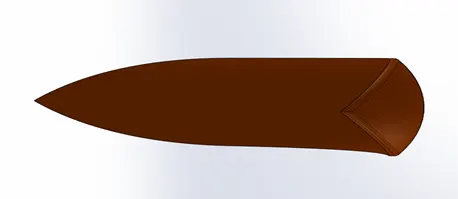
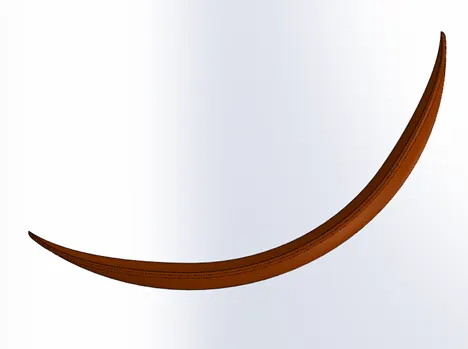
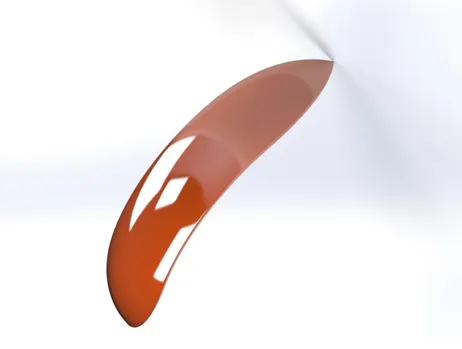
Front and Back View, Top and Bottom View, Side View, and Rendered ISO View, Respectively
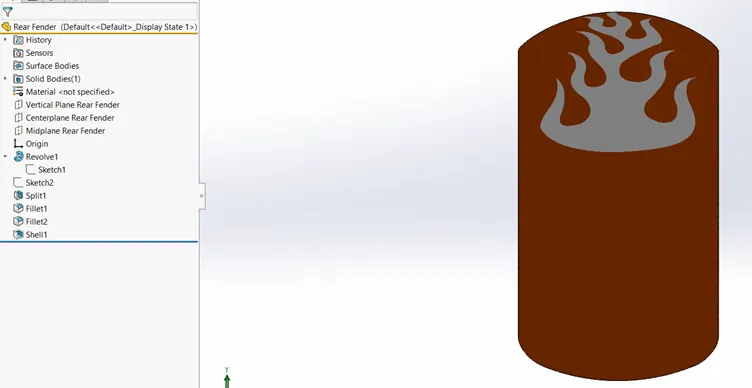
Rear Fender: Rear Fender is modeled with the help of the following features. Few Commands are the same as those used to model front fenders.
- Sketch
- Revolve
- Split
- Fillet (2 different)
- Shell
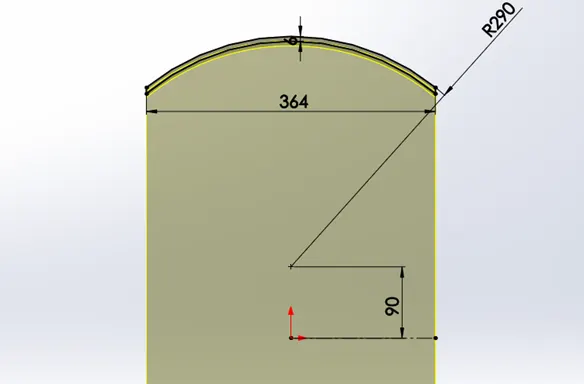
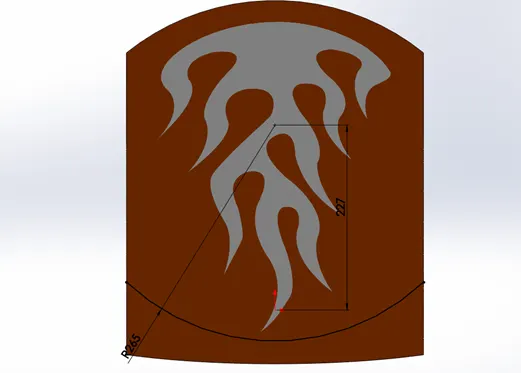
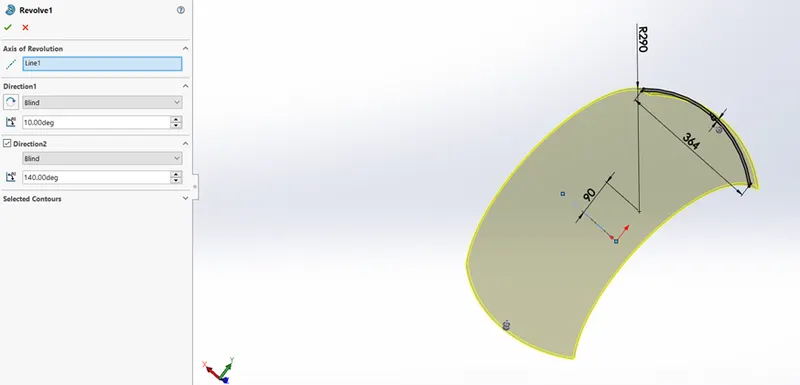
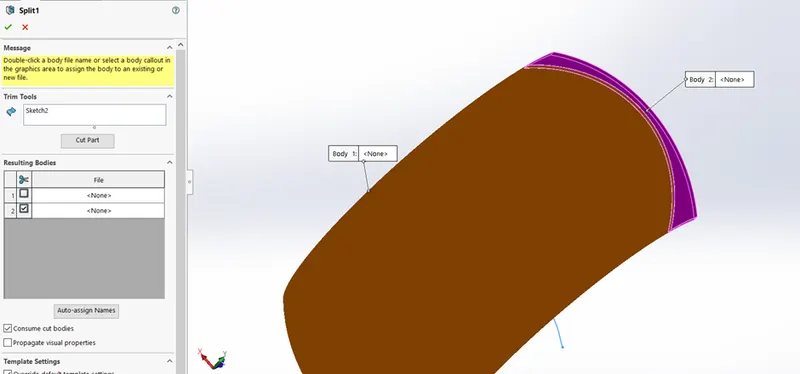
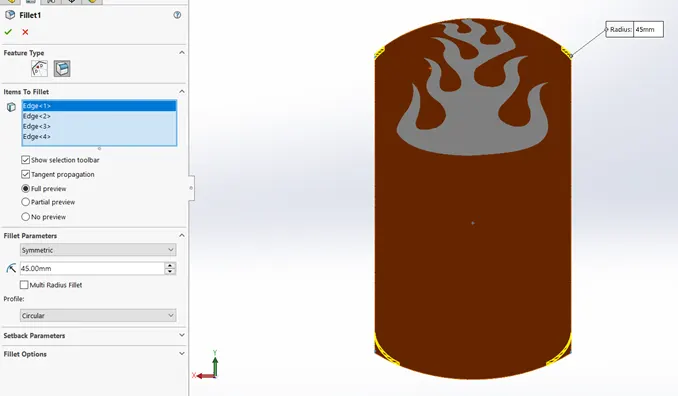
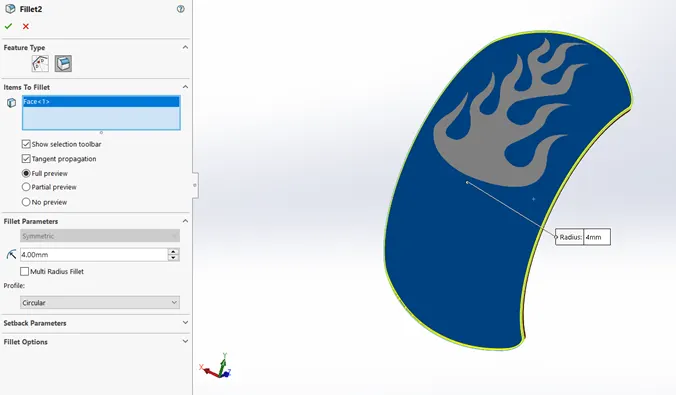
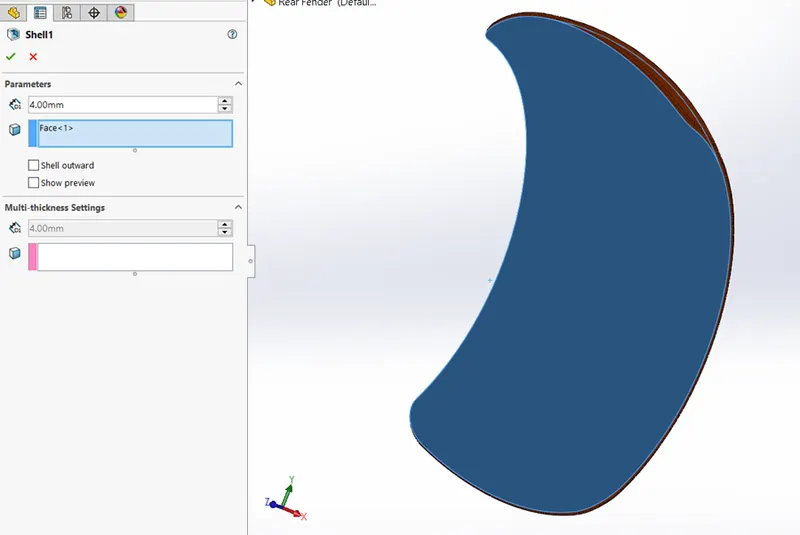
Sketch, Revolve, Split, Fillet, and Shell Feature, Respectively
Final Design of Rear Fender:
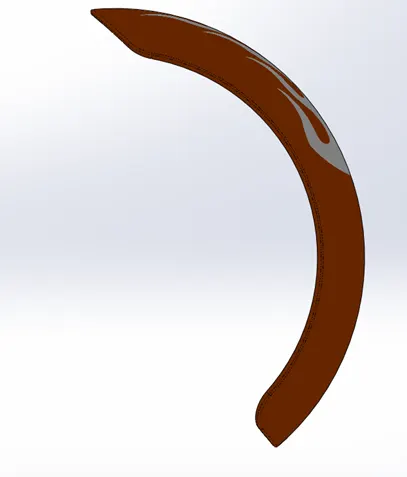
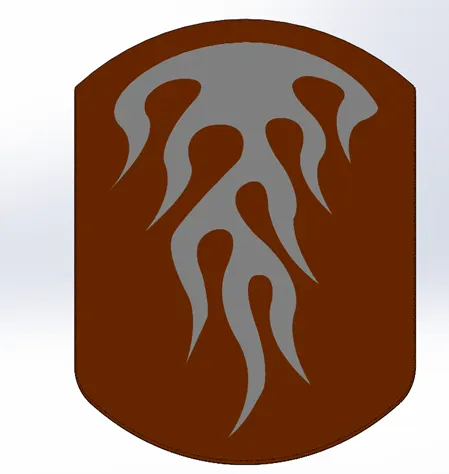
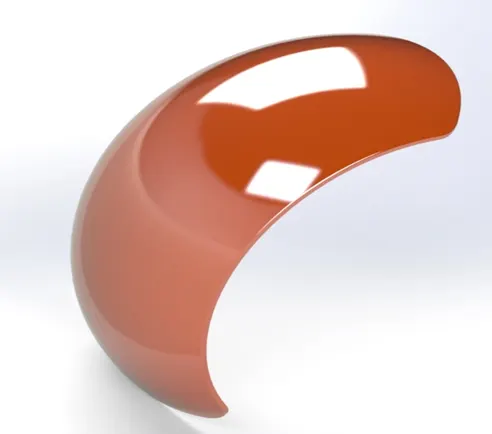
Front and Back View, Top and Bottom View, Side View, and Rendered ISO View, Respectively
Oil Tank: Following features are used to model Oil Tank.
- Sketch- Below sketch were later used for Combine feature.
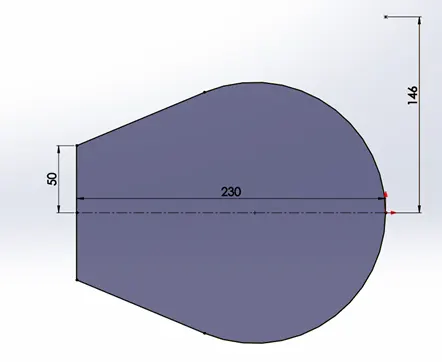
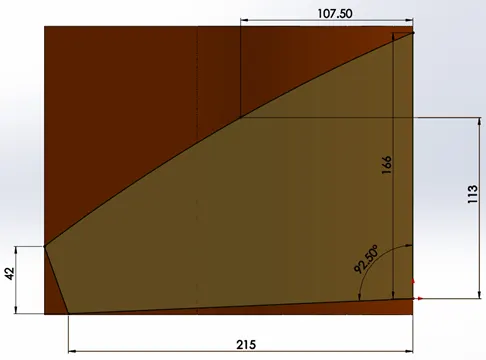
Skteches
- Boss Extrude-
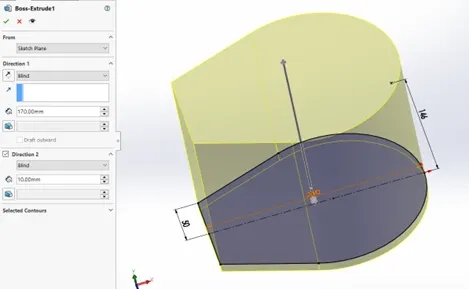
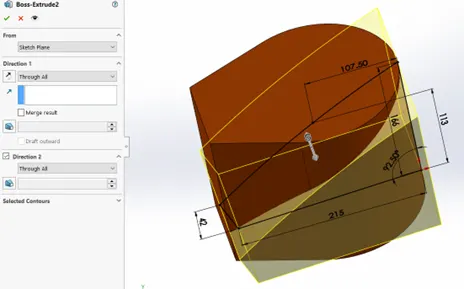
Boss Extrude
- Combine- This feature is used to combine the following two bodies. It converted two bodies into one by adding and subtracting.
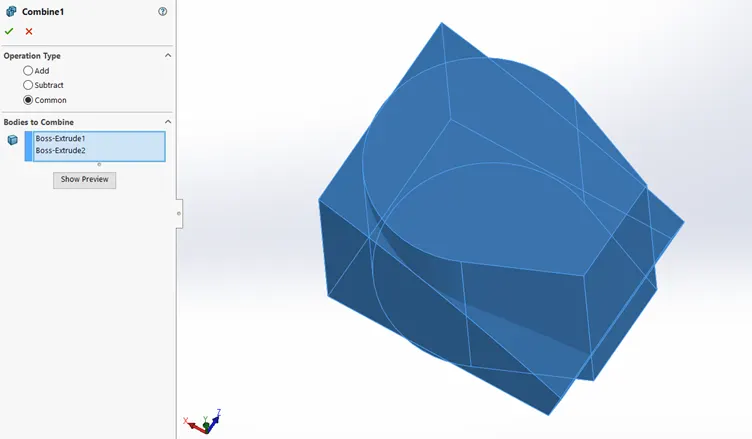
Combine
- Fillet-
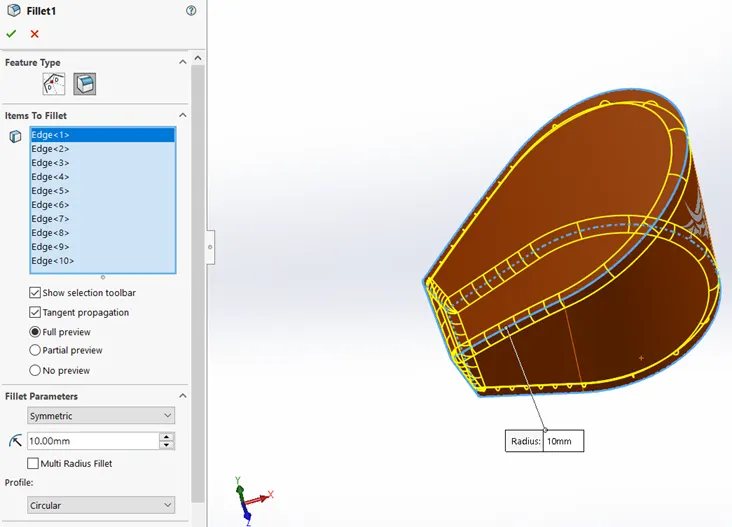
Filleted are edges
- Shell- It is enabling the bodies to convert into a hollow part.
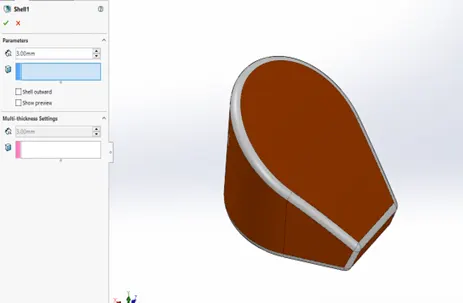
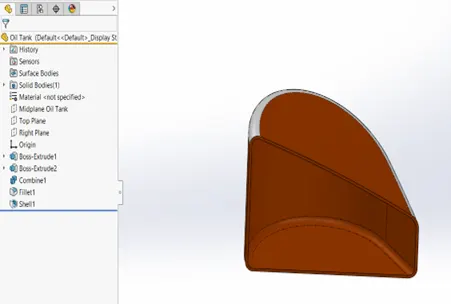
Shell feature and inside hollow view
Final Design of Oil Tank:
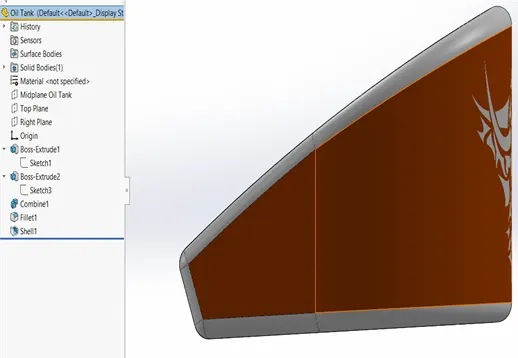
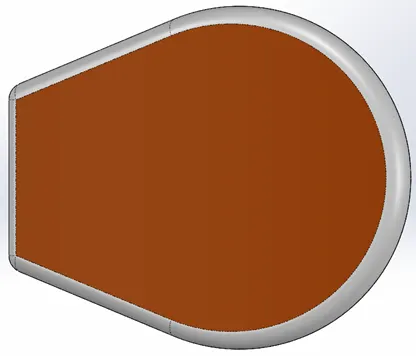
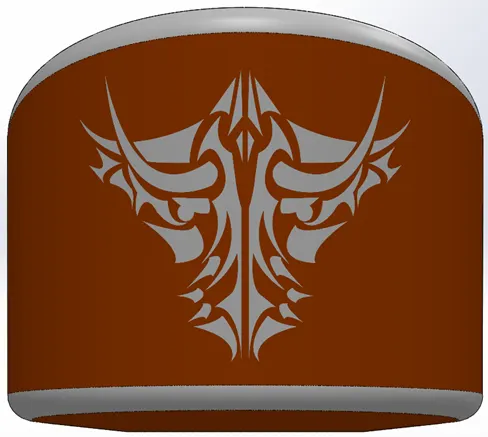
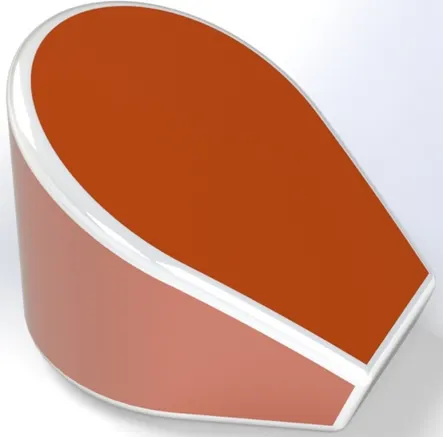
Front and Back View, Top and Bottom View, Side View, and Rendered ISO View, Respectively
Pedal: Following features are used to model the Pedal.
- Sketch-
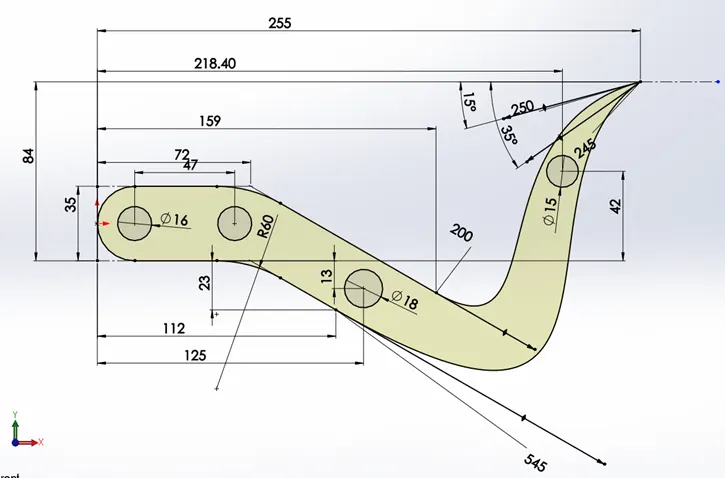
Sktech
- Boss Extrude-
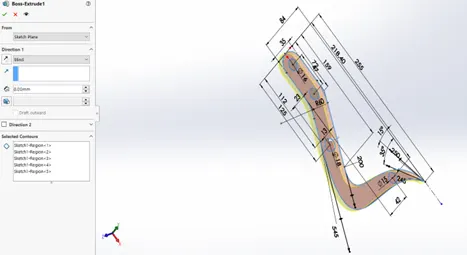
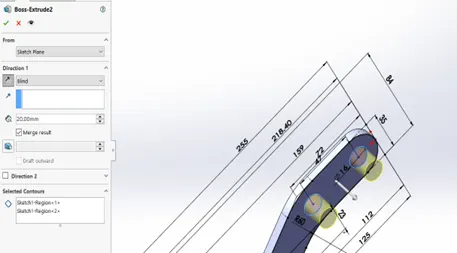
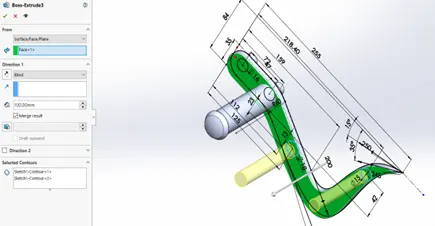
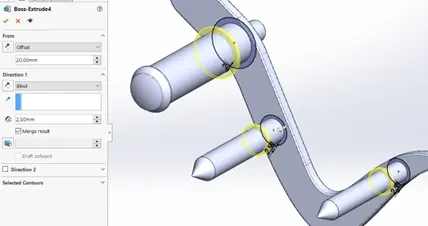
Boss Extrude Features
- Fillet-
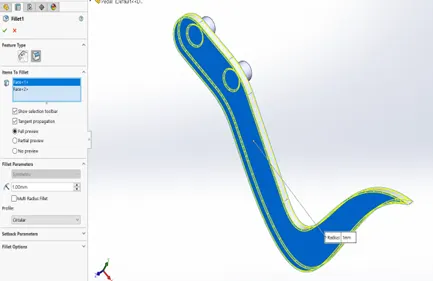
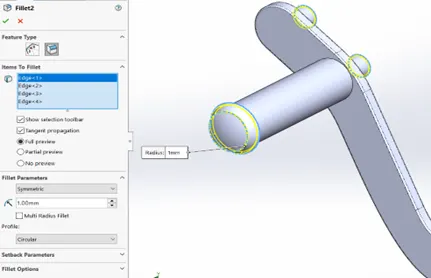
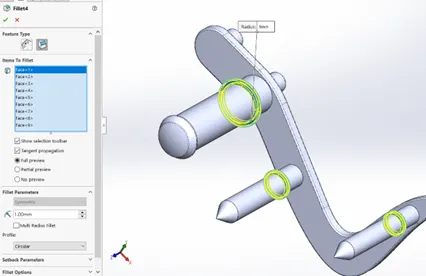
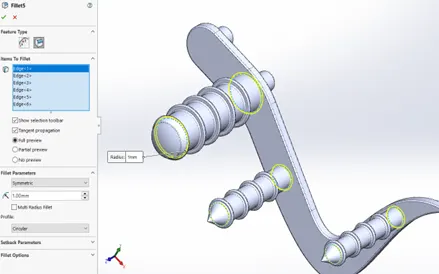
Fillets
- Revolve-
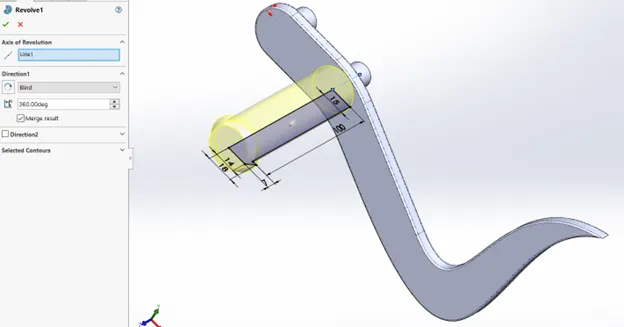
Revolve
- Dome-
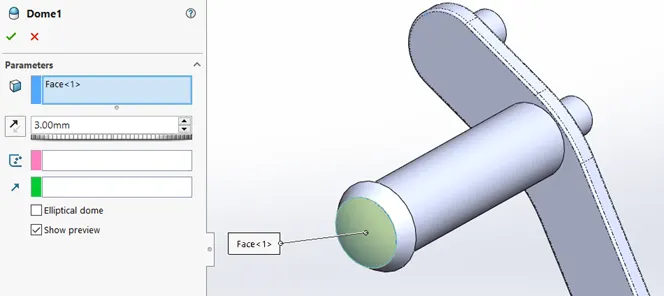
Dome
- Chamfer- It is allowed to break sharp edges with a bevel. The following images show how to perform it.
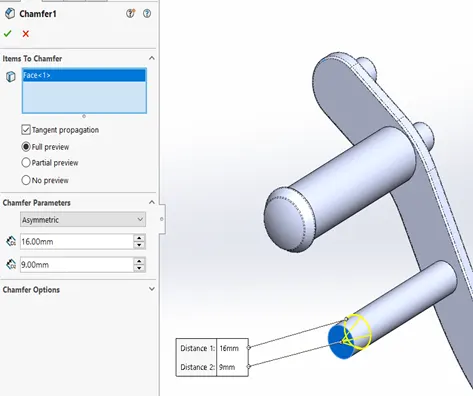
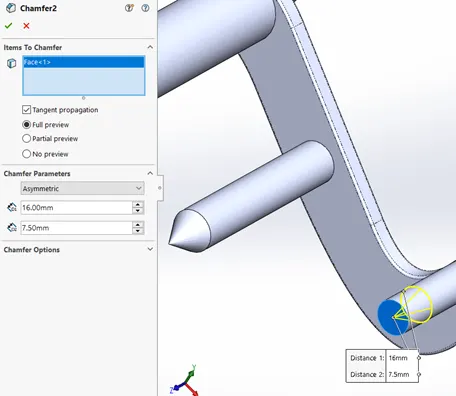
Chamfers
- Linear Pattern- It is used to make liner patterns of previously made features and faces. Below is a used linear pattern.
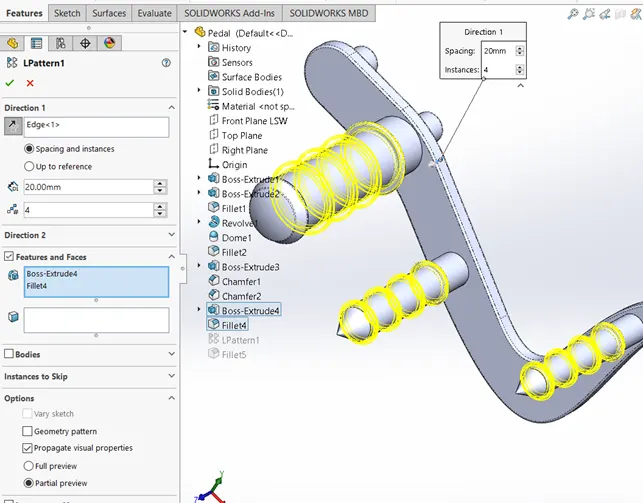
Linear Pattern
Final Design of Pedal:
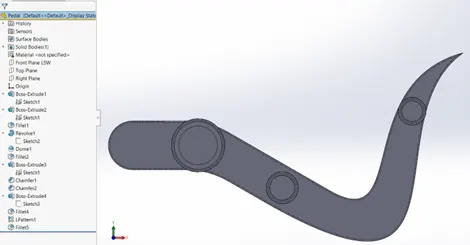
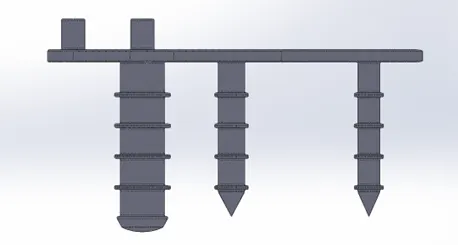
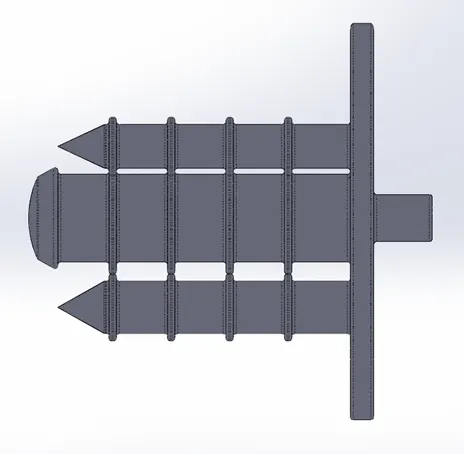
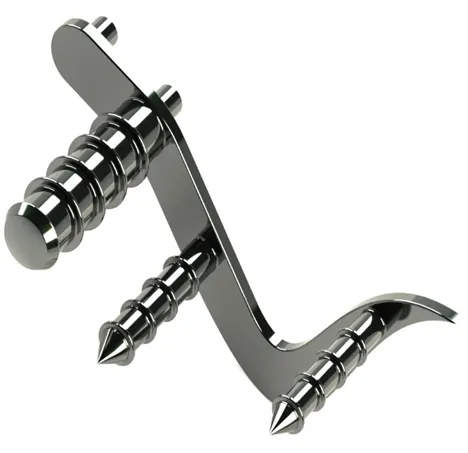
Front, Top, Side, and Rendered ISO View, Respectively
Chain: Following features are used to create a chain for American Chopper.
- Sketch- Below sketch created for the path which is later used for curve driven pattern.
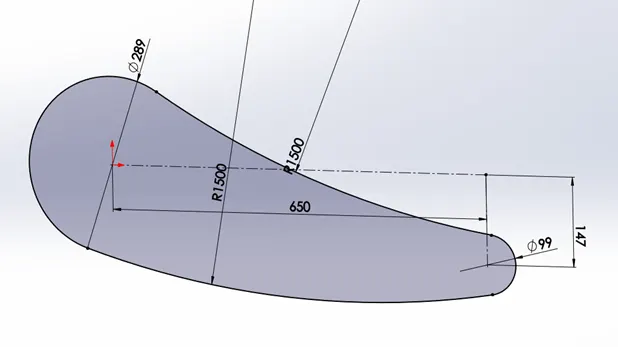
Sktech
- Extrude
- Fillets
- Blocks- It is allowed to create blocks for previously created sketches and used to insert them into other models. From this model point of view, the sketches are used to create chain links.
- Curve Driven Patterns- It is used to copy other bodies along with the previously created path.
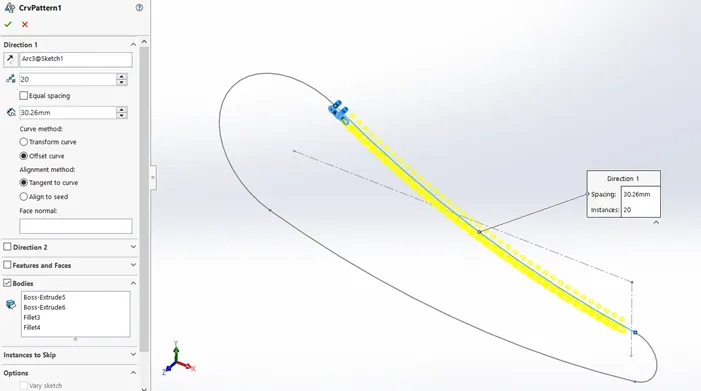
Curve Driven Patterns
Final Design of Chain:
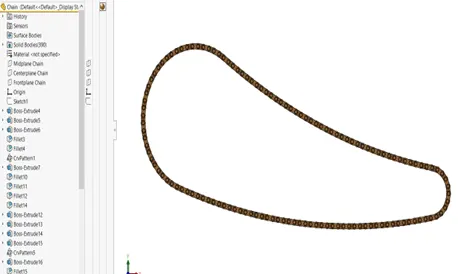
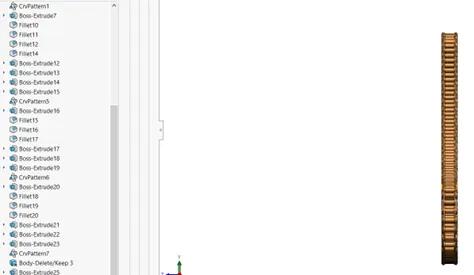
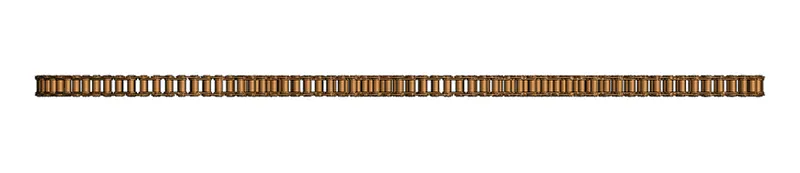
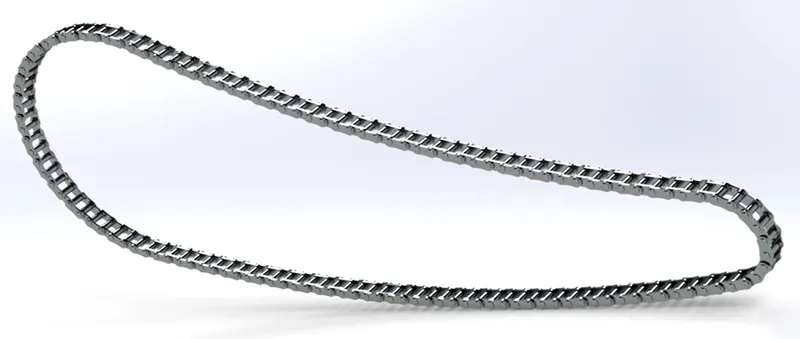
Front, Side, Top, and Rendered ISO View, Respectively
Front Fork: Following features are used to model the front fork.
- Sketch
- Trim
- Revolve
- Boss Extrude
- Fillet
- Linear Pattern
- Cut Extrude
- Dome
- Body Copy/ Move
- Mirror
- Cut Revolve
- Project Curve- It is used to make a new curve with the help of two or more sketches. The below yellow profile is projected with the help of two blue lines.
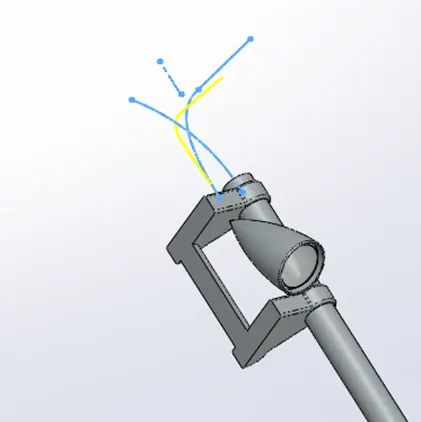
Projected Curve
- Sweep- Profile made with the help of the Project curve used here as a path for the circular profile.
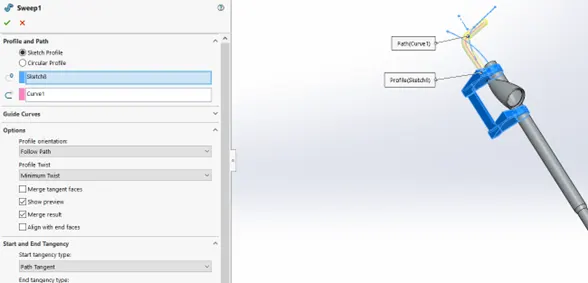
Sweep
Final Design of Front Fork:
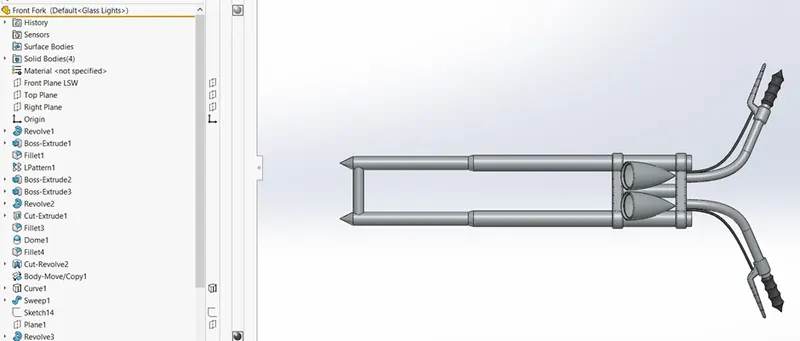
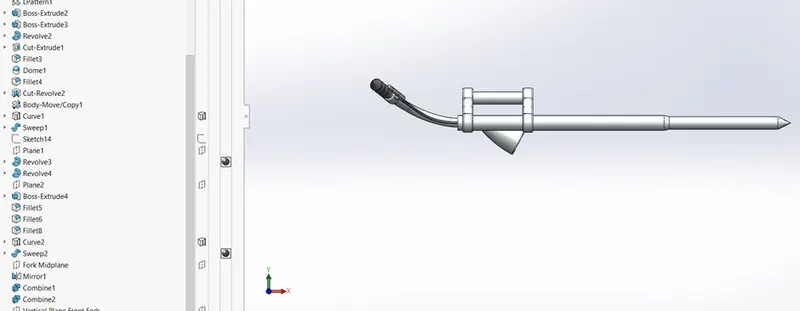
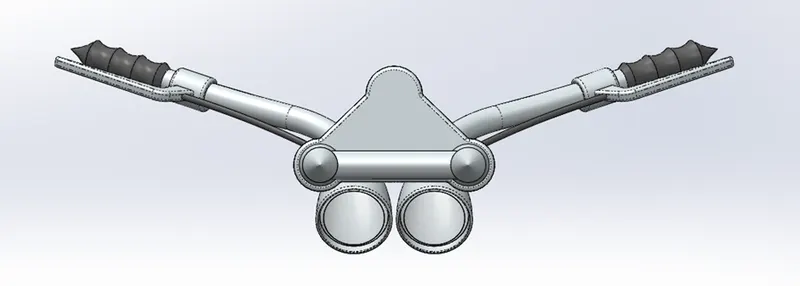
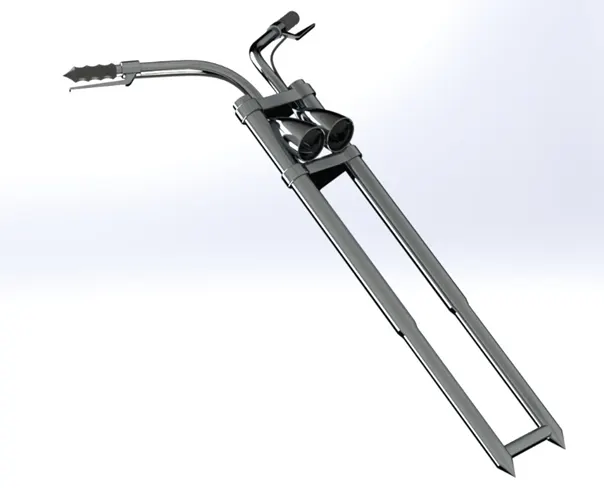
Top, Front, Right, and Rendered Rendered ISO Views, Respectively
Front Wheel: It is a subassembly that includes an axle, disc, and tire. The following features are used to model the Front wheel.
- Sketch
- Trim
- Revolve
- Boss Extrude
- Cut Extrude
- Cut Revolve
- Circular Pattern- It creates a pattern of spoke and holes on a disc.
- Combine
- Fillets
- Chamfer
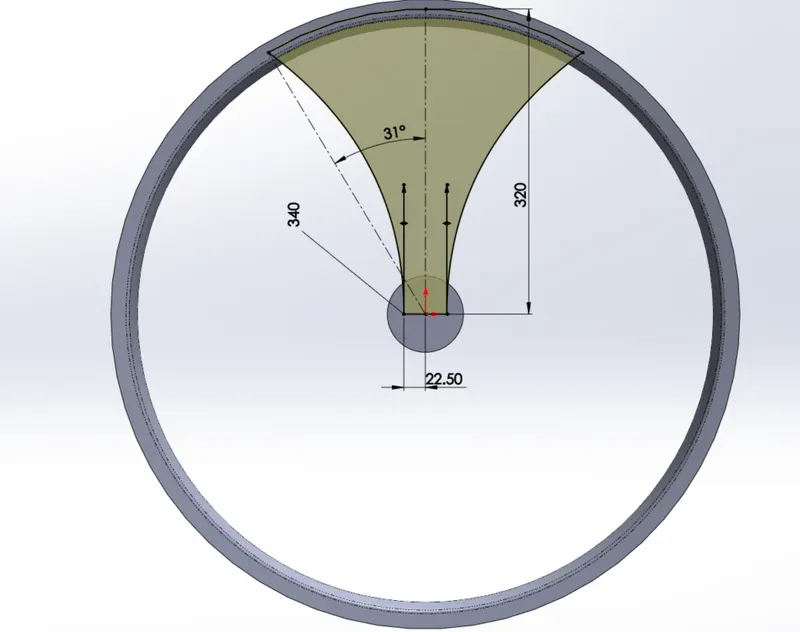
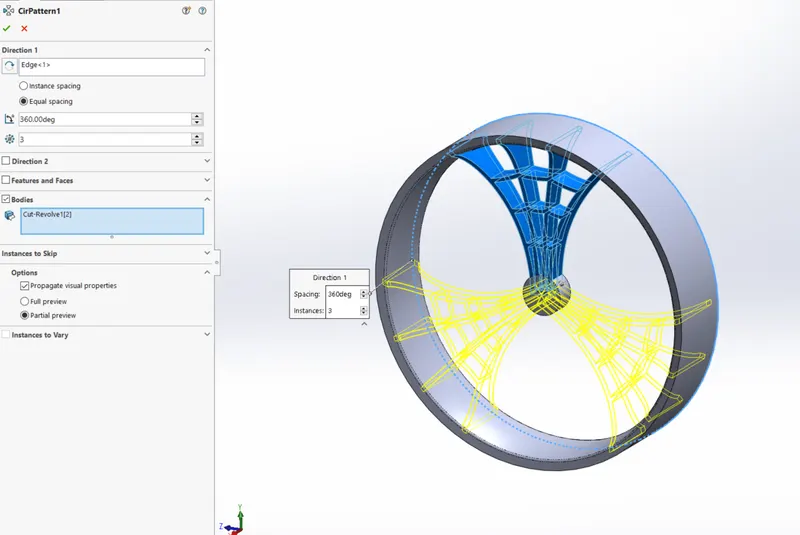
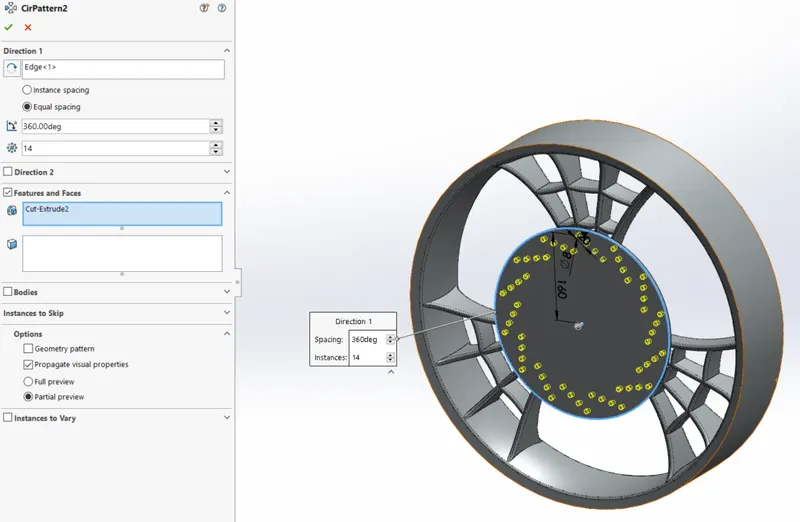
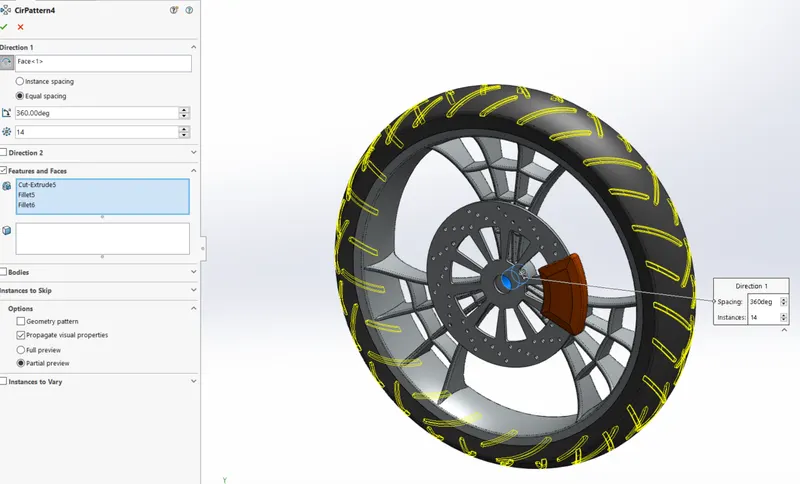
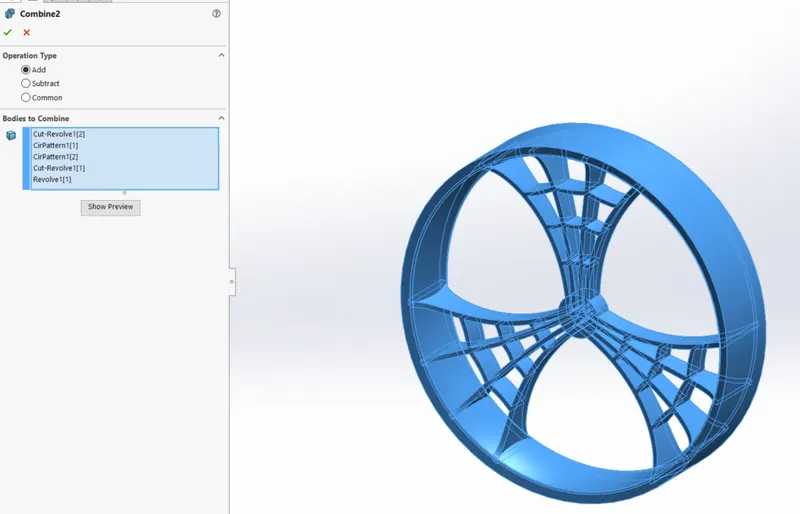
Final Design of Front Wheel-
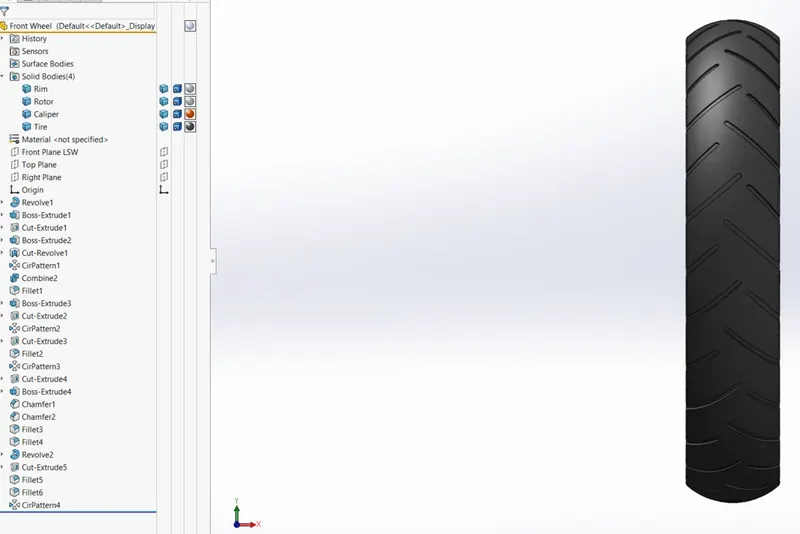
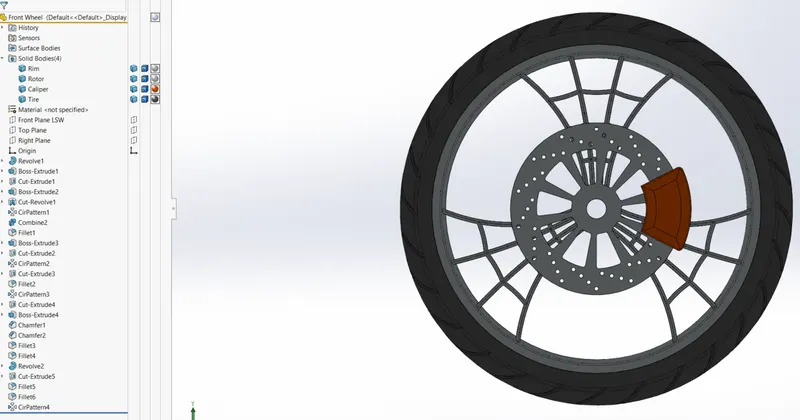
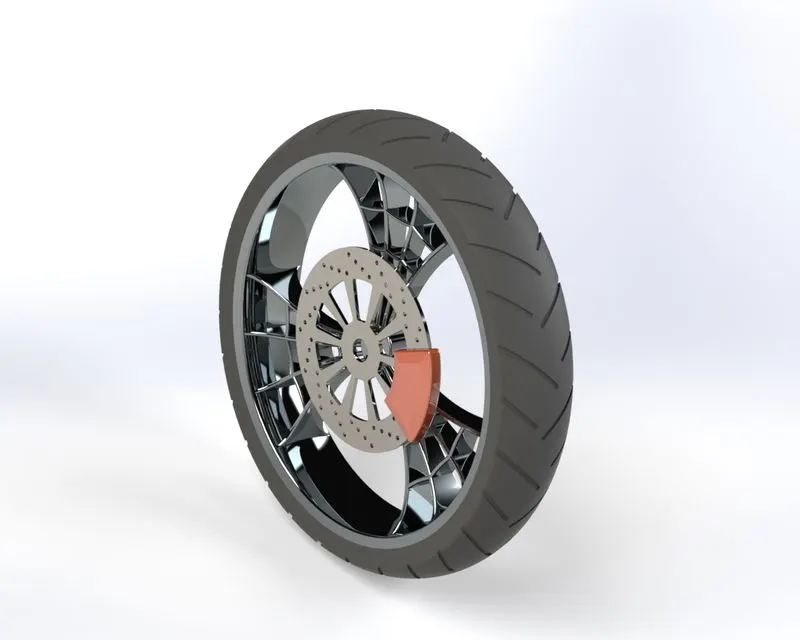
Front, Side, and Rendered ISO View, Respectively
Rear Wheel: This includes, tire, disc, sprocket, and axle. Few features are the same as Rear Wheel. The following features are used to create Rear Wheel.
- Sketch
- Revolve
- Fillets
- Extrude Boss
- Planes
- Revolve cut
- Linear pattern
- Chamfer
- Extrude Cut
- Circular pattern
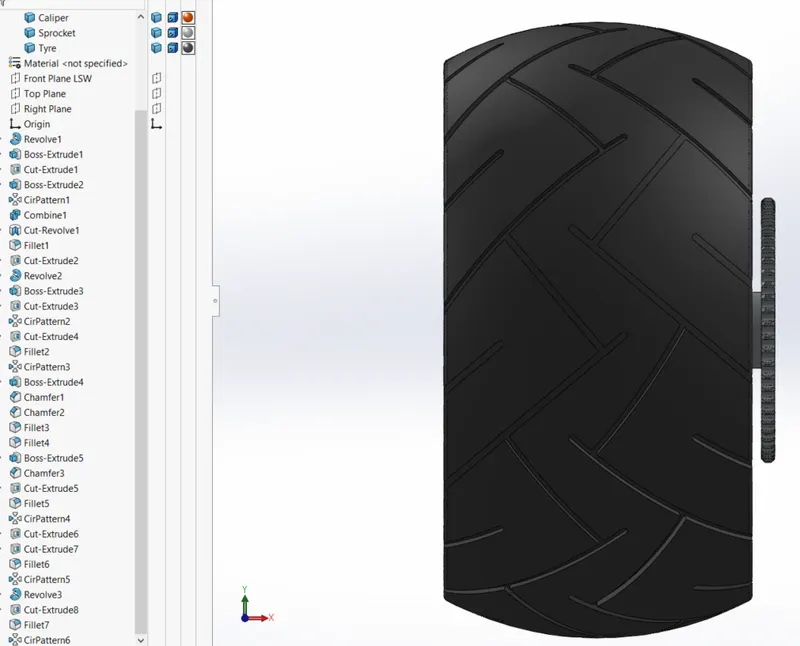
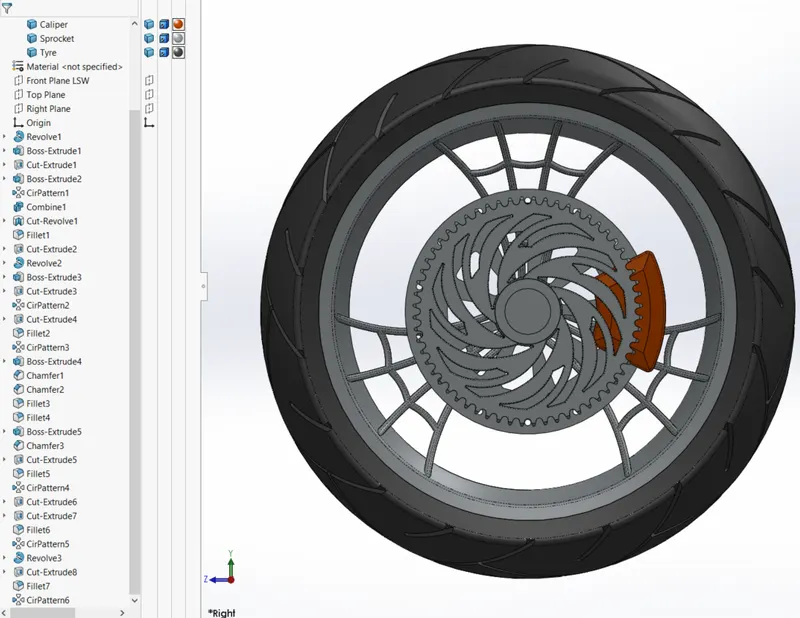
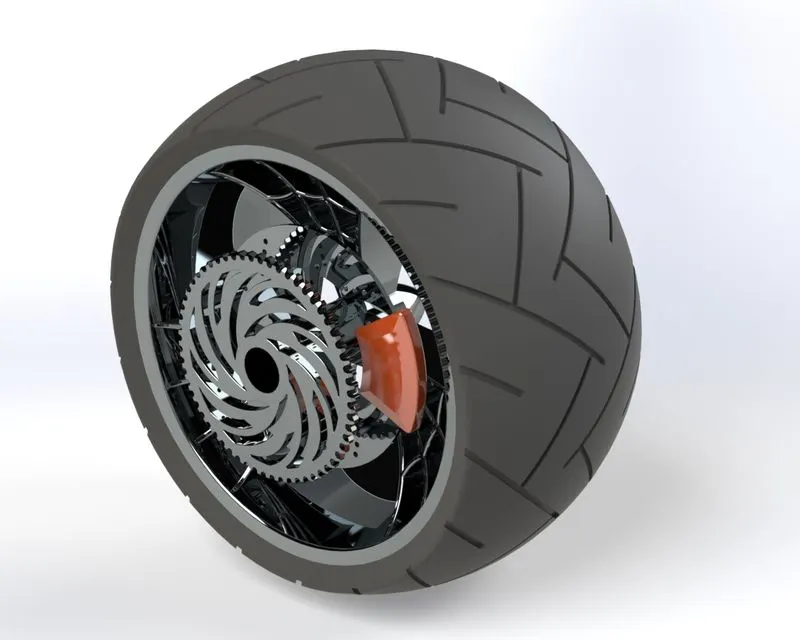
Front, Side, and Rendered ISO View, Respectively
Chassis: It is a primary part of the whole assembly. It carries all parts together. The following Features are used to model the Chassis.
- Sketch
- Offset entities
- Convert Entities
- Projected Curves
- Trim
- Sweep
- Split
- Revolve
- Cut Extrude
- Fillet
- Combine
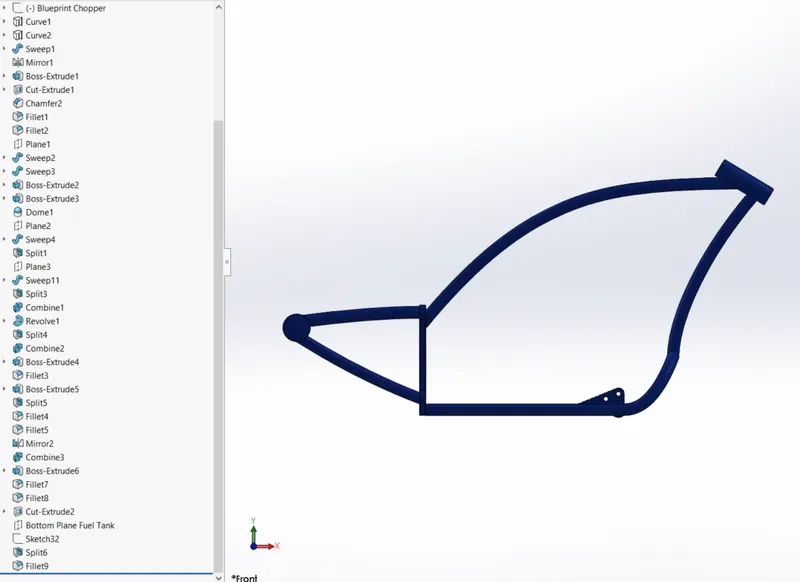
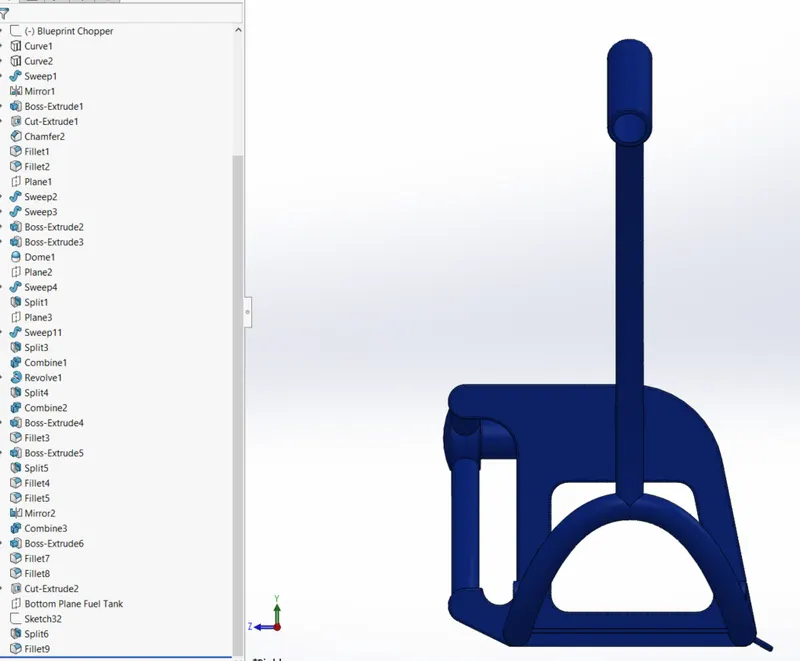
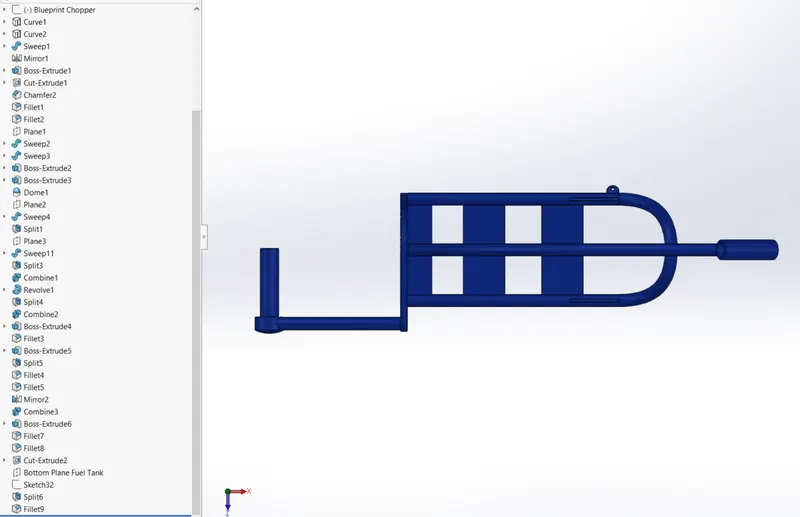
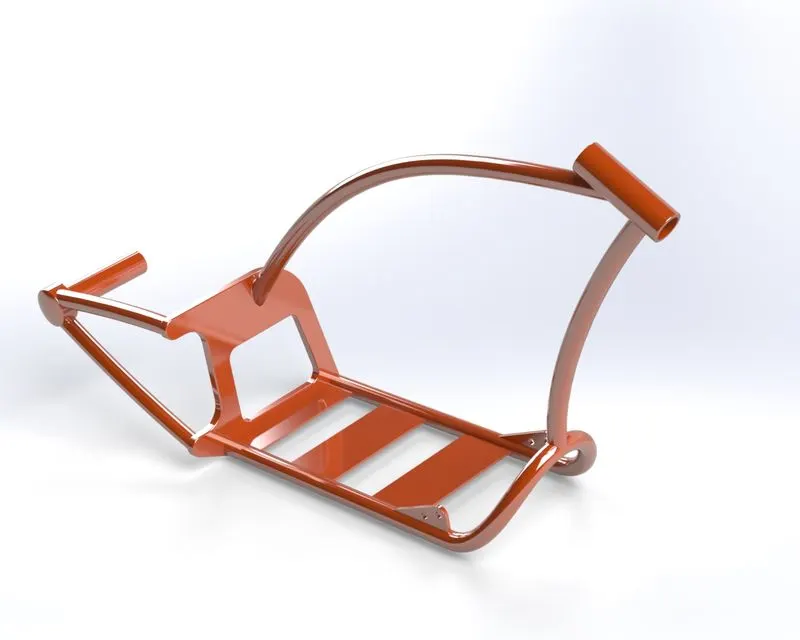
Front, Side, Top, and Rendered ISO View, Respectively
Gas Tank: Following features were used to model it.
- Blueprint Setup
- Sketch
- Projected Curves
- Sweep Surface- It generates from a section curve positioned along a path.
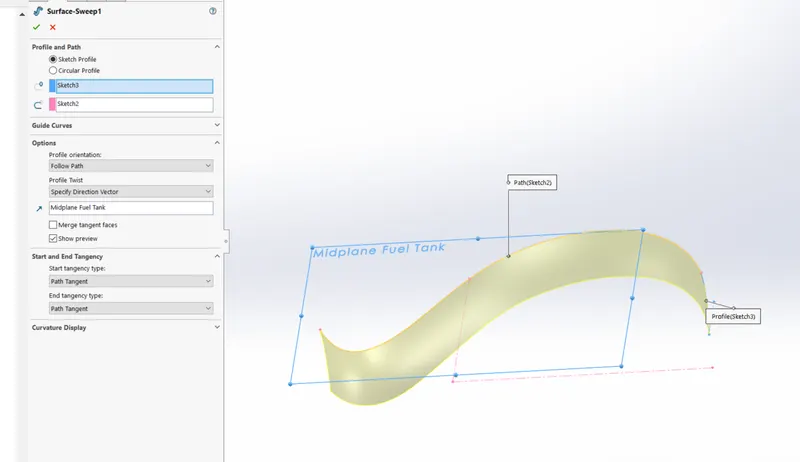
Sweep Surface
- Boundary Surface- Create a boundary surface between two profiles in two directions.
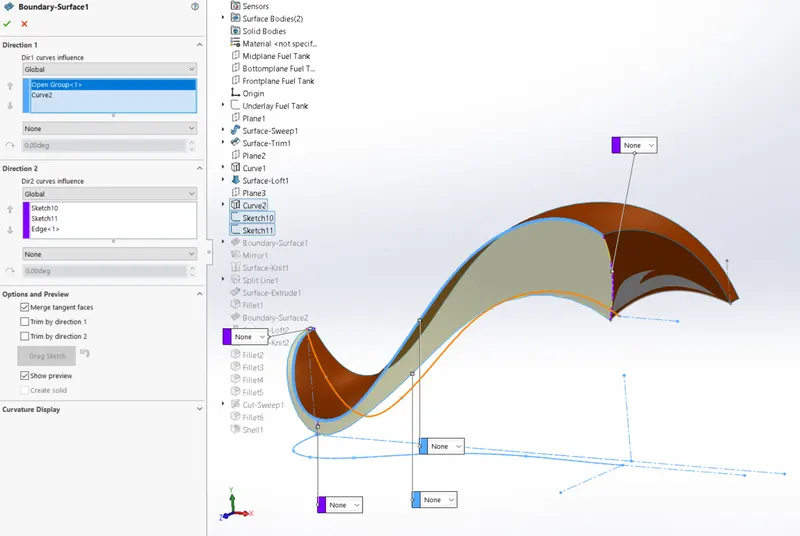
Boundary Surface
- Surface Trim- Trims a surface where one surface intersects with another surface, plane, or sketch.
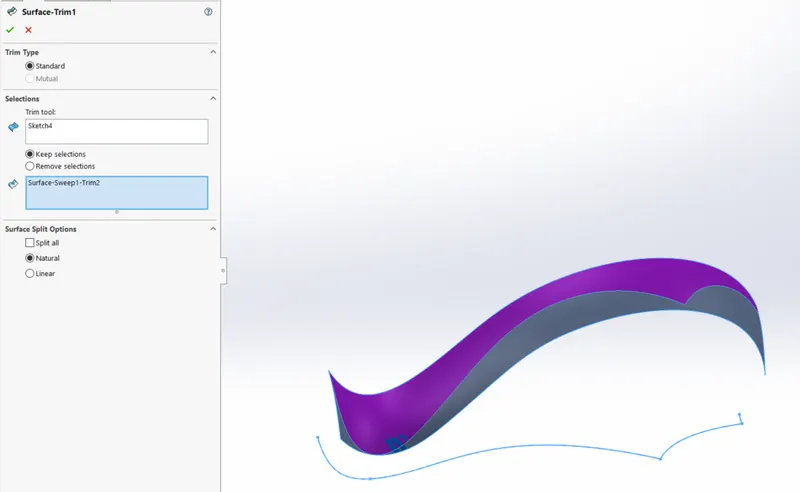
Surface Trim
- Surface Knit- Combine two or more adjacent, non-intersecting surfaces together.
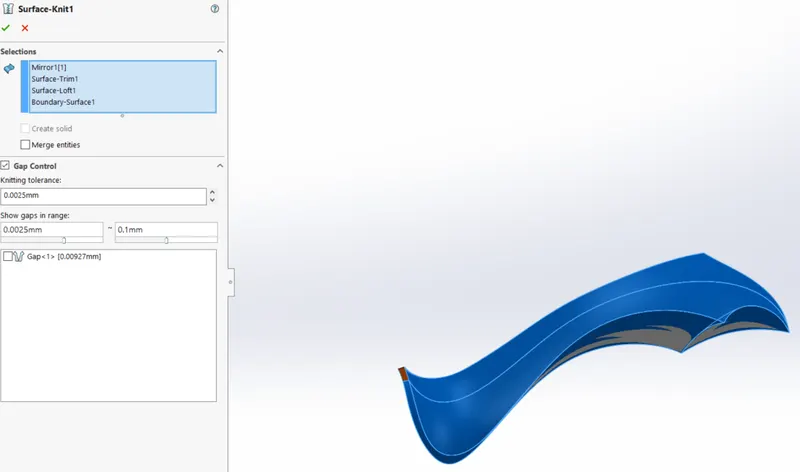
Surface Knit
- Split Line- Projects a sketch to curved or planar faces, creating multiple separate faces.
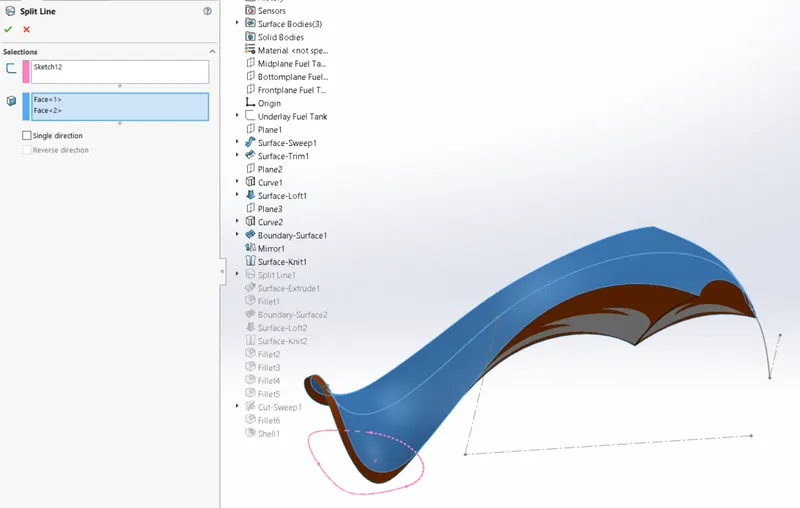
Split Line
- Surface Extrude- To create extruded surfaces from models that include 2D and 3D faces and Knit the extruded surfaces to surrounding features.
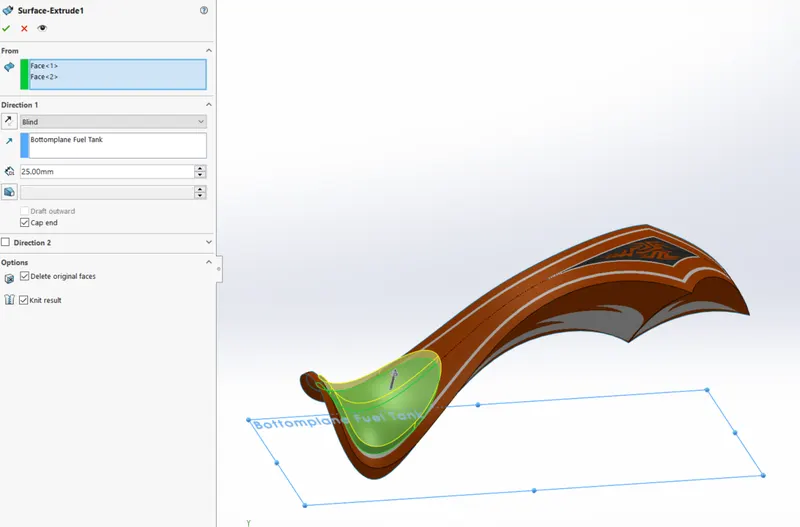
Surface Extrude
- Surface Loft- To create lofted surfaces between two or more profiles.
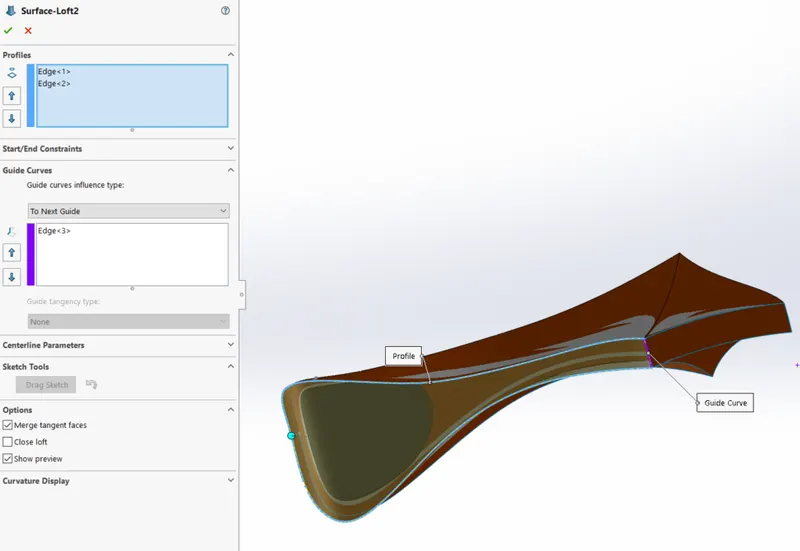
Surface Loft
- Fillets
- Cut Sweep- Cuts a solid model by sweeping a closed profile along with an open or closed path.
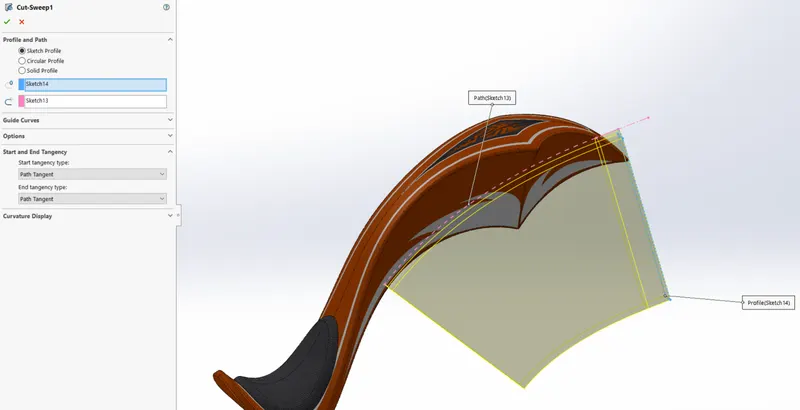
Cut Sweep
- Shell
Final Design of Gas Tank:
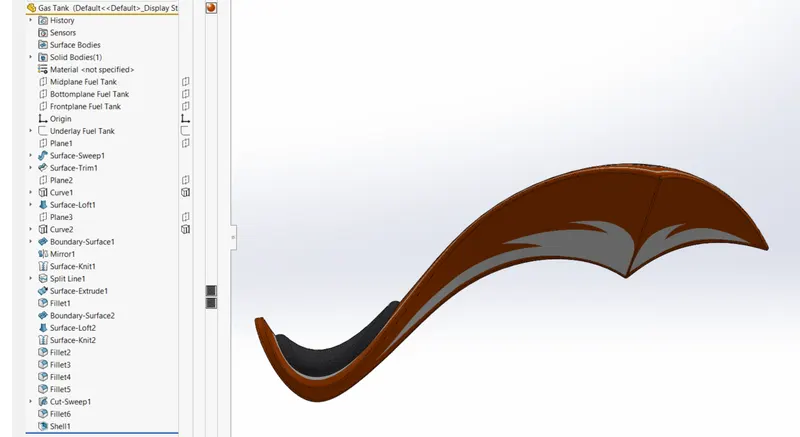
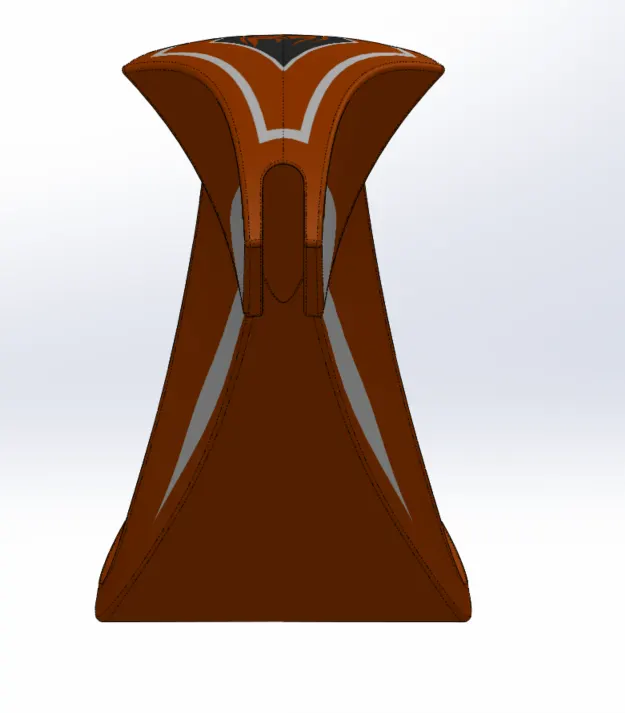
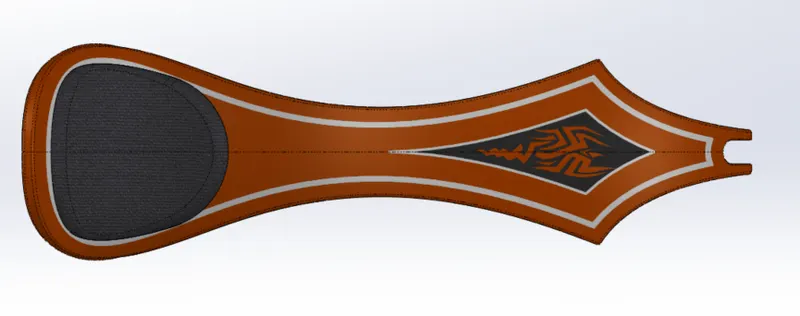
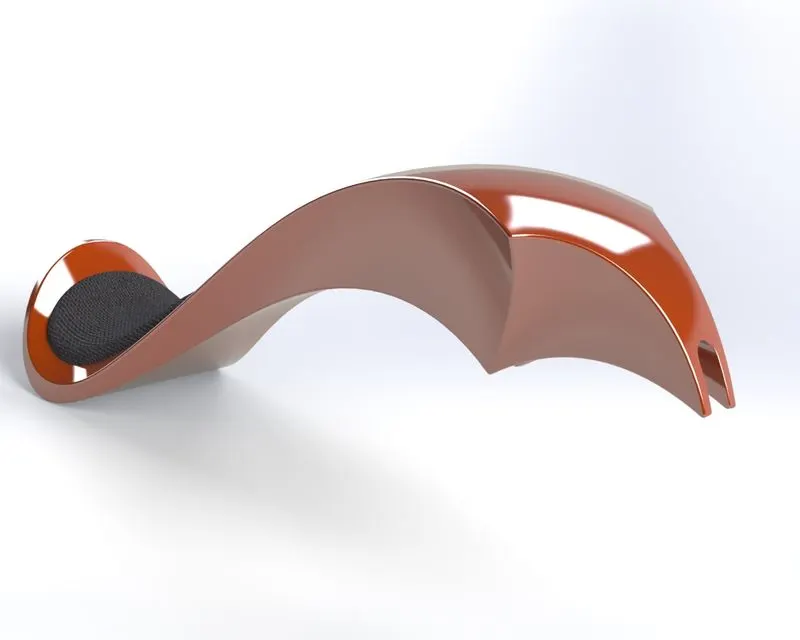
Front, Side, Top, and Rendered ISO View, Respectively
Engine with Exhaust Manifold: Following features were carried out to model it.
- Sketch
- Revolve
- Boss Extrude
- Extrude Cut
- Offset
- Dome
- Fillet
- Projected Curves
- Composite Curves- It is used to join two curves and convert them into one.
- Sweep
- Mirror
- Circular Pattern
- Split
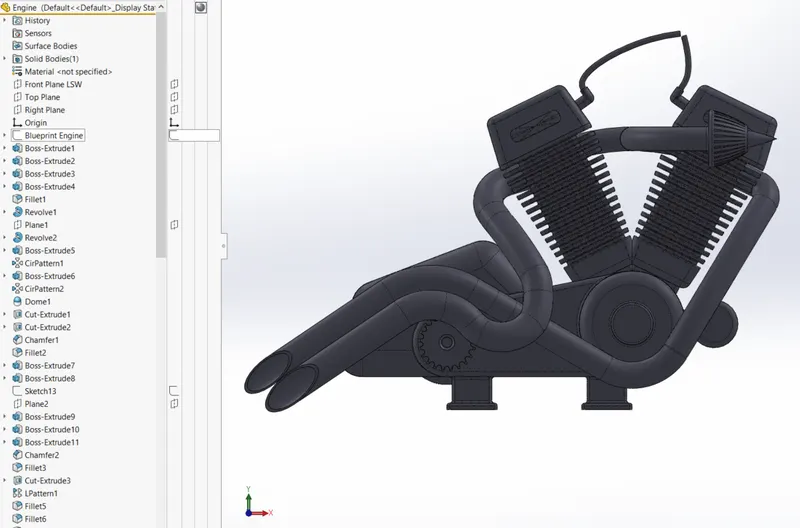
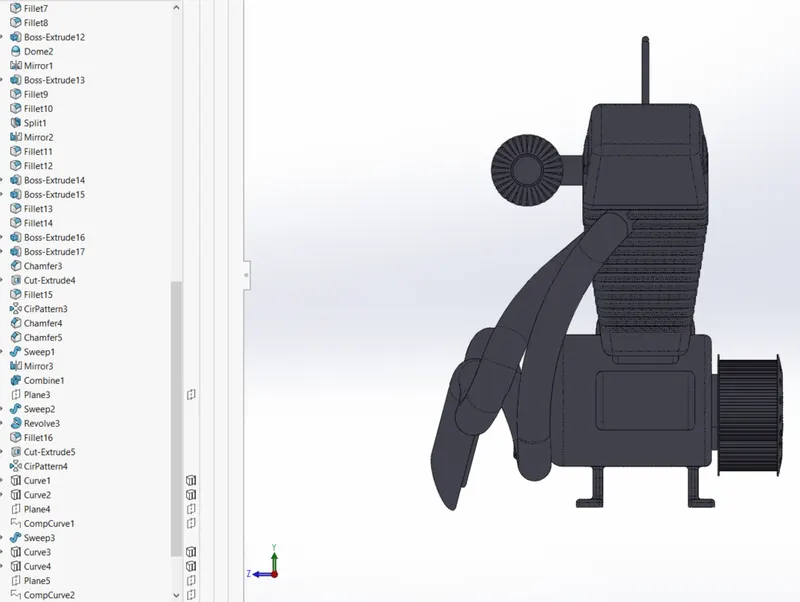
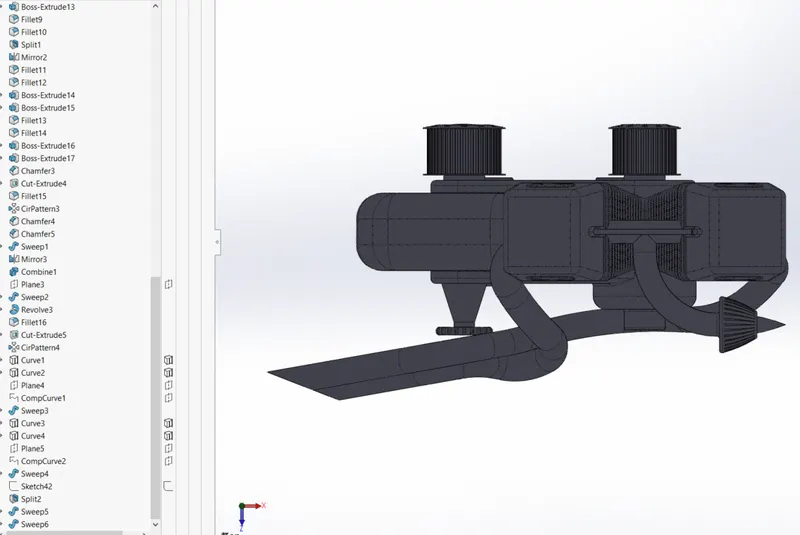
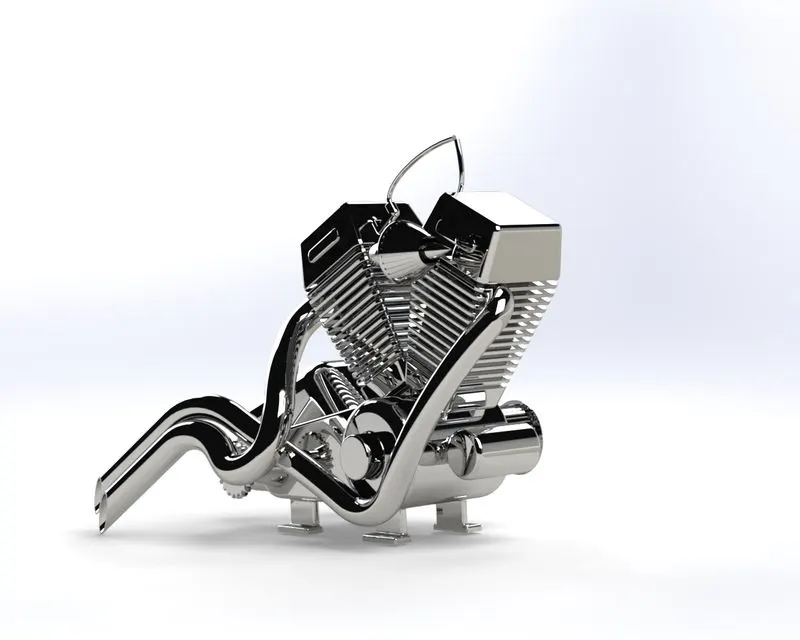
Front, Side, Top, and Rendered ISO View, Respectively
Final Assembly of American Chopper: The chassis is the first part where all parts are mates together for the final model. Below are the applied mates to make possible this assembly. To move components within the Degree of Freedom, Mates are used.
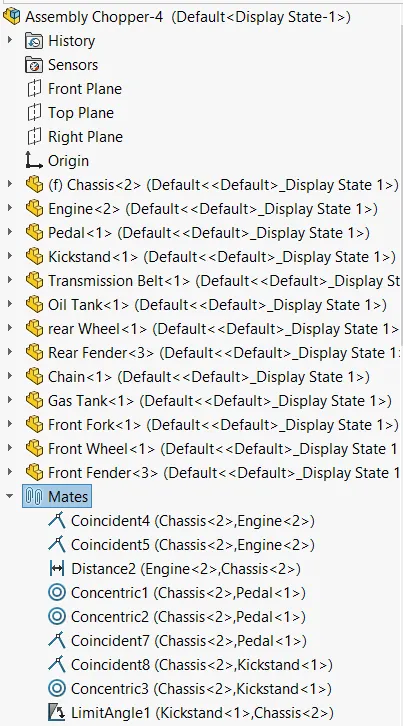
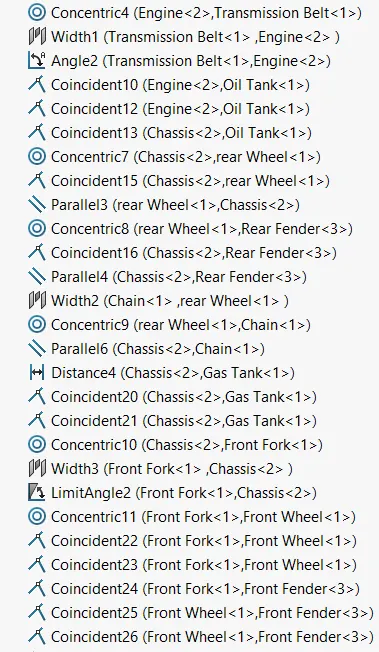
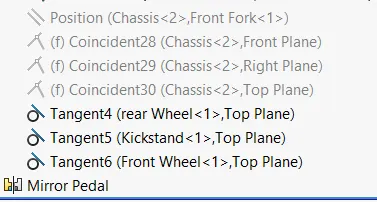
Mates Used
Final Assembly Model:
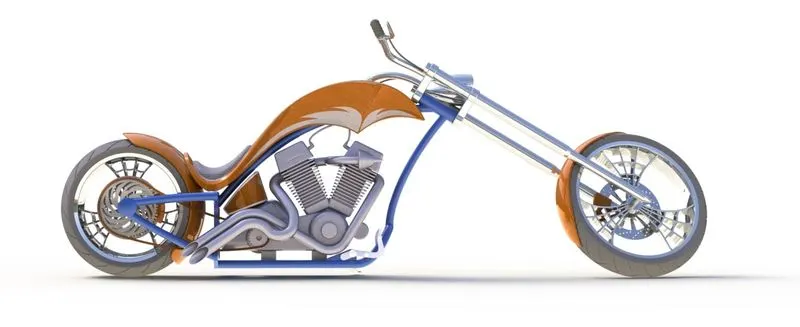
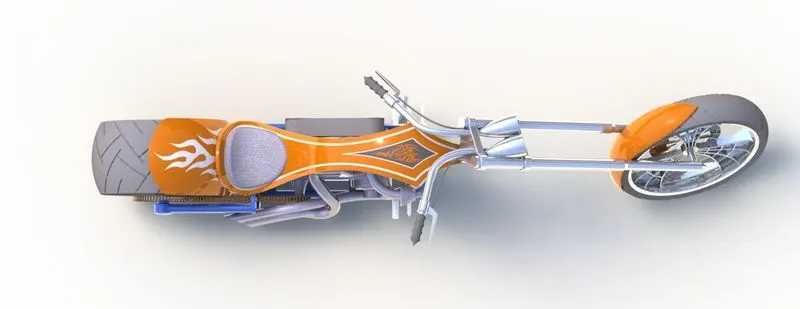
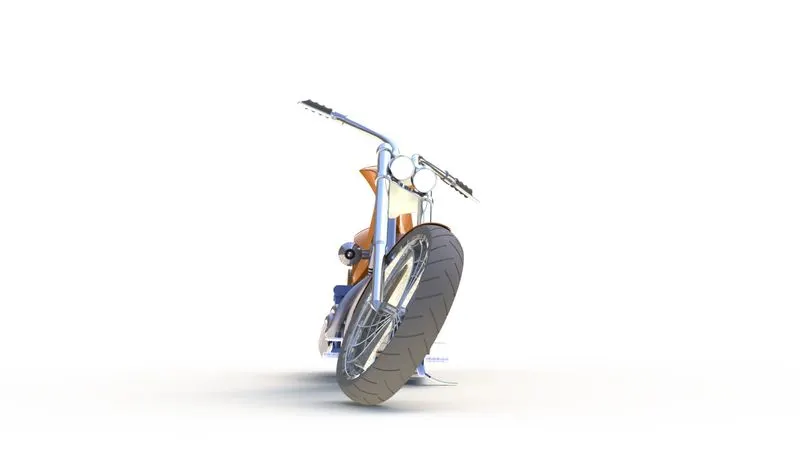
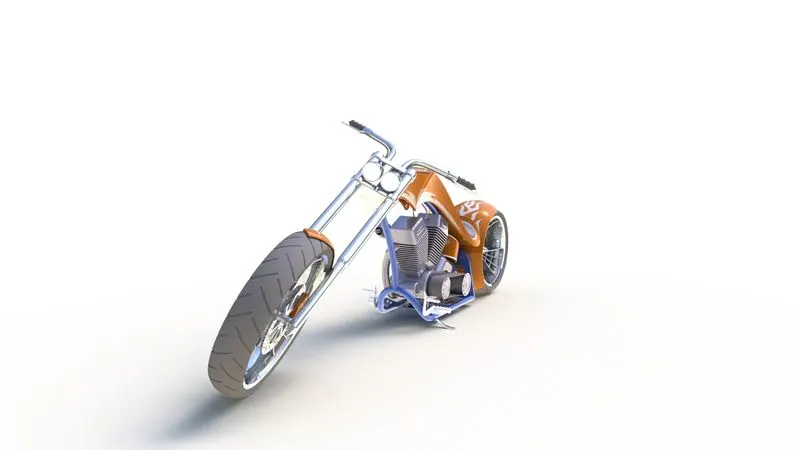
Front, Side, and Top View of Final Assembly (Rendered under Photoview 360)
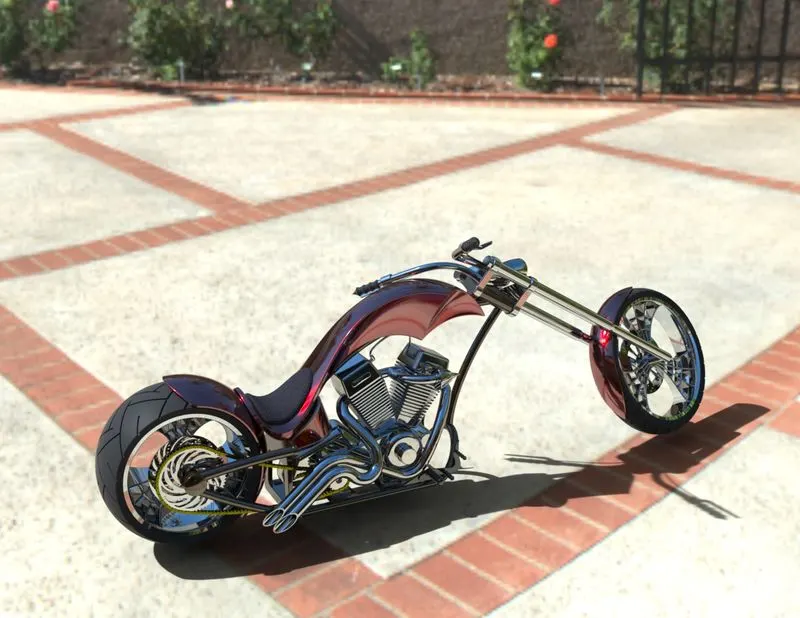
Final Rendering: Rendering is a design process used to create realistic images of the created model. Photoview 360 and SolidWorks Visualize are the best way to render any model created using SolidWorks. Photoview 360 is the inbuilt tool into Solidworks. While SolidWorks Visualize is a separate software that can render more realistic images. Below is the Final Render of American Chopper under SolidWorks Visualize.
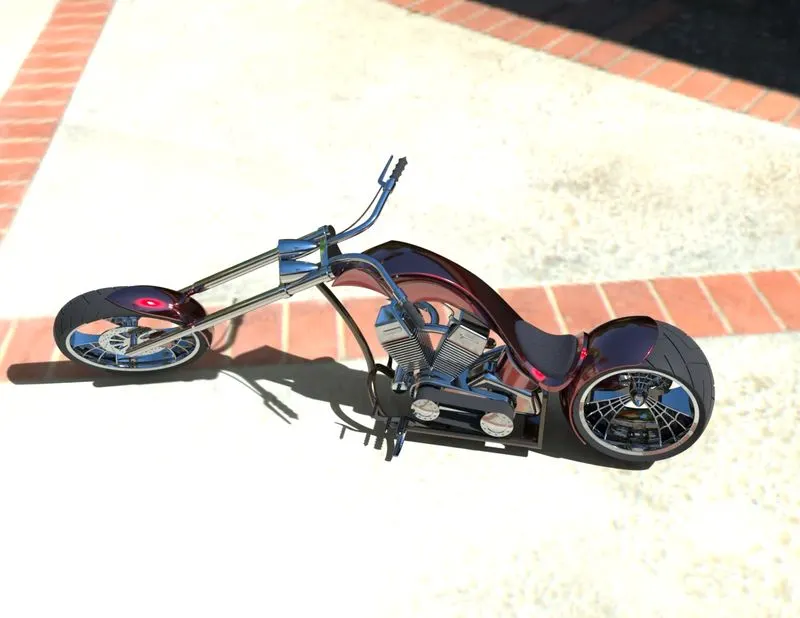
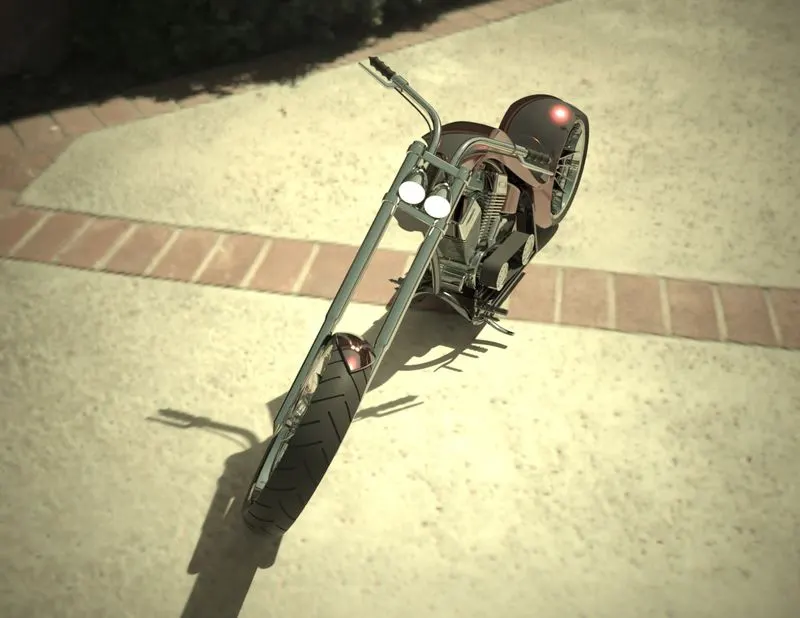
Conclusion: It is concluded that all components are designed successfully as well assembled with the best possible mates. It is successfully rendered under photoview 360 and SolidWorks Visualize.
Various parts, assembly and rendered files can be downloaded from below link.
https://drive.google.com/file/d/1PNgAc6IHR0UgSJfFg3BZBAdvTTMq7x4z/view?usp=sharing