Introduction to REVIT concepts
1.Aim :
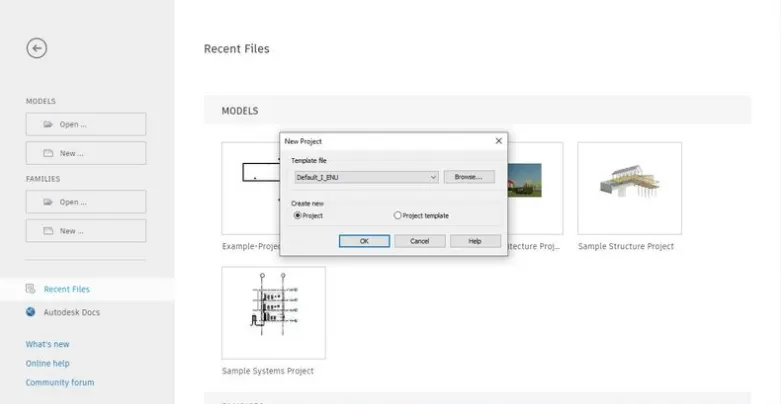
Creating new Project from particular template and Naming it.
Procedure :
- Open the Revit software
- From the left side menu from the models toolbar click new.
- Click on the template. Select the template depending on the type of project to be done (Architectural/Structural/Constuction)
- Click the New Project icon and click ok.
Result :
2. Aim :
Saving the project file in the Library. Handling the projects from file toolbar.
Procedure :
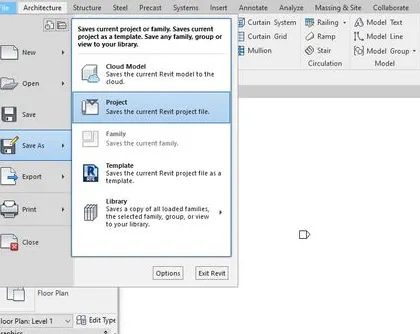
- Click the 'file' icon from the toolbar.
- From the dropdown list Click 'Save as' icon
- Next Click the Project (Group/family/Template/library) to save.
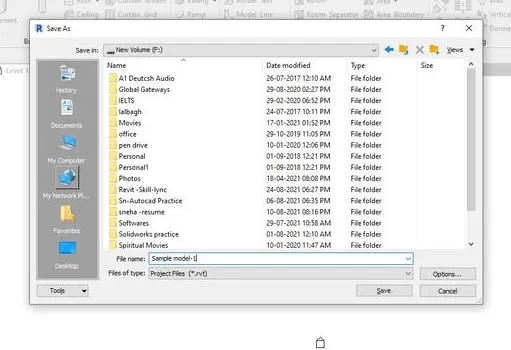
- Name your project and the save it in ur library.
- Now go to the file toolbar and close the Project. Now go to the File icon again
- Click on open icon and then click on project and now open the project saves earlier.
Result :
3. Aim :
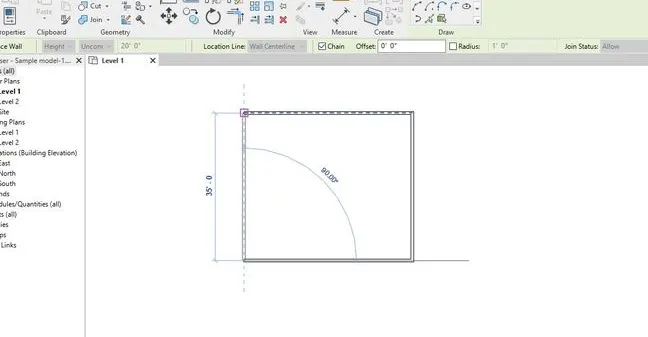
Creating rectangular wall of 40'-0" X35'-0"
Procedure :
- Click on the Architecture toolbar.
- From the architecture toolbar click 'wall' icon
- Here it shows different types of walls to draw i.e. (architectural wall / Structural wall).
- Now draw architectural wall of length 40'-0" and width 35'0"
Result :
4. Aim :
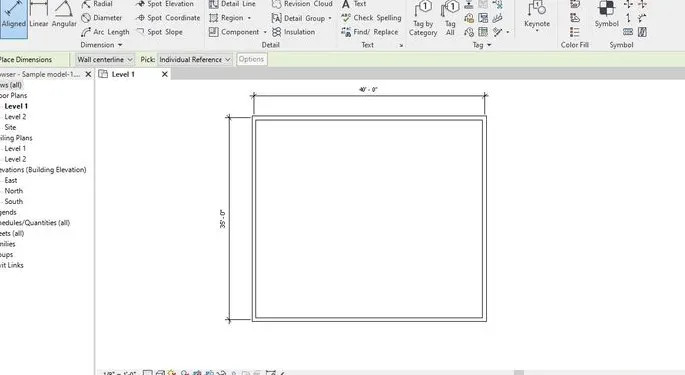
To add dimension to rectangular wall.
Procedure :
- Go to the Annotate toolbar
- From the dropdown list click 'Aligned dimesion' icon.
- Now add dimesions along the rectangular wall.
Result :
5. Aim :
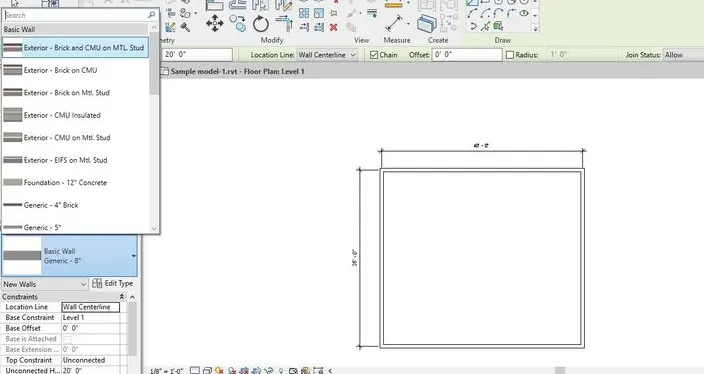
Using different types of walls using properties.
Procedure :
- Now click on any one side of the wall.
- Now go to the property browser and click on the arrow shown.
- From the drop down list, u can change type of the wall needs to be provided in your project
Result :
6. Aim :
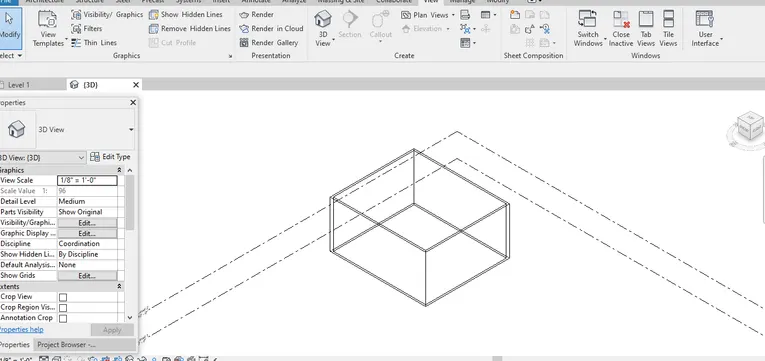
Creating 3D view and aving the file with proper name.
Procedure :
- Now go to the 'view' toolbar.
- Click on '3D view' icon.
- Now in the Project Browser and Properties toolbar 3D view will be added.
- Now go the 'file' toolbar and click on 'save as' icon.
- save the file with proper name like '3D view of sample Model-1.
- The 3D view of the structure will be appear as shown below.
Result :
7. Aim :
Using view cube navigation through 3d model
Procedure :
- Once the 3D view is created. Now click on the View cube situated on right top of the workspace.
- Now from the view cube u can see the project from alle side like Front/Rear/Right/Left/Top.
- Once all views are seen. we can swith back to isometric view by clicking the small home icon which was appeared on the top of the view cube.
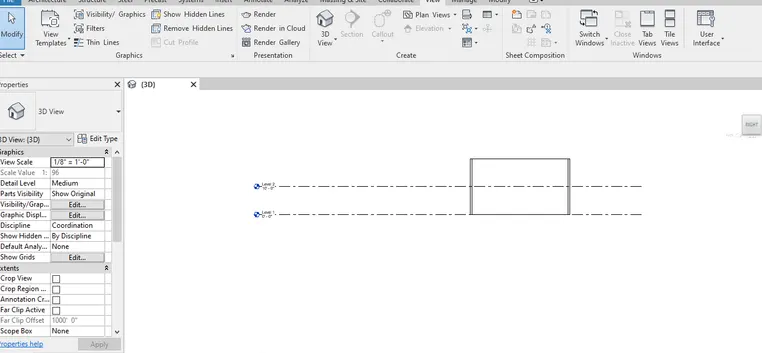
- An exampple of 'right view' is shown as below.
- likewise u can use full navigation wheel for navigation through ur model
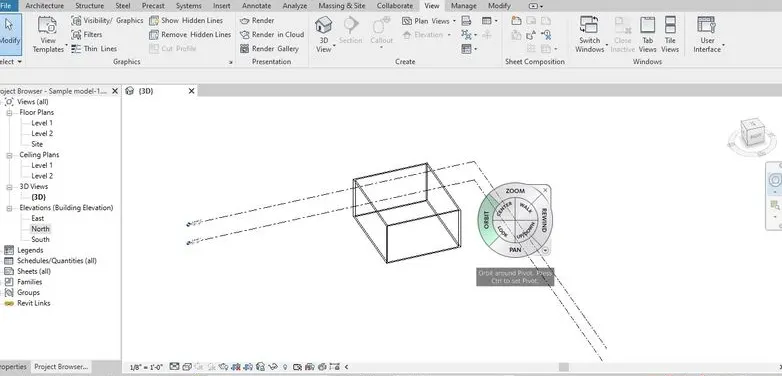
- From navigation wheel u can orbit the model along any pivot in space.
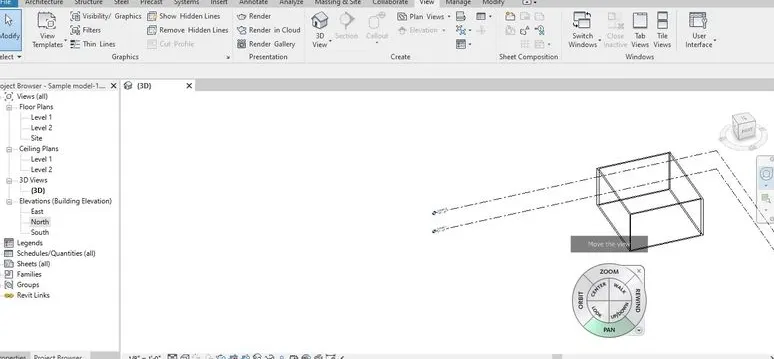
- From pan view u can move the model any place in particular direction.
Result :
Orbit through the model :
Pan through model :
8. Aim :
Using visual style wireframe switch themodel to shaded/realistic/hidden lines
Procedure :
- From the 'visual style wireframe' icon situated on the left bottom of the workspace.
- view the model in wireframe/shaded/hidden lines/realistic view.
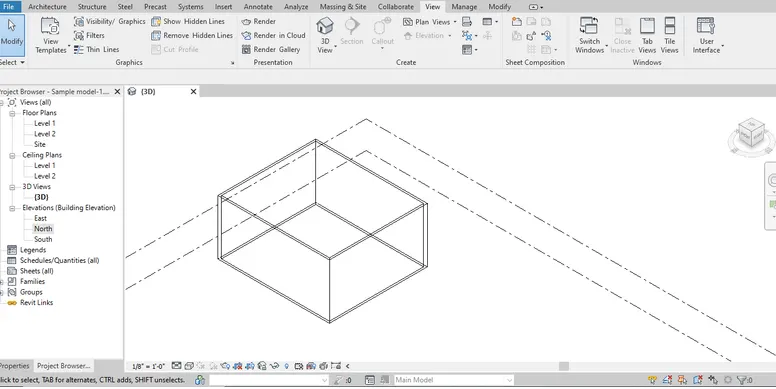
- wireframe view is the present view of the model.
- wireframe, shaded and realistic view will be as shown below:
Shaded view :
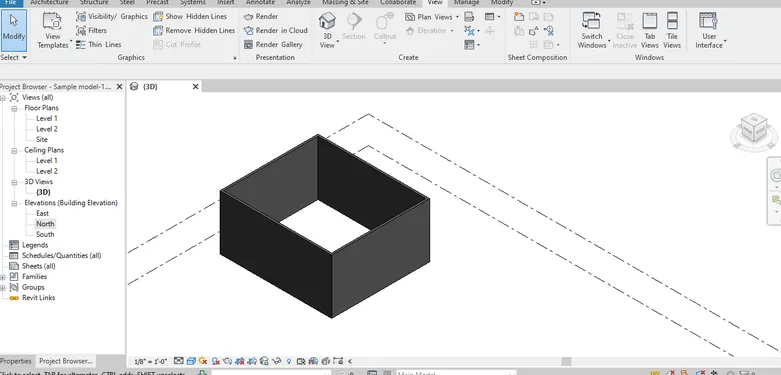
Realistic view :
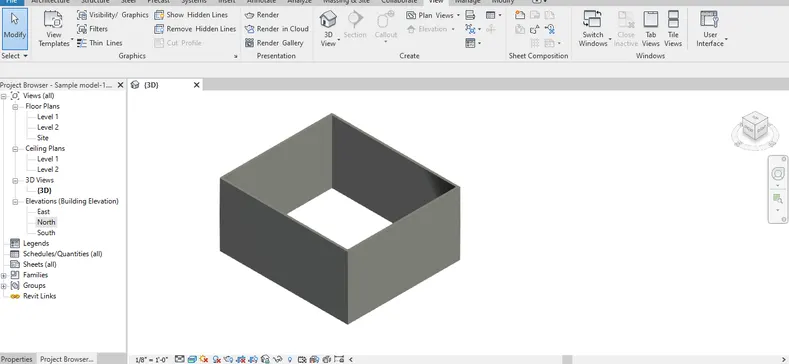
9. Aim :
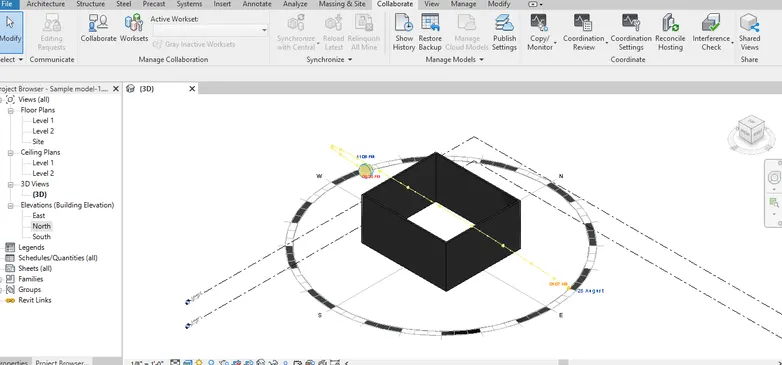
Sun Path icon usage to view shadings of the Layout created.
Procedure :
- At the left corner of the workspace an icon of 'Sun Path' has to be clicked.
- To view the movement of the Sun across the sky at the geographical location of the project.
- This allows us to place the Sun at any point between sunrise and sunset throughout the year.
10. Aim :
Using Manage toolbar to get information of the project
Procedure :
- Go to the Manage toolbar.
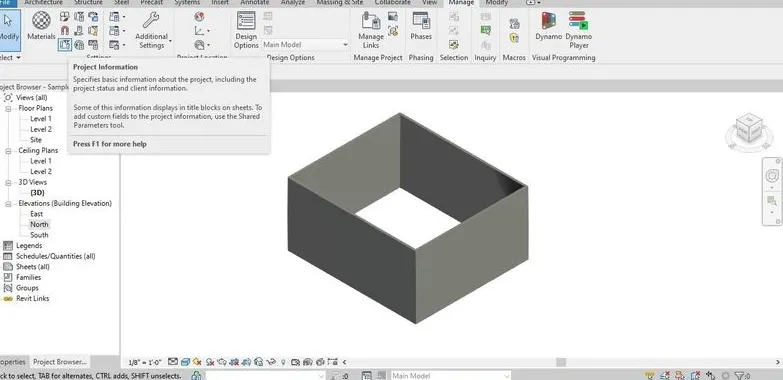
- From the dropdown list Click on the project information' icon.
- When we open the project in Revit. This icon gives access to the project information like Project name, issue date and Clients Information.
- These information will also be linked to the 3D model of the project.
Result :
11. Aim :
Uses of Analyze toolbar in Revit and its benefits.
Procedure :
- Analyze toolbar helps us to evaluate the building performance and to perform analysis on structural building.
- It helps to apply the boundary conditions, loads and also in loads combinations and to evaluate the performance of the structural building.
- It also helps to perform energy optimization and energy analysis of the structural building.
Result :
After performing Analysis it also generates reports for the whole structural building Energy simulation and Analysis.
12. Revit supports to link large category of file
- Revit supports to link the another Revit model to the current model with the same datum points.
- supports to link the models together the locations of individual building on the same location.
- And to link the models of different disciplines such as Architectural/ Structural/ Engineering.
- It links IFC file to the current project and takes its information for additional design works.
- If the IFC file is updated later, it will be automatically reflected in the Revit Model after reloading the link
- Cad Files can also be linked to the Current Revit Models.
- Enables to link existing Topography (created in Autodesk Civil 3D) to the current Revit Model.
- And DWF files can also be Linked to Revit Projects.
13. Collaborate tab in Revit :
- Collaborate Toolbar enables multiple members to work on the same model from different systems.
- It enables us to edit or sync a model connected by LAN or WAN.
- Enables to work different domains such as MEP Engineer on the same project with Structural Engineer simultaneously. By this the Efficiency and Accuracy in the Project will be enhanced.