Introduction to REVIT concepts
1) From the file menu, create a new project (Structural / Architectural / Construction template ) and name the project appropriately
Aim: To create a new project (Structural / Architectural / Construction template ) and name the project appropriately
Introduction: The given question is to create a new project with any of the templates like Structural/Architectural or Construction templates and name the project appropriately. In this case the project is named as Challenge 1 sample project and the project is created with Architectural template.
Steps:
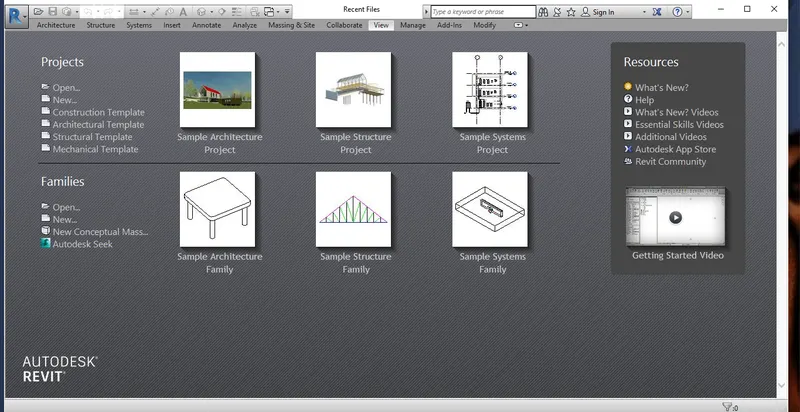
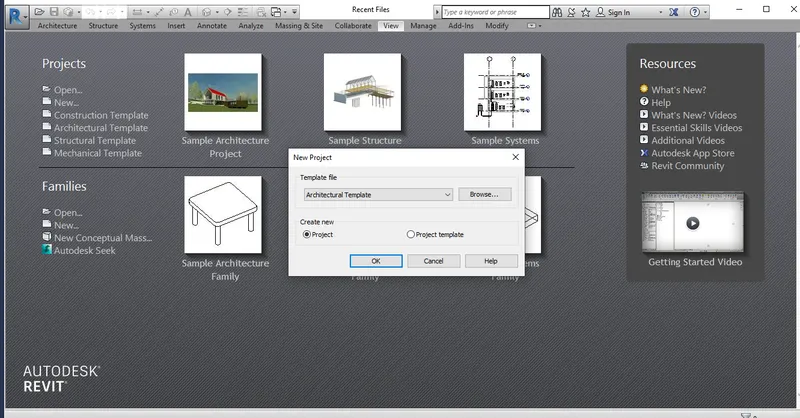
- Initially after opening the revit software the new option is selected
- Then any of the templates like Structural, Architectural and Construction can be selected from the options and hence a new project is created
Results: Thus a new project file with Architectural template is created sucessfully.
2) Save the new project file. Close and open using icons from file toolbar
Aim: To Save the new project file and to Close and open using icons from file toolbar
Introduction: The important part after creating a new project file is to save the project and to give it a proper title accordingly while saving. In this case the new project file is saved as Challenge 1 sample project and the project can be closed and opened from the file toolbar which is also exhibited in this.
Steps:
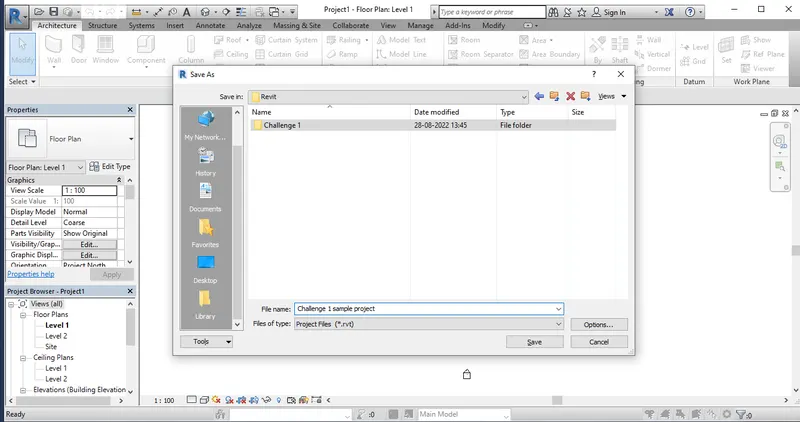
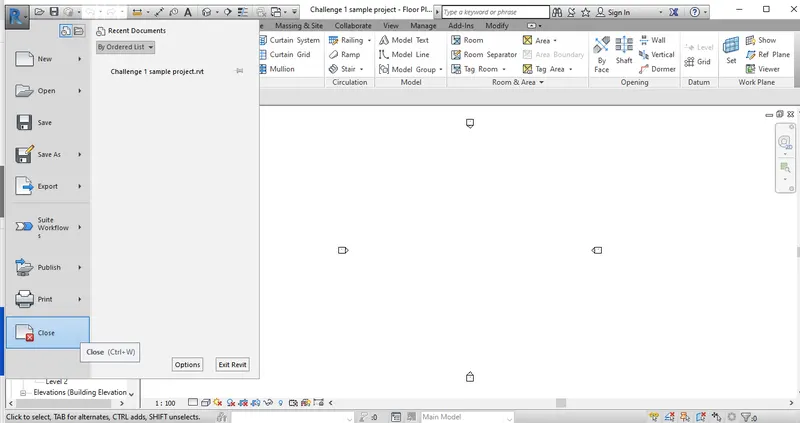
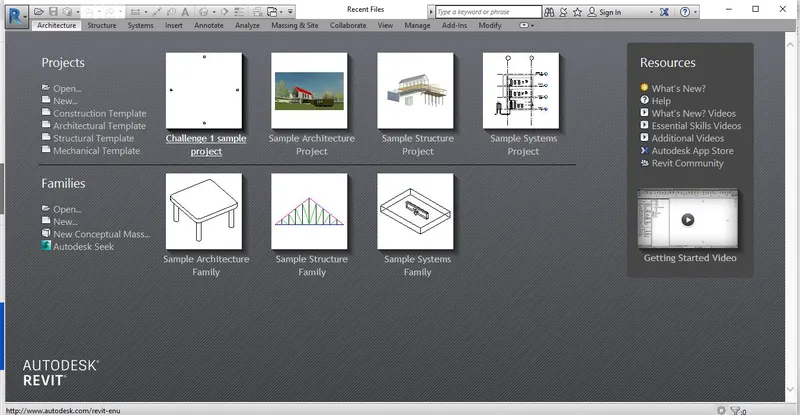
- The project file is saved using the file toolbar which is present at the top left of the revit
- In the file toolbar using the option save the project is saved and named as Challenge 1 sample project
- After saving the project using the same file toolbar using close option the current project is closed
- Then finally the project is reopened from the open option in the file toolbar
Results: Thus a new project is saved, closed and opened sucessfully using the file toolbar.
3) From the architecture/ structure toolbar familiarize with options to draw a wall. Create a rectangular layout of walls of about 40’-0” X 35’-0”
Aim: To create a rectangular layout of walls of about 40’-0” X 35’-0” from the architecture/ structure toolbar.
Introduction: The aim of the question is to create a wall of size 40' x 35' from the architecture/ structure toolbar. A wall is a basic element of architecture/ structure toolbar to be created for a building model and it can be created either with line, rectangular option. In this case the wall created is of Architecture template and using the line tool.
Steps:
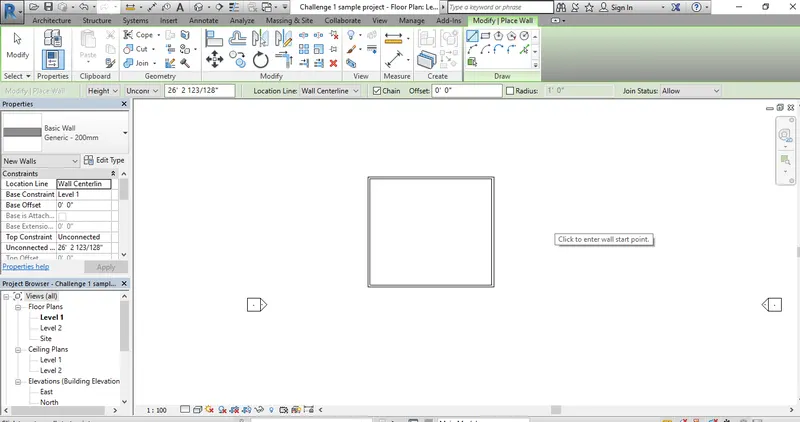
- After setting the model to architecture from the ribbon at the top wall option is selected
- Then using the line tool a line of 40' is drawn horizontally and continued in the vertical direction to a length of 35' and the lines are closed to make it a rectangle
- Thus a architectural wall is created using the line option of size 40' x 35'
- In this case among the wall types generic wall of 200mm size is selected
Results: Thus a architectural wall of 40' x 35' is created sucessfully.
4) From the Annotate toolbar use the aligned option to add dimensions to the layout
Aim: To add dimensions to the layout from the annotate toolbar.
Introduction: The aim of this question is to provide dimensions to the wall layout created. Dimensioning a layout is of vital importance in the modelling of a structure.
Steps:
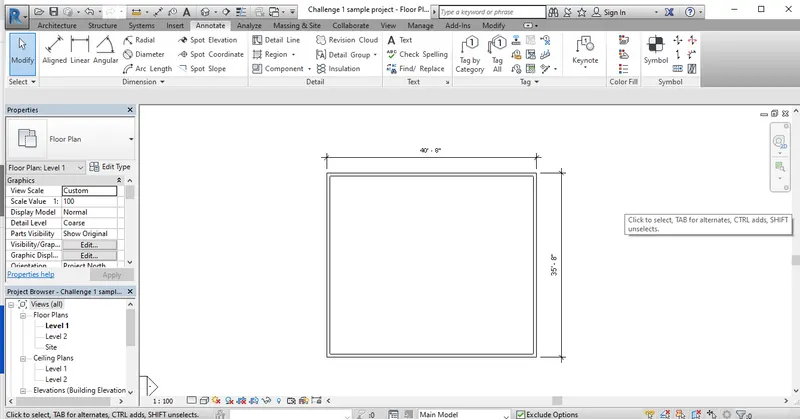
- Initially the annotate tool at the top of the ribbon is selected
- Then from the various options Linear command is selected for dimensiong and the walls are dimensioned both in x and y direction.
- The dimensioning of wall is done by selecting from end to end of the walls
Results: Thus dimensioning of wall layout is done sucessfully from annotate toolbar.
5) Use the properties browser to switch to different wall types
Aim: To switch to different wall types from the properties browser
Introduction: The aim of this question is to switch to different wall types using the properties browser. The properties browser is one of the important features of Revit where different types of elements are available for creating a model like wall,foundation,roof etc., The properties of the elements present in the properties browser are pre installed and can be subjected to editing after creating.
Steps:
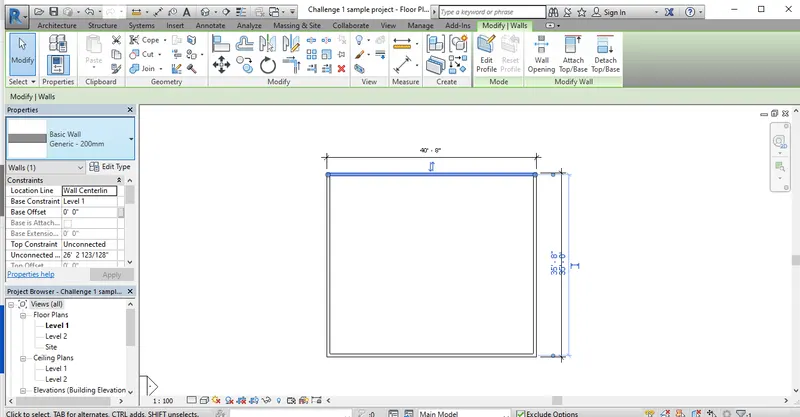
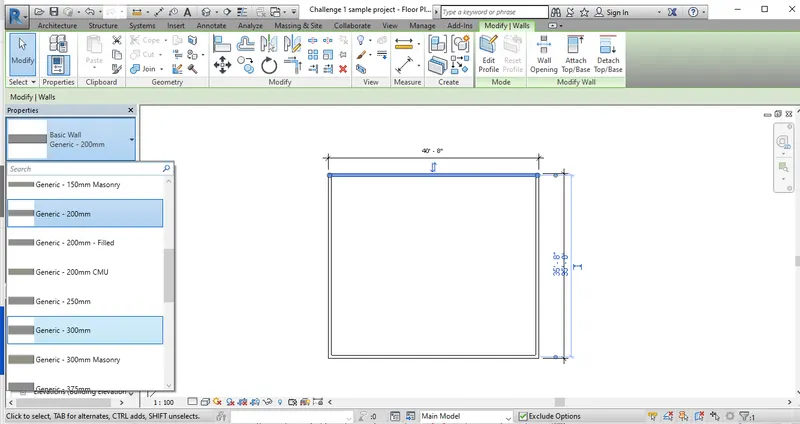
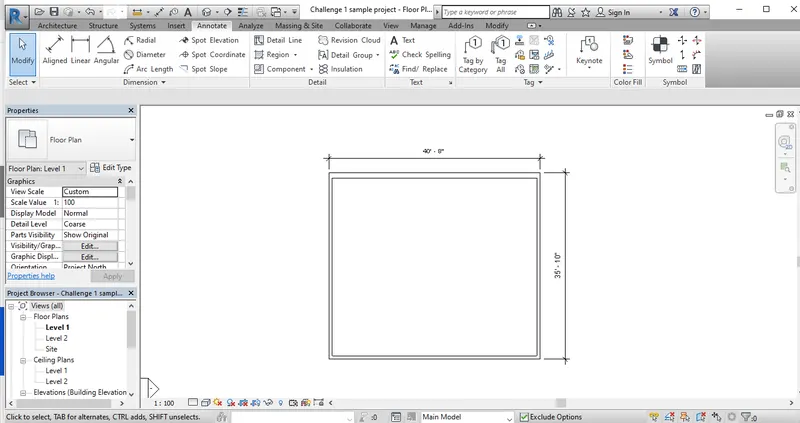
- For changing the wall type the first step is to select the particular wall which is meant for change
- Then from the properties browser at the left the different types of wall are popped if we select it and a type of can be selcted as per the requirement
- In this case the wall at the x direction is changed from generic 200mm wall to generic 300mm wall and thus the wall type is changed and displayed in the images above.
Results: Thus the wall is switched to different type from the properties browser successfully.
6) Create a 3D view from the view toolbar and save the view with the appropriate name
Aim: To create a 3D view from the view toolbar and save the view with the appropriate name
Introduction: As Revit is a 3d software providing different 3d views of the layout created is of vital importance. The different 3d views can be saved using the view cube at the right corner of the screen.
Steps:
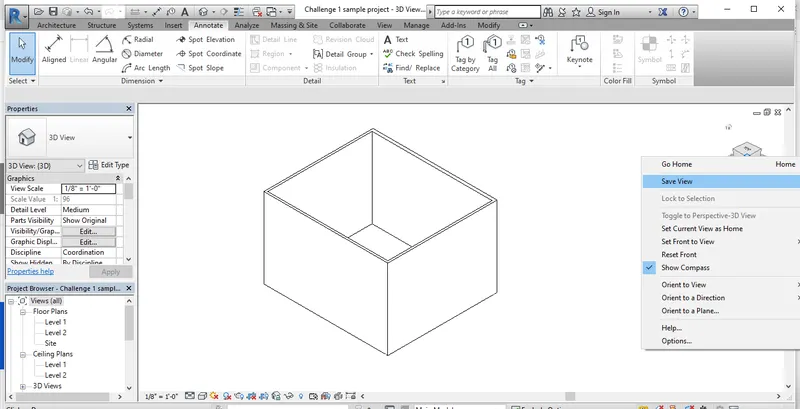
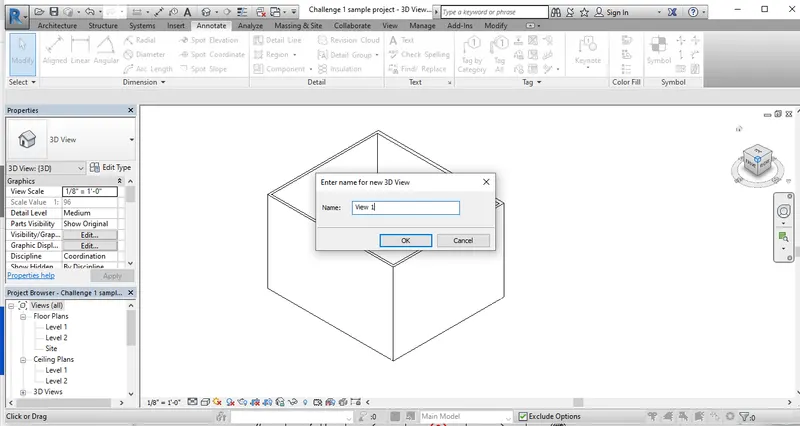
- Initially from the view toolbar at the top of the ribon is selected
- Then default 3d view is selected from the various options available
- Then using the view different 3d views can be viewed
- Then by right clicking at the view cube a dialog box appears and from that save view option can be selcted
- Then the view can be saved with the name as per the requirement.
Results: Thus 3D view of the wall is selected from the view toolbar and the view is saved sucessfully.
7) Navigate through the 3D model using the view cube. Orbit/pan through the model layout created
Aim: To navigate through the 3D model using the view cube
Introduction: The aim of this question is to navigate through the model layout created using the view cube. The view cube is used for viewing different views of the model created and save the views as per the requirement. Below the view cube navigation toolbar is present which is used for orbit/pan and walkthrough purposes in the model.
Steps:
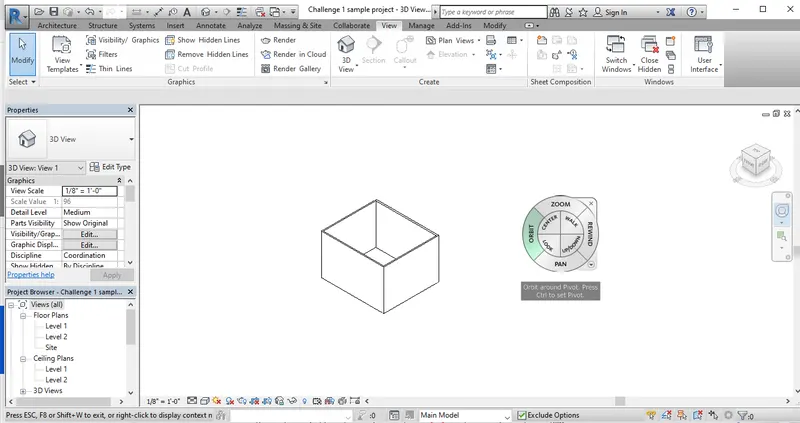
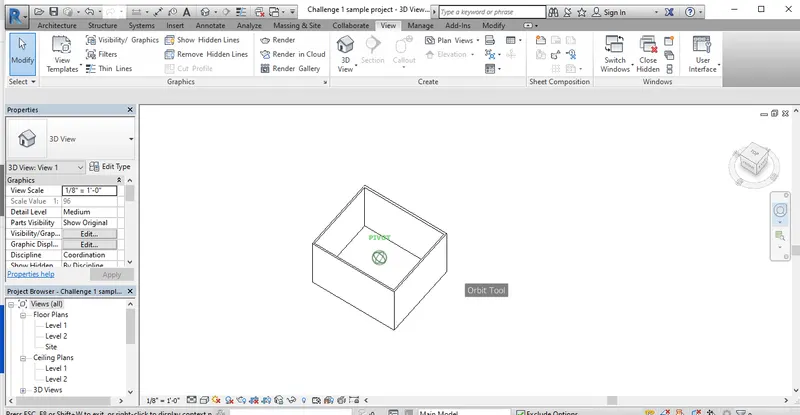
- Initially the navigation wheel tool is selected
- Then from the option orbit different views of the model are generated
- Then the required is saved and displayed in the image
Results: Thus navigate through the 3D model using the view cube is done sucessfully.
8) Use the visibility settings option below to switch model to shaded, realistic, hidden lines options
Aim: To use the visibility settings option below to switch model to shaded, realistic, hidden lines options
Introduction: The visibility settings provided is for the purpose of switching to different types of model view.The purpose of providing different views is for making the model more realistic like the real building in the software itself. In this case realistic view is provided.
Steps:
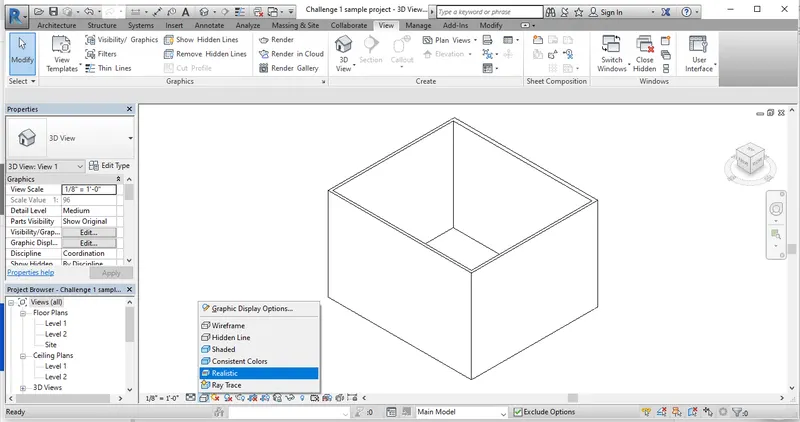
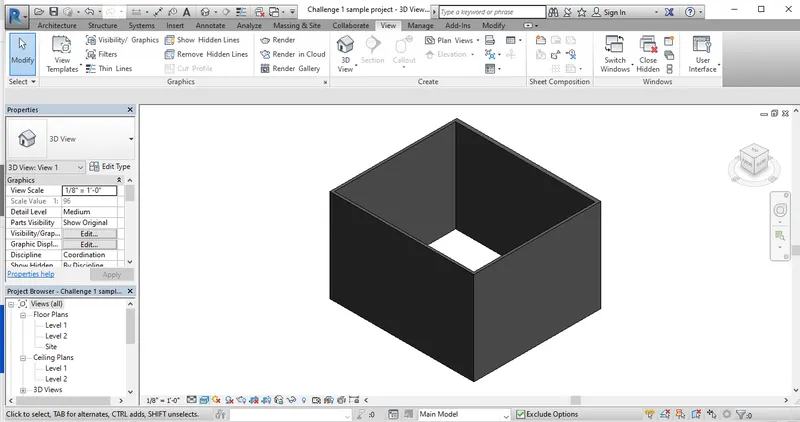
- Initially visibility settings tool is selected from the bottom toolbar
- Then from the options like conceptual,shaded etc., realistic option is selected
- Thus realistic view of the layout is created and provided in the image
Results: Thus using the visibility settings realistic view of the layout is created sucessfully.
9) Turn the sun path on and off to view shadings in the layout created
Aim: To turn the sun path on and off to view shadings in the layout created
Introduction: The aim of this question is to turn sun path on and off to view shadings. Sun path in Revit can be provided accurately as the loaction of the project can be set. It provides the sun path of the particular location accurately.
Steps:
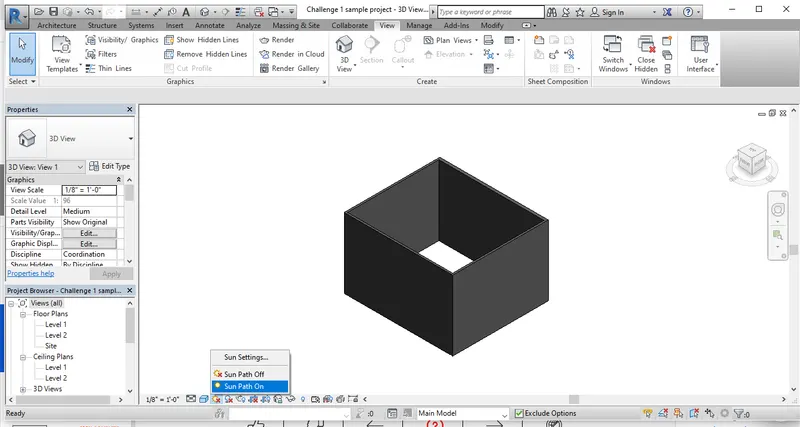
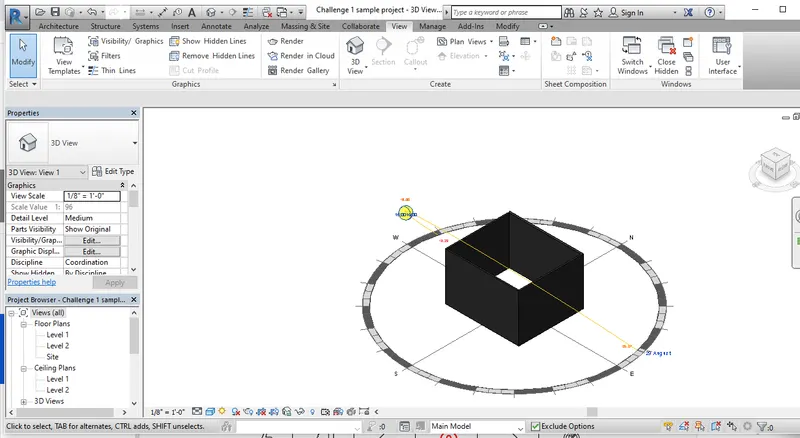
- Initially the sun path command is selected from the bottom toolbar
- Then in the sun settings a random loaction and time is set
- Then the sun path in option is selected to provide sun path in the layout created
Results: Thus the sun path is turned on and off as per the requirement in the layout sucessfully.
10) Use the Manage toolbar to enter project settings, project name, and project issue date (choose according to your convenience).
Aim: To enter project settings, project name, and project issue date as per the requirement using the manage toolbar.
Introduction: The process of providing project details such as name, date etc., is of vital importance in a project layout submission. The purpose of providing details is to lessen the gap between the layout and the field.
Steps:
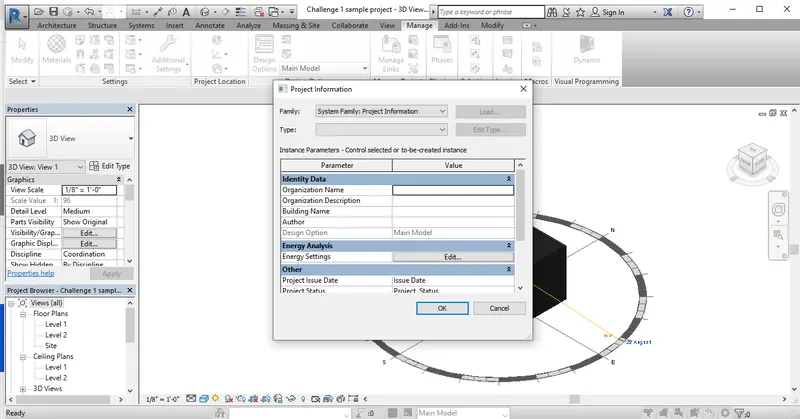
- Initially Manage command is selected which is provided at the top of the ribbon
- Then in the list of options select the project information command
- After selecting a list of information conatined dialog box appears
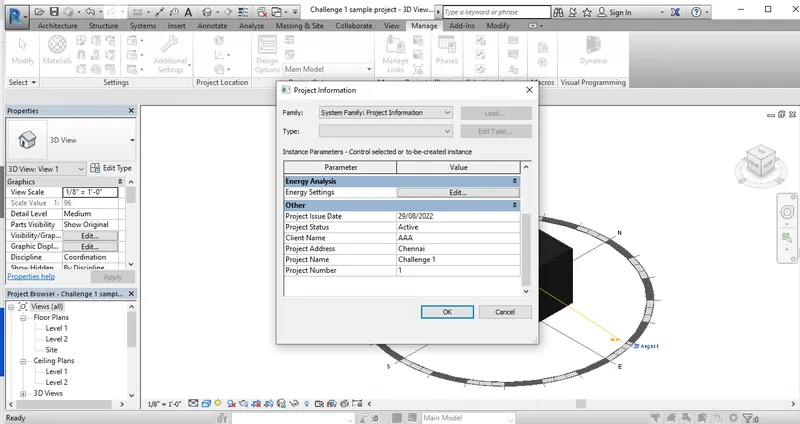
- In that no of informations are pre defined such as client name , project name, location etc.,
- The information are entered as per the convenience and are displayed in the image above
Results: Thus the project information is created sucessfully using the manage toolbar.
11) What is the Analyze toolbar used in Revit? How it is beneficial for design and modeling
Analyze toolbar in revit is used for structural analysis of the building model created. In this loads can be applied on the model with load cases and combination for add and edit purpose. It is beneficial for checking the stability of the model created.
12) What are the links that Revit supports to be linked to the model?
The links which are supported by the Revit software which can be linked to the current model are IFC file link, DWF file link, Point cloud file link and also a existing revit file link can also be linked to the current model.
13) Why do you need the Collaborate tab in Revit? How it supports modeling and its efficiency
Collabarate tab in Revit is used for file sharing the current working model in order to provide a common platform for different diciplines to work in the model. The file sharing can be done through the LAN and cloud sharing of the file is also available. Collabarate is of vital importance for creating multiple model of the project of various disciplines like Mechanical, Electrical with various elements and finally a central master model can be created with all the elements created by different disciplines and the most important advantage is that any changes in the central model automatically reflects in the other models which are collabarated.