Introduction to REVIT concepts
1)
Aim :-
From the file menu, create a new project (Structural / Architectural / Construction template ) and name the project appropriately.
Procedure :-
* Open the revit software.
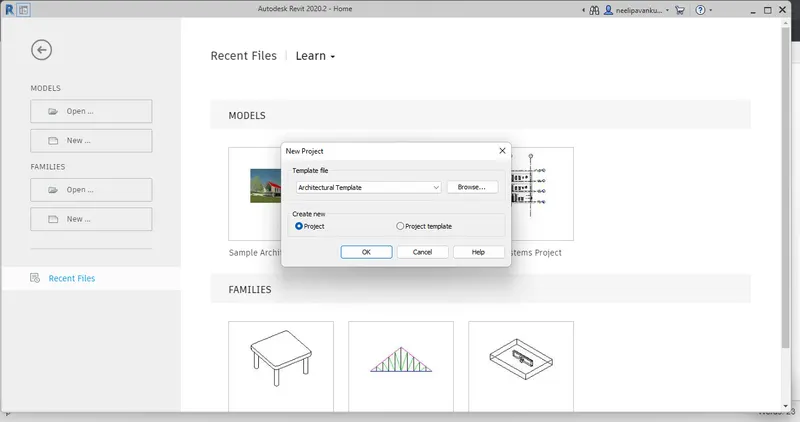
* Next we select model-new project.
* Template file select as Architectural template.
* Next click on OK.
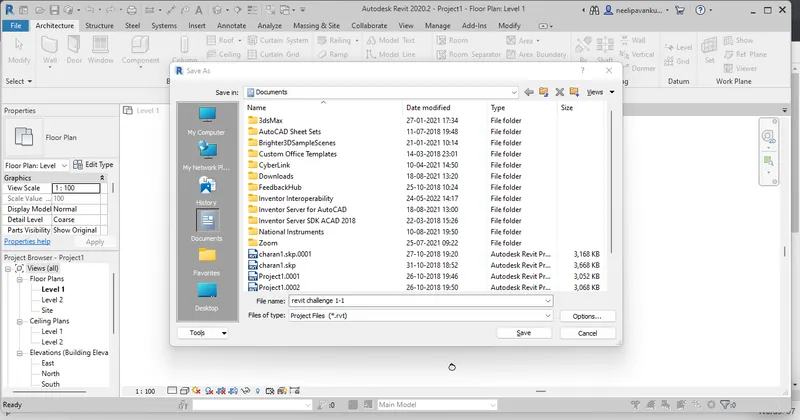
* In top left corner click on file menu it showing save or shortcut key as control+s.
* We click on save,type the project name click the save option.
Result :-
Complete From the file menu, create a new project (Structural / Architectural / Construction template ) and name the project appropriately.
2)
Aim :-
Save the new project file. Close and open using icons from file toolbar.
Procedure :-
* Open the revit software.
* Next we select model-new project.
* Template file select as Architectural template.
* Next click on OK.
* In top left corner click on file menu it showing save or shortcut key as control+s.
* We click on save,type the project name click the save option.
* Once again click on file menu it showing save or shortcut key as control+s.
* Next click on flie it shows close option.
* Click on close option the file will be close.
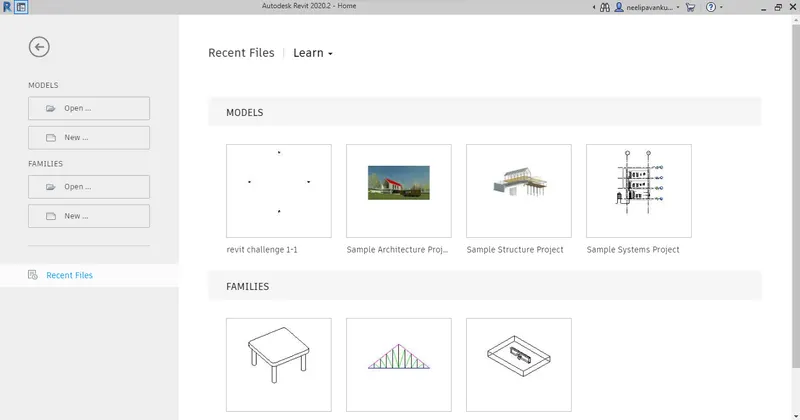
* In the revit decktop shows recent close files.
* Click on recent close file(file name - revit challenge 1-1).
Result :-
Complete the save the new project file. Close and open using icons from file toolbar.
3)
Aim :-
From the architecture/ structure toolbar familiarize with options to draw a wall. Create a rectangular layout of walls of about 40’-0” X 35’-0”.
Procedure :-
* Open the revit software.
* Next we select model-new project.
* Template file select as Architectural template.
* Next click on OK.
* In top left corner click on file menu it showing save or shortcut key as control+s.
* We click on save,type the project name click the save option.
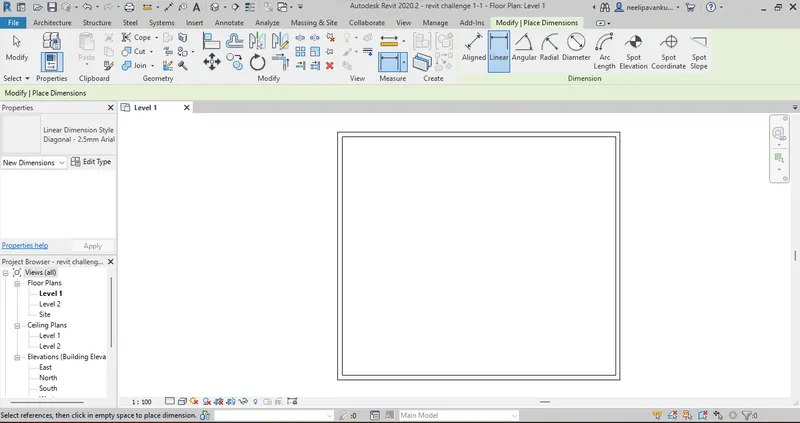
* Next we can create the rectangular layout of wall option under the achitecture tab.
* We can create the wall 40'x35'.
* Unit set as feet.
Result :-
Complete From the architecture/ structure toolbar familiarize with options to draw a wall. Create a rectangular layout of walls of about 40’-0” X 35’-0”.
4)
Aim :-
From the Annotate toolbar use the aligned option to add dimensions to the layout.
Procedure :-
* Open the revit software.
* Next we select model-new project.
* Template file select as Architectural template.
* Next click on OK.
* In top left corner click on file menu it showing save or shortcut key as control+s.
* We click on save,type the project name click the save option.
* Next we can create the rectangular layout of wall option under the achitecture tab.
* We can create the wall 40'x35'.
* Unit set as feet.
* This rectangular layout we need to add the dimension by annotate tab.
* In annotate tab it shows three options
* I'm choose linear option to add the dimension.
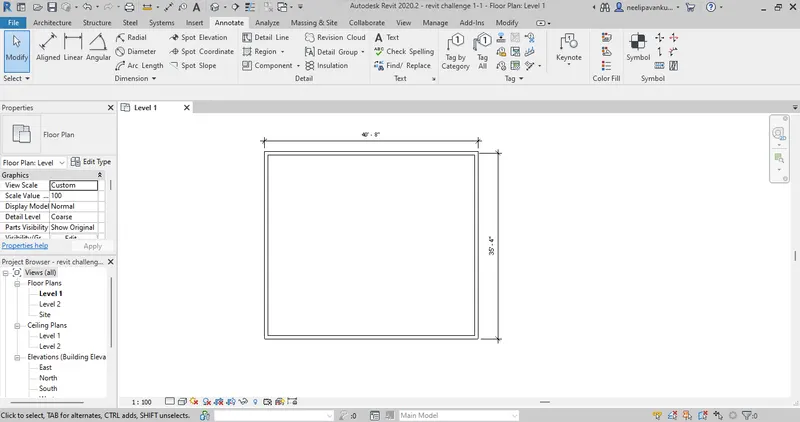
Result :-
Complete From the Annotate toolbar use the aligned option to add dimensions to the layout.
5)
Aim :-
Use the properties browser to switch to different wall types.
Procedure :-
* Open the revit software.
* Next we select model-new project.
* Template file select as Architectural template.
* Next click on OK.
* In top left corner click on file menu it showing save or shortcut key as control+s.
* We click on save,type the project name click the save option.
* Next we can create the rectangular layout of wall option under the achitecture tab.
* We can create the wall 40'x35'.
* Unit set as feet.
* We can use the properties browser to switch to different wall types.
* Property browser shortcut key as PP or right click browser to project browser.
' * First we can click one wall it shows the type of wall and thickness of wall.
* The type of wall and thickness of wall changes to another type of wall and thickness of wall.
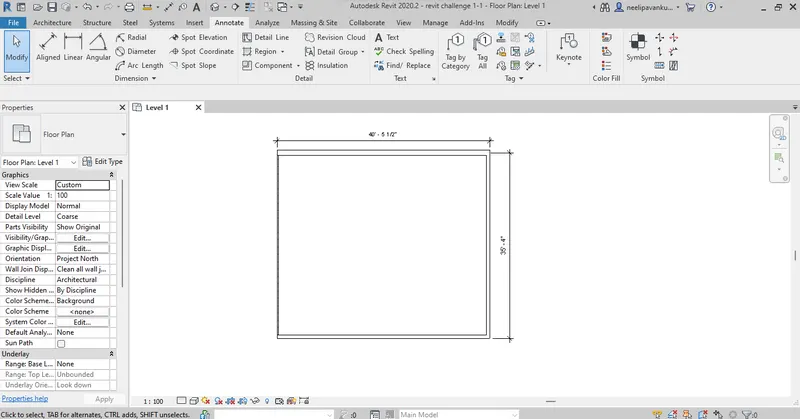
Result :-
Complete to use the properties browser to switch to different wall types.
6)
Aim :-
Create a 3D view from the view toolbar and save the view with the appropriate name.
Procedure :-
* Open the revit software.
* Next we select model-new project.
* Template file select as Architectural template.
* Next click on OK.
* In top left corner click on file menu it showing save or shortcut key as control+s.
* We click on save,type the project name click the save option.
* Next we can create the rectangular layout of wall option under the achitecture tab.
* We can create the wall 40'x35'.
* Unit set as feet.
* In the top showing default 3D view.
* Click on default 3D view it directly convert 3D view.
* Change of view by using view cube.
* In the view cube right click it shows the option save the view.
* Click on save the view and enter the any name.
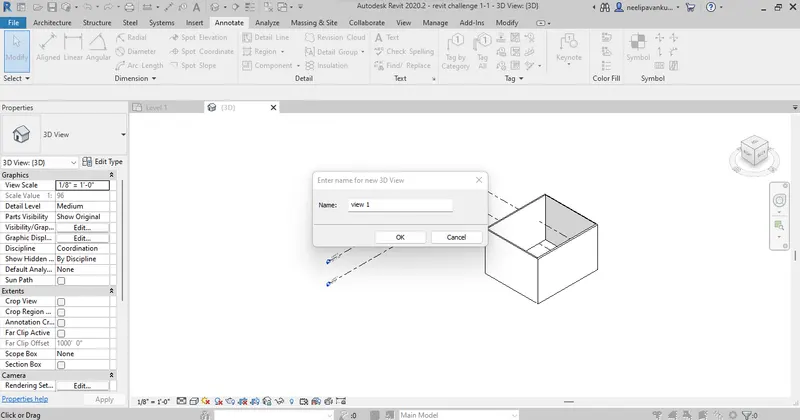
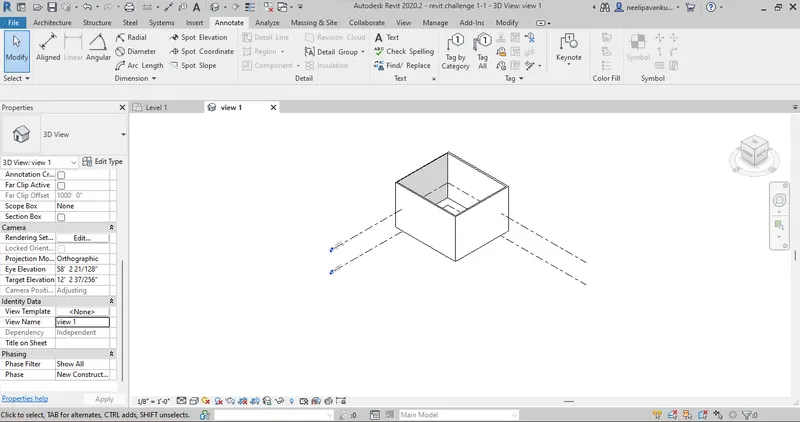
Result :-
Complete create a 3D view from the view toolbar and save the view with the appropriate name.
7)
Aim :-
Navigate through the 3D model using the view cube. Orbit/pan through the model layout created.
Procedure :-
* Open the revit software.
* Next we select model-new project.
* Template file select as Architectural template.
* Next click on OK.
* In top left corner click on file menu it showing save or shortcut key as control+s.
* We click on save,type the project name click the save option.
* Next we can create the rectangular layout of wall option under the achitecture tab.
* We can create the wall 40'x35'.
* Unit set as feet.
* In the top showing default 3D view.
* Click on default 3D view it directly convert 3D view.
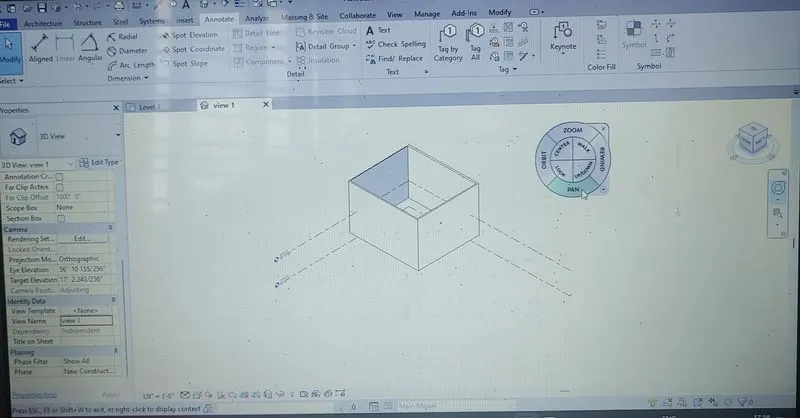
* In the view tab,click on user interface activate navigate tool.
* In the middle right side shows navigate tool.
* Click on navigate tool.
* Use orbit option rotate 3D view.
* Use pan option move the view.
Result :-
Complete navigate through the 3D model using the view cube. Orbit/pan through the model layout created.
8)
Aim :-
Use the visibility settings option below to switch model to shaded, realistic, hidden lines options.
Procedure :-
* Open the revit software.
* Next we select model-new project.
* Template file select as Architectural template.
* Next click on OK.
* In top left corner click on file menu it showing save or shortcut key as control+s.
* We click on save,type the project name click the save option.
* Next we can create the rectangular layout of wall option under the achitecture tab.
* We can create the wall 40'x35'.
* Unit set as feet.
* In the top showing default 3D view.
* Click on default 3D view it directly convert 3D view.
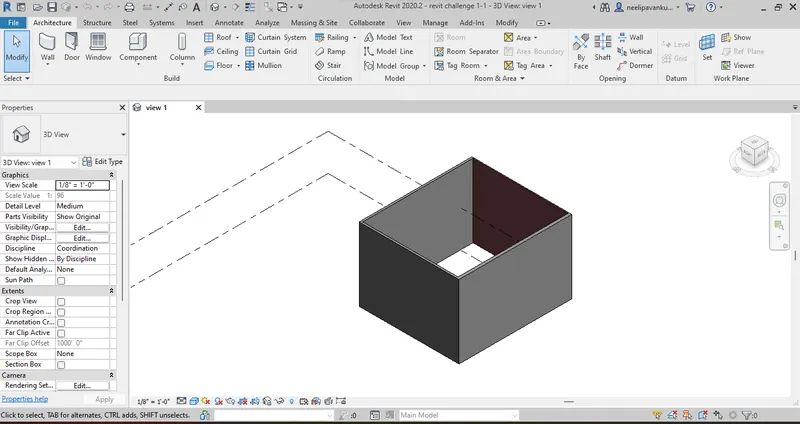
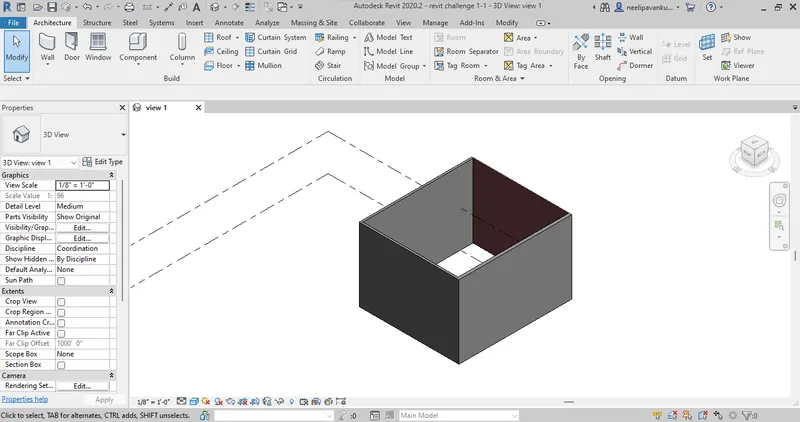
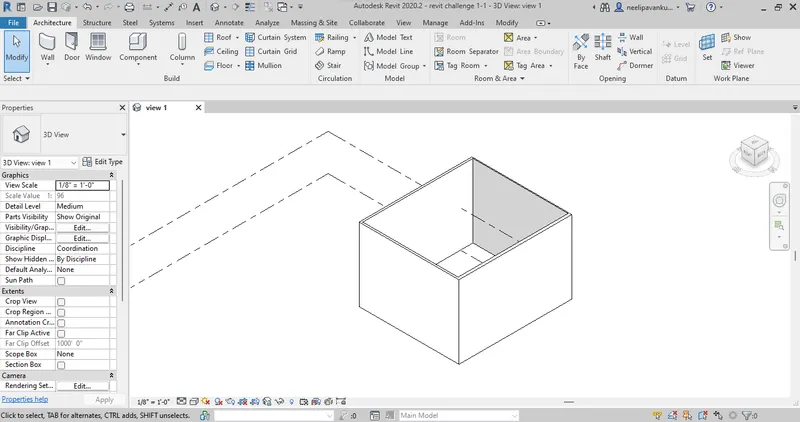
* In the below icons symbol(visible style) click on ṭḥē visible style it shows different options.
* We can select shaded,realistic,hidden lines it shows below images.
Result :-
Complete use the visibility settings option below to switch model to shaded, realistic, hidden lines options.
9)
Aim :-
Turn the sun path on and off to view shadings in the layout created.
Procedure :-
* Open the revit software.
* Next we select model-new project.
* Template file select as Architectural template.
* Next click on OK.
* In top left corner click on file menu it showing save or shortcut key as control+s.
* We click on save,type the project name click the save option.
* Next we can create the rectangular layout of wall option under the achitecture tab.
* We can create the wall 40'x35'.
* Unit set as feet.
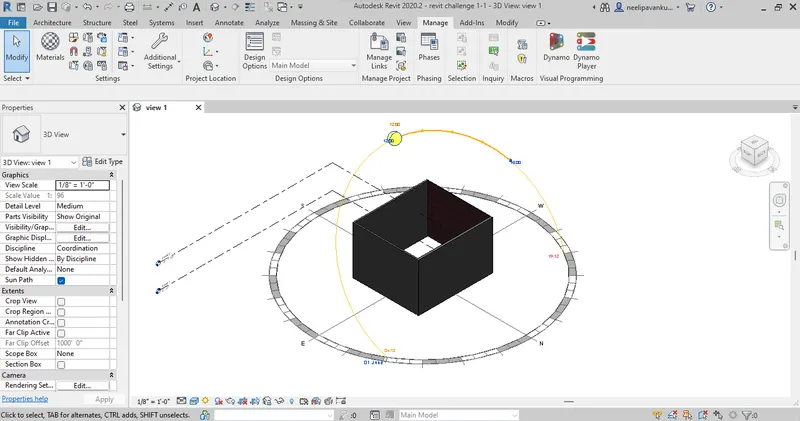
* In the below sun path tap is there.
* Sun path is on and also sun path setting change.
Result :-
Complete turn the sun path on and off to view shadings in the layout created.
10)
Aim :-
Use the Manage toolbar to enter project settings, project name, and project issue date (choose according to your convenience).
Procedure :-
* Open the revit software.
* Next we select model-new project.
* Template file select as Architectural template.
* Next click on OK.
* In top left corner click on file menu it showing save or shortcut key as control+s.
* We click on save,type the project name click the save option.
* Next we can create the rectangular layout of wall option under the achitecture tab.
* We can create the wall 40'x35'.
* Unit set as feet.
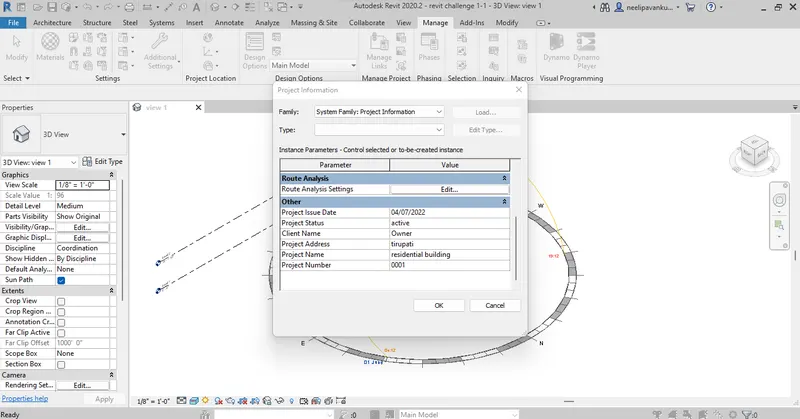
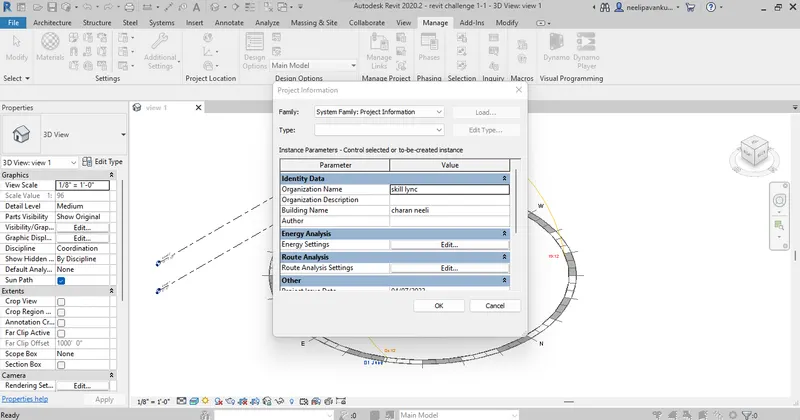
* In the above separate manage tab is there.
* In this manage tab project information tool is there clikck on this insert the details.
Result :-
Complete use the Manage toolbar to enter project settings, project name, and project issue date (choose according to your convenience).
11)
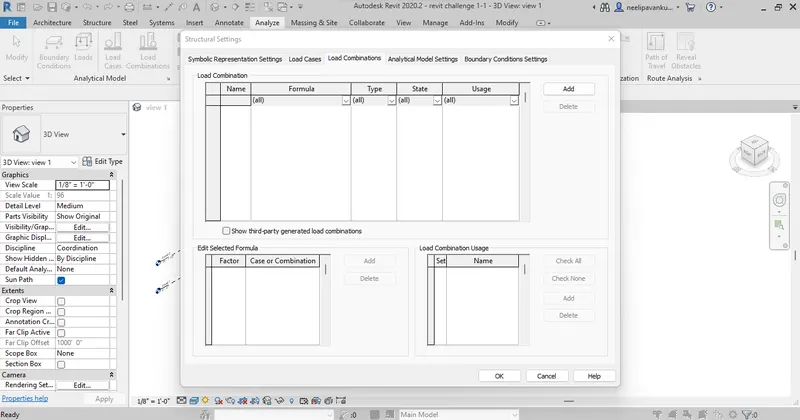
The Analyze toolbar used in Revit
Analyse tool bar is available in the revit software. Where it delicate tab called analyze. In these analyze tab can be used to perform structural analysis of building it has various options to anable that analysis process.
1) Boundary conditions :-
It anables points, lines and area boundary conditions in an analytical model.
2) Loads :-
Load optin apply point,line and area load to a model each load geometry family containing intenses and type parameters apply load for sketching, host componets.
3) Load cases :-
It can acts edits load cases for analytical model.
4) Load combination :-
It can acts edits combination the analytical model setting a load combination includes defining names formula,type,state and usage.
12)
The links that Revit supports to be linked to the model

13)
The Collaborate tab in Revit
Collaborate tab in the revit it anables work sharing through work sharing use on same local area net work together smae revit model so that is how need to use collaborate tab in Revit.
Actually collaborate tab helps to
1) Work together
2) Cloud sharing
3) Work sharing
4) Central model
For work together multiple revit models can be linked together allowing to with in content when there is a need for collaboration to occur among users who9se are not in the same grographic locations. By using revit software it can use multiple people work together single project with out any disturbance then work sharing. By anable work sharing involves in a master project known as central model from existing model. Central model stores the current ownership information for all works and elements project and act as the distribution point as changes model so all the users should have the own central model they can edit locally in these work space they can also sync with central to change the same model other users can see the work. Revit is really useful for MEP engineers also need to collaborate with other disciplinates and also supports the modelling. So collaboration to all the parties updated with the current project with one work sharing by revit could services.so it supports modeling and its efficiency.