Introduction to REVIT concepts
1)
aim: The main aim of this question is to create the new file and save the file using file menu
introduction: In this, i am gonna use the file menu bar to save the file
procedure:
- starting with the revit 2023 by double click on it
- creating new file with new project as architectural template
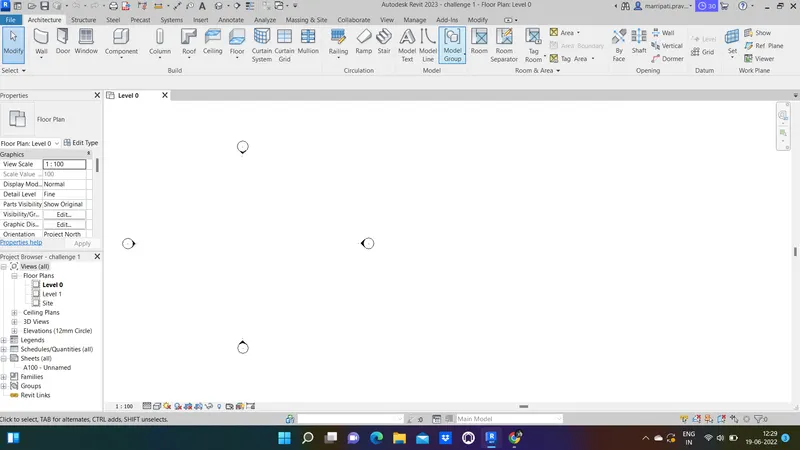
- by clicking the file menu, using the save option, i am gonna the project as challenge 1
result:
the result of the above procedure is as follows
2)
aim: The main aim of this question is to use the file menu tool bar to open and close the project file
introduction: In this, i am gonna use the open and close options in file menu bar
procedure:
- saving the new project
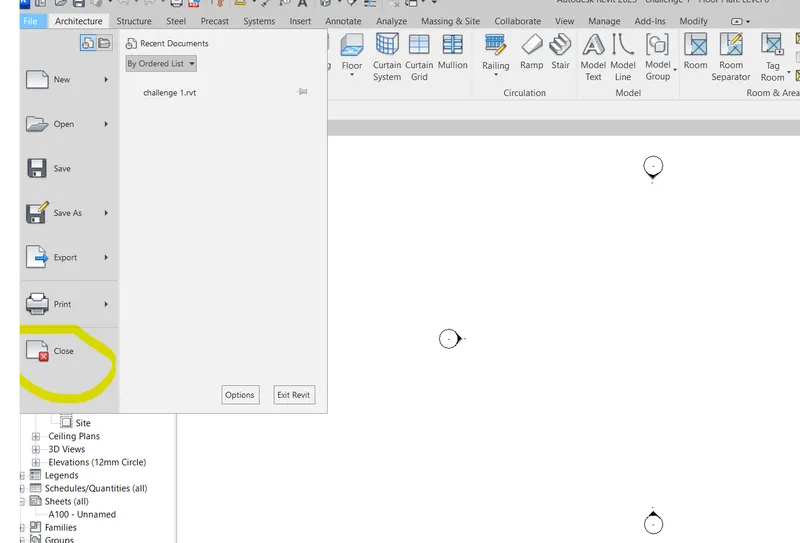
- opening the file menu tool bar
- closing the project using the close option in file menu bar
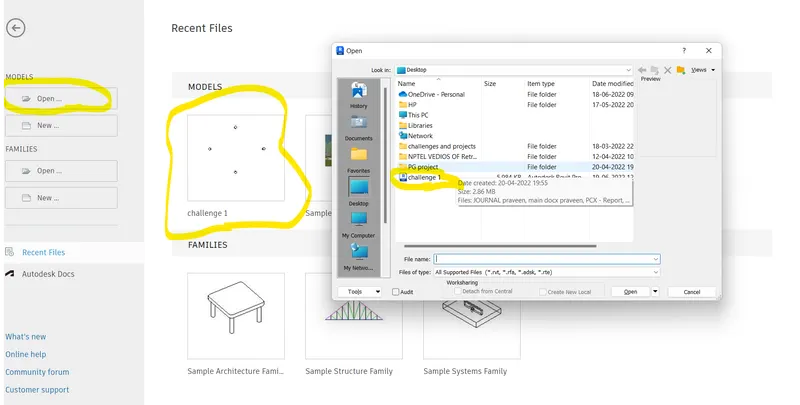
- after that, opening the project using the option open
result:
the result of the above procedure is as follows
3)
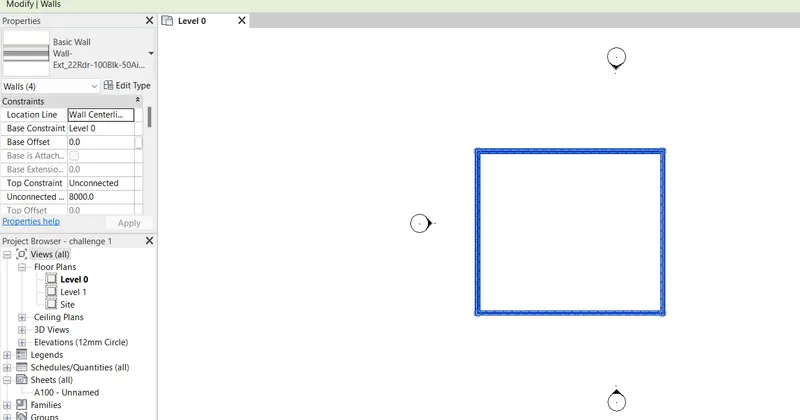
aim: The main aim of this question is to draw a layout of wall in rectangle sized 40'*35'
introduction: In this, i am gonna use the architecture/structure toolabar to create wall
procudure:
- creating the new project
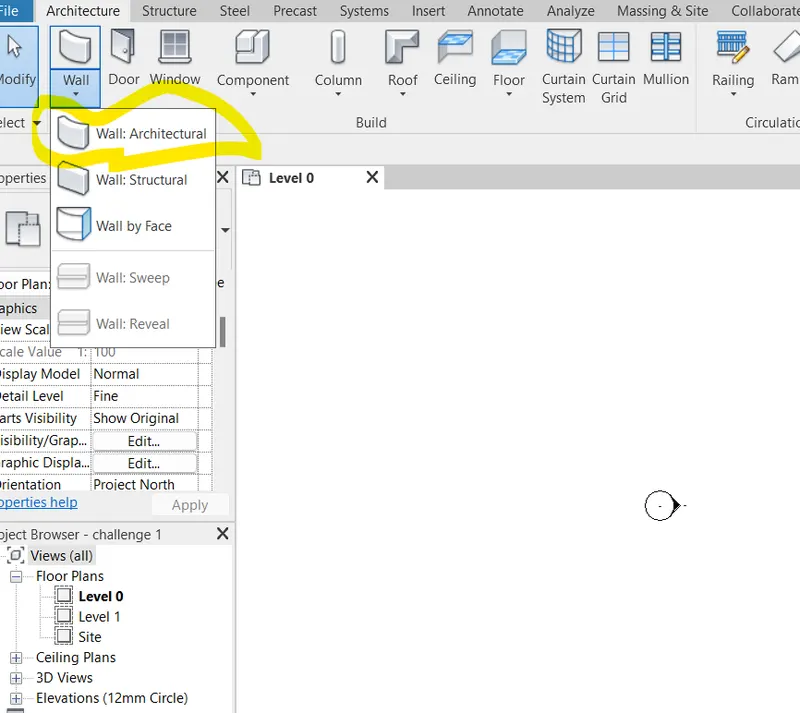
- creating the wall with size of 40'*35' from architectural tool bar
result:
the result of the above procedure is as follows
4)
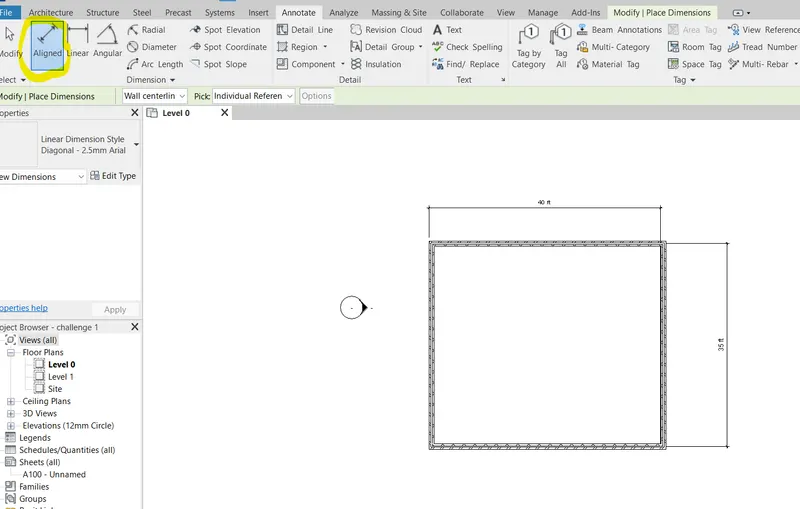
aim: the main aim of this question is to add dimensions for the layout using annotate tool bar
introduction: In this, i am gonna use the aligned option to add dimensions for a layout using the annotate tool bar
procedure:
- opening the new project
- creating a small layout
- assigning the dimensions by using the aligned option in the annotate tool bar
result:
the result of the above procedure is as follows
5)
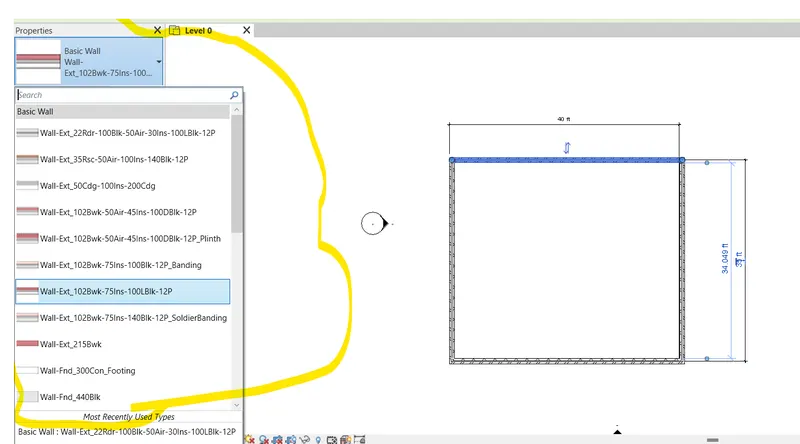
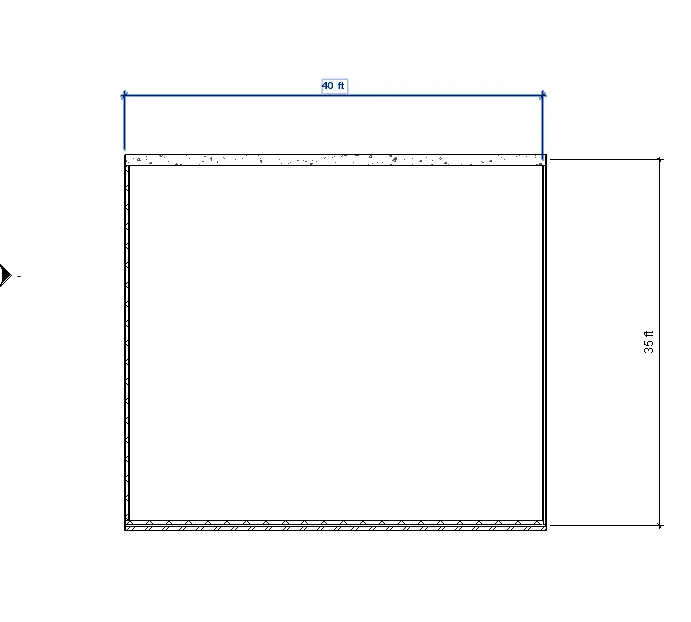
aim: The main aim of this question is to switch different wall types using property browser
introduction: In this, i am gonna use the property browser to switch different wall types
procedure:
- creating new project
- taking a small wall system
- switching different wall types using the property browser
result:
the result of the above procedure is as follows
6)
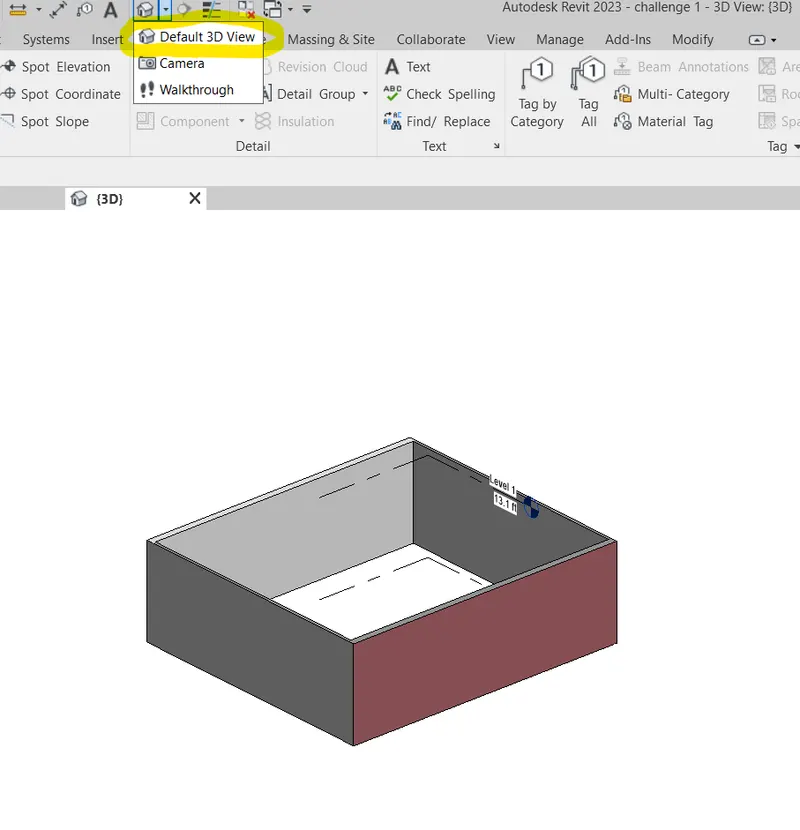
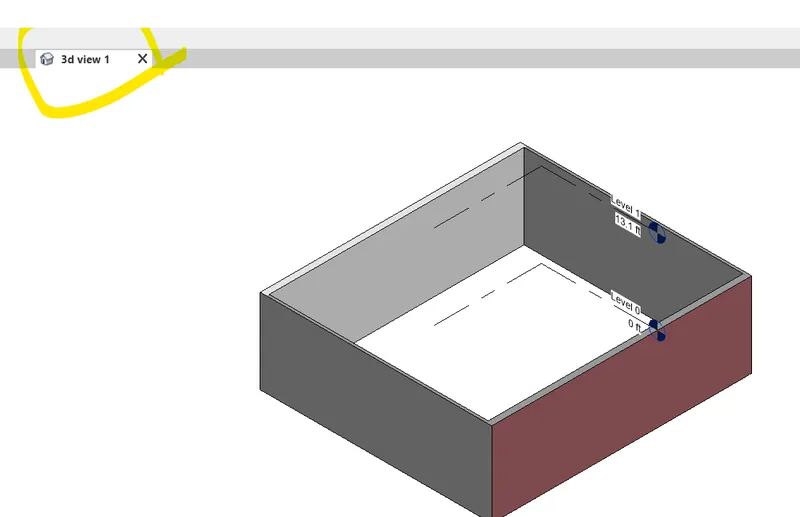
aim: The main aim of this question is create the 3d view and save the view with appropriate name
introduction: In this, i am gonna use the view tool bar
procedure:
- creating the new project
- using the view toolbar, the 3dview option is used to see 3d view
- using the view cube, the view is saved
result:
the result of the above procedure is as follows
7)
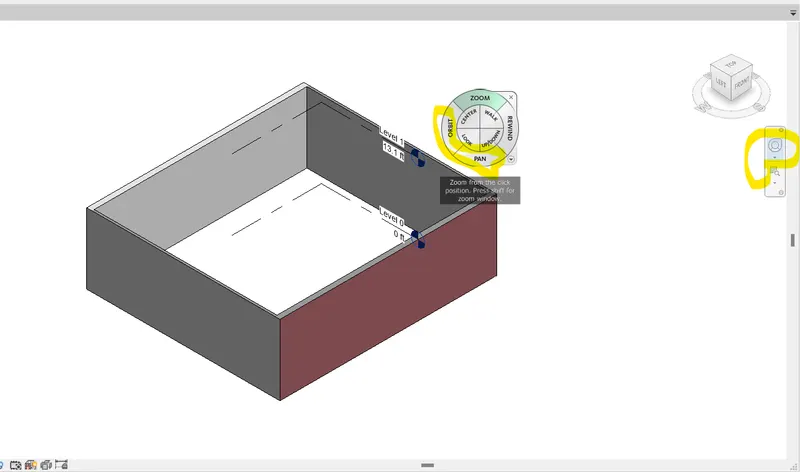
aim: The main aim of this question is to use the pan and orbit options
introduction: In this, i am gonna use the options pan, orbit and view cube to navigate the 3d figure
procedure:
- create the new project
- setting the view to 3d using view tool bar
- using the option navigation bar located at right side of screen , the pan and orbit option is used
result:
the result if the above procedure is as follows
8)
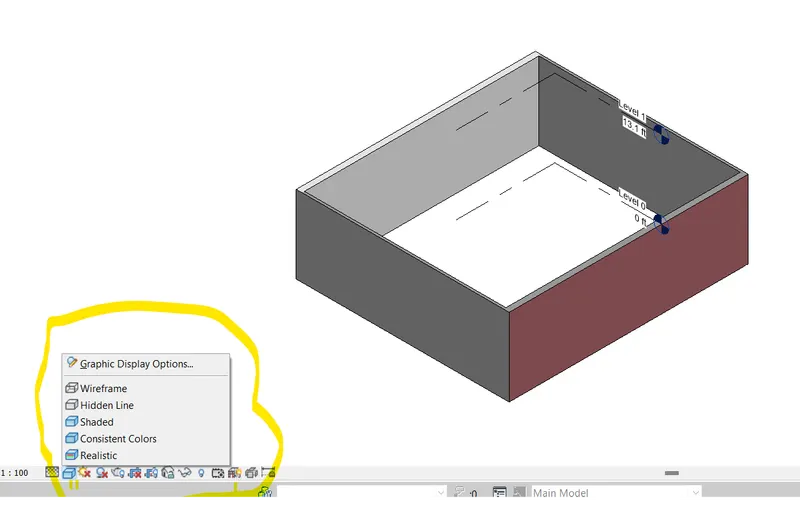
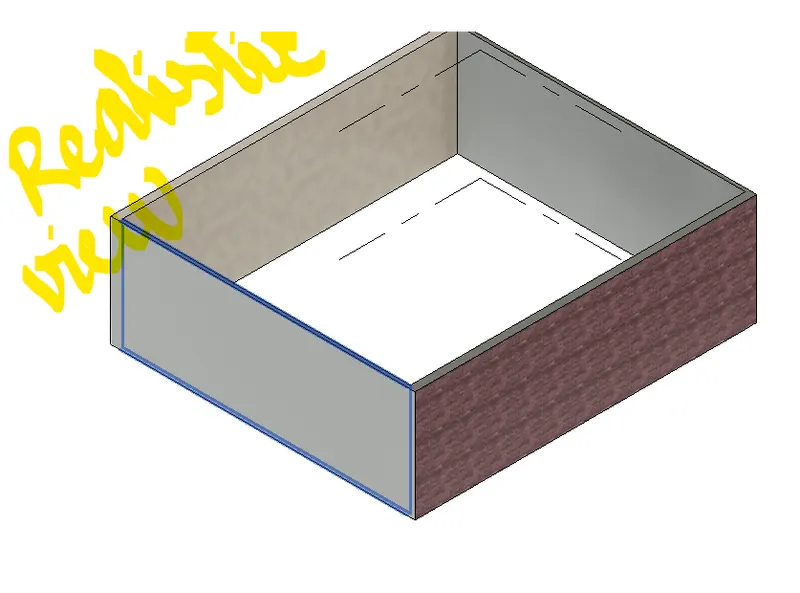
aim: The main aim of this question is to change the visibility options
introduction:In this, i am gonna use the visibilty settings to change the visibility like shaded, wireframe, realistic and hidden etc,.
procedure:
- creating the new project
- chahging the visual styles by using the option graphic display option located at bottom tool bar
result:
the result of the above procudure is as follows
9)
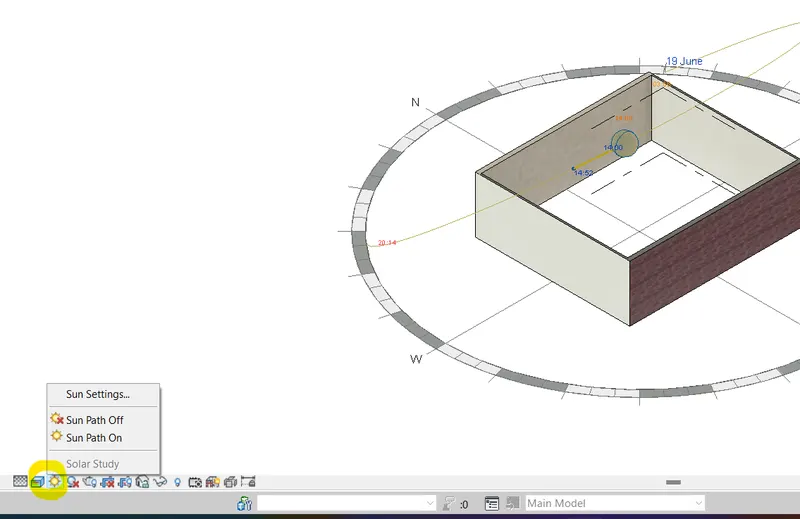
aim: The main aim of this question is tom turn on and off the sunlight
introduction: In this, i am gonna use sunpath option located at bottom tool bar to turn on and off the sunlight
procedure:
- creating the new project
- sunlight is turned off and on using the sunpath option at bottom toolbar
result:
the result of the above procedure is as follows
10)
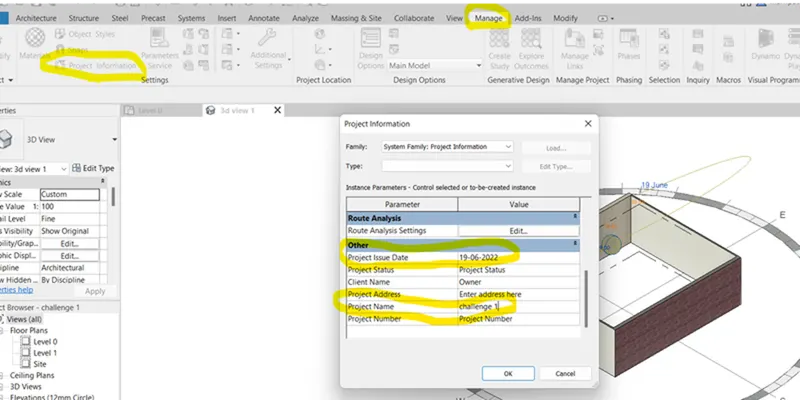
aim: The main aim of this question is to use the mange tool bar to enter project settings such as name and issue date etc,.
introduction: In this, i am gonna use the manage tool bar
procedure:
- creating the new project
- using the manage tool bar, from project information option, we gonna edit the name and issue date of project
-
result:
the result of the above procedure is as follows
11)

The analyze tool bar is used for structural analysis. in which, there are many tools such as
- boundary conditions for difining points,lines and area boundary conditions.
- load options for analysing the loads point,udl,etc,.
- load cases and load combinations
like wise the all tools in it are for analysis of structure
12)
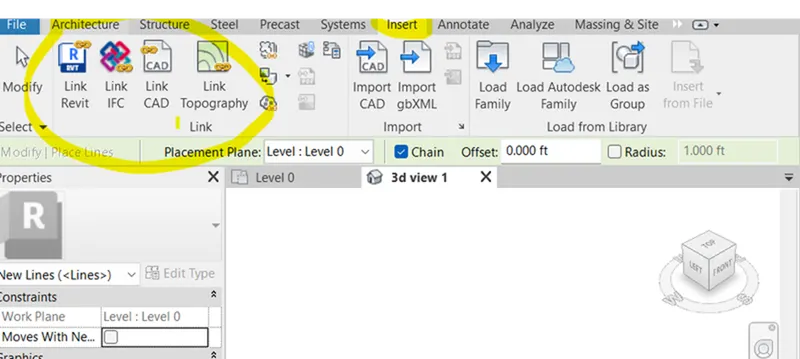
there are so many options to link for model which are mentioned in the insert tool bar as shown in below figure
13)
We need the collaborate tab to work together with different works at a time, also for cloud sharing, also for work sharing and for central model. the tools in the collaborate tool bar are shown below
