Hood design-Week 2
Aim: To design the hood of the car using Siemens NX software.
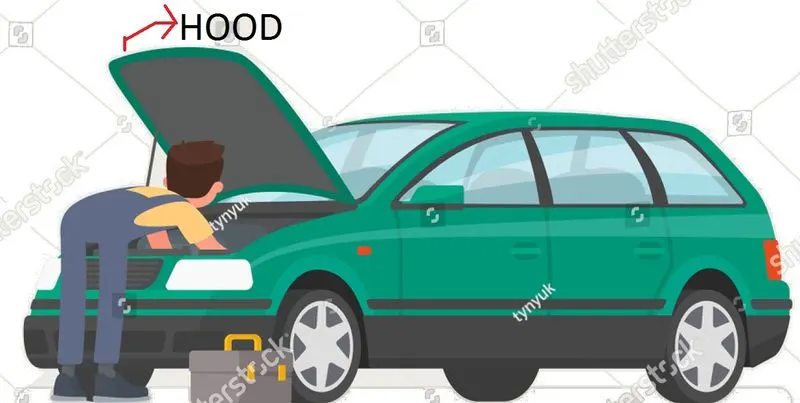
What is the Hood?
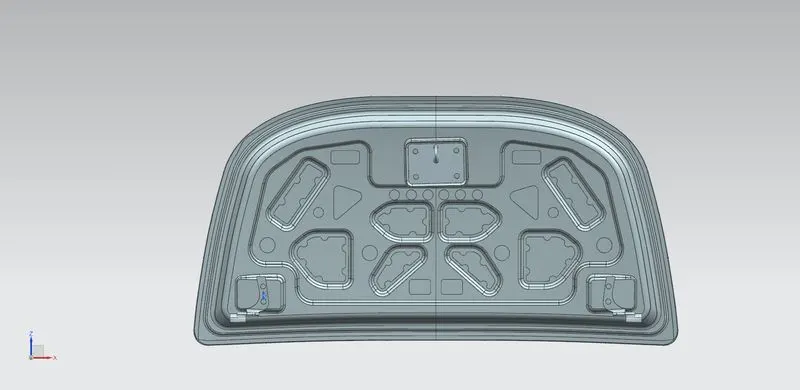
Hood is a main component of the car in the front portion which is used to cover the engine compartment. Hood is designed in such a way that it can be opened to allow the access for the engine compartment for maintenance and repair. Hood consists of the outer panel and the inner panel which are joined together with the help of hemming process.
Types of Hoods
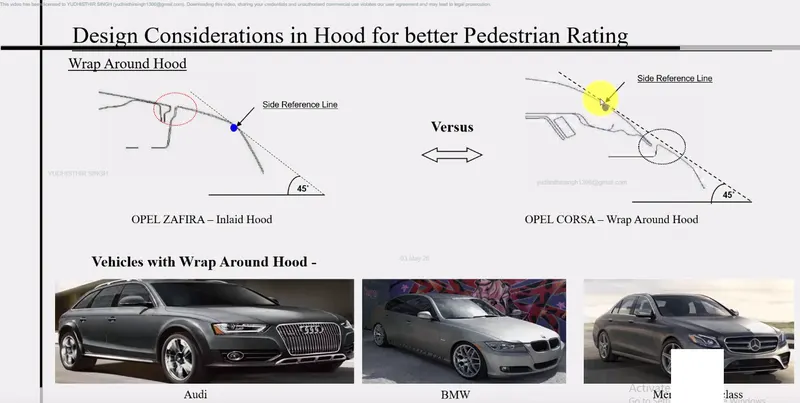
- Wrap Around Hood: Here the end point of the car lies on the Hood itself. This will reduce the head impact zone and hence can be able to achieve higher EURO NCAP ratings. This is the most commonly used Hood type these days.
- Inlaid Hood: Here the end point of the car lies on the fender, which causes more damage to the pedestrians and hence affecting their EURO NCAP ratings.
Components of the Hood
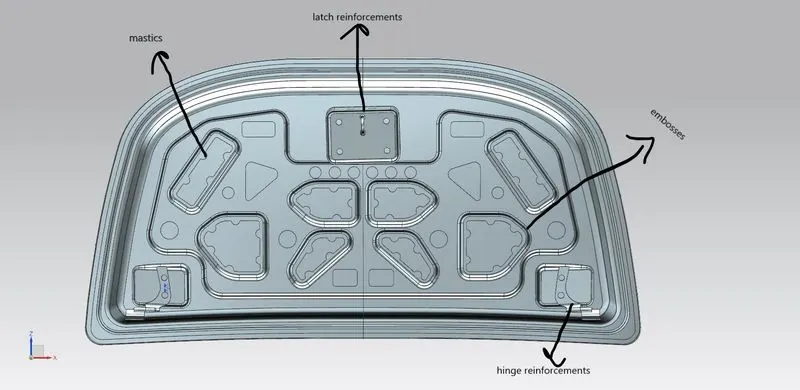
- Reinforcements: In hood to accommodate Latch and striker and hinges we have to remove some material which results in loss of strength of the material locally. Hence to improve strength locally we provide these reinforcements. The reinforcements provided in the latch and striker area is called Latch and Striker Reinforcements & the reinforcements provided in the Hinge area is called Hinge reinforcements.
- Mastic Seal: It is basically an NVH (noise, vibrations and harness) topic mastics are point / surfaces given on embosses for applying mastic sealant to join outer and inner panel and also give good value of NVH. One spot of mastic sealant provides strength locally at around 80 mm so we need to put these mastic points in such a way that it covers the most of the hood region except reinforcement area of latch and hinge.
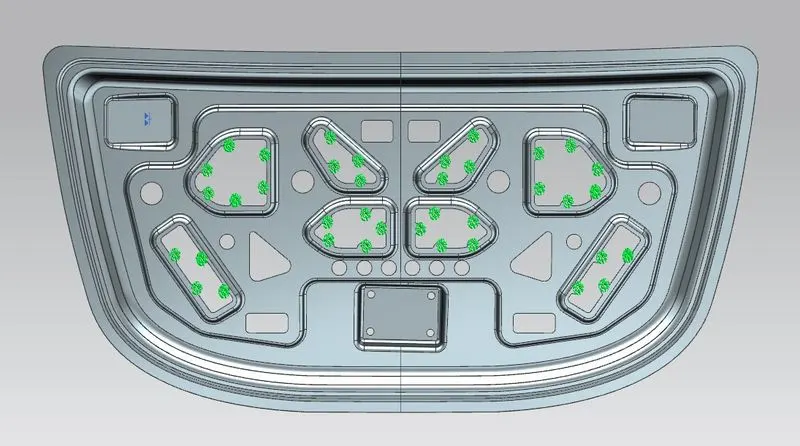
- Stiffener Pads: This is kind of Hard Sponge type between outer and inner panel to increase the strength and also during the motion of the hood there will be vibration. Hence to avoid vibration we use stiffener pads. This reduces the NVH (Noise, Vibration, Harness) level in the car.
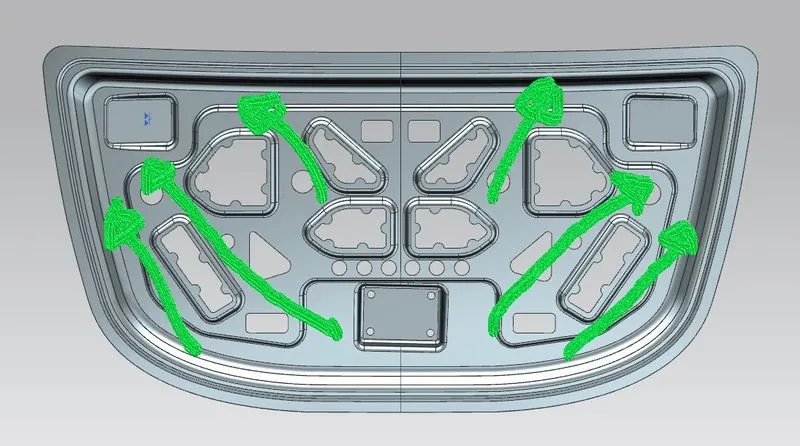
- Embosses: The implement of embosses are very important on the inner hood since it plays an important role in saving human life during a crash from the front. The embosses are designed in Y & V direction so that during the crash the forces dissipates outwards or towards the hinge. This will reduce the impact on the passengers in the front. Adding embosses also adds aesthetic values, improves traction & also good heat dissipation throughout the surface.
- Hinges: The Hinges helps us to open/close the hood as it is fixed and rotates at its axis.
- Latch: There are two latches present in the car for hood opening. One is under the driver's seat which enable us to open the hood partially. The second latch is under the hood front which enables us to open the hood completely.
Design Consideration for Hood
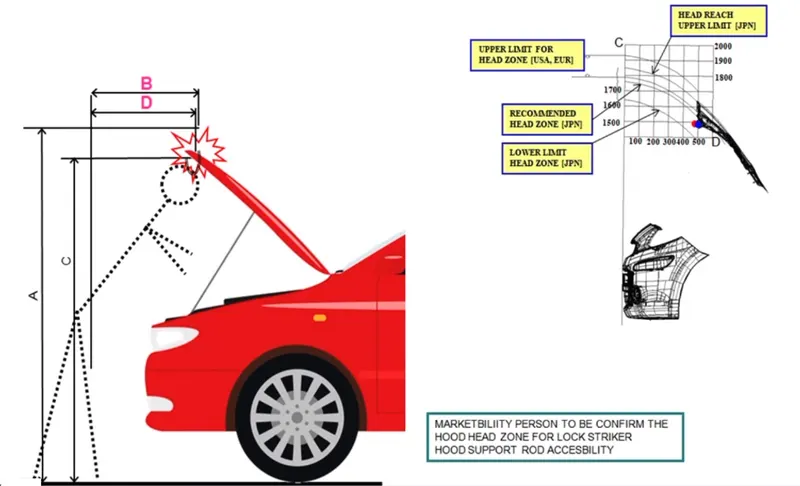
Hood Head Zone for Lock Striker
The hood is designed to open at an angle based on the average height of the people in that region / country. Head zone is one of the important parameters while designing the hood. Hood opening angle varies from the person to person and the country to country. For example, the average height of Indians is 5.8 feet, whereas the average height of the Europeans is 6 feet, based on these heights the hood open angle may varies from country to country. This hood open angle is considered as important because if the opening angle is less, then there will be chance of head injury to the human. hood requires a separate support stay rod to set the open angle according to the country’s average human height.
Design of the Hood
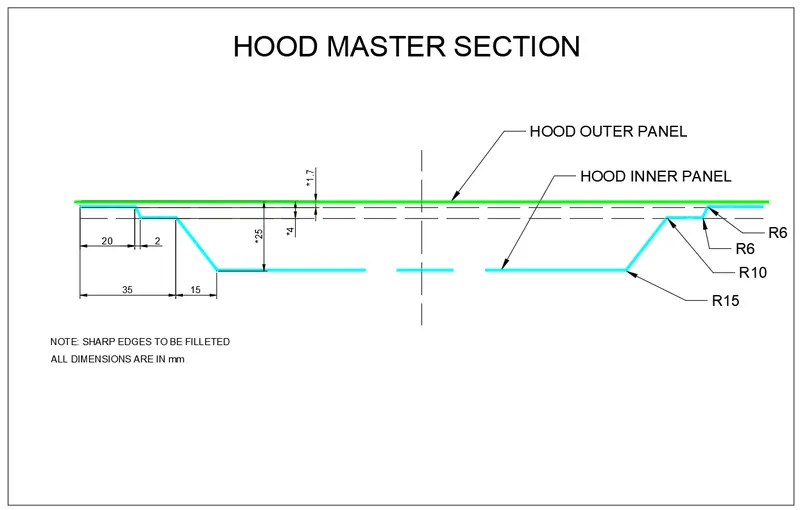
Master Section: The Master Section is the basic sketch which helps us to understand the various dimensions related to the hood. The master section denotes the following important features:
- The gap between the hood outer and the inner panel is minimum of 1.7 mm.
- The distance from the hood outer to the hood innermost surface is 25 mm. Engine compartment is installed below this 25 mm surface.
Hemming: The Hemming is a process where the hood outer is joined with the hood inner by adding extra material on the hood outer and made to wrap around the inner hood. This wrapping is done by running the ball rollers throughout the ends of the outer sheet. The Hemming is done to avoid spot welds. After Hemming, Sealants are provided to achieve the water tightness. 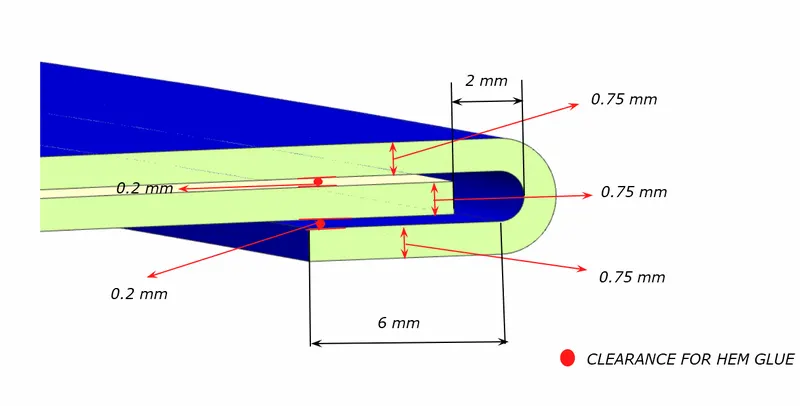
Reliefs: These reliefs are provided on the surfaces to avoid Spring back situations. The spring back occurs when the rollers are made to roll on the surfaces to join the outer and inner hood, the hood surface at the corners tends to come back or spring back to its primary position due to lack of pressure of the rollers on the surface.
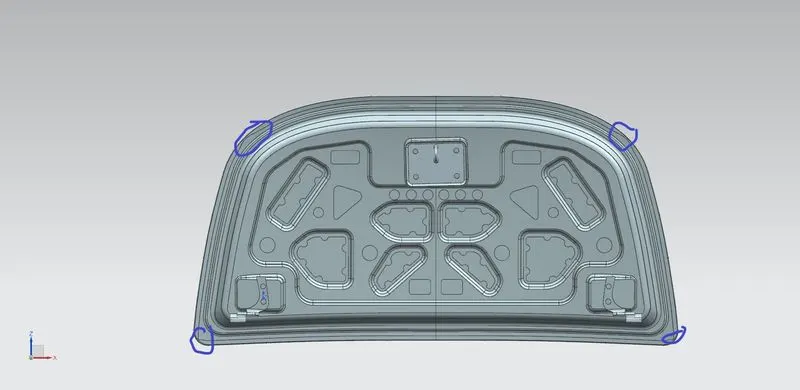
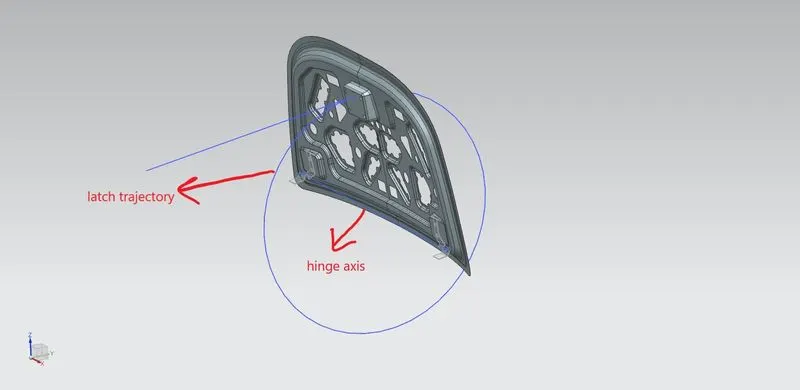
Position of Striker: For the proper opening & closing of the hood, the striker should be perpendicular to the trajectory of the hood. Firstly, the hinge is positioned and an axis is drawn. The Trajectory is derived from the hinge axis and the center distance from the striker. It is denoted as a circle.
Conclusion: A complete design of the hood is modelled and assembeled with given parts.