Hood design-Week 2
HOOD
- What is Hood?
A Hood is a hinged pannel or cover over the engine of vehicle. A car hood is also reffered to as a bonnet of a car, which is the movable part as it is a cover for the engine compartment. This is to provide for the access to the engine for maintenance purpose. It also protects the engine at the time of collision to get direct contact to anything. It decipates the heat energy outside rather than decipates it inside. It is also a classy surface, it reflects the elegency of the car.
- Why do we need a hood?
In order to protect the engine from direct contact from any collision we provide the hood. Hood also protects the important parts other than the engine from wear & tear. The furthermost important feature of a hood is for pedestrian safety. It allows easy & safe access to the repair & maintenance work for the engine. The hood plays an major role in the aerodynamics of the car to provide better output & makes the car fuel efficient. Hood decipates energy outside rather than decipates it inside. It absorbes collision impact when there is frontal crash happens.
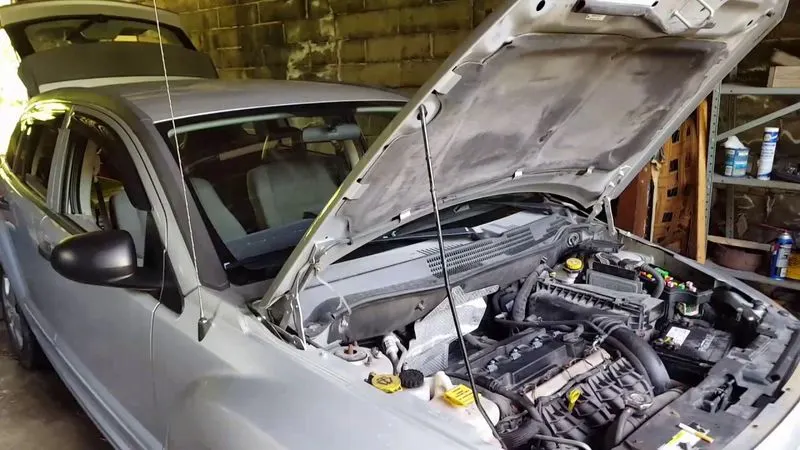
Car Hood
PEDESTRIAN SAFETY
It is the most important topic when we design a hood. Most of the deaths happens due to the Traffic accidents every year, The main cause is that the pedestrians get hit by cars or dragged by the cars. As if the pedestrian is get hit by a car the first part of the human body is came in contact is upper legs than pelvis & than the head to the bonnet or windshield. In order to reduce the injuries to the pedestrians the design considerations has to be made by the design engineers to make the hood, bumper, pillars energy absorbing (softer) without compromising in compressive structural integrity of the car.
The hood is made up of sheet metal & sheet metal is good absorber in comparision to other aspects. Most of the head injuries occure when there is no gap between engine & stiffner of the hood, as there are no chance of absorbing energy by collision & the chance of injuries got increased.
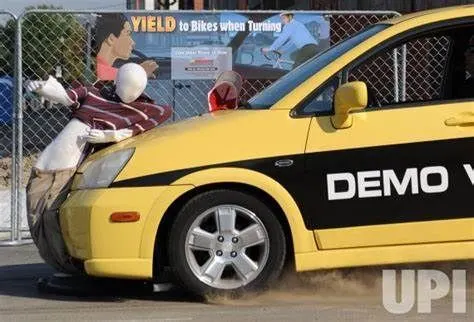
Crash Test for Pedestrian safety
- EURO NCAP
Now let's take a look about the EuroNcap (European New Car Assessment Programme). this organization is responsible for publishing safety reports on all car models that go on sale. It gives the ratings for the best & safest car model on the basisi of crash test reports. They coduct a fornt, side & pole crash impacts & impacts with pedestrians to verify the safety of the vehicle.
It gives ratings on the basis of different types of crash test conducted on a car & how the car performed under that circumstances. This organization gives different rating for chidren & adults.
- Wrap around distance
when a car crashes with the pedestrian the whole human body wrap around the front shape of the car and the head impacts on the bonnet or the car. The distance on which the head impacts on the car from the ground is called the wrap Around Distance (WAD).
To be specific the Wrap Around Distance is a measurement of distance from the ground to the head impact zone over the outer surface of the car. The wrap around distance is measured longitudinally in the centre of the vehicle hood from the ground.
The severity of the injury caused by the frontal crash depend on the type and shape of the vehicle, speed of the vehicle and the movement of the pedestrian relative to the vehicle in addition to these parameters, the wrap around distance plays a major role in the safety measurment of a pedestrian.
During the crash analysis based on the wrap around distaance, two test areas will be created namely as child head impact zone and the adult head impact zone. The child head impact zone is between 1000 to 1700 mm WAD and the adult head impact zone ranges between 1700 to 2100mm WAD.
On the basis of crash roports
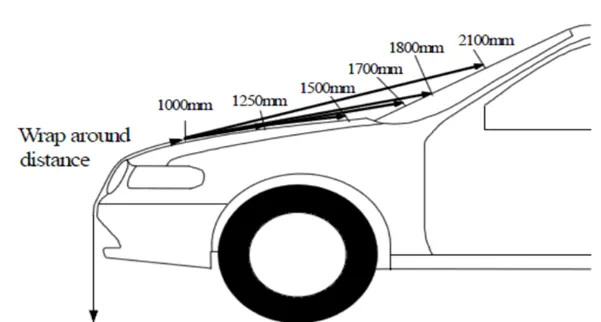
Wrap around distance Headform Test Zone
- Bonnet Leading Edge Reference Line
Bonnet Leading Edge reference line means the front upper outer structure of the vehicle, including the bonnet & wings, the upper & side members of the headlight surrounds & any other attachments. The reference line identifying the position of the bonnet leading edge is defined by its height above the ground reference plane & by the horizontal distance separating it from the bumper.
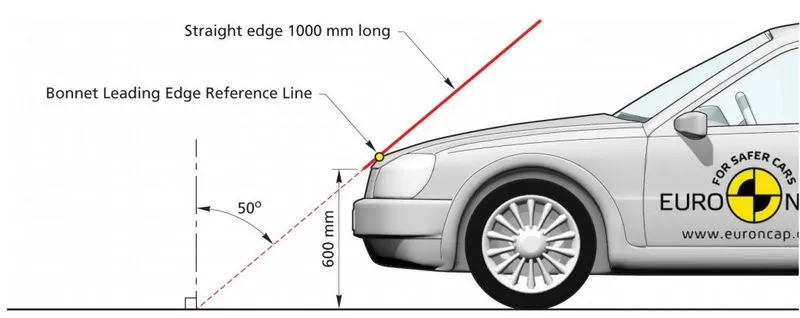
Bonnet Leading Edge Reference Line
when the straight edge held parallel to the vertical longitudinal plane of the car and inclined rearwards by 50 degree and with the lower end 600mm above the ground reference plaen is traversed across and in contact with the bonnet leading edge, for vehicles having the bonnet top surface inclined at essentially 50deg, so that the straight edge makes a continuous contact or multiple contacts rather than a point contact, determine the reference line with the straight edge inclined rearwards at an angle of 40deg.
- Bonnet Side Edge Reference Line
The bonnet side edge Reference line is defined as the geometric trance of the highest points of contact between a straight edge 700 mm long and the side of a bonnet and A-pillar, when the straight edge held parallel to the lateral vertical plane of the car and inclined inwards by 45deg is traversed down the side of the bonnet top and A-piller, while remaning in contacts occur the most outboard contact shall form the bonnet side reference line.
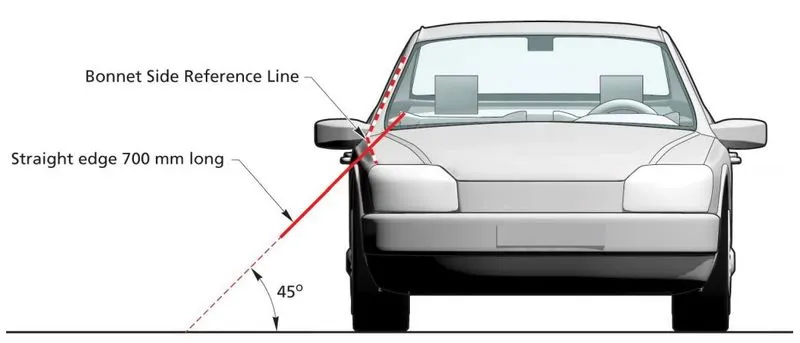
Bonnet Side Edge Referene Line
HOOD & IT'S COMPONENTS
- Hood Outer panel & Inner panel
A hood consists of 2 panels i:e; Outer & Inner panel. Outer panel is the one which is outer skin of the hood & underneath this skin there is a inner panel which povides strength to the hood & also distributes the collision impact towards the pillars side of the vehicle.
Inner panel is also used to mount the hinges for the opening & closing of the hood & also for the mounting of the stricker.
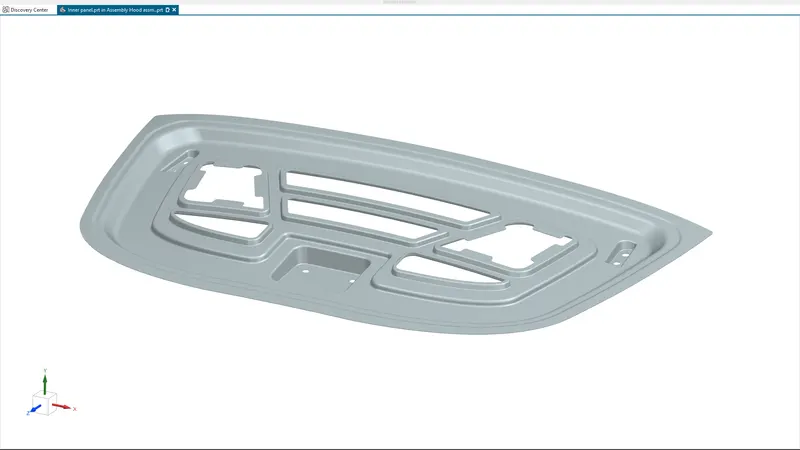
As we can see that in the Inner panel there is some cutouts in between the panel, this is to reduce the weight of the hood & also to resist/absorb the impact of the collilsion to prevent severe injusries to the pedestrians.
The process of joining the 2 panels together is carried out by hemming process (which w'll discuss further). The outer panel is directly exposed to the environment or it's a face of the car so we can't provide any spot weld or welding jobs or rivets & mechanical fastners, so we do hemming on the outer panel in such a way that it dosn't looks ugly from the outside.
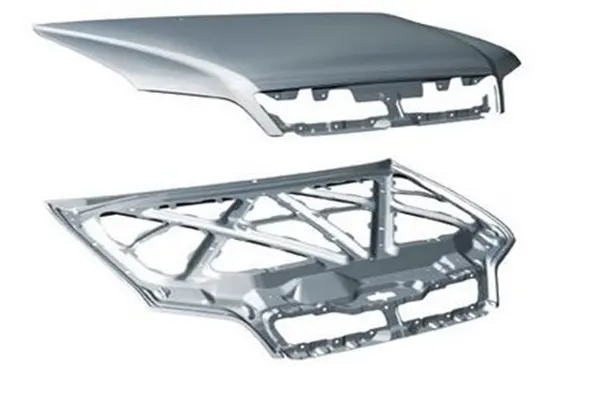
The above image shows the Outer & Inner panel of a car hood
- Mastic Sealant
Mastic sealant is a type of sealant which is used to provide the joining of the Outer & Inner panel. It is available in the gel type form.
Mastic sealant sticks on the surface of 2 panels & after applying heat to the mastic seal it spreaded all over the area 80mm around it's dia.
It also provide the NVH (Noise, Vibration & Harshness) to the hood. Mastic seal is also an altervative of stiffner pad which also prevents the nosises coming from the engine compartment.
Mastic seal covers around 8mm of dia & can be installed less to prevent good NVH.
When applying the mastic sealant between outer & Inner panel we need a minium gap of 5mm, to get good hold on the panels. The mastic sealant should not applied too much to cause over dripping of the sealant & should not applied too less to get bad hold on the panels & It also does not provide good NVH.
- Hood support rod
There are 3 types of support rods available in the OEM Industry, 1st is the simple metal rod & 2nd is the pneumatic type support strut.
Support rod is used to support the car hood in an open position. After disengaging the striker form latch by the help of a small lever underneath the driver's seat, we are able to open the hood manually & position the support rod at the given bracket the hood is now completely rests on the support rod. By predefining the length of the rod we can adjust the opening angle of the hood. Which differs from region to region.
As in the pneumatic type suppot strut we only need to disengage the hood's striker from latch after it disengaged the hood is now itself opens to the angle set by the design engineer & should not need any manual process for the resting of hood.
The metal support rod should not be completely staight as we all know that it dosn't reamains the enough strength to hold the weight of the hood. It also should not exceeds more than the maximum radius of curvature of 35mm as it would get bend & does not behold the weight of the hood.
Metal support rod should be designed in such a way that it does not covers unnecessary areas in the engine compartment. The metal support rod should be placed opposite to the direction of the battery because whenever we need to change or replace the battery the support rod shall not become an obstracle for the removal of the battery.
Always keep in mind that the metal support rod is a loose pivoted part so it always need an lock type arrangement for the resting of the support rod in the closed condition. As it would not produce rattling noise at time of driving.
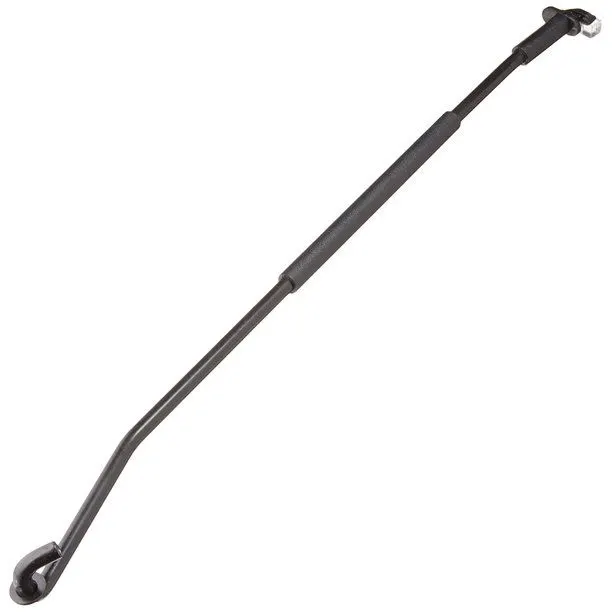
Metal Support Rod Support Rod In Opened Condition
The pneumatic support rod is more stable than the normal metallic support rod as it is mounted on both sides of the hood so the load of the hood distributed among 2 of these, It automatically operates & dosn't need any manpower. We need to provide the extra mounting arrangement for the pneumatic type support strut.
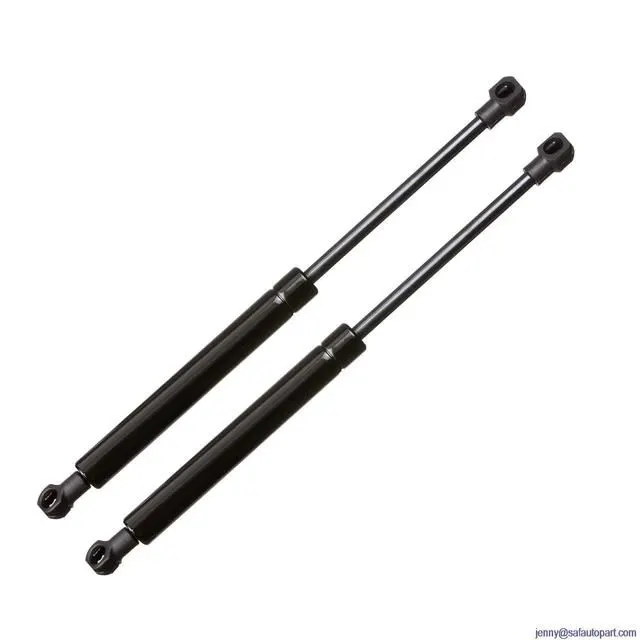
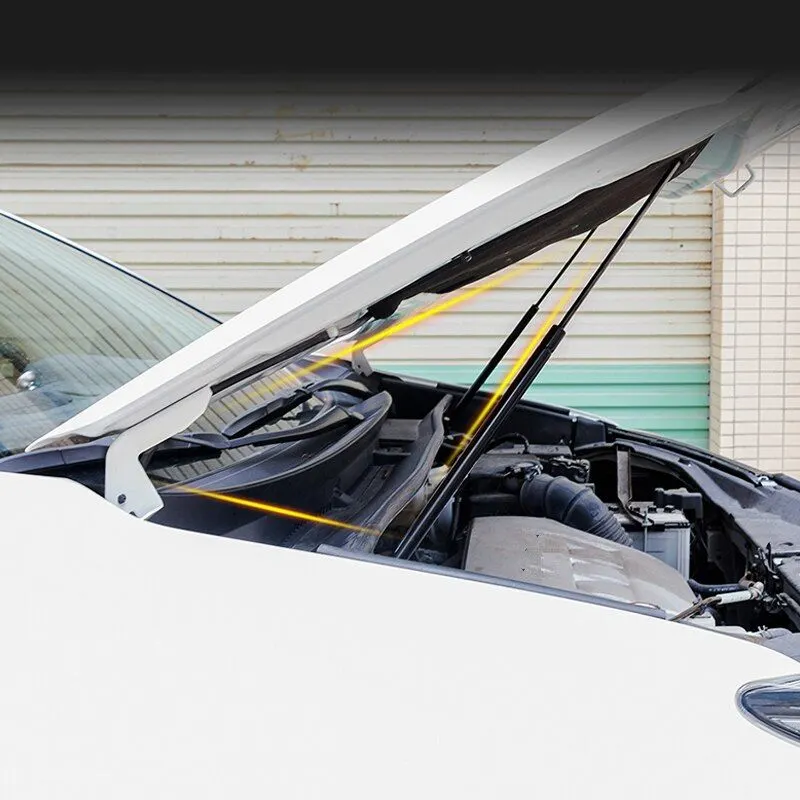
Pneumatic type support strut Pneumatic type support rod in opened condition
Following is the table shows the difference between metal support rod & pneumatic support strut:
|
- Internal & External Type Hinges
Hinge also plays an important role in hood because without hinge we can't able to open or close the hood for the maintenance purpose. As we know that the hood is not completely straight or flat in shape but for the mounting of the hinge assembly we need the flat surface to achive better performance in the motion of the hood & for long life of the hood also & for the proper opening & closing of the hood.
Hinge consists of 2 parts: 1st Engine compartment mount. & 2nd Hood compartment mount. One will be fixed to the engine compartment area & other half will be mounted on the hood. The hinge assembly mounted by the help of mechanical fastners. It is because if we've found any problem in the hinge assembly we can easily remove the complete assembly & replace it at it's best.
There is nothing big science in placing the hinge because it only executes smooth motion for the hood. We can also consider it as a major part of the car or any vehicle, wherever we need an angular motion there should be provided hinge for the movement. Without the pivot point we can't execute the angular motion.
There are 2 types of hood hinges available in the market is Internal car hood hinge & External Car hood hinge. The working & application of these 2 hinges are toatally same except their placment.
The Internal type hinge is mounted inside of hood & External type hinge is mounted outside of the hood, as shown in below images.
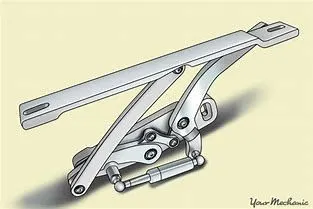
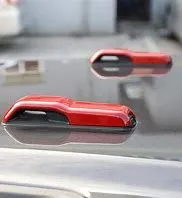
Internal Car Hood Hinge External Car Hood Hinge
Some major applicable areas in a car where we need the hinge are,
- Front Hood/Bonnet.
- Fornt doors.
- Back doors.
- Rear hood.
- Stricker Trajectory
Striker is a type of hook used to keep locked the hood of the car. It is mounted on the hood of the car & when we pull down the hood it will came in contact with latch which is mounted at the bumper of the car. Striker is a U shape bend rod welded on thick ms plate. The position of the striker depends upon the axis of the hinge & the length of the hood.
We can't directly defines the position of the striker on the hood. First we have to keep in mind the design considerations of the striker while designing the hood.
The space between hood's striker to the latch reciever should be minimum 10-15mm to access it easily after acctuating it from inside, to completely open the hood. This criteria is common in all the region.
We will further disscuss the process of mounting of striker to the hood.
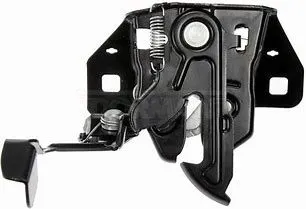
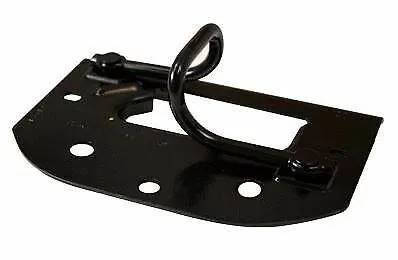
HoodLatch HoodStriker
- Mastic Data
Mastic is a type of sealant used as a adhesive for pasting 2 metal sheets together for vehicles. We cannot use other joining methods for pasting 2 diff. sheets. Let's take an example of hood;
Hood has 2 panels, 1 is outer panel & 2nd is inner panel so to paste it together we can't use welding, riveting or other mechanical processes like nut bolt & fastners. so here we use mastic sealant or hemming.
Mastic is also used for giving good NVH. As to reduce the cost & weight from the hood later we remove the stiffner pad if it's necessary.
It is a type of gel like solution & covers around 80mm dia after applying beteween 2 surfaces. There should be minimum gap of 5mm between 2 surfaces for applying the mastic sealant. Less than 5mm gap will not be tolerated as the sealant would overflowed form the surface. Greater than 5mm gap will also not to be tolerated cause it requires more amount of sealant & shall not get sticked together.
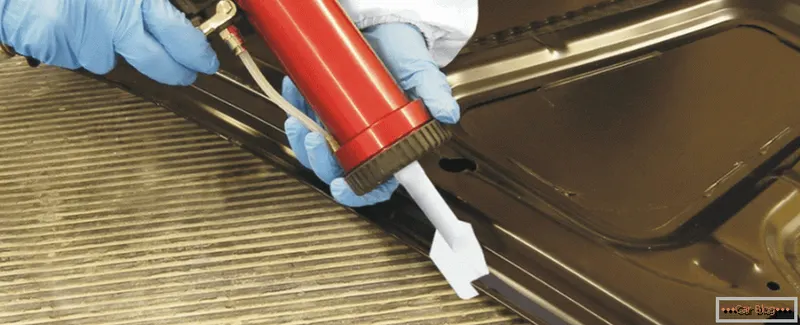
Mastic Sealant
- Emboss
Emboss is used to create the reinforcment to the hood inner panel. The inner panel is the reinforcment for the outer panel to give extra strength to to the hood outer panel & to mount several other necessary attachments to it.
This is to provide additional strength to the hood in order to compensate any damage at the time of collision in order to provide safety.
Keep in mind that creating the emboss in such a way that at the time of frontal crash the force will not get directly to cabin area, it should get distributes equally towards the vehicle's side body or towards the A arms.
The direction of embosses should be in Y & V shape because when vehicle crashes the after effect of force will get reduced. The designing of the emboss is upto the design engine then after the CI team validates & they'll verify wether the design of emboss is valid or invalid.
Always design the emboss in 3 steps to achieve better strength. The emboss angle should be more than or equal to 7degrees. There should always be a positive draft.
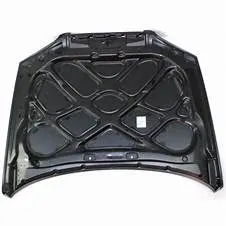
Hood Emboss
MANUFACTURING PROCESS
- Deep Drawing
It is a sheet metal forming process in which a sheet metal blank is radially drawn into forming die by mechanical action of a punch & die. It is thus a shpae trasnformation process with material retention. The process is considered deep drawing when the depth of the drawn part exceeds it's diameter, this is achieved by redrawing the part through a series of dies.
In this process the flange experience the radial drawing stress & tangential compressive stress due to material retention property. These compressive stress in flange wrinkles. Wrinkles can be prevented by using a blank holder.
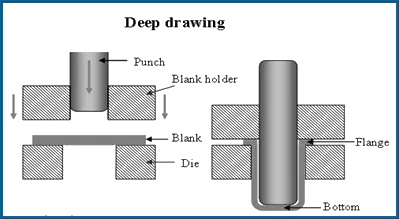
Deep Drawing
- Hemming
In hemming, one pannel is made to overlap to the other & then both are joined by an extended edge which being folded back around the other, probably by the aid of some adhesive. The accuracy of the hemming process affects signigicantly the appearance of the car's outer surfaces & has therefore a critical importance in the final perceived quality of assembled vehicles. This process is used in automobile industries for making doors, tailgates & hood.
However it is less strong than the welded joint. On other hand it is possible to join to sheet together by instance gluing. Being the last step in production of closure panels, flanging is followed by pre-hemming. In this, a pre-hemmer forces further deformation of the outer panel by certain degrees.
Hemming involves two steps:-
1) Pre-hemming.
In pre-hemming the flange of the sheet metal is hemmed at a certain degree i,e; 30 to 60`degree`
2) Final-hemming.
In final hemming process the flange is completed bends at an angle of 180`degree`with the help of hemming robots.
Hemming Process
-----------------------------------------------------------------------------------------------------------------------------------------------------------
PARAMETERS OF HOOD DESIGNING
- Hood Outer Panel (Classy Surface)
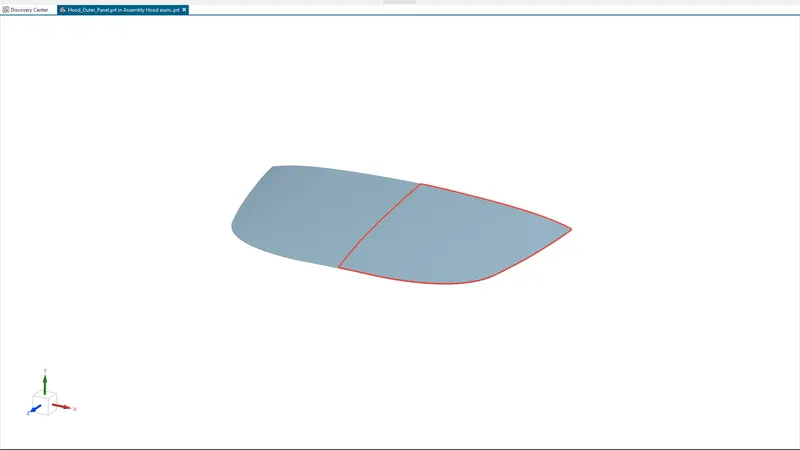
we'll get the outer panel design model of the car hood from the design engineer. We've to design the inner panel & other necessary parts for the hood to complete it market ready or for manufacturing.
2. Hood Inner Panel
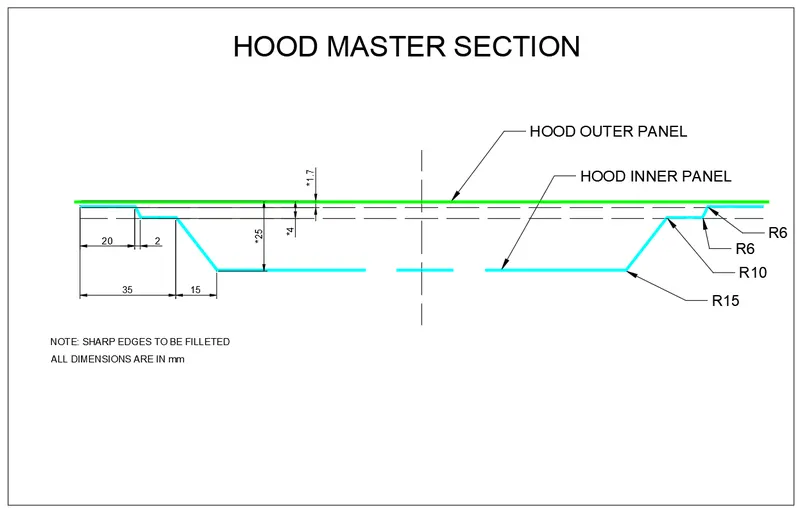
We have to keep in mind all the design aspects while designing the hood inner panel like Emboss direction & distance & flange width, as shown in below image.
3. Provide good mastic surface area
Provide good mastic surface area to get better NVH.
4. Smooth Edges
There should not be any sharp edge in designing the hood. The blend radius should be 3x of thickness. The sheet metal thickness provided here is 0.75mm to both inner & outer panel.
5. Latch & Striker Emboss
The hood is not completely straight, so we have to provide flat surface to attach the hinges & striker to execute proper functionality of the hood.
We can create it by 2 methods:-
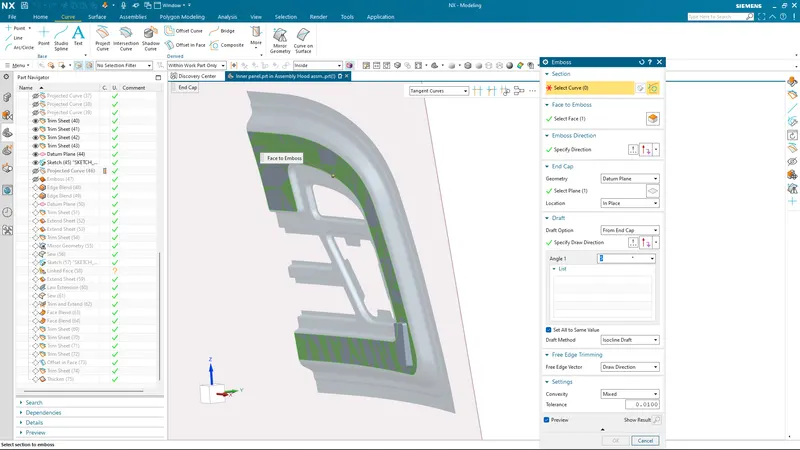
A. By Emboss Feature
Create a plane parallel to the hood inner panel in order to achieve flat surface. 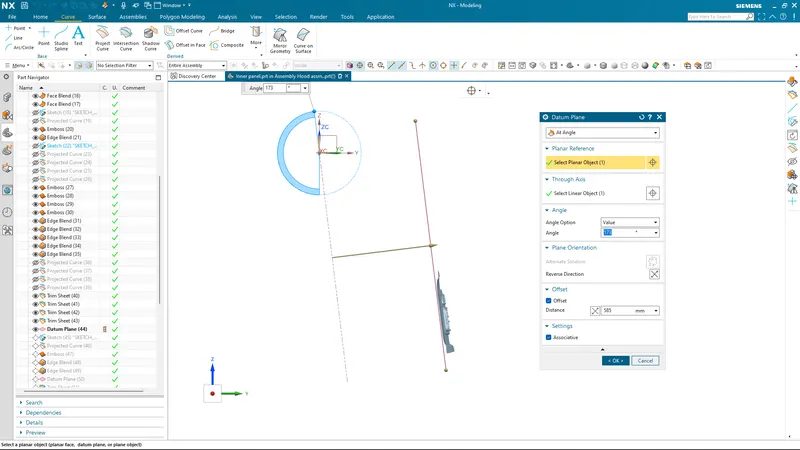
Create a sketch according to hingel mounting surface & then project it onto the hood inner surface panel.
Use the emboss feature to create the hinge emboss.
6. Latch Trajectory
This component should be placed accurately to achiev perfect locking arrangement to the latch. The striker trajectory is directly relative to the hinge placement.
The axis of the hinge is the centre or axis of the trajectory path.
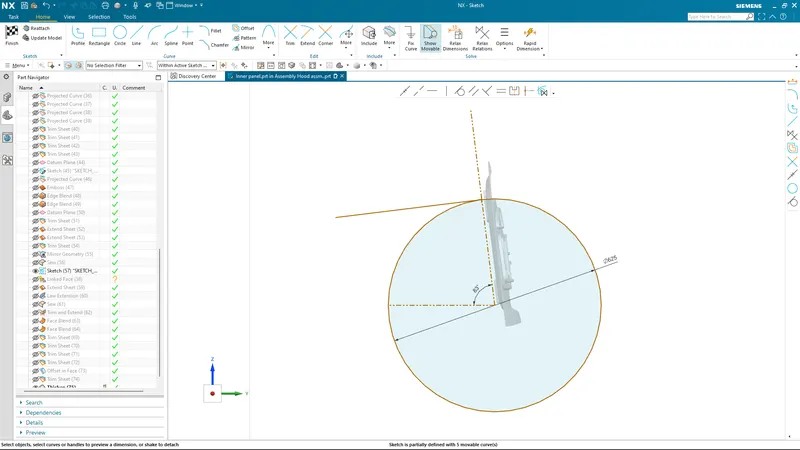
Create a line in between the hinge's pivot point & use that line as the centre axis for the trajectory path.
Then create a circle from that axis & specify the radius according to the latch position.
Then create a horizontal line & one line at an angle of approx. 60`degree`.
From that intersection point create a tangential line. The tangential line is used to apply the mate feature for the striker to align it on the emboss.
That intersection point is now follows the path of the circle about the centre axis.
7. Hemming on hood outer panel
Now we are good to go for the hemming process on the hood outer panel.
Using the data given we will create the hemm on the outer panel of hood.
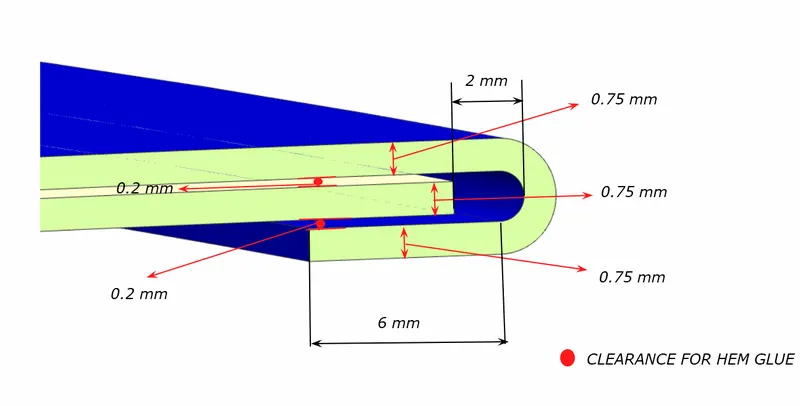
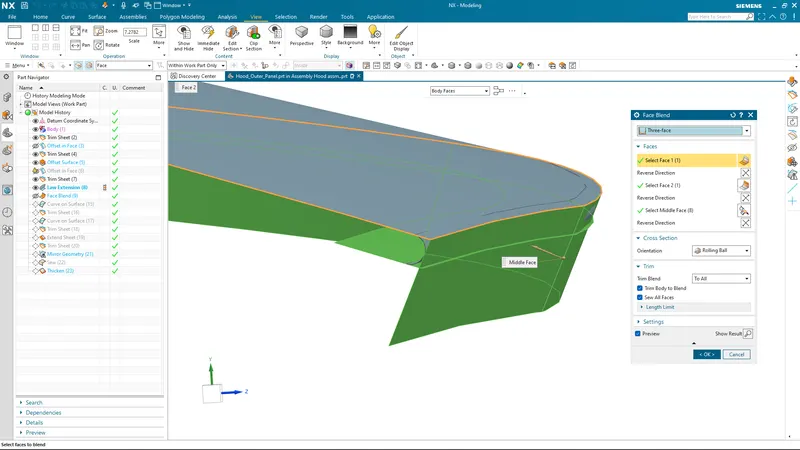
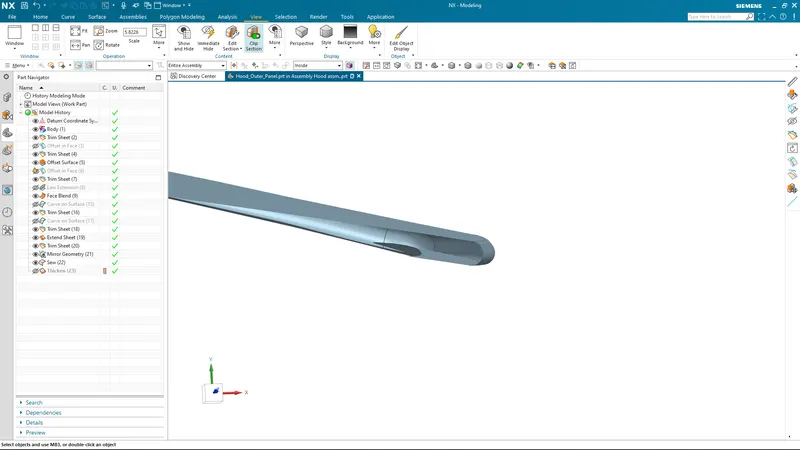
Firstly eliminate all the sharp corners exist on the panel & than offset the surface, use the law extension feature & create a closd loop for the blend feature, after applying the face blend trim the excess sheet or hide it. Keep the clearance gap for hemm glue & then join the 2 surface together by face blend. As shown in below images.
Always keep in mind all the standards & need(s) while designing the hood or a complete car.