Hood design-Week 2
HOOD DESIGN IN UG NX
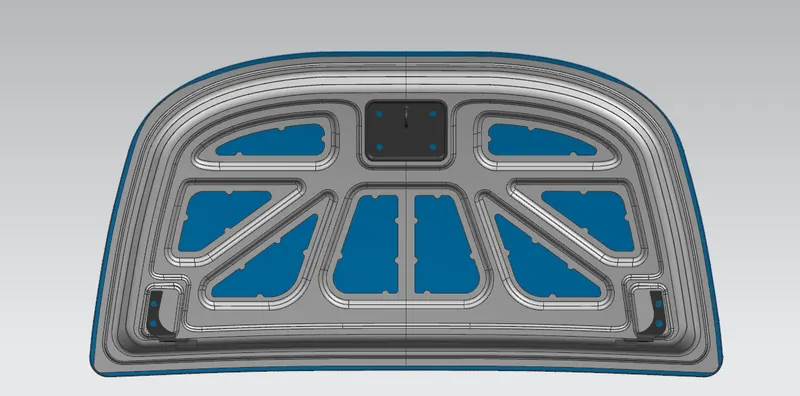
OBJECTIVE
Design hood outer panel, inner panel and reinforcements with the given outer hood skin, master section and design parameters.
DESIGN PERAMETERS
Hood Thickness Information
- Outer Panel Thickness = 0.75mm
- Inner Panel Thickness = 0.75mm
- Reinforcement Thickness = 1.5mm
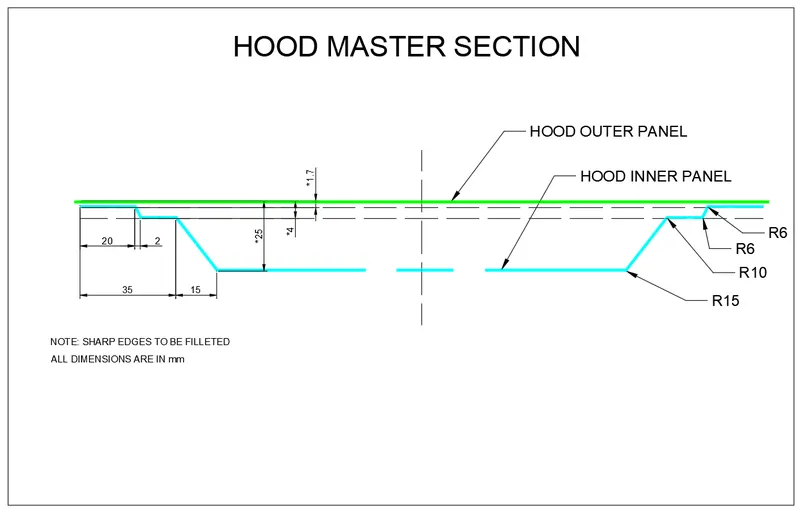
MASTER SECTION
INTRODUCTION

The hood or bonnet is the hinged cover over the engine of motor vehicles. Hoods can open to allow access to the engine compartment for maintenance and repair. Hood consist of Hood outer panel, Hood inner panel, Hinge, Latch & Striker, Hinge & Striker Reinforcement and Hood stay. The purpose of opening the engine hood is for inspecting engine room, replenishing cooling water and engine oil, changing parts and making repairs etc. In Hood assembly there will one part called hood stay which is used hold the hood when ever we need. It may be a Support rod or Gas stay. With the help of hood stay we don't need someone to hold the hood when we needed.
Components:
1. Hood outer panel:
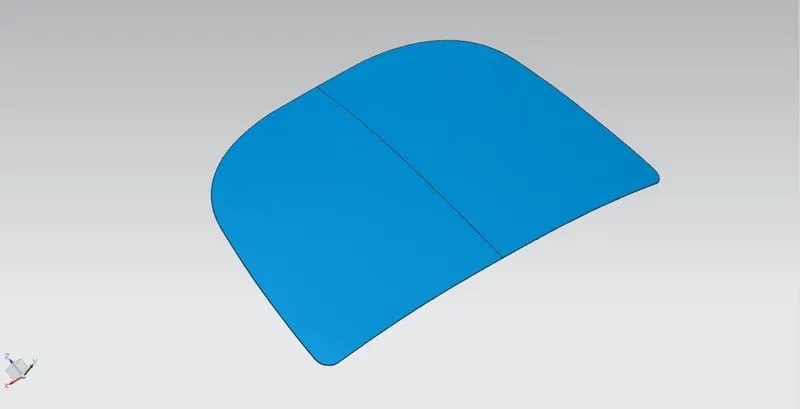
Hood outer panels are the aesthetic elements of a car. This part of the hood will be designed by styling team. From this part we can able to design a hood inner panel. There will be hemming flange which is used to attach the hood outer panel and the inner panel. Hemming relifs must be given to every corner in the hood outer panel. It helps to do hemming operation. In between hood inner panel and the outer panel there will be mastic sealants which helps to absorb and reduce vibration. Hood outer panel design is show in Fig.4.
2. Hood inner panel
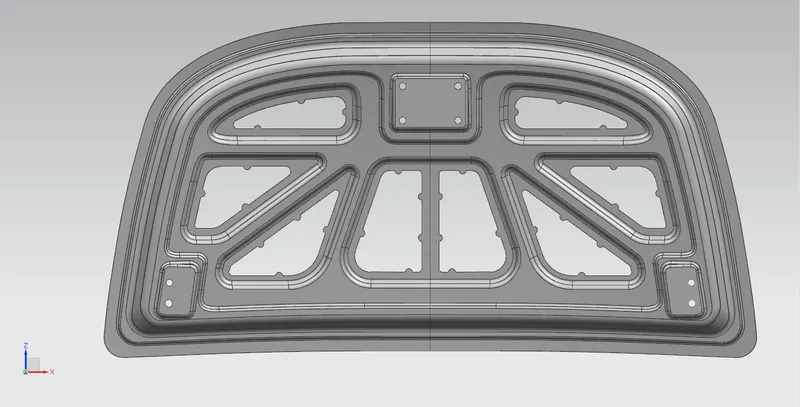
Hood inner panel design is show in above fig.5. It is designed from the hood outer panel with the help of Master section in Fig.2. It is the part that gives strength and rigidity to the outer panel. By the help of master section we create the initial emboss and the final emboss. And also there will be a seperate emboss for latch and striker, and as well as hinge.
3. Latch and striker
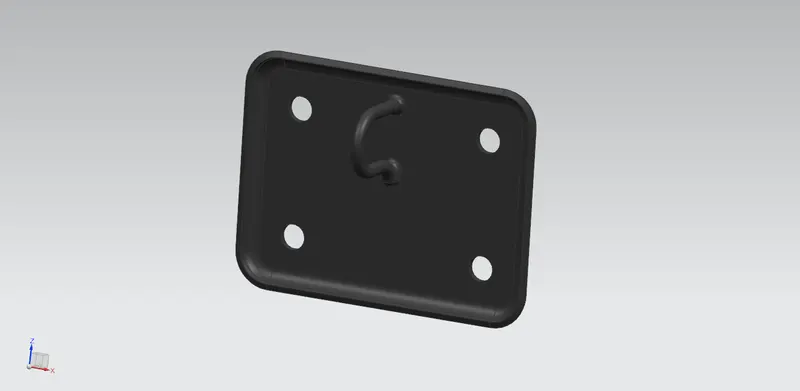
Latch and striker is the part that helps to catch and lock the hood when ever we needed and also we can unlock. We should place latch and striker properly. If we did't place it properly it will not lock and it may open while driving and It is difficult to see with the hood in your way, so it can cause you to hit something or hit vehicles around you. So we should place it properly.
4. Hinge
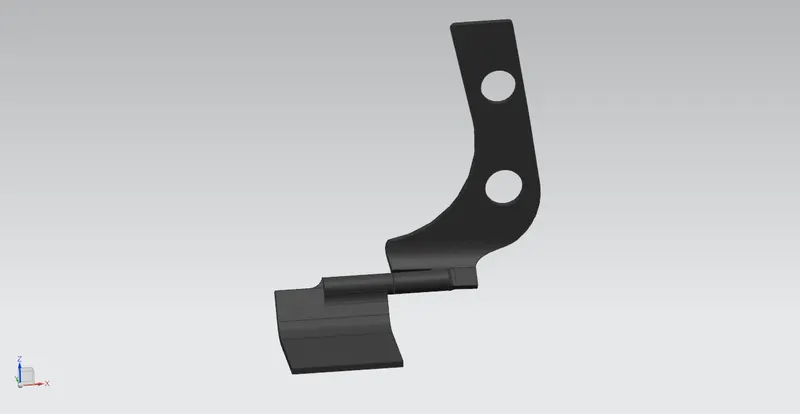
Hinge helps to join two parts while allowing them to rotate relative to each other. It has two flat faces that we can mount on the two parts. That two flat know as leaves and one leaf is attached to each other of the parts being joint.
5. Latch Trajectory
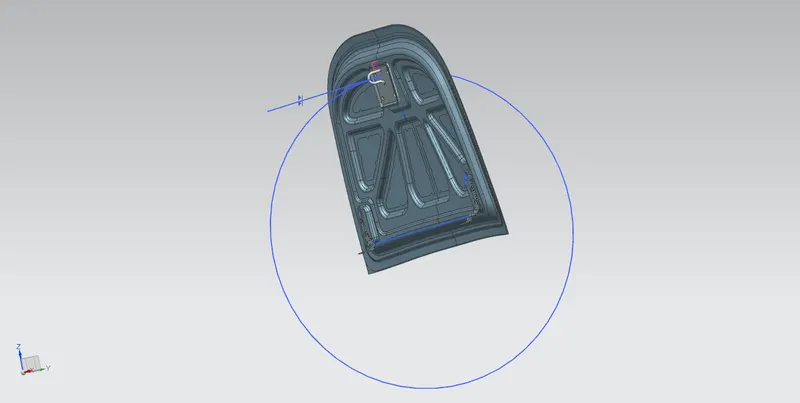
To place the latch proper position we must fix the hinge first. Then we place the Latch acording to the hinge axis. Always The centre of the striker's circular trajectory should be perpendicular to the hinge axis. Here we place the latch acording to its trajectory shown in the fig.
6. Reinforcement
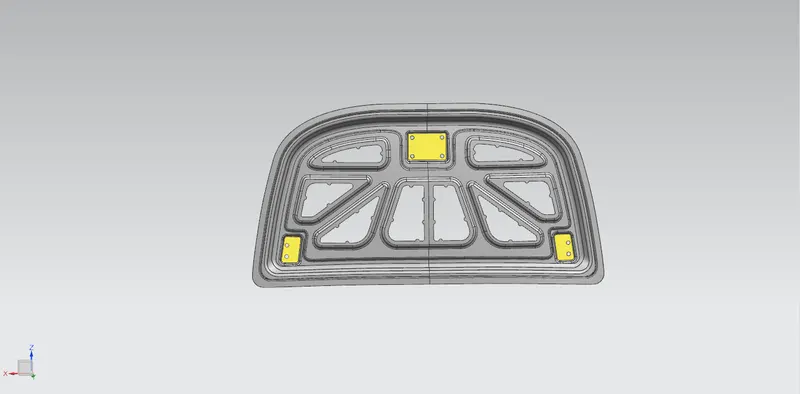
We must incresses the strength of the area where we mount hinge and the latch. Here we provide proper reinforcement for the mounting area to increase the strength. Reinforcement thickness must be greater then hood inner and outer panel thickness. so, here we provide 1.5mm thickness for reinforcement.
10. Mastic data
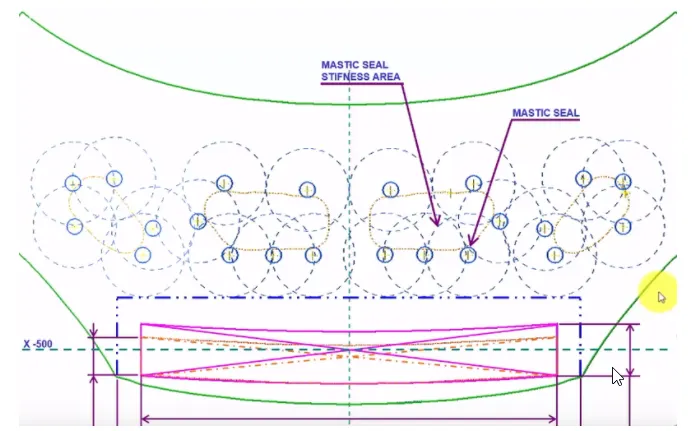
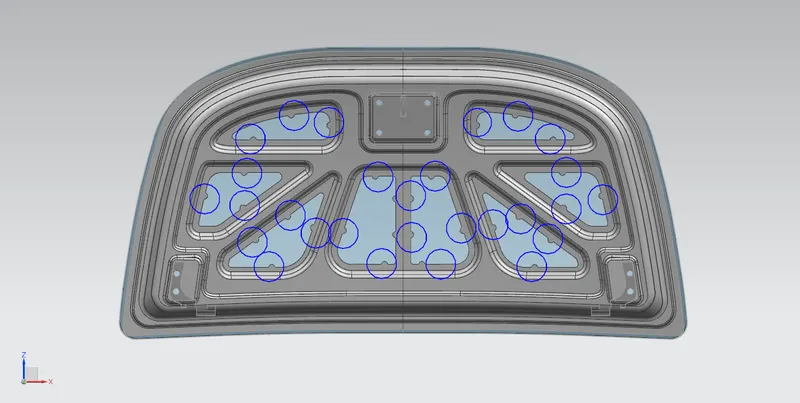
Hood commonly possess large surface area and hemming will be provided in the edge of the hood outer panel.And we can't able to use other joining techniques like welding, riveting etc because it will leave marks on the outer panel which spoil its aesthetic appearance of the hood. So, mastic sealants are used to stick inner panel and the outer panel. Mastic selants are elastic compound that behave like rubber. It is applied in every mastic spot that mentioned in above fig. Each spot of mastic sealants has its effect aroud a circular region of 80mm diameter. The mastic points are arranged in such a way. so, that it can also absorb vibration and noise.
11. Emboss
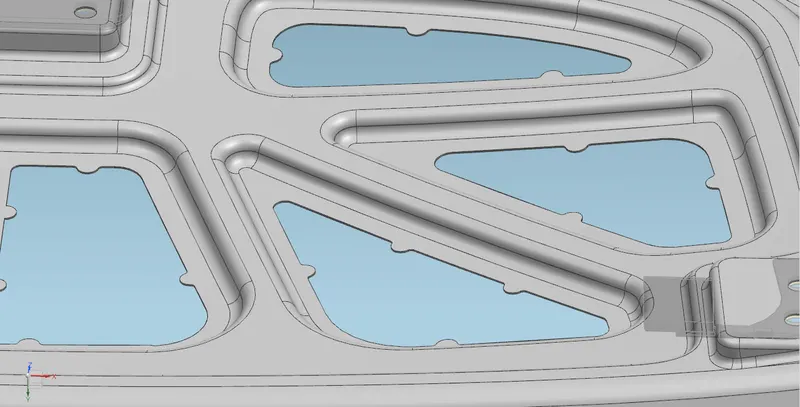
In sheet metal forming, the embossing technique are used to strengthen sheet metal materials and to improve their properties. If we didn't form emboss on the sheet metal then it will become weaker. Also we create emboss acording to force distribution during collision. Here in this fig emboss is created in such a way.
Manufacturing processes
1. Deep drawing
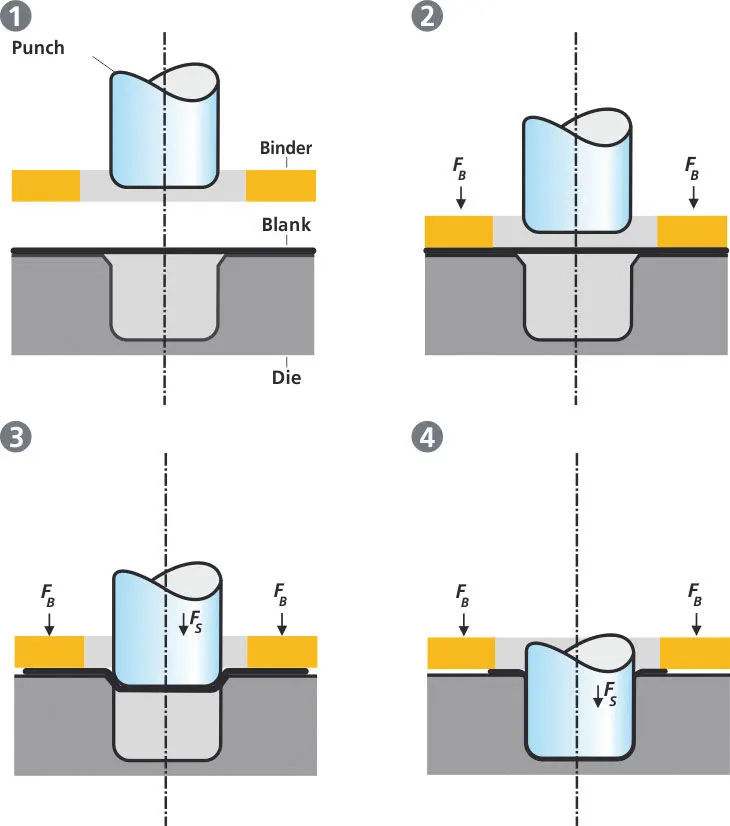
Deep drawing is the one of the forming processes used to deform the shape of the sheet metal acording to our desired shape with the help of die. This processes is used to create an emboss in the hood inner panel. Above fig shows the step by step operation of the deep drawing processes. Here, which a sheet metal blank is radially drawn into a forming die by the external force given through the punch.
2. Hemming
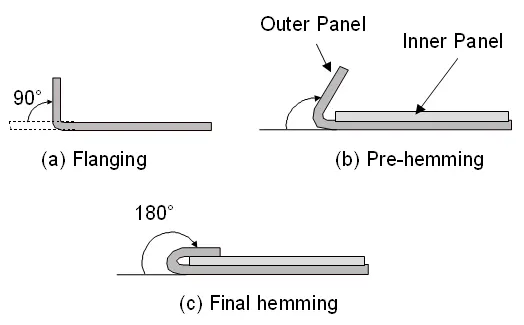
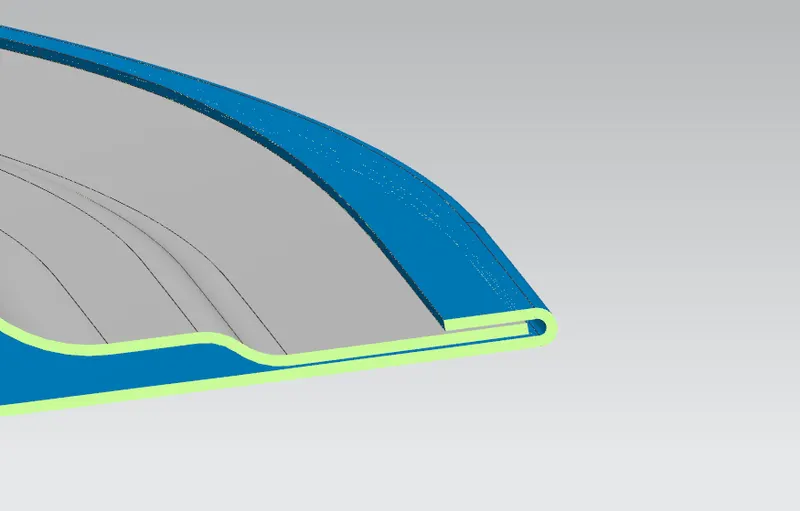
Hemming is one of the sheet metal forming processes which sheets are joined by bending into 180 degree. Here we used hemming to join hood inner panel and hood outer panel. In this processes, usually a sheet is bent with the help of nner sheet in three different stages, those stages are shown in above fig. Mosty we use two different methods for hemming operations. Which is Conventional die hemming and Roll hemming. In conventional die hemming we use die for the hemming operation.And in roll hemming we use roller to hem in all the corners of the sheet metal.
Hood Final Assembly
Conclusion
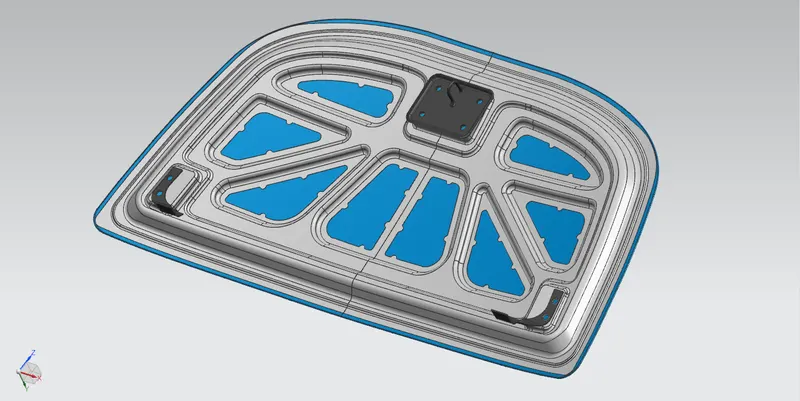
All the parts of hood is designed and assembled acording to the given master section with the Design parameters and we can forward this design for manufacturing process. Here, we designed this hood by considering safty of both the occupant and the pedestrian.