Hood design-Week 2
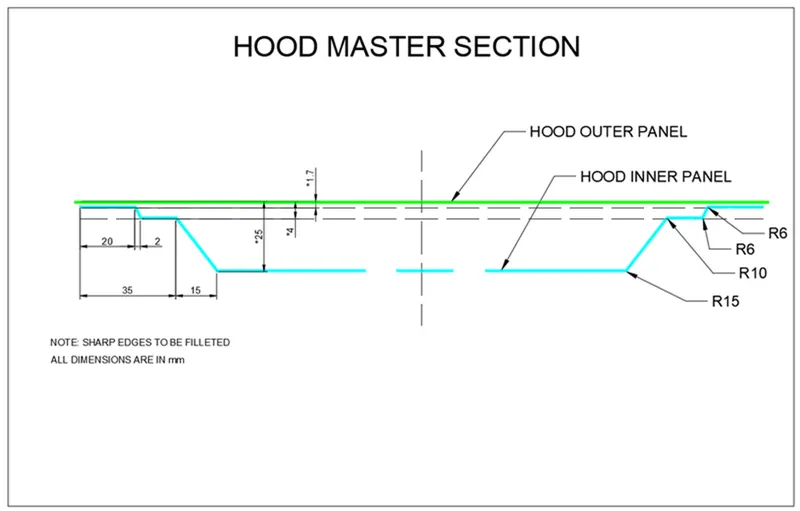
Design Hood Outer Panel, Inner Panel, and the necessary reinforcements by following the Master Section mentioned with the Design parameters explained in the videos.
HOOD:
The hood or bonnet is the hinged cover over the engine of motor vehicles. Hoods can open to allow access to the engine compartment for maintenance and repair. The shape of the bonnet is made aerodynamic to minimize the air effect.
The work has been done on the hood design of the vehicle’s front end to reduce injuries to pedestrians in the event of a pedestrian-vehicle collision. The front portion of the vehicle gets damaged including the bonnet when met with an accident. The bonnet system is an access panel to the engine compartment to enable maintenance of the power train, drive belts, battery, fluid levels, and lamp units. It is fundamentally a reinforced skin panel with many safety and quality requirements.
Design Considerations in Hood
While designing a hood several design parameters are to consider such as the opening angle of the hood, Support system for the hood, Pedestrian safety rules, etc.
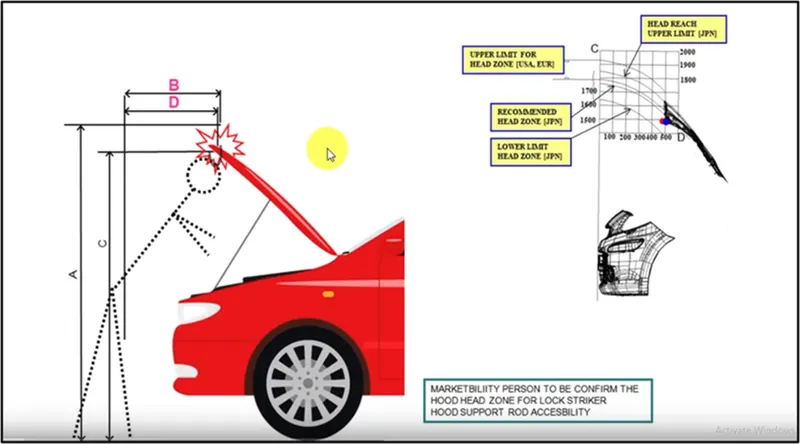
- Hood head zone for striker locking
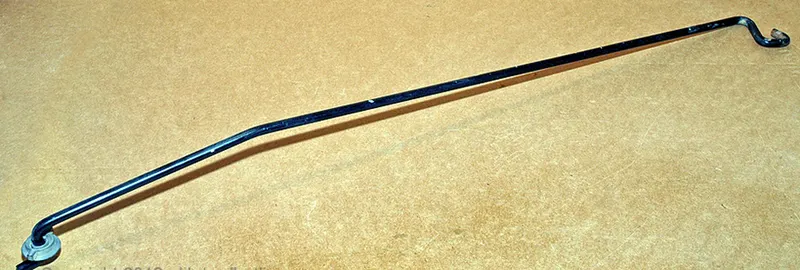
- Hood Stay
|
Hood Stay |
|
HOOD HEAD ZONE FOR STRIKER LOCKING |
Pedestrian safety:
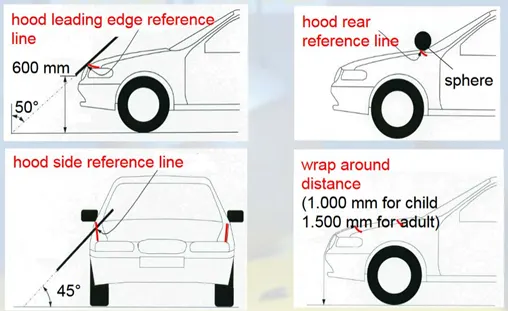
While designing the hood, it is vital to consider the safety of pedestrians as when your car hits a pedestrian during a crash, it is very important to study the areas over the hood where different body parts of pedestrians are going to be hit. According to The European new car assessment program. They are the team who analyses and give a rating on how safe the car is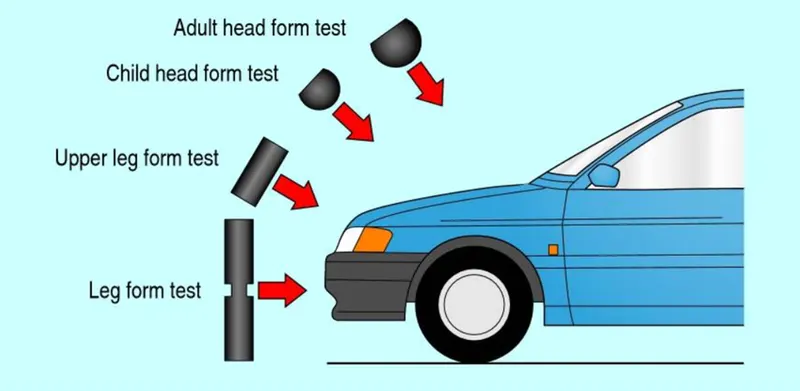
Wrap around Hood: from the ground when we take a 45-degree angle and when it touches the endpoint of the hood trap around the hood.
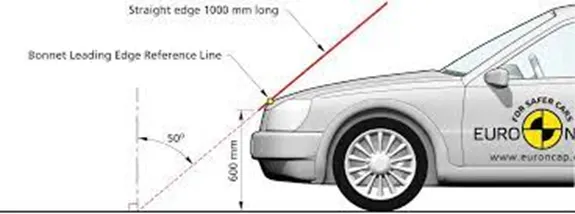
Side reference line: from the ground when we take a 45-degree angle and when it touches the endpoint of the car is the side reference line.
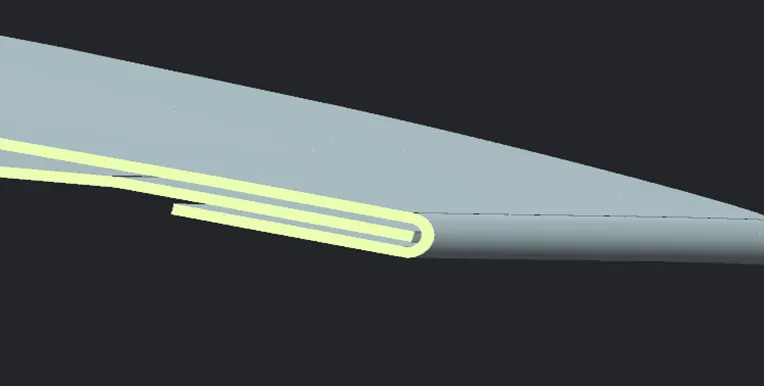
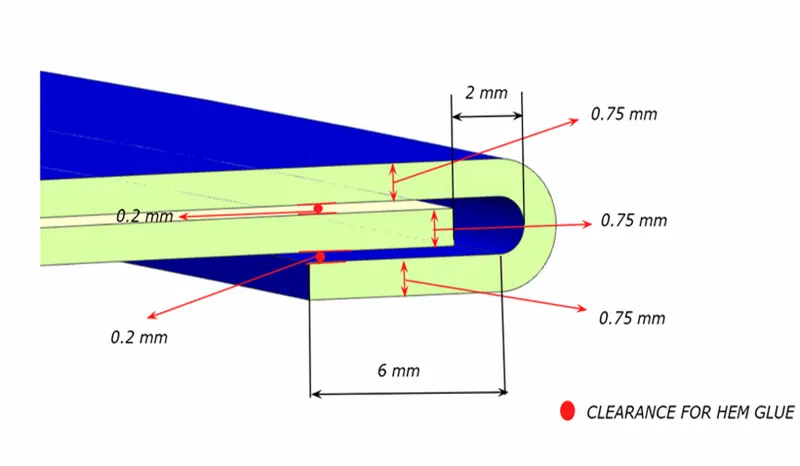
Hem: Hemming is the process where the outer panel is joined with the inner panel by adding extra material on the hood outer and made to wrap around the inner hood. The wrapping is done using the running ball rolls throughout the end of the sheet.
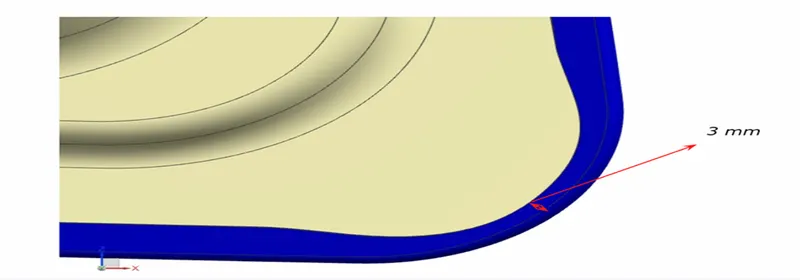
Relief angle: In sheet metal, a bend relief is an incision cut along the sides of a planned bend. Though bend relief lengths and widths vary between projects, they all share a common goal: preventing tearing and part deformation during the bending process
Design parameters:
Hood Thickness Information
Outer Panel Thickness = 0.75mm
Inner Panel Thickness = 0.75mm
Reinforcement Thickness = 1.5mm
Hood assembly:
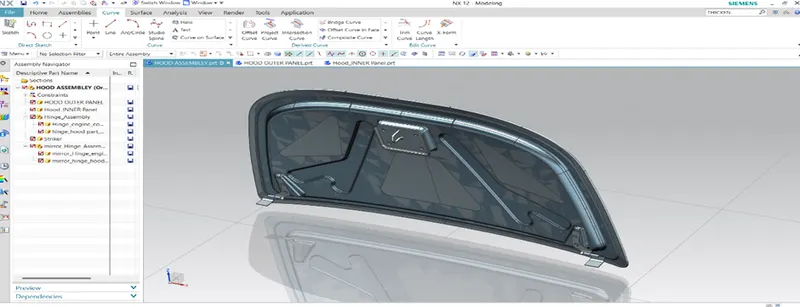
Hood assembly consists of:
- Hood outer panel or skin of the hood
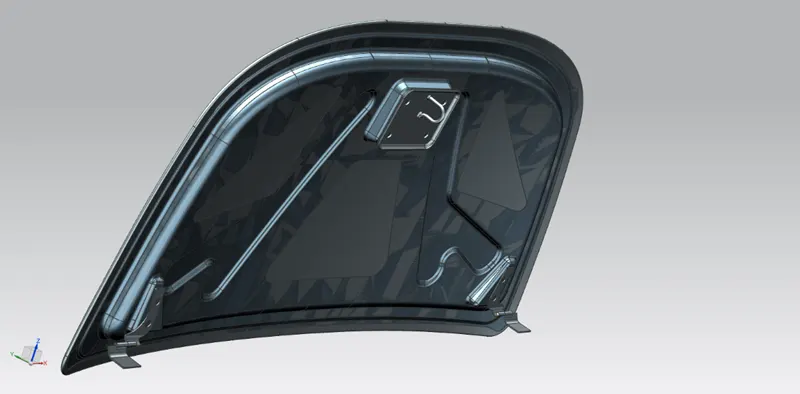
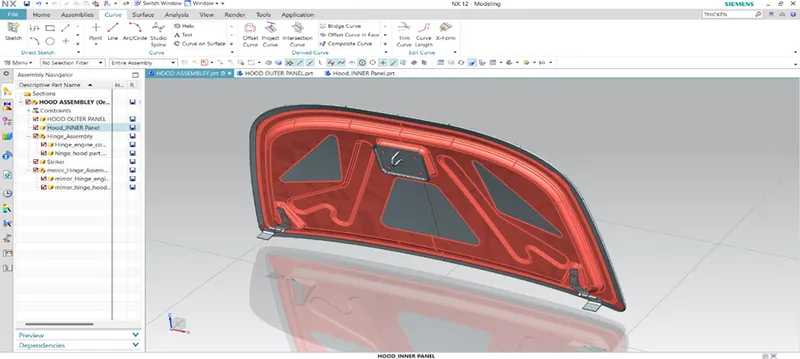
- Hood inner panel
- Hinge assembly
- Striker
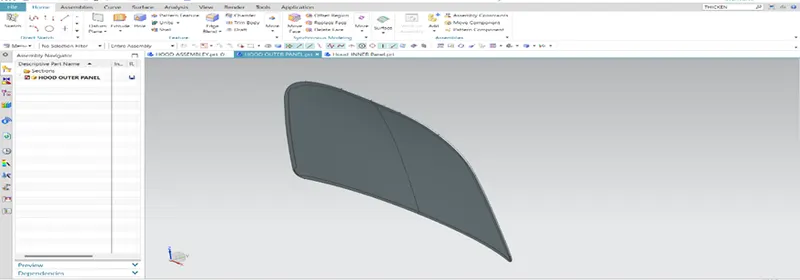
Hood outer panel or skin of the hood:
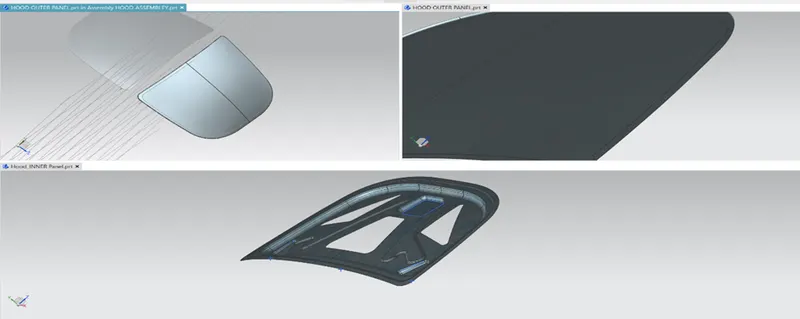
The outer panel is the extracted model from the prototype design. The skin of the inner panel is the outer panel. It gives the luxurious look to the car. Through hem, the outer panel is joined to the inner panel. The relief is given at the corners. Reliefs are provided on the surfaces to avoid spring-back situations.
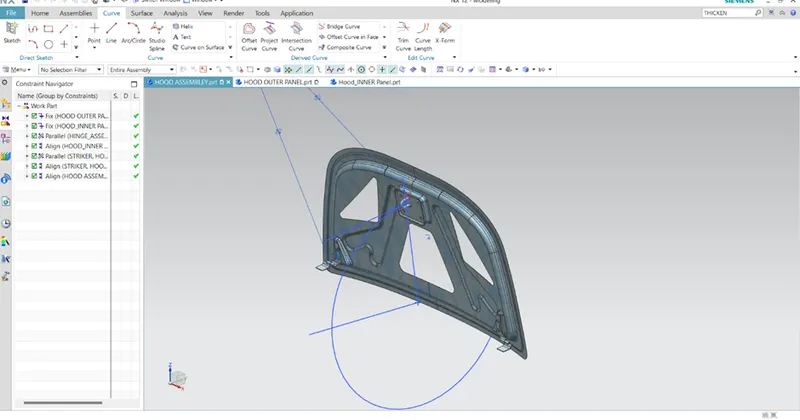
Hood inner panel:
Inner Panel is the major part that acts as support material for the outer panel. It consists of embosses that help in the distribution of forces during the impact. The inner panel is offset from the outer panel from the given data. The thickness of the inner panel is 0.75mm as mentioned.
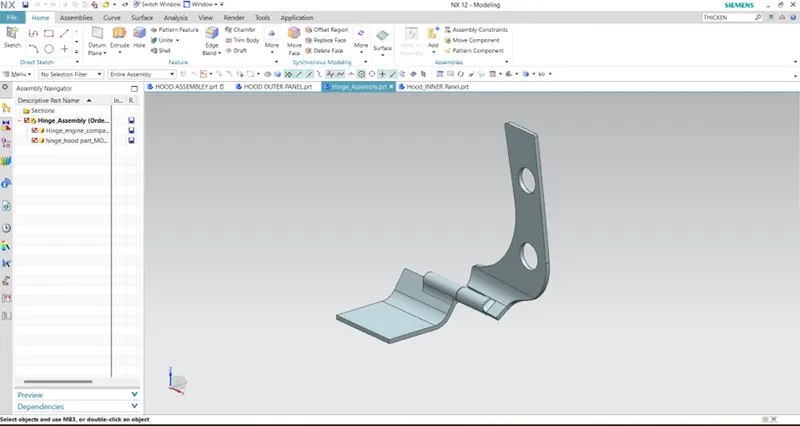
Hinge assembly:
The hinge assembly is an important part of our hood because by use of this part only we can open and close our hood whenever required with ease. This part should be strong enough to take the load of the hood and also the forces which act upon the hood in case of a crash.
Striker: This part is used for providing locking to the hood it consists of a latch-type mechanism and it is located on the inner panel of the hood to decide the position of our striker, the trajectory method is used with the help of this method we can easily locate our striker. 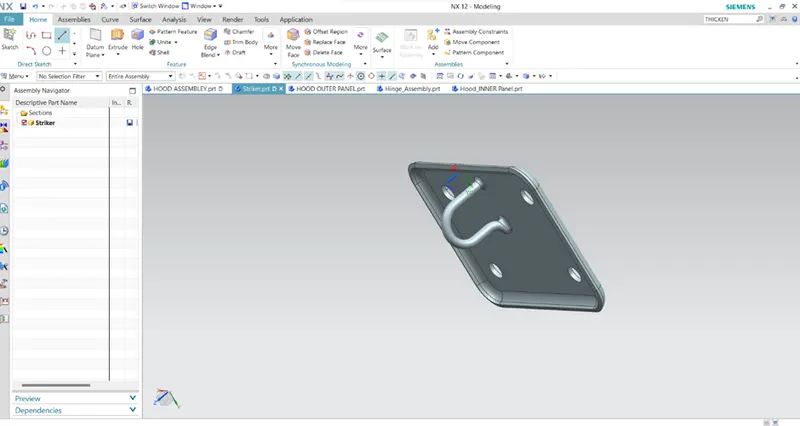
Commands used:
- Offset surface
- Offset curve in the face
- Trim body
- Law of extension
- Through Curves
- Trim & Extend
- Face Blend
- Emboss
- Mirror Assembly
- Thicken
Position of Striker:
For the proper opening and closing of the hood, the striker should be positioned in the correct position. The striker should be perpendicular to the trajectory of the hood. The flanges are positioned at their respective positions. Then the line is drawn at a straight. Now the trajectory is derived from the hinge axis and the center distance from the striker. It is denoted using the circle.
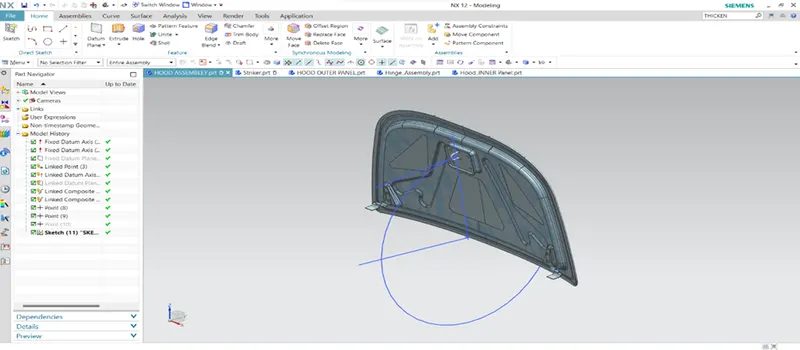
|
STRIKER ASSEMBLY |
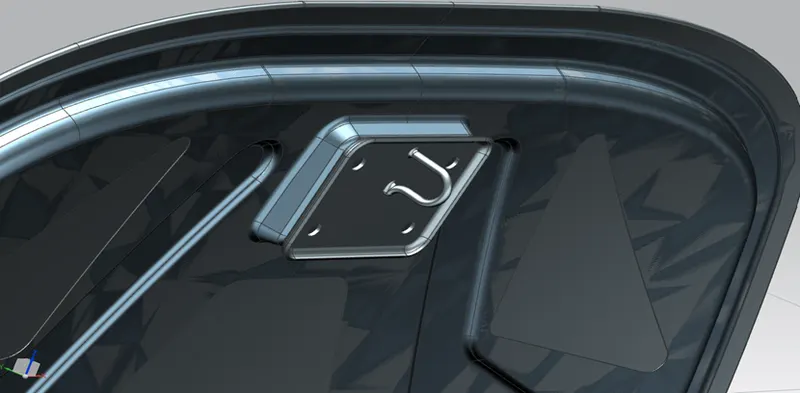
|
HINGE ASSEMBLY |
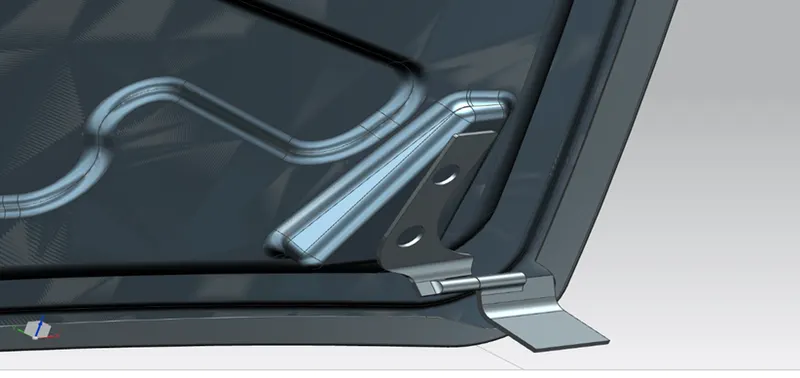
|
FINAL ASSEMBLY |
Conclusion:
Hood is designed in NX Cad tool with understanding the design requirements and considering the passenger’s and pedestrians’ safety.