Hood design-Week 2
#Challenge 1 HOOD DESIGN
Name: Sri Gokul P
Course: Automotive Sheet Metal Design using Siemens NX CAD / CATIA V5
Hood:
A car hood also referred to as a bonnet in some other countries is the hinged cover that rests over the engine of a front-engine vehicle.
Car hoods are usually constructed from steel but sometimes it made of aluminium. it may be formed from various other materials, including carbon fibre, fibreglass, or dry carbon.
During an accident with a pedestrian head impact, an active structure separates the hood's surface from the vehicle's motor components.

Design requirement:
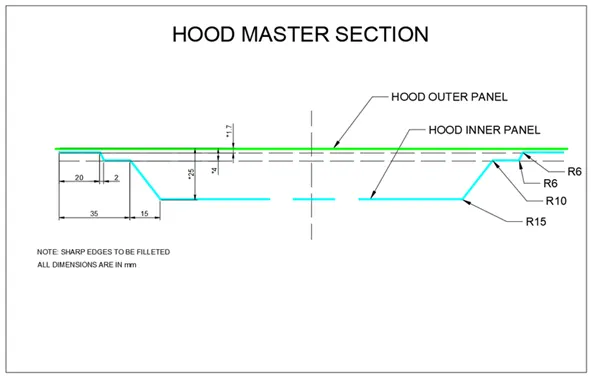
Hood Thickness Information and dimension are provided we are using this requirement to build a hood.
- Outer Panel Thickness = 0.75mm
- Inner Panel Thickness = 0.75mm
- Reinforcement Thickness = 1.5mm
 |
 |
 |
 |
 |
 |
 |
 |
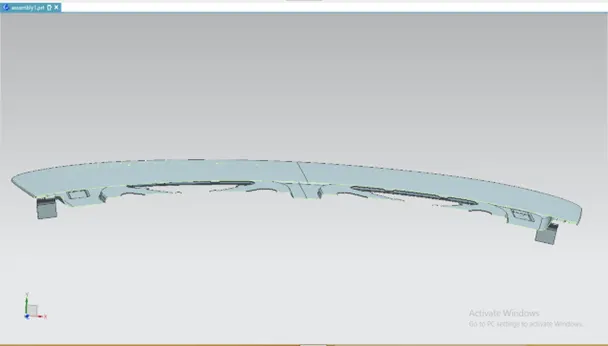
Part of hood:
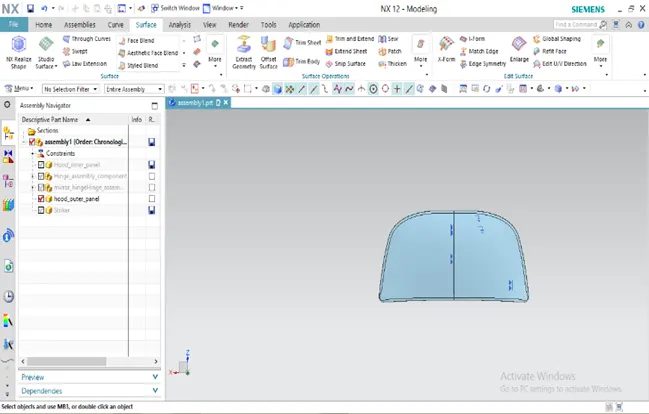
- Outer panel
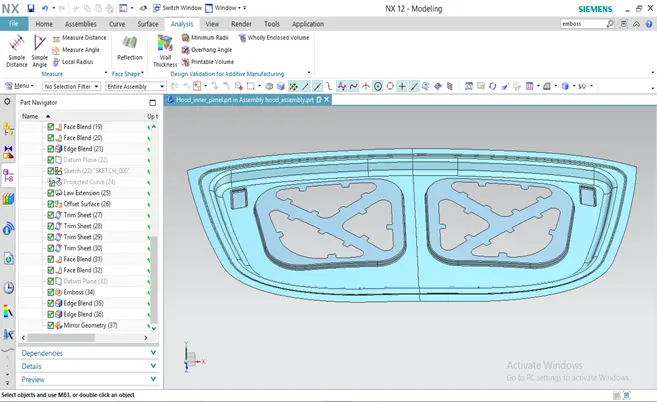
- Inner panel
- Hinges
- Latch and sticker
- Support rod
|
Outer panel: o It is an important part of the hood because of increased pedestrian safety, the strength of the hood and the durability of the car. o In inner panel to increase the durability of the structure includes reinforcement. o During an accident combination of inner and outer panel help pedestrian safety and increase WAD in a panel. |
|
|
Inner Panel: o It is an important part of the hood because of increased pedestrian safety, the strength of the hood, durability of the car. o In inner panel to increase the durability of the structure includes reinforcement. o During an accident combination of inner and outer panel help pedestrian safety and increase WAD in the panel. |
|
|
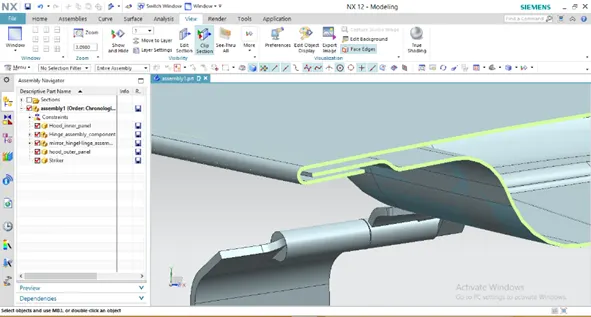
Hinge: o Hinges are connected car body and hood. Mounting is very important because during pedestrian all shock waves will move through hinges to the car body. o It might be questionable whether hinges are always necessary, but some mountings are certainly needed. These mounting points are usually the most difficult to fulfil head impact. |
|
|
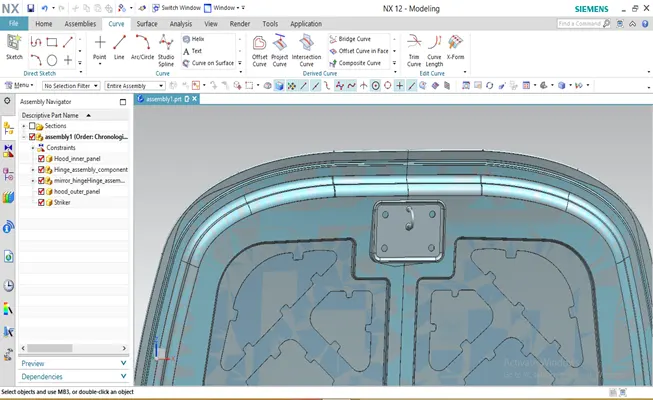
striker and Latch: o The purpose of these latches is to keep your hood closed, protecting you from getting injured by flying parts if there are any accidents while driving. o Hood latches are a safety mechanism that keeps your car’s hood closed. It is important to inspect them regularly for wear and tear. |
 |
|
Support rod: Support rod intended to safely hold up vehicle hoods during inspection and repairs. |
|

Latch Trajectory:
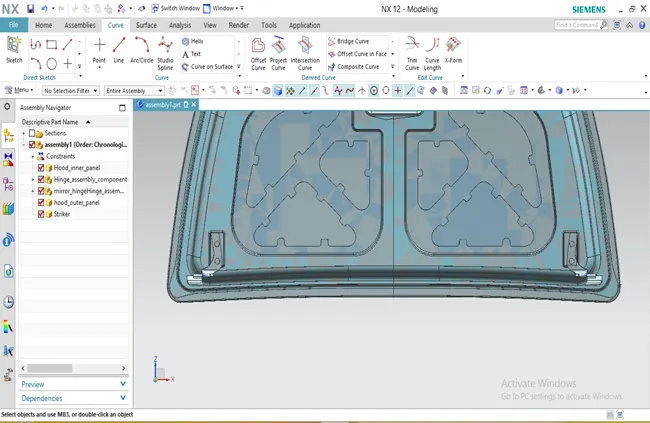
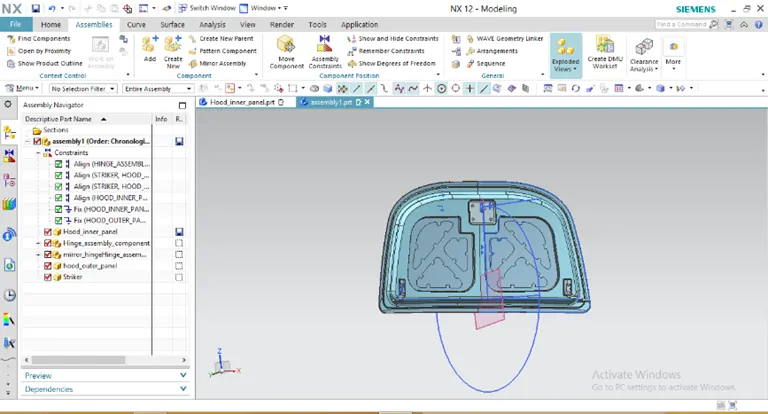
- Step 1: Find the centre axis of the hinge to draw a line between the two hinges.
- Step 2: Create a datum plane in the centre of the line using this draw a circle up to where the latch is placed.
- Step 3: draw a line from the centre of the circle to the circle and create a tangent line where the line was drawn.
- Step 4: using constrain we can place the latch.
Reinforcement:
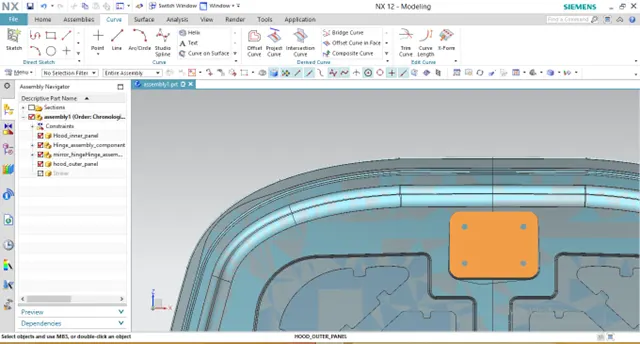
The purpose is to increase the strength of the material by adding an excess of material to its weakened areas and reducing the impact on the material during collisions.
Mastic Sealant:
- It is used to reduce NVH in vehicles and usually resists some applied pressure. It is also capable of resisting corrosion, temperature, UV rays and water.
- Its sealant is placed between the inner and outer panel region and its effect around a circular region of 80mm diameter.
The manufacturing process of Hood Design:
Deep Drawing:
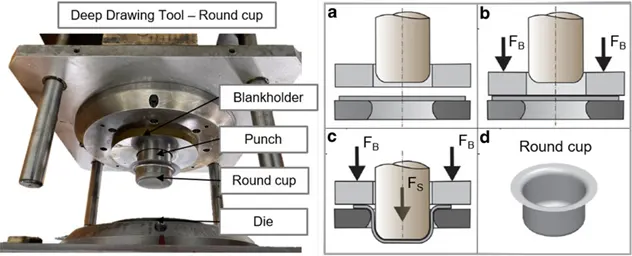
- The deep drawing process is a forming process which occurs under a combination of tensile and compressive conditions.
- A flat sheet of the metal blank is formed into a hollow body open on one side or a hollow body is formed into a hollow body with a smaller cross-section.
- Forming is achieved in stretch forming purely as a result of a decrease in sheet metal thickness. Stretch forming is extensively used for the forming of only slightly curved parts with a low depth of draw.
Hemming:
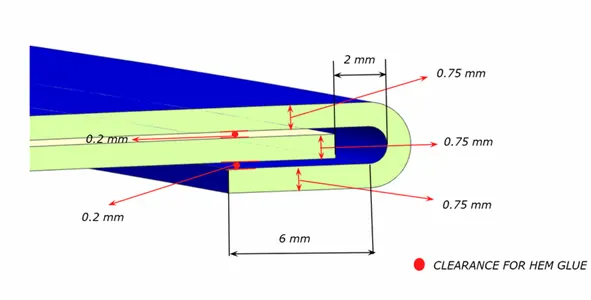
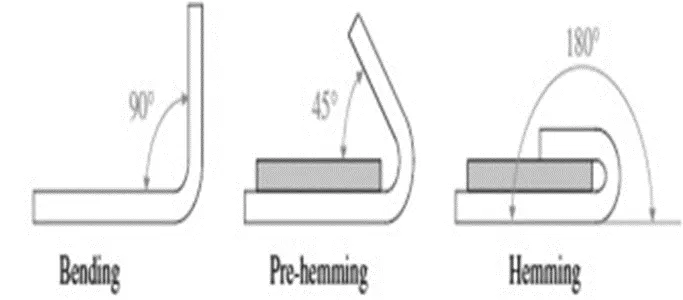
- Hemming is a technology used by the automotive industry to join inner and outer closure panels together (hoods, doors, tailgates, etc.). It is the process of bending/folding the flange of the outer panel over the inner one.
- The accuracy of the operation affects significantly the appearance of the car’s outer surfaces and is, therefore, a critical factor in the final quality of a finished vehicle.
- Hemming is performed to:
- Achieve a better final geometry in the vehicle´s part
- Add resistance and rigidity to the part
- Allow safe handling of the part.
Embossing:
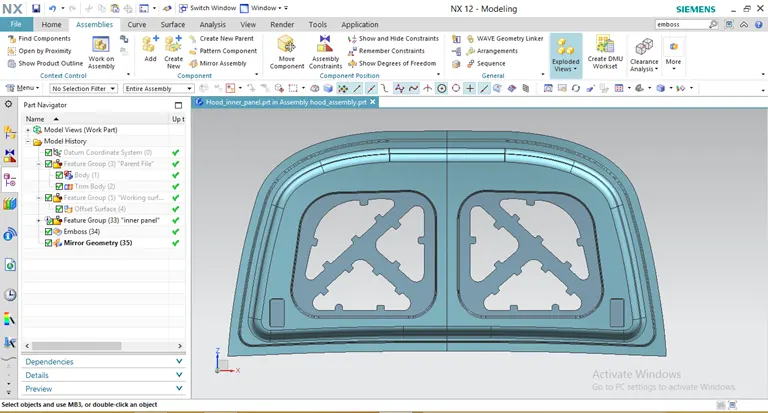
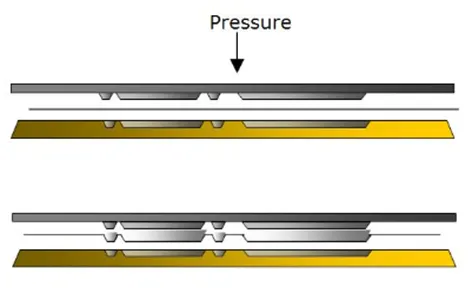
Embossing by definition is the process of giving a 3-dimensional look to a material or product. Pressure is applied to the surface of the material and results in an image remaining on the surface of the material. ‘Relief’ is another term used to encompass the process of embossing.
Features used in designing:
Trim Body – It is used to trim one or more bodies using a face or plane. You can also specify the bodies to retain and the bodies to discard.
Offset Surface – It allows you to offset one or more existing surfaces.
Offset in Face – This command will allow you to offset particular edges or curves on selected faces.
Trim Sheet – It is used to trim off a portion of a sheet body using curves, faces, edges or planes.
Through Curves – It will allow you to create a body Through multiple sections, where its shape changes to pass through each section.
Law Extension – This command extends a curve or edge to create a sheet body at desired angle length by changing the rules under angle law and length law.
Trim and Extend – It helps you to trim and extend intersecting surfaces and make corners at their intersection.
Face Blend – It creates fillets between faces.
Edge Blend – It creates fillets on the edges.
Extend Sheet – It will allow you to extend an existing surface to the required distance.
Emboss – Emboss command creates an embossing by modifying a body with faces created by projecting a curve/section along a direction. You can modify the emboss using options like endcap location and draft angle.
Projected Curve – It is used to project an existing curve/curve on a selected plane or surface by selecting a direction for projection.
Mirror Geometry – As the name suggests, it allows you to mirror geometries about a selected plane or surface.
Sew – It combines sheet bodies by sewing their common edges. There shouldn’t be any gaps larger than the specified tolerance.
Thicken – It is used to convert a surface into a solid body by providing thickness.
Extrude – It helps you to create a feature from a sketch. You are also able to create a thin feature using a sketch or curve under this command.
Wave Geometry Linker – With this, you can create, associative or linked copies of any entity of a part into other parts. It may be a surface, edge, curve, body, sketch etc. The changes made to the original entity will be reflected in the copy of that entity.
Conclusion:
Under the given parameters, I designed and assembled the car hood along with its components, using NX CAD.