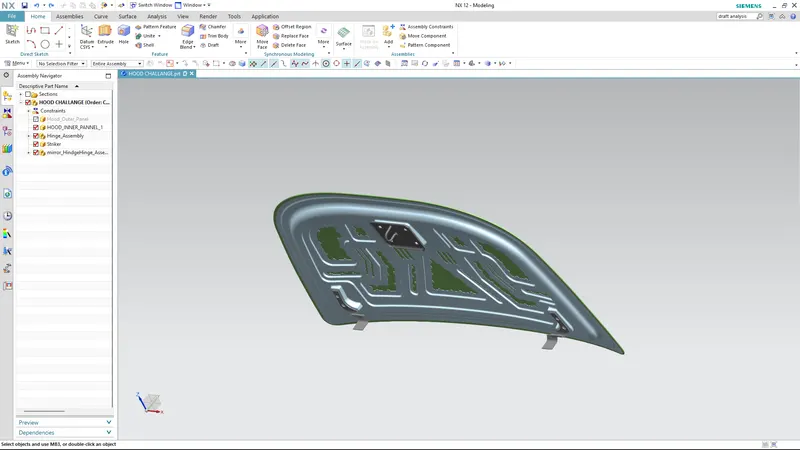
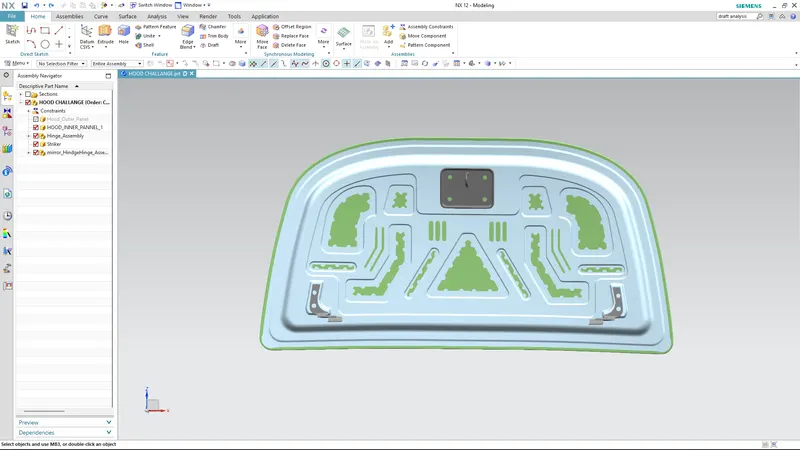
Hood design-Week 2
Hood Design Challange-Using NX CAD
Aim: To design the hood of the car using NX CAD
Objective:
- To design the outer panel from the given styling surface according to the Euro-New Car Assessment Program.
- To design the inner panel with respect to the given styling surface as well as considerng the design of the outer panel as per the Euro-New Car Assessment Program.
- To place to hindges and striker at their respective places considering the necessary reinforcement for the inner panel.
- To analyse the Latch traectory.
- To provide proper hem for the outer panel considering corner relief.
- to check the manufacturing feasibility of the inner panel by draft analysis.
Introduction:
A hood, also known as bonnet is the hinged cover over the engine of motor vehicles. Hoods can be opened to allow access to the engine compartment, or trunk for maintenance and repair. Hoods are typically made up of sheet-metal component however, some aftermarket companies produce replacements for steel hoods in fiberglass or carbon fiber to make the vehicle lighter.
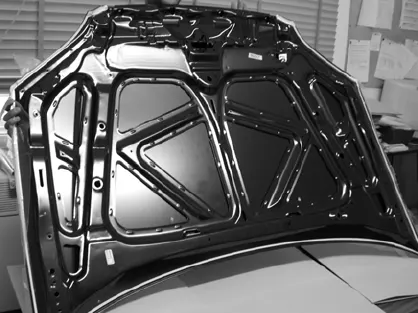
Figure (1) An example of Hood
A typical hood consists of 4 parts; Inner panel, Outer panel, Hindges and Latch & Striker. The inner and outer paner are joined together by hemming and applying mastic sealants or tapes/pads.
Types of Hood:
1. Inlaid Hood or Built in type:
In this type of hood, there is a gap between the hood and the car body as shown in the figure (2). Here, the end points or the side reference line of the car lies on the fender, which is more impactful to the pedestrains and hence affecting their Euro-NCap ratings.
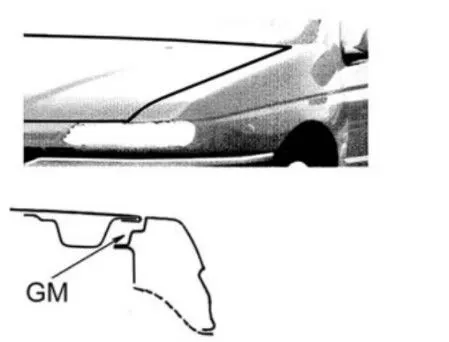
Figure (2) Inlaid Hood Type
2. Wrap Around Hood:
It is most commonly used hood type in the automotive industry. In this type, the hood tends to warp around the car body as shown in the figure (3). Here, the end point or the side reference line of the car lies on the hood itself and thus reducing the head impact zone and ultimately boosting the Euro-NCap ratings.
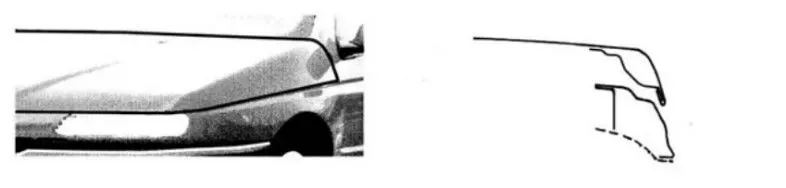
Figure (3) Wrap Around Hood
Hoods can further be classified on the basis of Hood stay types:
1. Support Rod Hood Type:
It is the basic and most commonly used support for the hood in low cost and mid range cars. The support rod is slightly bent intentionally, as hsown in the figure (4). so that it adds strength and rigidity to the rod which can hold the hood effectively.
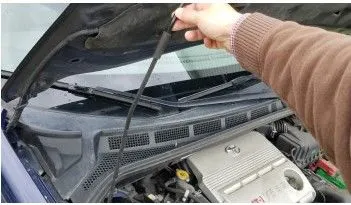
Figure (4). Support rod hood type
There are some restriction to the design and placement of the support rod. Some of them are:
- the maximum distance a rod can be bent is less than 35mm as shown in the figure(5).
- The support rod should be placed opposite to the battery compartment for the ease of operation near the battery area.
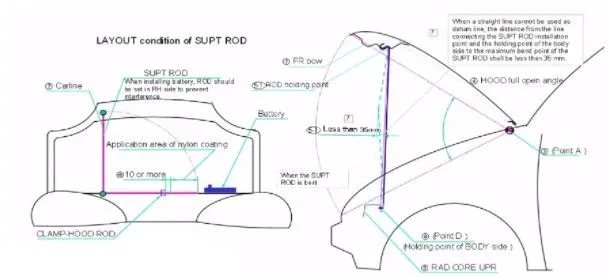
Figure (5). Layout condition of Support Rod
2. Gas Stay Hood Type:
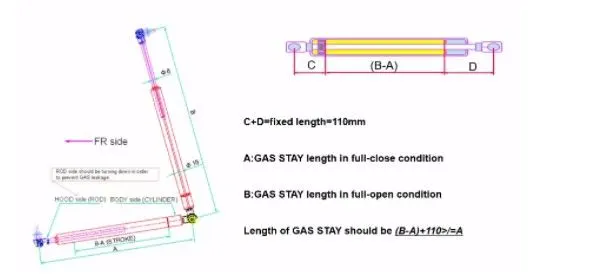
Figure (6). Gas Stay
These hoods consists of a gas stay mechanism which requires less effort to open the entire hood. One has to put only small amount of inital effort and the hood opens up itself. This is very convenient when the weight of the hood is more and difficult to lift.
The one end of the gas stay is fixed to the engine compartment and the other one is fixed to the hood itself.
Stud ball is used to fix the gas stay support.
Components of Hood:
1. Hood Outer Panel
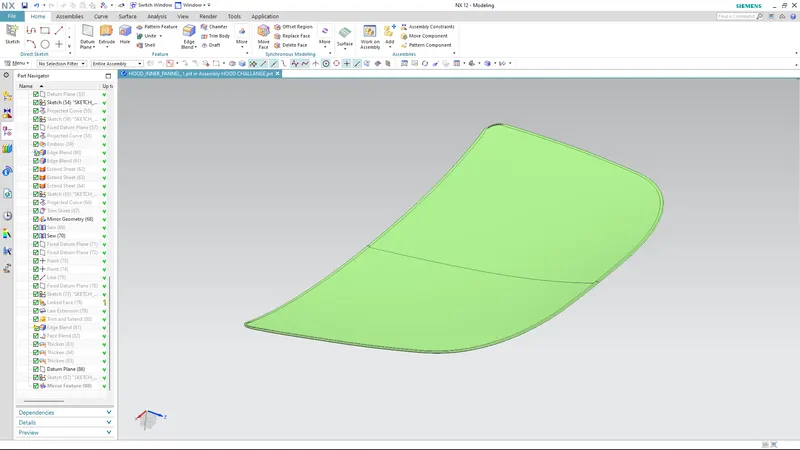
Figure (7). Hood Outer Panel with Hem
It can also be considered as the skin of the hood inner panel. It provides the aesthetic look to the car. It is attached together with the hood inner panel with a process called hemming.
2. Hood Inner Panel
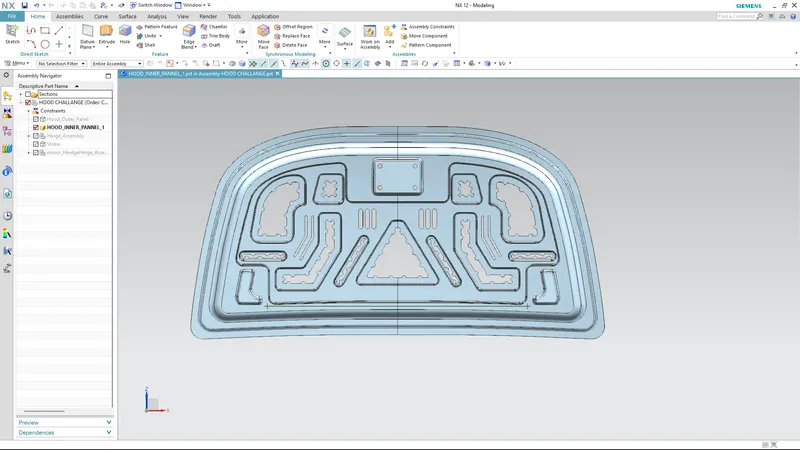
Figure (8). Front View of the Hood Inner Panel
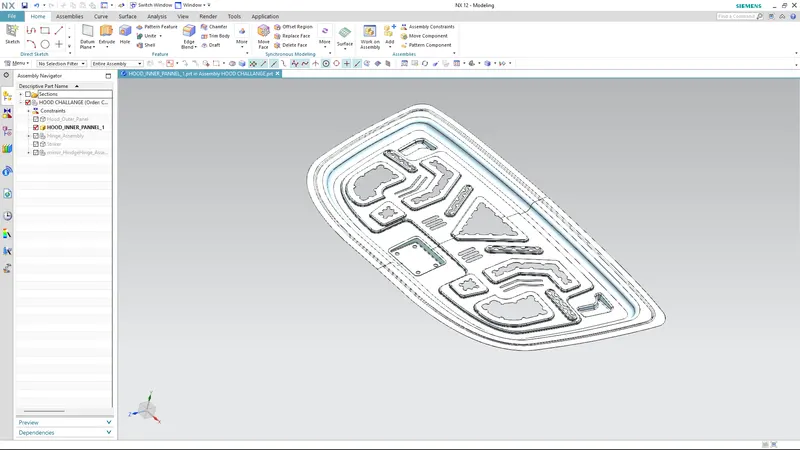
Figure (9). Isometric View of the Hood Inner Panel
Basically, it is the backbone of the hood outer panel as the hood outer panel cannot bear the load or impact itself. It is the part where all the required embosses and reinforcements are provided for hindge and striker placement.
A simple representation of my hood design which shows the force transfer throughout the body is as follows:
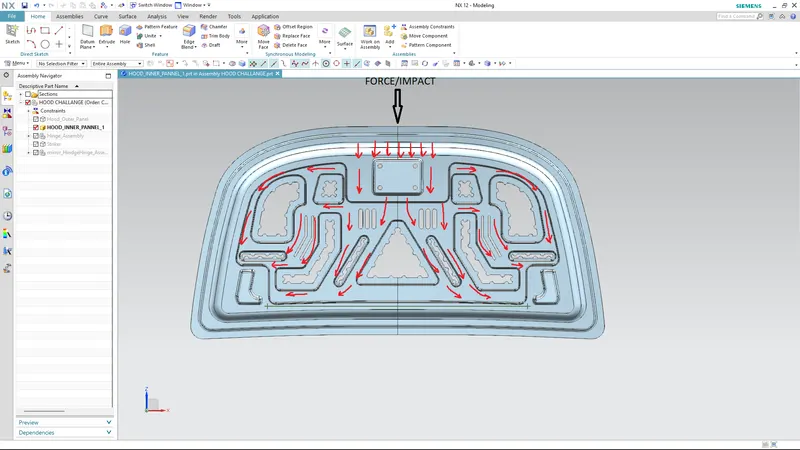
Figure (10). Representation of Force transfer on the hood
So, from the above figure you can see most of the forces are directed outwards of the hood body to the A pillar side. Therefore, during impact not all the forces will be directed towards the passanger's cabin.
3. Latch and Striker
It bolts to the underside of the hood at the front. It engages the hood latch when closed.
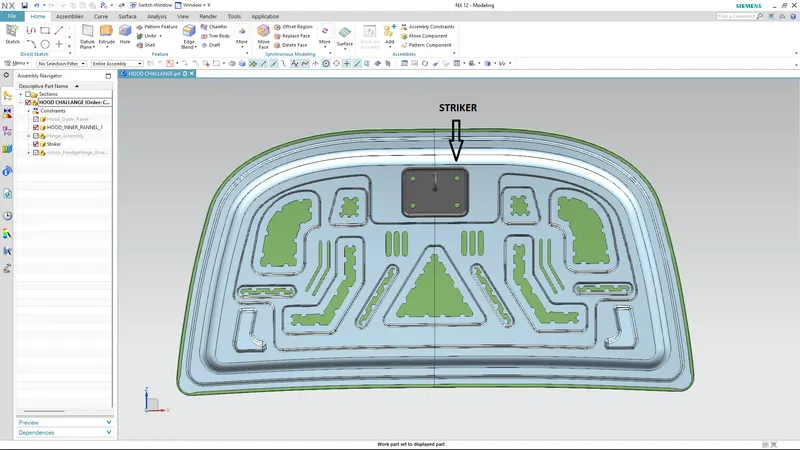
Figure (11) Striker
4. Hindges
It is a movable joint or mechanism on which the hood opens or closes.
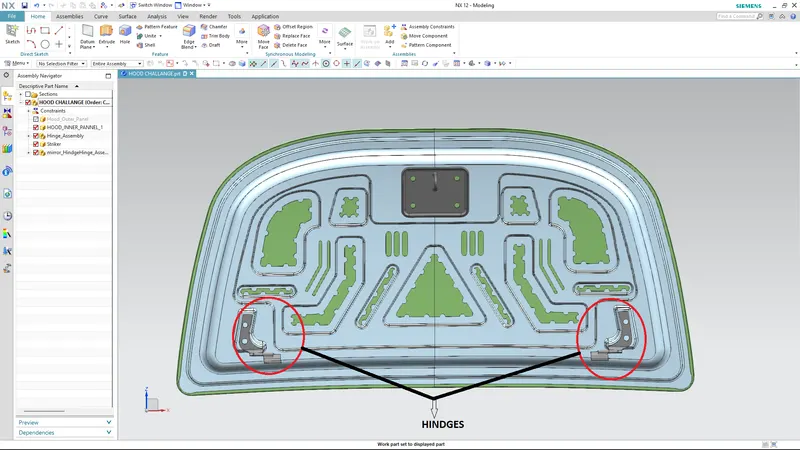
Figure (12) Hindges
Design Criteria:
1. Pedestrain Protection
Euro NCAP believes more effort by manufacturers in Pedestrian Protection would save the lives of many pedestrians and negate the emotional trauma encountered by many drivers every year as they live with the consequences of injuring or fatally wounding a pedestrian. With inclusion of the pedestrian score into the overall rating, Euro NCAP aims to encourage improvement of vehicle performance in this assessment. Euro NCAP’s results in this rating are achieved through leg form, upper leg form and child/adult head form testing.
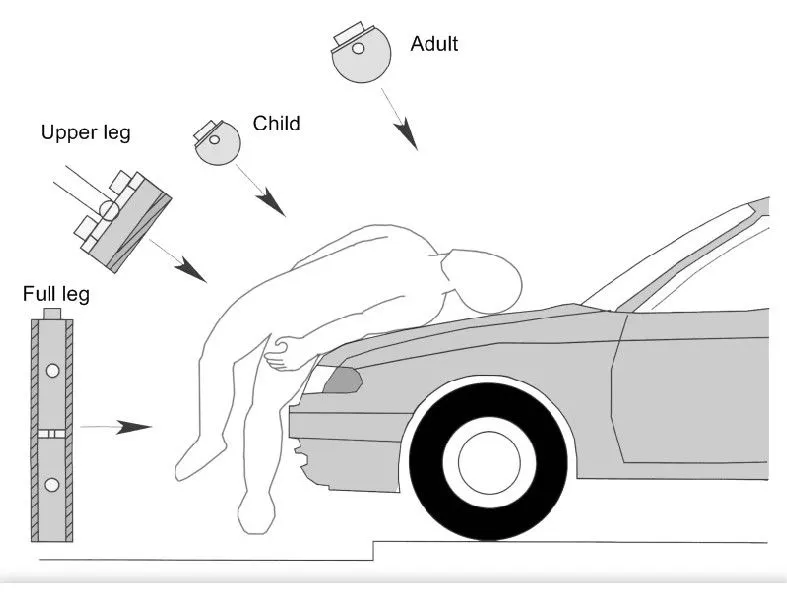
Figure (13). Pedestrain Headform Impact Tests
Therefore, the car inner panel should be designed in such a way that the embosses lie on the Adult Head Impact Zone and Child Head Impact Zone. By removing the materials from these areas we intend to reduce the strength on that part, therefore anything thats hits on that part will experience less impact. This overall improves the safety of the pedestrain in an unfortunate event.
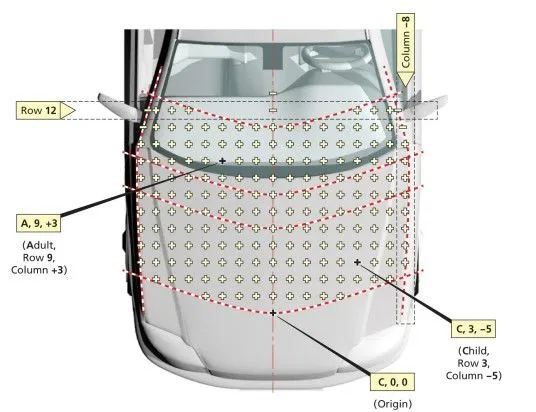
Figure (14). Labelling of the headform grid points
Euro-NCap give their ratings to the cars by analysing the safety factors for pedestrains based on the crash test performed by them. Higher the N-Cap ratings, safer the car for pedestrains.
2. Hood head Zone for Lock Striker
The hood is designed to open at an angle based on the average height of the people in that region/country.
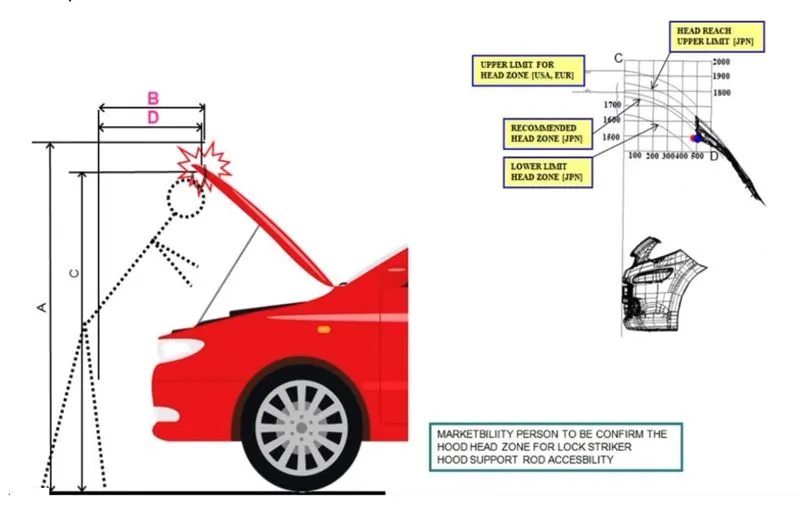
Figure (15). Hood head Zone for Lock Striker
3. Master Section
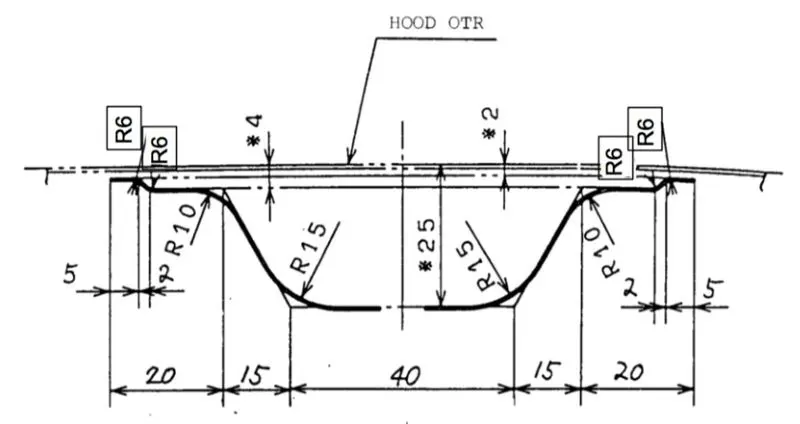
Figure (16). Master Section
A master section is a basic sketch which represents the various dimensions related to the part. Figure (16) is the master section of the hood and this master section helps to understand the following important features:
- The hemming region and the corner relief to be provided.
- The gap between the inner and outer hood panels.
- The blends/fillets to be provided at the edges.
Some Other Important Considerations:
1. Position of the striker
We have to set the position of the striker in such a way that it should be pependicular to the trajectory of the hood. In order to do so, first the hindge should be tentatively positioned and an axis is created between the two centrepoints of the hindges as shown in the figure(17).
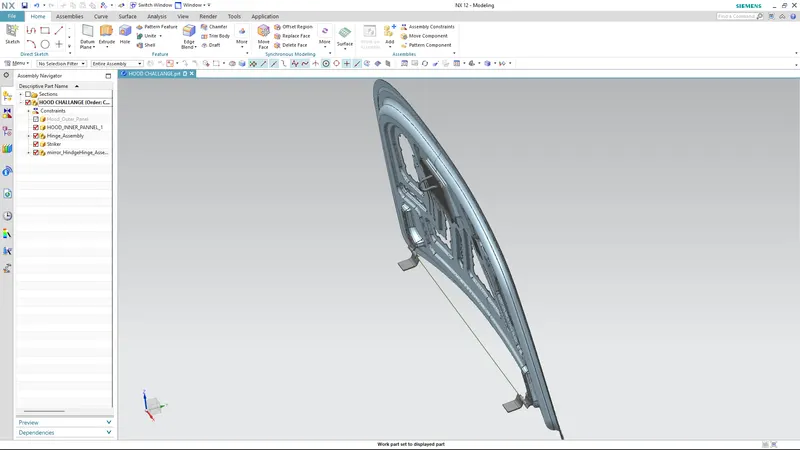
Figure (17). Hindge axis
The trajectory is derived from the hindge axis and the centre distance from the striker. It is denoted as a circle as shown in the figure (18).
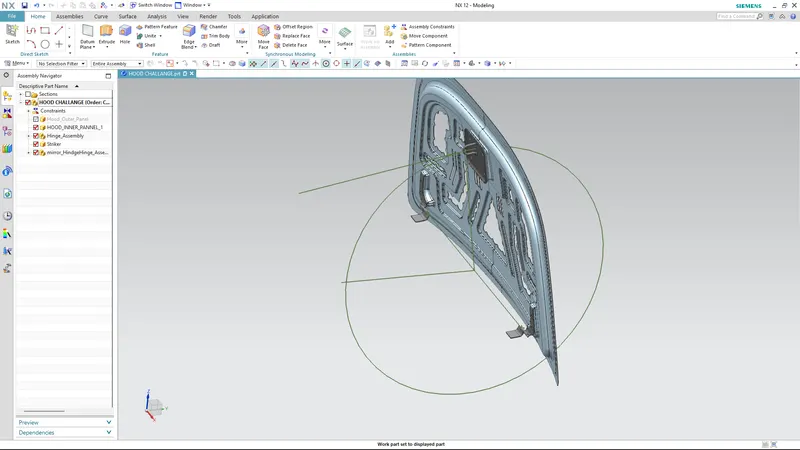
Figure (18). Tragectory of the striker
2. Hemming
It is a process of attaching the outer hood panel to the inner hood panel by adding extra material on the outer hood panel and made to wrap around the inner hood panel as shown in the figure (19).
This wrapping or roll over is done by running the ball rollers of variables radii throughout the ends of the outer sheet.
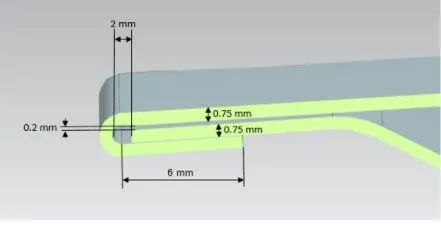
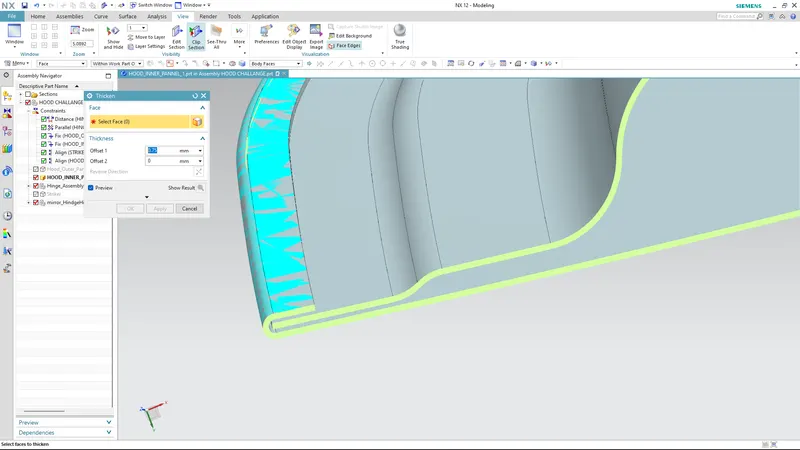
Figure (19). Hemming
3. Mastic Data
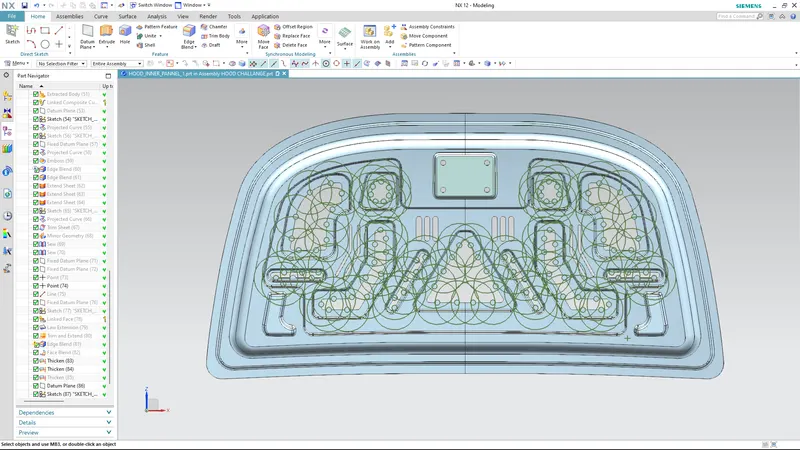
We can apply mastic sealant to the hood inner panel to join it with the outer panel. The Mastic Sealant is an elastic compound that behaves like a rubber. They help the hood outer panel to come back to the original shape after it gets deformed. The mastic has an influence area of 80mm in radius as shown in the figure(20).
Figure(20). Mastic Data
While creating the emboss a coin shaped extends were created for applying the mastic points. The main function of the mastic sealant is to reduce the NVH (Noise, Vibration and Harshness) created on the hood. The mastic points will reduce the NVH for the radius of 80 mm. So by providing as many as mastic points on the centre area the hood wil increase the performance of the car.
4. Draft Analysis
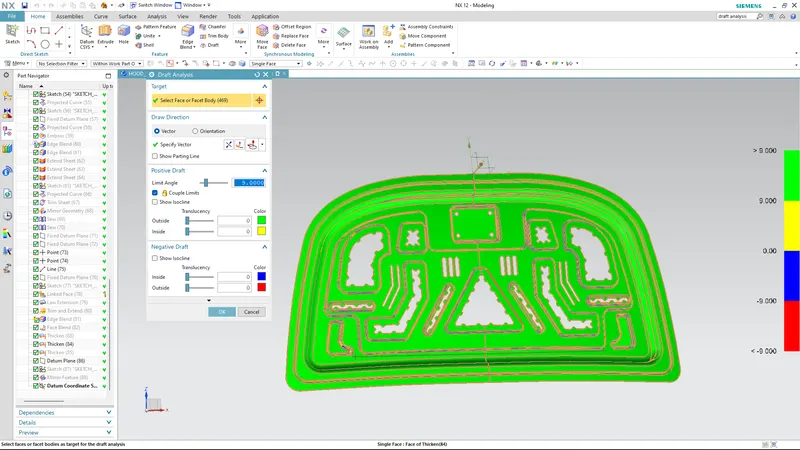
Figure (21). Draft Analysis
A draft analysis is done with a limit angle of 9 degrees for the positive draft.
Conclusion:
Hence, the hood of a car is designed as per the industrial manufacturing requirements following the Euro-NCap standards.