Hood design-Week 2
HOOD DESIGN
OBJECTIVE:- Design Hood Outer Panel, Inner Panel and the necessary reinforcements by following the Master Section mentioned with the Design parameters and make detailed report about the Hood Design which includes a detailed explanation about hood and its components, Latch Trajectory, Mastic Data, Emboss Definitions, Manufacturing process like Deep-Drawing and Hemming, and all the parameters followed in the design.
HOOD
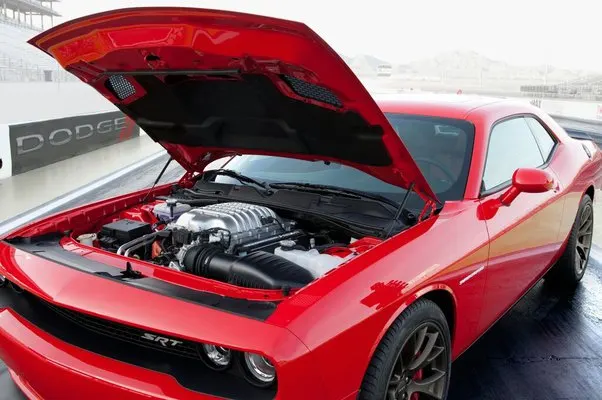
Hood is a main component of front portion of a car. It is an opening body panel that covers the engine in front engine vehicle. It consists of an outer panel and inner panel. The inner panel provides the strength while the outer panel functions as the metal cover. It is an access panel to the engine compartment to enable maintenance of power train, drive belts, battery, fluid levels and lamp units.
DESIGN CONSIDERATION
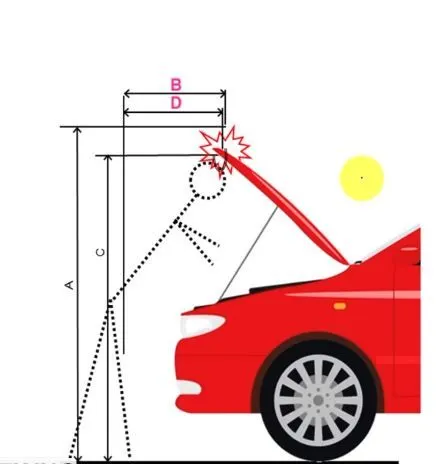
The human comfort factor for automobile design is first consideration. It is a method to safeguard and protect space for the human user and necessary components that make up the vehicle being designed. All safety regulations are ensured during this process. Ergonomically consideration consist of Hood clearance, Hood Opening angle and location of support rod or gas stay.
Hood opening angle is different for different regions or countries. It is decided by the average height of the human in that particular country.
Safety requirements:-
The most important safety requirement is regarding the frontal collision.
It should withstand in high collision forces as well as it should divert the forces in outward direction so intensity of collision forces would be reduced to cabin side of car.
Pedestrian safety:-
Design should be such way that it should reduce the injuries to the pedestrians in the event of a pedestrian vehicle collision. The objective of these measures is to reduce the number of road accident fatalities and the severity of injuries sustained by pedestrians involved in a collision with a vehicle in urban traffic.
The height, weight and age of the pedestrian all play a role in the kinematics of the event and in his ability to survive. Most fatalities for the younger population are related to brain damage caused by head impact on the bonnet. For older people additional risks include rupture of arteries in the lower limbs and pelvis from bumper and bonnet leading edges. Impact frequency and seriousness of injury has been studied for many years, resulting in rating systems and improved design.
Evaluation of pedestrian safety for a bonnet must be carried out in the context of its surrounding elements like Vehicle styling, size (wrap around distance “WAD”) and under bonnet clearance to other elements (considered as hard points). Local bonnet stiffness is influenced by mounting point stiffness such as hinges, bump stops and latches. This is better understood by superimposing the kinematics of a dummy onto the test conditions.
Wrap Around Distance (WAD) :- It is the geometrically traced distance from the contact point with the Ground Reference Plane, vertically below the front face of the bumper, to any point on the vehicle front structure.
Side Reference line :- The geometric trace of the highest points of contact between a straight edge, held parallel to the lateral vertical plane of the vehicle and inclined 45 deg. is traversed down the side of the front structure, and the side of the front structure.
Child Head Impact Zone: - 1000 WAD to 1500 WAD
Adult Head Impact Zone: - 1500 WAD to 2100 WAD
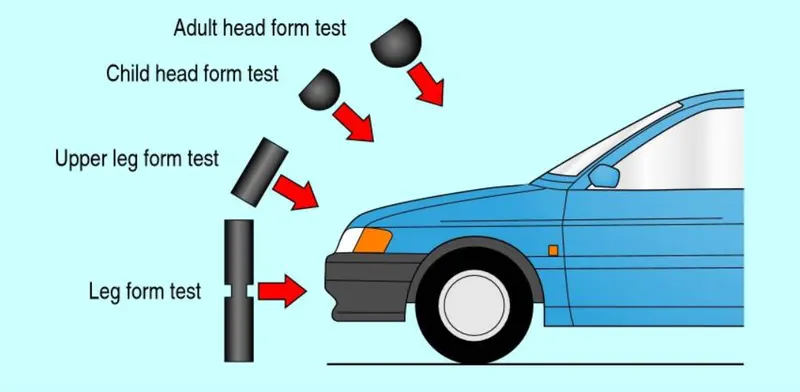
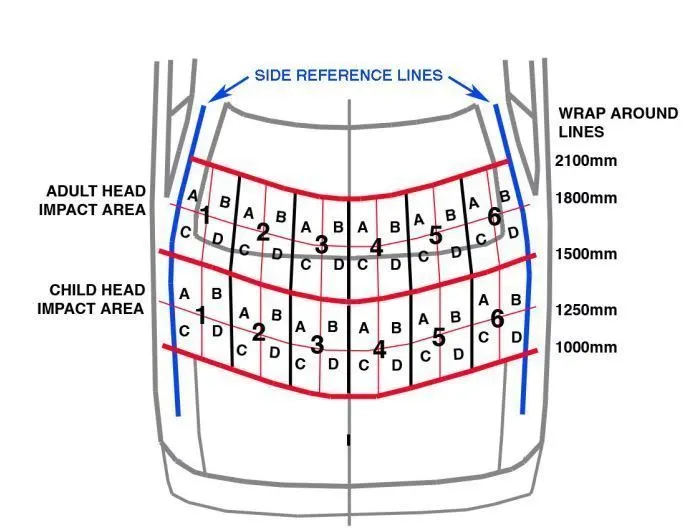
Besides functioning as an engine compartment cover, the hood of modern vehicles can also help manage the impact energy of a pedestrian’s head in a vehicle-pedestrian impact. However, a hood’s ability to absorb impact energy may be impeded by the proximity of the hood to components packaged inside the engine compartment, i.e., by its under hood clearance.
For example, for a given hood design, the hood’s ability to absorb impact energy through deformation can be significantly reduced when the hood and engine block are in close proximity.
Therefore, a large under hood clearance would be preferred for pedestrian protection.
The predicted level of protection offered by the vehicle is verified by EURO-NCAP.
DESIGN
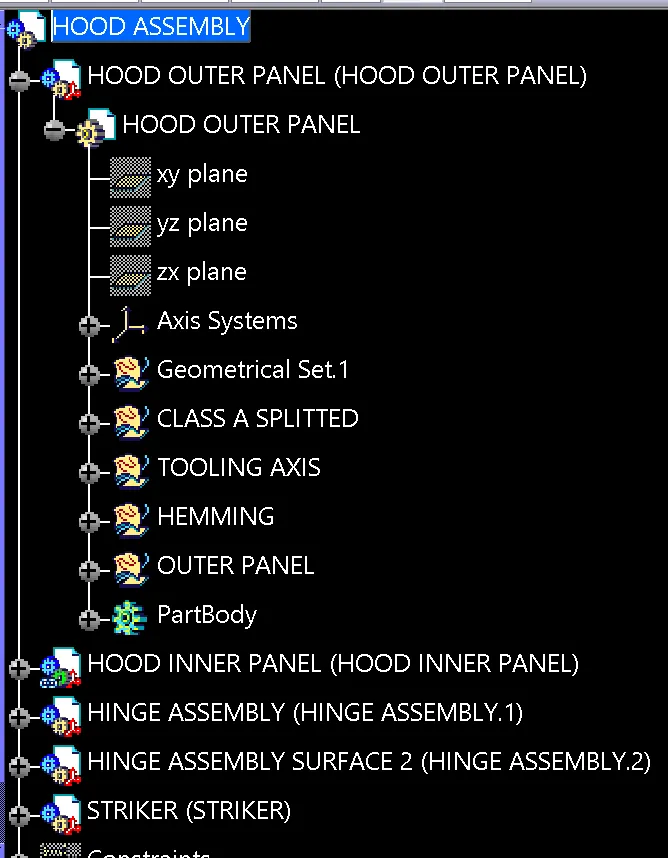
HOOD ASSEMBLY MAINLY CONSIST OF -
- OUTER PANEL
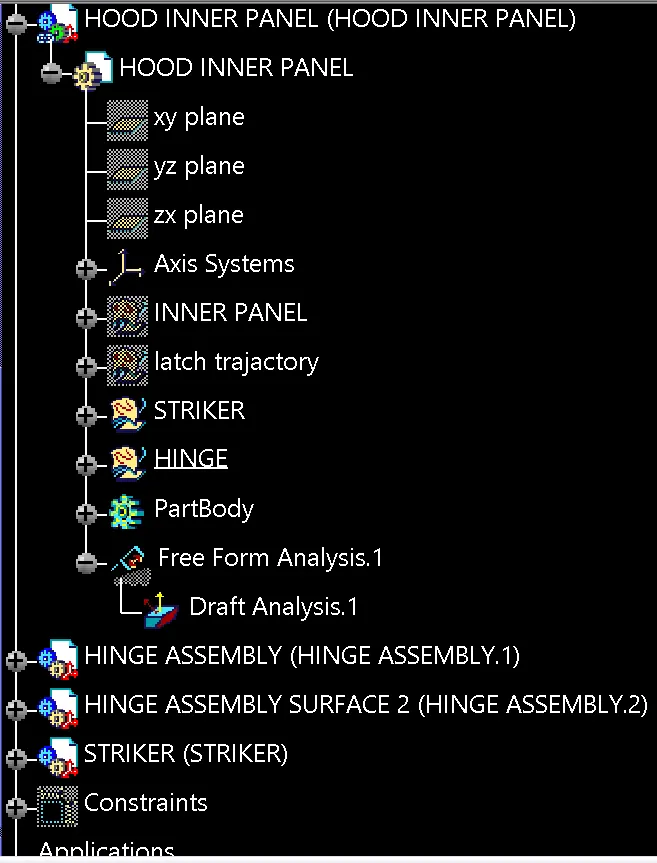
- INNER PANEL
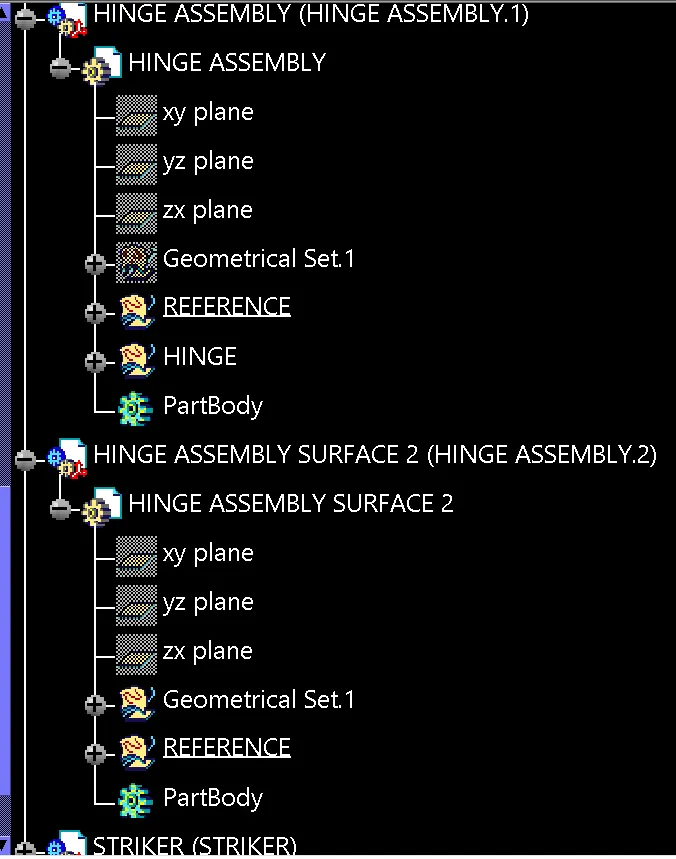
- HINGE ASSEMBLY
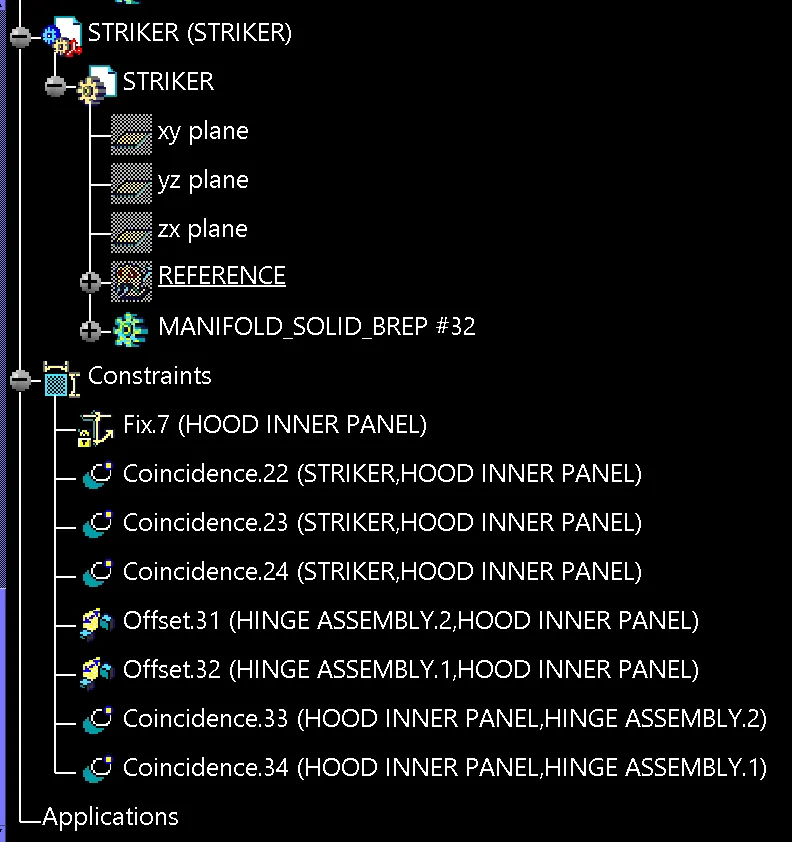
- LATCH AND STRIKER SYSTEM
GIVEN DATA
Hood Thickness Information
- Outer Panel Thickness = 0.75mm
- Inner Panel Thickness = 0.75mm
- Reinforcement Thickness = 1.5mm
Hood Outer Panel/Skin Data
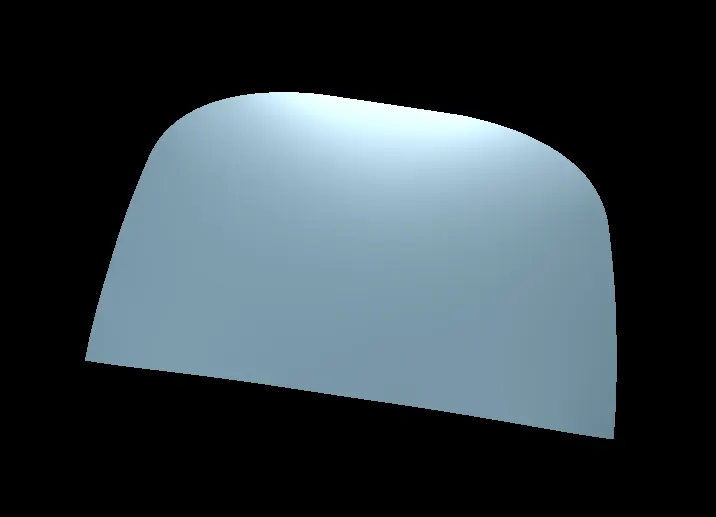
In the vehicle development, Hood outer is an important part of the front portion of the car which is used to decorate and which gives aesthetic look to the car, the hood outer from style department from achieved the aesthetic look of vehicle, maintain the gap and falseness with surrounding part. Outer hood panel must be follows the aerodynamic criteria, this will change the class as well as type of vehicle. Also to design to pass the standard load cases like, buckling resistance of metal outer panels (Dimpling and Oil Canning), this will change as per manufacture of vehicle. Mainly flushness is considering the aerodynamic consideration of a vehicle. Gap between two components consider on dimensional and shape tolerance of component, which also depend on the manufacturing process. Small gap then required the tight tolerance and high cost.
Hinge assembly
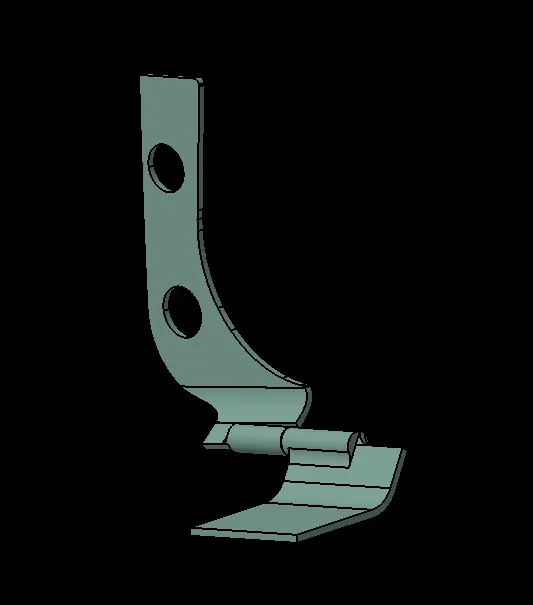
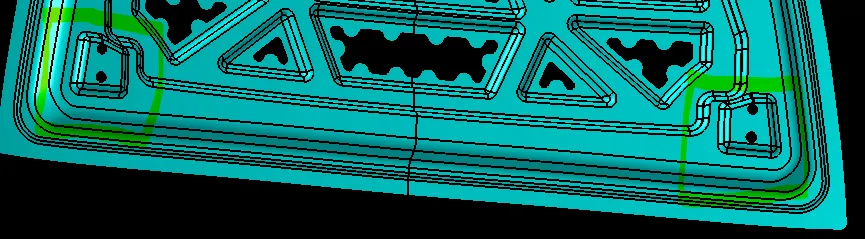
The hinges also guide and hold the hood when opened. Their kinematics has to ensure that the hood does not contact other components for hinges with a single joint, the choice of position is very limited. In many cases, this problem can be overcome by selecting a multipoint hinge. Different design concepts for hinges have been found. A single-joint hinge used in this project with its rotation point outside the area could provide the required deformation space
Striker
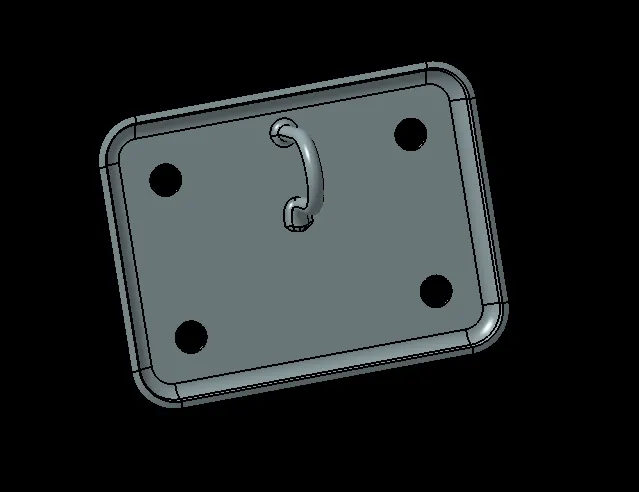
This system is the attachment of hood assembly and vehicle body. The hood latch system must be able to catch the striker of the hood upon closing and instantaneously, as well as automatically, lock. Once in the locked state, it must remain locked and only unlock upon the operator’s control.
Creating Hood Inner Panel:
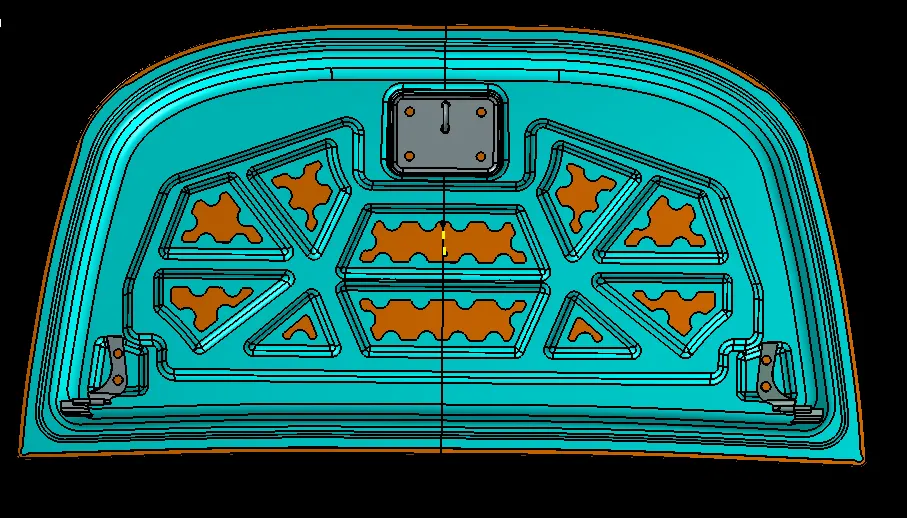
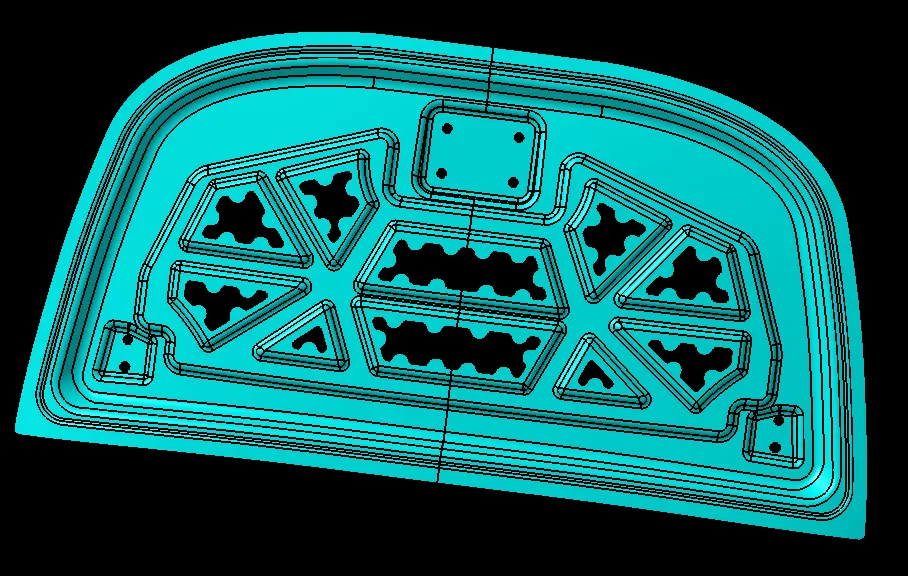
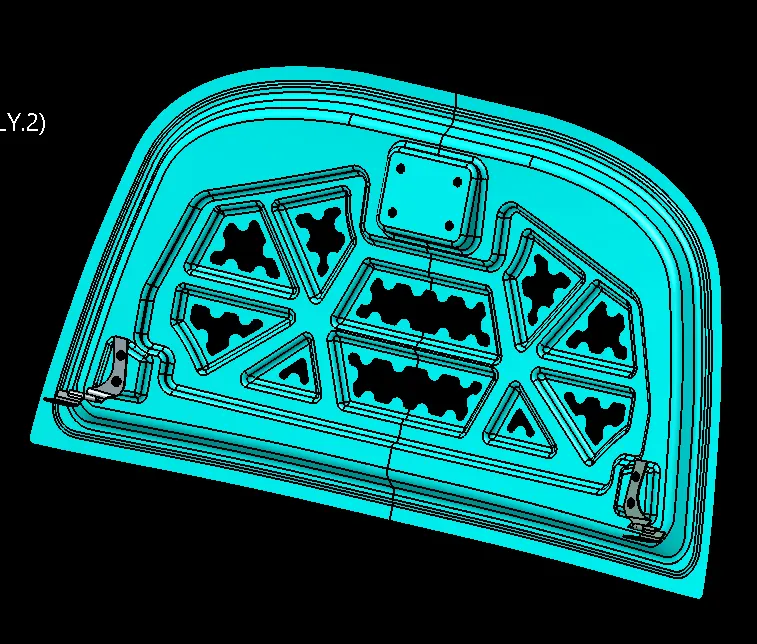
Hood inner is main functional part in hood design, It’s most critical and weight consuming part in hood assembly. In the vehicle development, the hood inner was designed to meet the standard load cases. The exact targets for these load cases are laid down in the vehicle manufacturers technical traditionally; the hood inner panel is designed with a rib structure supporting the hood outer panel. Such a design usually has weak points and stiff points
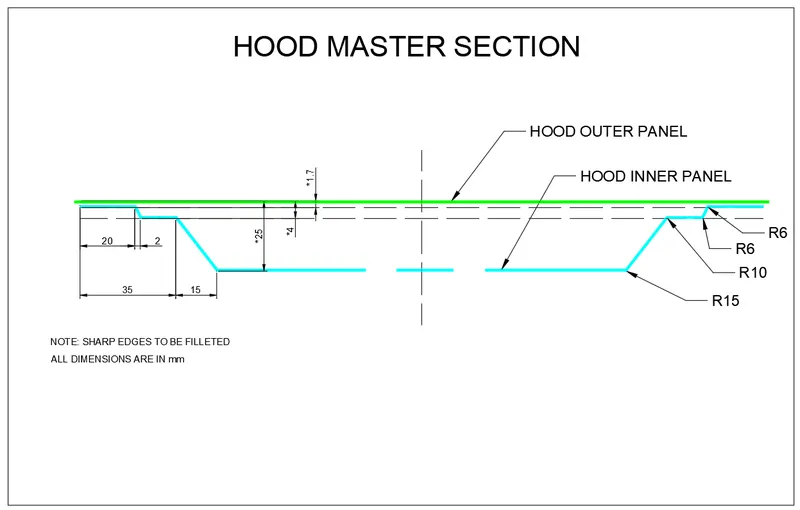
To create the Hood Inner Panel, the below input (i.e Master section) needs to be followed.
Emboss definitions
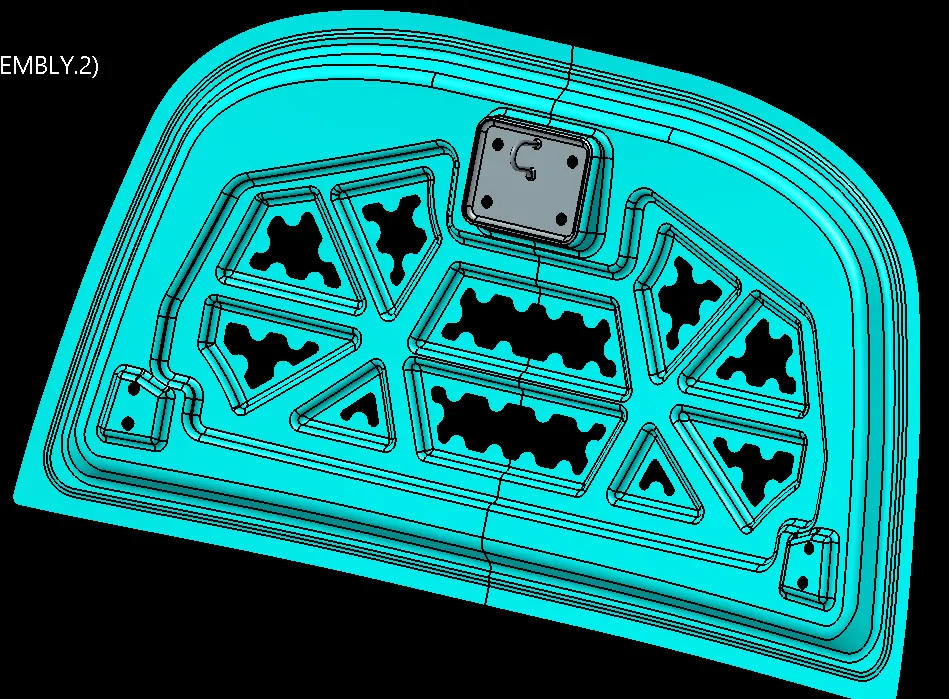
Throughout the inner panel we provide different embosses. We can increase the stiffness of the inner panel through these embosses. The shape and size of the embosses also determine the direction of the force distribution resulted from frontal collision. The force should be always distributed away from the passengers. Here in the figure the embosses are designed in such a way that the force is directed to either side of the car.
Mastic Sealant:
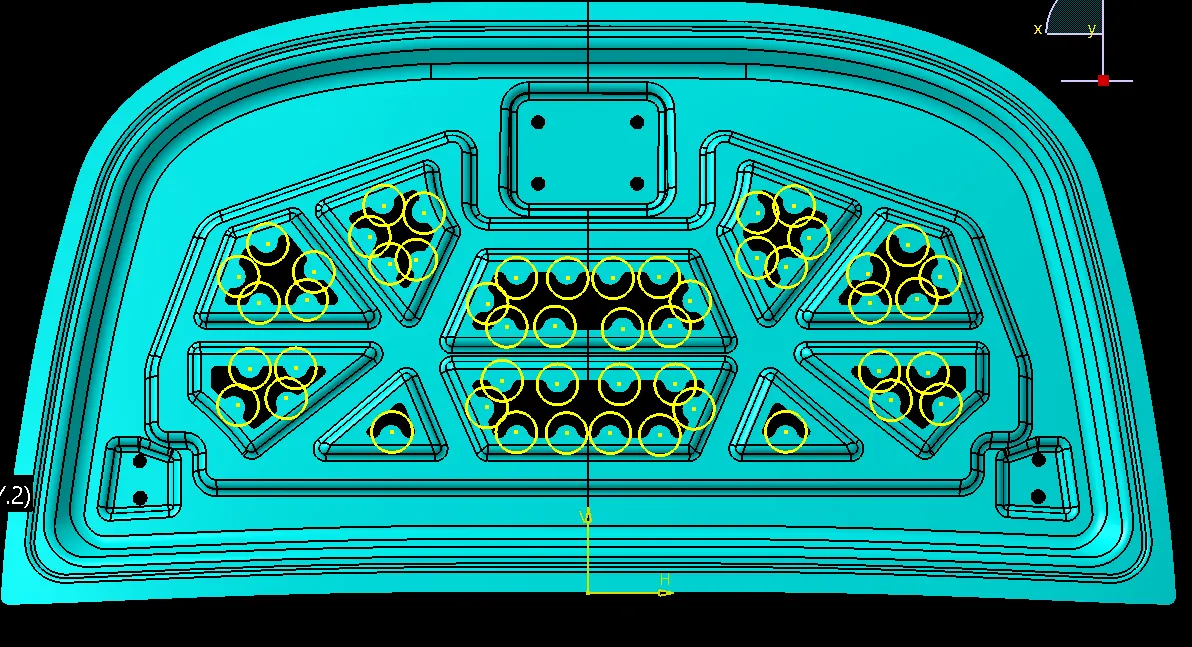
Mastic sealant helps to locally improve strength of the hood. It is generally a hard rubber part, which is introduced as a paste in between inner and outer panel of the hood, which will get hardened inside the furnace. Every mastic sealant point will have a tendency to improve the local strength in around 80 mm diameter. Considering this, the mastic points are positioned such that most of the hood region is covered.
Creating Hood Outer Panel:
To create the Hood Outer Panel, the below inputs needs to be followed.
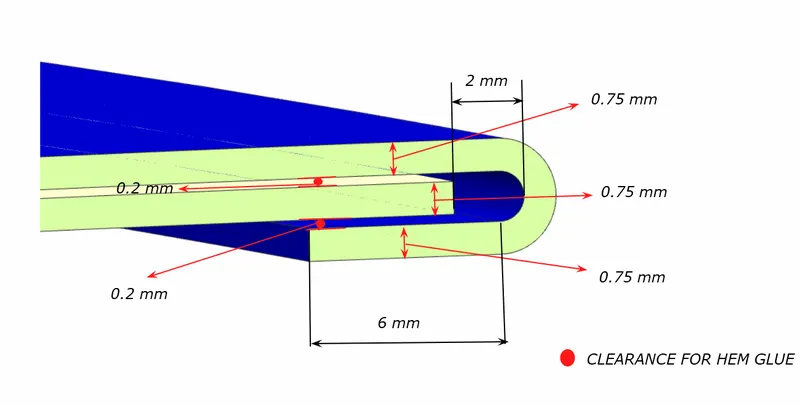
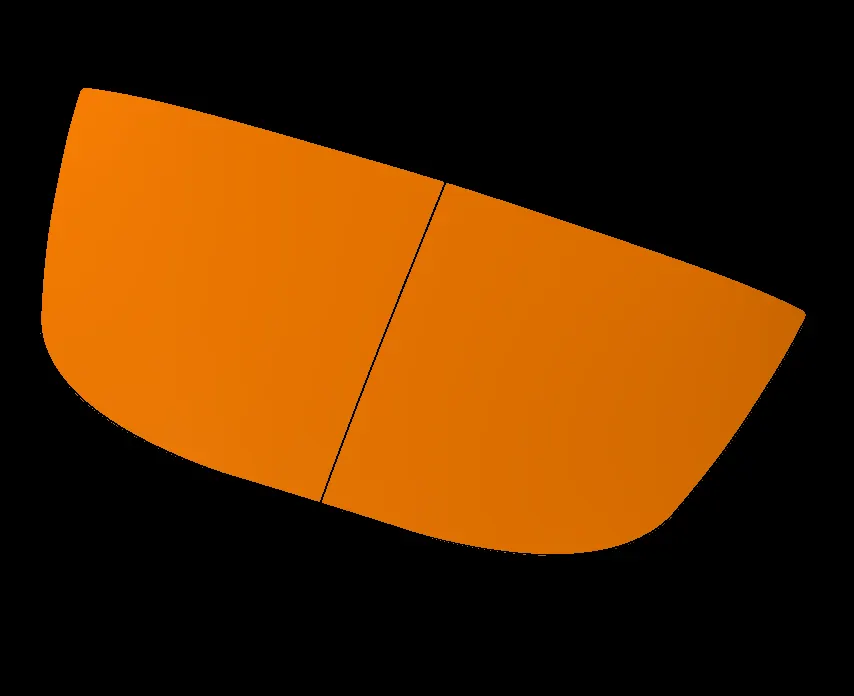
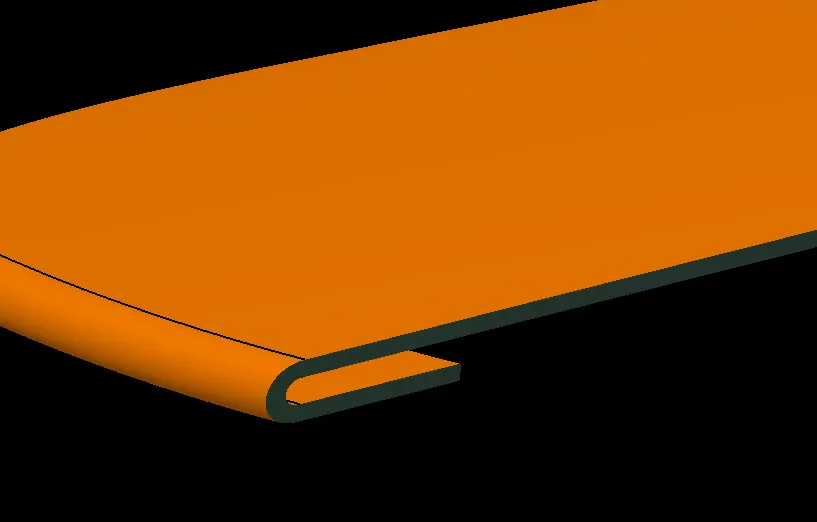
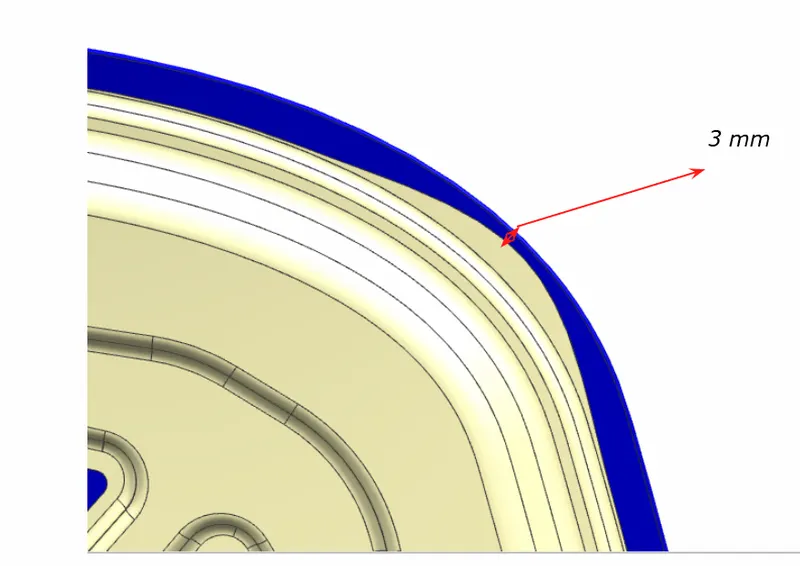
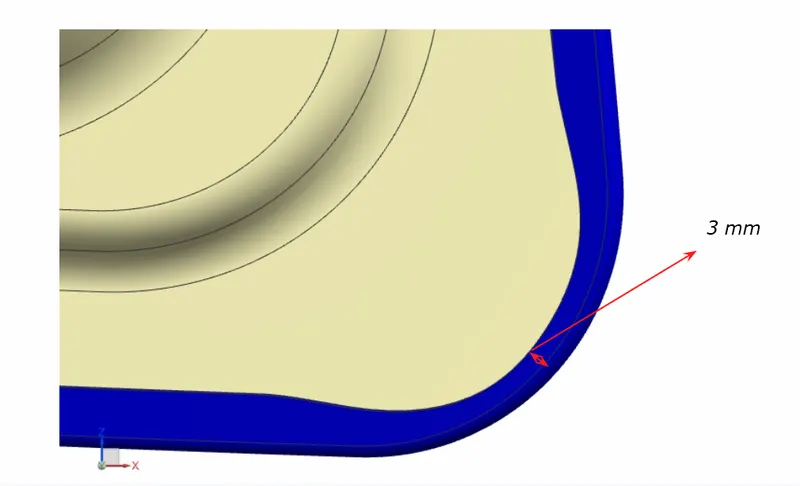
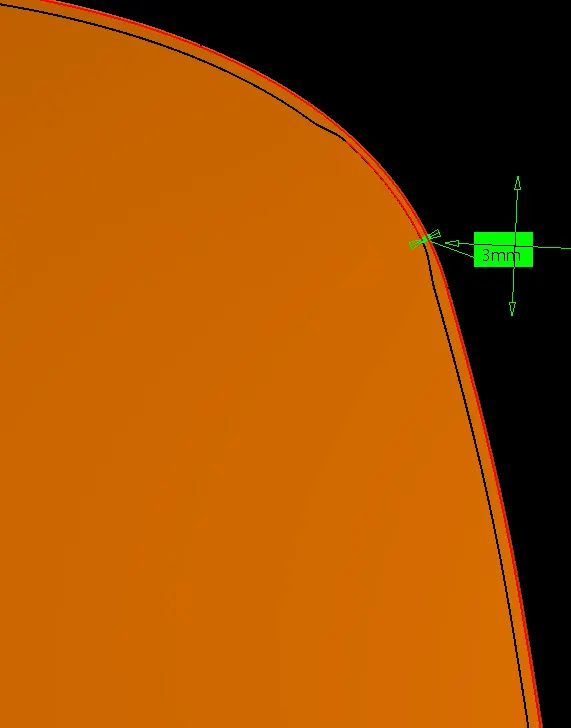
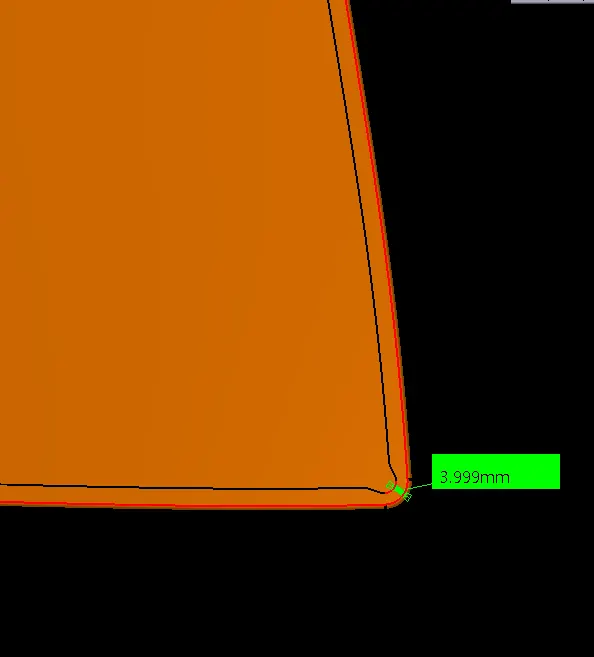
According to the requirement, we need to give 3mm cutouts at the hemming regions.
Creating embossment for Hinge:
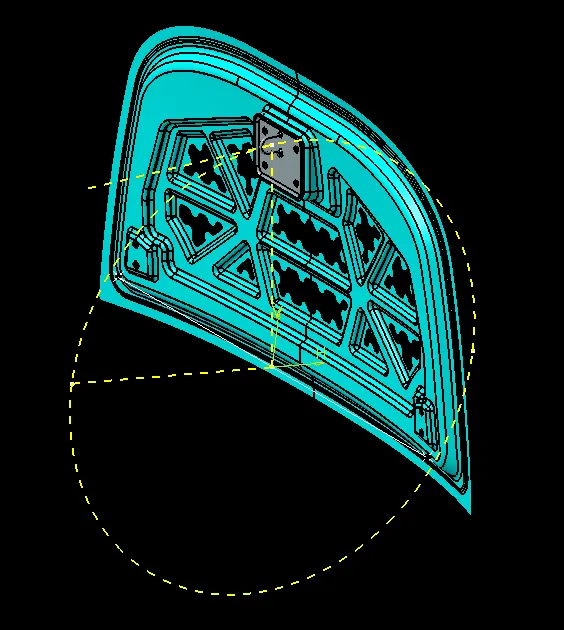
LATCH TRAJACTORY
It is the path along which the hood rotates during opening and closing movement. The striker on the hood follows a particular path while opening or closing the hood, which is along circumference of a circle with center at the hinge axis. This path is nothing but latch trajectory. It is a very important aspect in hood design, in order to decide hinge, latch and striker installation points.
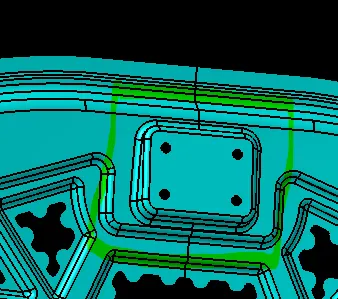
CREATING EMBOSS FOR STRIKER:
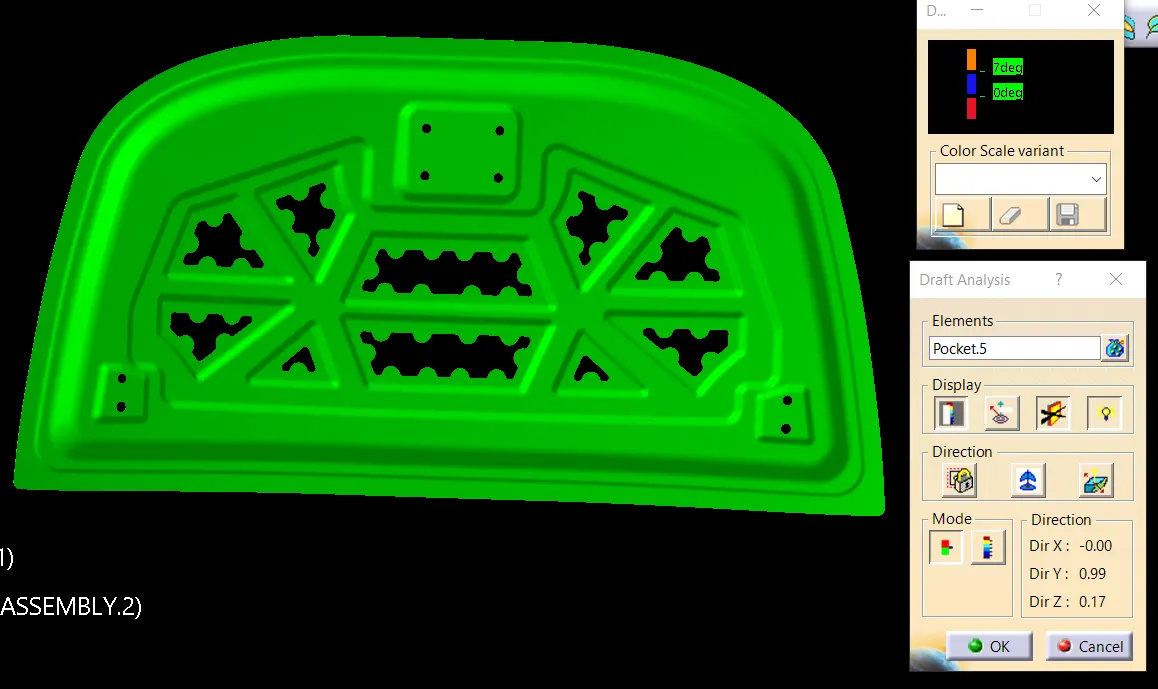
DRAFT ANALYSIS OF HOOD INNER PANEL:
The draft analysis of the hood inner panel was successfully performed with a minimum angle of 7 degrees with respect to the tooling direction.
MANUFACTURING PROCESS
DEEP DRAWING
The Primary Process involved in manufacturing BiW components is Deep Drawing/Stamping. This process is usually followed by other processes like blanking, piercing, trimming, etc.
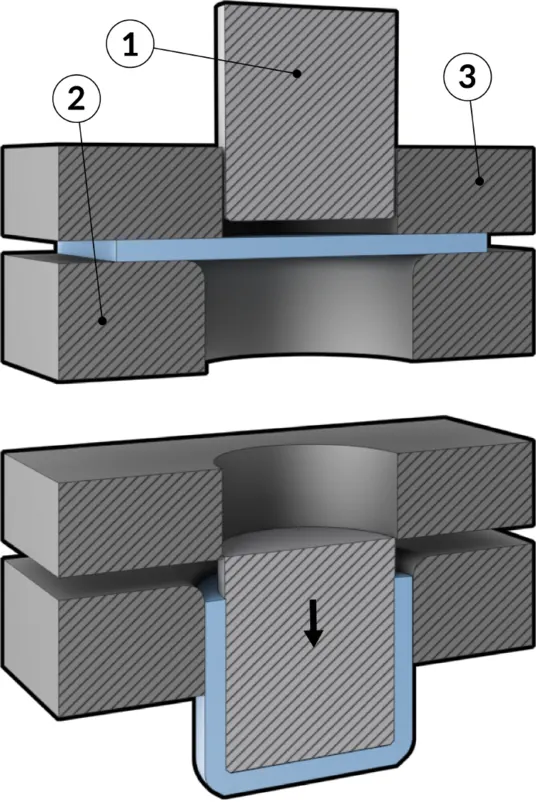
Deep drawing is a form of metal forming, where rigid tools such as punch [1], die [2] and blank holder [3] is used. The blank is placed between the die and the holder and then deformed by the punch pushing the sheet into the die and the blank finally assumes the shape of the die. The metal plate is fixed between the die and the holder before processing begins, this prevents the formation of undesired deformations such as wrinkles.
Deep drawing changes metal sheets into curved parts or create curved parts with smaller diameter from already curved details. Often a series of deep draws are done to achieve the final shape
Hemming
Hemming is a forming operation in which the edges of the sheet are folded or folded over another part in order to achieve a tight fit. Normally hemming operations are used to connect parts together, to improve the appearance of a part and to reinforce part edges.
In car part production, hemming is used in assembly as a secondary operation after deep drawing, trimming and flanging operations to join two sheet metal parts (outer and inner) together. Typical parts for this type of assembly are hoods, doors, trunk lids and fenders.
The accuracy of the hemming operation is very important since it affects the appearance of the surface and surface quality. Material deformations, which occur during the hemming process, can lead to dimensional variations and other defects in parts. Typical hemming defects are splits or wrinkles in the flange, material overlaps in the corner areas or material roll-in. This is why it is important to use simulation tools in order to, on the one hand, better understand the hemming process and, on the other hand, significantly reduce the number of “trial and error” loops during tryout und production.
There are various types of hemming operations:
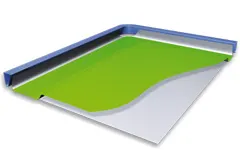
- Conventional die hemming
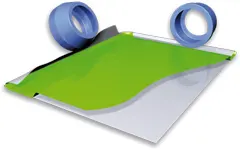
- Roll hemming
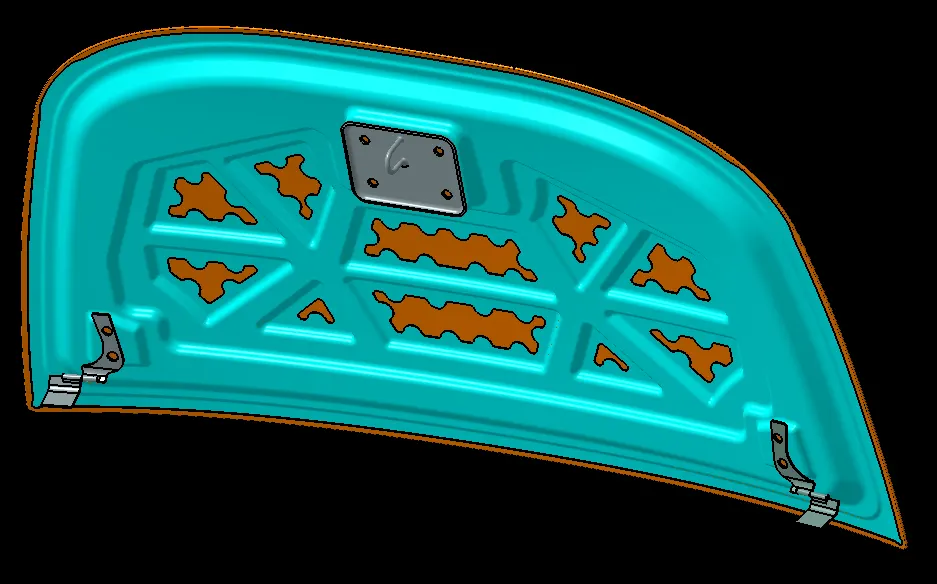
FINAL ASSEMBLY
TREE STRUCTURE