Hood design-Week 2
Report on the Hood Design
Contents:
- Hood Inner panel - Emboss & Cut outs
- Hinge Mount - Hinge Axis, Constraints, Flat surface
- Striker mount - Latch Trajectory and Striker position
- Hood outer panel - Hemming, Edge relief
Hood Inner panel:
Hood inner panel is designed by using the wave geometry linker and extracting the surface from the given outer panel. Use of offset curve in face and trimming the sheets based on the required dimensions are done and we come up with a draft inner panel.
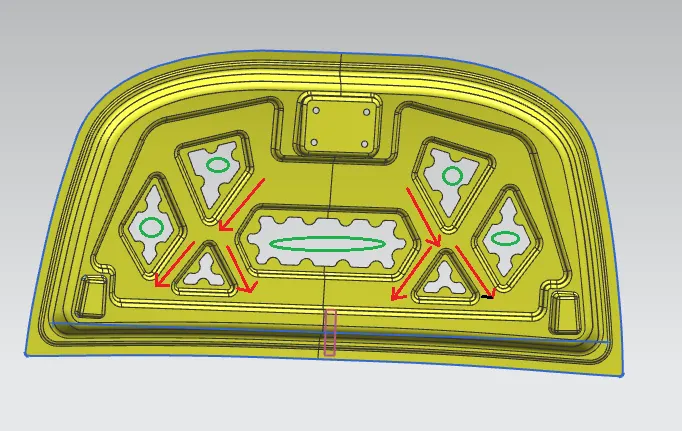
The most important consideration in the inner panel design is the emboss and cut outs. Embosses are provided to make sure the pedastrian safety so that whenever the crash happens, the force is dissipated in the direction away from the passenger in the car. Also the cut outs make sure that any deformation to the surface is within those cut out and the energy thus is not dissipated to the passenger.
The red line in the below image shows the embosses created which make the direction of the energy to go in a different direction. The green sketch marks the cut outs provided to allow the deformity during a crash
Once done, we need to thicken the surface upwards for a thickness of 0.75mm
Hinge Mount
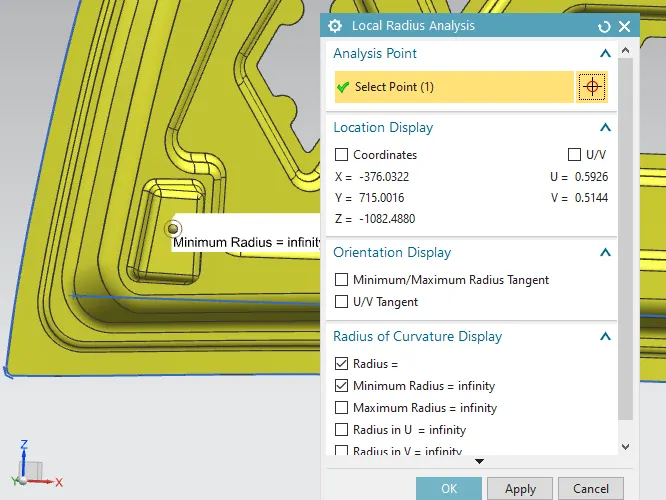
The most important thing to consider when hinges are mounted is the hinge mount area. The surface should be flat surface. if not, the hinge is will not be positioned properly. Also we need to make sure the following items
- Hinge constraints
- Flat surface
- Hinge should have a minimum clearance with the edge blend
- Most part of the hinge should be accommodated on the flat surface
- Hinge Axis - Axis around which the hood rotates to latch on the striker
The below image gives us the flat surface on which the hinge is to be mounted
Striker Mount
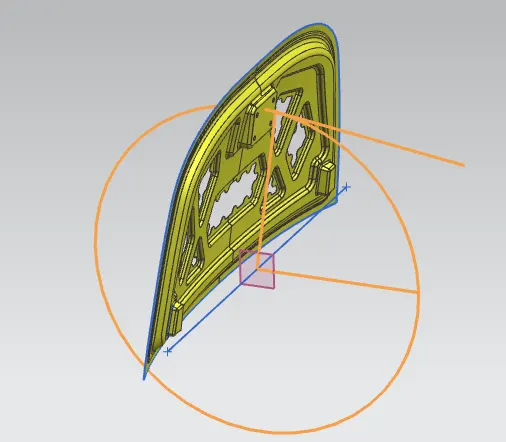
Once the Hinge axis is completed, we need to draw a circle and create a tangent which should coincide with the normal of the striker latch. This is the most important consideration as if this is missed out, then the latch will not lock properly. The below image shows the hinge axis (blue line) and the circle (orange line) around which the hood will rotate. The tangent of the circle is coinciding with the normal of the striker.
Hood outer panel
Hood Outer panel is another part which is mounted upon the inner panel using a process called hemming. The hemming is just rolling the outer panel over the inner panel to keep those in place and allow 5mm distance of mastic sealants that hardens upon heating. Next is the edge relief as during the hemming the edge tends to get more stressed. So a relief would reduce the stress around the edges. The minimum clearance between edge and relief is to be 3mm.
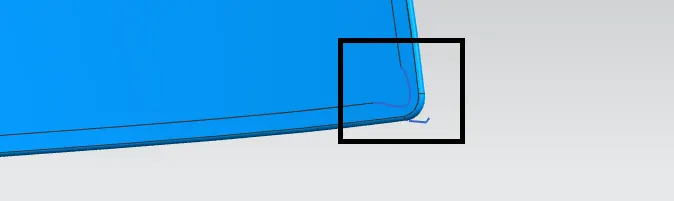
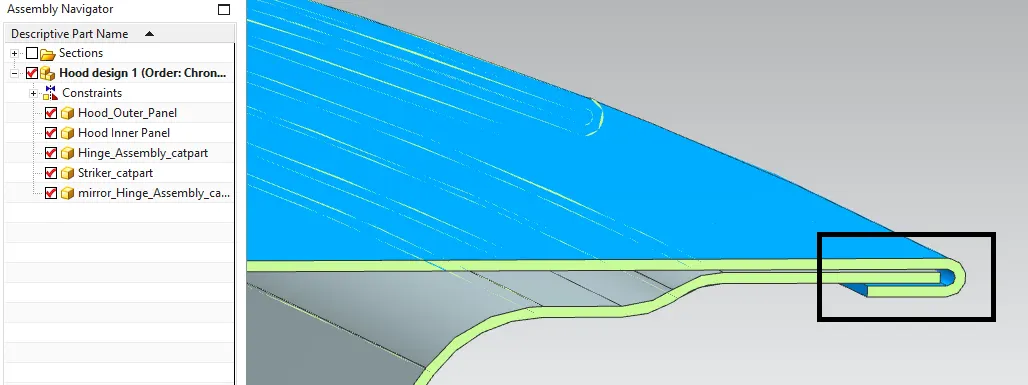
The above images show the edge relief and hemming of the outer panel over the inner panel. The clearance between inner and outer panel is 0.2mm at hemming end while the mastic clearance will be 5mm.