Fender Design
Fender design:
They are separate components in the front side. Usually of 2 types, Half and Full. Modern designs use half bumper as we can use a single blank to product 2 half bumpers thereby reducing
the material costs. Most important design considerations include, drip area and wheel arch.
Contents
- Drip Area
- Sill Mounting
- Baffle mounting
- A-pillar mounting
- Bumper mounting
Drip Area:
Area where the fender is mounted on the engine compartment. We will need to provide a clearance of 300mm or less on the side where wiper materials are mounted and a clearance
of 150mm where the headlight housing is present. The drip does not have a specific length.
Also, the depth should be between 40mm-60mm as anything more than 60mm will lead to springback effect and the tool not being able to work on the drip area.
Additionally we will need to provide a 3 deg angle in the depth corner and then provide a flange of 7mm-8mm so as to not provide visibility to the engine
compartment between gaps of hood and fender. The length to extend after the depth should be around 35mm-40mm with an angle of 3 deg and then should end with
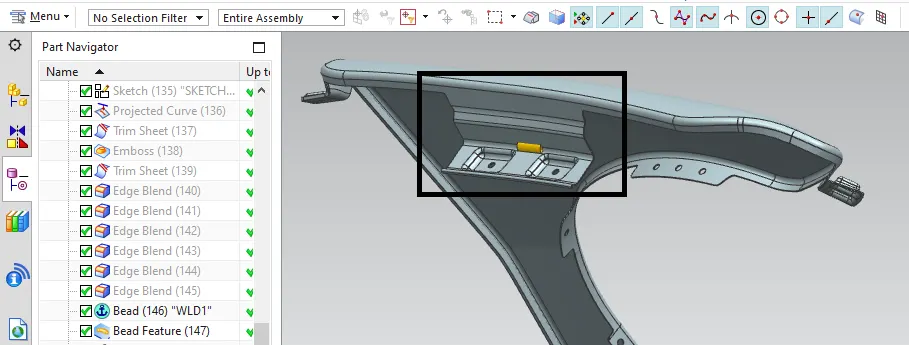
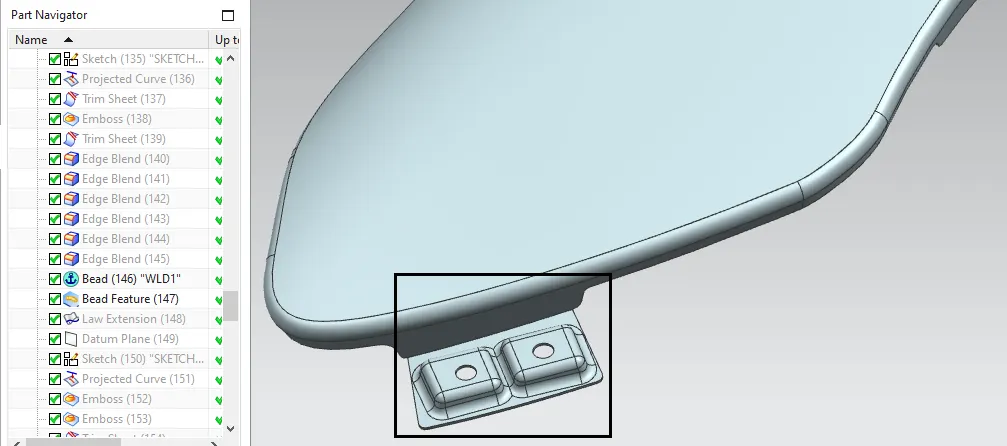
a emboss to make the structure stronger. Embosses are created with a flat surface for mounting purposes. Please find the image below of the fender. A bead is included in order
to increase the strength of the drip surface as due to its nature, it may vibrate.
Sill Mounting:
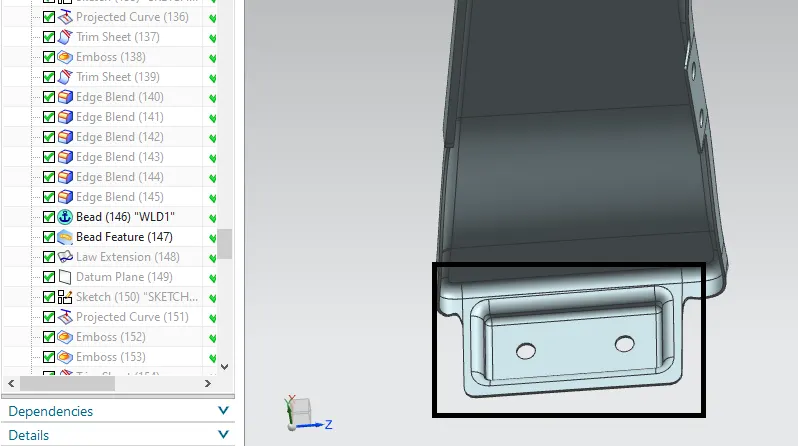
Present at the bottom of the fender and is mounted. So this too requires a mounting region with a flat surface for the bolts to be mounted and tightened. The reason for a flat surface
is because, it will properly mount on the surface else, there may be clerance that may lead of concentration of forces on that particular area. Please find the image of the sill mounting
area below.
Baffle Mouting:
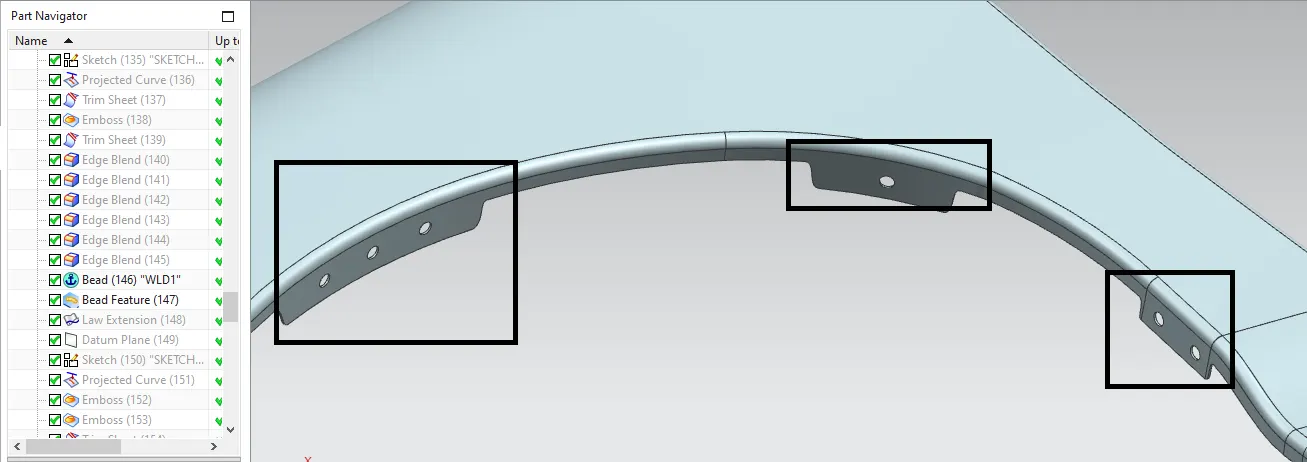
Baffles are black pastic materials that are used to improve the NVH condition of the vehicle. They are mounted around the wheel arch and usually does not require embosses.
As they are plastic mounts, a hole is enough for the baffles to be directly mounted on the fender around the wheel arch. The availability of baffles depend on the budget of the vehicle.
Normally all high end cars have baffles while low end does not. Please find the image of the baffle mounting points below.
A-Pillar mounting:
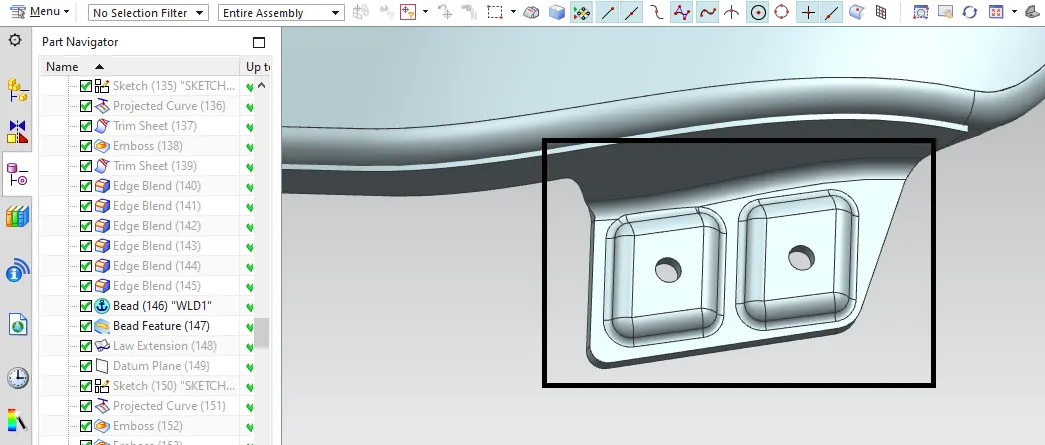
The part where it is mounted to the roof structure. This is a tricky area as they tend to produce a curved surface. We can create a 3D line instead, use law extension to create a flat
surface and then extend sheet to create a corner. Thsi would help us in projecting the curve properly on the surface. Again this requires a flat surface for the mount and hence the use of
embosses is required. Please find the image of the A-pillar mount below.
Bumper Mounting:
The front portion is mounted to the bumper. Again this requires a flat surface for the mount and hence the use of embosses is required. Please find the image of the A-pillar mount below.
Things to take care:
- Avoid any sharp corners
- Make sure the holes created are normal to the vector and not normal to the surface
- Thickening operation is to be done inwards for a offset of 0.75mm
- Flat surface for mounting area - Measure the same through local radius command