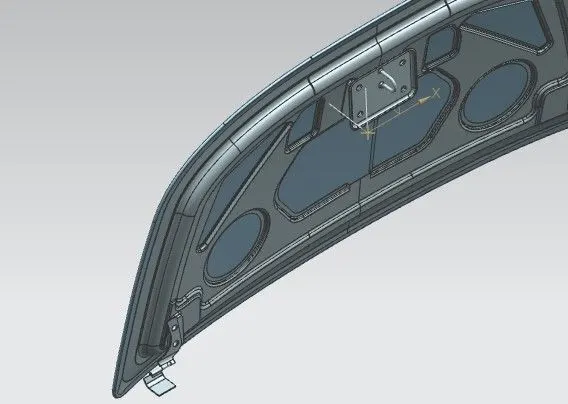
Hood design-Week 2
AUTOMOBILE HOOD DESIGN

Introduction:
The Hood or the Bonnet of a car is considered as the frontal BIW enclosure component. Bonnets are designed to reduce air resistance as the air flows around the car. The design of the bonnet is vital since it affects the aerodynamic flow around the car. Apart from this, bonnets are also designed to meet several other requirements. They serve a great deal of purpose in protecting the passengers inside the car and the pedestrians in the event of an accident. It also acts as the engine cover.
Objective:
The main objective of this project is to come up with a design idea for the bonnet BIW that satisfies the manufacturing requirements, functional requirements and as well as Euro NCAP standards
Theory:
The hood or the Bonnet consists of the following parts.
- Hood outer panel
- Hood inner panel
- Latch and Striker re-enforcement
- Hinge re-enforcement
- Gas stay re-enforcement
The hood or the bonnet is commonly manufactured using Stainless steel of various grades. For vehicles that weigh less, the bonnet is made up of aluminum. The Stainless steel bonnet uses a technique called deep drawing to manufacture the component. The Aluminum bonnet employs a procedure called as casting.
In this project, we are going to design a hood that is manufactured using stainless steel material.
Manufacturing Requirements:
While designing the inner panel hood that will be manufactured using the deep drawing process, there are some minimum requirements that we need to fulfill:
Hood Thickness Information
- Outer Panel Thickness = 0.75mm
- Inner Panel Thickness = 0.75mm
- Reinforcement Thickness = 1.5mm
No sharp corners inside the component
Mounting areas and welding areas need to be flat
Provide appropriate corner relief on the area of curvature.
Functional and Safety Requirements:
The 1st and most important safety requirement to be considered while designing the Bonnet is the frontal collision requirements.
In this image, you can see the deformation on a hood that underwent a frontal collision:
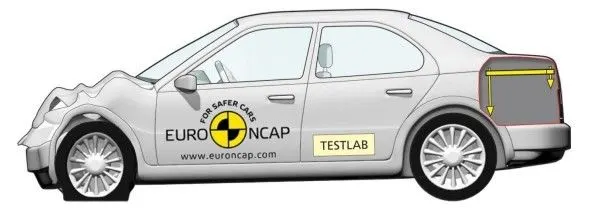
It is clear that the design intention of the hood according to the frontal collision requirement is that the hood crushes and dissipates forces in the upward direction and to the hard points on the hood thereby deflecting the force on to the body and not the passengers.
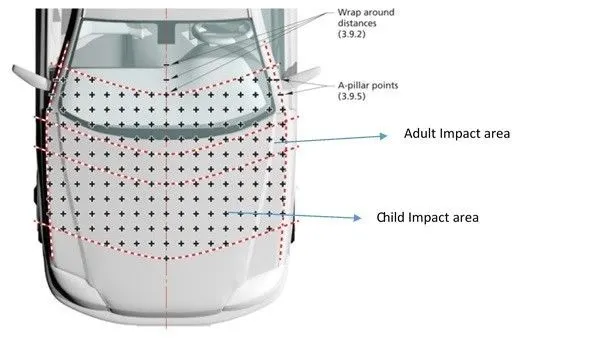
Regarding the safety of the pedestrians, the above image from Euro NCAP shows the area of impact for a child and an adult. It is of utmost importance that we make sure not to place re-enforcement on the areas prone to high head impact. Also, the child impact area is designed with lesser thickness than the adult impact area so that in the event of a frontal collision where a child is involved, the bonnet will absorb the impact of the crash and crumble to protect the child’s head from absorbing the force.
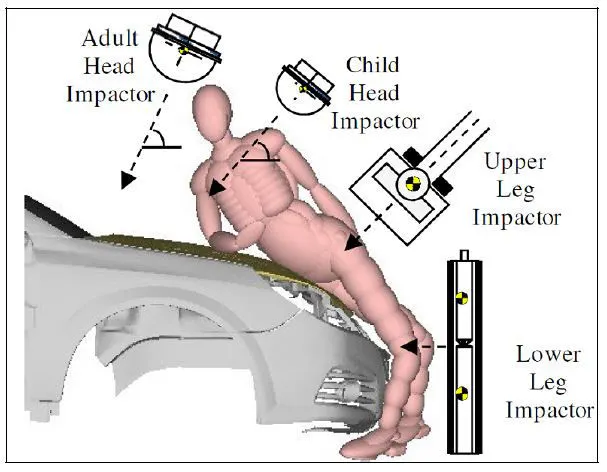
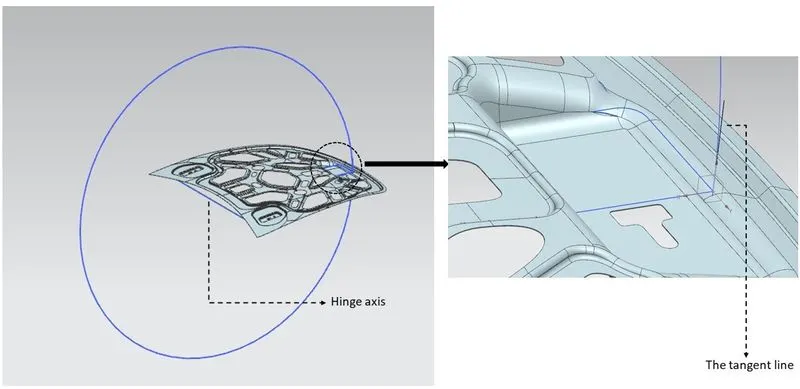
The other major functional of the hood is the opening and closing of the hood. This is done with the help of the latch and striker. To position the latch and striker effectively, we position the hinge and draw the hinge axis. Now, using the hinge axis as the center we draw a big circle to the position where we need the latch to be placed. Then, we draw a tangent line to the circle at that point and place the latch in that region.
Master section creation:
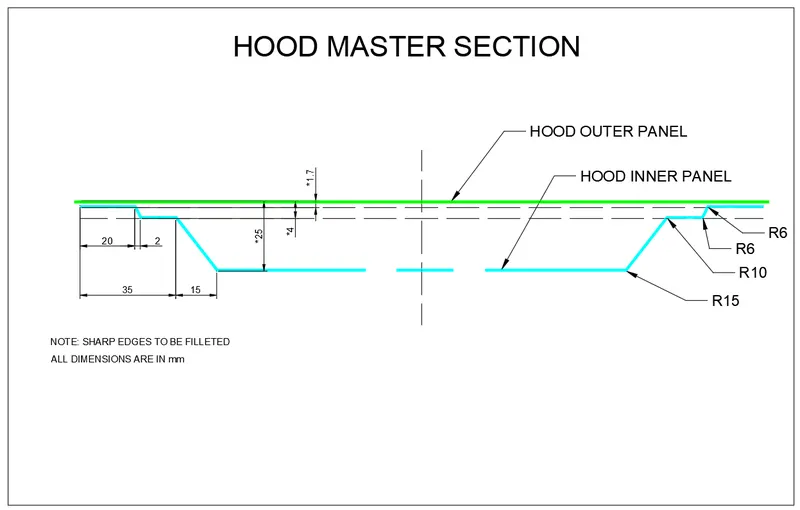
The master section is created based on the requirements received from the marketability team and the manufacturing requirements that we saw before. Below are the images of the master section used for the design.
Geometry and emboss creation:
The geometry is created based on the master section that was designed above. After performing the initial stages of design, we will provide local embosses to strengthen the component. The component will be strengthened based on the master section. When a force impacts the hood from the front, it travels in an upward direction. The component is designed to divert the force away from the passengers into the hinges, as shown in the image below:
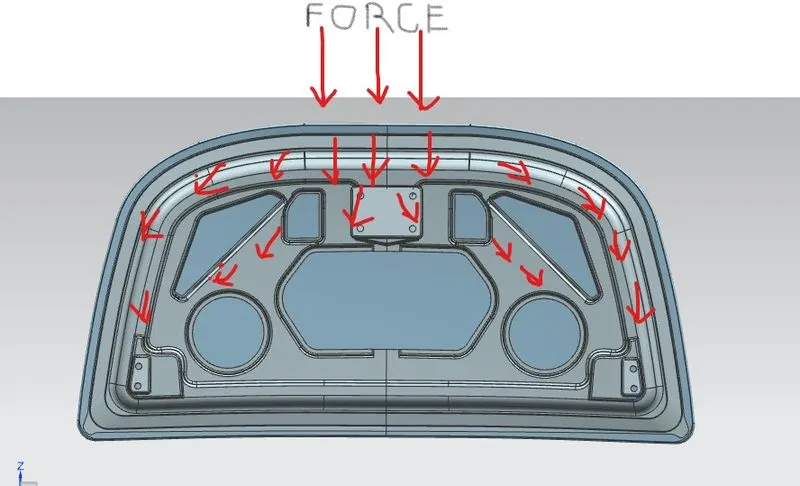
In this image, you can see the force as it branches out on the hood, avoiding the passengers.
The embosses in the inner panel are made according to the diversion of the load path.
Fine-tuning the emboss:
To make the component easy to manufacture, all the sharp corners from the embosses are removed. The curvatures intersections from different nearby emboss are blended out to produce a smooth transition.
Building re-enforcements and crash bead:
After the development of the entire inner panel for the hood, we need to develop some additional necessary re-enforcements. The Latch striker and the hinges will need a re-enforcement that needs to be developed. All the re-enforcements are made from sheet metal of thickness 1.2mm.
Mastic Sealant:
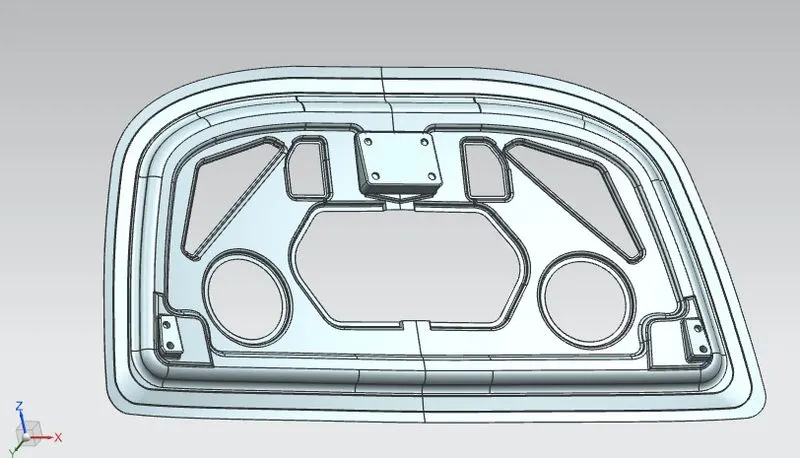
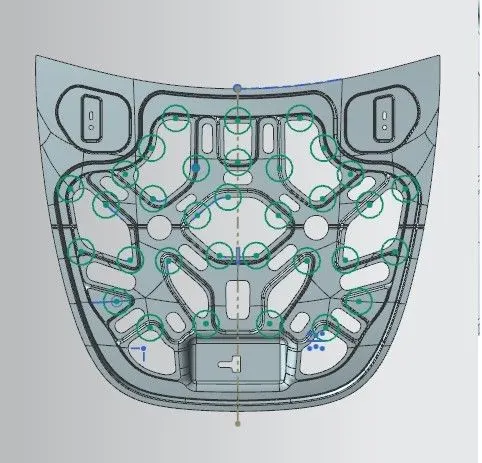
The Mastic sealant or the Mastic point is an elastic compound that behaves like a rubber. The mastic points are defined on the hood inner panel where the hood can easily deform. They help the hood outer panel to come back to its original shape after it gets deformed.
Hemming:
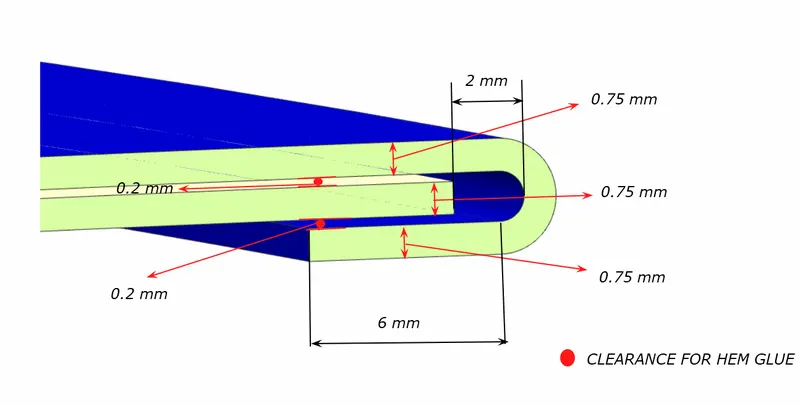
Hemming is the process of joining both the outer and inner panel together. The hemming process roles and wraps the hood outer panel around the inner panel and holds it tightly together. The following are the dimensions followed for hemming.
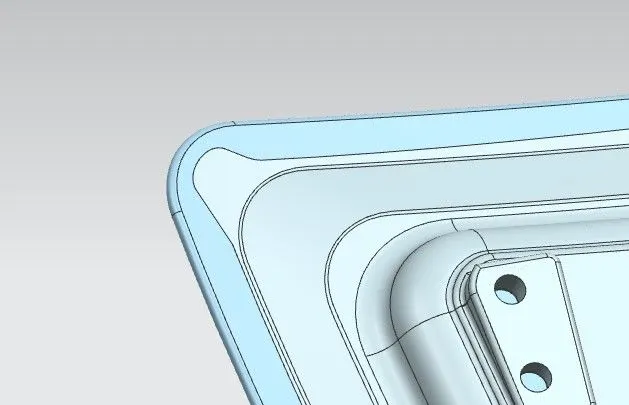
After the hemming process is done, now we need to provide corner relief which is 3mm on the corners of the hood so that the part is manufactural
DRAFT ANALYSIS
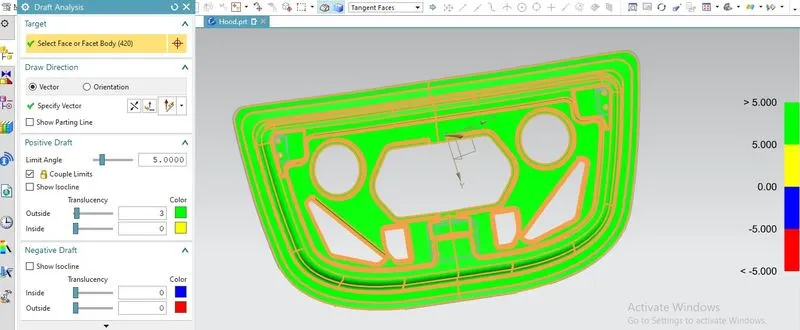
Draft analysis is carried out to see that the pannel can be drawn or not. It also helps to find the negative draft present in the component which can cause difficulty in manufacturability.
CONCLUSION:-
All the parts of the hood are designed based on the required conditions and given values and assembled together to complete the hood design.