Hood design-Week 2
Aim:-
Design the hood outer panel, inner panel, and reinforcements with the given outer hood skin, master section, and design parameters, and also prepare a detailed report on Hood Design.
Hood:-
A car hood is a hinged cover that rests over the engine compartment in a front-engine car. A latch is provided under the hood in order to prevent accidental opening during driving. The purpose of the hood is to provide access to the engine and battery for repair and maintenance. It also protects these parts from direct sunlight and dust.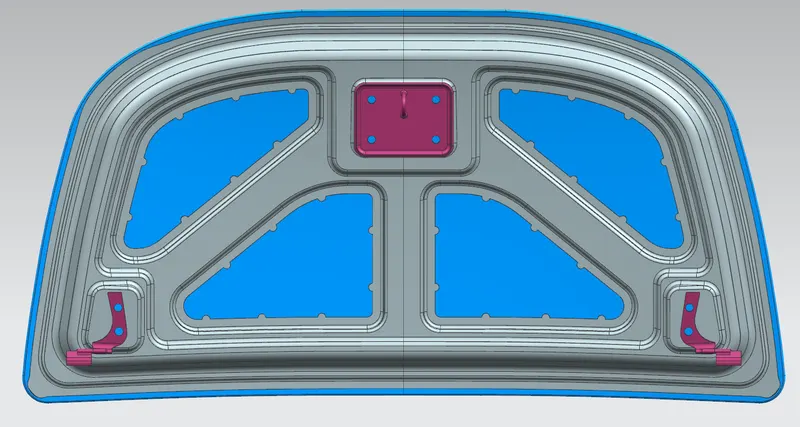
Fig.1:- Hood Assembly
Components of Hood:-
- Hood Outer Panel:
Outer panels are the aesthetic elements of a car. It is the top styling surface of the car hood.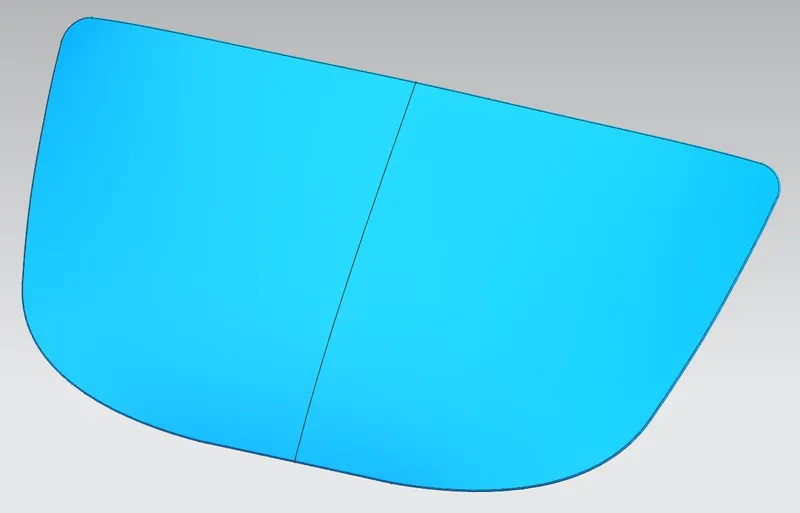
Fig.2:- Hood Outer Panel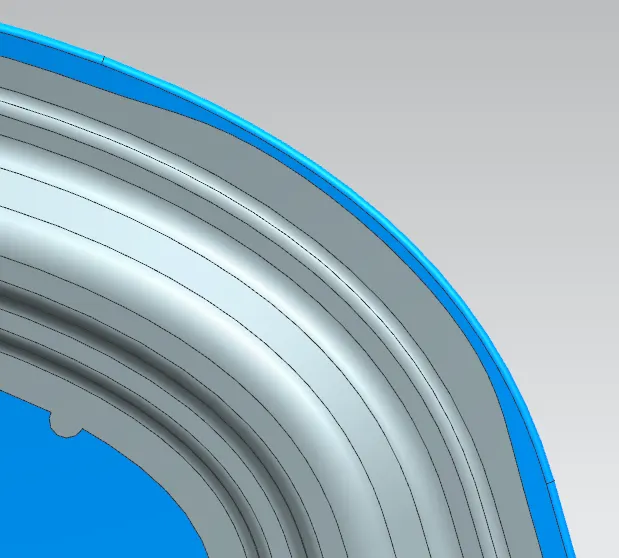
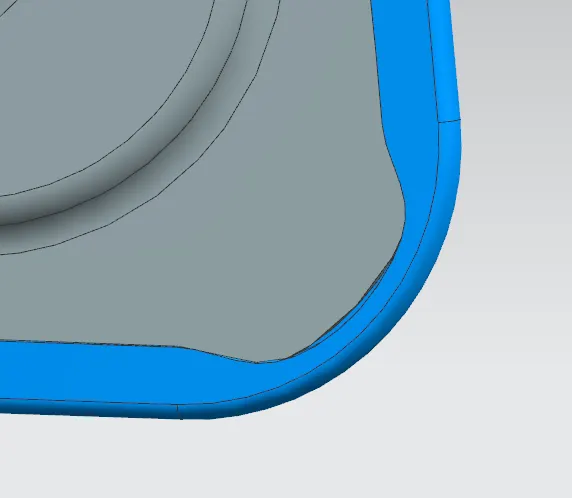
Fig.2.1:- Front Corner Relief Fig.2.2:- Rear Corner Relief - Hood Inner Panel:
The inner panel is the part that gives strength and rigidity to the outer panel. It is where the latch for the striker and hinges are mounted.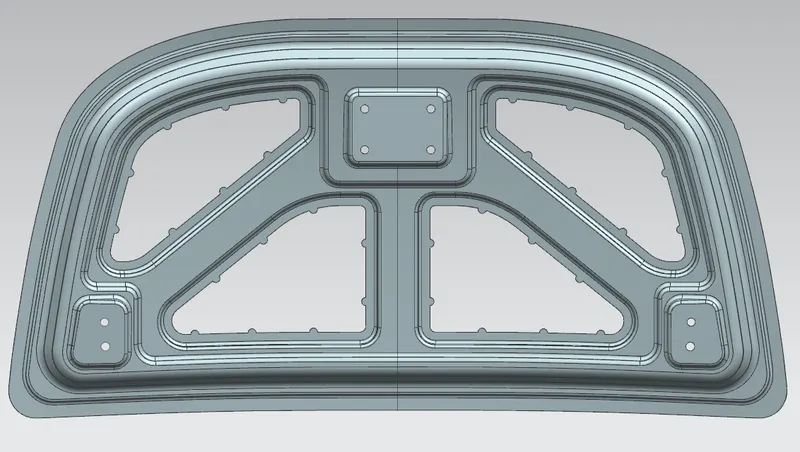
Fig.3:- Hood Inner Panel - Latch and Striker:
A latch and striker mechanism is provided to lock and unlock the hood, in order to prevent accidental opening of the hood during driving and also to open the hood for maintenance if required. The latch is mounted in the engine compartment while the striker is mounted to the inner panel of the hood.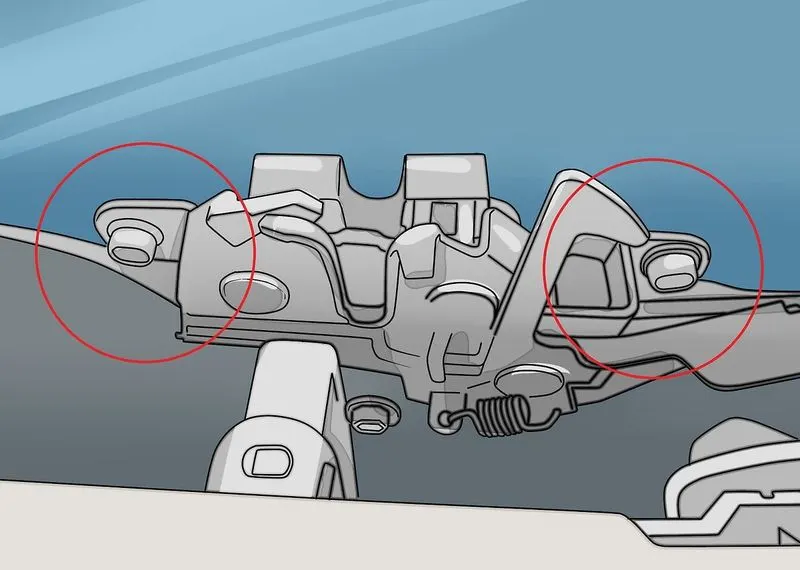
Fig.4:- Latch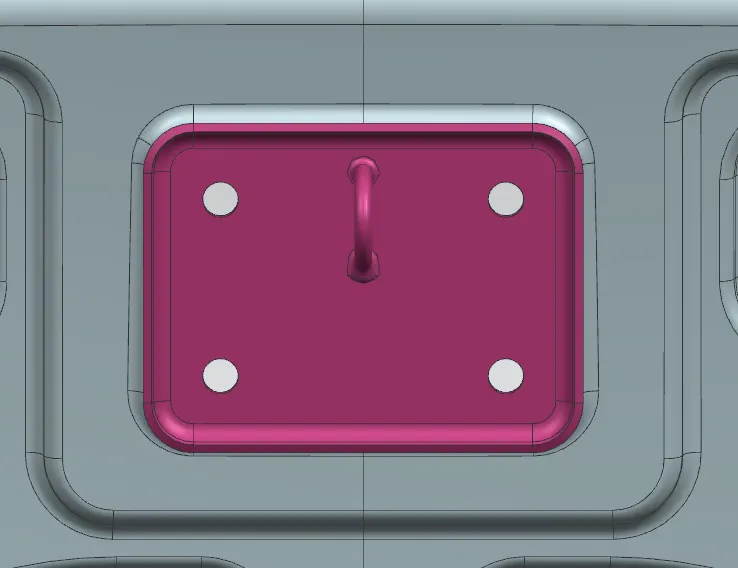
Fig.5:-Striker - Hinges:
Hinges allow the hood to rotate around a fixed axis for opening and closing movement. One part of the hinge is fixed with the engine compartment, while another part is connected to the hood's inner panel.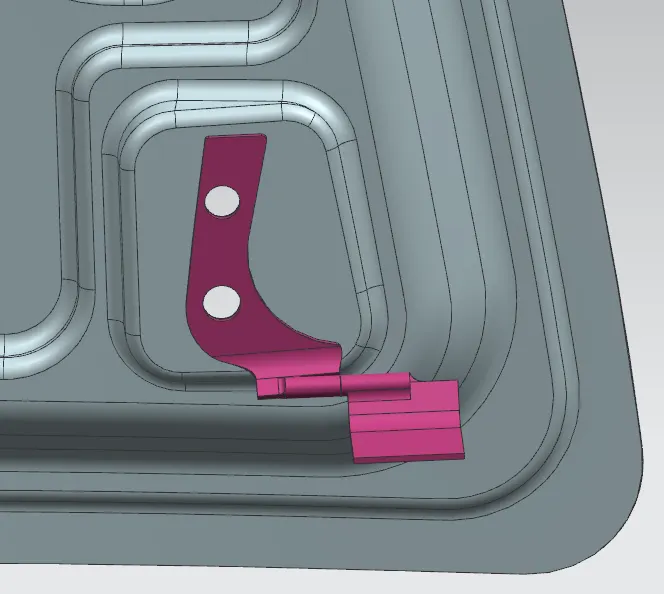
Fig.6:- Hinge - Reinforcement:
Reinforcements are provided according to the design requirements. Mainly it is provided at the hinge and latch regions to improve the strength locally.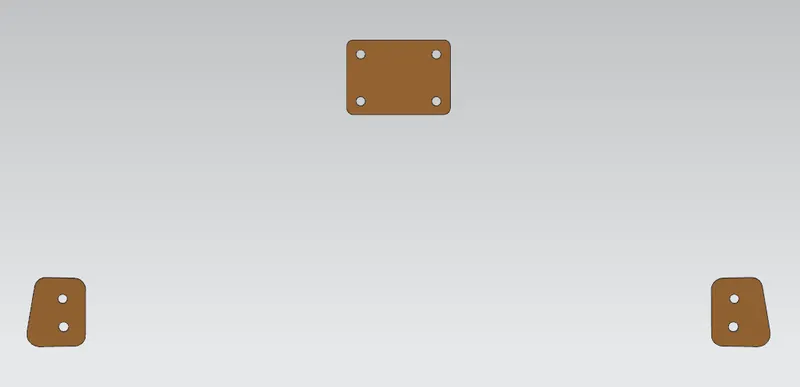
Fig.7:- Reinforcement - Support Rod and Gas Stay:
A support rod is a rod provided in the engine compartment of the car to support the hood so that the hood remains open when required. In some high-end cars instead of support rod gas stay is provided.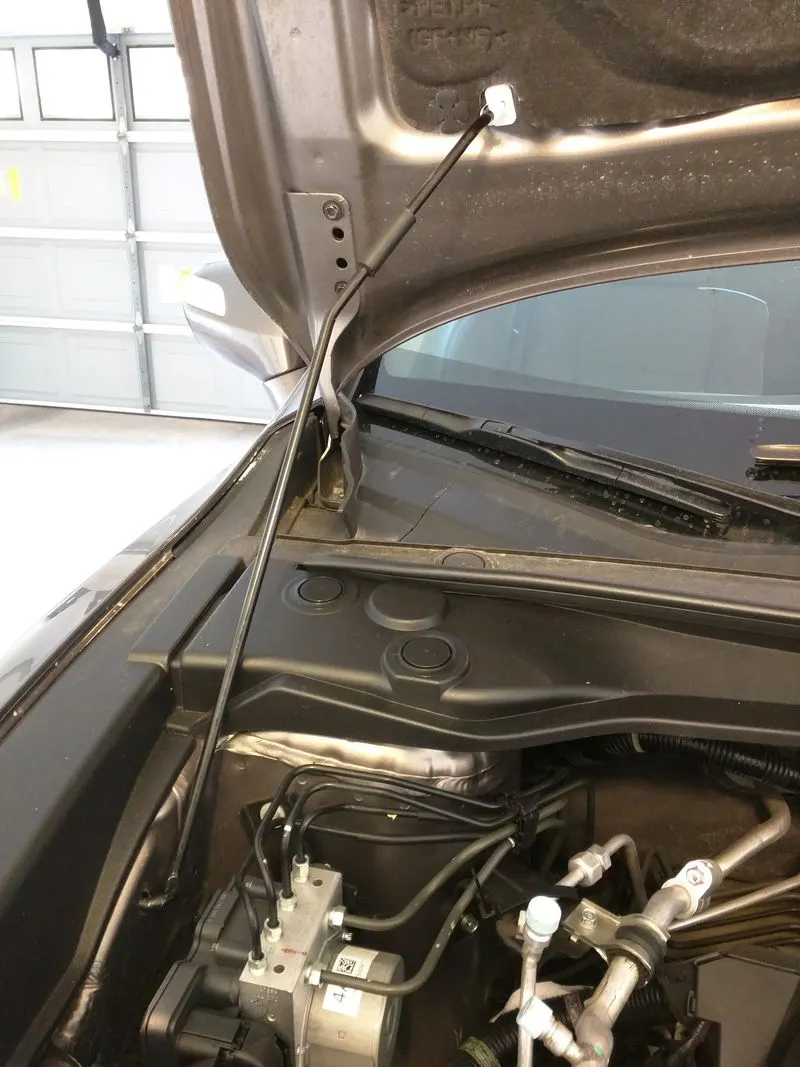
Fig.8:- Support Rod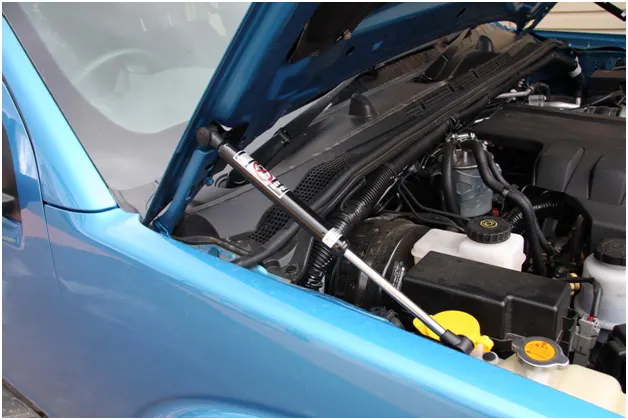
Fig.9:- Gas Stay
Latch Trajectory:-
Latch trajectory is the path along which the hood rotates during opening and closing movement. It is the circumference of a circle that is drawn from the center point of the hinge axis. It is a very important aspect of hood design, in order to open and close the hood smoothly.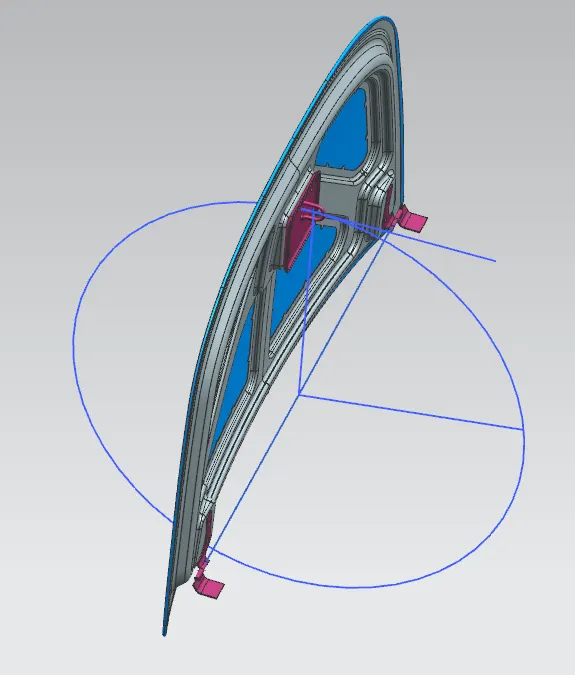
Fig.10:- Latch Trajectory
Mastic Data:-
Mastic sealants are used to join the inner surfaces of the outer panel and inner panel. It also improves the strength of the hood locally. It is generally a hard rubber part, which is introduced as a paste in between the inner and outer panel of the hood, which will get hardened inside the furnace. Each 10mm diameter spot of mastic sealants has its effect around a circular region of 80mm diameter. Thus, the mastic points are positioned such that most of the hood region is covered.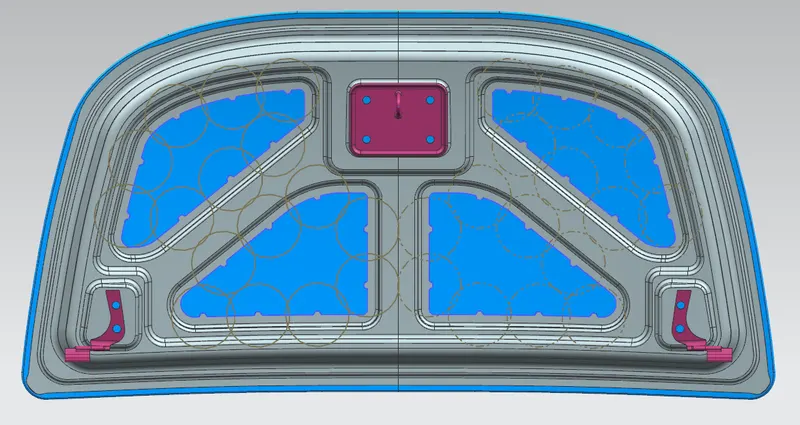
Fig.11:- Mastic Data
Embossing:-
Sheet metal embossing is a stamping process for producing raised or sunken designs or reliefs in sheet metal. Embossing also helps in improving the strength of the thin sheet metal. This process is carried out by means of matched male and female roller dies, or by passing the sheet or rolls of metal between rolls of the desired pattern.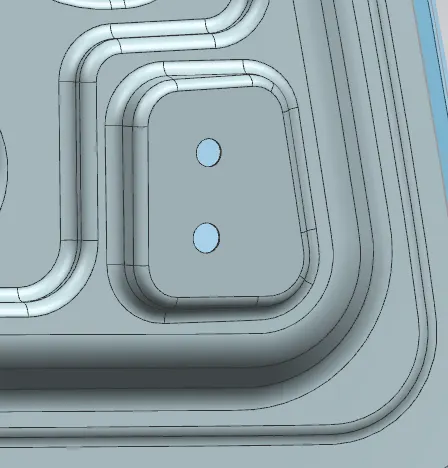
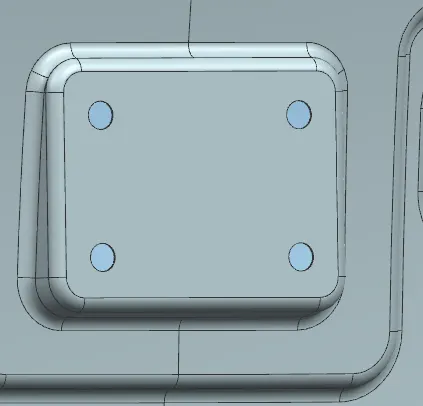
Fig.12:- Embossing
Manufacturing Process:-
-
Deep Drawing:
It is a sheet metal forming process in which a sheet metal blank is radially drawn into a forming die by the mechanical action of a punch. The process is considered deep drawing when the depth of the drawn part exceeds its diameter.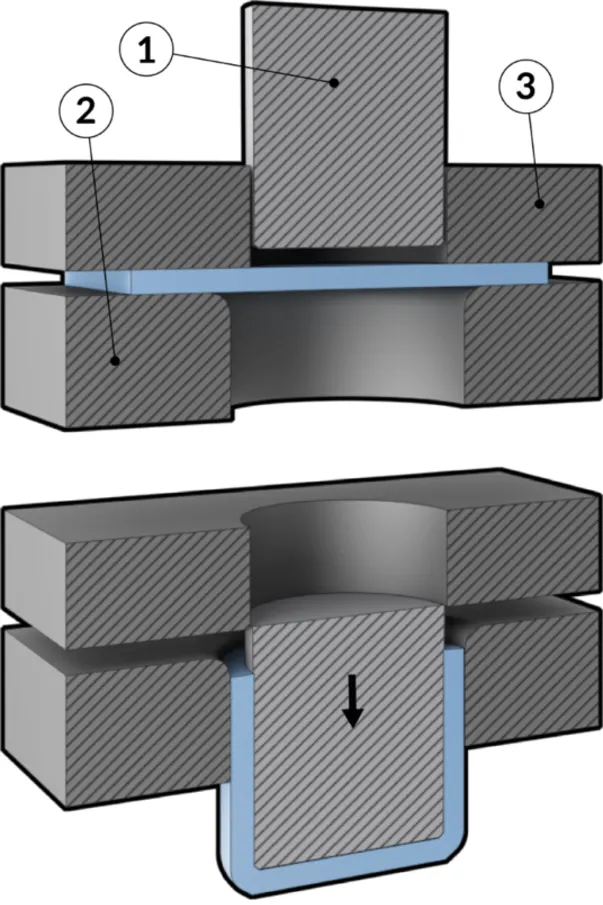
Fig.13:- Deep Drawing - Hemming:
Hemming is a forming operation in which the edges of the sheet are folded over other parts or simply folded in order to achieve a tight fit. In car part production, hemming is used in assembly as a secondary operation after deep drawing, trimming, and flanging operations to join two sheet metal parts (outer panel and inner panel) together.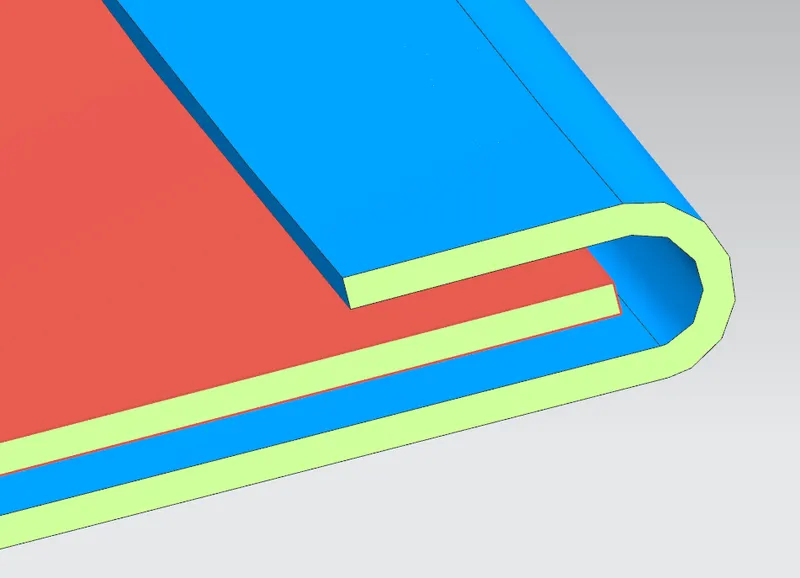
Fig.14:- Hemming
Design Procedure:-
- First, the inner panel is designed from the given styling surface of the outer panel by following the master section provided. The various commands and features used are - Wave Geometry Linker, Trim Sheet, Offset Surface, Offset in Face, Through Curve, Face Blend, Edge Blend, Project Curve, Embose, Law Extention, Trim and Extend, Mirror Geometry, Sew and Thicken.
- Then the outer panel is designed from the same given styling surface of the outer panel. Here hemming is done on the edges of the outer panel and also corner reliefs are provided. The parameters for the hemming and corner reliefs are taken as per the given data.
- Now, on the inner panel, the emboss for the hinges and striker are created by considering their respective dimensions and assembly positions. First, the emboss for the hinges was created and then by fixing the hinge into its position, an axis is drawn passing through both hinge axes to form a common axis. And then we position the striker such that it will move along the circumference of a circle whose center is at the midpoint of the common axis which is also known as the Latch Trajectory. Based on this the emboss for the striker was also created.
- At last different colors were provided for the different components of the hood to make it look more aesthetic.
Conclusion:-
By following the above design procedure and by using the given parameters and data the Hood Design was done.