Hood design-Week 2
Aim: Desigining of an Hood with Hood Outer Panel, Inner Panel and the necessary reinforcements.
Objective:
>Submiting an ASSEMBLY of Hood Inner Panel, Outer Panel, Latch, Hinge and the Reinforcements.
>A detailed report about the Hood Design which includes a detailed explanation about hood and its components, Latch Trajectory, Mastic Data, Emboss Definitions, Manufacturing process like Deep-Drawing and Hemming, and all the parameters followed in the design.
What is Hood: Hood is an opening body panel that covers the engine in a front-engine vehicle.The hood is also considered as another type of door in a vehicle as it consists of an outer panel and inner paanel.
>A car hood also referred to as a bonnet in some other countries is the hinged cover that rests over the engine of a front-engine vehicle. Its purpose is to provide access to the engine for repair and maintenance. Car hoods are typically constructed from steel and sometimes from aluminum.
>Hoods are usually made from the same material as the rest of the body. This can be steel, aluminum, fiberglass, or carbon fiber. However, some aftermarket companies produce fiberglass or carbon fiber steel hood replacements to make the vehicle lighter.
>The hood release system is common on most vehicles and typically consists of an inner hood latch/lock handle, a hood release cable, and a hood lock assembly. The hood lock handle is usually located under the steering wheel, next to the driver’s seat, or in the door frame.
Parts Of an Hood:
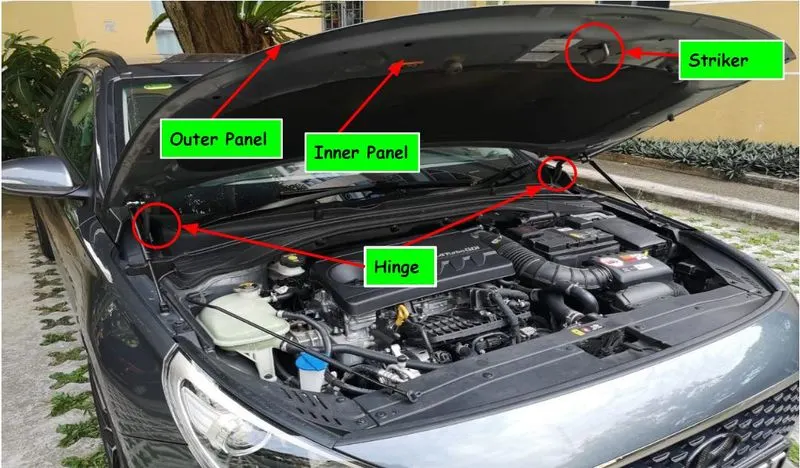
Parts Of an Hood
>Here the above figure explains the detailed parts of an car hood,it consists of Outer pannel,inner pannel,Sriker,Hinge.
1.Outer Pannel:
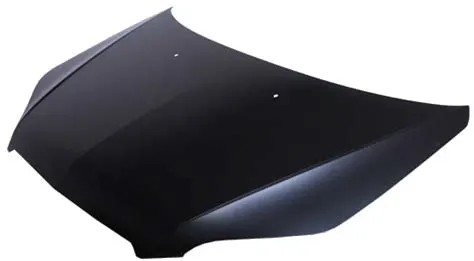
>The basic representation of an Hood outer surface
2.Inner Pannel:
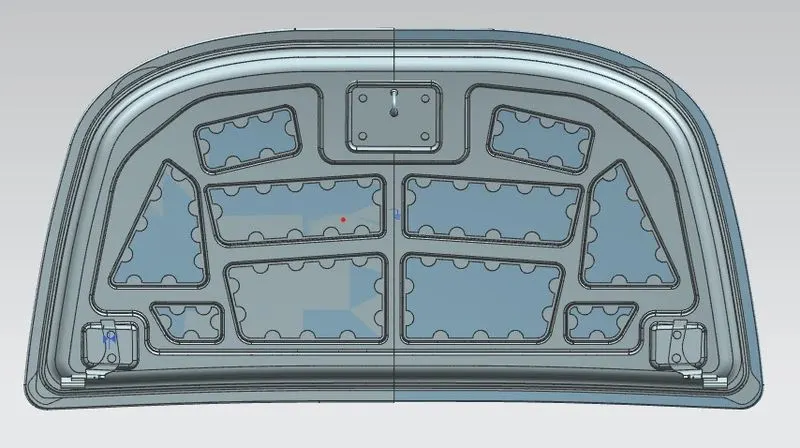
>The above figure represents the inner pannel,where the inner pannel supports the hinges at the edges for the liftment of hood door,the reniforcement is also placed for the locking of an hood.
3.Hinges:
>using hinges and brackets designed to pivot and support the weight of the hood fully once it's opened.When hinges are properly secured, aligned, and doing their job, a hood will open smoothly and easily, then stay raised at exactly the point you leave it. Additionally, closing the hood should be equally effortless - with it shutting in such a way that gaps are straight and even, and the hood panel sits level from side to side.
>Hood hinges are subject to lateral stresses as the mass of the hood is pulled left-to-right and up-and-down. These constant forces can cause metal fatigue, which interferes with proper opening and closing. In worst cases, a hinge can even fail completely when the hood is opened - creating a dangerous condition.
4.Hood Strike:
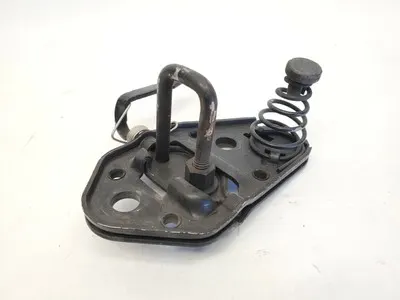
>This is place on the hood inner pannel ,for the locking purpose of an hood.Here while desigining the hood the reinforcement is place for the stike because of neglecting the hood strenght.
Desigining Factors:
1.Head Clerance:
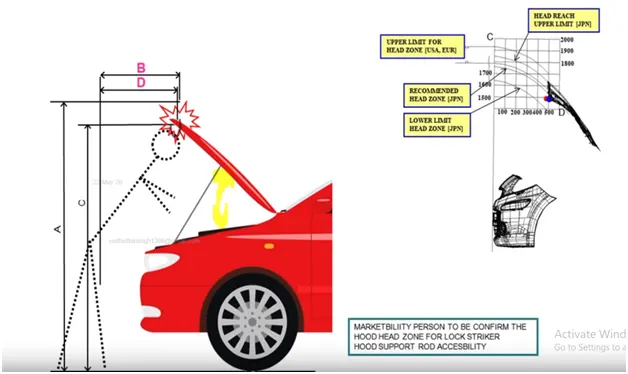
>It is the vertical clearance space above the head of driver/passenger in an automobile.
>The Head clerance is dependens upon the different companies,here we are discussed about an averge situation.From the above figure we can understand that the C and D points represents the hood clerance angle.for better upliftment it should have better clerance.
>A minimum 5.0 cm head clearance for jolt in a vehicle is recommended . In vehicular workstation, available head clearance must be sufficient for wearing and removing the helmet in seated posture in seat.
> The head, the lower body and the legs are amongst the most frequently injured body regions. To estimate the potential risk of head injury in the event of a vehicle striking an adult or a child, a series of impact tests is carried out at 40 km/h using an adult or child head form impactor. Impact sites are then assessed and the protection offered is rated as good, adequate, marginal, weak or poor.
2.Hood Stay/ Support rod :
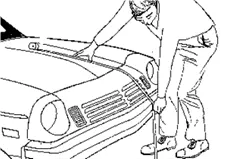
>As their name implies, the hood lift supports are the small, usually gas charged, cylinders that are used to support the hood when it is opened. When the hood is opened the lift support is extended and the pressure inside the cylinder supports the weight of the hood.
>A lift support is strong enough to support the weight of the hood without retracting under the weight. Only with the additional leverage of the hood, should the lift support be able to be collapsed.
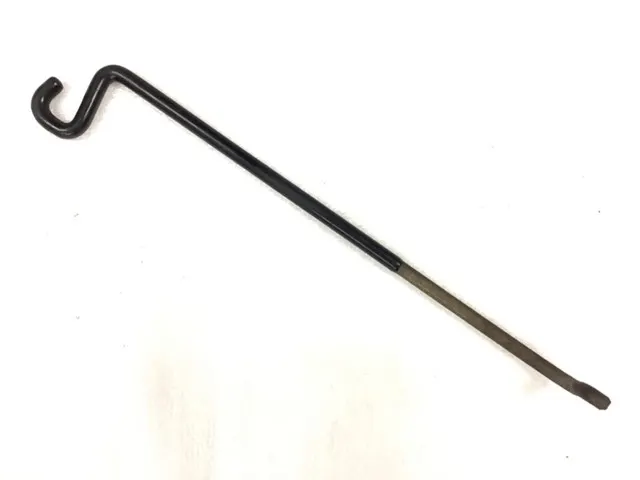
>the hood of the vehicle is a kind of lid covering the engine room located at the front of the vehicle, and the front part is lifted about the hinge formed at the rear side.
>The hood is equipped with a locking device to prevent the hood from being opened while driving, and the locking device is configured to release the locking force by the operation force of the hood dredge provided on one side of the driver's seat of the cabin.
>Here the support is in bended shape because of stregth improvement and here the bend sholuld be 35mm .
3.Gas Stay:
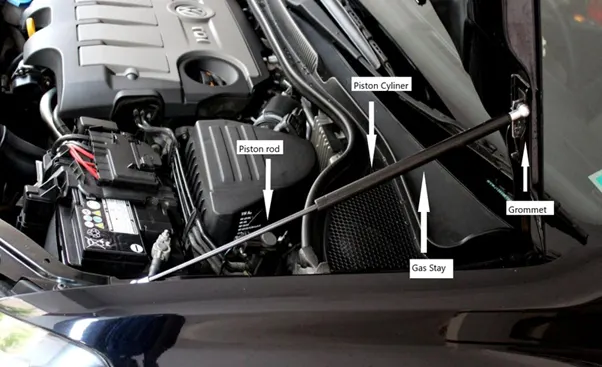
>Earlier we used the hood stay which is used for opening and holding the hood, but now the technology has changed instead of mannual operation we are now using gas stay which is automatic equipment which is used for holding the hood.
>Basically used for high-performance cars where the length of enigne compartments is more,where the hood size and weight is also more.
>The gas stay is operates on hydraulic conditions,which consists of piston rod,piston cylinder,and an hydraulic oil.The forward and backward movement of the piston rod inside the piston cylinder represents the movement of the hood opening and closing position.
4.Hood Hinge:
>Mounted inside formed doors, a concealed hinge eliminates appearance concerns.
>Detent hinges are suitable for lightweight applications.
>In-line hinge
>A pin-style hinge offers easy lift-off door removal and replacement. The lift-off feature provides unrestricted access inside an enclosure, cabinet, or storage space.
5.Wrap around distance:
>During most pedestrian-vehicle crashes the car front impacts the pedestrian and the whole body wraps around the front shape of the car. This influences the head impact on the vehicle. Meanwhile the windscreen is a major impact point and tested in NCAP conditions.
>The severity of injuries is influenced by car impact speed; type of vehicle; stiffness and shape of the vehicle; nature of the front (such as the bumper height, bonnet height and length, windscreen frame); age and body height of the pedestrian; and standing position of the pedestrian relative to the vehicle front.
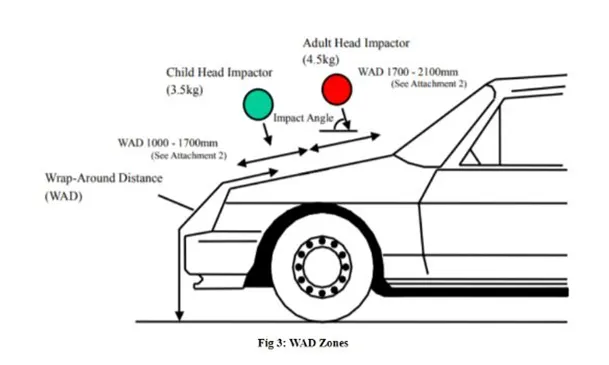
>To be specific the wrap around distance is the measurement of distance from the ground to the head of impact zone over the outer surface of the car.The warp around distance is measured logitudinally in the centre of the vehicle from the ground.
>The so called Wrap Around Distance WAD is one of the important measurements for the assessment of protection of pedestrians and of bicyclists as well because the kinematic of bicyclists is similar to that of pedestrians.
>The severity of the injury caused by the frontal crash depends on the type and shape of the vehicle,speed of the vehicle and movement of the pedestrain relative to the vehicle.
>During the crash analysis the WAD ,two test areas zones will be detected, one is child impact zone and other audlt impact zone.The child impact zone will be between 1000 to 1700 mm WAD and the adult head impact zone will be between 1700 to 2100 mm WAD.
Desigin Parameters:
Data to be used:
Hood Thickness Information
- Outer Panel Thickness = 0.75mm
- Inner Panel Thickness = 0.75mm
- Reinforcement Thickness = 1.5mm
Master Section:
>The above provided master section tells us about the detailed modelling of an hood outer surface,here it consists of outer pannel thickness as 0.75 mm,inner pannel thickness as 0.75 mm,reinforcement as 1.5mm.Here we are providing an angle at the edges of Inner surface for the better movement.
Deep Drawing:
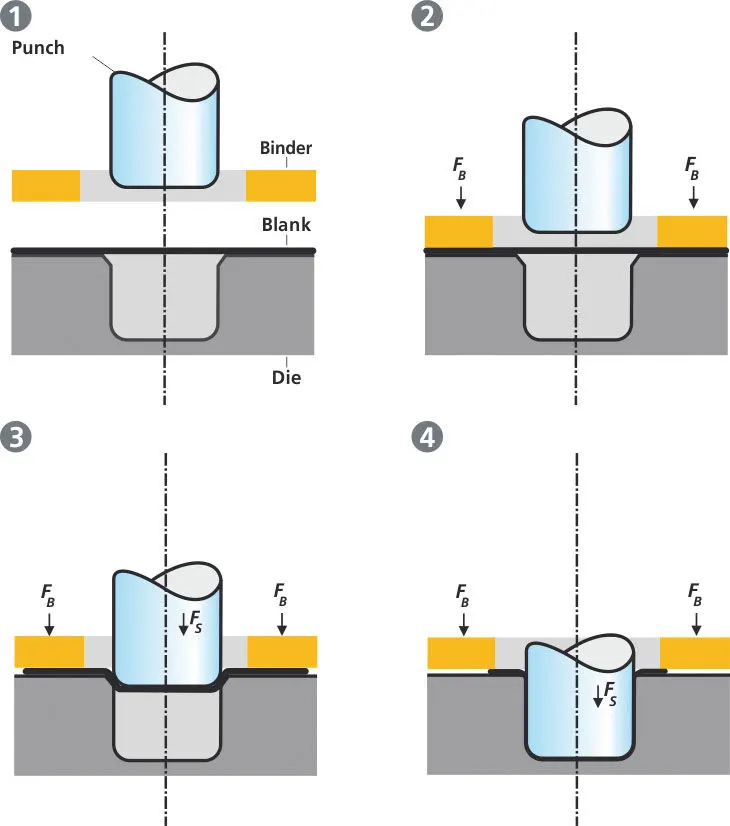
>The deep drawing process is a forming process which occurs under a combination of tensile and compressive conditions. A flat sheet metal blank is formed into a hollow body open on one side or a hollow body is formed into a hollow body with a smaller cross-section.
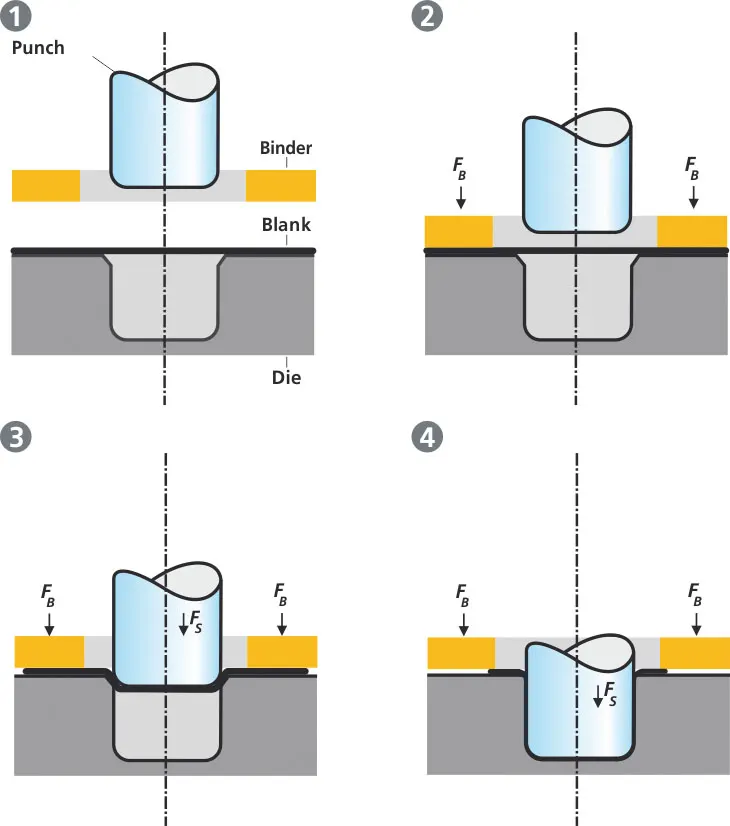
>The rigid tools consist of a punch, die and binder. In deep drawing, the plate holder closes after the metal sheet blank has been inserted.
>Whereas in pure deep drawing there is no reduction of sheet metal thickness, forming is achieved in stretch forming purely as a result of a decrease in sheet metal thickness. Stretch forming is extensively used for the forming of only slightly curved parts with low depth of draw (e.g. roofs, doors).
>Here as per the design of the surfaces the deep drawing process is used for the manufacturing.
Hemming:
>Hemming is a forming operation in which the edges of the sheet are folded or folded over another part in order to achieve a tight fit. Normally hemming operations are used to connect parts together, to improve the appearance of a part and to reinforce part edges.
>In car part production, hemming is used in assembly as a secondary operation after deep drawing, trimming and flanging operations to join two sheet metal parts (outer and inner) together. Typical parts for this type of assembly are hoods, doors, trunk lids and fenders.
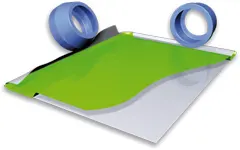
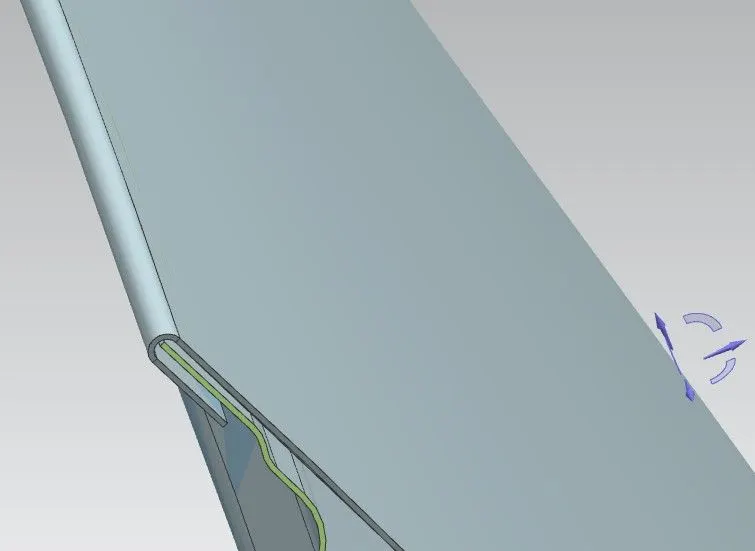
>Here in hood desigining the hemming done over the outer and inner surface pannels and we are using rolling hemming process for the better fitment.
>Roll hemming is carried out incrementally with a hemming roller. An industrial robot guides the hemming roller and forms the flange. Roll hemming operation can also be divided into several pre-hemming and final hemming process steps. Roll hemming is very flexible to use and tool costs are significantly lower as compared to those of conventional die hemming. However, the cycle times are much higher since the hemming is realized using a hemming roller which follows a defined path.
Hemming Data:
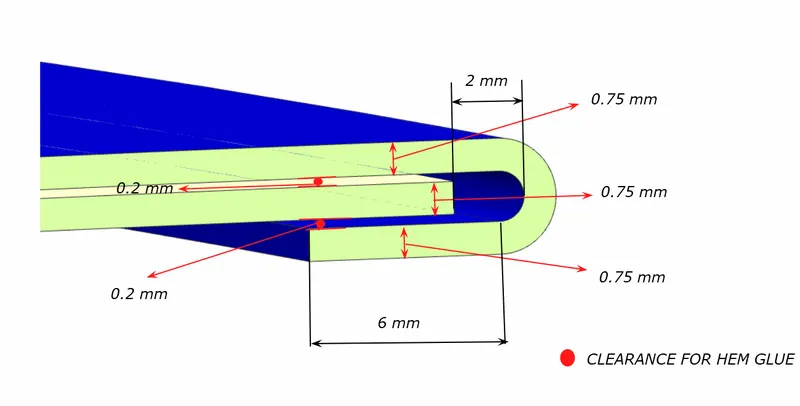
>The hemming data shows in the above figure as 6mm lenght of outer pannel with 0.75mm thickness is rolled over the inner pannel,and the clerance between the two palnes is 0.2mm above and below the palnes and also 2mm of bending allownace is provided.
Relief rear section:
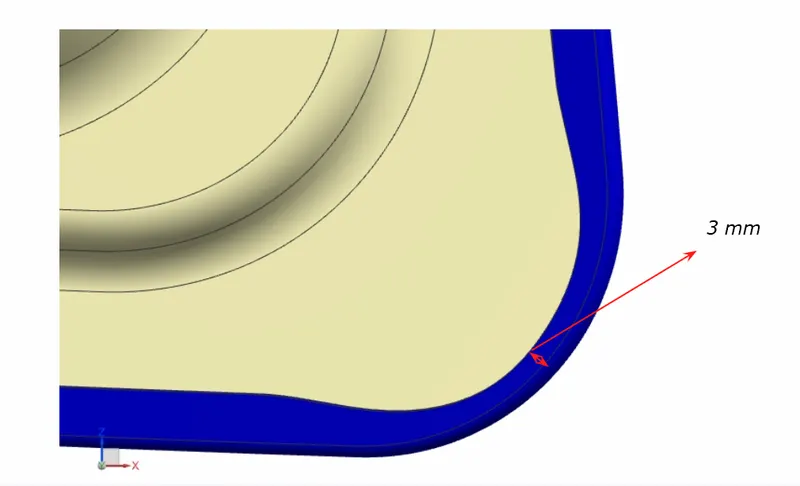
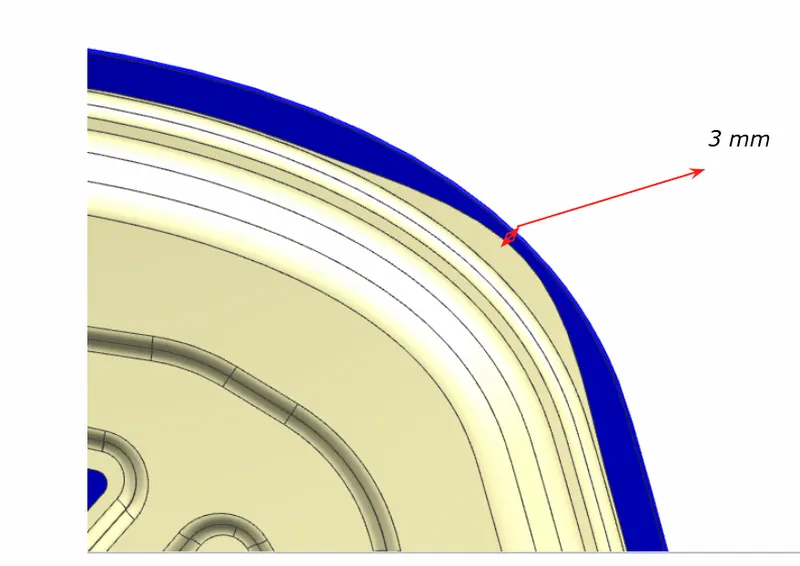
>The rare relief section at the surface edges is provided with 3mm for the better fixing of the hood into the car hood spacing .
Front relief:
Desigining procedure of an Hood:
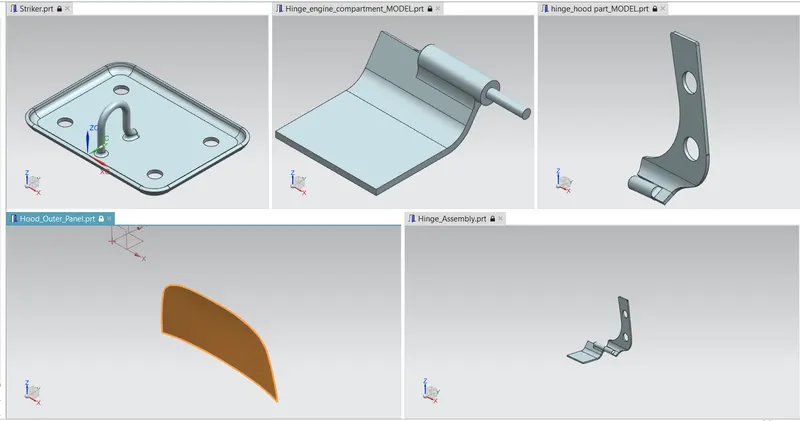
>The above figure explains the all the hood parts,Now here we are going to combine all the parts and creating the hood inner surface and hemming the outer surface over the inner surface and providing lancet reinforcement.
1.Outter surface:
>The Loading of an given hood outer surface into the NX worksheet.
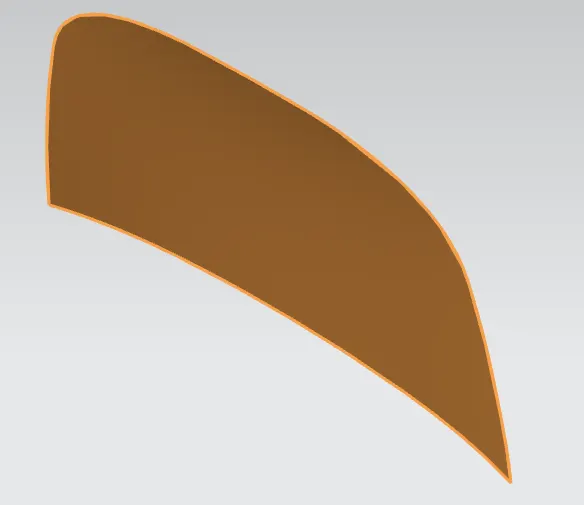
>The above figure shows us the outer surface of an hood,after this we are going to offest the given surafce and also make an parent file of the hood. so that we cant disturb the hood orginal surface anymore.
2.Making the Hood inner flange:
>Make an Working surface on which we are going to create the hood inner pannel
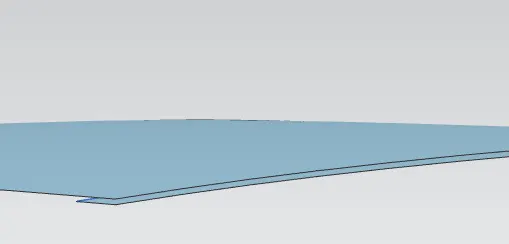
>After making of an Hood inner flange , we are going to make an hood outer flanges through offsetting the hood ,and Trim and extended sheet,off set curve properties.
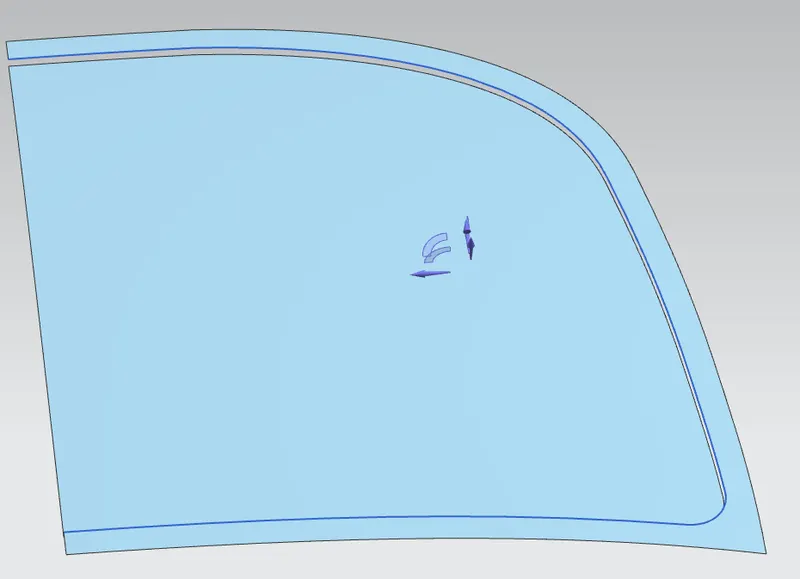
>Here after the hood inner and outer flanges are created and then after by using the through curve setting we are creating the hood surface.
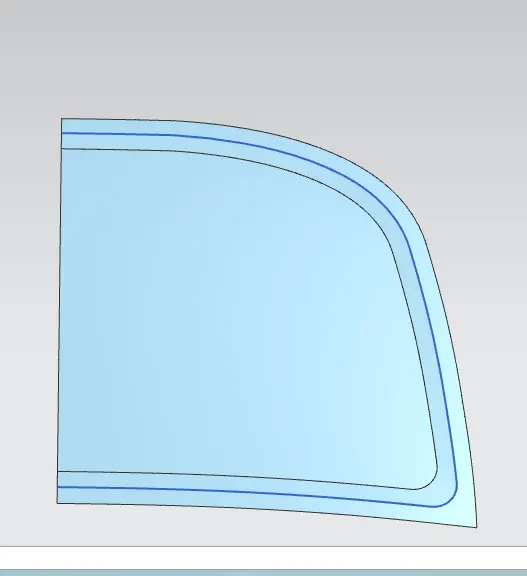
>Here after by using the offset,face blend,off set curve ,Trim sheet properties we are creating an hood inner surface.
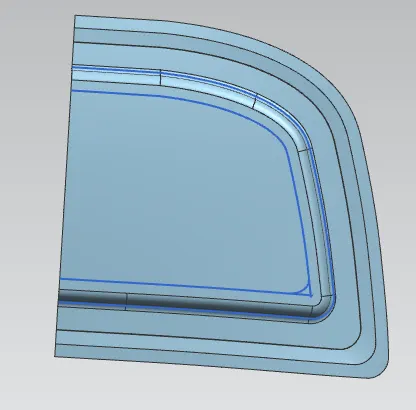
>Here we are bended the edges of the surface and creating an offset of inner plane.Then after we are going to provind an emboss ,reinforcement to the inner surface.
Mastic sealants:
>Here we are giving emboss to the surface and then after make a sktech of inner surface by providing mastic sealants which are used to join one surface to another or protect thr area to which it is applied. it has a heat resistant propertires and the ability to form a strong bond whichnis applied using a mastic sealant gun.
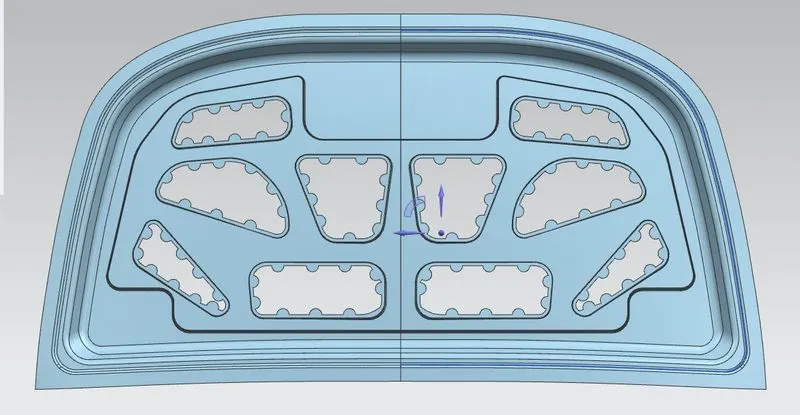
>The surface is extended by using the lawextension command by the 10mm height with 8degress angle.The after bend the edges of the surface by using edge command of the bend 5mm.
>Then after trim the inners sheet an then after make an sketch an project it on the surface, after make an off set of 7mm to create the inner surface of the sketch to the offset.Then after provide the mastic points with 8 mm radius , after compeletion of the sketch project it on the surface.Then after trim the projected sketch after the mastic points are provided on the surface.
Reinforcement:
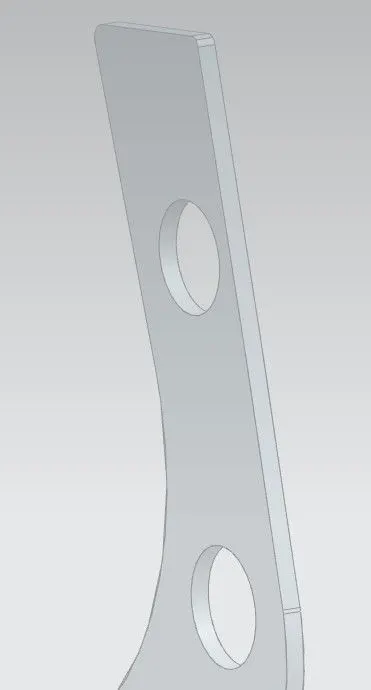
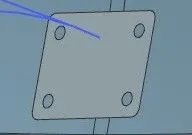
>When ever there is an addition of material to the component there is a loss of strength locallly,in this case , the additional material is the striker and the hinge where additional reinforcement had to attached due to loss of strength locally in the attachment areas.
> The thickness of the reinforcement should be in the range of 15mm
Deep drawing :
It is a sheet metal forming process in which a sheet metal blank is radially drawn into a forming die by the mechanical action of a punch. It is thus a shape transformation process with material retention. The process is considered "deep" drawing when the depth of the drawn part exceeds its diameter.
Deep drawing processes are divided into three types:
- Deep drawing with tools
- Deep drawing with active means
- Deep drawing with active energy
Embossing:
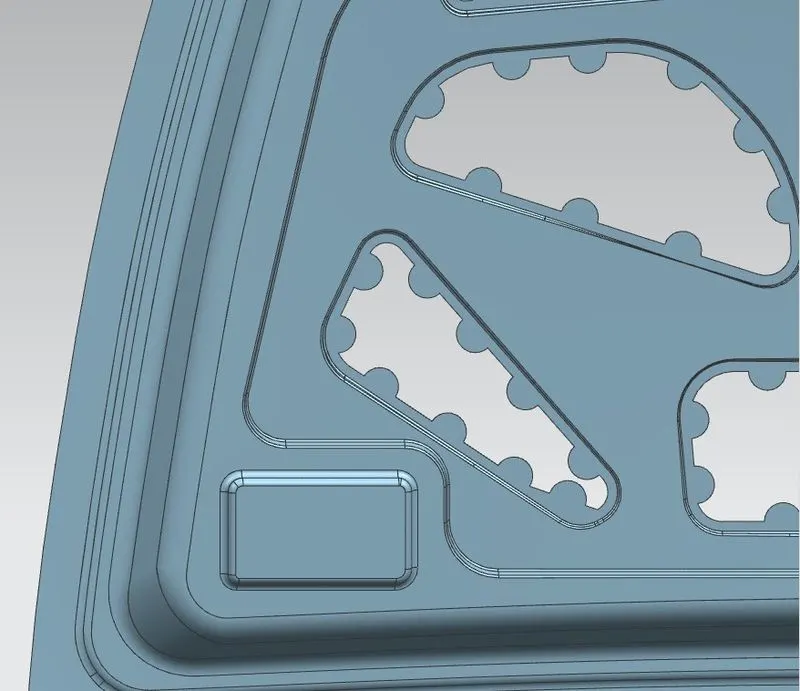
The Emboss feature raises or recesses a profile relative to the model face by a specified depth and direction. The embossed area can provide a surface for a decal or painting. A recessed embossed area can provide clearance for another component in an assembly.
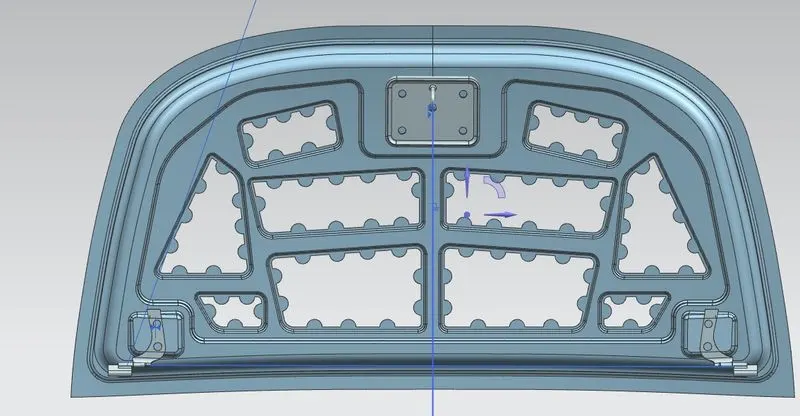
Hinge Assembly
LATCH TRAJECTORY :
The hood latch on any car is used to connect the hood release cable to the hood locking mechanism. If it breaks you will no longer be able to open the hood using the hood release in the inside of the car, which will be problematic the next time you have to enter the engine.
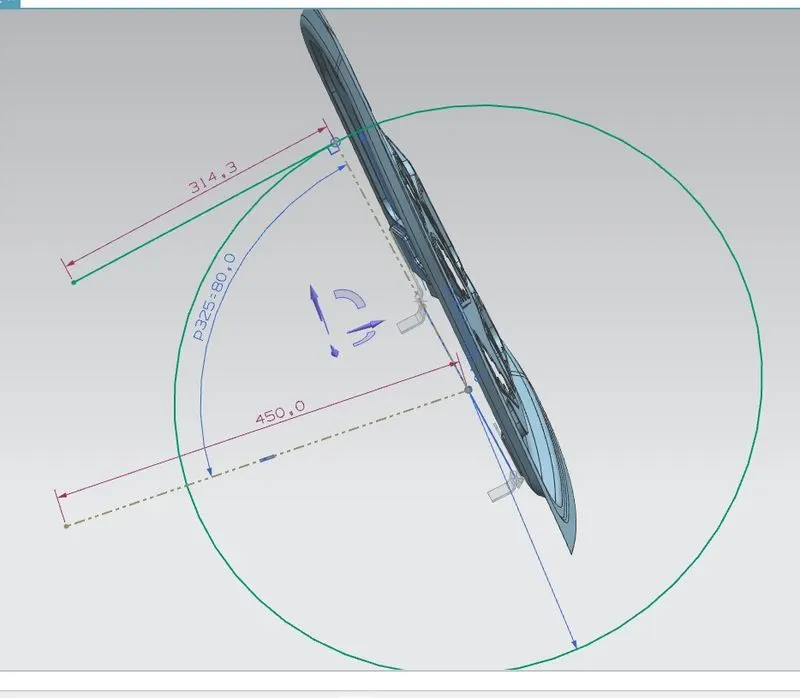
>The trajectory path is perpendicular to the striker then my hinge position is correct. if these are not perpendicular opening and closing of the hood becomes hard.
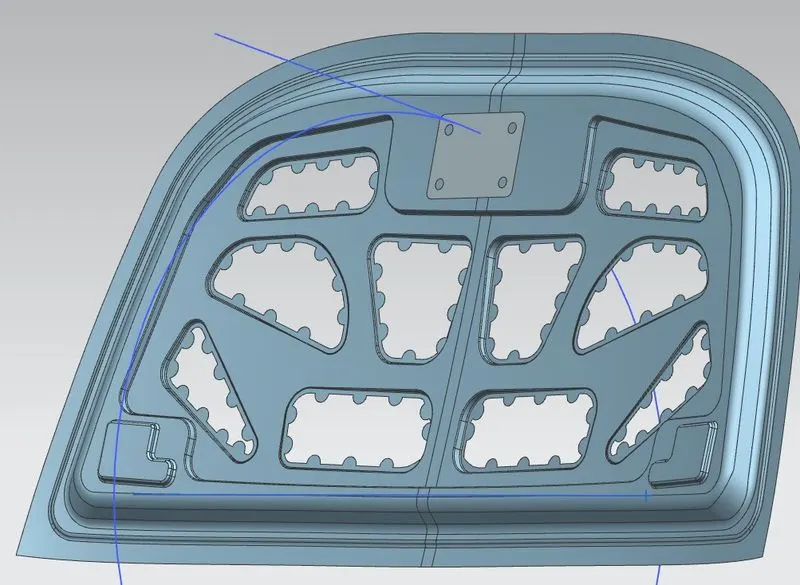
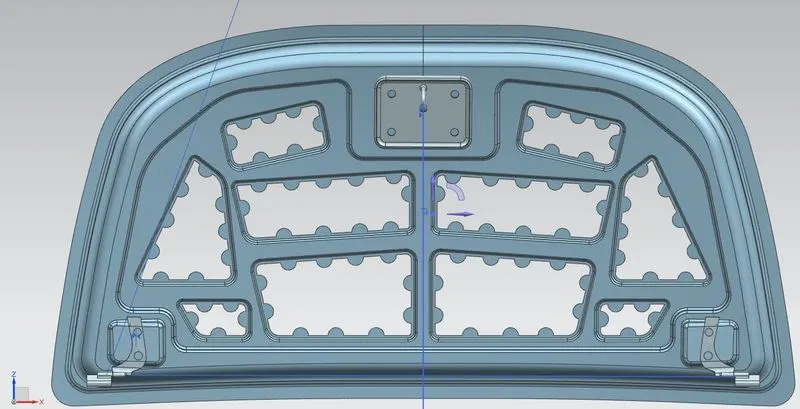
Striker Assembly:
>Here we are created an reinforcement for the striker for which we want to create an datum plane which is parallel to the hood face then after the palcement of striker by placing the lazent axis
Hemming:
Hemming is a forming operation in which the edges of the sheet are folded or folded over another part in order to achieve a tight fit. Normally hemming operations are used to connect parts together, to improve the appearance of a part, and to reinforce part edges.
There are various types of hemming operations:
- Conventional die hemming:
conventional die hemming is suitable for mass production. In die hemming, the flange is folded over the entire length with a hemming tool. Normally the actual hemming is a result of a farming operation in which the flange is formed with a hemming tool after the drawing and trimming operations have been completed. - Roll hemming:
Roll hemming is carried out incrementally with a hemming roller. An industrial robot guides the hemming roller and forms the flange. Roll hemming operation can also be divided into several pre-hemming and final hemming process steps. Roll hemming is very flexible to use and tool costs are significantly lower as compared to those of conventional die hemming. However, the cycle times are much higher since the hemming is realized using a hemming roller that follows a defined path.
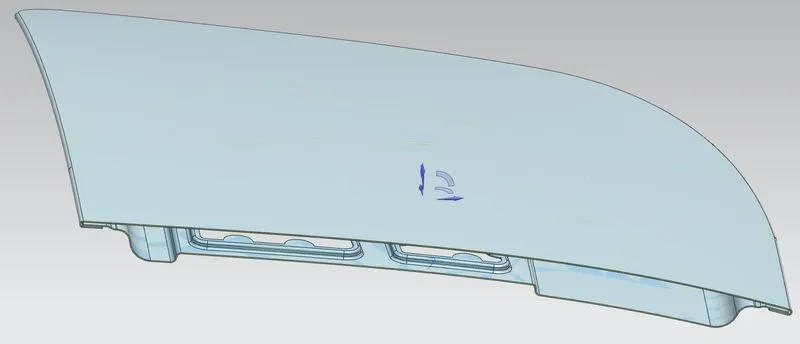
Hood Outer pannel:
Edge Reliefs:
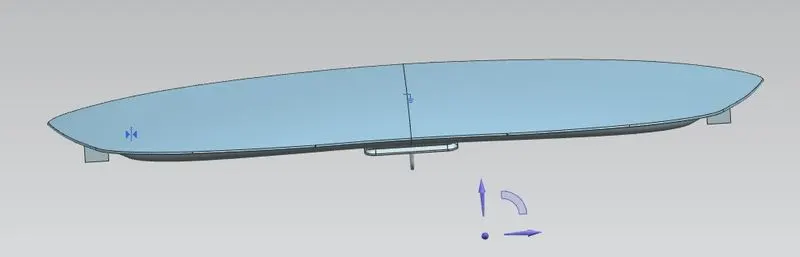
> Here we are provided with an edge relief angle of an 3mm at both corners of the hood outer pannel.
Full Design of an Hood:
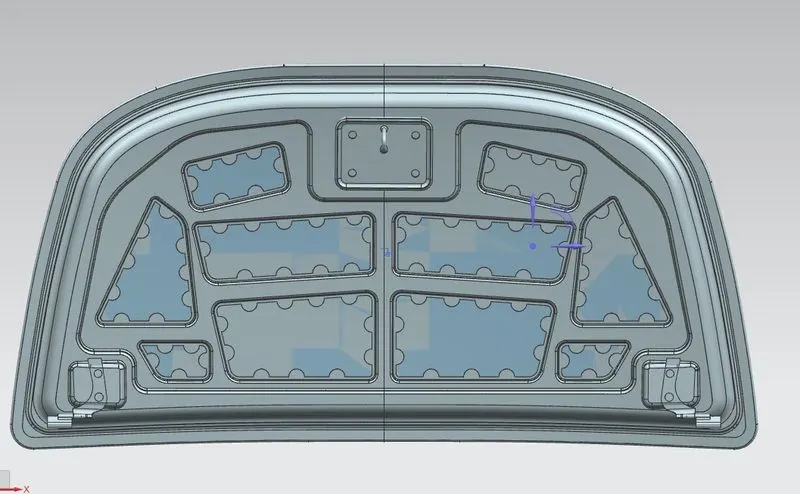
>The image shows the full hood with an assembly of striker ang hinges with the outer pannel.
Note : sir here i have an uploaded images of an report contains different than the file which i was uploade because my hood design was got deleted so i have designed an new file which was uploaded.so kindly accepted the report and mention the error in the report.