HOOD DESIGN
HOOD DESIGN
AIM: Our aim for this project is to create a hood assembly from the hood outer panel which is provided as input surface to us according to the master section sketch.
THEORY: The hood is an opening body panel that covers the engine in a front-engine vehicle. The hood is an assembly of following parts:
- Hood outer panel
- Hood inner panel
- Striker and latch
- Hinge assemble
Hood inner panel provides strength while the hood outer panel functions as the metal cover.
While designing the hood, we have to keep following things in mind at the initial level
- Opening angel: The angel up to which the hood should open. This angel varies from region to region as the average height is the basis for the same. For example the average height in India is 5.5 feet while in Europe it is 6 feet, so the opening angle of the hood in Europe has to be more than that in India.
- The hood is opened in 2 mechanisms. First, we pull the lever from inside the car, this unlocks the primary latch. Here we have to consider giving enough gap so the secondary latch can be unlocked using fingers.
- The type of support for the hood. After opening the hood, we need to keep it stable at one position so that we can work on the engine without getting hurt. We have to consider various factors and decide if we have to give support rod or gas stay for holding the hold at one position.
MASTIC SEALANTS: It is a paste which is laid between outer and inner panel. After cooling down, this hardened between them. Every sealant improves the strength locally in 80mm diameter around it. Therefore they are given in way so that we cover most of the area of the hood. The following video shows the process of laying mastic sealants.
https://www.youtube.com/watch?v=kqeG46v1u-w
https://www.youtube.com/watch?v=4q0b43kfwhU
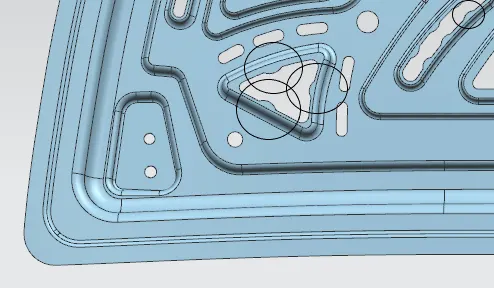
REINFORCEMENTS: When we add weight to the hood, like hinges and latch, the area decreases and so does the strength of the hood. To compensate this strength, we introduce the reinforcements at that position. The thickness of the reinforcements is usually more i.e. 1-1.5mm.
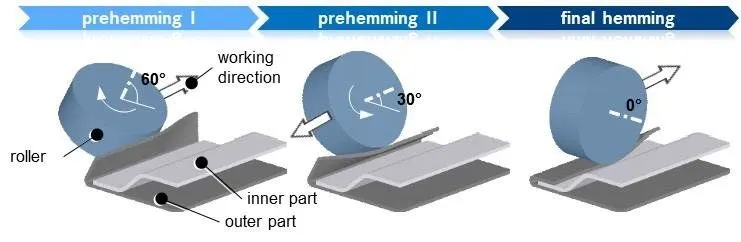
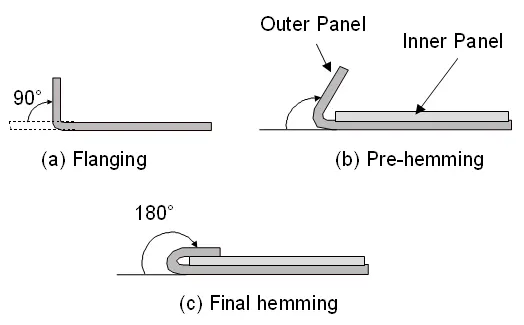
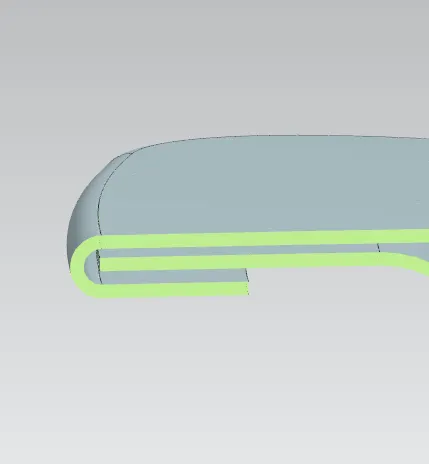
HEMMING: Hood outer panel and inner panel are joined together using hemming process. In this process the outer panel is wrapped around inner panel from all the sides to restrict its movement. This is done using rollers. The following link is to the video of hemming process.
https://www.youtube.com/watch?v=8iOoeNe6BT8
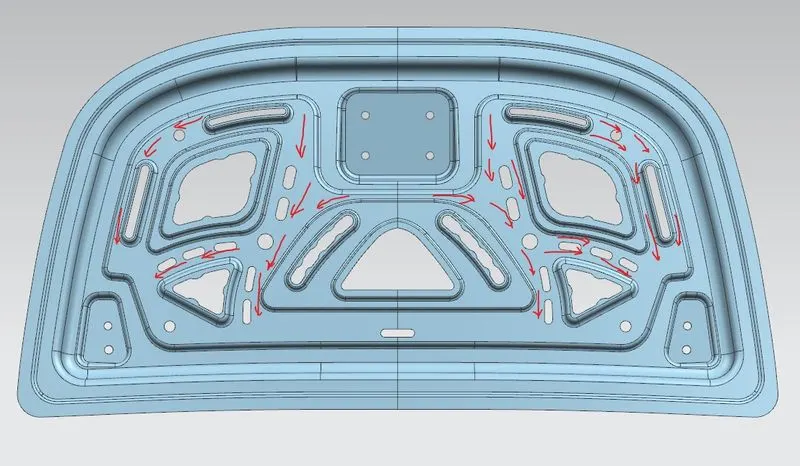
EMBOSS: They distribute the forces outwards rather than towards the passengers in the situation of crash
MASTER SECTION
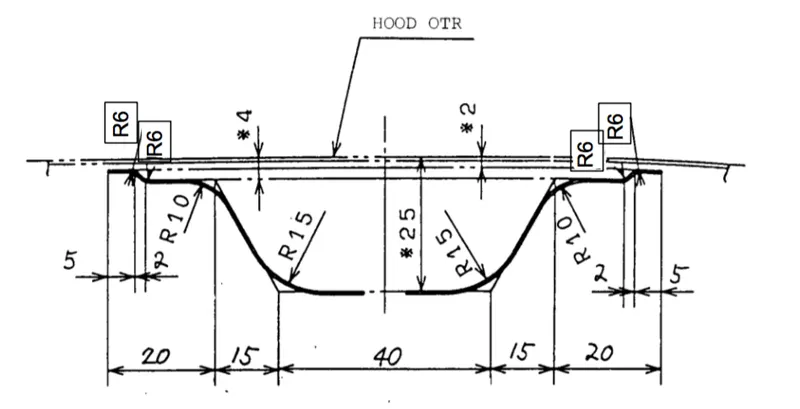
APPROACH:
CREATING BASIC INNER PANEL
- Understand the master section very clearly. This sketch contains the entire detail about the basic shape of the inner panel.
- As the hood is symmetric, we just need to make a half of it. So we make a 0mm offset of the outer panel and trim it with the plane about which we will mirror it later.
- Once we understand the sketch, use offset surface, trim surface sheet, trim and extend, law extension, curve projection, sketch, face blend, edge blend etc tools to make the basic shape. Offset distance should be properly given.
- Once this basic shape is obtained, we will then make our own design. There is no rule to make this design. We just have to create emboss. This feature distributes the force side wards rather than directing it to the passengers in case of crash.
- To make emboss we can follow two methods. Either we can create emboss from sketch or we can make a sketch then use law extension then offset curve and trim extend all of them. In any method, we should always remember to give a positive draft value.
- This method has to be repeated again and again to get our desired shapes. We can sketch at our free will. We are free to cut shapes according to our wish.
- Once this is done we should move to make emboss for latch and hinges. These parts require flat emboss at the top, so we have to follow different method here.
CREATING HINGE EMBOSS AND MOUTING HINGE ON IT
- Make a sketch in side plane. This sketch is of a line parallel to the hood.
- Extrude this line to get a flat surface. This fulfills our need for flat surface. The rest is same.
- Make a sketch around hinge. Project it on the surface and use law extension feature.
- Trim and extend it with the flat surface. Use blends.
- Use assembly constraints. Make sure to use parallel constraint with x axis and hinge axis.
- Create a mirror assembly using associative mirror to get the hinge on other side as well.
CREATING LATCH EMBOSS
- Create points on both of the hinge axis and make a line through those points.
- Make a datum coordinate system on the midpoint of that line. Sketch on its side plane and make a circle.
- Also make a horizontal reference line and a slant reference line at certain angle coincident with the circle. At its end point make a straight line again.
- This is because, if we change angle the point moves too. And also, we will constrain the latch with respect to this line.
- Create two horizontal lines on the striker (on U) and make a line in the middle of them.
- Assembly constraint the latch and circle. Now if we change the diameter or the angel then position of the latch will change.
- Make inner panel as work part and use wave geometry to extract the back portion of latch here. Extend the extract and make emboss out of this face using emboss command.
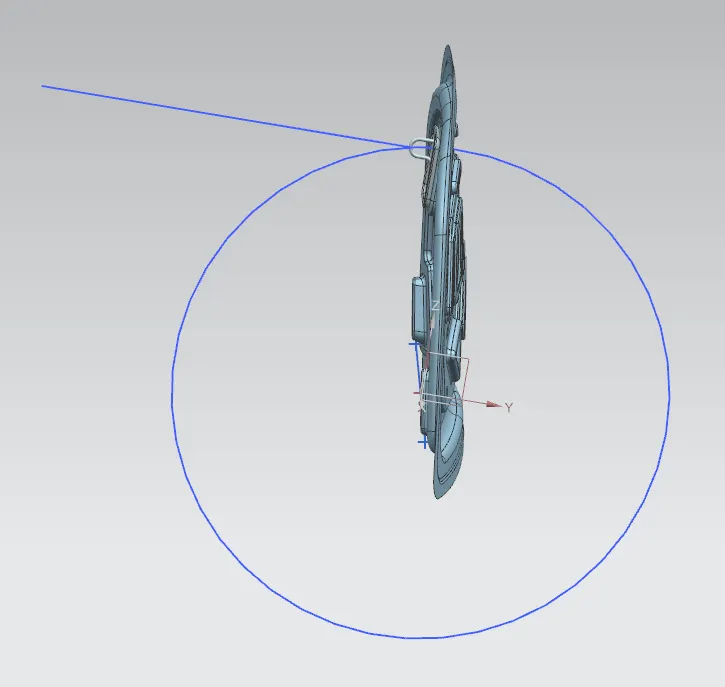
CREATING FINAL INNER PANEL
- Mirror the inner panel about the plane.
- Sew them and check if there is problem in the surface.
- Naturally there is a problem in the middle line because of the blends. Correct them by extending the surface and trimming them again with the same plane.
- Again mirror them and sew them together.
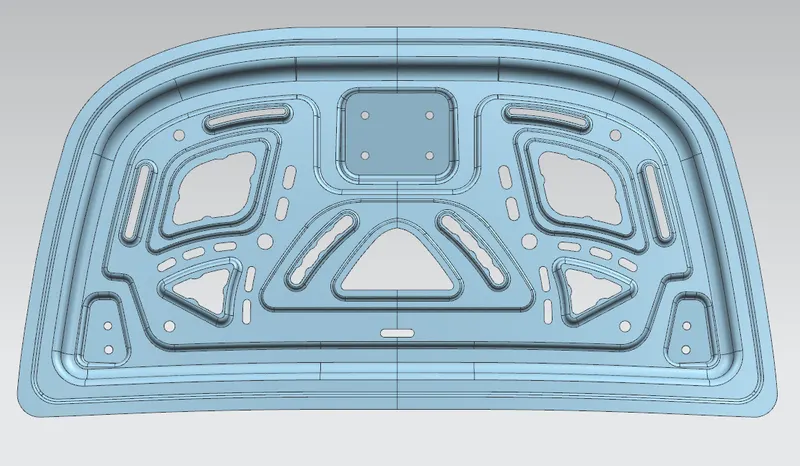
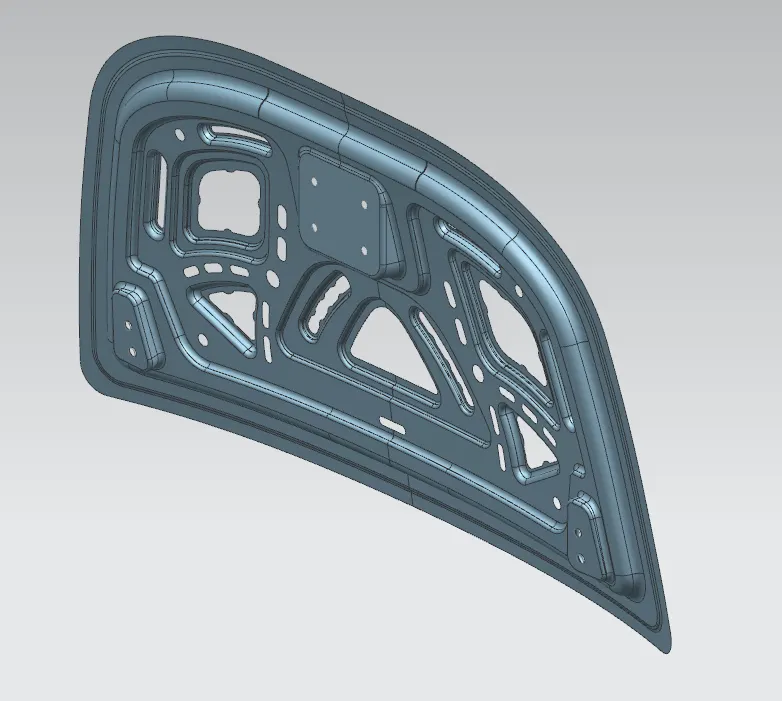
CREATING HEMM
- For creating hemm, first we need to extract the boundary on the outer panel and make a law extension on both sides.
- Offset the extension by the distance of about 10-15mm.
- Also offset the outer panel by calculating proper distance taking thickness and tolerance into consideration.
- Trim off the unnecessary offset surface.
- Now use three face blend and blend the outer panel, first law extension and offset surface to wrap it around the inner panel.
- Mirror this surface and sew it.
- Thicken the entire model to create a solid hood.
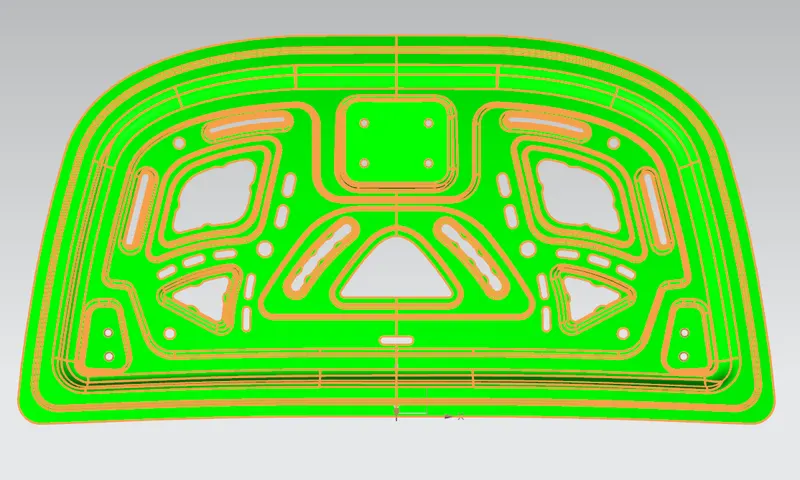
DRAFT ANALYSIS: This analysis tells us if we have enough draft on the model or not. It is 7deg for sheet metal.
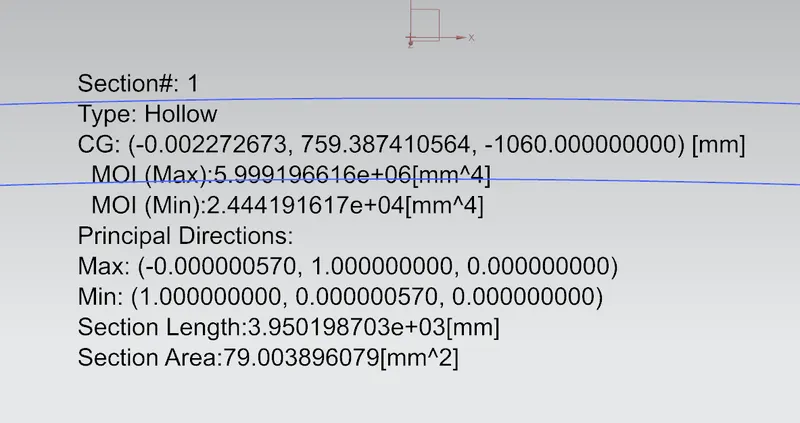
SECTION INERTIA ANALYSIS: This is to improve MoI
1. create a datum plane.
2. sketch on it and get the intersection of the outer and inner panel.
3. run section inertia analysis.
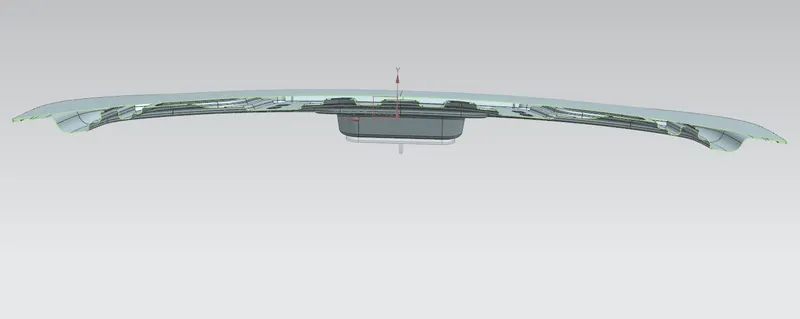

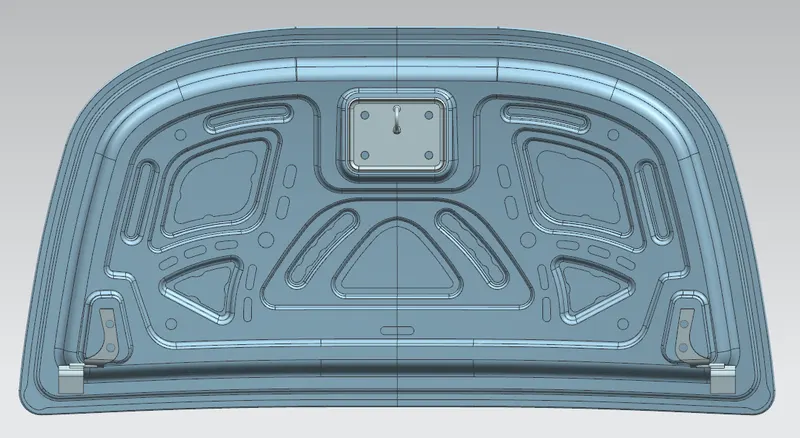
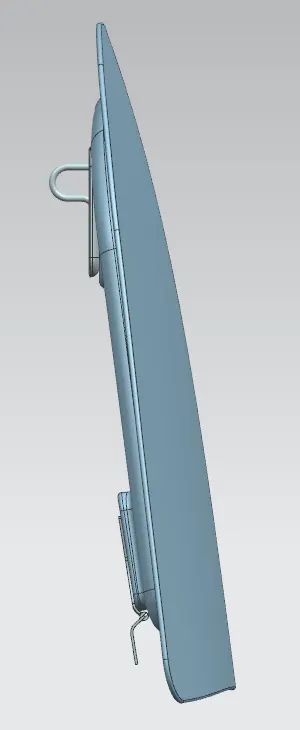
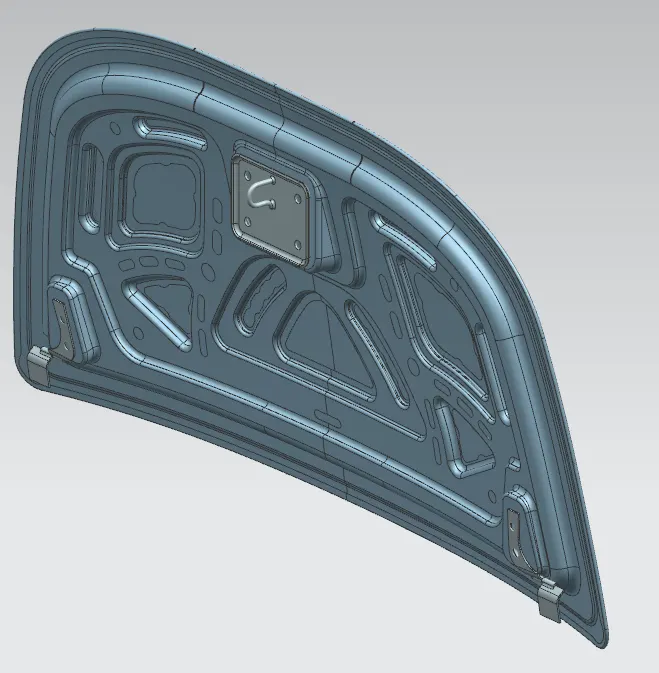
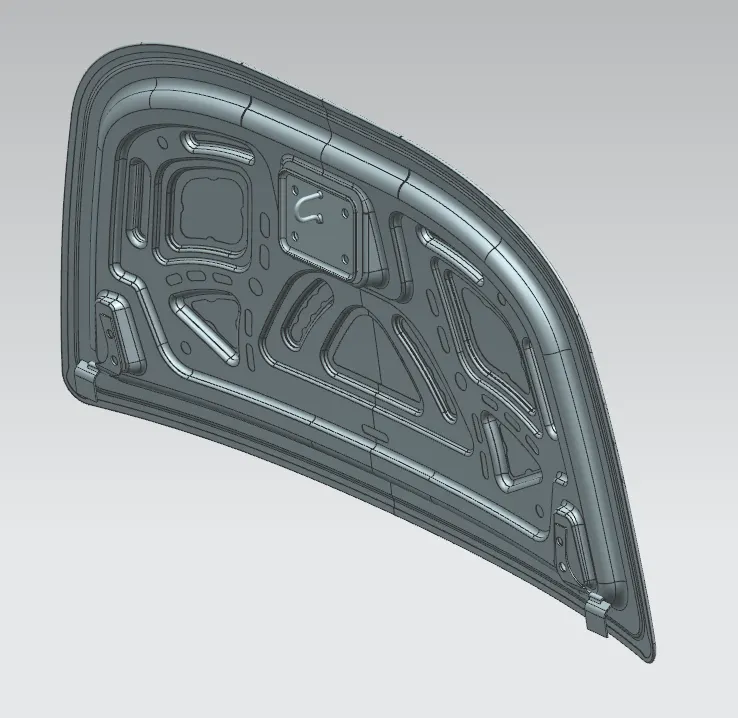
IMAGES OF THE MODEL