Hood design-Week 2
TITLE:- Basic Information about automotive hood design and their sub-components
- Introduction :-
- A hood is a part of a car body and it covers the engine parts. It prevents dust and water from coming directly to the engine.
- Whenever there is a malfunction in the engine, we open the engine area with the help of the hood and we can check and replace damaged part.
- Hood reduces aerodynamic forces when we are driving car. It depends on the aerodynamic shape of the hood and speed.
- Automotive company use steel sheet for Hood material. Sheet thickness is under 6mm. but we are using 0.75 mm thickness of sheet for this hood design.
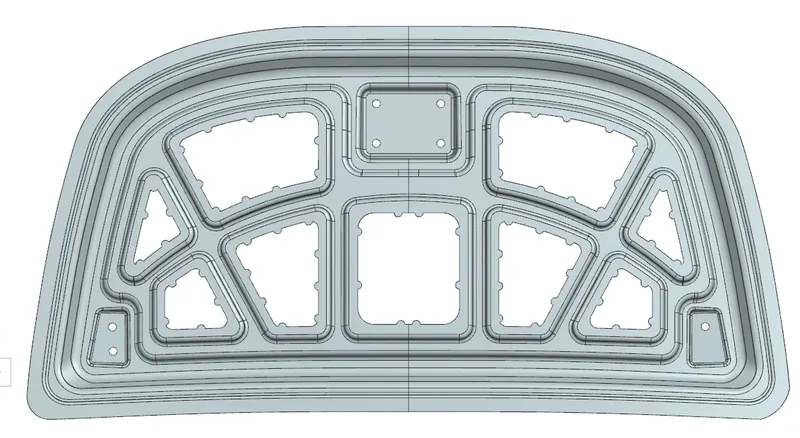
- Hood is made of two part, inner panel and outer panel. Outer panel use for class A surface and styling purpose. Inner panel help to observe forces with help of shape emboss. Both panel is connected by the glue and hamming process. Between both panel we feel reinforcement material to observe load.
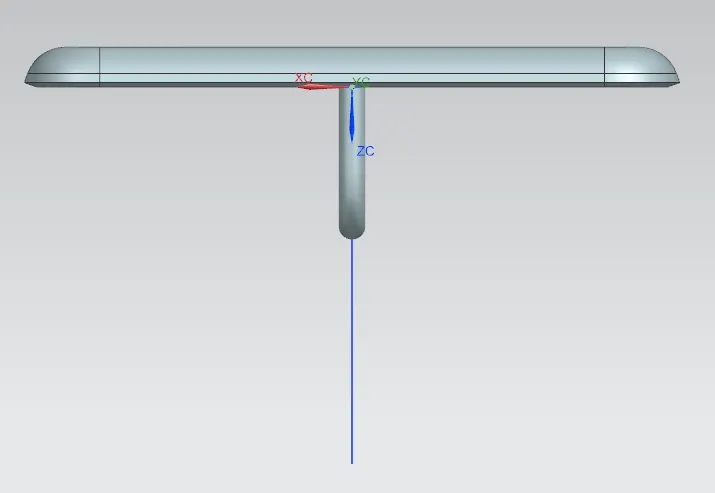
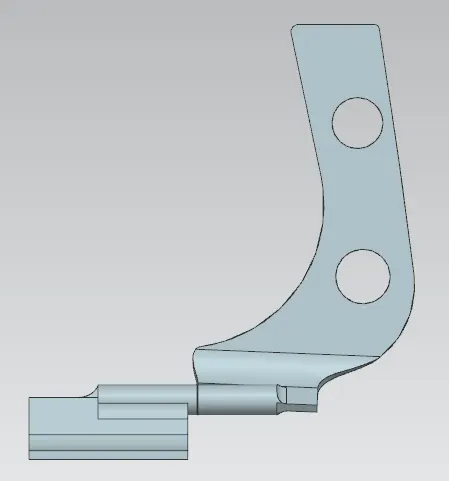
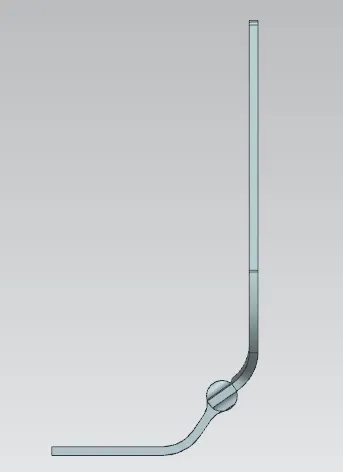
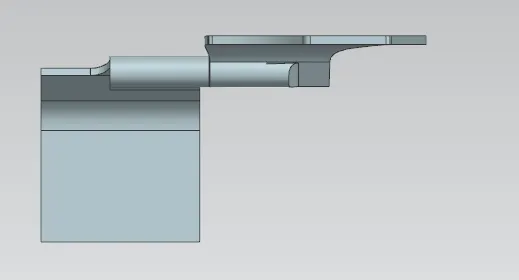
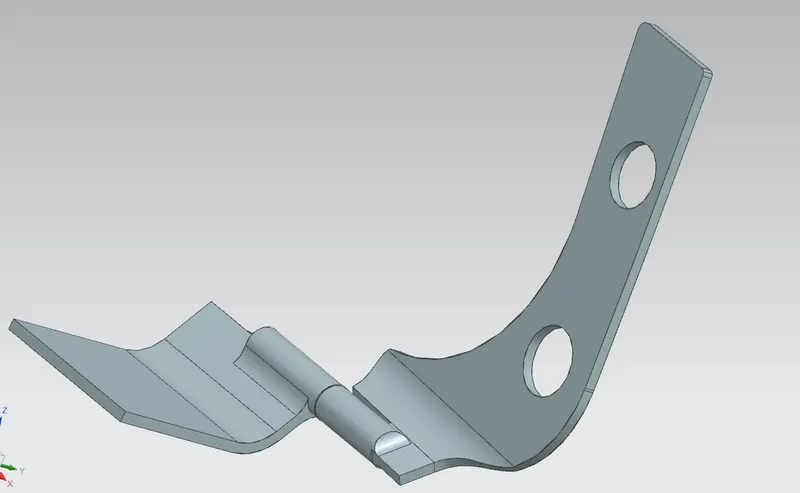
- Hood is connected to the engine compartment by the help of hinge part. Hinge is helped to open and close of hood. Hood is look by the striker.
- In this project we are focussing on the hood design and manufacturing processes. We try to make good design.
2.Objective :-
- Design consideration for car hood.
- hood model is created with using of master section of the hood in NX CAD.
- Discuss of manufacturing of process.
3.Design consideration for hood
- Pedestrian safety
The hood has two types, one is wrap around hood and second is inlaid hood. End point of the car touches the fender is called inlaid hood , but end point of the car touches on the hood is called wrap around hood.
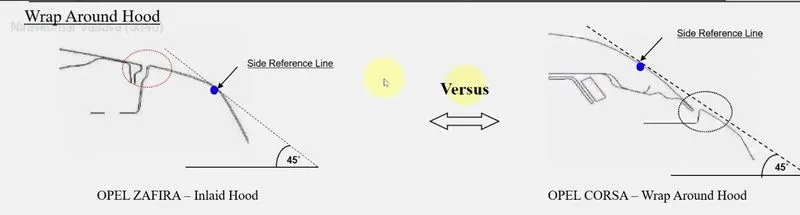
Side reference line is the trace of the highest contact point between straight edge inclined at angle of 45 and side of the vehicle.
Wrap around distance is the trace of the points received on the front structure, when one end of flexible tape of required length held at ground reference level and other end in contact with the front structure.
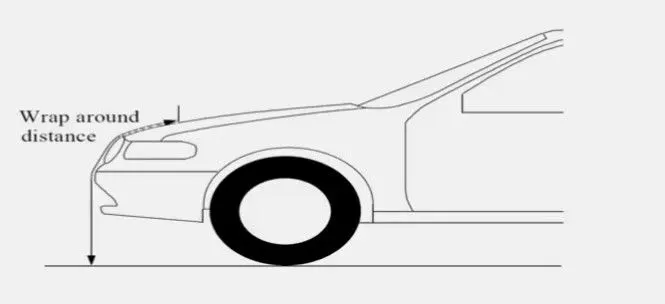
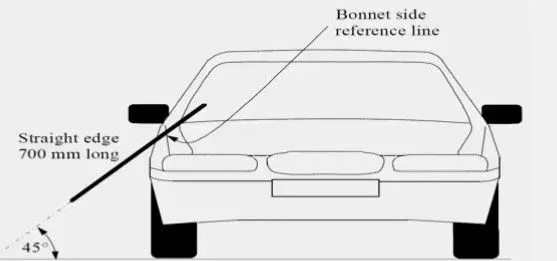
To find the child head impact zone and adult head impact zone, we use side reference line.
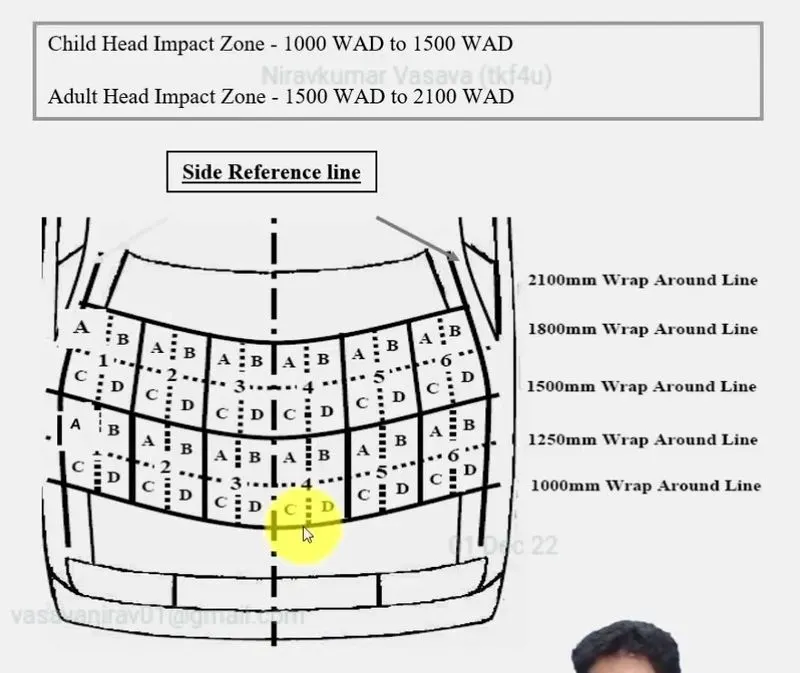
child crash on the car, it fall on the child hood area and adult crash on the car, it fall on the adult area.
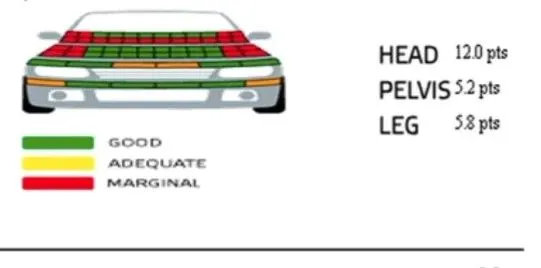
when side reference line touch the area, area become red and line is not touch ,it is become green.
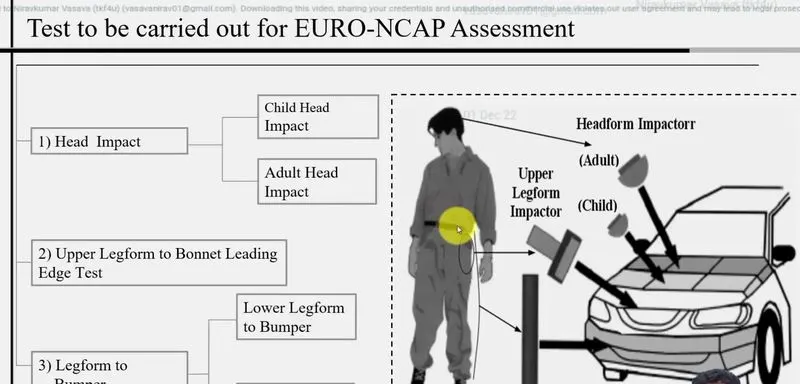
EURO-NCAP is the team that test the car and check how safe is the car.
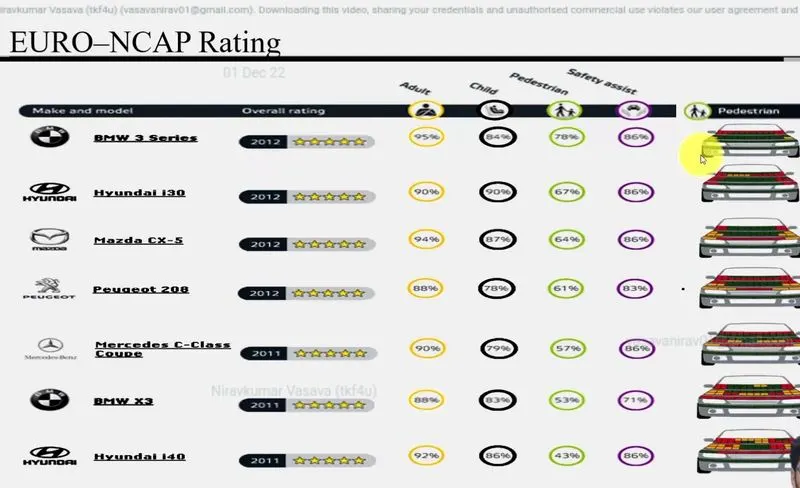
the image shows the NCAP rating, there is rad area is impact zone and green area is less impact zone.
- Opening angle -proper gap between striker and head
Before fitting the striker, Designer checks the striker position. They decide the open angel of the hood according to the average height of the man. They take care that the striker does not touch the man's head.
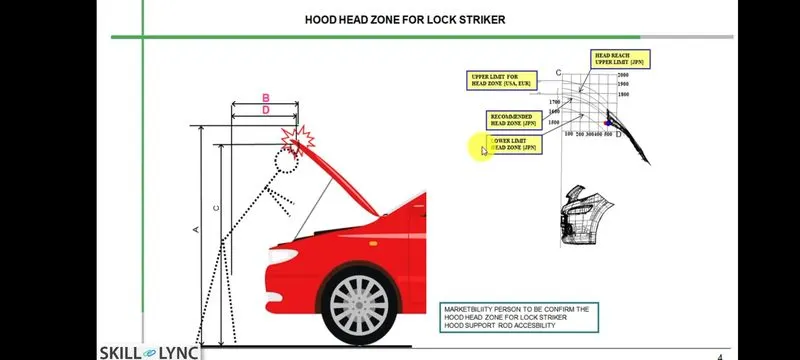
The image above shows that its angel changes according to different heights. The hood is connected to the engine body with the help of a hinge. With the help of striker we can open and close the hood. A support rod helps keep the hood fixed in place. We have two type of support rod, one is simple support rod and second is the gas stay. Gas stay works by the hydraulic pressure.
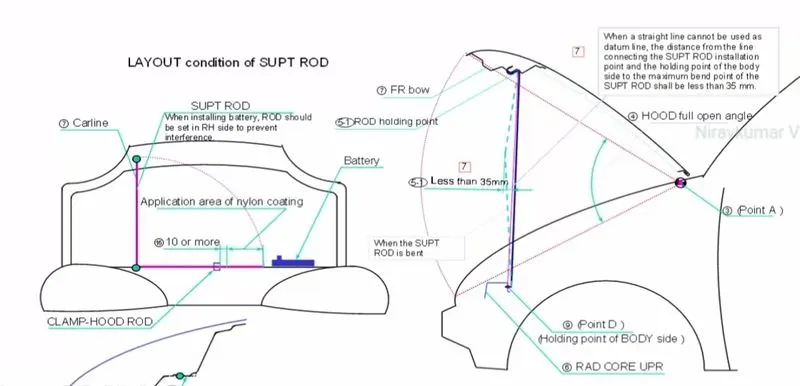
When we open the hood, the rod is fixed to the hood which keeps it open. The rod is always set opposite to the battery position. The road is not straight because the rod has to be placed on the engine body.
- Good reinforcement should be given for required strength.
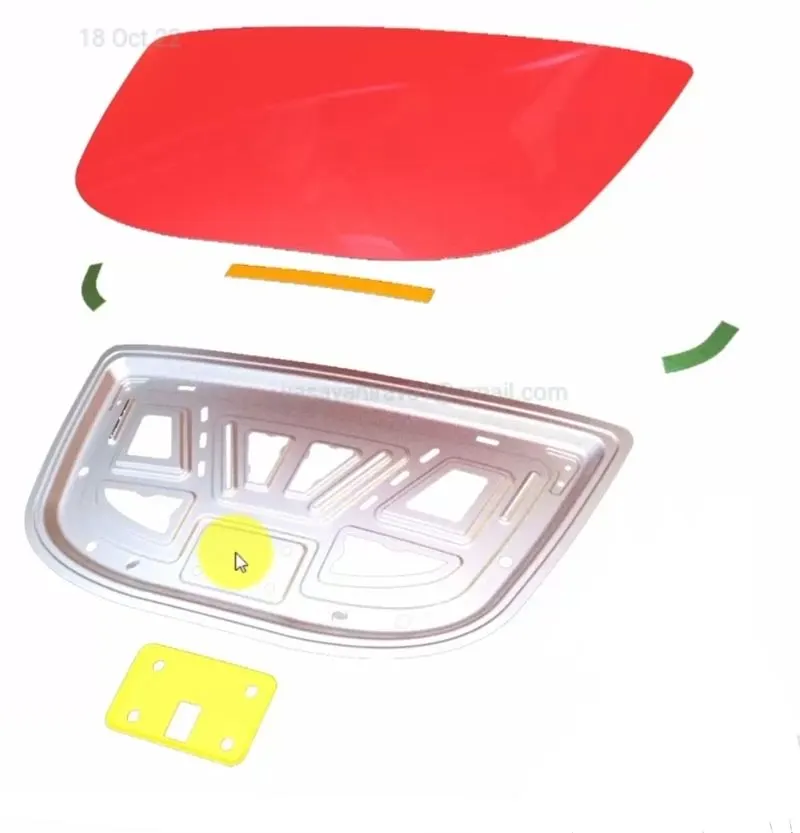
Whenever we weld or join a sheet to another sheet, we reduce sheet strength. Therefore reinforcement material is used where the hinge and striker join. Reinforcement material is increasing strength of component. It is also help for NVH.
- Force distribution on panel
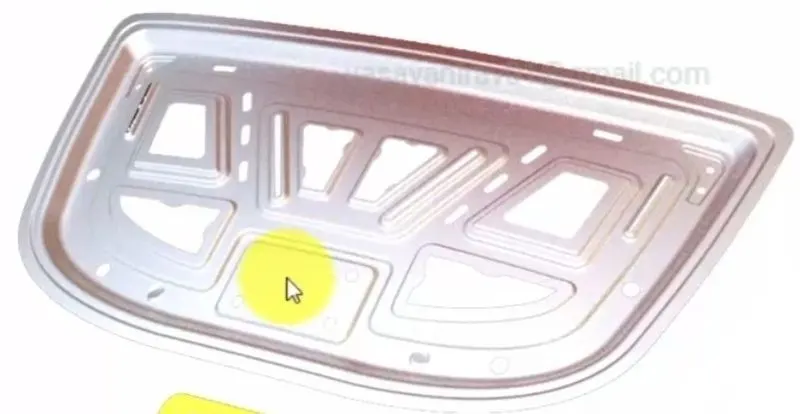
Inner panel a most important part for force distribution. Force is distributed with the help of emboss and it is on panel. Different shape of emboss is help to reduce or control the force.
- Good heat dissipation
Whenever we drive the car for a long time, the engine heats up. So the hood material is chosen which transfers heat fast. Emboss shape also help to transfer the heat.
4. Generating hood in NX CAD
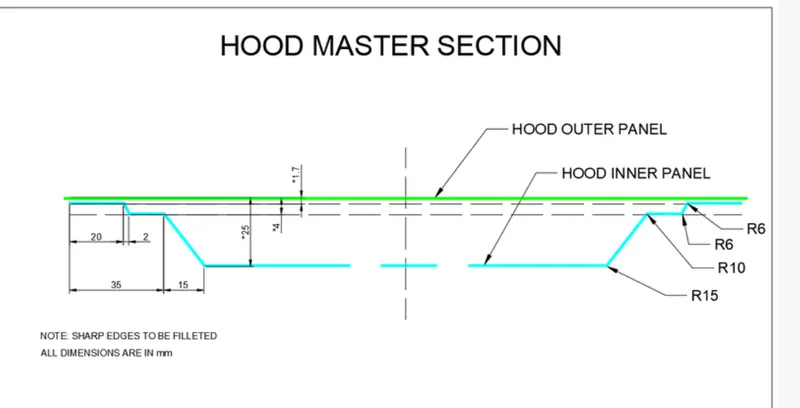
- The photo above shows the dimensions of the inner panel and outer panel. With the help of this photo we have made the inner panel. Let us focus on the dimensions, the maximum gap between inner panel and outer panel is 25mm. This gap is kept for the reinforcement material, it increases the material strength and it also reduces the vibration. It is also use for NVH purpose. Both the panels are joined by glue and humming presses.
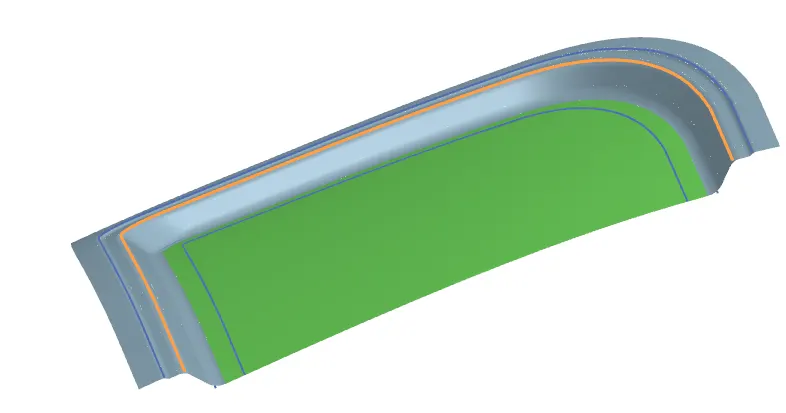
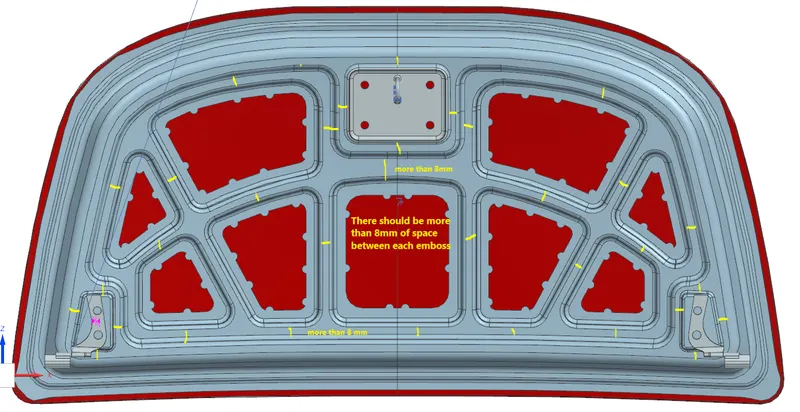
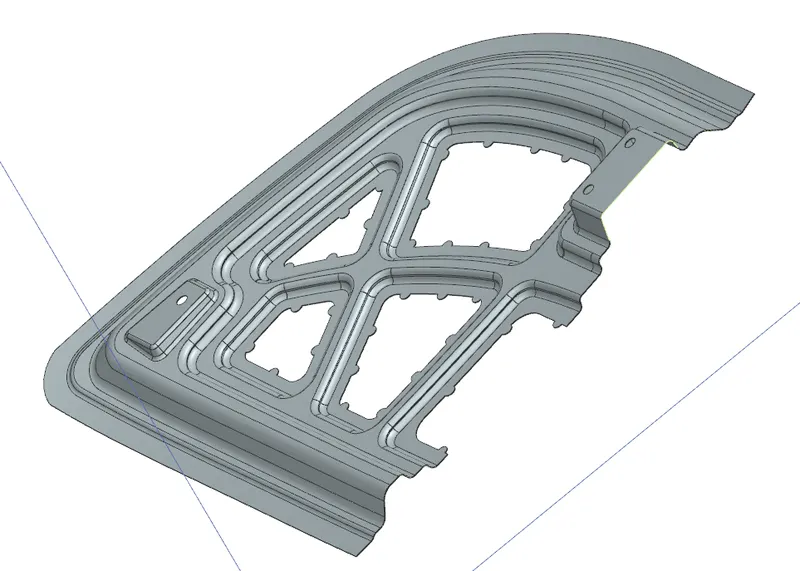
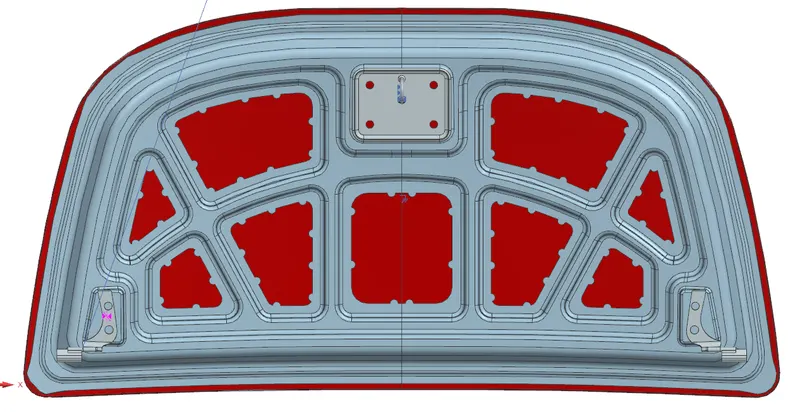
- According to the given dimensions, we have made sub-sections on the inner panel. For more stress distribution inside the inner panel we have to make an emboss. Emboss is sub-section on the panel which is distribute load. Due to shape of Emboss, the panel will distribute the load. Shape is very important for load distribution. Let’s create the Emboss on panel.
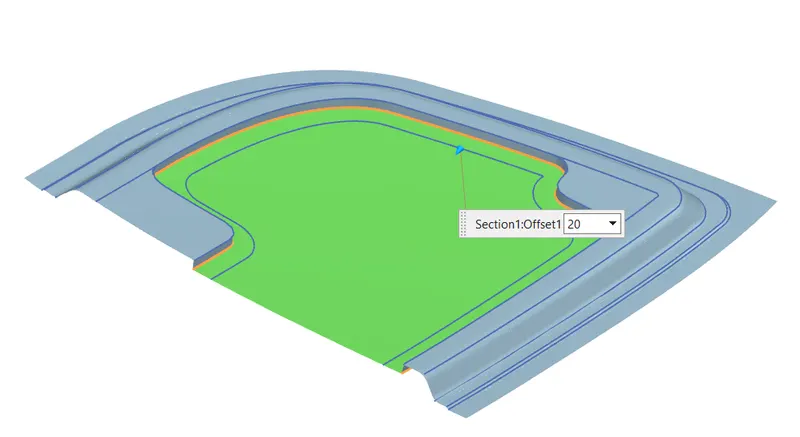
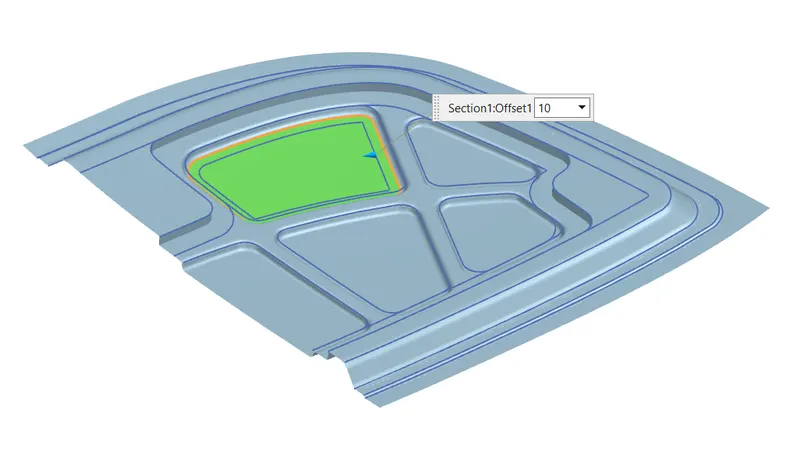
- Before creating Emboss, leave space for the striker and hinge.
After creating embosses we created sub embosses and it also help to load distribution. - A mastic seal is used to control NVH and increase strength on inner panel. When we apply mastic, its effect is seen up to 80 mm. it spreads vertically up to 5 mm.
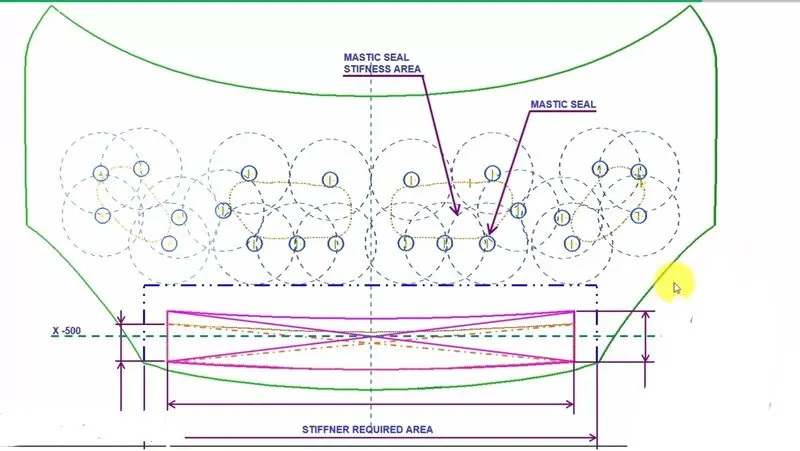
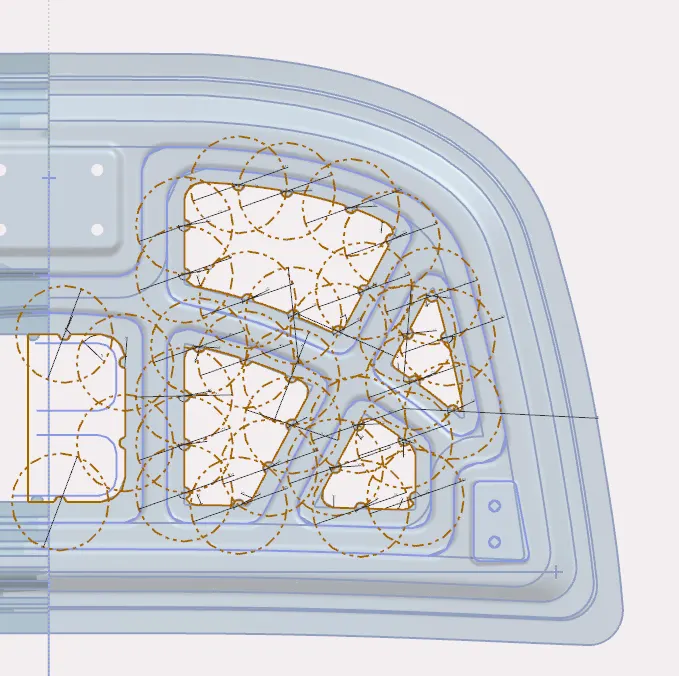
- Whenever we weld or cut, the strength of the sheet decreases, Because of this we will use stiffener material to maintain the strength of panel. Stiffener is used below the striker and hinge joint. For stiffener we create sub-section no the panel.
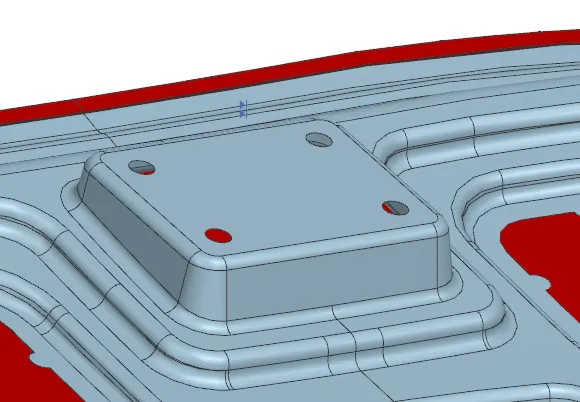
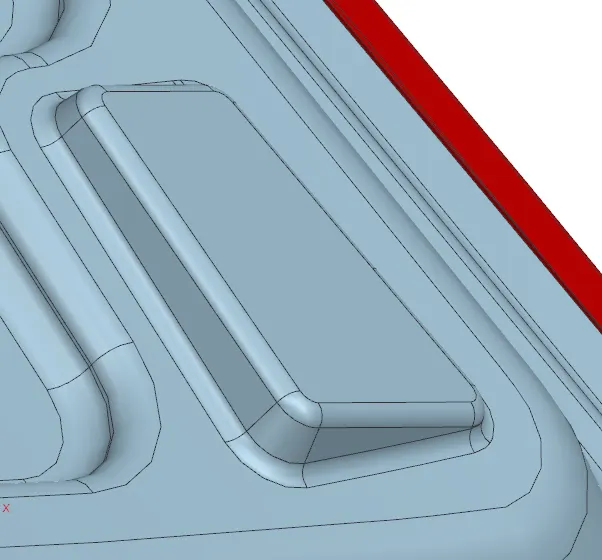
- Striker position :-
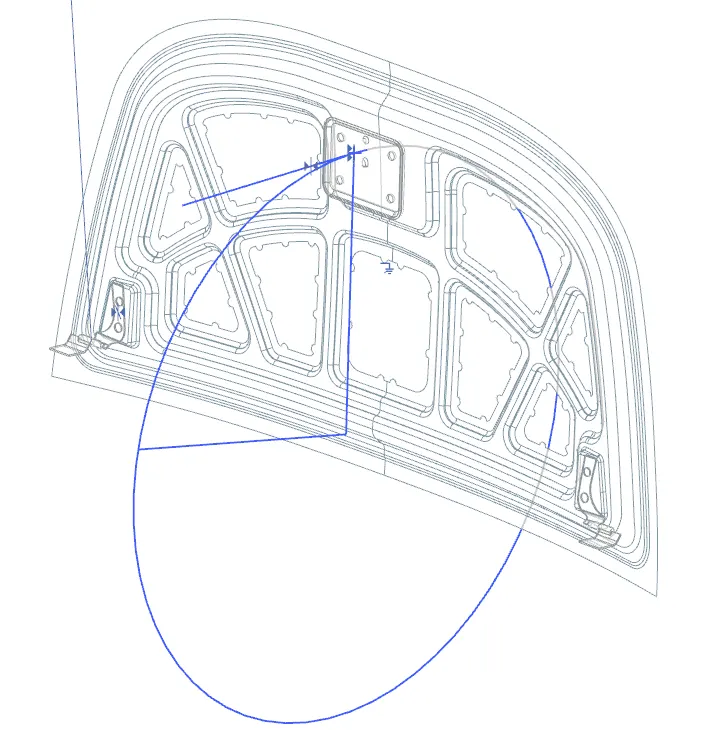
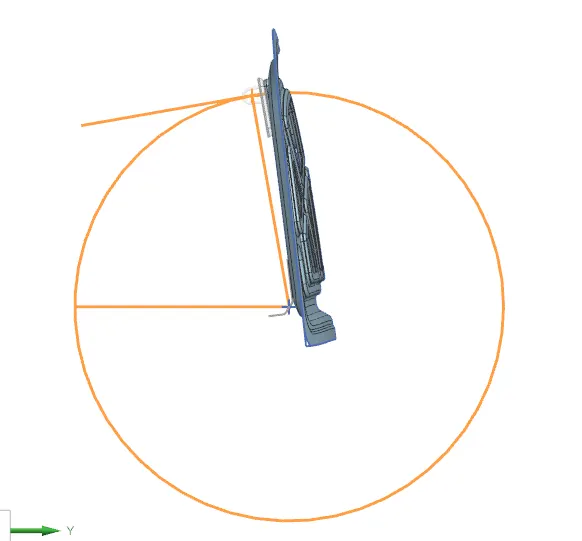
- Before creating the emboss for the striker we have to set the position of the striker. As shown in the figure, with the help of Hinge, we find center points of inner panel. Next we create circle and Its diameter is measured from the center point to the striker point. The striker is kept at 70 or 80 degrees from the horizontal axis.
- Outer panel :-Create U flange around the given panel and U flange is show hamming process between inner and outer panel . For better hemming process we have made U flange on the outer panel and few parts are left free on the corner.
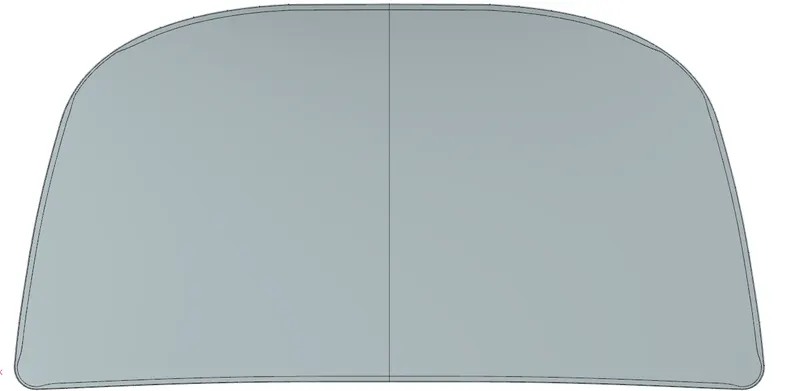
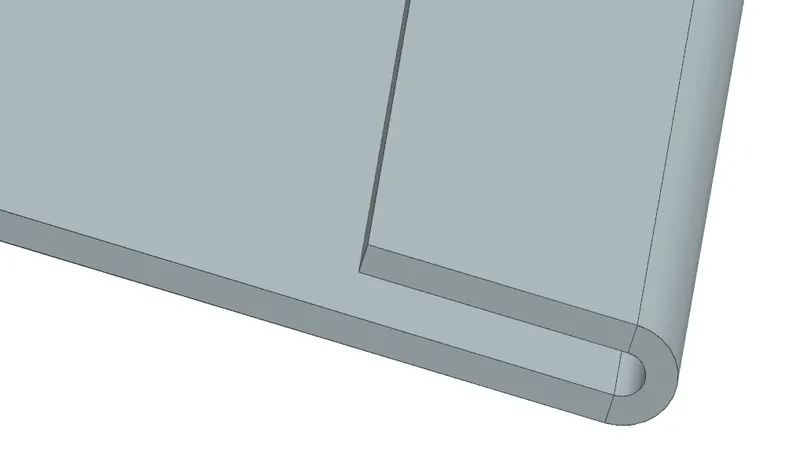
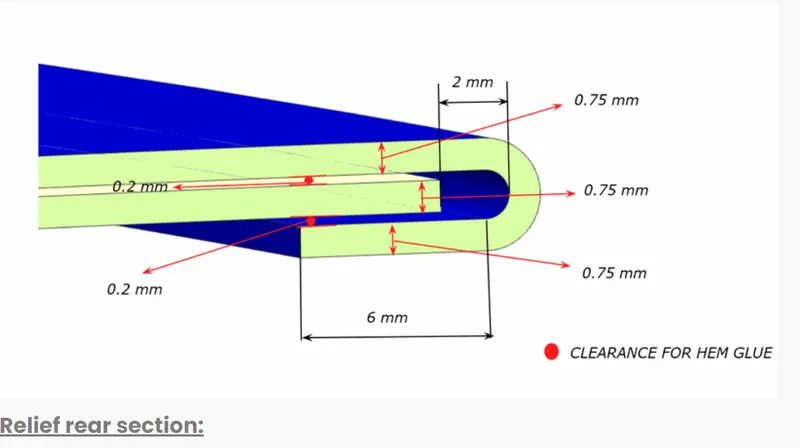
- As shown in the figure, a space of 0.2 mm is kept between the inner panel and outer panel. Make the flange according to the dimensions of figure.
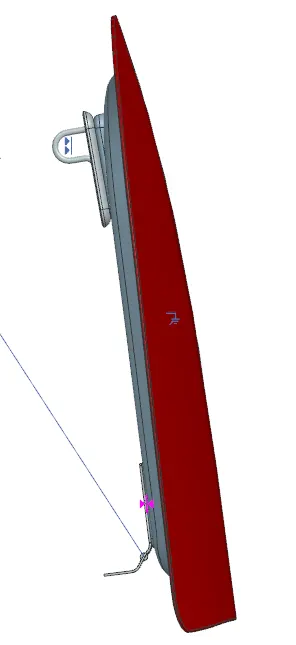
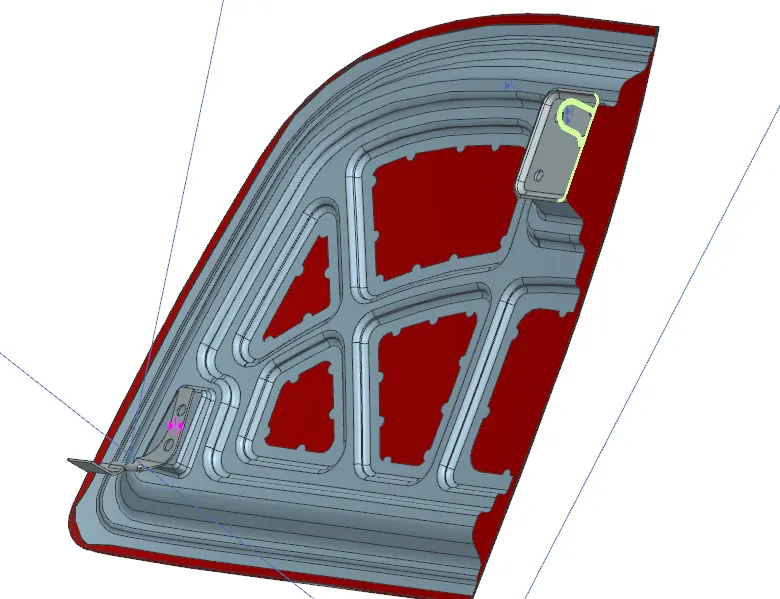
- The final design will be done as shown in the figure. A striker and hinge model are provided and they attached on the inner panel.
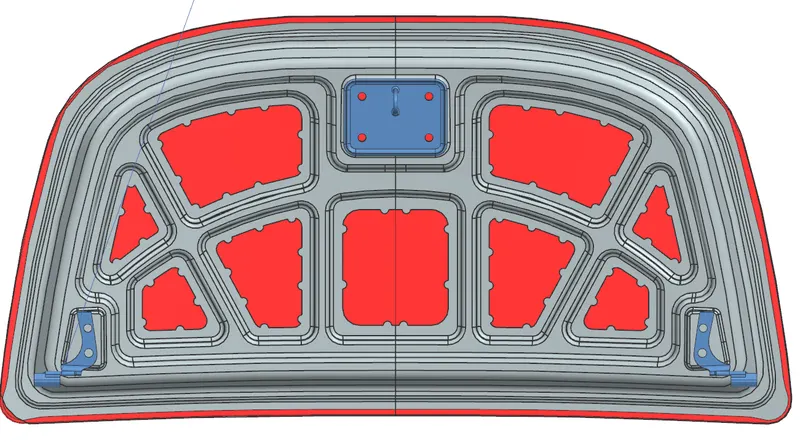
- A space of 8 mm is kept between two Emboss, 8mm for the blend because sheet need flat surface for blend.
5. Manufacture processes for hood design
Inner panel
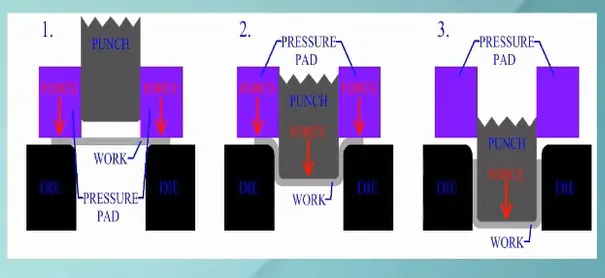
A forming process is used to make the inner panel. Emboss and sub-emboss create by the forming process. High accuracy stamping machine used for creating inner panel. Sometime they use welding, riveting, fastening and adhesive bonding.
Outer panel
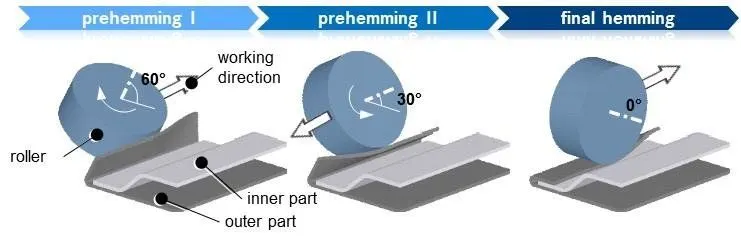
Outer panel is jointed on inner panel by the hamming process. There is also used glue for joining.
Hinge
Hing is connected on the inner panel by the welding process. Other side of the hinge is connected on the body frame of the car.
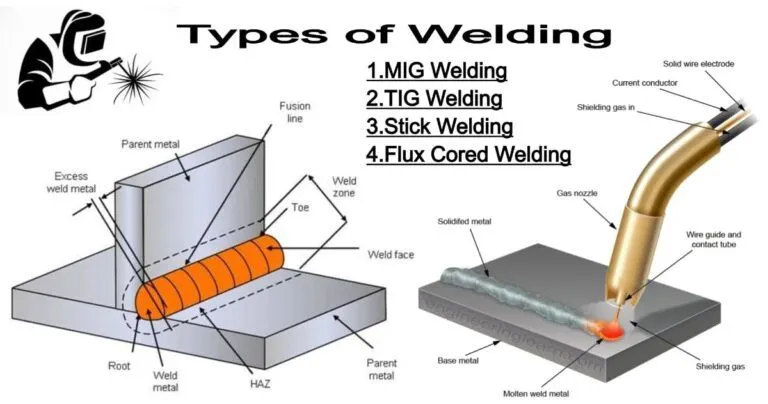
Striker :- Strikers are joined by processes like welding, bolting or riveting.
- Some manufacturing process use in automotive company
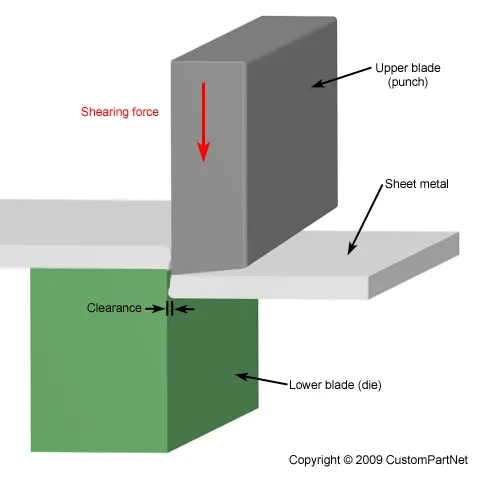
- Shearing, also known as die cutting, is a process that cuts stock without the formation of chips or the use of burning or melting. Strictly speaking, if the cutting blades are straight the process is called shearing; if the cutting blades are curved then they are shearing-type operations. The most commonly sheared materials are in the form of sheet metal or plates. However, rods can also be sheared. Shearing-type operations include blanking, roll stilling, and trimming.
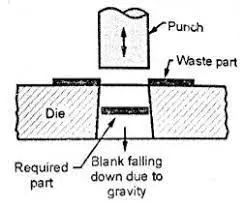
- Punchingis a forming process that uses a punch press to force a tool, called a punch, through the workpiece to create a hole via shearing. Punching is applicable to a wide variety of materials that come in sheet form, including sheet metal, paper, vulcanized fibre and some forms of plastic.
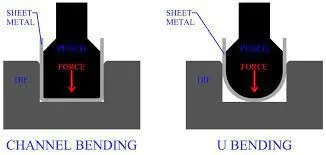
- Bendingis a manufacturing process that produces a V-shape, U-shape, or channel shape along a straight axis in ductile materials, most commonly sheet metal.
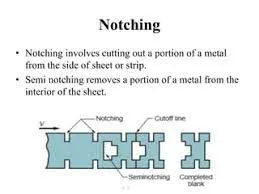
- Nothing is a shearing-related metalworking process that involves the use of a punch press to selectively cut unwanted material from the outer edges of a workpiece. After the workpiece is secured in place, the punch press cuts away the unwanted material from its outer edges using a cutting tool. The end result is a smaller workpiece with a different shape.
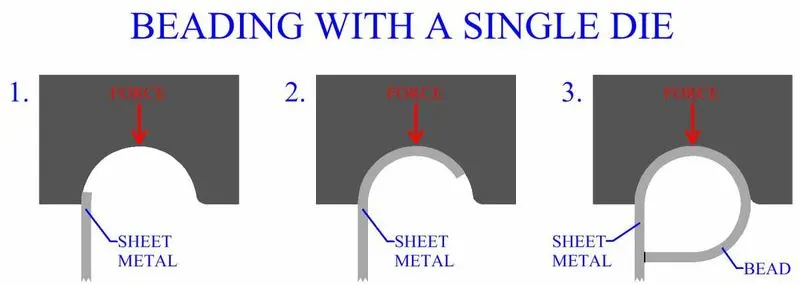
- Beading is one of the common bending operations which are used to form beads at the end of the sheets. In beading, the periphery of the sheet metal is bent into the cavity of the die as shown in following figure. A bead or a round corner is formed at the end of the sheet.
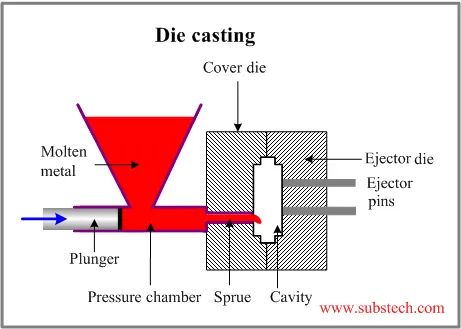
- Die castingis a metal casting process that is characterized by forcing molten metal under high pressure into a mold cavity. The mold cavity is created using two hardened tool steel dies which have been machined into shape and work similarly to an injection mold during the process. Most die castings are made from non-ferrous metals, specifically zinc, copper, aluminium, magnesium, lead, pewter, and tin-based alloys. Depending on the type of metal being cast, a hot- or cold-chamber machine is used.
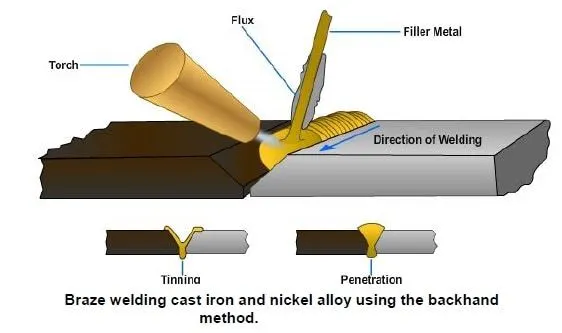
- Welding is a fabrication process whereby two or more parts are fused together by means of heat, pressure or both forming a join as the parts cool. Welding is usually used on metals and thermoplastics but can also be used on wood. The completed welded joint may be referred to as a weldment.
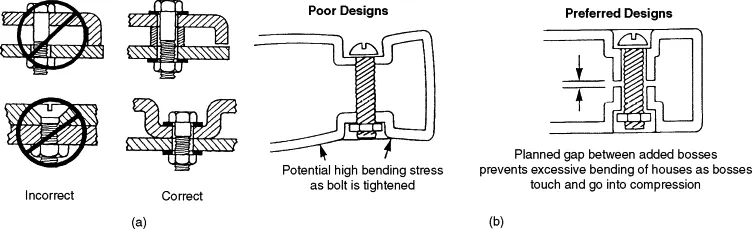
- Fastening is one temporary joining process that employs additional elements to mechanically assemble or attach two or more parts together. Additional mechanical elements that are used for fastening is called fasteners. There are three main types of threaded fastener; Bolts, Screws and Studs. Bolts have a head on one end (this is usually a hex head) and are threaded on the other. They are generally used in conjunction with a nut (and sometimes a washer) to hold them in place.
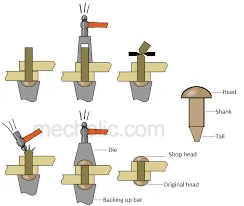
- A rivet is a permanent mechanical fastener. Before being installed, a rivet consists of a smooth cylindrical shaft with a head on one end. The end opposite to the head is called the tail. On installation, the rivet is placed in a punched or drilled hole, and the tail is upset, or bucked, so that it expands to about 1.5 times the original shaft diameter, holding the rivet in place.
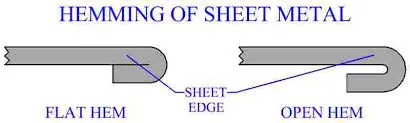
- Hemming is the process in which the edge is rolled flush to itself, while a seam joins the edges of two materials. Hems are commonly used to reinforce an edge, hide burrs and rough edges, and improve appearance.
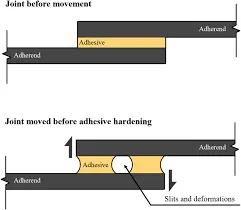
- Adhesive bonding is a joining process for metals and non-metals that uses and adhesive or glue, typically in the form of a liquid or a paste. It offers the major advantage of being able to join a wide array of materials, but is limited by joint strength and applicable service conditions.
6 final hood model images
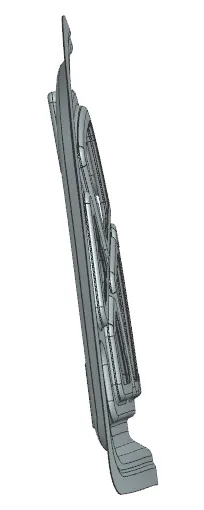
1. lnner panel

2. outer panel
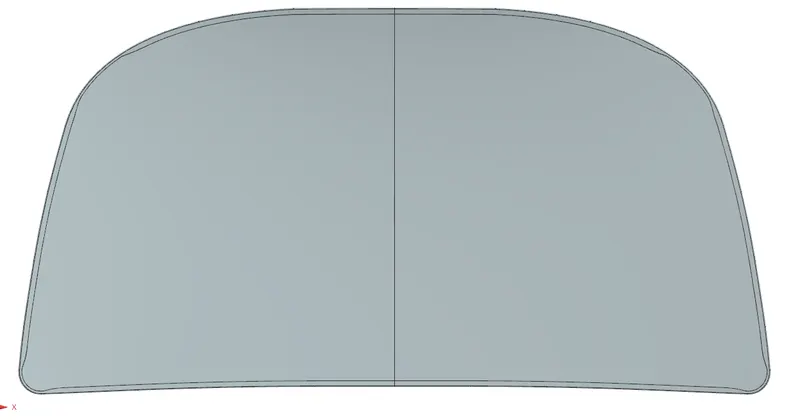
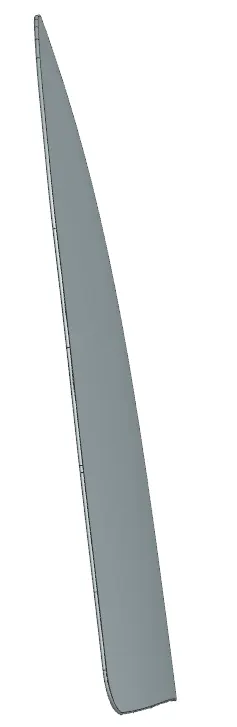

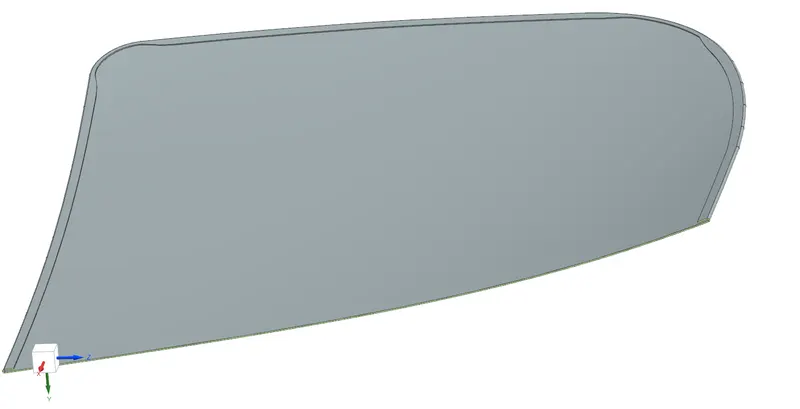
3. striker
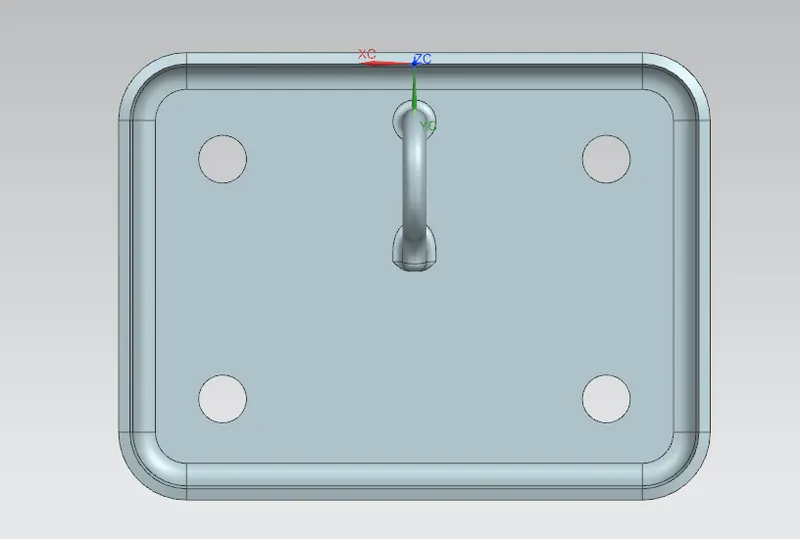
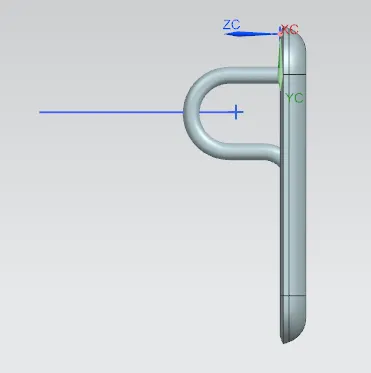
4. hinge
5. assembly

7. Conclusion
In this project we have study about HOOD design and and their component. hood include inner panel, outer panel, striker and hinge. outer panel is used for styling purpose and class A surface, inner panel is used for force distribution. striker we use for the locking a hood. hinge is used when we open a hood hinge is help to hood for angular motion. we discussed design consideration for hood. we writed some helpful manufaturing process which is using for make a hood.