Hood design-Week 2
INTRODUCTION:
PEDESTRIAN SAFETY : Safety is the most important criteria in automobile designs which concentrates on both pedestrian and occupant safety. The pedestrians are the most vulnerable road users and are at high risk of traffic accidents.
The major reason for the fatality of the pedestrian in traffic accident is due to the head injury resulting from the hard impact of the head against the stiffer hood or the ground. This leads to the necessity of new inner hood panel which is less stiffer and pedestrian friendly.
The fatality of a head injury is based on the head injury criterion (HIC) value. This HIC value is calculated on the basis of the resultant acceleration of the head’s centre of gravity (hereafter called the head centre) during head impacts.
HIC15 < 1000 = Yellow
1000 < HIC15 < 1350 = Orange
The pedestrian safety system needs to meet several test criteria. (Euro-NCAP, 2011) The tests are designed to evaluate impact to the pedestrian’s different body parts. As seen in Figure , adults as well as children have to be taken into consideration. European Union has set a demand that by 2015, all pedestrian involved in an accident with a car moving 40kph or less must survive.
THE EXPLANATION OF PARTS & PARAMETERS USED IN THE HOOD PANEL:
- HOOD - It is also known as bonnet. The hood or bonnet is the hinged cover over the engine of car that allows access to the engine compartment, or trunk on rear-engine and some mid-engine vehicles for maintenance and repair. Hood comprises of inner hood panel & outer hood panel, which is then set together using hemming process.
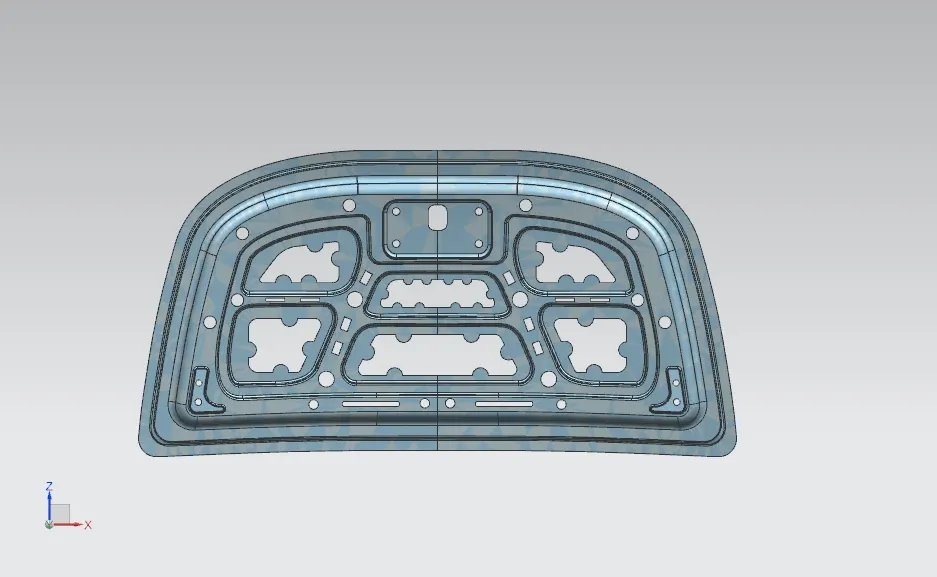
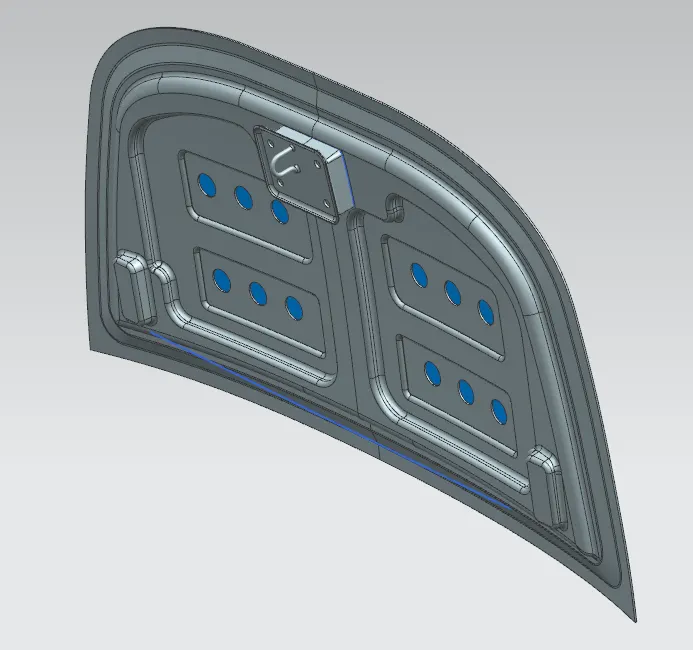
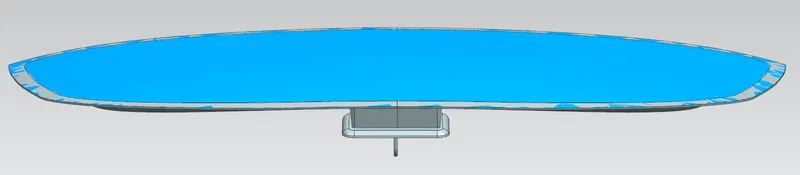
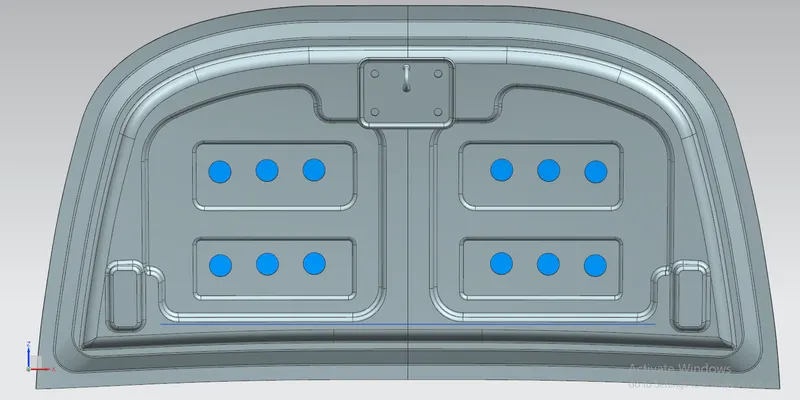
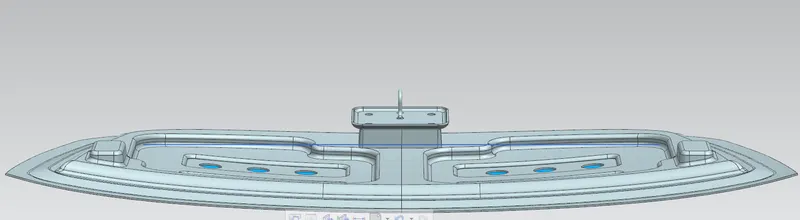
Fig. Hood Inner Panel
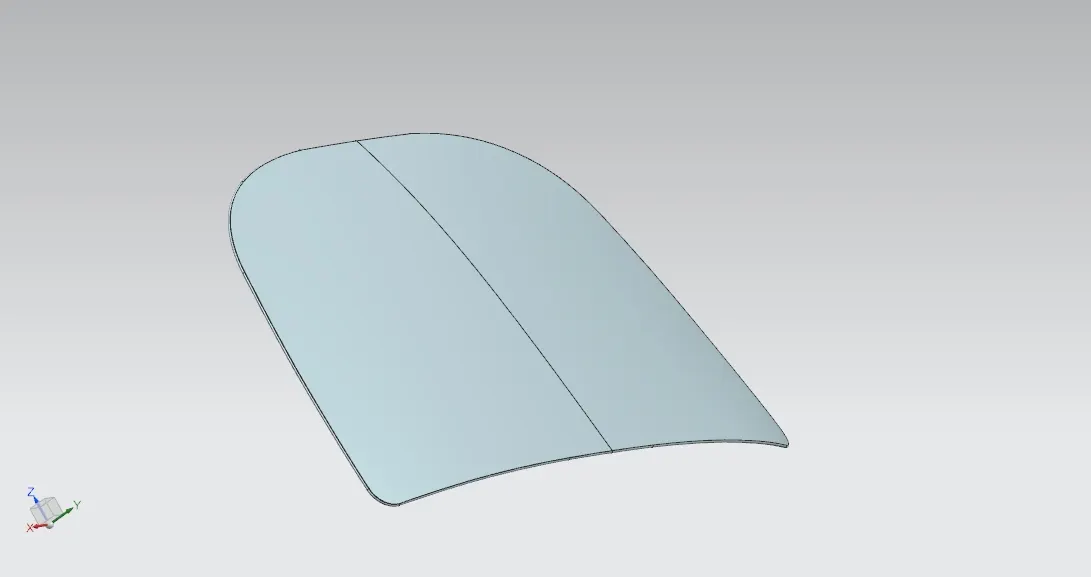
Fig. Hood outer Panel
- HINGE - Hinge is used as a controlling element for opening & closing of the hood. It connects the hood & engine compartment of car. The hood's hinges serve one other purpose besides holding the hood-safety. In case the hood latch should fail, the hinges are there to keep the hood attached to your car. Otherwise, if you were traveling at high speeds and the latch fails, the hood could break from the damaged hinges and cause disaster and injury.Actually, even if only one hood hinge fails, a strong slipstream can topple the hood and hammer it against the windshield.
• Allows hood to open and close without losing alignment
• Holds hood down in case of a collision
• Provides a direct fit
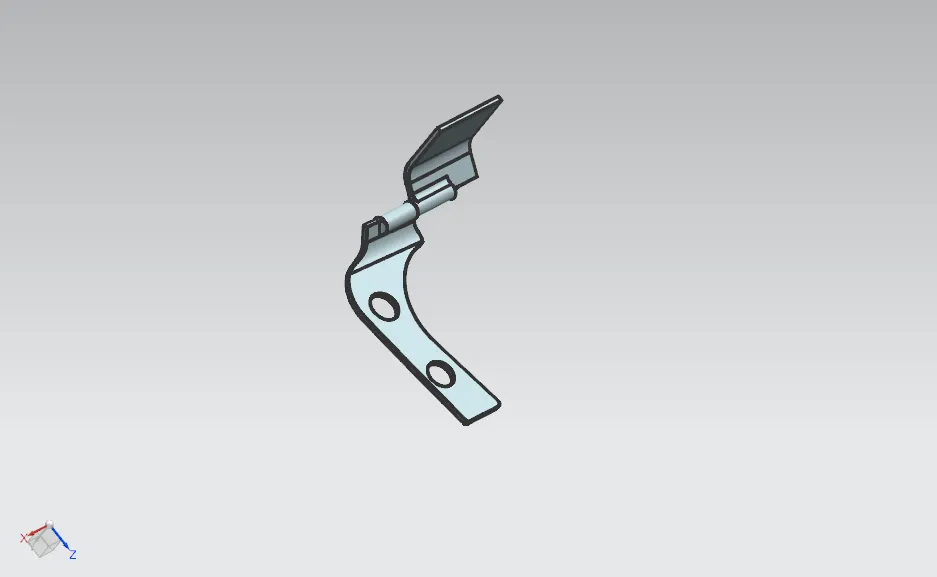
fig. Hinge
- LATCH - Latch is a striker, which is placed over the hood & get attached to the hole provided in engine compartment. thus it is used for locking purpose of hood with engine compartment.
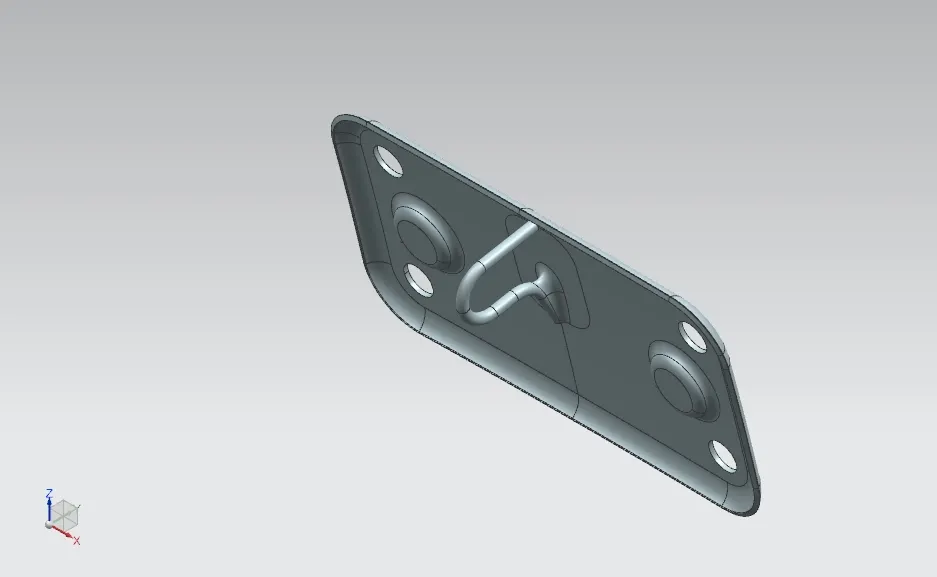
Fig. Latch
- REINFORCEMENTS - Hood reinforcement structures as provided to reduce impact in collisions & sound absorption. Glass fibre / glass filament is the most widely used material to reinforce sound absorption elements in the automotive industry.
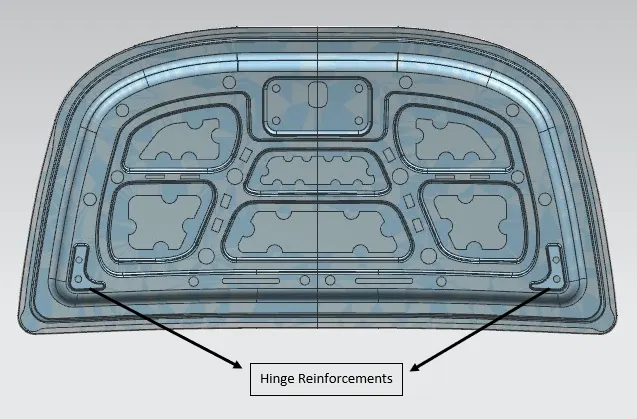
Fig. Hinge reinforcement on inner hood panel
- LATCH TRAJECTORY - While assembling the latch with the hood panel it is strictly recommended that the position of latch striker should be placed such that the latch striker exactly fit into the lock hole in the engine compartment. Keeping this in mind, the latch striker is placed on the inner hood panel using latch trajectory path. This path is created using the the hinge axis taken as reference to draw a big trajectory path.
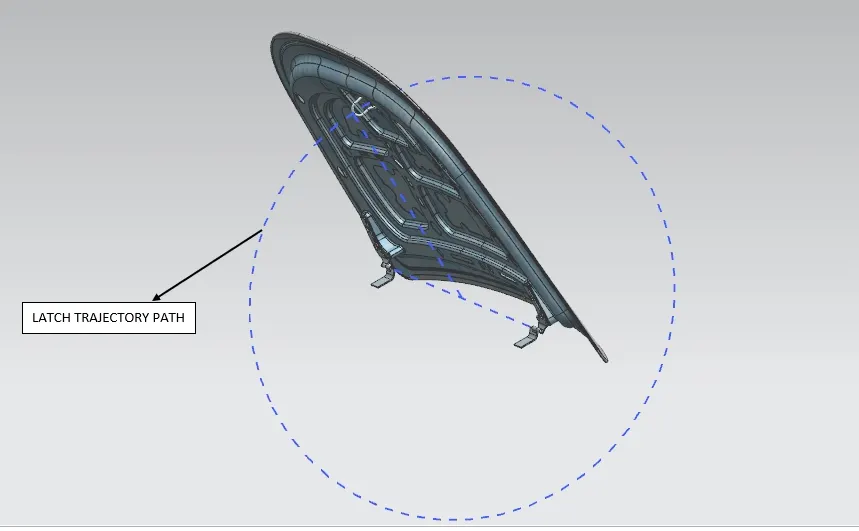
Fig. Latch Trajectory Path
- EMBOSSED SURFACE - Embossed surface plays an important role in car hood panel while crashing or accident of car. Because during the collision, hood is most affected part which sustains all the impact forces while crashing. most of the impact forces are directly flows in the direction of collision & thus can harm the driver sitting under the car, thus to overcome this problem generally, V or Y shaped embosses are given in inner hood panel. so that, the impact forces coming in the direction of collision is diverted towards the corner point of the hood & driver couldn't be harmed.
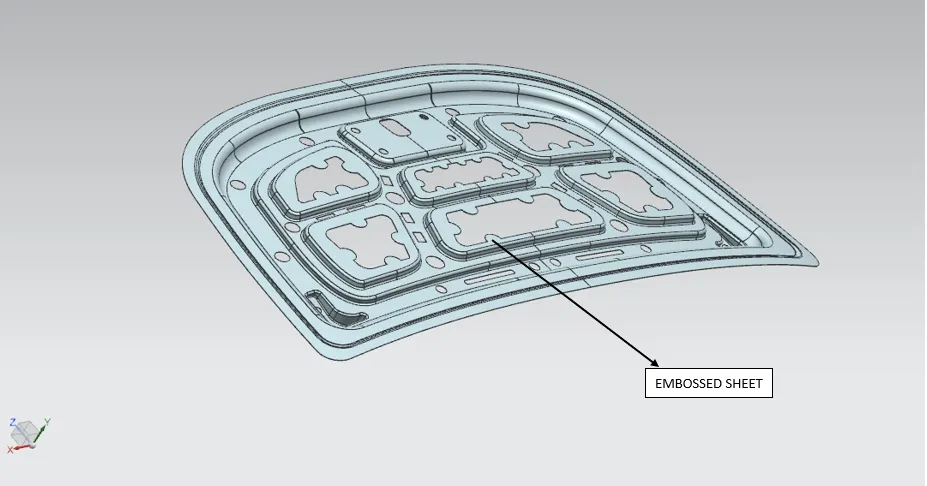
Fig. Embossed surfaces on inner hood panel
- MASTIC DATA - As we know that the main purpose of the outer panel is for the aesthetic looks. Thus we cannot use bolts or welding. This has to be done with the help of the hemming and mastic sealants. Mastic sealants are elastic compound that behaves like the rubber. It is placed between the outer and inner panel. Initially is it in paste form, but after the hot furnace bath it gets hardened thus joining the outer and inner panel. Mastic sealant has the tendency to increase the strength of the panel and has influence of 80mm diameter. The minimum gap between the inner hood panel & outer hood panel is 2 mm.
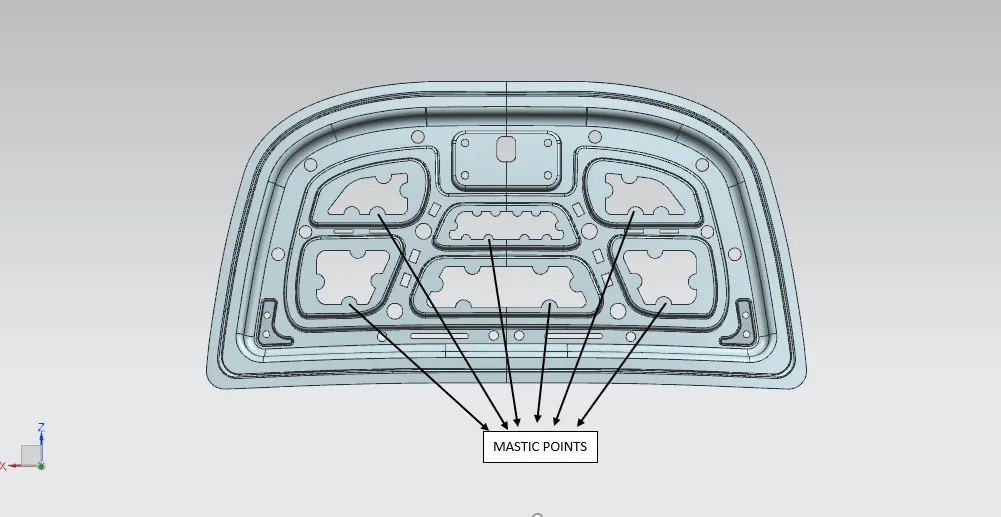
Fig. Mastic Point
- THE MANUFACTURING PROCESS USED IN THE HOOD PANEL ARE:
- DEEP DRAWING
- HEMMING
- DEEP DRAWING - Deep drawing is a sheetmetal forming process in which a sheet metal blank is radially drawn into a forming die by the mechanical action of a punch. It is thus a shape transformation process with material retention. The process is considered "deep" drawing when the depth of the drawn part exceeds its diameter.
Fig. Deep Drawing process
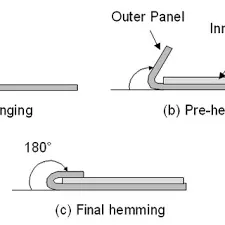
- HEMMING - Hemming processs is basically used to join the inner hood panel & outer hood panel together.
Hemming metalworking processe in which a sheetmetal edge is rolled over onto itself. Hemming is the process in which the edge is rolled flush to itself, while a seam joins the edges of two materials.
Hems are commonly used to reinforce an edge, hide burrs and rough edges, and improve appearance.
Fig. Steps of Hemming Process
- MASTER SECTION : Here is the master section of the hood panel, which is provided as the dimensional refernece for the design of hood panel. Along with the master section hood thickness & other informations are also provided , i.e.
Hood Thickness Information
- Outer Panel Thickness = 0.75mm
- Inner Panel Thickness = 0.75mm
- Reinforcement Thickness = 1.5mm
Fig. rear releif Fig. Front Releif
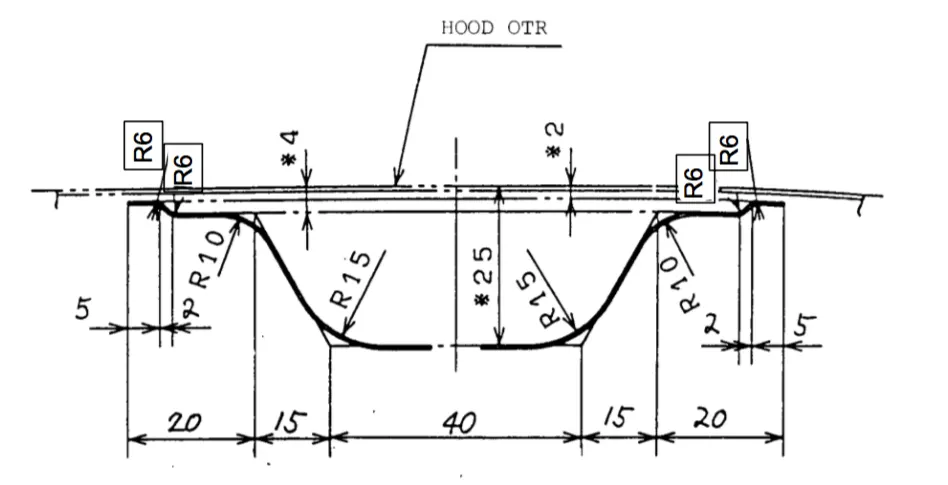
Fig. Master Section of Hood Panel
- HERE IS THE FINAL ASSEMBLY MODEL OF CAR HOOD PANEL USING THE GIVEN INFORMATIONS:
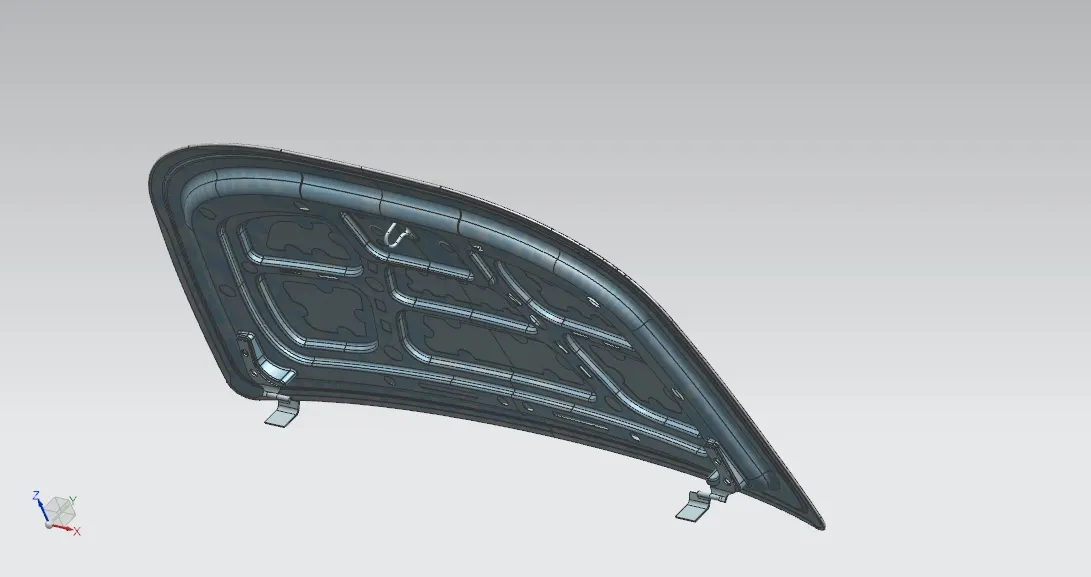
- Here is the link for zip file of the assembly of hood panel, hinge & latch reinforcements :-
https://drive.google.com/file/d/1tldZUD4eE_xeU2aCww2gIOyEqcW9fODJ/view?usp=sharing
CONCLUSION:
- In this project I have learnt to design the model & assembly of car hood panel & the basic surface commands on NX cad model software.
- I have also learnt about the pedestrian safety requirements used in car, so that driver is left with no harm during frontal collision.
- Along with this, I have also learnt about the manufacturing process used in the car hood panel i.e. hemming & deep drawing process.
EXPLINATION OF HOOD
-
First we will discuss about the use of hood :
The hood (North American English) or bonnet (Commonwealth English) is the hinged cover over the engine of motor vehicles. Hoods can open to allow access to the engine compartment, or trunk (boot in Commonwealth English) on rear-engine and some mid-engine vehicles) for maintenance and repair.
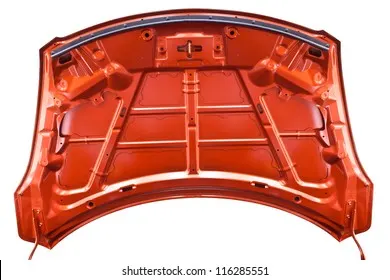
Hood Angle :
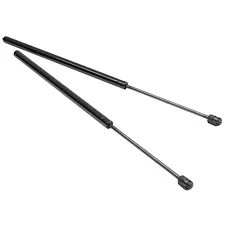
One of design parameter for design of hood is opening angle. This opening angle is being control by supporting rod or gas stay. The length of supporting rod controls the opening angle of hood. Supporting rod is placed on engine and after opening is attached to hood or vice versa.
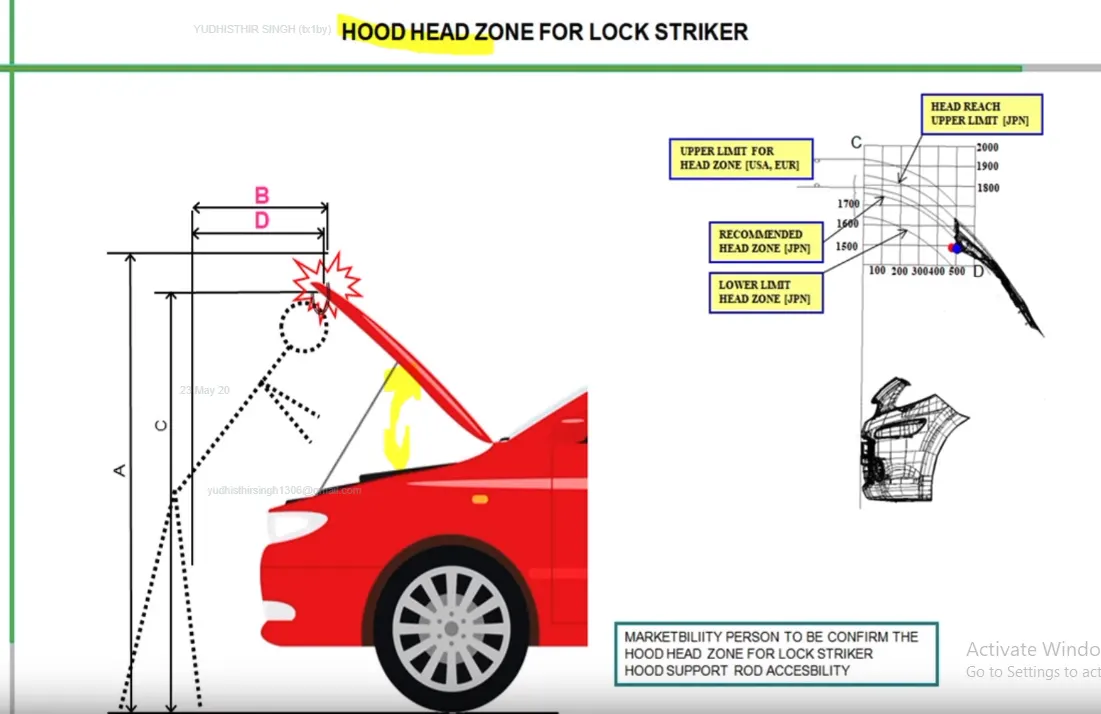
Parts of a Hood Assembly :
1.Support Rod :
The support rod is used to hold the hood at the hood opening angle and is usually hinged at the engine as shown above.The support rod is usually given a curvature so that it gets strength and the curvature should be less than 35 mm as too much curvature can lead to bending .
2.GAS STAY:
It is also a Hood stay but it is automated or need some slight amount of force then gas itself actuates it and make it work desirably. Advantages: It is automatic in nature
3.Reinforcements
We give reinforcements in the area wherever there is an attachment given such as striker or hinger so that the strength in these areas increase.
4.Wrap Around Distance Concept :
WAD (Wrap-Around Distance) is the geometrically traced distance from the contact point with the Ground Reference Plane, vertically below the front face of the bumper, to any point on the vehicle front structure.
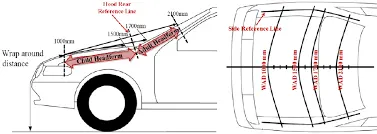
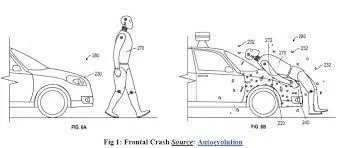
The wrap around distance tells us where exactly the child or adult will end uo colliding on the hood .The distance for child and adult vary according to the euro norms and should be kept in mind while designing the hood .The following pictures gives us a good example :
Now we will talk about hemming process used :
Hemming Process :
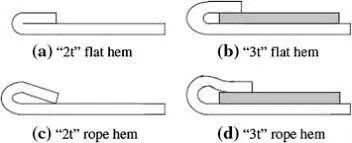
Hemming is a sheet metal forming process in which sheets are joined by bending it usually to 180°. Automotive body panels and automotive parts such as deck-lids, trunk-lids, doors, hoods and tailgates are formed by hemming process.
Hemming is a forming operation in which the edges of the sheet are folded or folded over another part in order to achieve a tight fit. Normally hemming operations are used to connect parts together, to improve the appearance of a part and to reinforce part edges.
Deep Drawing :
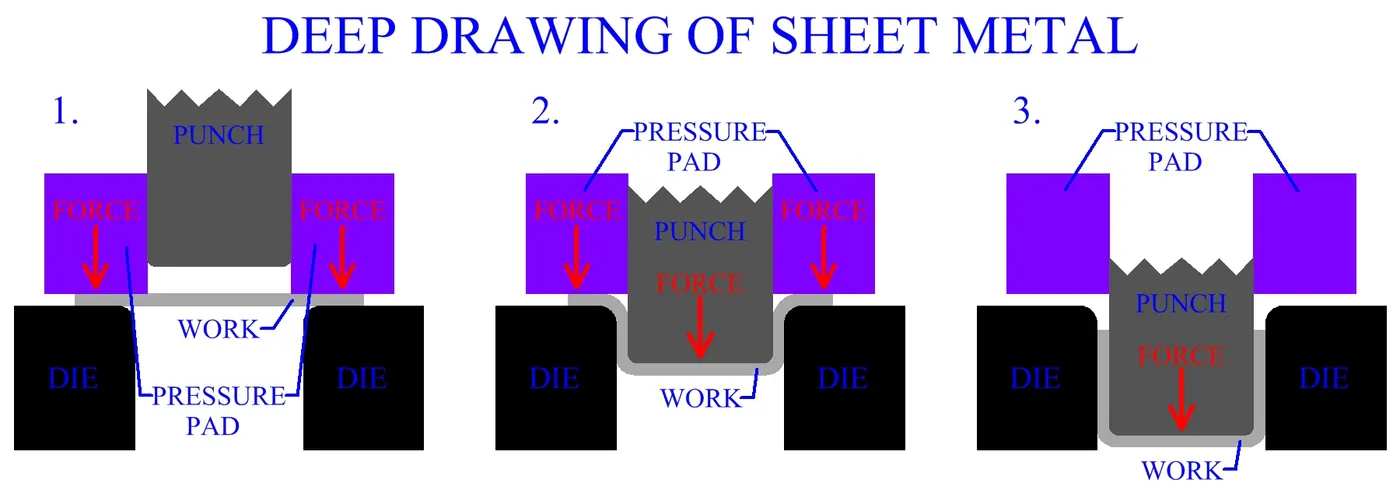
Deep drawing is a process in sheet metal forming by the mechanical action of a punch. A flat sheet metal blank is formed over a single, rigid, shape defning tool half by a flexible rubber diaphragm under uniform hydrostatic pressure.
We have the following condition :
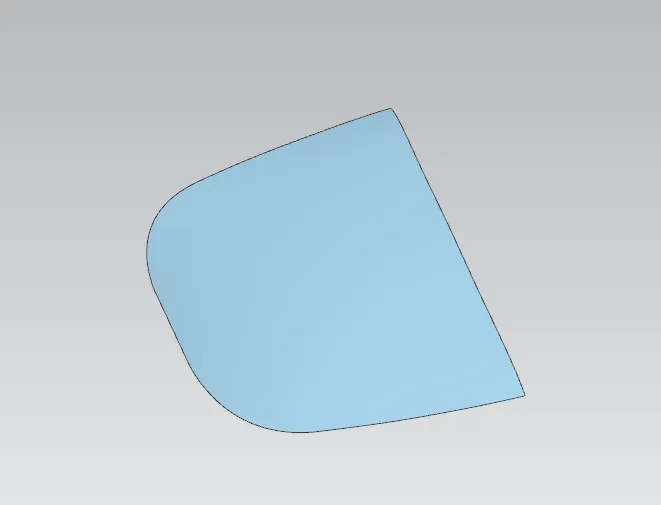
The following class A surface has been given to us :
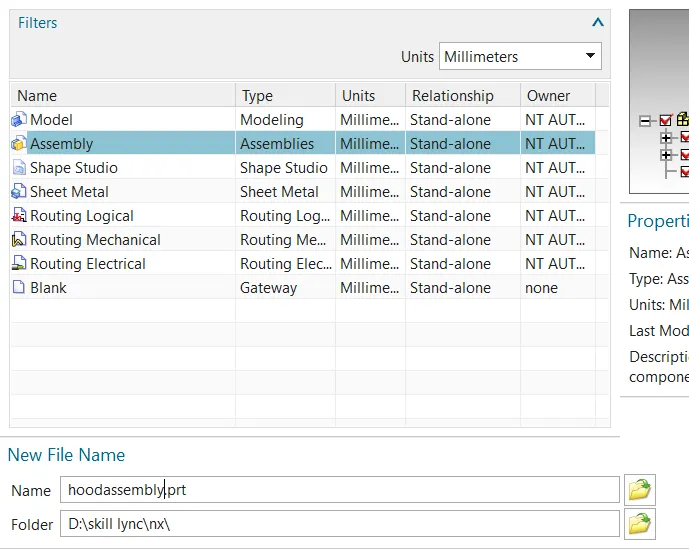
We will also create assembly file as shown below :
Now we have added the part as shown below :
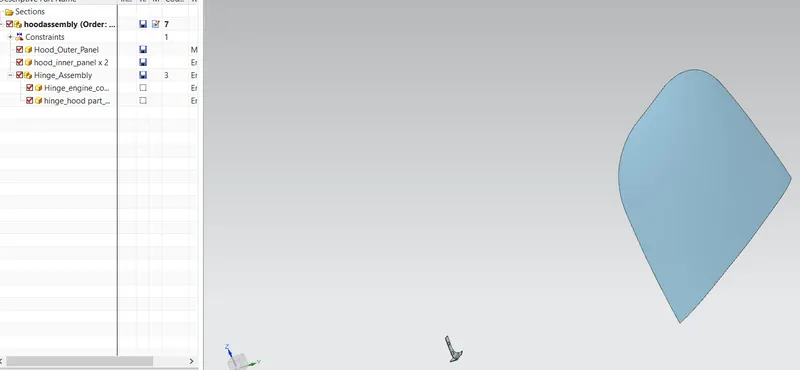
Now we will extract the body from the hood outer panel as shown :
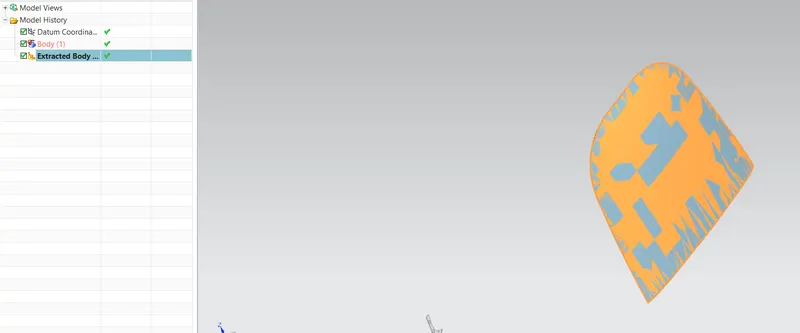
We will copy this into the inner hood panel :
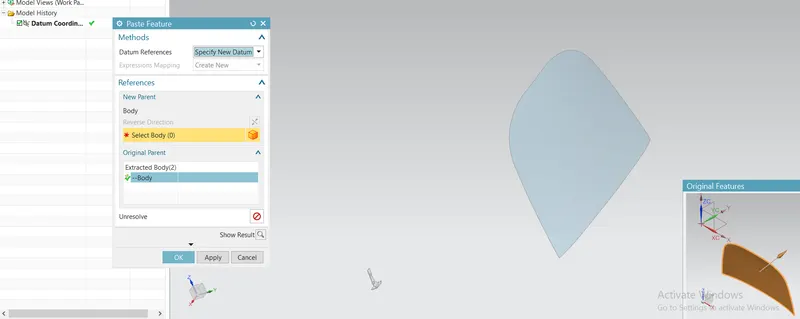
Now we have copied the parent class A surface and inserted into a separate part , we will use this copied surface to extract the class b and class c surface , first we will trim it about y place as it is symmetrical as shown below :
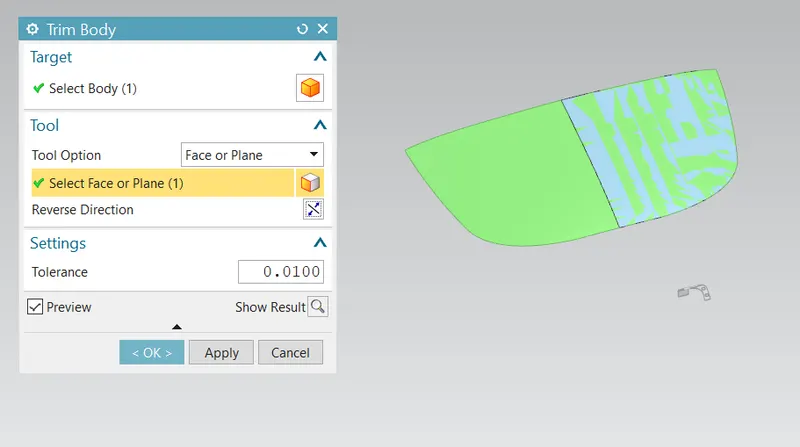
We get the following :
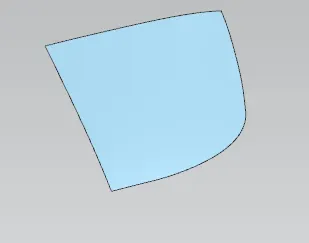
We will name this working surface.
Now we will offset this surface by 2 mm :
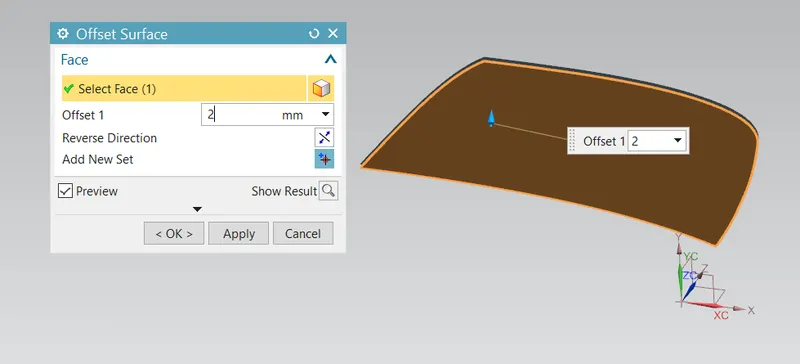
Now we will offset the curves present on the edges of the offset surface :
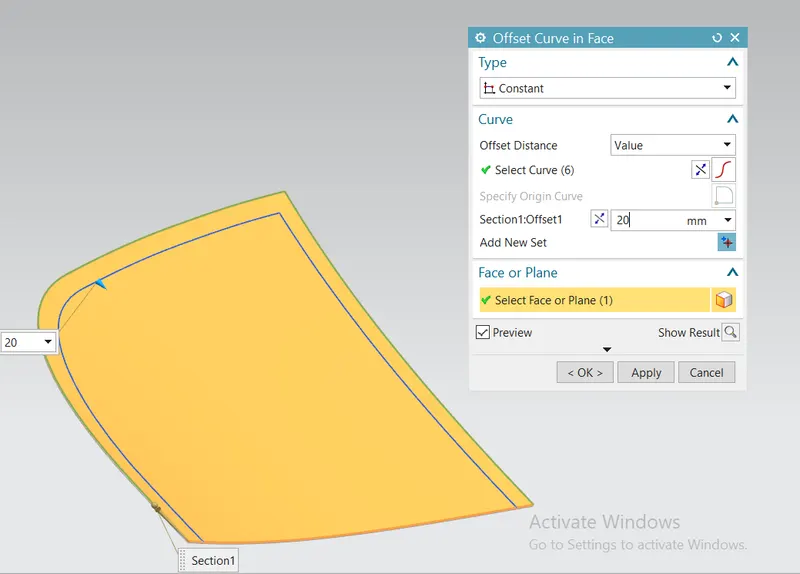
Now we will use trim command as shown below :
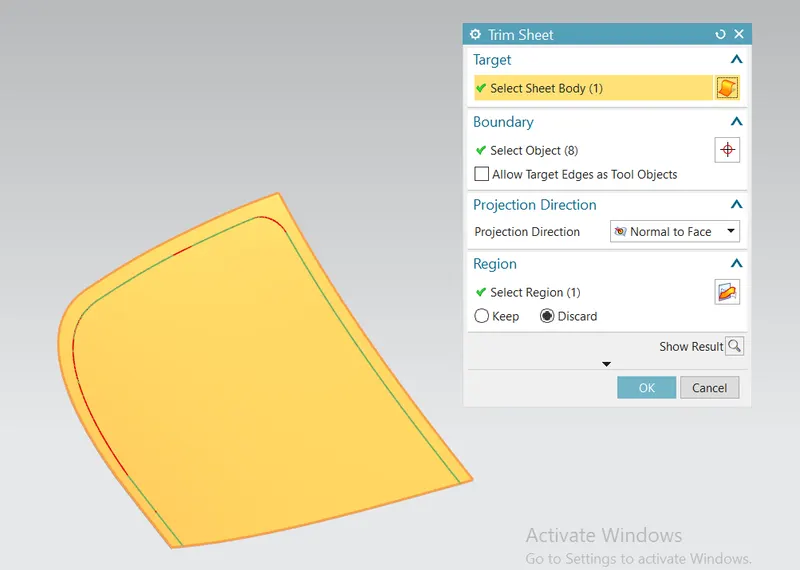
We get the following :
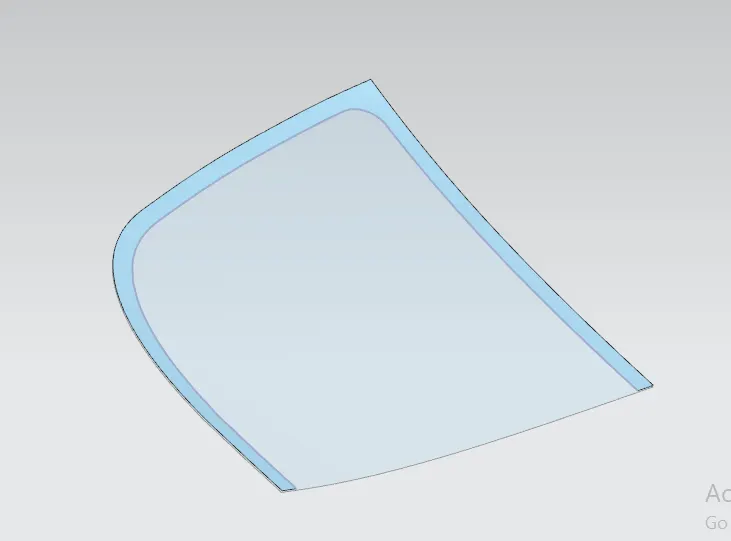
Now we will get the following with respect to the working surface :
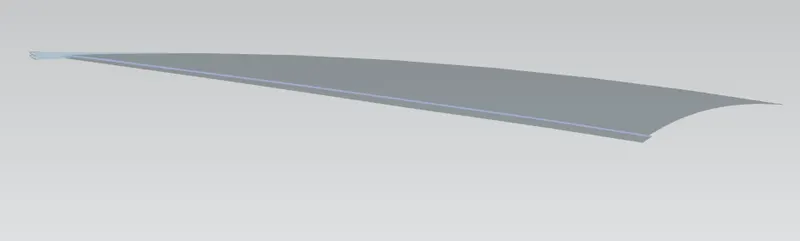
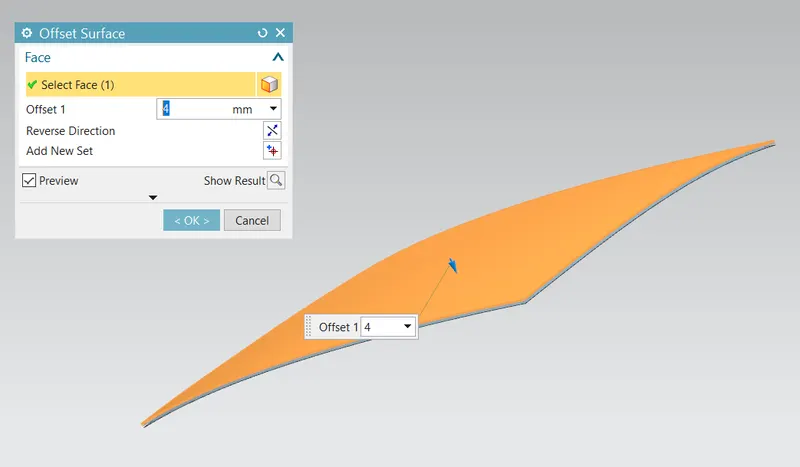
Now we will create the second flange by offsetting the working surface by 4 mm a shown below :
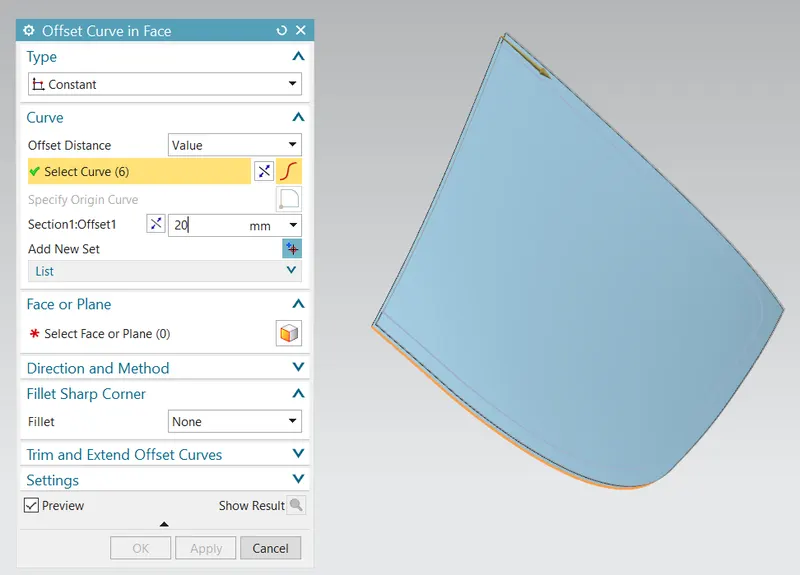
Now we will offset the curve on the face by 40 mm as shown below :
Now we are going to trim this sheet using the curve and keep the inner area as shown :
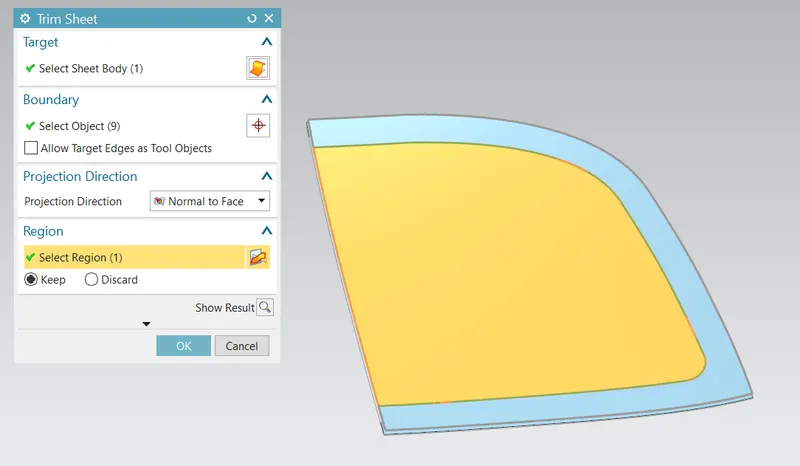
After this we get :
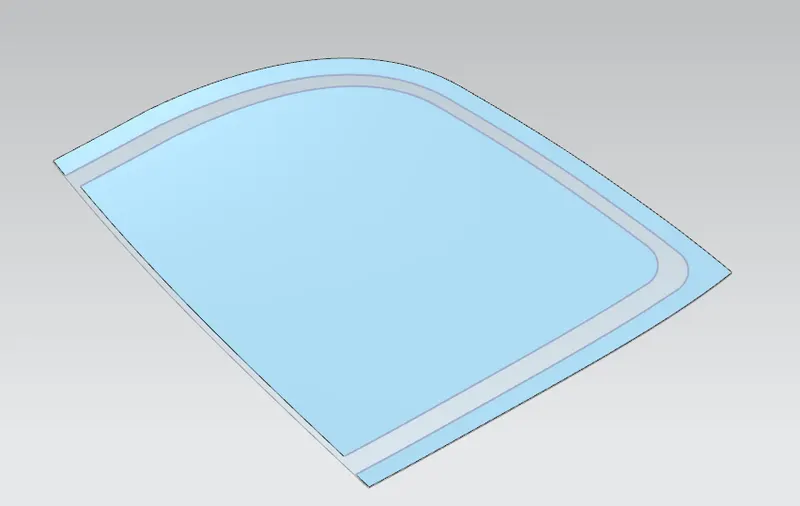
Using through curves we will connect these two surfaces as shown :
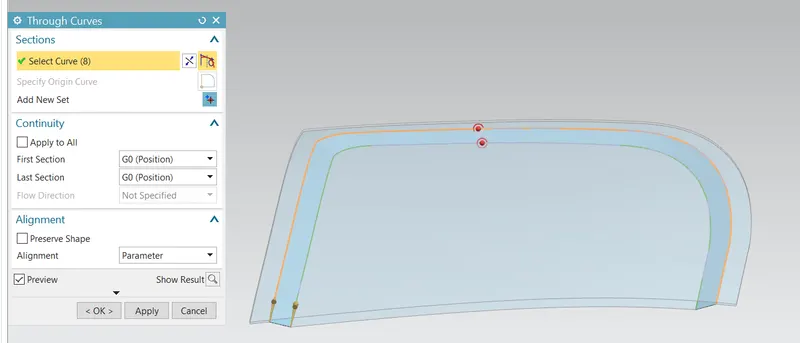
After this we get :
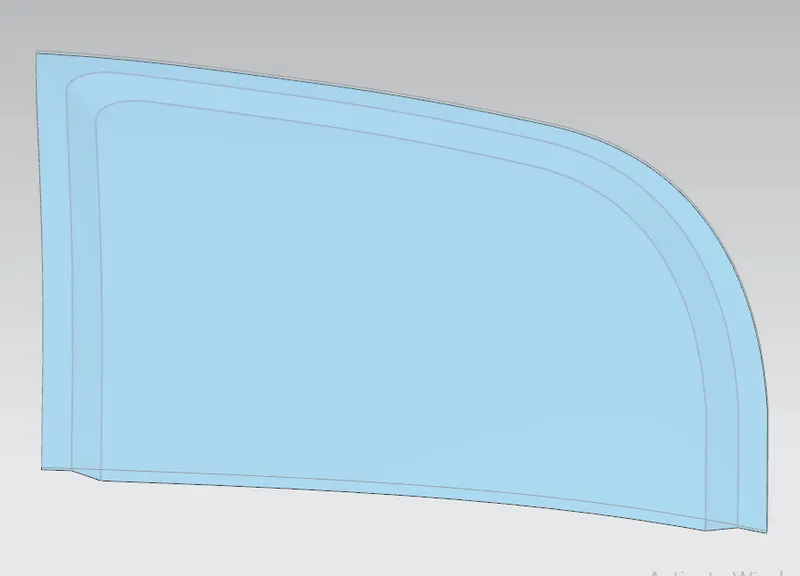
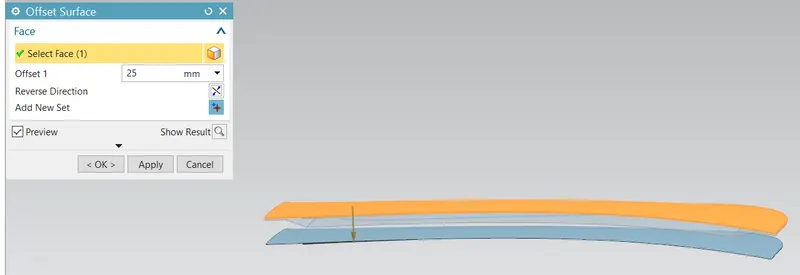
Now we create the final surface which is at an offset of 25 mm from the working surface as shown below:
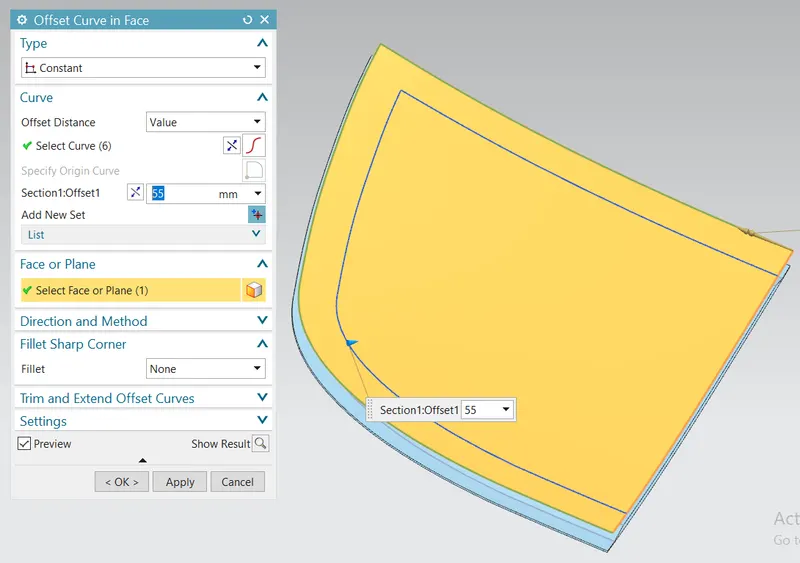
Now we will offset the inner curve 55 mm as shown below :
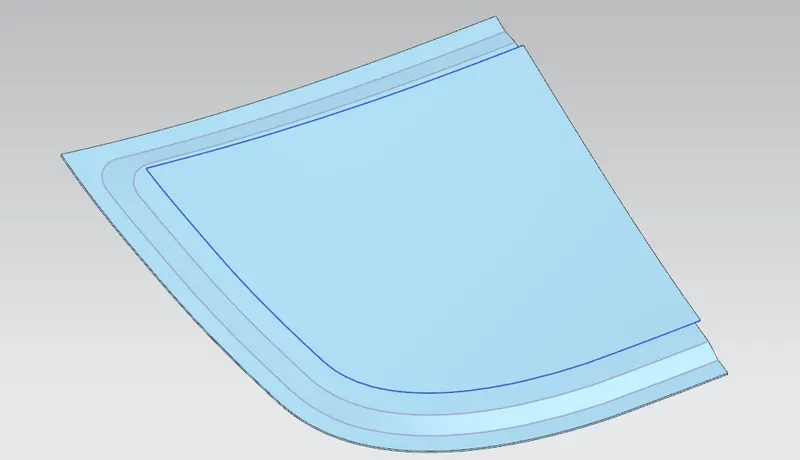
We will trim the sheet and keep the inner region as shown below :
Using law extension we get the following :
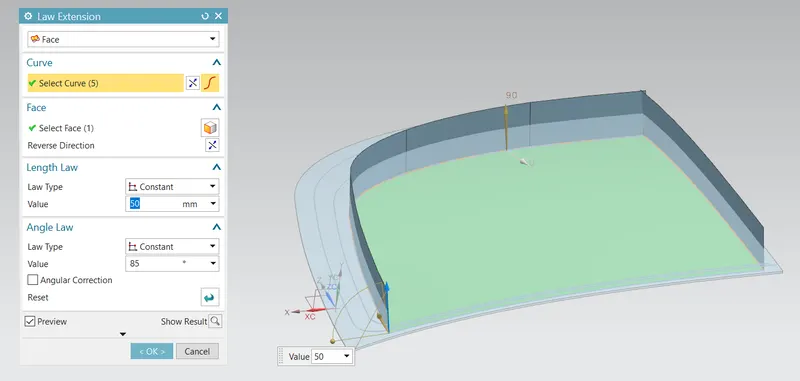
We have given a draft of 5 degrees so that it can be removed easily while moulding.
Now we will be giving a face blend between the following faces :
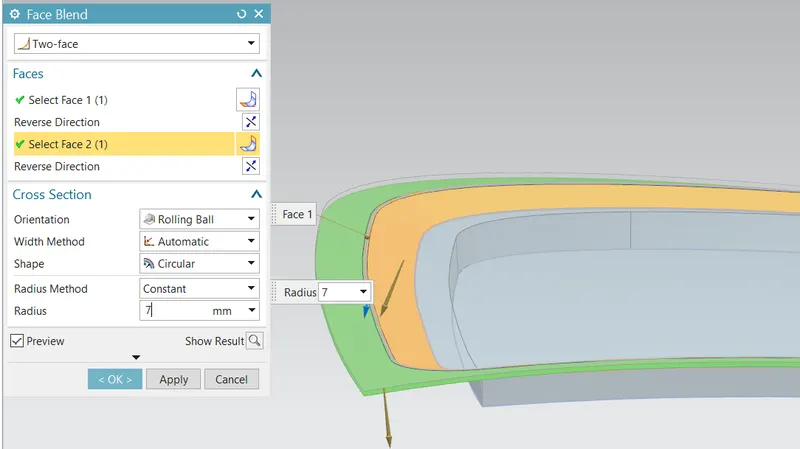
After giving face blend we get the following :
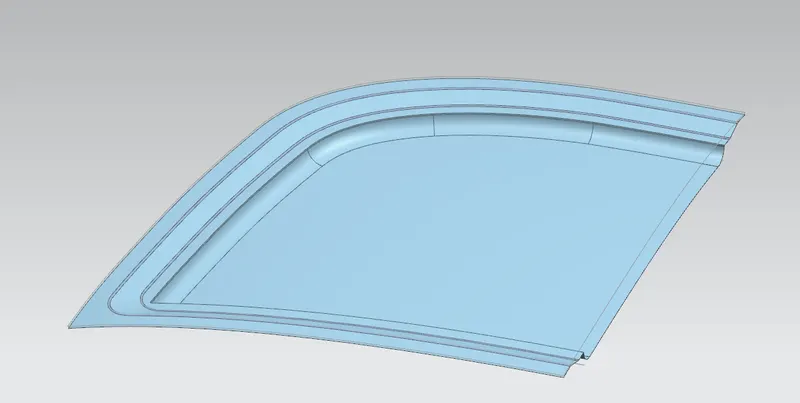
Now we will work on the embosses for the inner region as shown below :
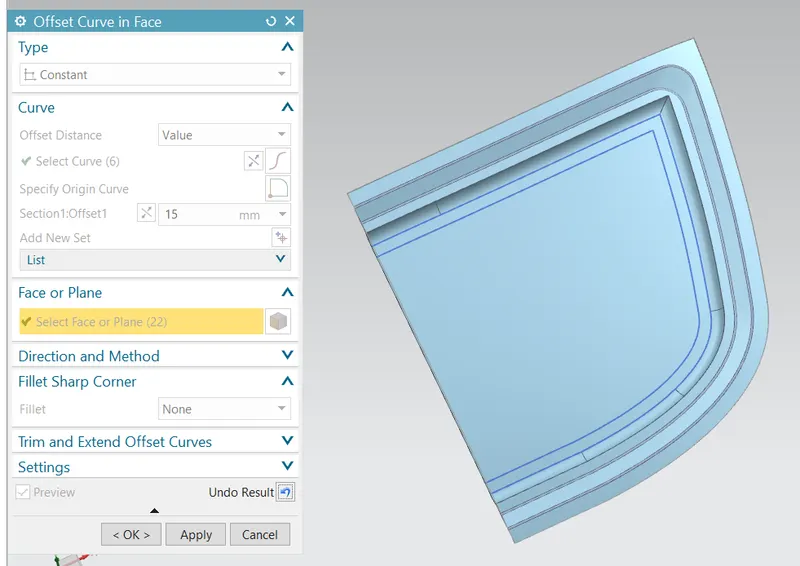
The inner curve will be offset by 15 mm as shown below :
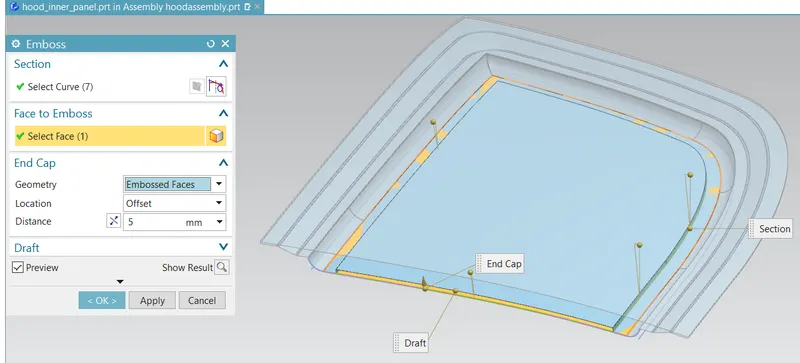
Now we will use embossment command for this inner curve as shown below :
Now we will create another emboss as shown below :
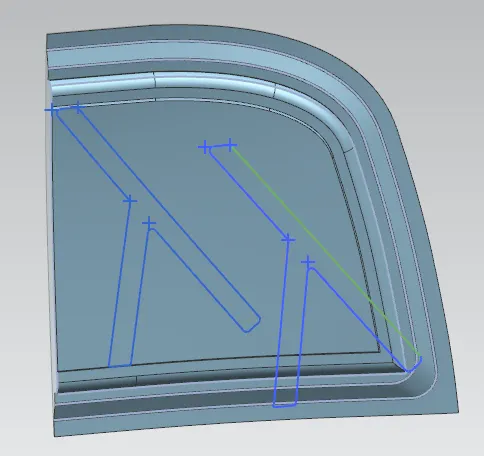
We have used law extension , offset and trim to get the following :
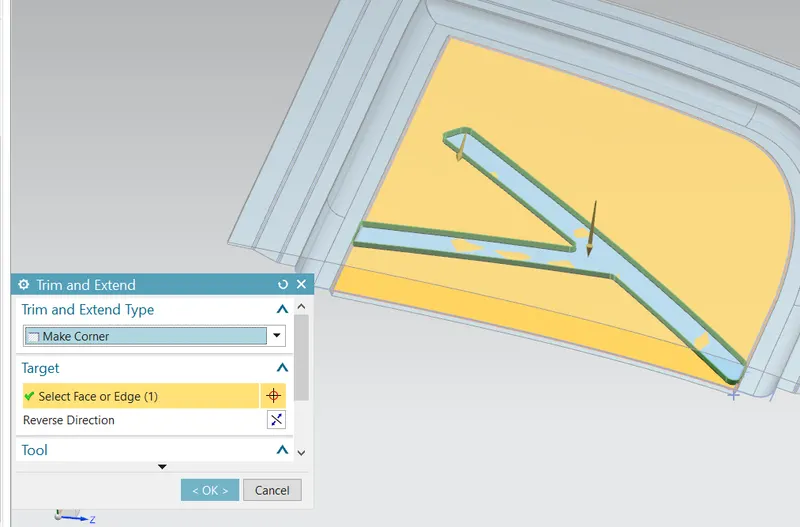
We get the embossment as shown :
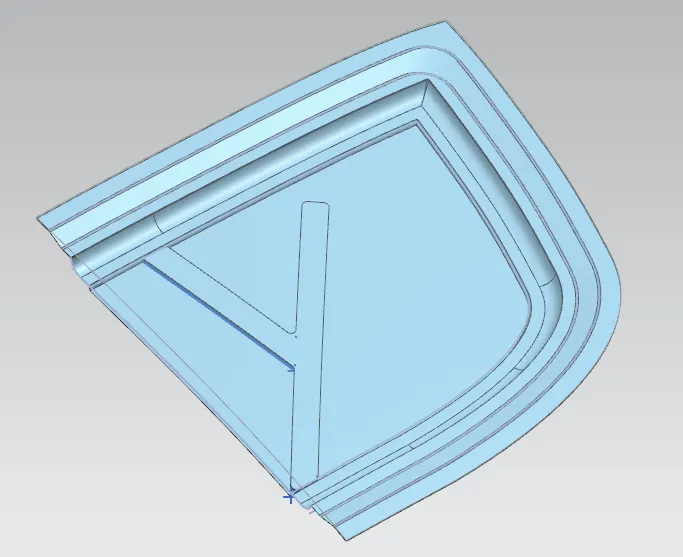
Now we will trim this with the following curves as shown :
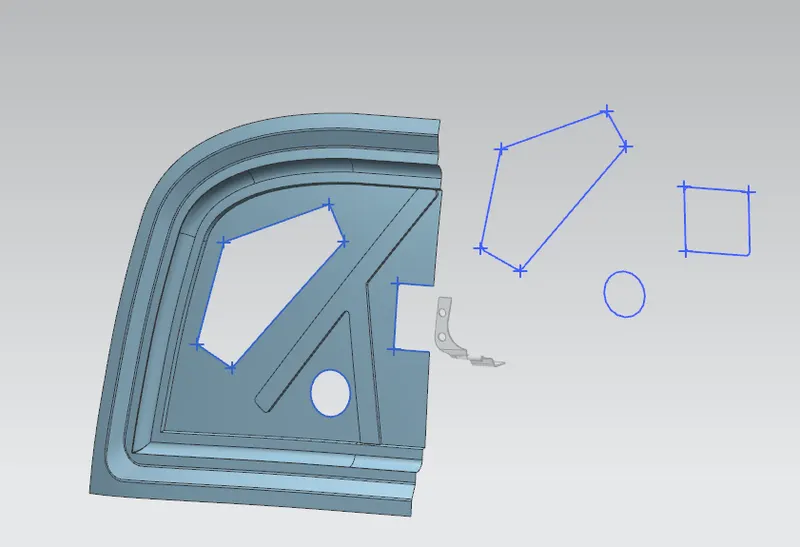
After this we will trim the outer most surface to create the hem region :
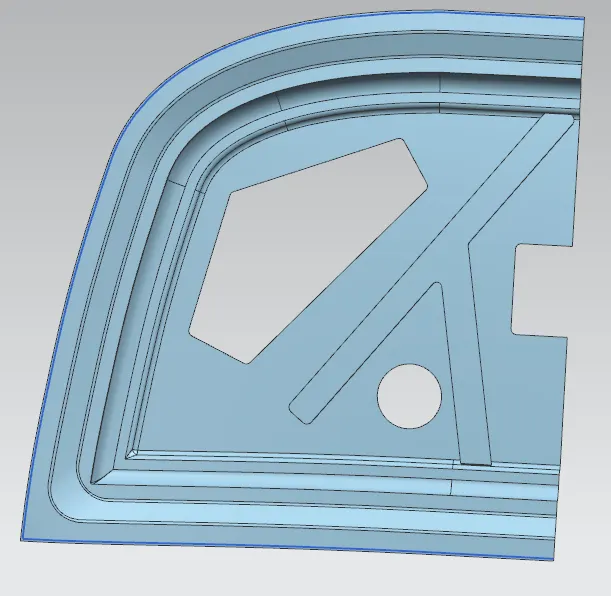
We have created an alternative embossment as shown below to add strength and to keep a distance of 5 mm between the inner and outer hood as shown below :
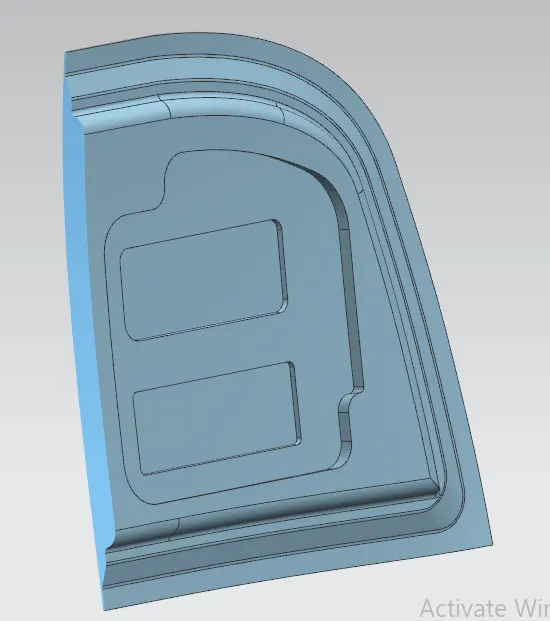
Now we have trimmed the sheet as shown below to reduce weight and impact affect on the pedestrian :
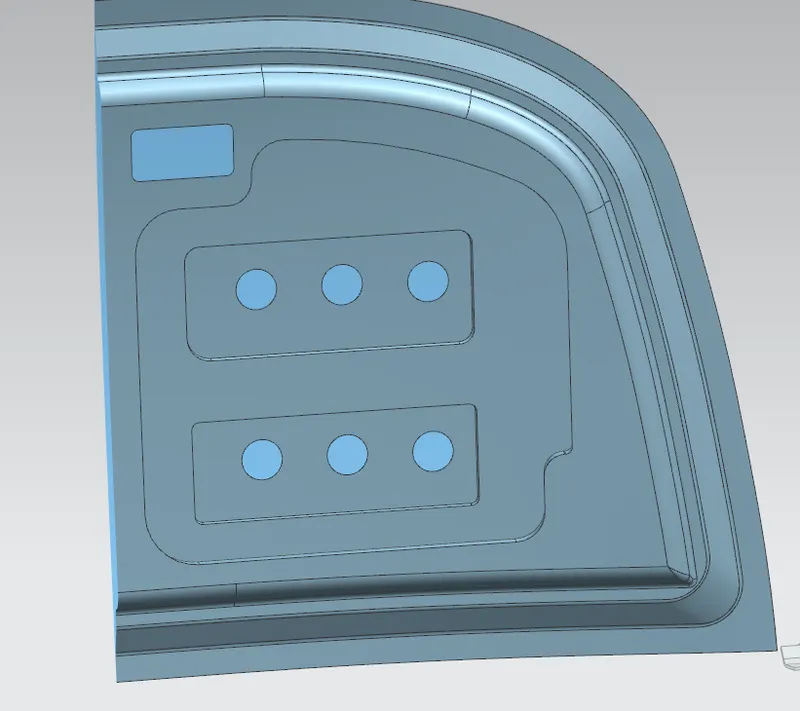
Embossment of the hinge
We will create a flat embossment for the attachment of the hinge assembly and we will move the hinge close to the inner panel as shown below :
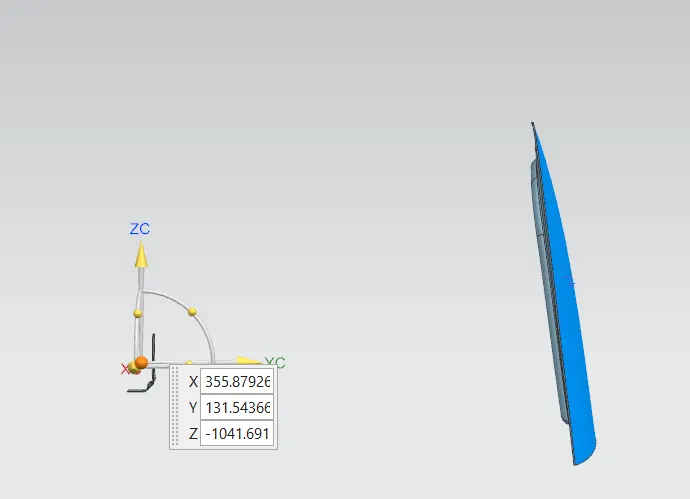
After moving it we get the following :
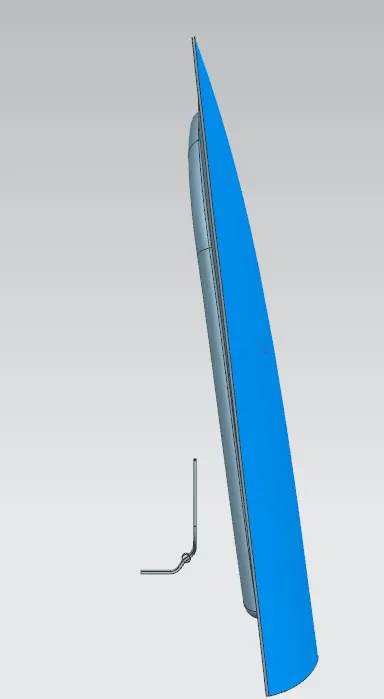
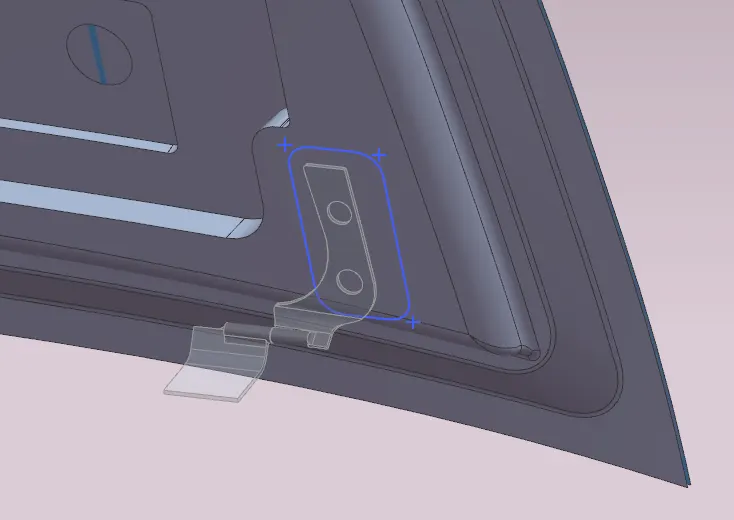
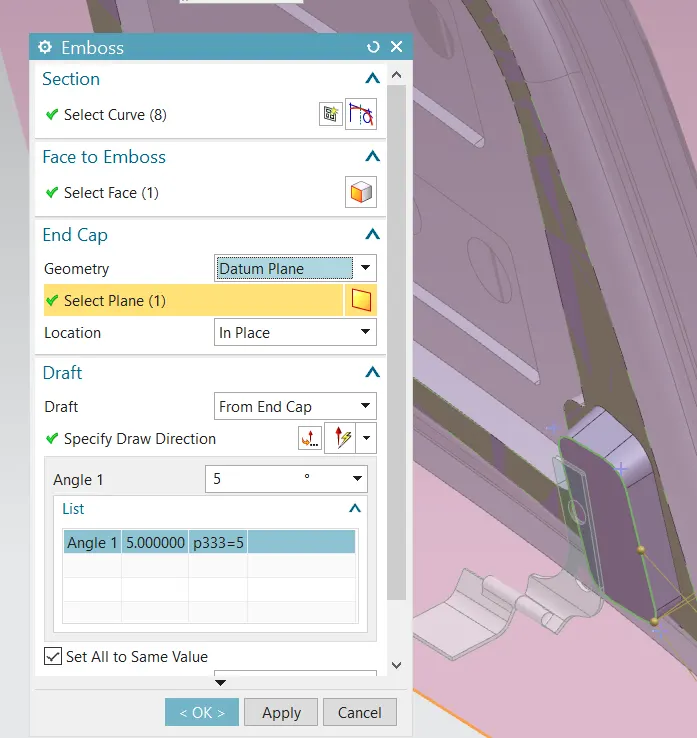
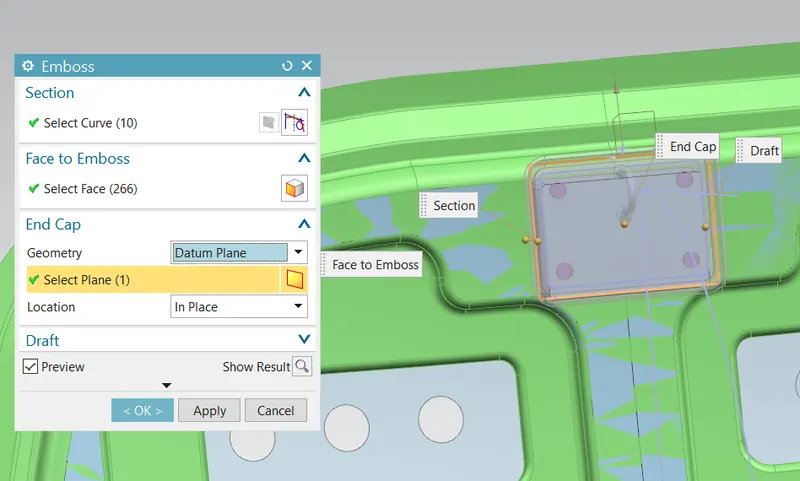
Now in order to mount the hinge we will create an plane parallel to xz plane and close to the inner panel and create embossment which will result in flat surface , this is done because the inner panel is curved and cannot be used for attachment as it result in gaps between the hinge hole and inner panel.
Now we have created the datum plane as shown below at an offset :
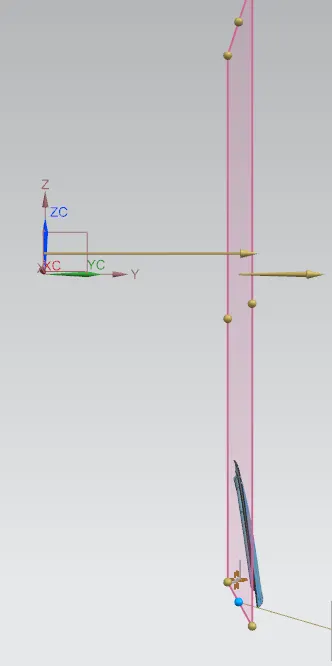
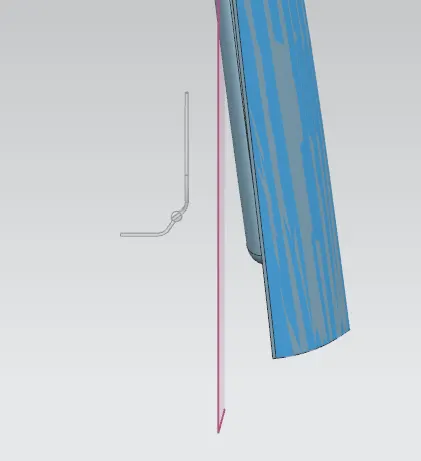
We have inclined the plane as shown below :
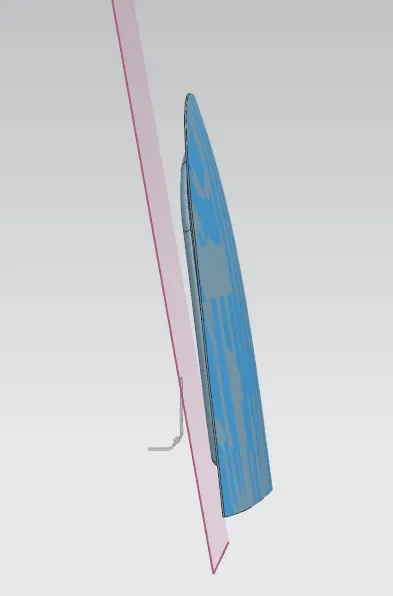
Now we will create a sketch as shown below :
We have created the emboss and made the end cap flat as shown below :
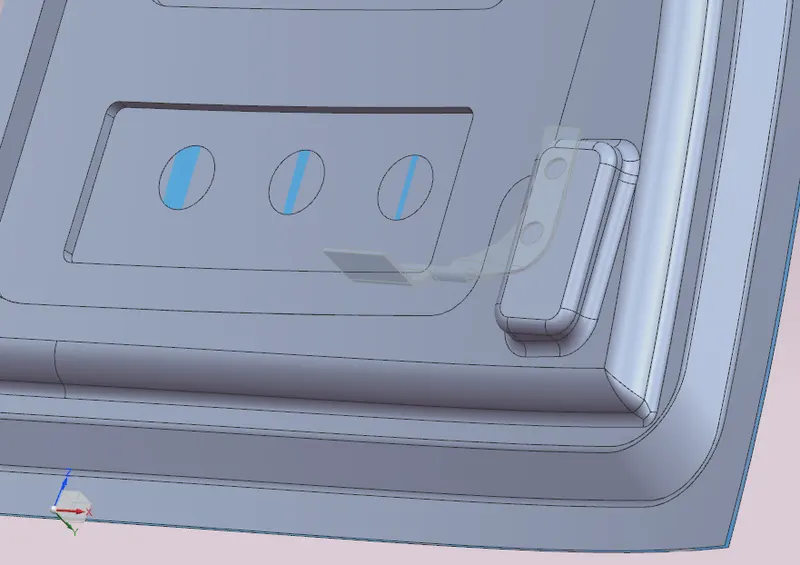
Now we have given fillets as shown :
Now we will mount the hinge on the inner hood using assembly contraints :
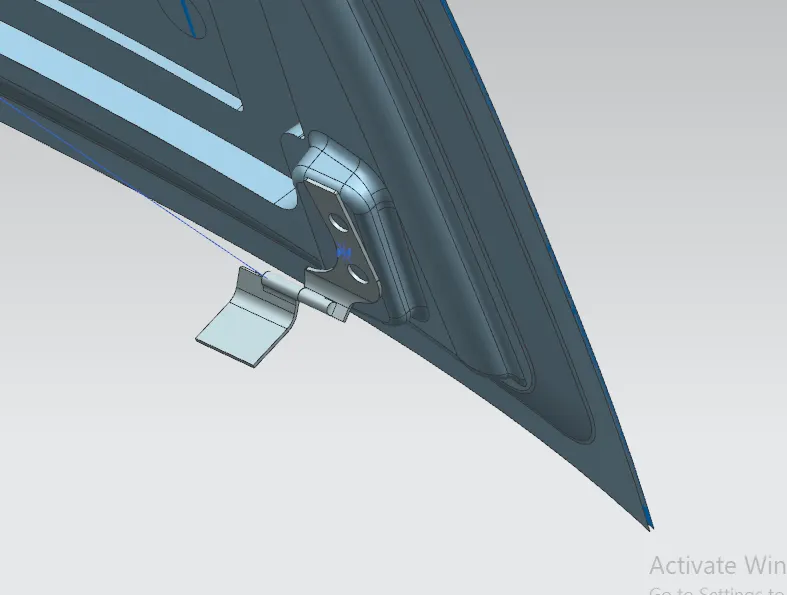
We have mirrored the hinge as shown below :
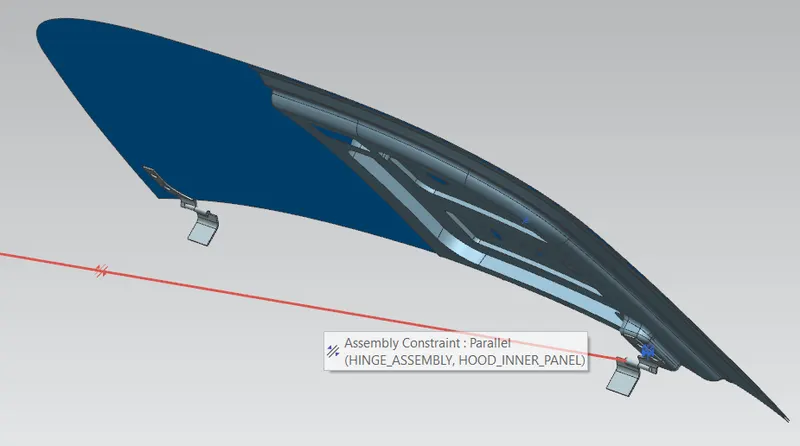
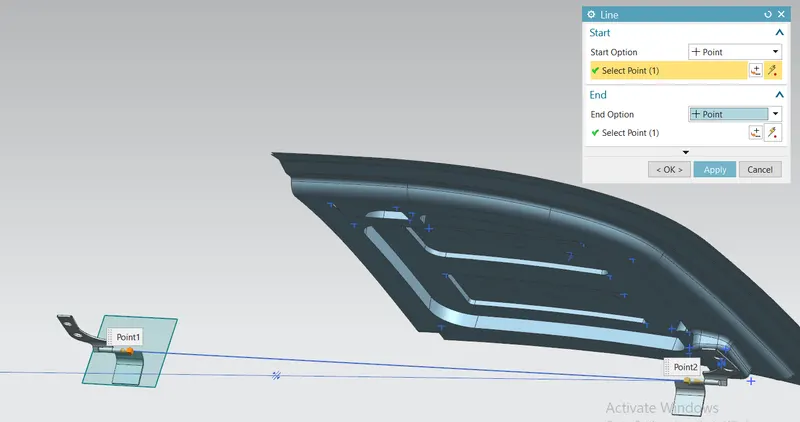
Now we will create the hinge axis as shown below :
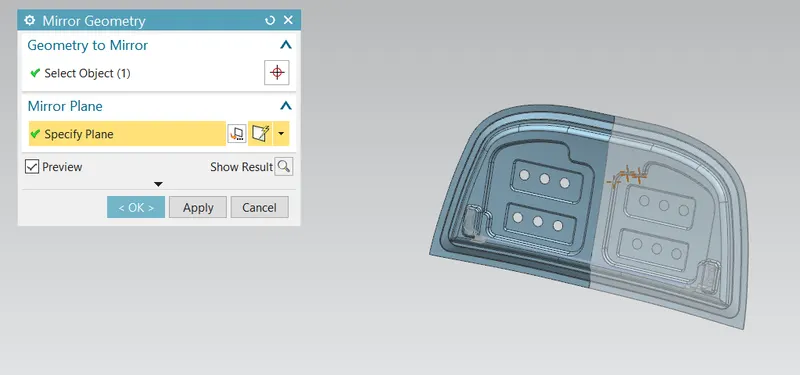
We have mirrored the geometry as shown below :
As you can see that there is a gap between the two ,during sewing as shown :
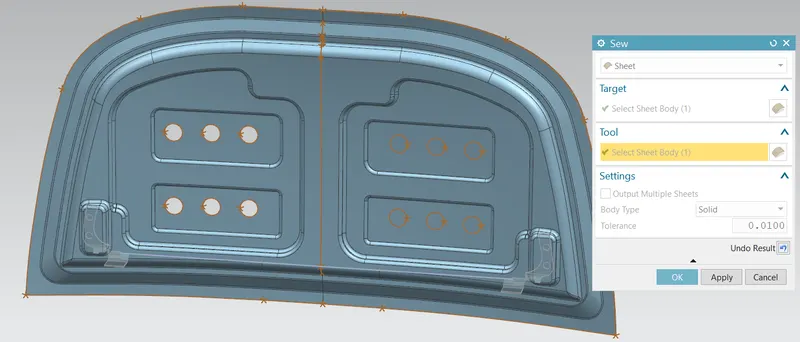
After sewing and extending
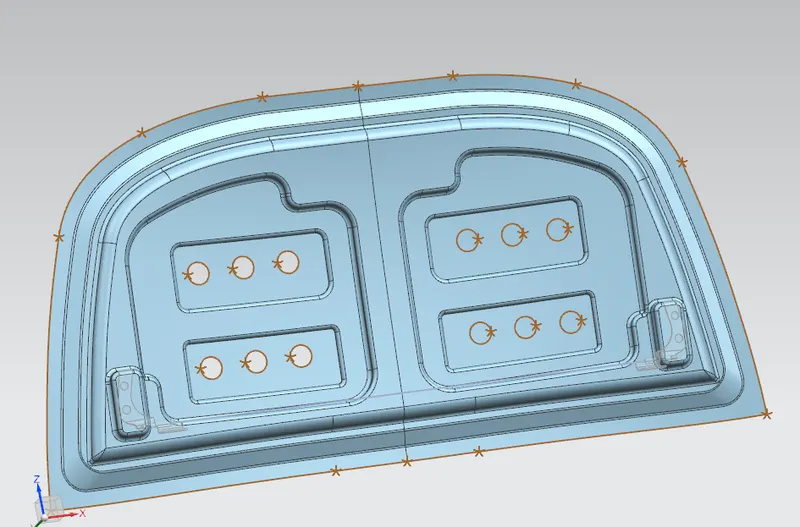
we get the following ,now we will create the embossment for the striker as shown below :
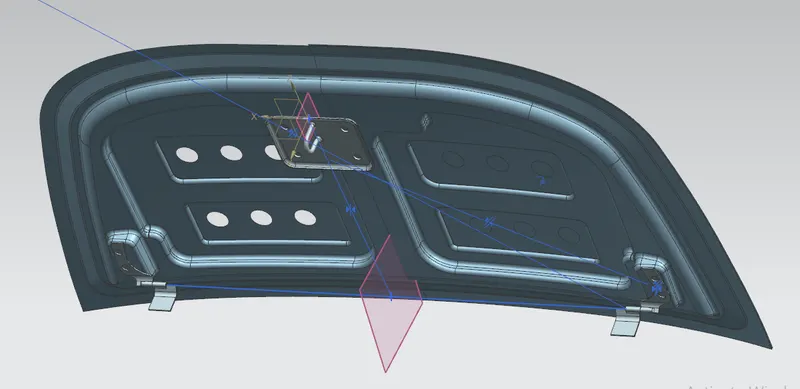
We have created a circle through the center point which will helps us to find the location of the striker:
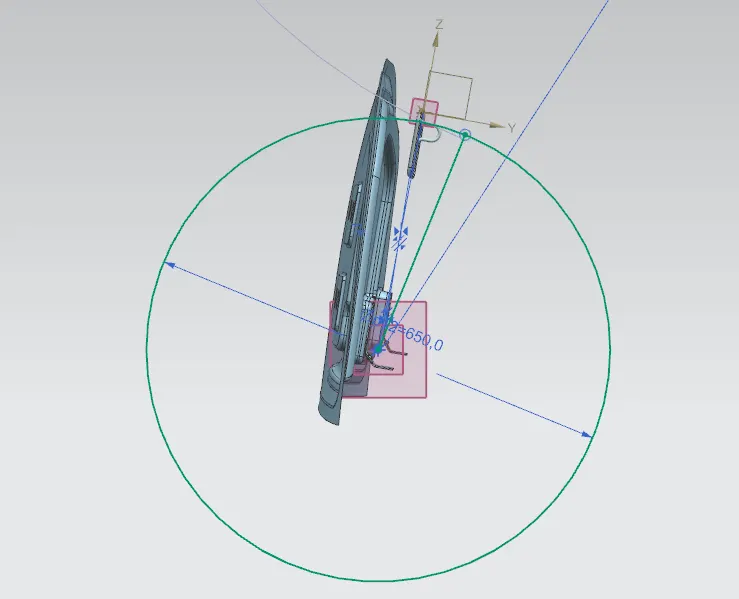
We have created a tangent as shown below :
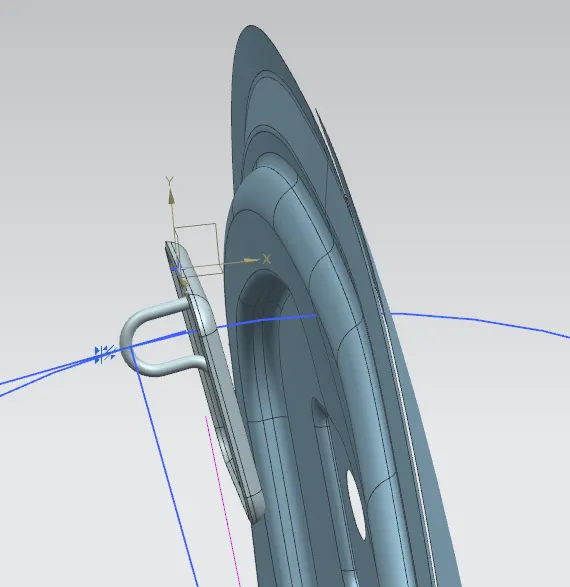
Now we will create the striker embossement as shown below :
Conclusion
Hence we have created the hood as per design rules as shown below :