Final Project: Electric Rickshaw modelling
Create a detailed MATLAB model of an electric rickshaw (three wheel passenger vehicle) as per details below:
Rear wheels driven by PM brushed type motor
Assume efficiency points of motor controller and motor
Make an excel sheet of all input and assumed data
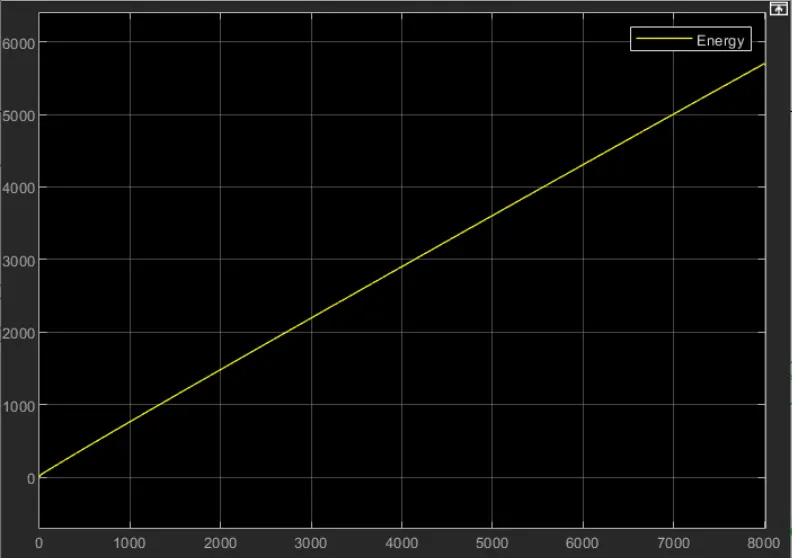
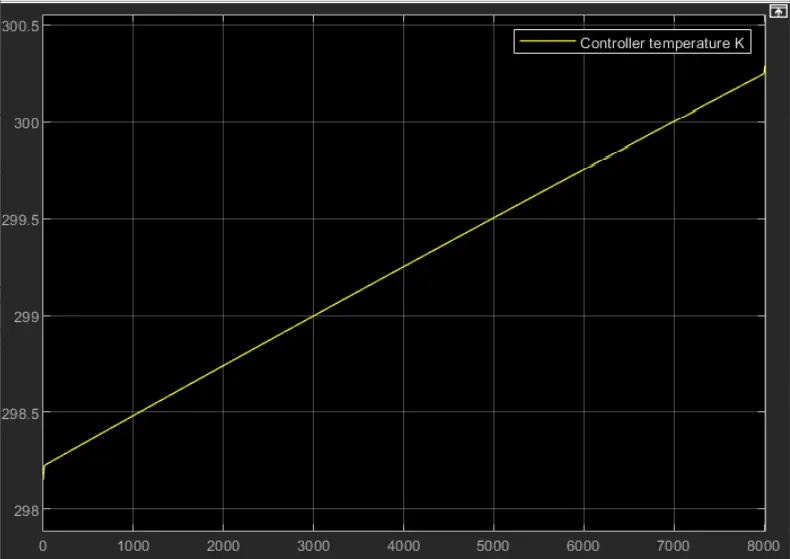
Results: For any three standard driving cycles show energy consumption, temperature rise of motor and controller for 100 km constant speed driving at 45 kmph.
Electric rickshaw:
Electric rickshaws (also known as electric tuk-tuks or e-rickshaws or toto or e-tricycles) have been becoming more popular in some cities since 2008 as an alternative to auto rickshaws and pulled rickshaws. This popularity is due to their lower fuel cost and ease of use compared to human-pulled rickshaws. They are being widely accepted as an alternative to petrol/diesel/CNG auto rickshaws. They are three-wheelers powered by an electric motor ranging from 650 to 1400 Watts. They are mostly manufactured in India and China. Battery-run rickshaws could be a low-emitter complementary transport for the low-income people, who suffer most from a lack of transport facility, if introduced in a systematic manner according to experts.
Design and construction
These rickshaws have a M.S(Mild Steel) tubular Chassis, consisting of three wheels with a differential mechanism at the rear wheels. The motor is brushless DC motor manufactured mostly in India and China. The electrical system used in Indian version is 48V and Bangladesh is 60V. The body design from most popular Chinese version is of very thin iron or aluminum sheets. Vehicles made in fiber are also popular because of their strength and durability, resulting in low maintenance, especially in India. Body design is varied from load carriers, passenger vehicles with no roof, to full body with windshield for drivers comfort. It consist of a controller unit.They are sold on the basis of voltage supplied and current output, also the number of mosfet (metal oxide field effect transistors) used. The battery used is mostly lead acid battery with life of 6–12 months. Deep cycle batteries designed for electric vehicles are rarely used. Weight of the electric car has also been a recurring design difficulty in them.
India
One of the first attempts to design electric rickshaws was done by Nimbkar Agricultural Research Institute in late 1990s. In India, these so-called e-rickshaws are widely spread all over the country, starting to gain popularity around 2011. The design is now much different from cycle rickshaws.
Today, e-rickshaws play a vital role in providing livelihood to people in India. Due to their low cost and high efficiency, they are accepted on the Indian streets but government policies have been threatening the e-rickshaw and banned its use in the capital city Delhi, but failed to put them off the streets. E-rickshaws are still rising in number and widely used in Delhi and other parts of India. In Delhi, as per government official's figures in April 2012, their number was over 100,000
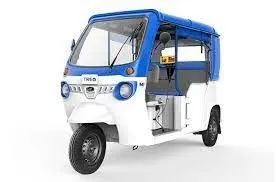
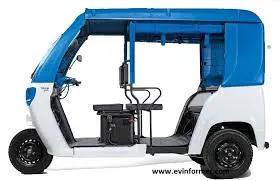
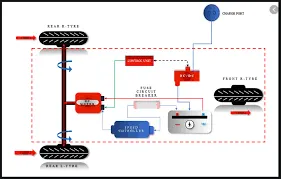
General detail of E-Rickshaw
# Battery Type Lithium-ion 330 V 75
# Vehicle kerb weight 260 kgs
# Load capacity 340 kgs
# Vehicle speed 7 kmph
# Driving range 140 km (160 Ah)
# No of wheels per axel 2
# Frontal Area 91m
# Drag coefficient 5 Wheel radius 306m
# Vertical load 3000 N
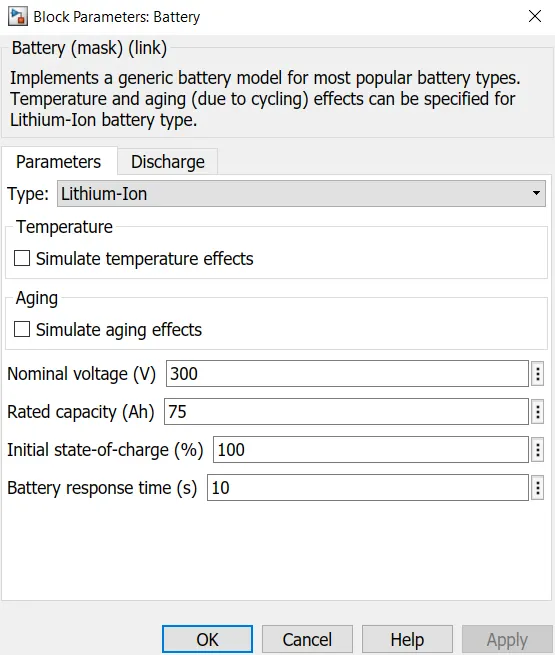
# Nominal Voltage 330 V
# Rated capacity 75Ah
# Initial SOC 100 %
# Internal Resistance 5 ohm
Model:
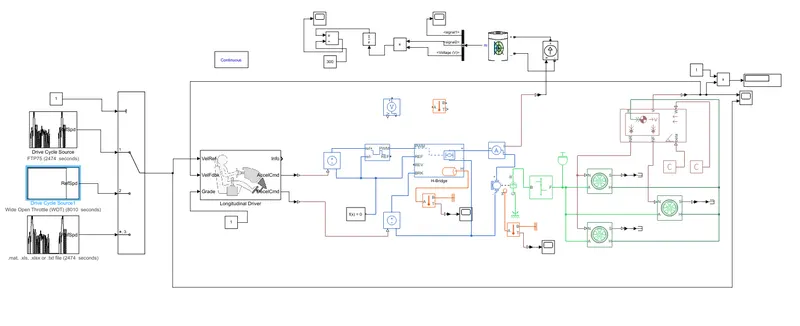
Initially the current flows to DC Motor from the battery through the DC-DC power converter to drive the motor. The required voltage will be controlled in the controller. The Controller will follow the given drive cycle reference and run the motor in the required rpm. Then the motor power is transmitted to the wheels of a vehicle through the gear box. and the controller will take the vehicle speed and compare and controlled.
Drive Cycle:
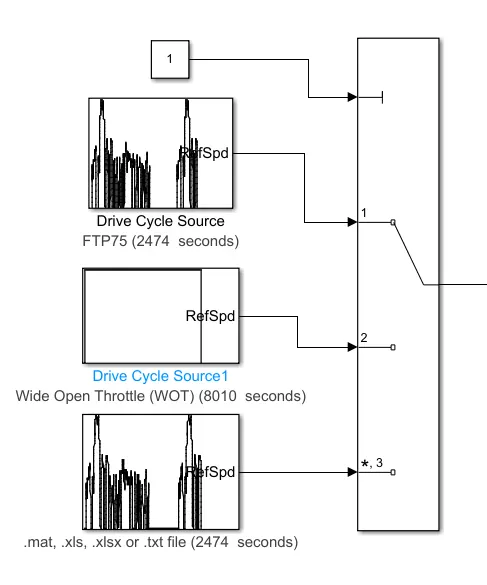
Drive cycle is assumed as the driver's input of a vehicle, it replaced how a driver will drive a vehicle. Here I have used three drive cycles which is used to test the vehicle performances. These drive cycle will have high speed, low speed, braking conditions in it. There are different drive cycles like WOT, FTP75 etc., Here in this model I have used FTP 75, WOT & Manually prepared in excel Drive Cycle source.
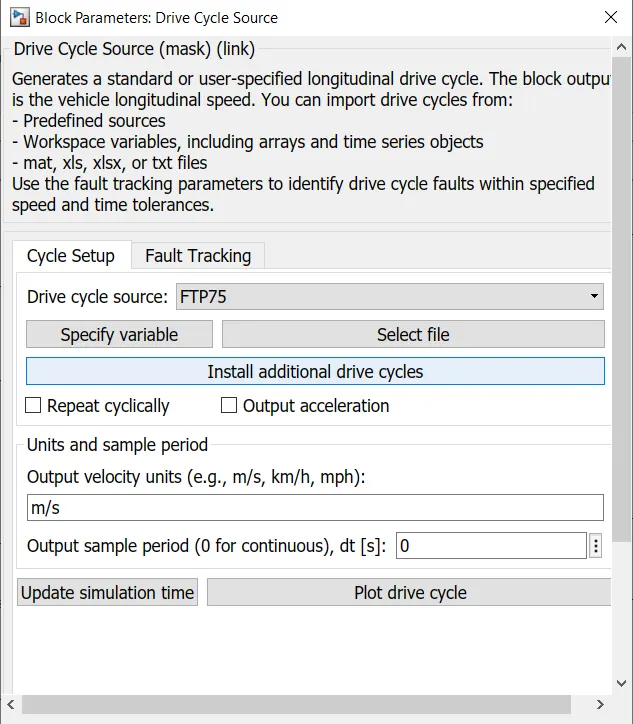
Generates a standard or user-specified longitudinal drive cycle. The block output is the vehicle longitudinal speed. You can import
drive cycles from:
- Predefined sources
- Workspace variables, including arrays and time series objects
- mat, xls, xlsx, or txt files
Use the fault tracking parameters to identify drive cycle faults within specified speed and time tolerances.
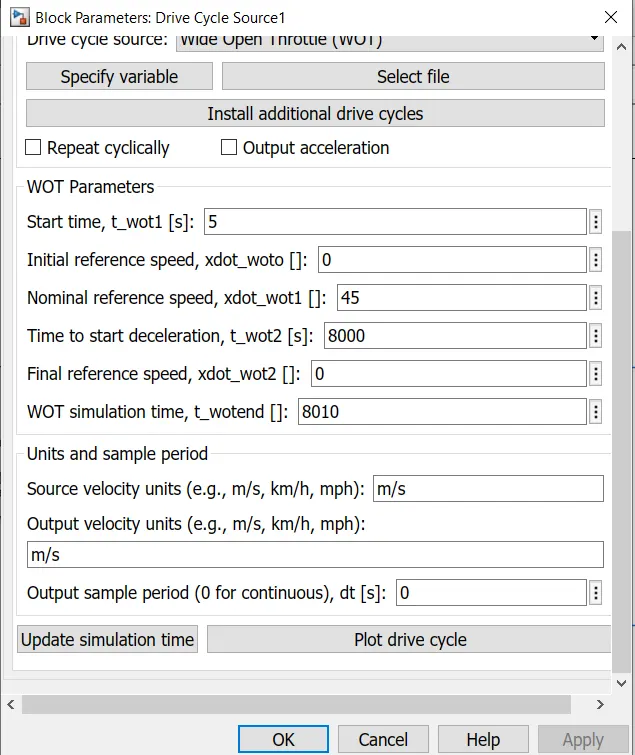
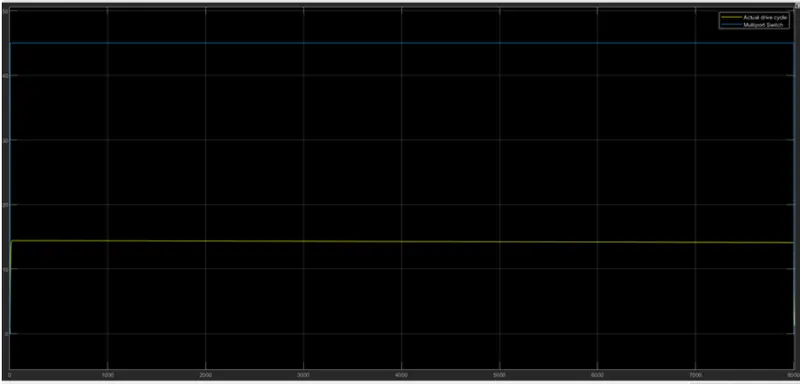
Wide Open Throttle (WOT):
LONGITUDINAL DRIVER:
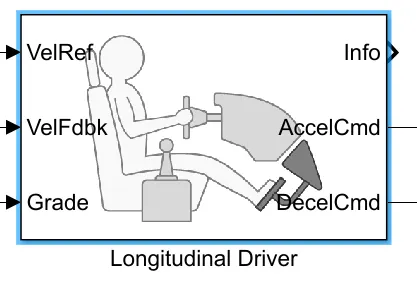
The longitudinal driver block creates a driver scenario for the system. THis block also consists of a PI controller, which is used to match the actual drive cycle of the system with the selected reference drive cycles. The parameters of the block are shown below.
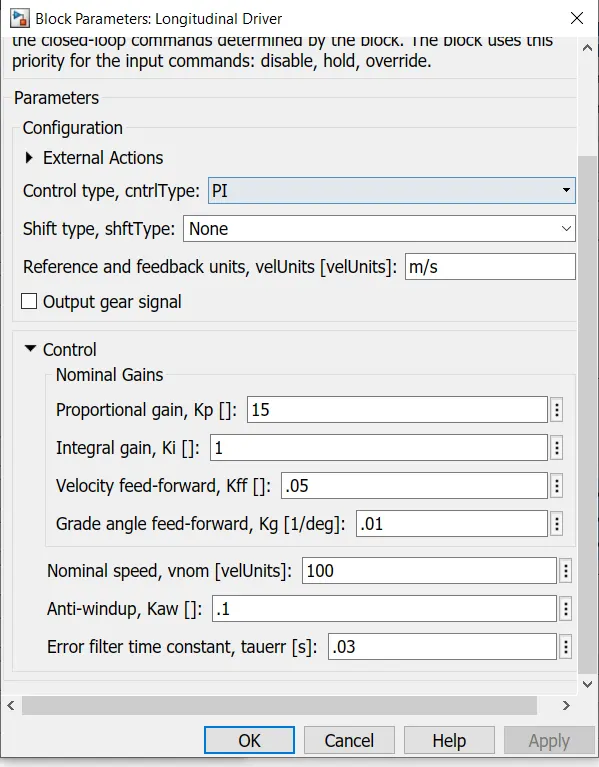
he propotional gain and integral gain are kept as default.
The multiport switch output is connected to the Vel.Ref port. The Vel.Fdbk is the actual drive cycle of the system, which comes out from the vehicle body dynamics. The grade angle is kept as 0.
The longitudinal driver block converts the reference drive cycle data as equivalent current & voltage signals, which are connected to the controlled voltage sources.
Now we will see the motor drive system of the model.
MOTOR DRIVE:
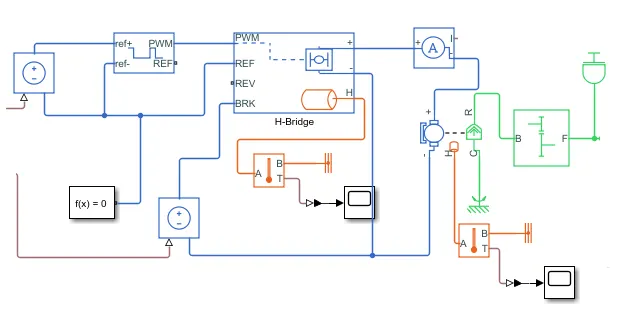
We have already decided that our motor controller would be the PWM H-bridge. This PWM H-bridge consists of 4 transistor switches with the motor at its center, making the circuit shaped as the alphabet H. These switches when open & closed, changes the direction of the current. The direction of current determines the direction in which the motor would rotate.
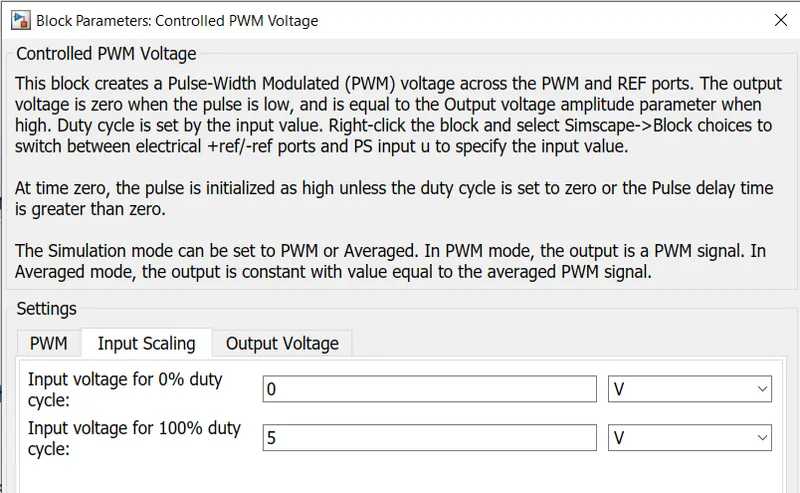
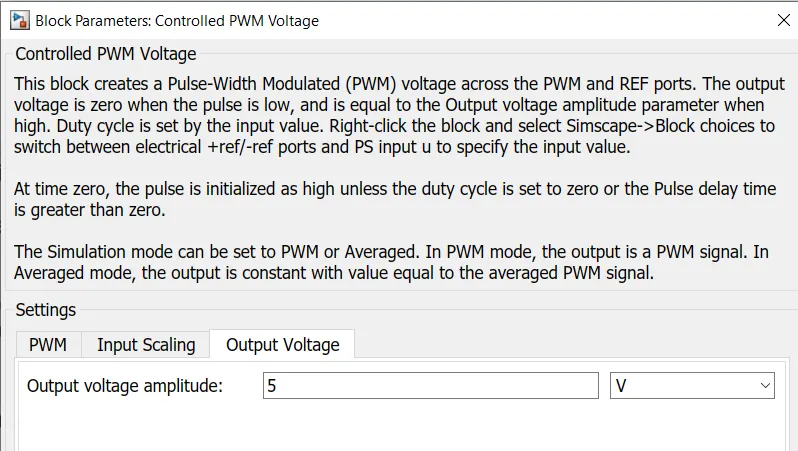
We have to convert our controlled voltages into controlled PWM voltages. This is done with the help of the controlled PWM voltage block, which changes the pulse width of the signals according to the controller requirement
They are passed on to the controller. The controller parameters are shown below. The controlled PWM voltage block converts the voltage signals to the parameters shown below.
H-Bridge:
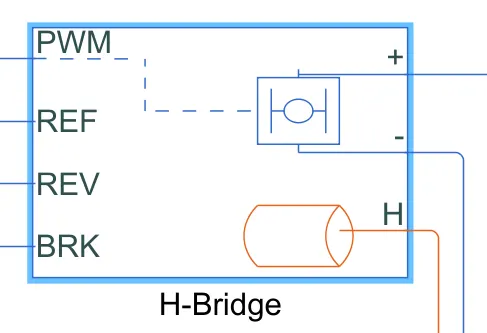
This block represents an H-bridge motor drive. The block can be driven by the Controlled PWM Voltage block in PWM or Averaged
mode. In PWM mode, the motor is powered if the PWM port voltage is above the Enable threshold voltage
in Averaged mode. the PWM port voltage divided by the PWM signal amplitude parameter defines the ratio of the on-time to the PWM period. Using this ratio and assumptions about the load, the block applies an average voltage to the load
that achieves the correct average load current. The Simulation mode parameter value must be the same for the Controlled PWM Voltage and HBridge blocks.
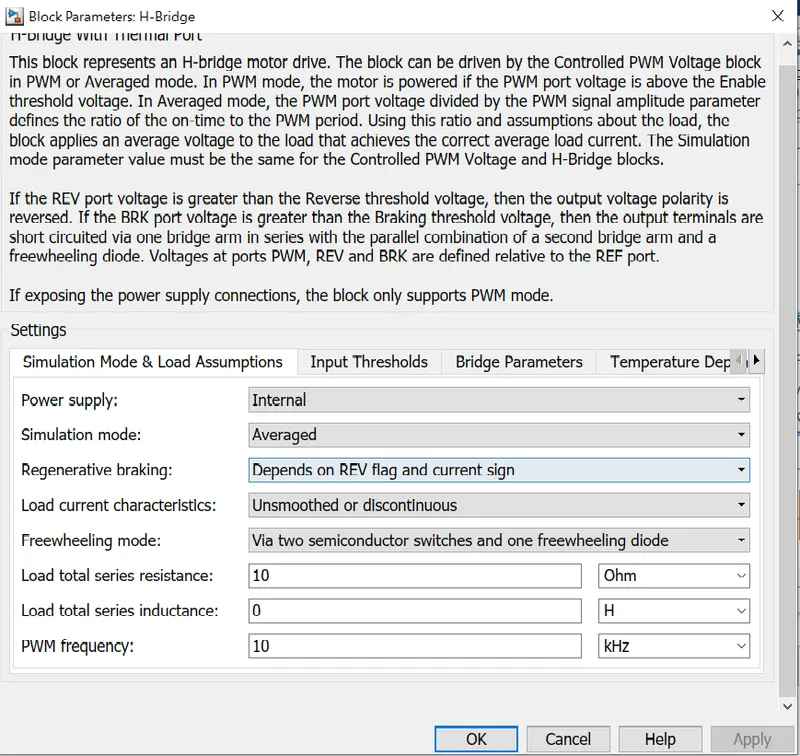
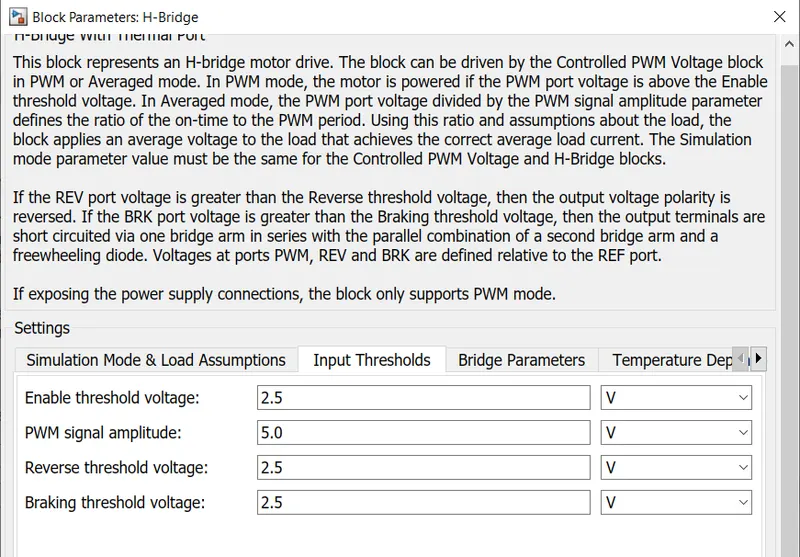
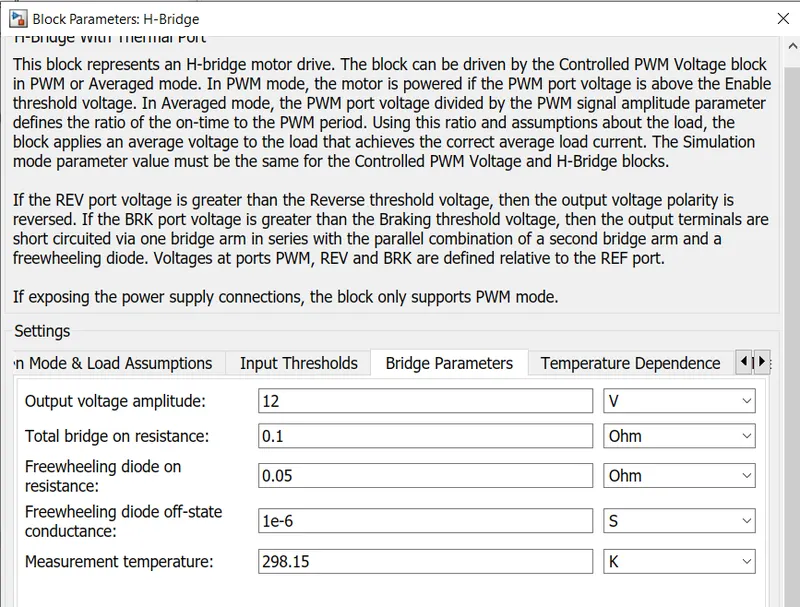
• If the REV port voltage is greater than the Reverse threshold voltage, then the output voltage polarity is reversed.
• If the BRK port voltage is greater than the Braking threshold voltage, then the output terminals are short-circuited via one bridge arm in series with the parallel combination of a second bridge arm and a freewheeling diode.
• Voltages at ports PWM, REV, and BRK are defined relative to the REF port. If exposing the power supply connections, the block only supports PWM mode.
DC Motor:
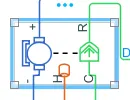
• This block represents the electrical and torque characteristics of a DC motor includes Thermal port to series the temperature of Motor
• The block assumes that no electromagnetic energy is lost, and hence the back emf and torque constants have the same numerical value when in Si units Motor
• Motor parameters can either be specified directly or derived from the no-load speed and stall torque. If no information is available on armature inductance, this parameter can be set to some small non-zero value.
• When a positive current flows from the electrical to-ports, a positive torque acts from the mechanical C to R ports. Motor torque direction can be changed by altering the sign of the back-emf or torque constants.
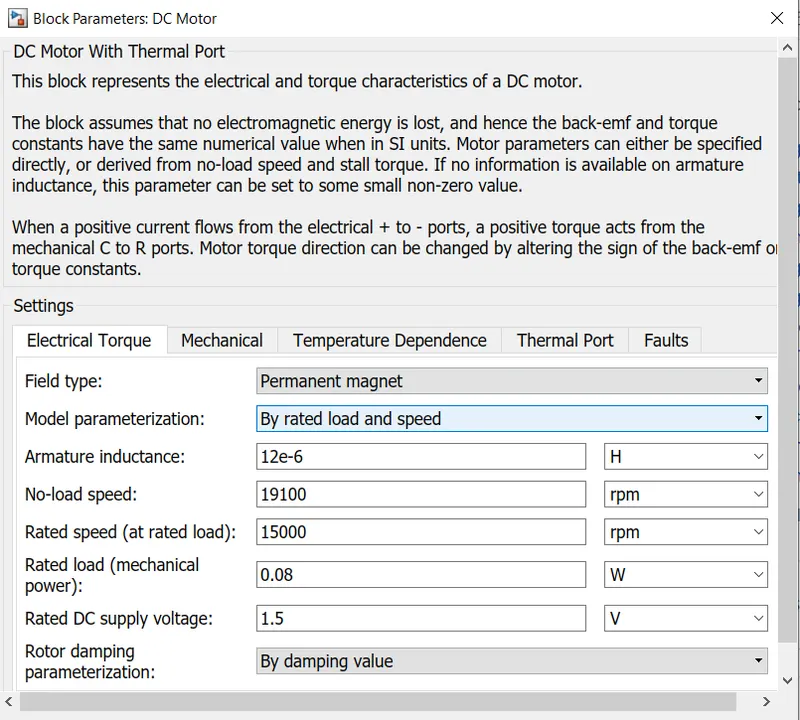
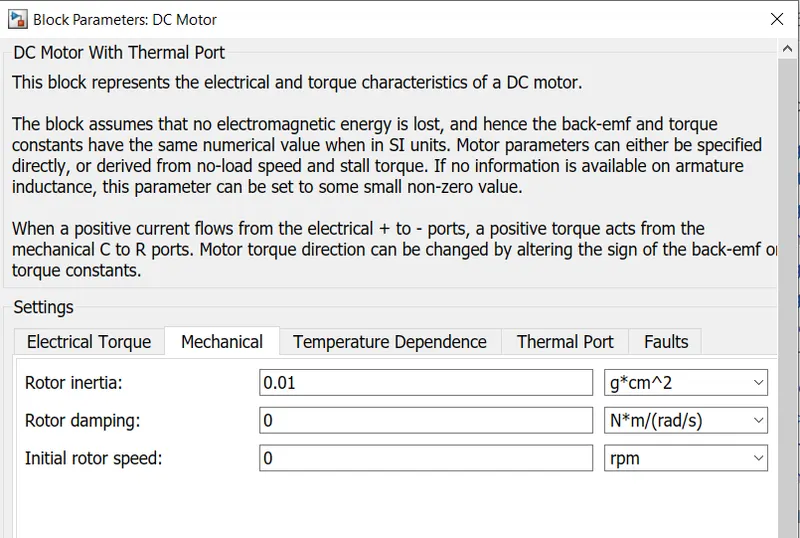
• The Motor controller will get input from the longitudinal driver. Its tasks are to control the speed of the motor and drive according to the input of the driver.
• Majorly motor controlled we designed had two main parts named PWM voltage generator and H-Bridge Input 1 is getting from the accelmd of a longitudinal driver and it is given to a controlled voltage source block where it is input to the controlled PWM voltage will generate a PWM signal in such a way that H-bridge will generate the required voltage to operate the DC motor for the given driver input
• PWM voltage block negative reference and REF are grounded and REF of H bridge respectively. H-bridge is a motor controller that has IGBT components aligned in the shape of H and will operate only two at a time respectively to the input of the signal from the PWM block.
• When deceleration occurs this H-bridge will give an output from the positive and negative terminals of it. These negative & positive terminals are later connected to the DC motor and battery. All these components are the simscape electrical components so they need a connection to the solver configuration block which helps to solve the simulation.
Controlled PWM Voltage:
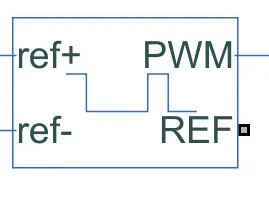
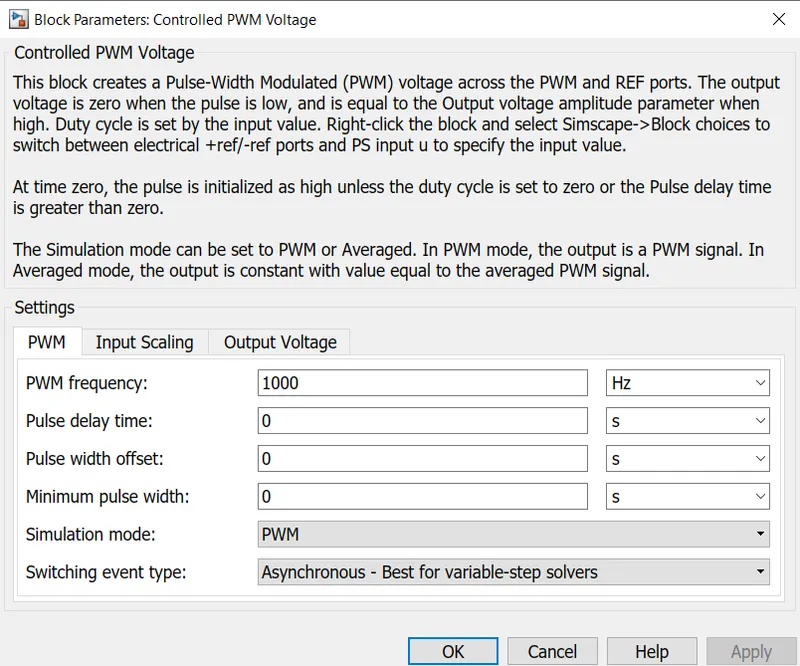
• This block creates a Pulse-Width Modulated (PWM) voltage across the PWM and REF ports. The output voltage is zero when the pulse is low and is equal to the Output voltage amplitude parameter when high.
The duty cycle is set by the input value. Right-click the block and select Simscape Block choices to switch between electrical ref/-ref ports and PS input u to specify the input value.
At time zero, the pulse is initialized as high unless the duty cycle is set to zero or the Pulse delay time is greater than zero.
The Simulation mode can be set to PWM or Averaged. In PWM mode, the output is a PWM signal. In Averaged mode, the output is constant with a value equal to the averaged PWM signal. Select Simulation mode as Averaged.
Vehicle Body and Tire Subsystem Model:
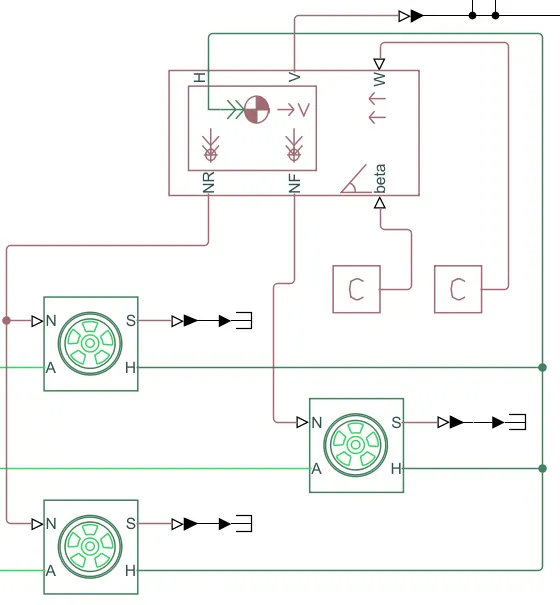
• Motor will produce the rotational output which will give to the vehicle body and transmission system. The rotational output is take by the gear system here to maintain the constant speed throughout the transmission without any loss in speed from the motor to tires.
• Below is a diagram that is how it is inside the vehicle body and transmission system and in the main design, it is referred just only as a transmission system. Here I created a Rear-wheel drive transmission system.
• The gear output is given to axels of Rear tires in the circuit it is shown that gear is connected to Rear wheels and the front tire is free to rotational motion, thus the vehicle moves forward. N is the normal force caused by the tires and it is given to the vehicle body's normal force port.
• The vehicle body has an H-Hub, S- Tire slip, N-Normal force. As axel connection, wind velocity, inclination angle. The tires hub is connected as a common node to the vehicle body.
• The vehicle body wind velocity is connected to a constant block and the beta-inclination angle is connected to another constant block where we can assign wind velocity and inclination angle as per requirement. Velocity is the output port where we can get at which speed the vehicle is moving. The velocity is taken out to get the distance traveled and state of charge
Vehicle Body Parameters:
• Vehicle body mass, Centre of gravity distance values, and aerodynamic drag variables are modified.
• Pitch dynamics are kept ON with other variable values as default values.
Tire:
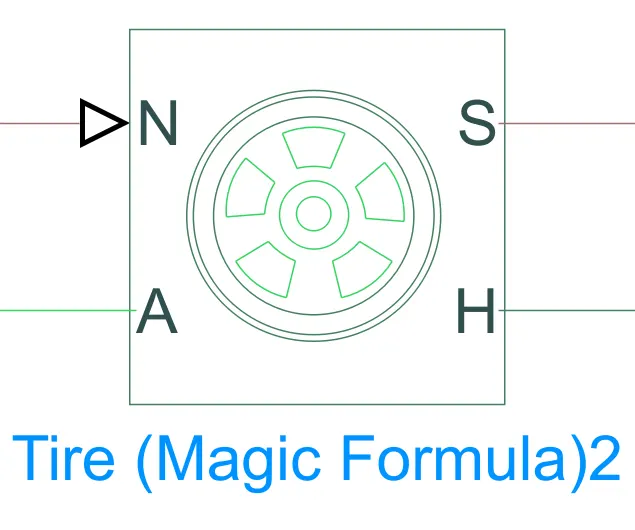
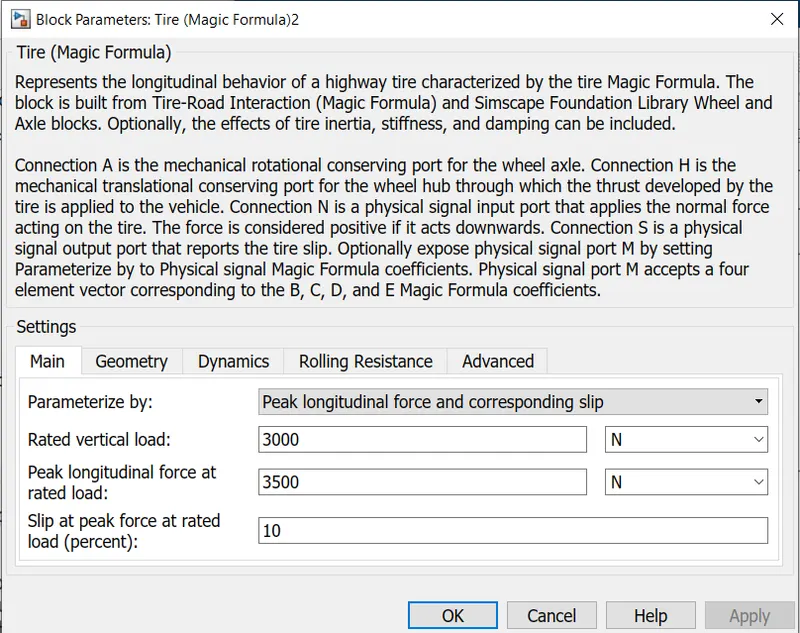
• Represents the longitudinal behavior of a highway tire characterized by the tire Magic Formula. The block is built from Tire-Road Interaction (Magic Formula) and Simscape Foundation Library Wheel and Axle blocks. Optionally, the effects of tire inertia, stiffness, and damping can be included
• Connection A is the mechanical rotational conserving port for the wheel axle.
• Connection H is the mechanical translational conserving port for the wheel hub through which the thrust developed by the tire is applied to the vehicle.
• Connection N is a physical signal input port that applies the normal force acting on the tire. The force is considered positive if it acts downwards.
• Connection S is a physical signal output port that reports the tire slip. Optionally expose physical signal port M by setting
Parameterize by to Physical signal Magic Formula coefficients.
• Physical signal port M accepts a four-element vector corresponding to the B, C, D, and E Magic Formula coefficients
Gear:
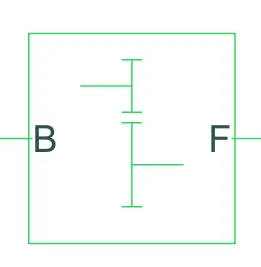
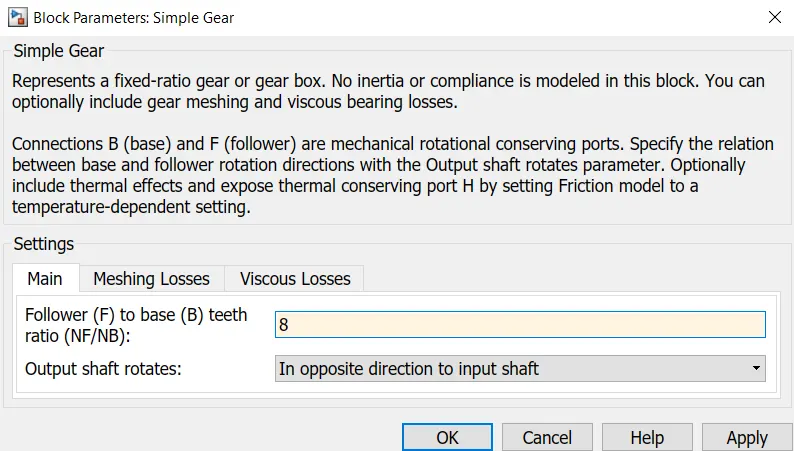
Represents a fixed-ratio gear or gearbox. No inertia or compliance is modeled in this block. You can optionally include gear meshing and viscous bearing losses.
Connections B (base) and F (follower) are mechanical rotational conserving ports. Specify the relation between base and follower rotation directions with the Output shaft rotates parameter.
Optionally include thermal effects and expose thermal conserving port H by right-clicking on the block and selecting Simscape block choices to switch between variants Output shaft rotates in the same direction of the input shaft.
The base is connected to the Motor shaft and the follower is connected to the Rear-wheel derive.
Vehicle Body:
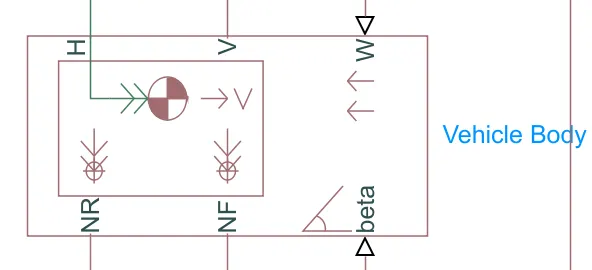
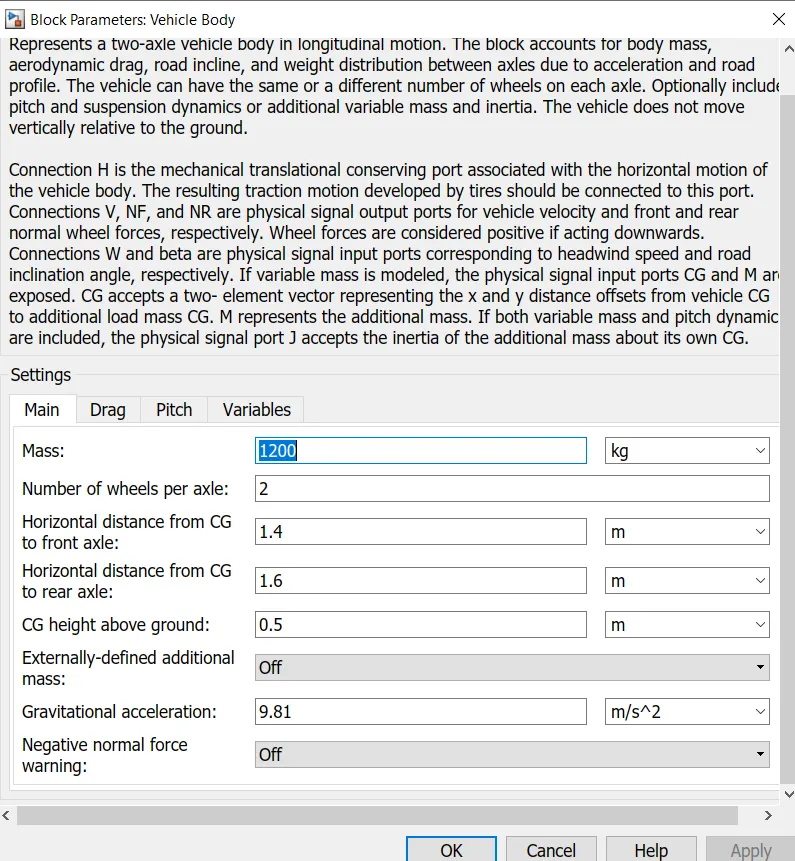
• This block basically represents a two-axle vehicle body in longitudinal motion. The block accounts for - body mass, aerodynamic
drag, road incline, weight distribution between axles due to acceleration road profile.
• Here, connection H is the mechanical translational conserving port hub. NF & NR correspond to the output ports for normal reaction
forces on the front axle and rear axle wheels respectively.
• Connection V represents the actual output translational velocity of the vehicle beta is the road inclination angle & W corresponds to
the headwind speed (headwind direction opposite to that of the vehicle).
• The gross weight is given to be 1200 kg. The geometric parameters of the vehicle are given as
Battery And Soc Subsystem Model:
Battery:
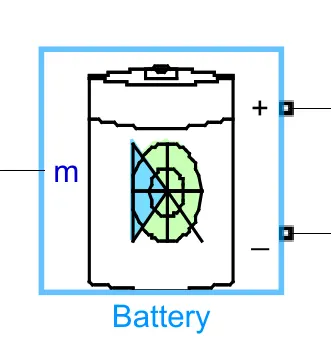
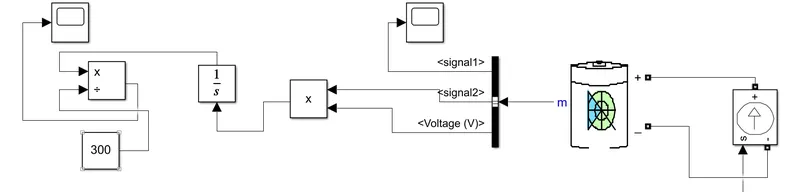
The battery is required to power the controller and motor. The controller uses the battery power according to produce the input given by the motor to obtain maximum speed. The battery is also used to power every electrical component in the vehicle. The Battery block implements a generic dynamic model that represents the most popular types of rechargeable batteries.
Controlled Current Source:
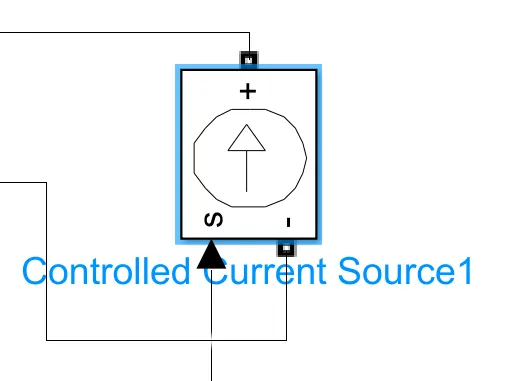
• The Controlled Current Source block converts the Simulink input signal into an equivalent current source. The generated current is driven by the input signal of the block. The positive current direction is as shown by the arrow in the block icon.
• We can initialize the Controlled Current Source block with a specific AC or DC. if we want to start the simulation in steady-state the block input must be connected to a signal starting as a sinusoidal or DC waveform corresponding to the initial values
• Double click controlled current source and from the drop-down menu of measurement select current.
• Signal output will connect with scope by adding the current signal to it. (+) the terminal will connect with the battery (-) terminal.
BUS Selector:
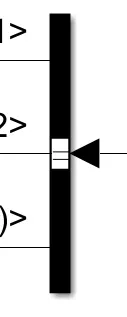
The Bus Selector block outputs the signals you select from the input bus The block can output the selected elements separately or in a new virtual bus
RESULTS:
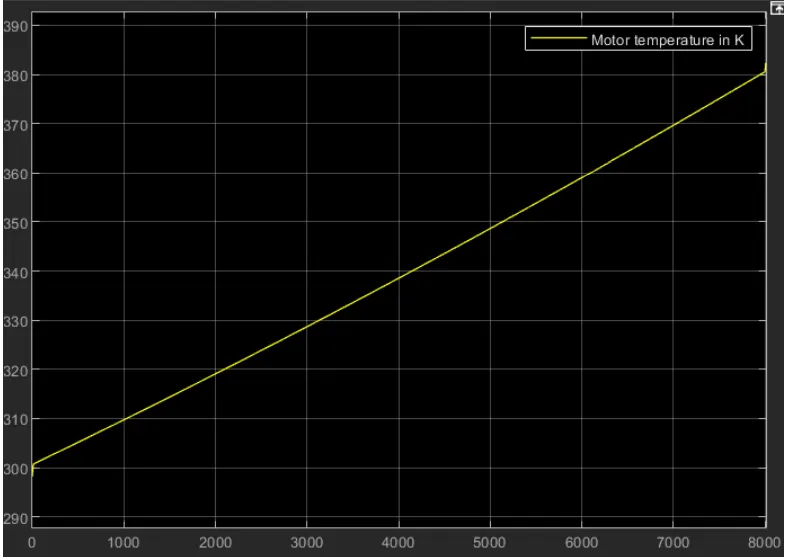
motor temperature :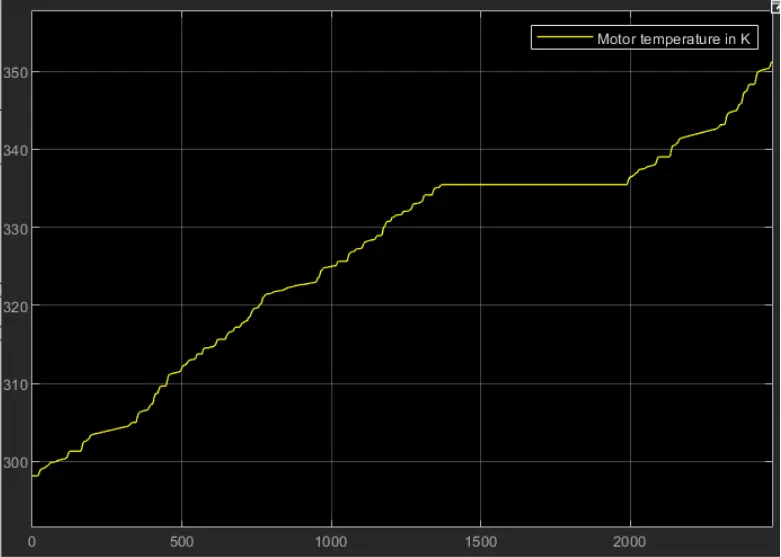
controller temperature :
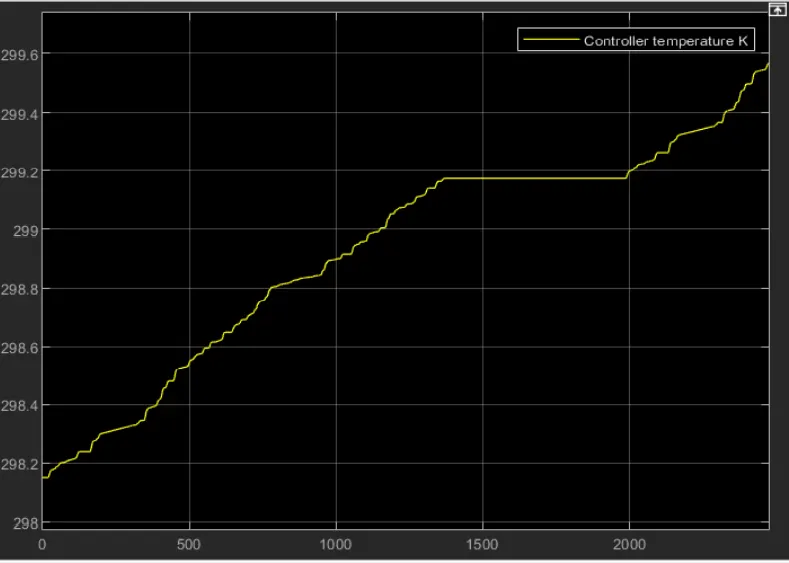
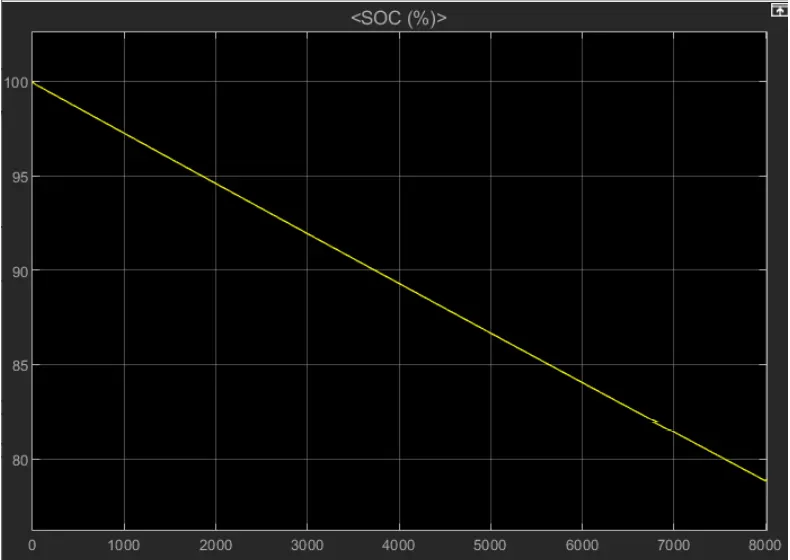
SOC for the simulation :
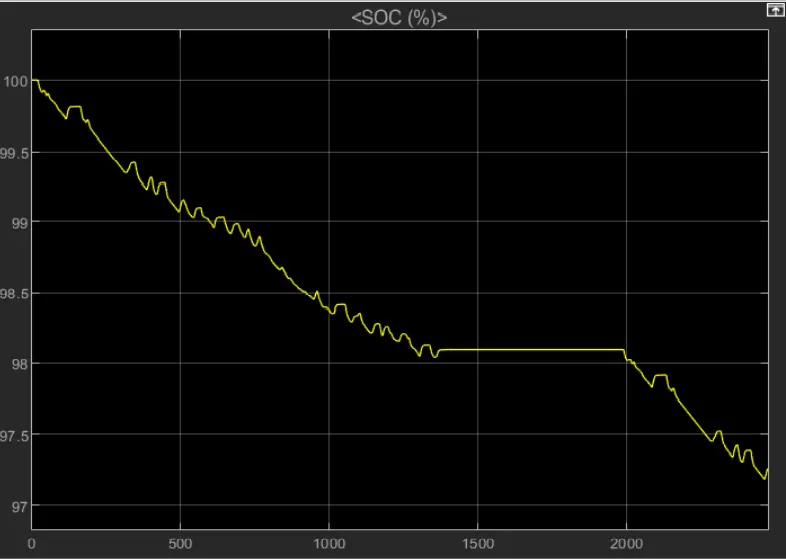
drive cycle of the WOT :
SOC of the drive cycle :
motor temperatures :
controller temperatures:
total energy consumption: