Fender Design Challenge
Fender Design challenge
A fender is the part of a car, truck, motorcycle, or other vehicles that frames or covers a wheel well. Fenders actually guard the vehicle against the different types of debris that fly off from the road. They are just that – “defenders of road debris.”
The fender car part is the body kit or body part installed on the left and right sides of the vehicle. Manufacturers usually attach fenders to the wheel arches. The main purpose why there are fenders on cars is that they shield the wheels and they protect the passengers, the pedestrians, and the other vehicles from stones, mud, liquid, and other debris that can fly in the air because of the speeding rotating wheels while the car is running.
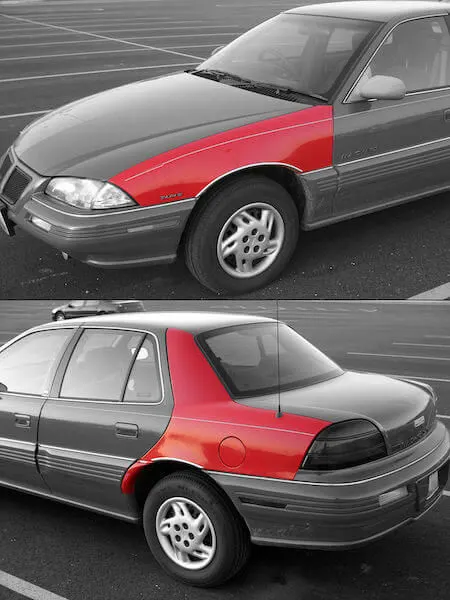
- How Car Fenders Offer Protection
Driving will be very messy if your car doesn’t have fenders that house the wheel wells. The tires of your car spin fast when you drive. As they rotate, they catch moisture and debris from the pavement and spray them into the air.
The tire’s kinetic energy ejects these foreign matters into the air at high velocities. As this thing is happening, the moisture and debris that fly in the air can cause the following to happen:
- Get other vehicles or pedestrians on the road side dirty
- Hurt pedestrians
- Scratch the bodies of other vehicles
- Cause minor, and even major damage to other vehicles
1.1 Fenders are classified as
Full Bumper Type
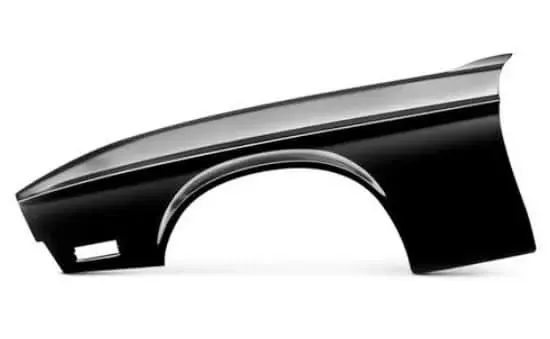
Half Bumper Type
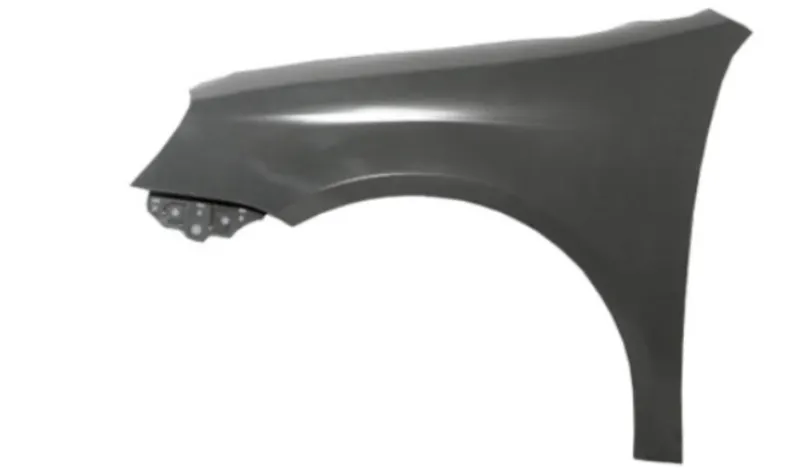
In 90’s full bumper type fenders are used. Here the blank used to produce full bumper type was really big and also leads to have a great wastage around.
Now these days the companies opted to design half bumper, in this case companies have a high possibility to reduce the scrap by slightly increasing the blank size results in producing two fenders at the same time. This is called scrap management and it reduces the steel weight on the fender which results in better performance and cost reduction.
1.2 Design consideration of Front fender for pedestrian safety
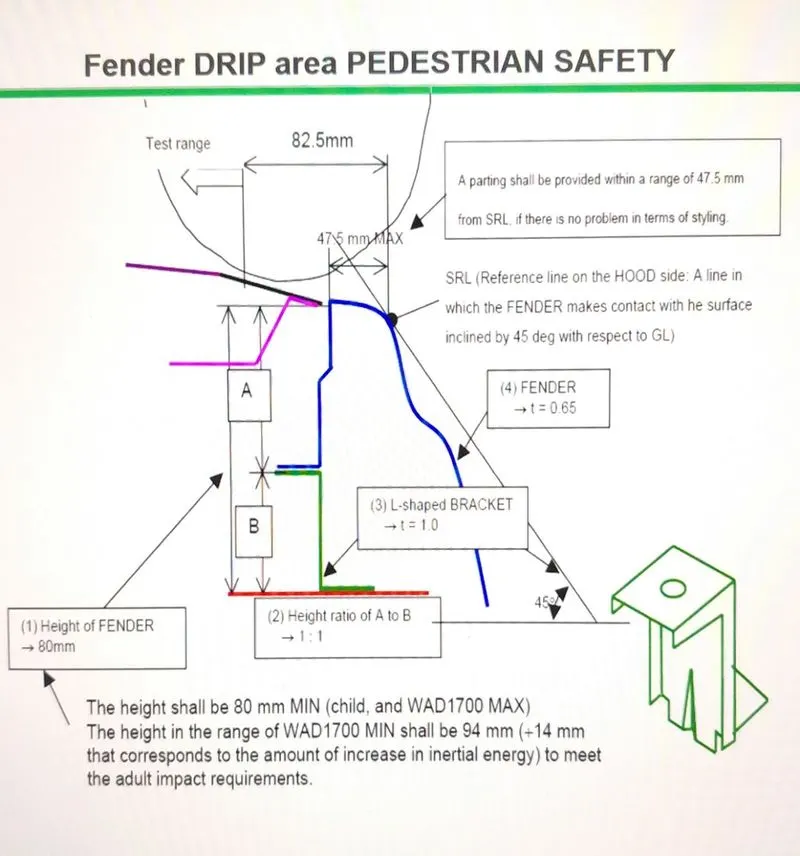
1.3 The manufacturing process of car fender includes the following steps
- At the beginning, unfolding and shearing are carried out on a plate, wherein a proper cold roll specification is selected at first, a cold roll is unfolded, and then the unfolded cold roll is sheared to an iron plate of the corresponding size according to production material specifications.
- Then oil pressing and punching are carried out, wherein the iron plate is extended at first, then side shearing and punching are conducted on the iron plate, folding and shaping are carried out on the iron plate, and finally reshaping is carried out on the iron plate.
- After that small first parts of the fender are machined, wherein first of all, the iron plate is punched to a needed outer contour blank, then the iron plate completing the outer contour blank is further shaped, and the iron plate is punched at last.
- Final step is installation and welding of a metal plate are conducted. The manufacturing process for the car fender is simple and high in production efficiency; a body of the fender and the small parts can be separately machined, so waiting time is shortened; working efficiency of production is improved.
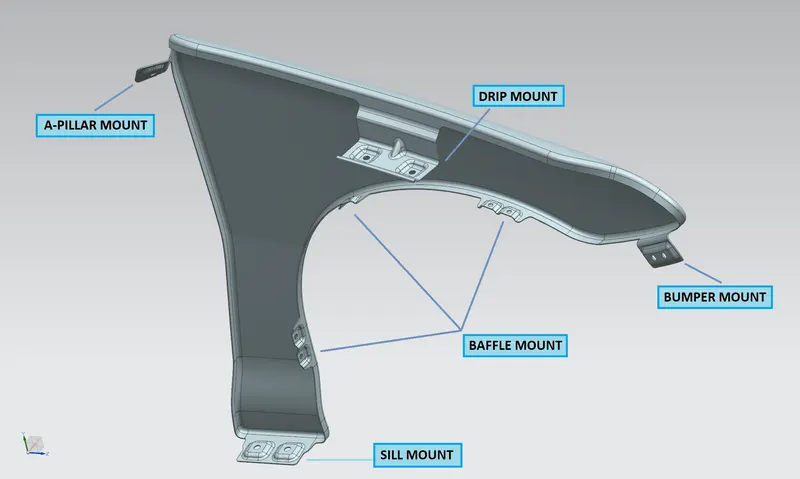
Important mounting regions of fender are
- Drip mounting region
- A pillar mounting region
- Sill mounting region
- Bumper mounting region
- Baffle mounting region
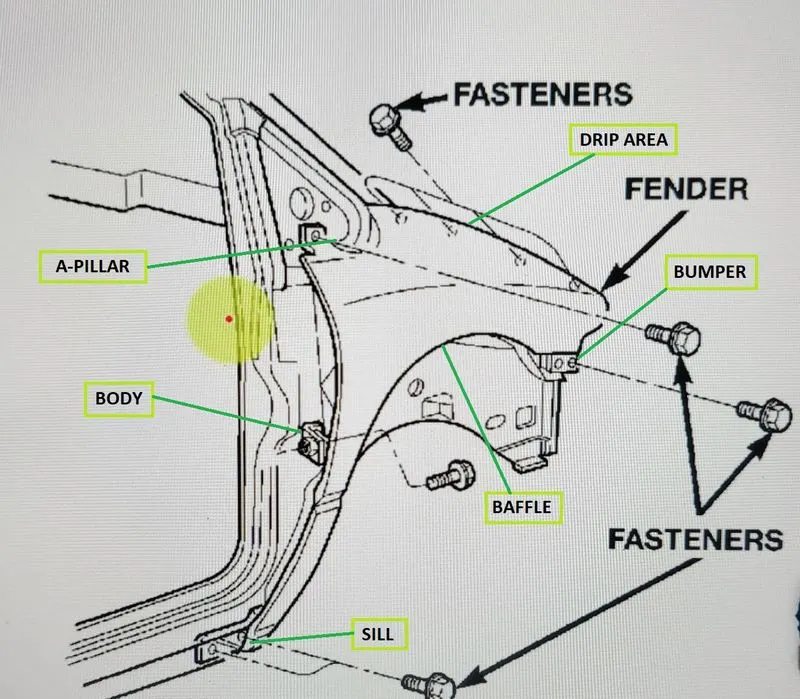
2. Objective – Design a front fender from the given skin data and the master section provided with Drip mounting, A-pillar, Sill, Bumper and Baffle (splash) Mounts
Design Requirements
- Provide embosses and darts to improve strength.
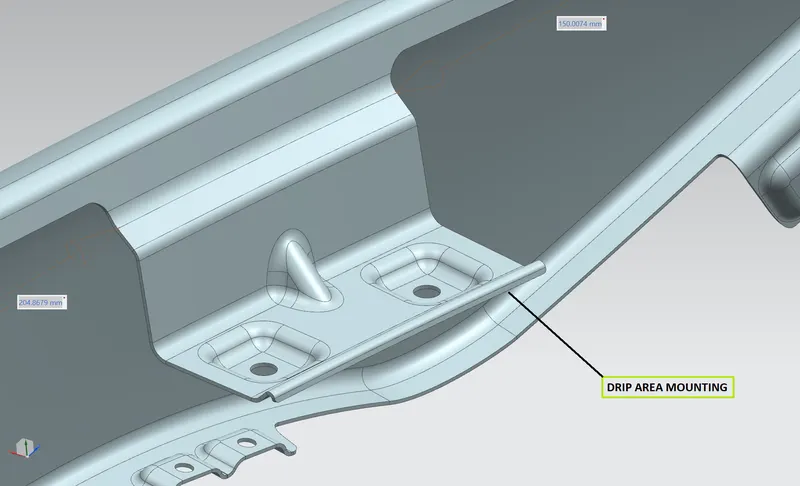
- Provide minimum distance of 150 mm and 200 mm from front and back of fender respectively while creating drip mounting.
- Thickness – 0.75 mm
2.1 Drip Area
Master section provided for the drip area
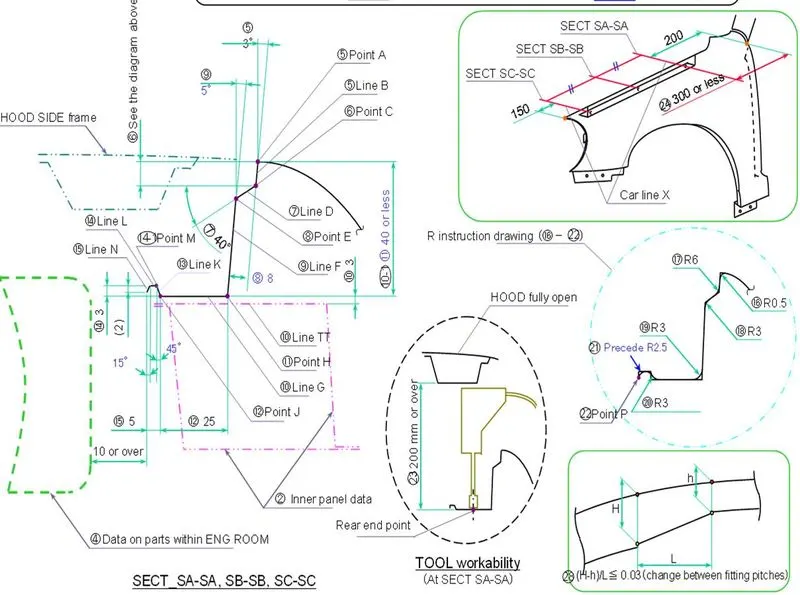
- Drip area is the major fender part which is going to mount to the engine compartment.
- While designing the drip area, there should be minimum 200 mm distance from the back side of the fender to provide sufficient space for the cowl to setup and a minimum of 150 mm distance from the front side of the fender to provide space for the headlight housing.
- Provide at least 10 mm distance from the engine room.
- The hood side drip area depth must be 40 mm or less as maximum productivity is achieved at the depth of 40mm. forming is not feasible is depth exceeds 60mm due to wrinkling and spring back effect.
- Dart is provided for extra strength.
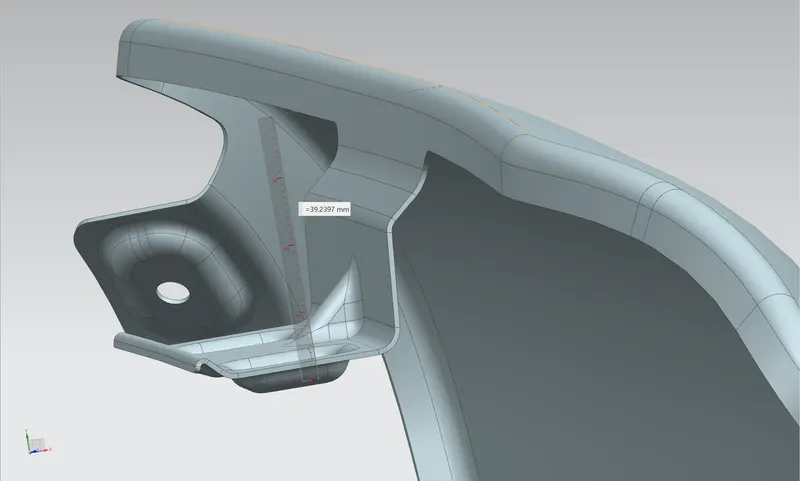
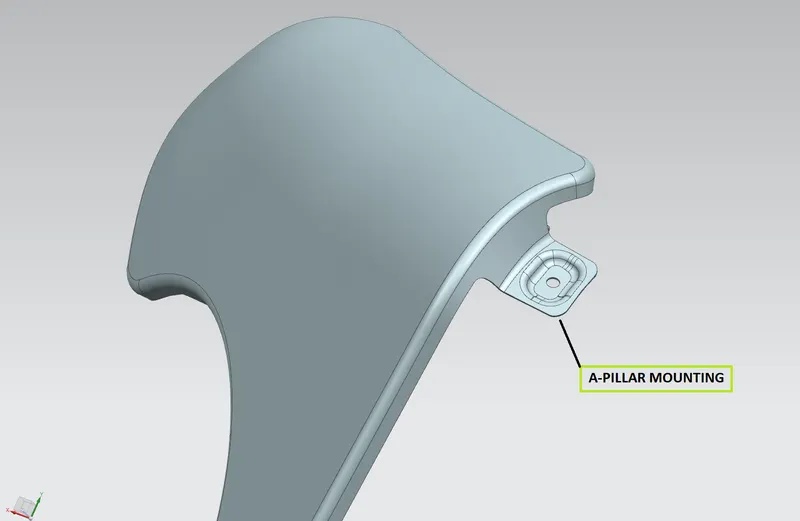
2.2 A-Pillar Mounting Area
This region is located on the top-back side of the fender where the A-pillar is connected with the fasteners. This cowl area is covered with the ORVM of the vehicle.
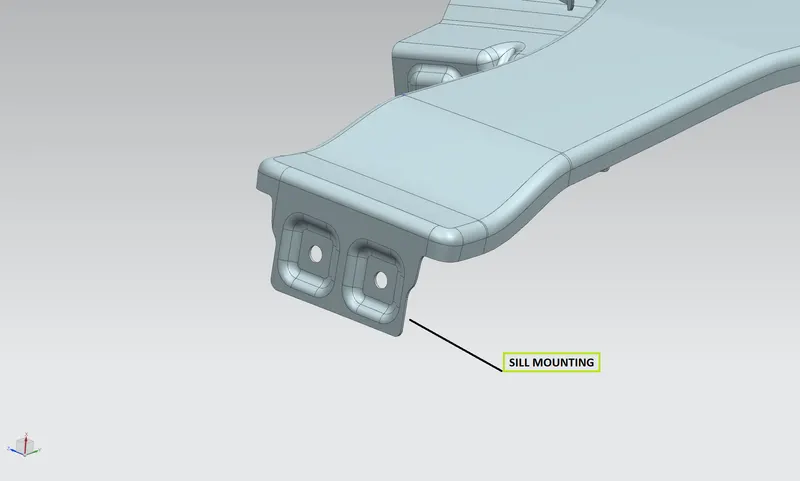
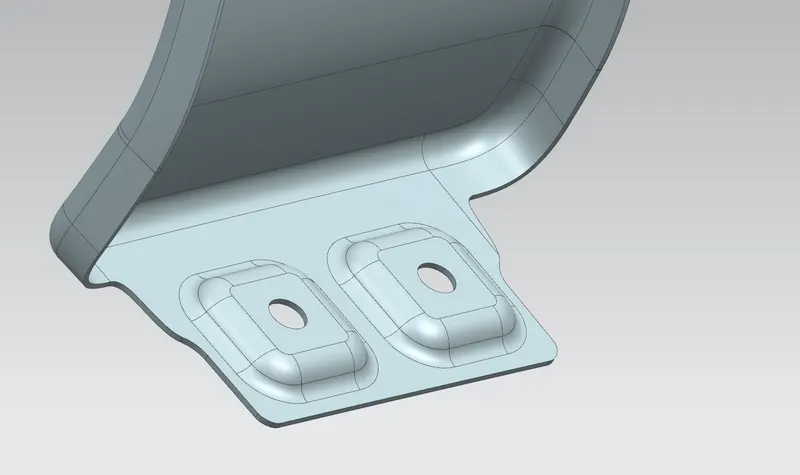
2.3 Sill Mounting Area
Sill mounting area is the fender part where the floor body of the car is connected to it with the fasteners near the bottom of front doors. Embosses are provided for proper seating the fasteners.
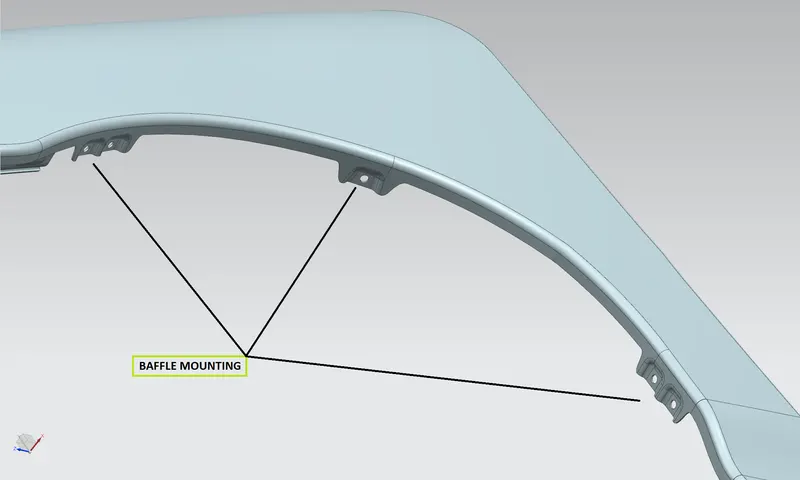
2.4 Baffle Mounting Area
Baffle mounts are provided to attach the splash protectors which act as a barrier against the debris and other particles flying towards the engine room and passenger compartments.
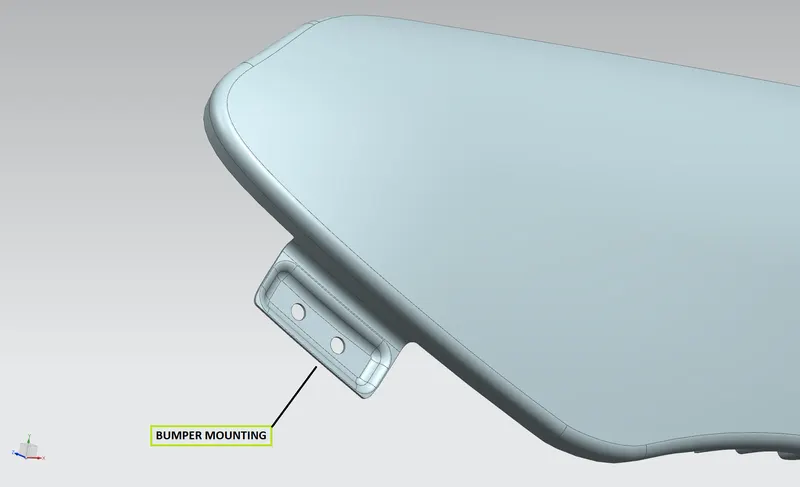
2.5 Bumper Mounting area
Bumper mounting is located beneath or near to the headlight area, which is provided to mount the bumper of the car.
Fender design with all important mounts
Conclusion
All the mounting regions are designed and created as per the manufacturing requirements using Siemens NX CAD plm software.