Fender Design Challenge
Objective:
As aim of this assignment we’re going to see how to design the fender in NX 12 and how our approach of design should be.
What is fender:
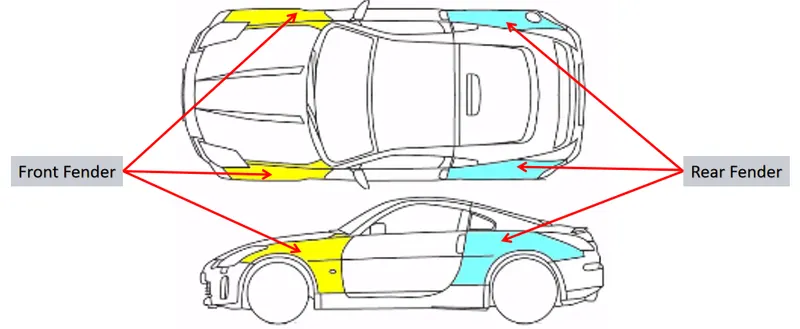
The fender is the metal structure that extends between your front door and your front bumper, providing necessary protection for your front wheels. If your fender has been damaged, you should have it repaired right away to ensure that you further damage your tires or car body while you're on the road, as well as there’re couple of types are there in type of fenders that is
- Full bumper and
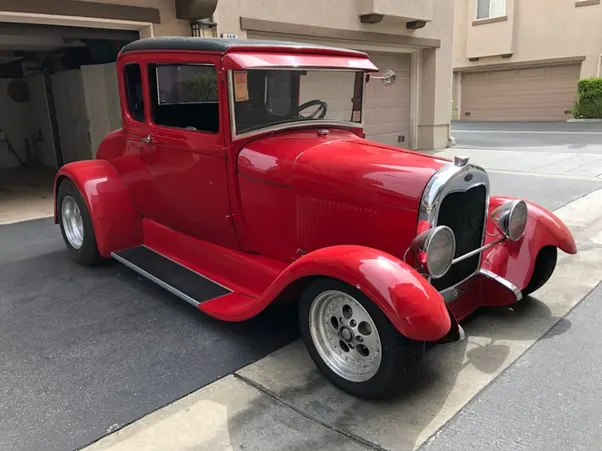
The full bumper type fender was used in old cars, it covers the full area until the front lighting. But it has a lot of sheet metal material which is unnecessary and increases the weight of the fender. These type fenders are no longer used in the automobiles.
- Half bumper

Half bumper fender is used because the waste of material is less & can produce two fenders at the same time by slightly increase the raw sheet. and to reduce the weight & cost mostly bumper fender are been produced. It is the area which the fender is to be attached to engine housing through bolts.
Mounting regions of fender:
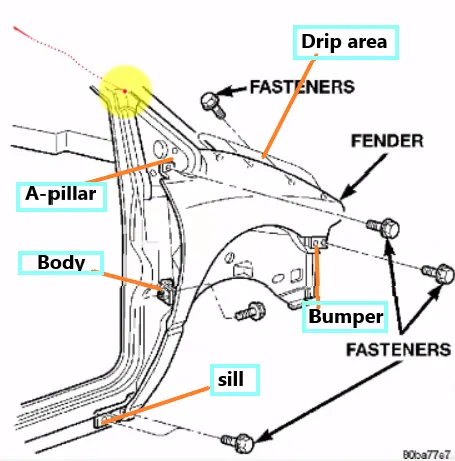
There're five regions are there in every automotive vehicle to mount the fender and that are
- Drip area
- Sill area
- A pillar area
- Bumper area and
- Body side area
- Baffle mount area
Design procedure:
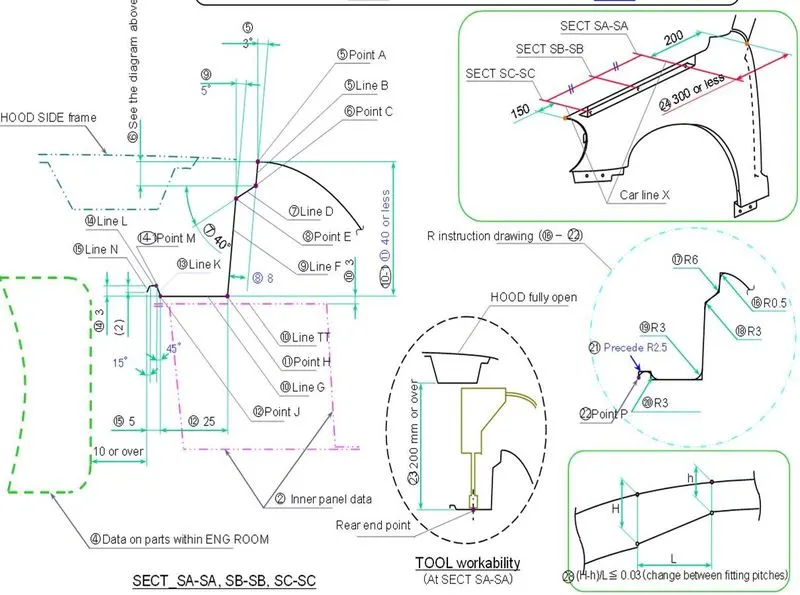
Given data: Here we’ve got a master section of bumper area from our styling team we’re going to design the strengthen components such as drip area, sill, bumper, body side, and fender areas.
Class A surface:
Other than the master section we’ve also provided class a surface from the styling team.
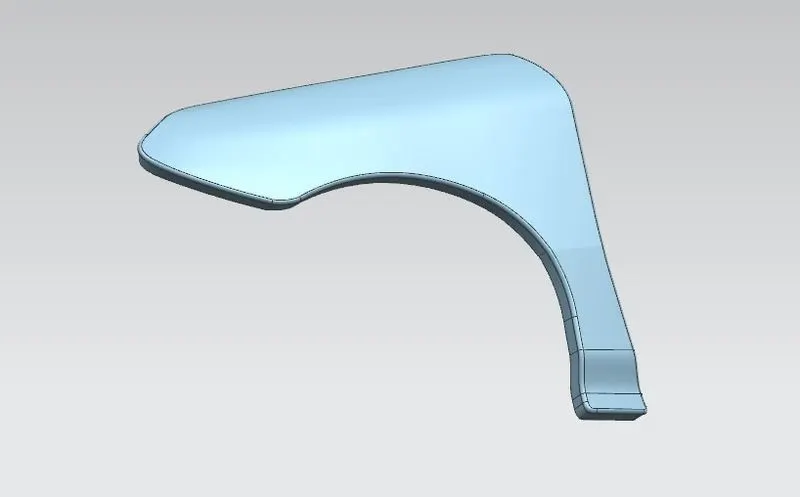
Drip area:
In this case drip area is where we must’ve been focused on because drip area considered as most important because drip area which is mounting the bumper near the engine bay so we should take all the constrains to our consideration before we move ahead.
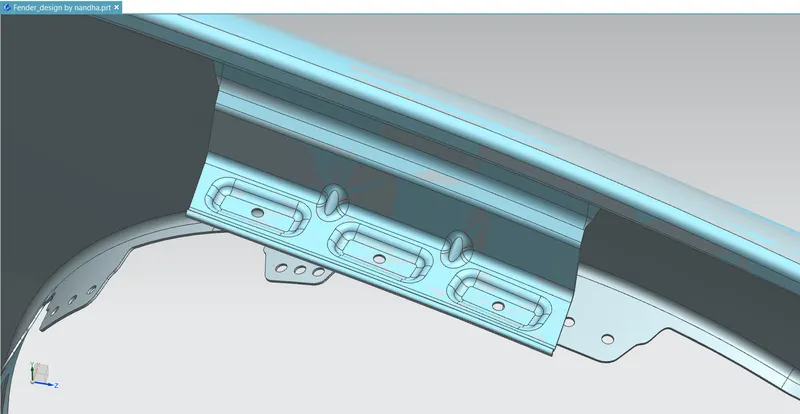
Sill area:
This one ‘s created by extend the sheet and creating emboss and trim off the other sharp corners.
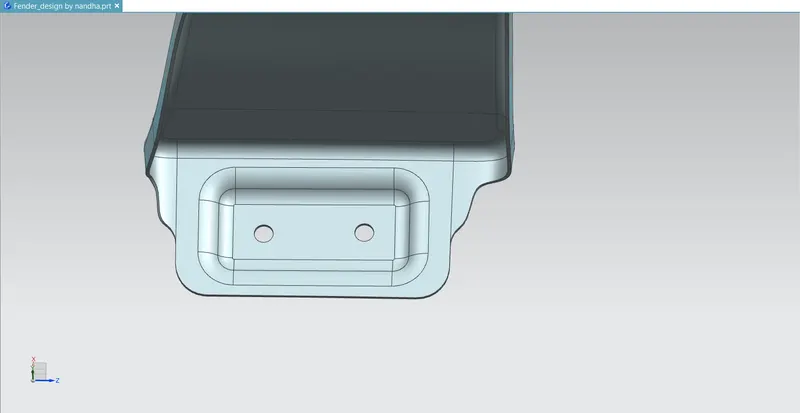
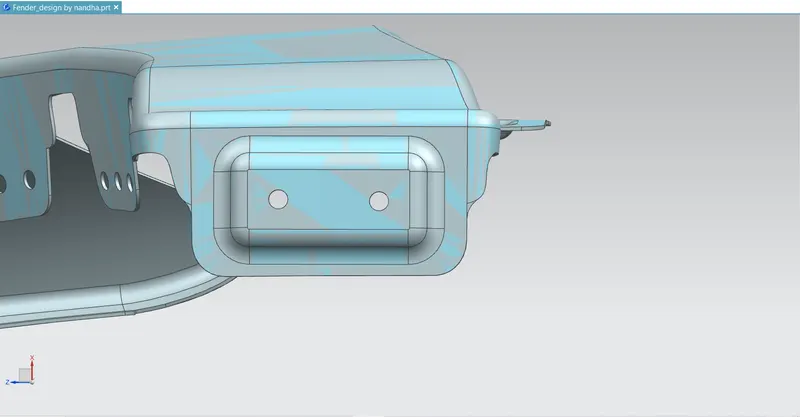
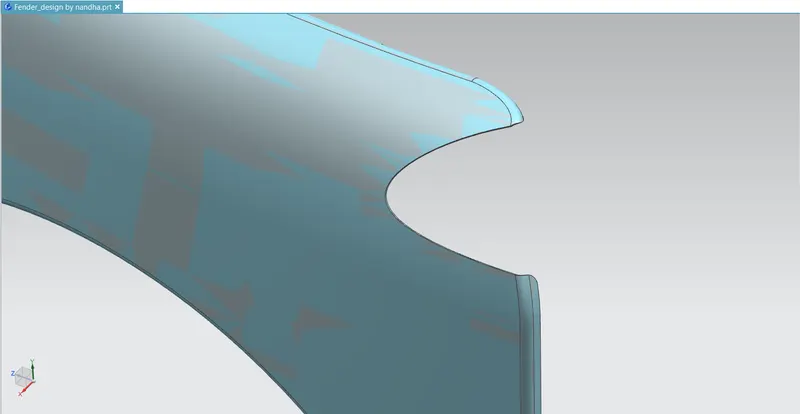
A pillar area:
This one is also created by the same process then it’s kind of tricky part, but in this case since I've made some changes on itself it will look as flat surface because if we create the some blends this surface will become as curvy so there will be an issue for that surface to get merge with the other surface and it does take a toll on aesthetic of the vehicle and aerodynamics as well.
Bumper area :
This area of mounting is consulting with bumper design team and create as per theirs's norms and requirements.
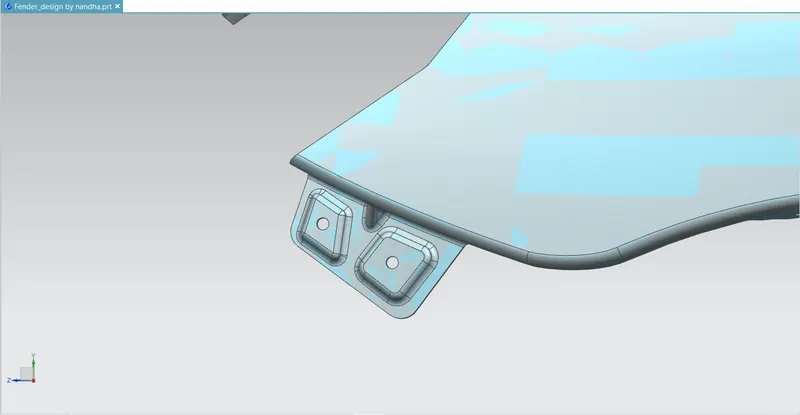
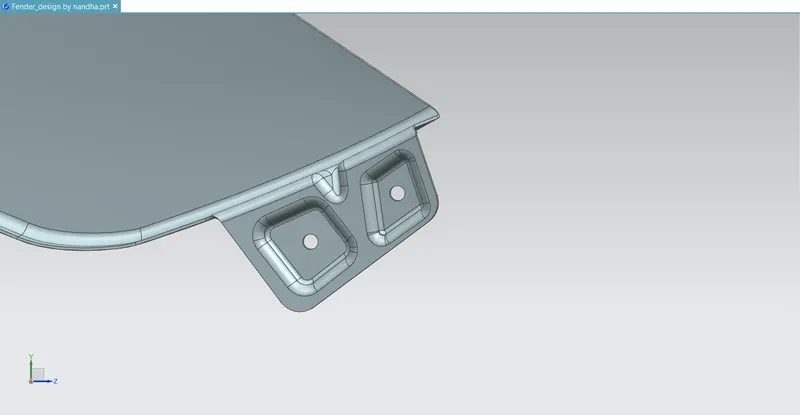
Body side area:
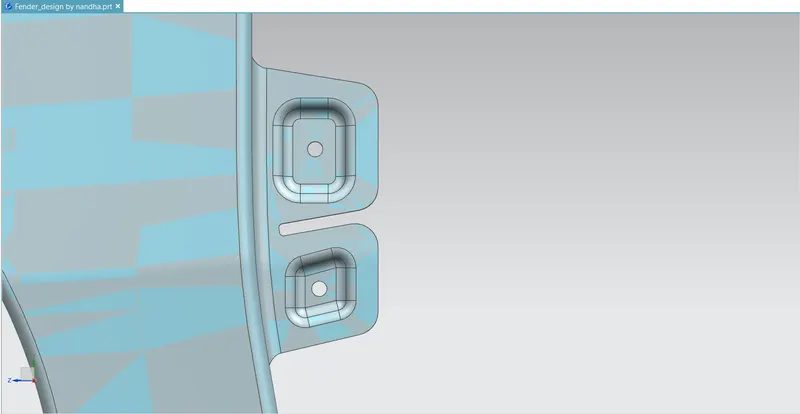
This one is actually will get mounted with the body of the vehicle and it does have around couple of emboss with couple of mounting holes.
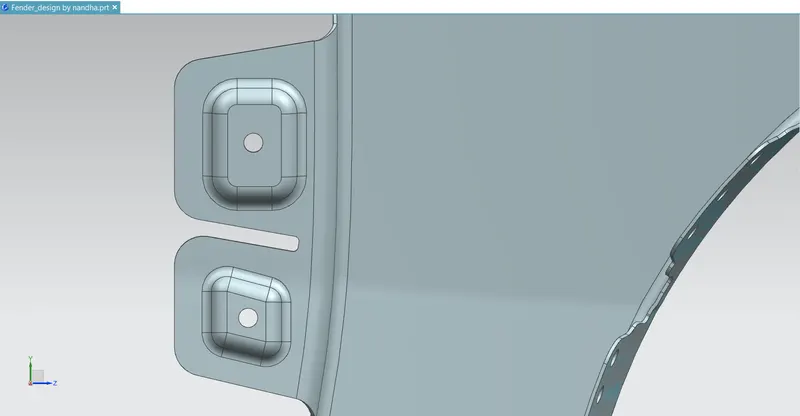
Baffle mounting area:
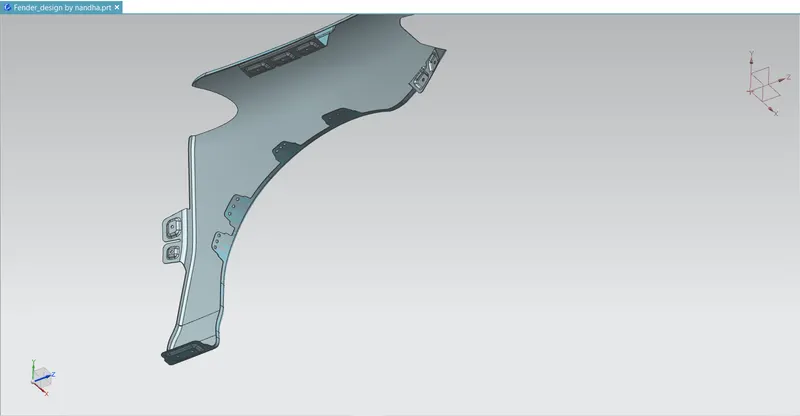
In this region we're going to create the hole which are respected to the requirements and tolerence for mounting purpose.
About my own perspective in this design process :
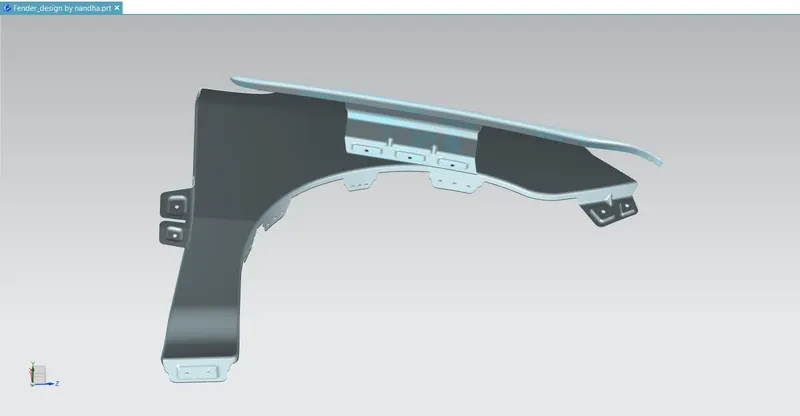
As you see there will be cuts on my fender, I made this because I've focused a lot on weight reduction and easy mounting that’s the reason behind, I'd create these cuts over the fender.
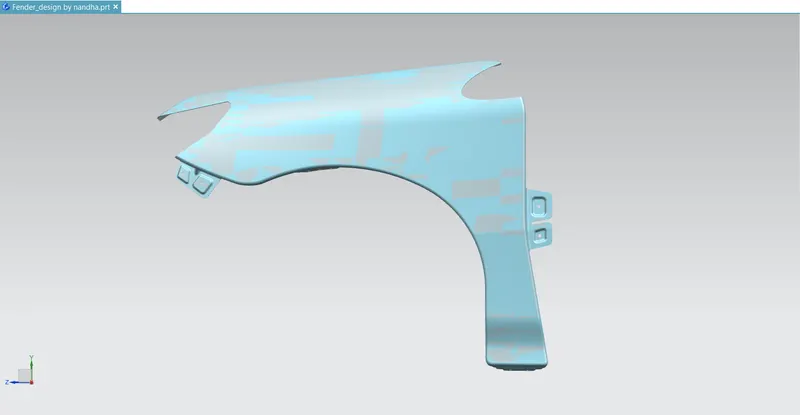
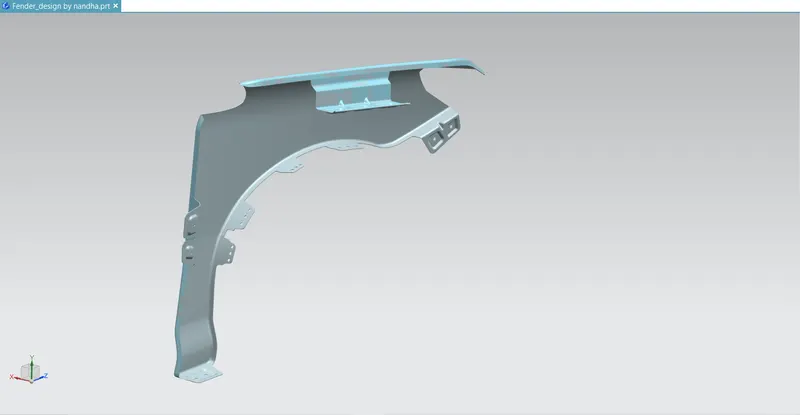
And over all view of the fender after we complete rendering:
Conclusion:
We’ve designed the fender as per the requirements of styling team and with required mounting regions as flawlessly, as well as i've attached the compressed zip folder of the part file from the end of myself.