Fender Design
FENDER DESIGN
Aim:
To develop the front Fender Design using Nx cad following the design parameters.
INTRODUCTION
Fender:
In the context of automobiles, a fender refers to the part of the bodywork that covers the wheel well and protects the vehicle from mud, rocks, and other debris thrown up by the wheels. Fenders can be made from a variety of materials, including metal, plastic, and composite materials.
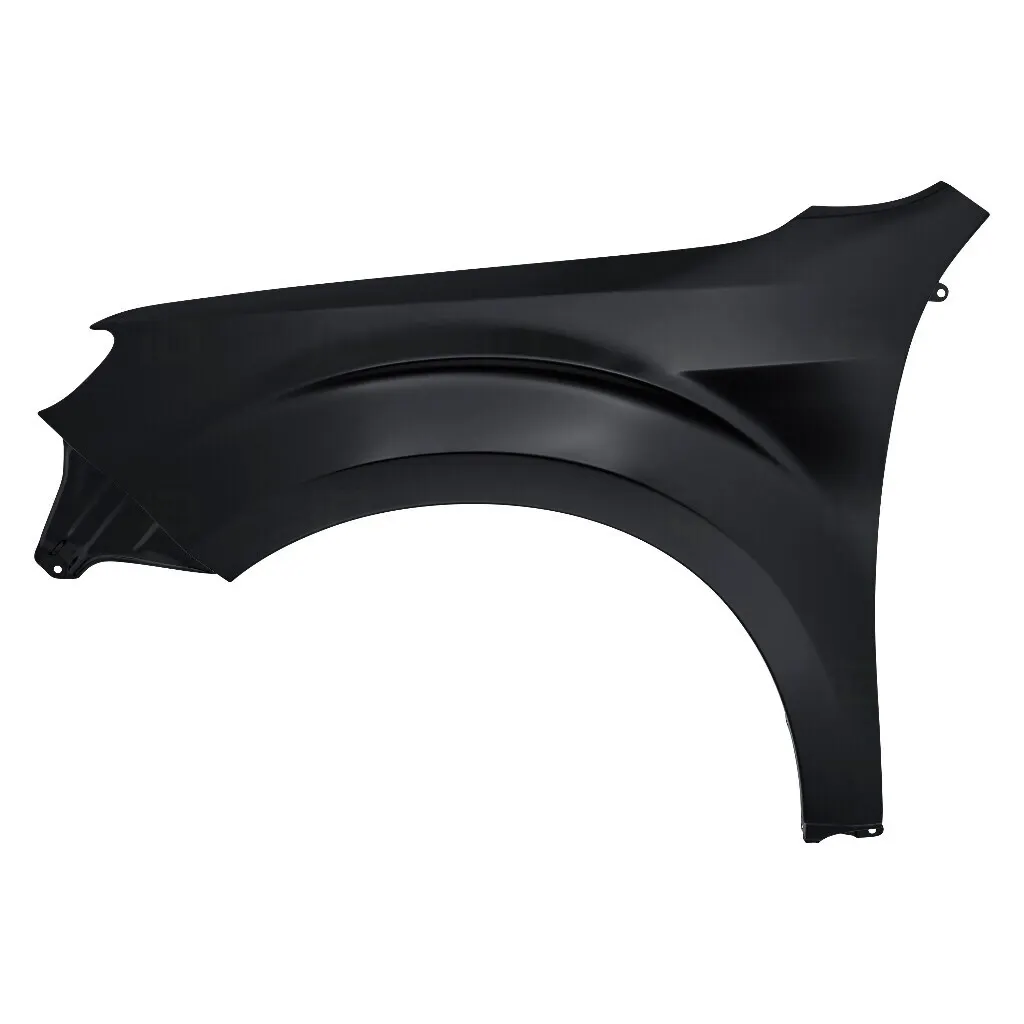
In modern cars, fenders are often integrated with other body panels and may be difficult to replace individually. In some cases, minor damage to a fender can be repaired through a process called "paintless dent removal," where a skilled technician uses specialized tools to massage out dents and dings without needing to replace the entire fender.
In classic cars, fenders were often detachable and could be easily removed and replaced for repair or customization purposes. Some classic car enthusiasts enjoy restoring and modifying fenders to achieve a particular look or style.
Overall, fenders play an important role in protecting cars from damage and contribute to the overall aesthetic of a vehicle. In the world of automobile design, fenders can vary widely in shape and size depending on the style and purpose of the vehicle.
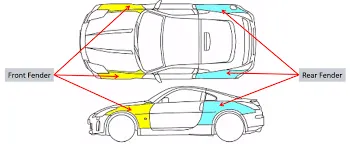
Fender Design and its different mounts
In cars, the term "fender" usually refers to the panels located above the wheels that help protect the vehicle's body from debris and impacts. These fenders are typically welded or bolted onto the car's body, and are not removable without some modification to the vehicle. However, there are some aftermarket fender designs that can be mounted in different ways. Here are some common fender designs and their mounting options:
-
Wide Body Fenders: Wide body fenders are designed to accommodate larger wheels and tires, and are often used in car modifications to give the car a more aggressive look. They can be mounted in several ways, including using bolts, screws, or adhesive tape.
-
Fender Flares: Fender flares are add-ons that attach to the car's fenders to extend their coverage and provide extra clearance for larger wheels and tires. They can be mounted using bolts, screws, or adhesive tape.
-
Fender Vents: Fender vents are decorative elements that are installed on the car's fenders to improve airflow and reduce heat buildup in the engine bay. They are typically mounted using screws or adhesive tape.
-
Fender Mirrors: Fender mirrors are small side mirrors that are mounted on the car's fenders instead of the doors, a popular design feature in some Japanese and European cars. They are typically mounted using bolts or screws.
Overall, the mounting options for car fenders are limited compared to marine fenders, as they are an integral part of the car's body. However, aftermarket fender designs can provide some versatility in terms of mounting options, and can be a popular choice for car enthusiasts and modifiers.
Manufacturing process of Fender design
The manufacturing process for fenders on cars can vary depending on the specific type of fender and the materials used. Here is a general overview of the manufacturing process for a typical metal fender:
-
Sheet Metal Cutting: The first step in the manufacturing process is to cut the sheet metal into the desired shape for the fender. This is typically done using a laser cutter or a stamping press.
-
Metal Forming: The cut sheet metal is then formed into the final shape of the fender using a metal forming process. This can involve bending, folding, or pressing the metal into shape using specialized tools and machinery.
-
Welding: Once the metal has been formed into the shape of the fender, it is then welded together to create a solid and durable structure. This is typically done using MIG or TIG welding techniques.
-
Surface Preparation: After the welding is completed, the fender is cleaned and prepared for painting. This involves sanding down any rough edges or imperfections, and applying a layer of primer to the surface of the fender.
-
Painting: The final step in the manufacturing process is to paint the fender using a spray booth. The fender is typically painted with a base coat, followed by a clear coat to protect the finish and provide a glossy shine.
Overall, the manufacturing process for fenders on cars involves a combination of metal cutting, forming, welding, and painting techniques to create a finished product that is both durable and aesthetically pleasing.
Design Parameters
The design parameters for fenders on cars can vary depending on several factors such as the make and model of the car, the intended use of the fender, and the design preferences of the manufacturer. However, here are some common design parameters that are considered when designing fenders for cars:
-
Wheel Size: Fenders need to be designed to accommodate the size of the wheels on the car. This involves ensuring that there is enough clearance between the fender and the wheel, so that the wheel can rotate freely without rubbing against the fender.
-
Vehicle Width: Fenders also need to be designed to match the width of the vehicle. This involves ensuring that the fenders provide adequate coverage for the wheels and tires, while also maintaining a streamlined and aerodynamic shape.
-
Material Selection: The material used for the fender can have a significant impact on its performance and durability. Common materials for fenders include metal, plastic, and fiberglass, each of which has its own advantages and disadvantages in terms of strength, weight, and cost.
-
Impact Resistance: Fenders need to be able to withstand impacts from debris, road hazards, and other sources of potential damage. This involves designing the fender with sufficient strength and stiffness to absorb impacts without cracking or deforming.
-
Aesthetics: Fenders also play a key role in the overall appearance of the car. This involves designing the fender with a shape and style that complements the rest of the car's design, while also incorporating any desired aesthetic features such as vents, flares, or trim.
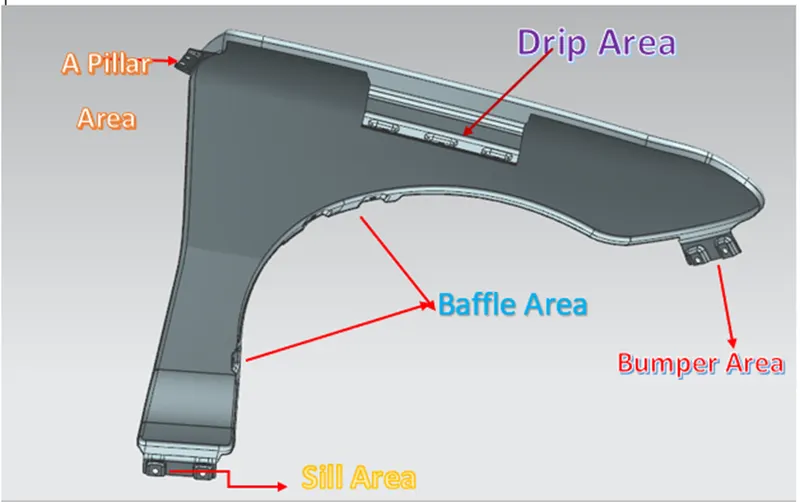
PROCEDURE
Given Fender design:
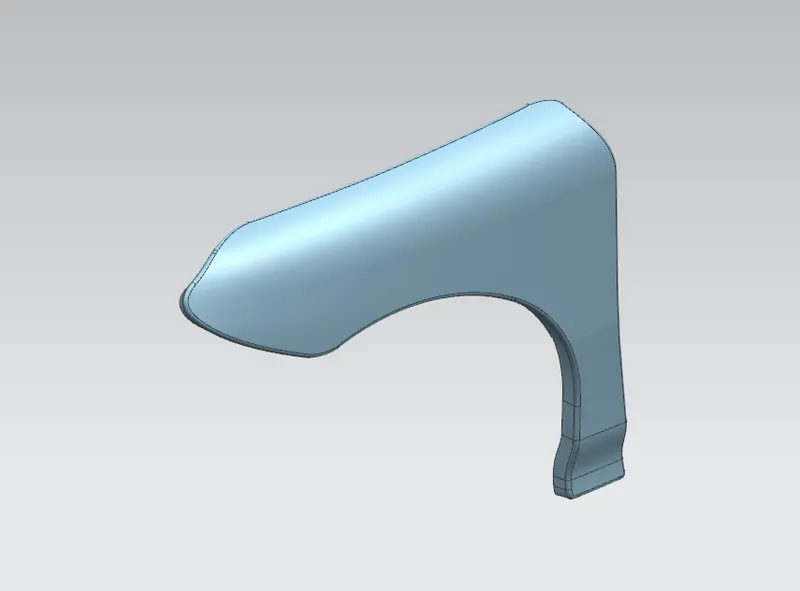
Design Requirements:
- To increase the strength, embosses are given.
- For simple panel manufacturing, smooth curves are developed.
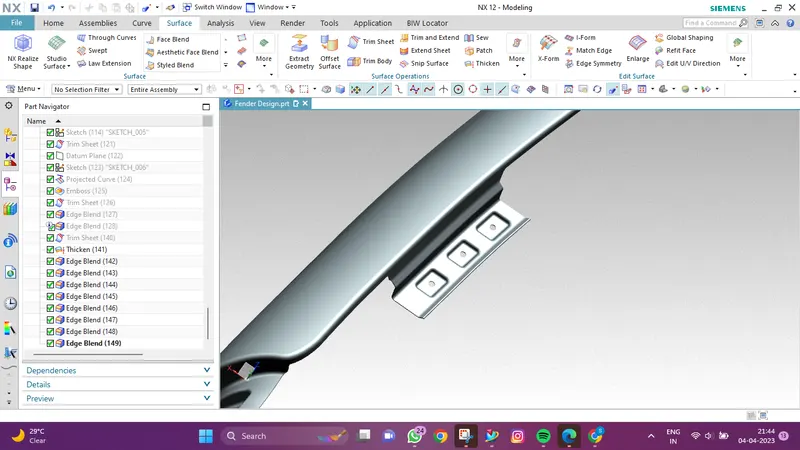
- Ribs are offered to the drip area attachment to provide structural support and added strength.
- Keep a 10mm buffer between the smooth surface and the fastner holes.
- In most regions, all fillets should keep a radius of 2 or 3.
- Fender thickness is 0.75 millimetres.
Drip Mounting Area:
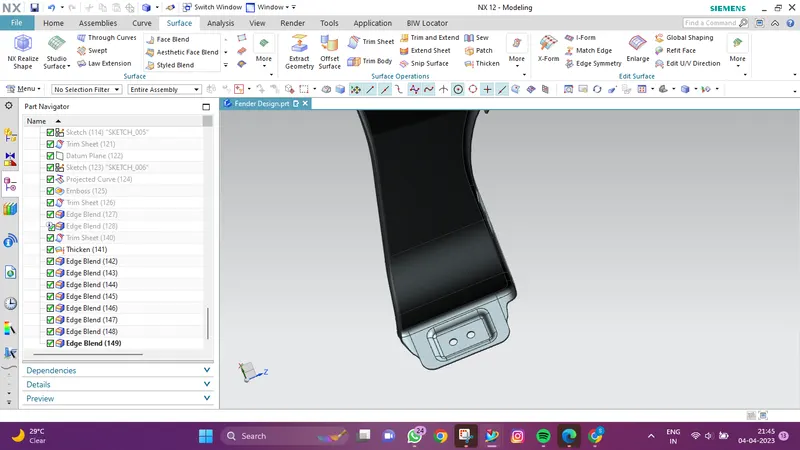
Sill Mounting Area:
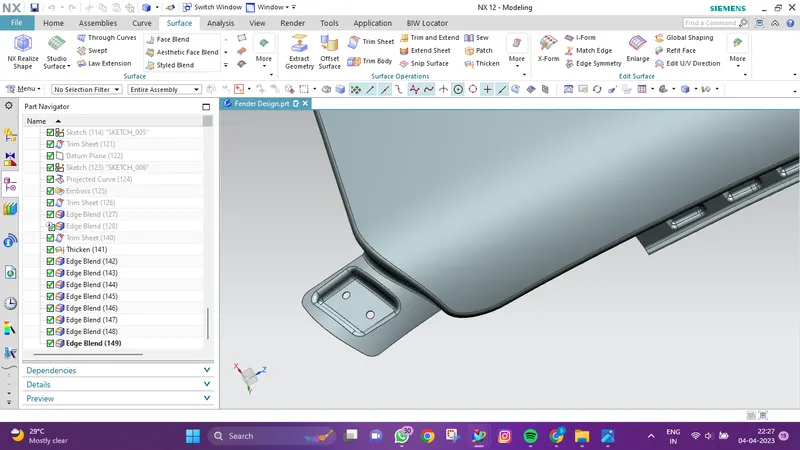
A-Pillar Mounting Area:
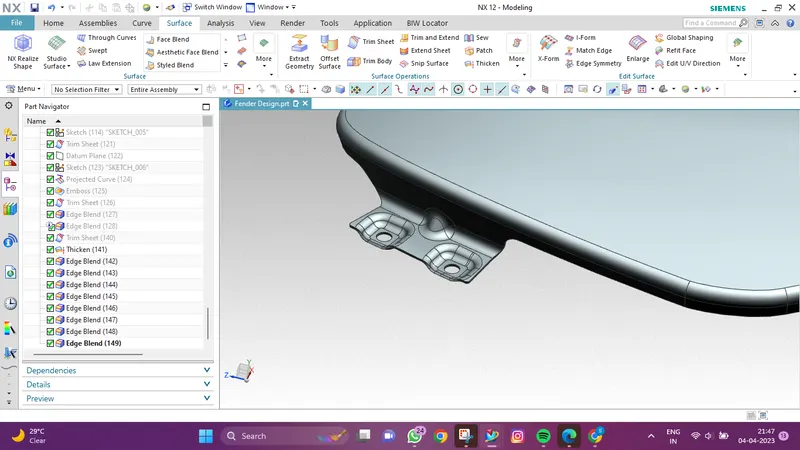
Bumper Mounting Area :
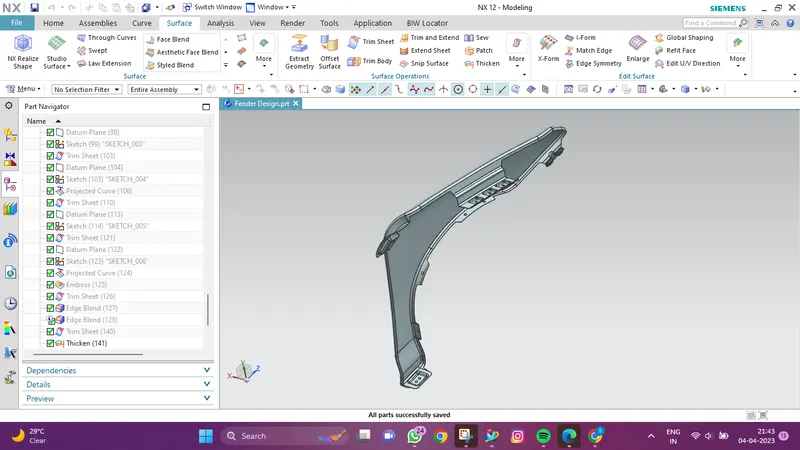
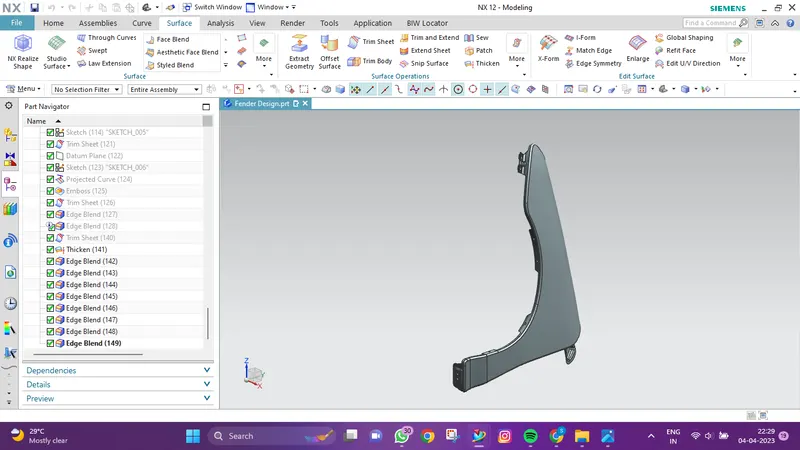
Final Design:
Conclusion
Following the design guidelines and mastersection, we created a front fender with mounting points.