Fender Design
Objective:
To design a front fender with all mounting features as per Engineering standards.
Fender:
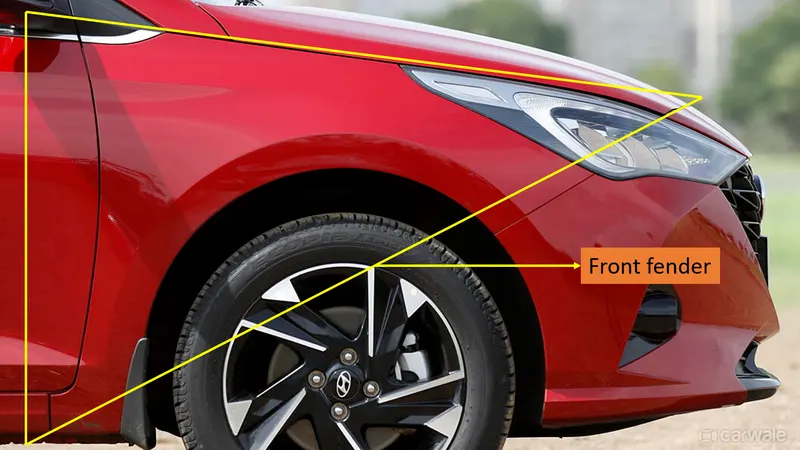
A fender is a curved panel that sits above the wheels of a car, covers the engine component, and runs from the bumper to its doors. It protects the car by picking up all the dirt and other things on the road, which would otherwise damage the car.
There are two types of fenders used in cars. They are,
- Full bumper type and
- Half bumper type.
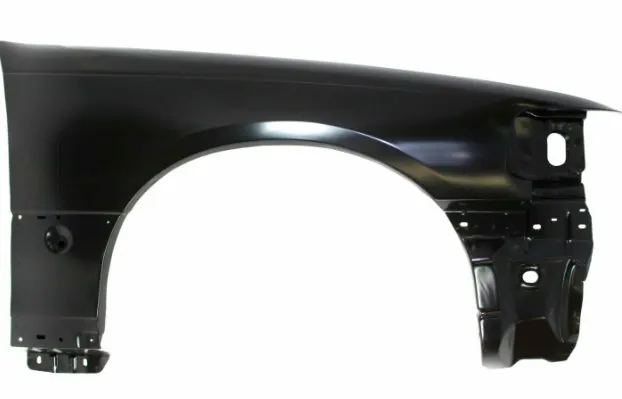
Full bumper type:
In full bumper type, the fender covers the entire wheel area from the front to the body side. This type is widely used by the OEMs and automotive industries in the early days.
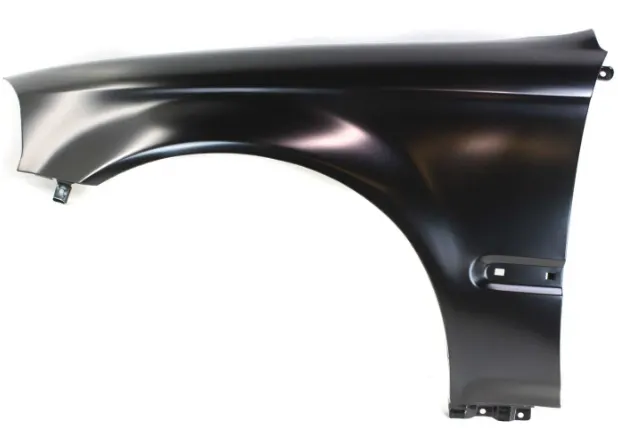
Half bumper type:
In the half bumper type, the fender covers only 1/3 times the wheel area and this reduces material wastage and weight of the car with no considerable loss in safety.
Design considerations:
1. A Fender is a styling surface that needs to be visually pleasing for the customer.
2. Fender is designed to hide all the fastening or mounting zones.
3. The surface is designed to be smooth to enable smooth airflow and reduce drag
4. A fender should have all of its mounting area to be flat to ensure its alignment.
5. Since these are sheet metal and undergo forming operation there is a tendency of spring back effect. So, to improve strength, darts are provided to restrict spring back issues.
6. These fenders need to be designed to protect pedestrians from having direct contact with the wheel.
Manufacturing process:
- It involves sheet metal forming operation with the design of punch and dies. The cut sheet of the required size is placed and formed to the required design.
- The flush is machined or laser-cut to desired cutout.
- The required holes are later punched at all desired positions.
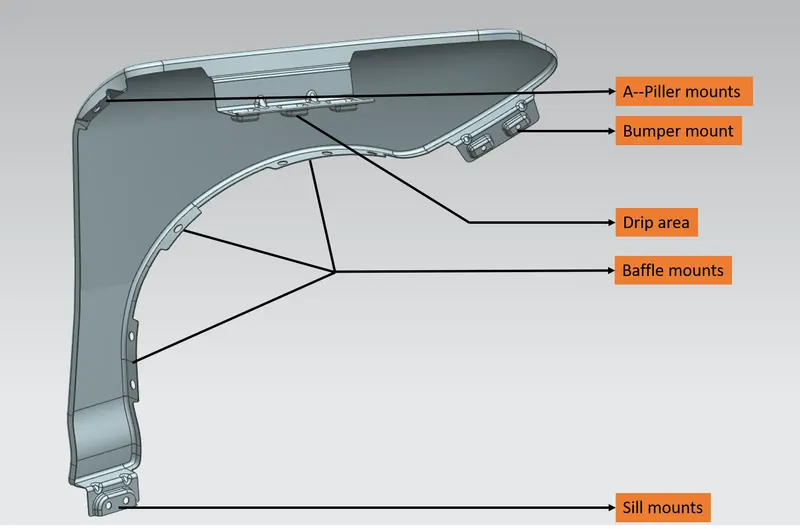
Different Mountings of Front fender:
- Drip Area
- A-Pillar Mount
- Sill Mount
- Bumper Mount
- Baffle Mount
Drip Area:
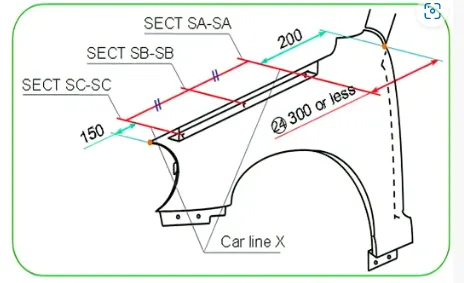
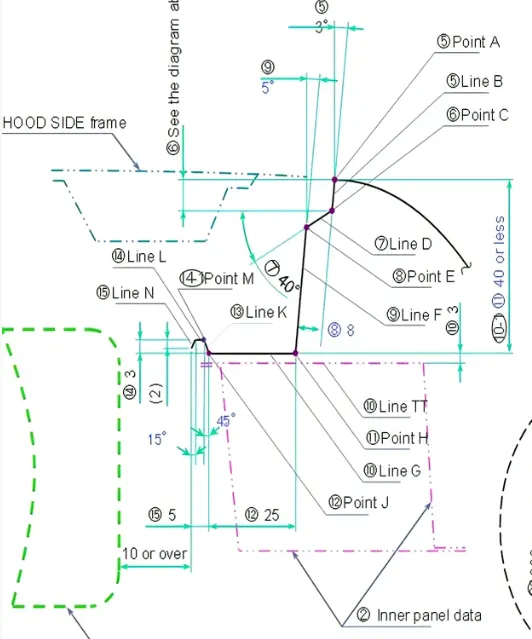
The drip area is the place where the fender mounts to the engine compartment. The drip area is designed with some constraints to ensure the assembly of the front light housing and allocate space for the wiper mount. To allocate them, an amount of space is sacrificed in front and back of the drip area.
Procedure:
- The drip area mounts inside and is accessible when the hood is opened.
- The curve on the surface is used to ensure smooth curvature for the flanges.
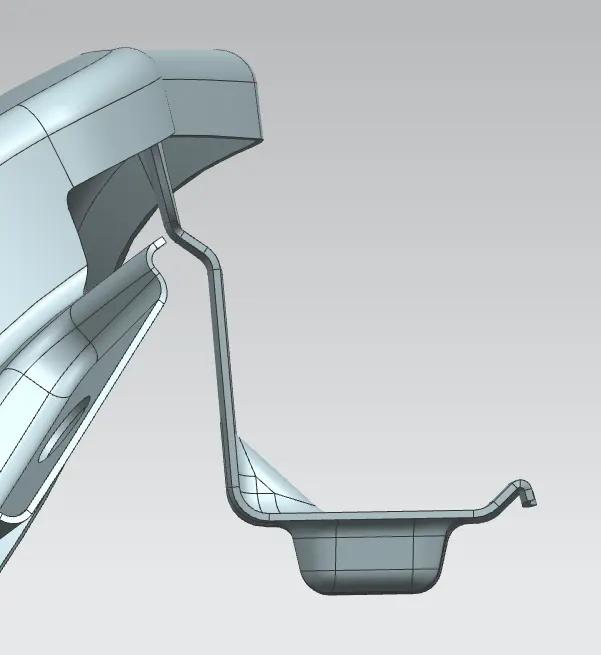
- The law extension tool is used to make a profile of the drip area at the required angle.
- The reason behind the specific angles is to hide the visibility of inner components and fasteners from the naked eye.
- The depth of the drip area is maintained at less than 60 mm to avoid the spring back effect.
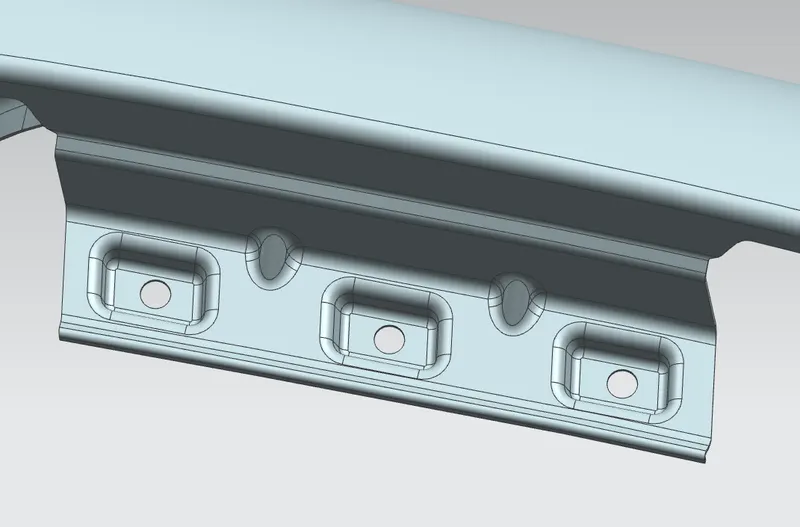
- Darts are provided at required areas to improve the local strength of the mounting portions.
- The mounting areas are embossed to maintain flatter mounting areas(Depth between 5-7 mm).
- All sharp corners are rounded to a specific radius.
A-Pillar Mount:
It is a place where the finder connects the A-pillar. A-Piller is the area that connects the body with the roof.
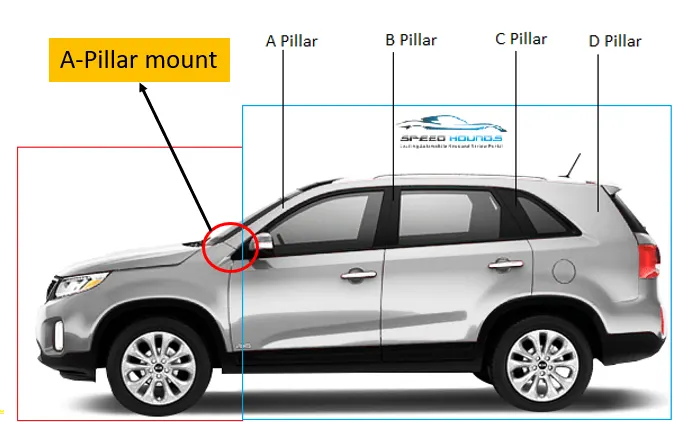
Procedure:
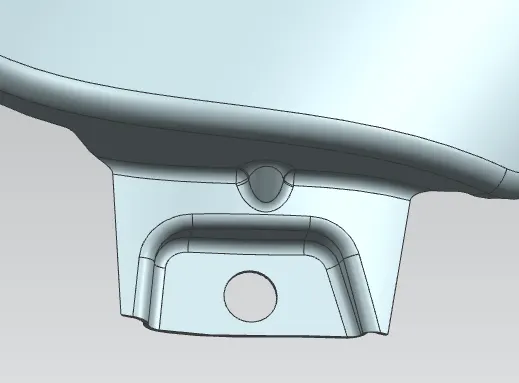
- The curve on the surface tool is used to trim the sharp edges
- The law extension is developed at a specific angle normal to the mounting area.
- Open emboss is developed using a stop-at-intersection option
- Darts are provided at the required spots
- All sharp corners and edges are rounded off
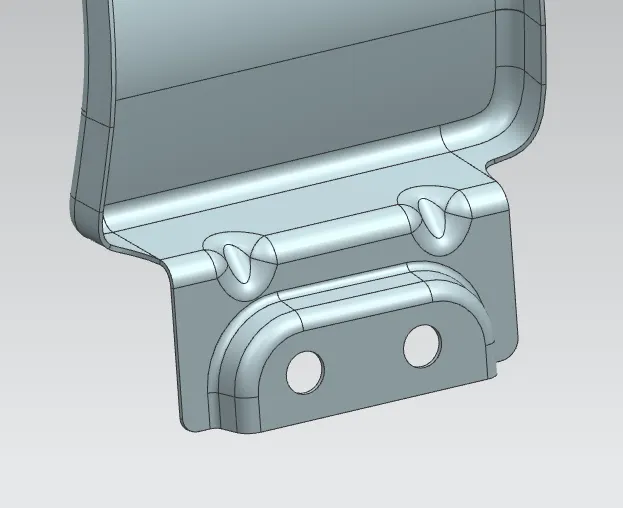
Sill Mount:
The sill mount connects the fender with the rails of the car.
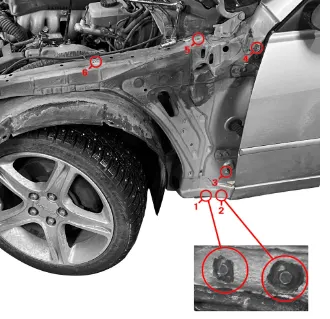
Procedure:
- Using the curve on the surface and the law extension tool, the desired surface is extended in the required direction.
- Create a datum plane using inferred point and offset between 5-7 mm for embossing.
- Create emboss using the designed profile.
- Use the trim sheet tool to remove the mounting hole surface.
- Sew the surfaces and create darts where required.
- Round all sharp corners using the blend option.
Bumper Mount:
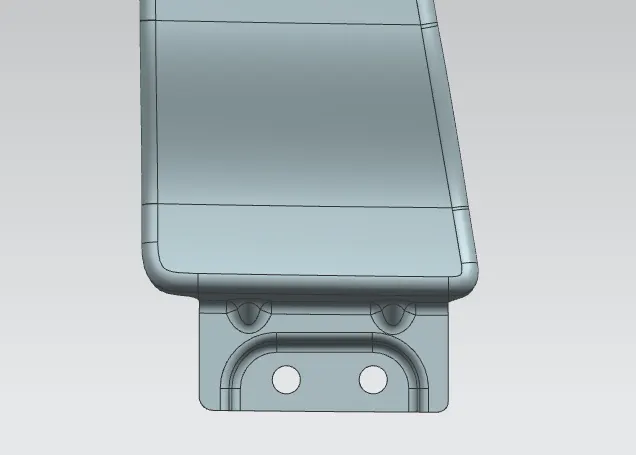
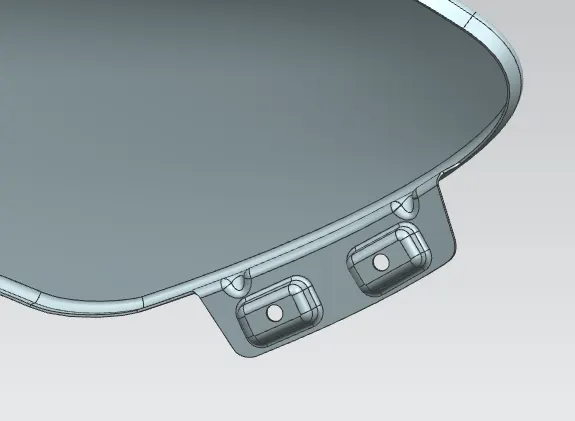
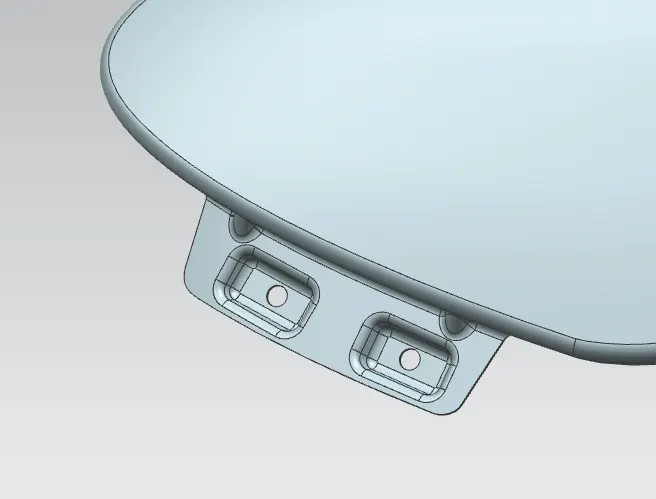
Bumper mounts as the name suggests, connect the fender with the bumper.
Procedure:
- The bumper mounts extend outward the fender and are made accessible for serviceability.
- It also involves the usage of the same tools like law extension, embossing, etc.
- Darts are provided to improve strength and avoid the spring-back effect of sheet metal.
Baffle Mount:
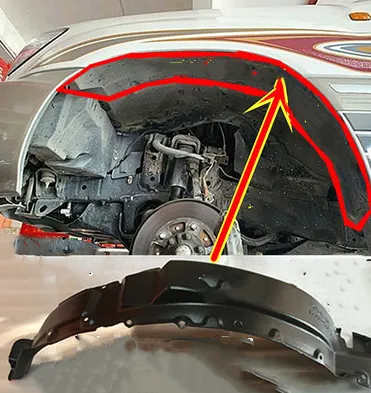
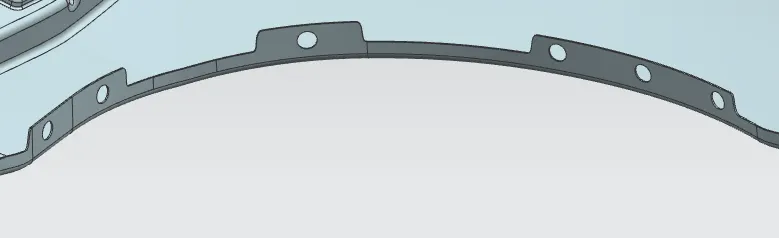
Baffle plate mounts are provided to mount the splash guard in place to protect the engine compartment from debris on the road.
Procedure:
- The baffle plate mounts are usually made without embossing features because the liner has some flexibility to mount and is designed with plastic.
- The sheet metal embossing makes the manufacturing cost high and baffle mounts are not critical areas for providing a flat embossing area.
- The tools used are similar to other mounts like curve on the surface tool, and trim sheets.
- The mounting holes for the splash shield are provided at the required regions.
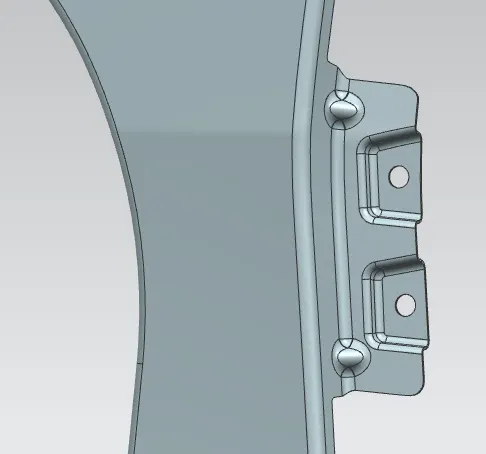
Door mounting:
In addition, another mounting to the door side mount is provided.
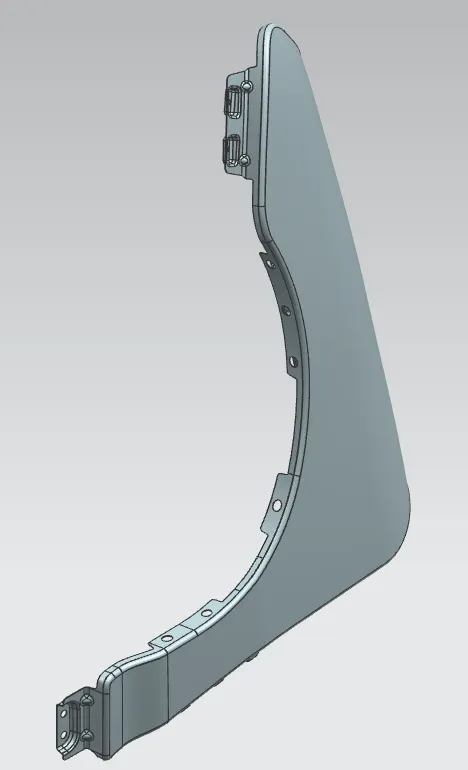
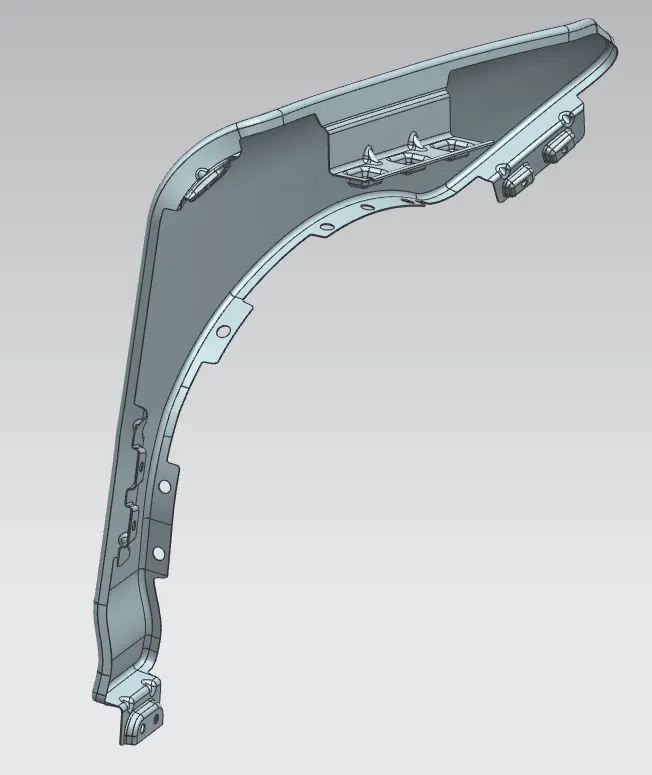
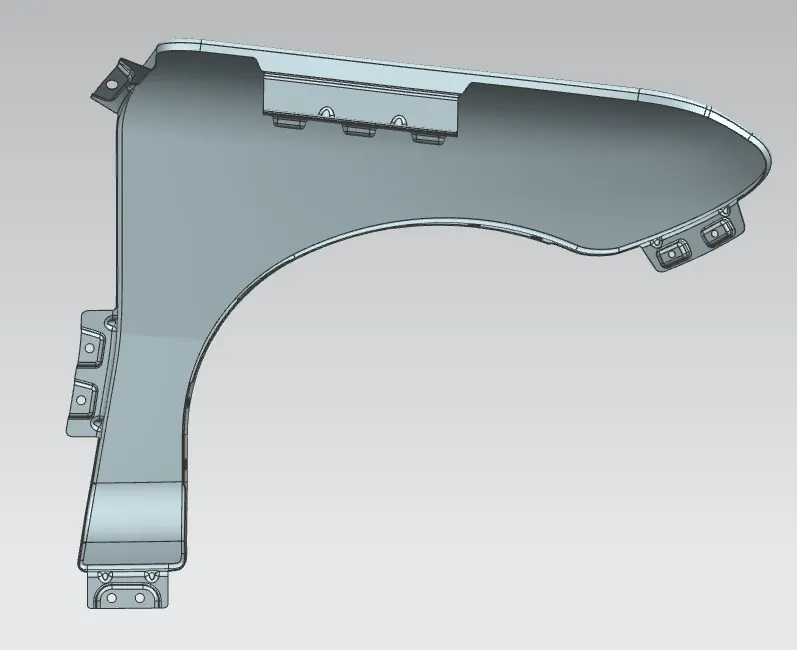
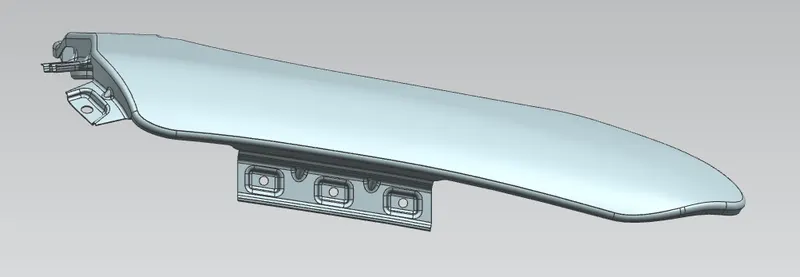
Views of Front fender:
Isometric:
Front view:
Top view:
Conclusion:
From the provided master data of the front fender, the actual part with all recommended mountings like drip area, sill, A-pillar, bumper, and baffle mounts are provided and thickened to 0.75mm using NX. The part is designed as per the design guidelines provided.