Fender Design
Car Fender Design-
Objective-
The main objective of this project is to design a fender using a new age design software - NX - CAD
Design-
Fender is the part of an automobile, motor cycle or other vehicle body that frames a wheel well (the fender underside). Its primary purpose is to prevent sand, mud, rocks, liquids, and other road spray from being thrown into the air by the rotating tire. Fenders are typically rigid and can be damaged by contact with the road surface.
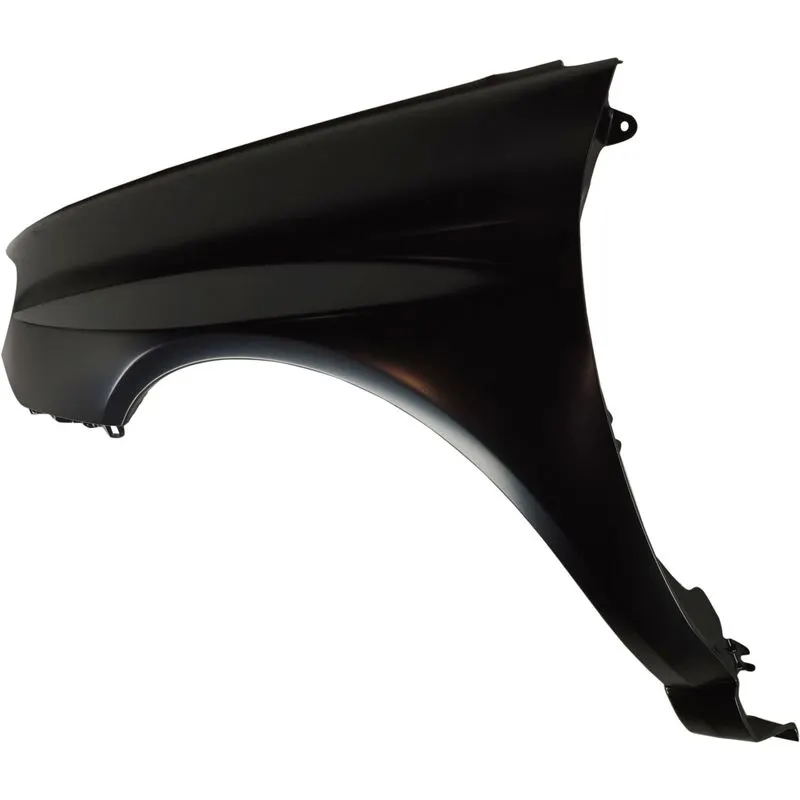
Sticky materials, such as mud, may adhere to the smooth outer tire surface, while smooth loose objects, such as stones, can become temporarily embedded in the tread grooves as the tire rolls over the ground. These materials can be ejected from the surface of the tire at high velocity as the tire imparts kinetic energy to the attached objects. For a vehicle moving forward, the top of the tire is rotating upward and forward, and can throw objects into the air at other vehicles or pedestrians in front of the vehicle.
INTRODUCTION :
Design of any product starts from an requirement . The design engineer sketches the product based on the the requirement . Then the 2D sketch with the proper dimensions is converted into the 3D model using the advanced CAD software's . The another important thing in the design is that , every product that is designed should be able to manufactured . so the role of the design engineer is to design the product that can be easily manufactured and with less cost effective . This is the place where the Design for manufacturing [DFM] and Design of assembly [DFA] takes a role while developing any product . The process of development of design carries on until the design satisfies the customer needs .Here in this project the product that we are going to develop is a car fender
FENDER :
The main purpose of the fender is to prevent sand,mud, rocks,liquids and another road spray from being thrown into the air by the rotating tire .
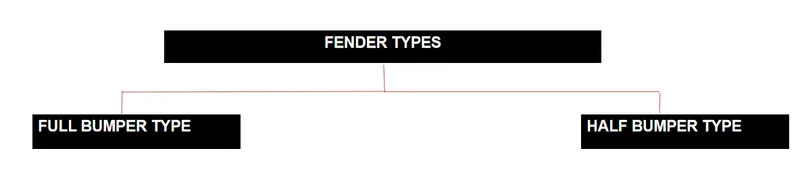
TYPES OF FENDERS :
OBJECTIVE:
In this project we are going to design the mounts for the Front fender such as drip, sill, bumper, A-pillar, cowl and baffle for this we are going to design mounts.
FEATURES/TOOL USED:
- SKETCH
- OFFSET IN FACE
- CURVE ON SURFACE
- BRIDGE CURVE
- EMBOSS
- TRIM SHEET
- LAW EXTENSION
- FACE BLEND
- EDGE BLEND
- DART
- THICKEN
DESCRIPTION:
In this project as we said we are going to design the front fender mounts.
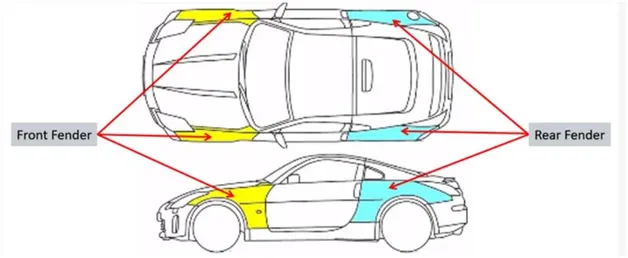
Front and rear fender
We have two types of fender full and half bumper type in the below image you see that.
Full and half bumper type
So now a days half bumper fender is in use as it reduce the cost of manufacturing of it as compare to full bumper type.
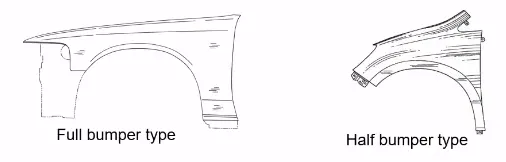
- Presently we are using the half bumper type , the reason for choosing the half bumper type is that when we choose the full bumper type the blank used for creating it is very large and also has the lot of wastage , but in the case of the half bumper type we have the possibility to reduce the scrap . This is what we called as scrap management
- In half bumper type we reduce the usage of the steel material and uses the lots of plastic on the bumper which in term decreases the cars weight and increases the performance
And we have been provided the master sketch for the drip area mounting.
FENDER WHEEL ARCH :
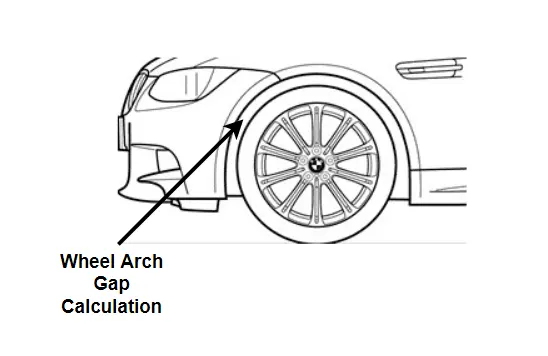
- Fender wheel arch is having some standard specifications , for example if you see the car from the front, if you see the wheel outside fender it does more chipping and it causes lots of damage to the pedestrians and also to the car
- In order to maintain the pedestrians safety we have to position the tire wheel inside the fender
- For the European requirement the clearance between the wheel and the fender outer most skin is 5mm
- This requirements changes from country to country based up on the road conditions
ASSEMBLY :
There are two types of assembly , they are
- Bottom-up assembly
- Top-down assembly
Bottom -up assembly: The bottom-up assembly is the most preferred approach for creating assembly models . In this type of assembly the components are created in part design work bench ( As nx cad part) file. Parts are conceived in assembly design workbench using product structure tools . After inserting each component,constraints are applied to position them properly in the 3d space with respect to the other components. This assembly is preferred for large assemblies, especially those having intricate individual components .
Top -down assembly :
In the top assembly design approach, components are created inside the assembly design workbench . There fore , there is no need to create separate part files of the components. This design approach is completely different from the bottom-up design approach. Here you have to create the product file first and then one by one create all the components. Note that even then the parts are created the product file , they are saved and opened individually one by one when they are needed . Here the construction and the assembly takes place simultaneously .
MOUNTING REGIONS ON FENDER :
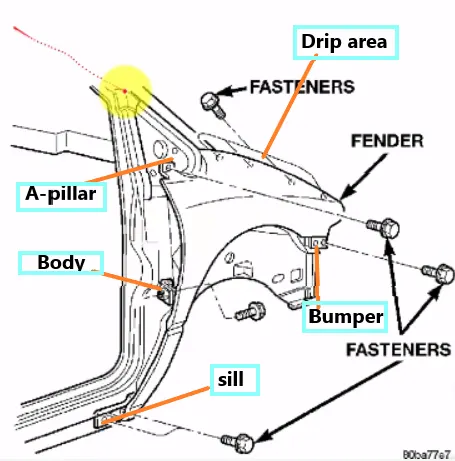
There are 5 mounting regions on the fender , they are
- A- pillar mounting
- Body mounting
- Sill mounting
- Bumper mounting
- Drip mounting
Manufacturing-
Manufacturing process for a car fender. The manufacturing process includes the following steps that firstly, unfolding and shearing are carried out on a plate, wherein a proper cold roll specification is selected at first, a cold roll is unfolded, and then the unfolded cold roll is sheared to an iron plate of the corresponding size according to production material specifications; secondly, oil pressing and punching are carried out, wherein the iron plate is extended at first, then side shearing and punching are conducted on the iron plate, folding and shaping are carried out on the iron plate, and finally reshaping is carried out on the iron plate; thirdly, small first parts of the fender are machined, wherein first of all, the iron plate is punched to a needed outer contour blank, then the iron plate completing the outer contour blank is further shaped, and the iron plate is punched at last; fourthly, installation and welding of a metal plate are conducted.
The manufacturing process for the car fender is simple and high in production efficiency; a body of the fender and the small parts can be separately machined, so waiting time is shortened; working efficiency of production is improved.
Data given for Designing Fender
Master sketch
As per the master sketch we are going to design the drip mount and we will follow the design parameters as per industry for the other mounting area too.
And we are going to design the fender in NX CAD.
So first we are going to work on the drip mount which will mounted to the engine compartment.
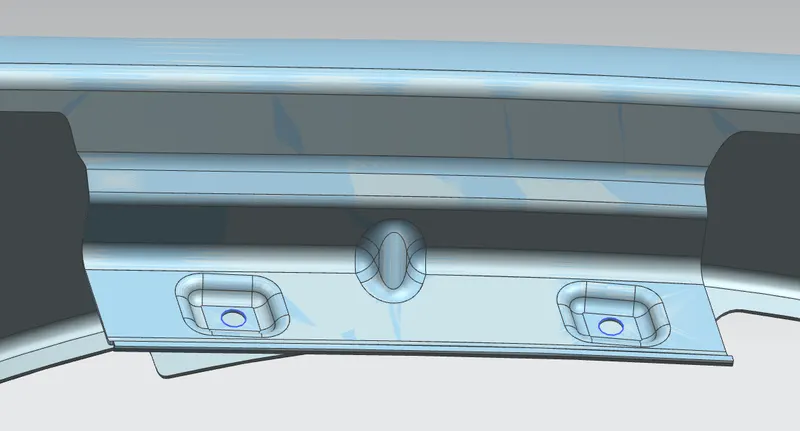
Drip mount
As you can see in the above images we have created some emboss and mounting holes for the fasteners we have created flat surface and have given the minimum 5mm flat area around the mounting holes.
And we have also provided darts to it to increase the strength of the mount.
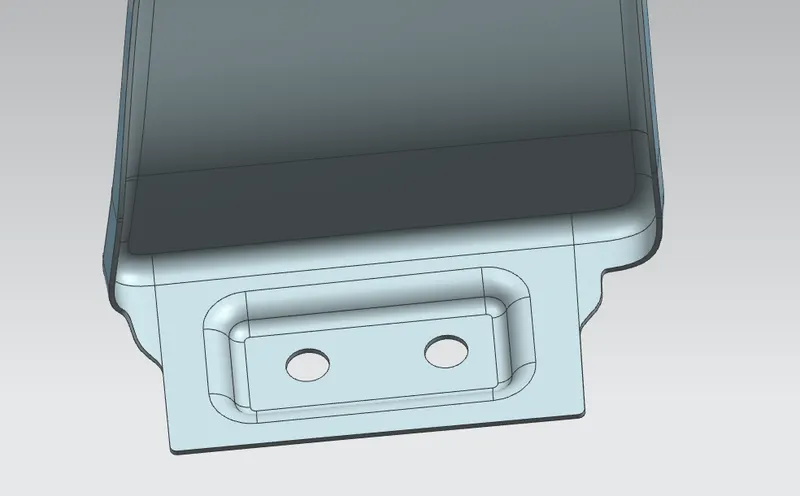
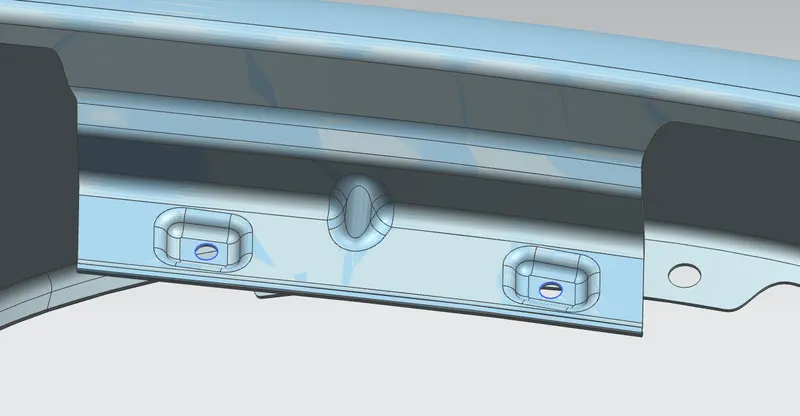
Sill mount
Like drip mount we have created the sill mount too and we made sure that we didn’t have any sharp corners and we provided relief to it.
We did this by using bridge curve and trim sheet.
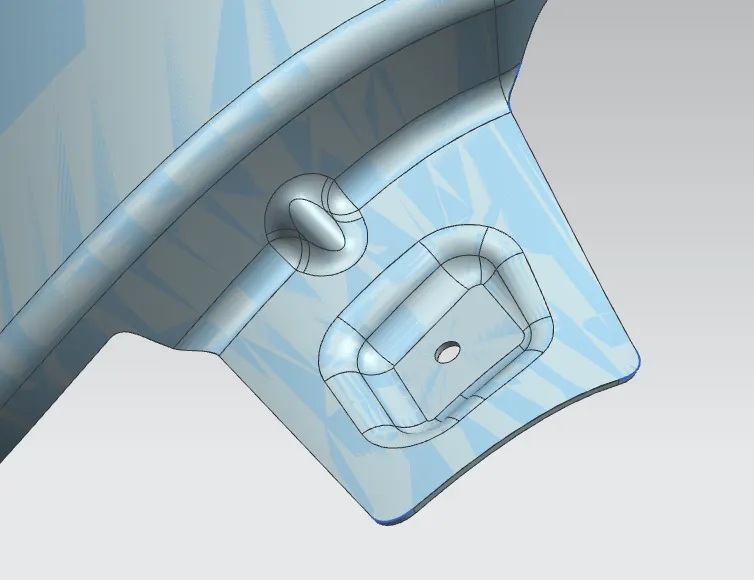
Bumper mount
As you can see we have created the bumper mount using emboss, dart and bridge curve to cut out the sharp corners.
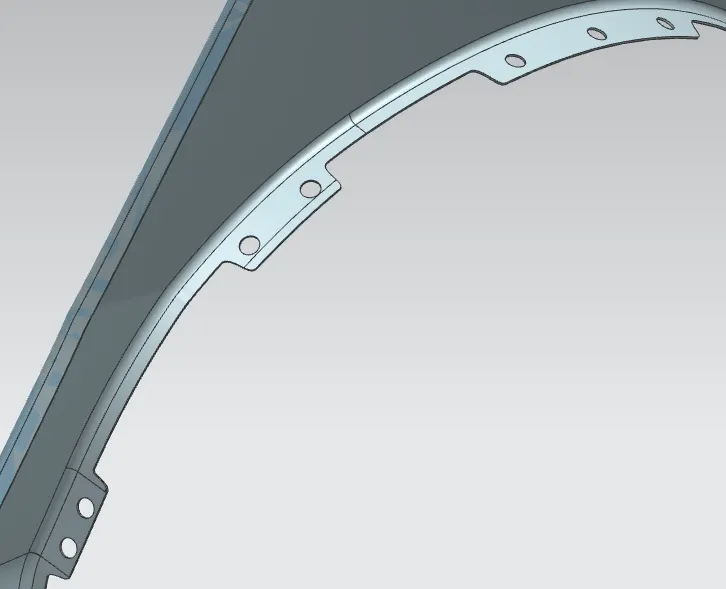
A-PILLAR Mount
While creating this mount was tricky one as we have create a emboss on curved surface so for that we have used datum plane and according to that we have created the sketch.
BAFFLE Mount
For baffle mounting we didn’t made any kind of emboss we have created the mounting holes for it and we have created the baffle flange on which the holes are there.
After creating the mounts we finally thicken it which gives thickness to the sheet metal.
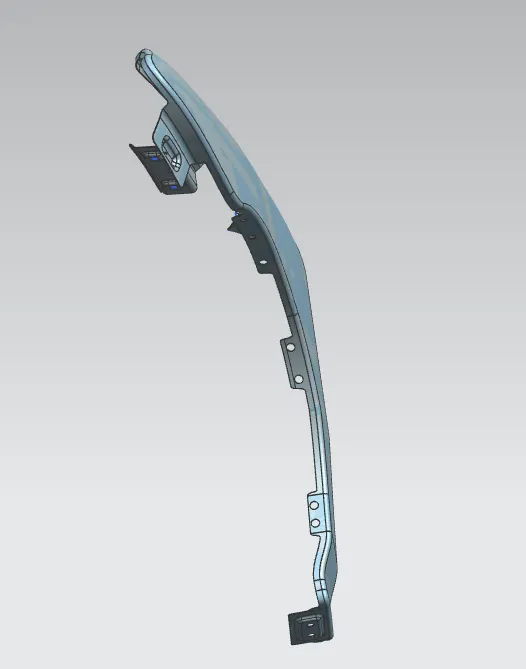
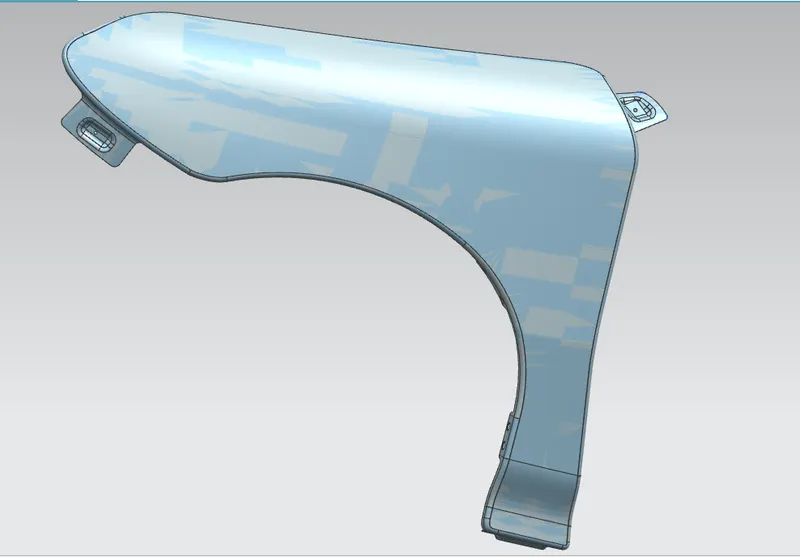
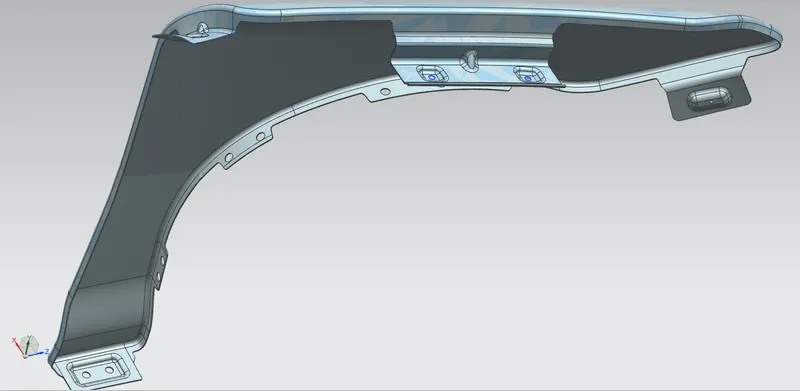
So the above image is the final fender part.
CONCLUSION:
As we successfully learn about the feature and purpose of front fender and made it in NX CAD and we have learn the tools involved in it.