Drafting of various geometries using Chamfer, Fillet tool in AutoCad
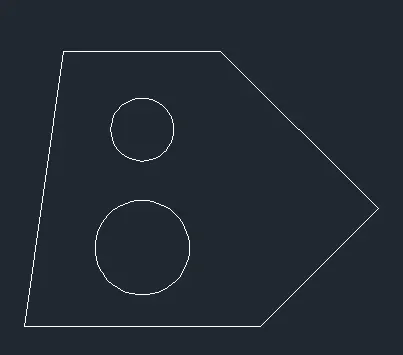
- 1st set the sheet to desimal using un command
- using line command draw a line of 3mm
- give the angle of 135d and distance 2mm (@2.12<135)
- give the next point of distance 2.83mm & 90d (@2.83<90)
- @ top give the distance of 2mm
- at last use c command to close the drawing
- now give the offset of 1mm from the bottom and from the left
- now using circle c command click on the poin and give a dia 1.20
- same method follow to the 2nd circle too but here dia is 0.80.
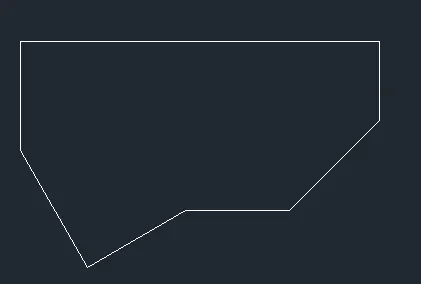
- Here set the sheet to Architectural wit feet using un command
- using the line command draw the line of 8'
- take next poin as 1'9"
- now give the angle of 135d and distance of 2'10"
- end the line
- now start from another side of end point of line
- give 2'5" in y direction
- next point give an angle of 90d and distance 3'
- next 2'6" distance and 30d
- close the line by c command
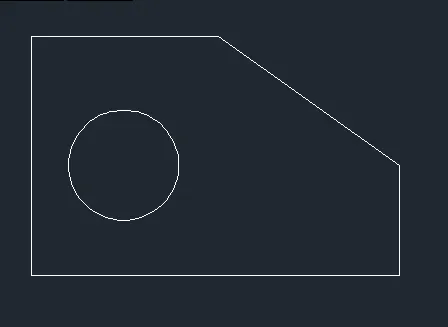
- set a sheet in engineering
- using line command draw a line of 5'-0.1"
- draw a line in y direction distance of 1'-6.0"
- now start from another end point
- give a distance of 3'-3.0" @ y direction
- @ x direction with distance of 2'-6.5"
- now give an angle of 125d
- join to the end point
- now using an offset of distance 1'-6.0" & 1'-3.0" @ left and bottom side
- by using that point draw a circle og dia 1'-6.0"
- then delete an offset line.
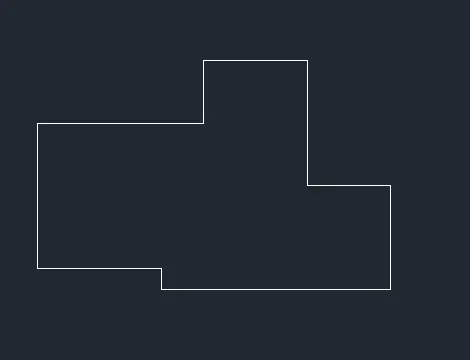
- By setting an sheet in desimal format mm
- use a line command of distance 3
- @y direction with distance of 0.50
- now give the x direction with distance of 5.50
- next poin is @ y direction
- give a distance of 2.50
- x direction 2.00
- y direction 3.00
- again x direction 2.50
- y direction 1.5
- x direction of distance 0.5
- then close the line command by using c command
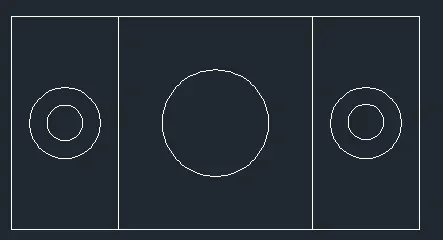
- continue with the same scale of desimal
- take a line and give a 1st point
- then give a horizontal direction of distance of 11.50
- y direction 6.00
- again x distance of 11.50
- and y 6.00
- now using an offset of 1.50 from the LHS offset it
- now from the bottom @ distance of 3
- by using that point draw a circle of dia 2 & 1
- same thing follow for the other side of RHS
- now give an offset of 4.25 from the middle of the LHS or RHS circle
- and an offset from the bottom of 3
- now by clicking on that point draw a circle of dia 3
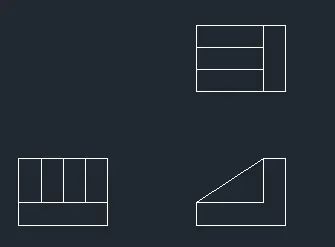
- sheet @ desimal
- using l command draw a horizontal line of distance 2
- give an offset of 0.5 @ y direction
- now close the two ends by using line
- @end point of the line draw a line of 1
- at x direction with distance of 2 draw a line
- now close the line by giving distance of 1
- take an offset of 0.5 & give an offset using multiple option of 3 lines
- now at certain distance of 2
- draw a line of 2 and y direction of 1.5
- draw horizontal distance of 0.5
- now using an offset of 0.5 offset @ both the side and join the line
- now using line connect the end points of the line
- @ 1.5 distance gap at y direction draw a rectangle of 2*1.5
- using an offset of 0.5 offset it and using trim option trim the extra lines
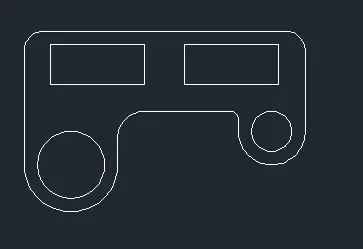
- using L command draw a line of 210
- now at y direction draw a line of distance 100
- using c command draw a circle of dia 50
- give an offset of 10
- now move the circle to the point as showen in the above fig
- follow the same step for the other side too
- using fillet give an radius of 15 at the corner of the end point line
- now using an offset of 10 offset the x direction line
- 2o for the rhs & lhs
- now give an offset of 70 for both the side of height 30
- now using trim command trim the extra lines
- for middle line using fillet give a radius of 6 and 20
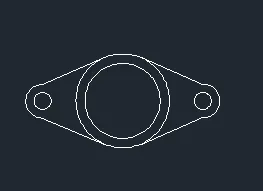
- using line drae a line of 8.55
- using circle of dia 0.90 draw a circle in the end point of the line at both the side
- give an radius of .90 outer the circle at both the side
- now at middle of the line draw a circle of dia 4 and again using circle draw draw a circle of dia 5
- trim the extra line using tr command
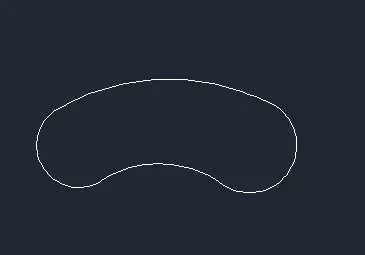
- set the sheet using un command
- using line of dist 32'-6" draw a line
- at end point of the line draw a circle of r 8' and another side r9'
- using circle of radius 41'-8" draw a circle as it touches the both ciecle
- now for the bottom circle of radius 20'=10"
- using tr command trim the extra lines
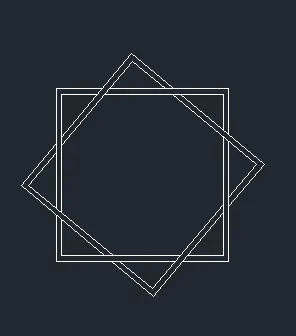
- set the sheet in desimal mm
- useing rec command draw a rectangle of 3,3
- give an offset of 1
- now using co command coppy the rectangle one more
- using ro command rotate to 90d
- now move to the 1st rectangle exactly center of the 1st rectangle
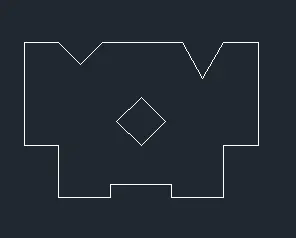
- set the sheet in architectural
- draw a line of distance 3' in x direction
- in y direction at the distance of 4'-6"
- and x direction at distance of 4'-6"
- y direction at distance of1'-2"
- use the same distance another side too to complete the drawing
- now draw the line in y direction at distance of 9'
- at x direction of 10'-2"
- now draw a line middle of the x direction of 10'2"
- middle line at distance of 3'-7"
- now using line command give the angle of 30d at both the side like v shape
- same method follow for the another side with different angle like 45d at the height of 2'-8"
- join the line to the 1st end point
- now using an offset of 3' give an offset inside the figfrom bottom
- and 6'=9" from the top
- now we will get an point to make an 90d angle rectangle
- using line draw a 90d at 4 side @ a distance of 3'.