Door Arm Rest Week 8 Challenge
AIM:
To Create the Door Arm rest Component and add thickness to it by using Catia V5.
OBJECTIVE:
- Create a tooling axis following the OEM standard
- Making the Surface into Solid Body
- Part Thickness : 2.5 mm
- Performing the draft analysis to the component
INTRODUCTION:

Door Armrests are very helpful in providing support for your arms and hands. They will help to guide both your arms and hands into a relaxed position, easing the muscle tension that often shows up when they are not in the right position.
The armrest is manufactured in one-piece black polyurethane with left and right design. The material is soft, extra durable and can be easily cleaned and dried.
METHODOLGY:
- Creating the Tooling Axis
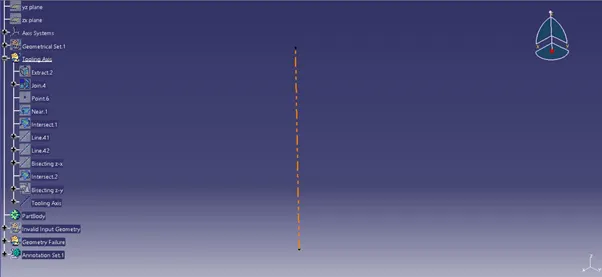
The tooling direction is used to find the direction in which the part is removed from the core and cavity. The draft angle should be positive to the tooling axis to manufacture the component easily. The step by step procedure of creating the tooling axis is given below.
Step: 1
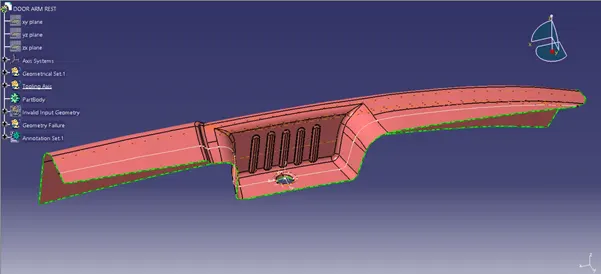
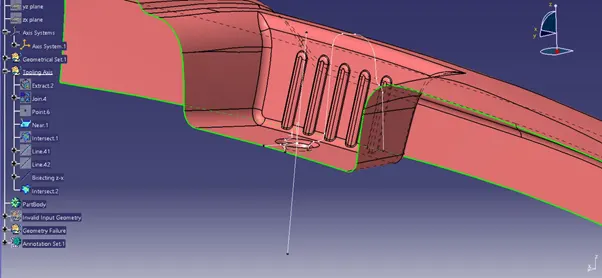
Creating the point on surfaces respectively also the axis system to the point. Now creating the intersection to the Z-Y and Z-X direction of the surface as shown below.
Step: 2
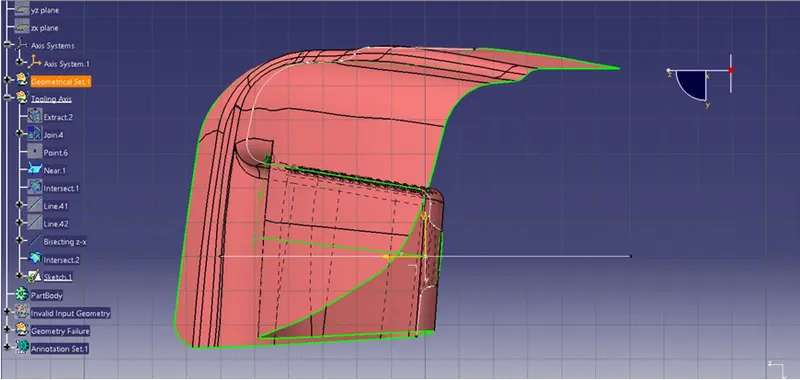
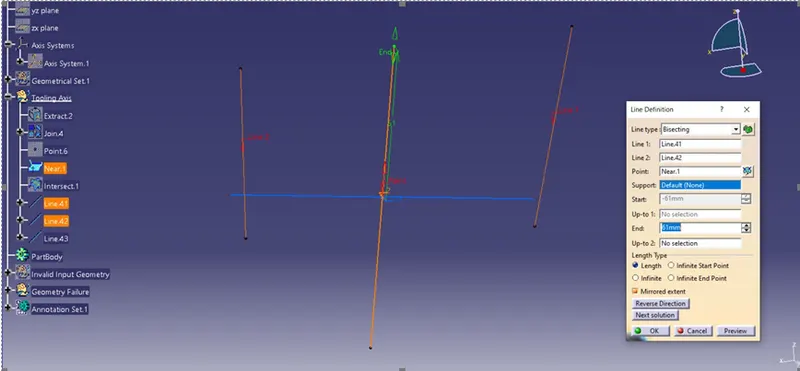
Now creating the bisecting lines for the intersection lines to the tooling axis for both Z-Y and Z-X axis. Once we get the bisecting lines for both axis now bisect that both bisecting lines to get main tooling axis.
Step: 3
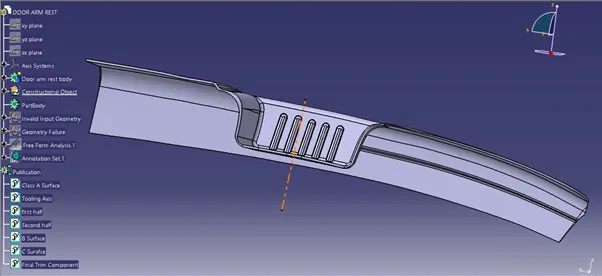
Finally we get our main tooling axis for the door arm rest component.
- Creating the B surface.
Step: 1
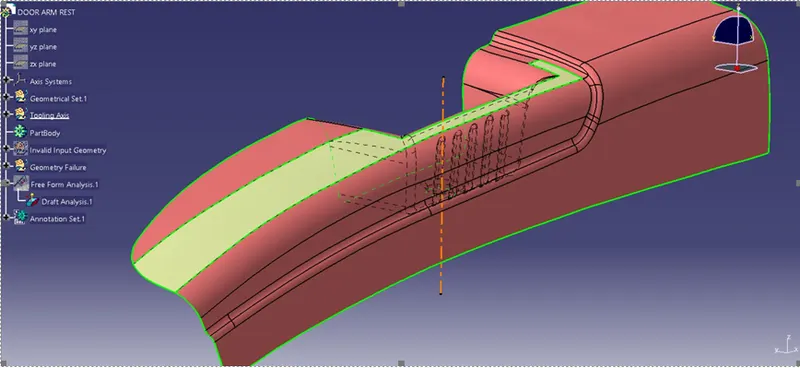
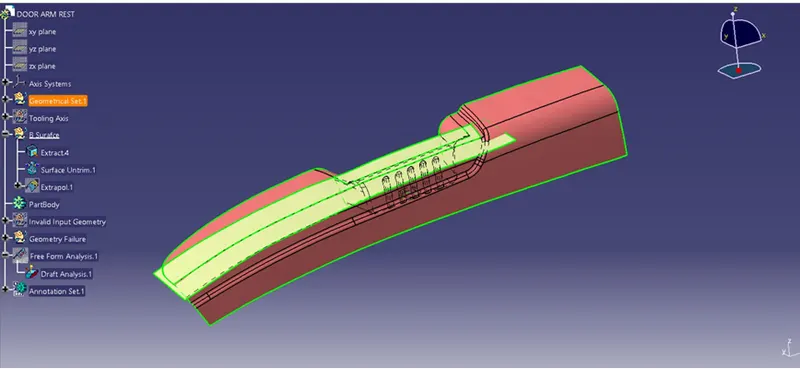
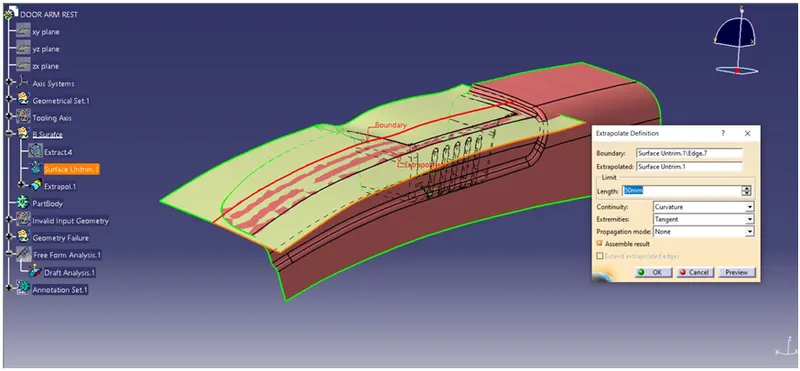
Creating the B-SURFACE by extracting the class A surface, by each surfaces separately, it is untrimmed and extrapolated to certain distance using point continuity for uniform extension all over the boundary as shown below.
Step: 2
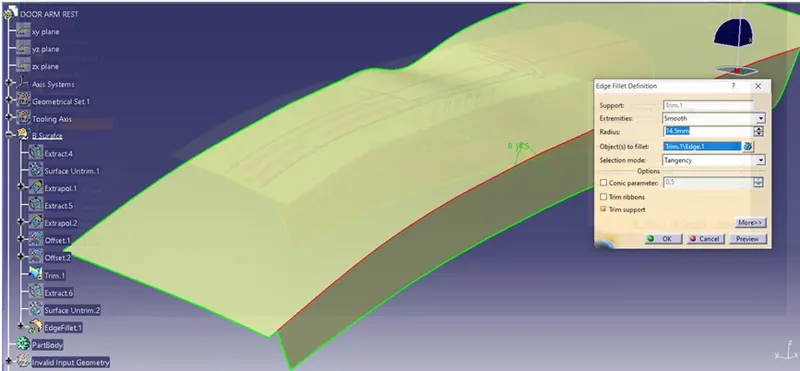
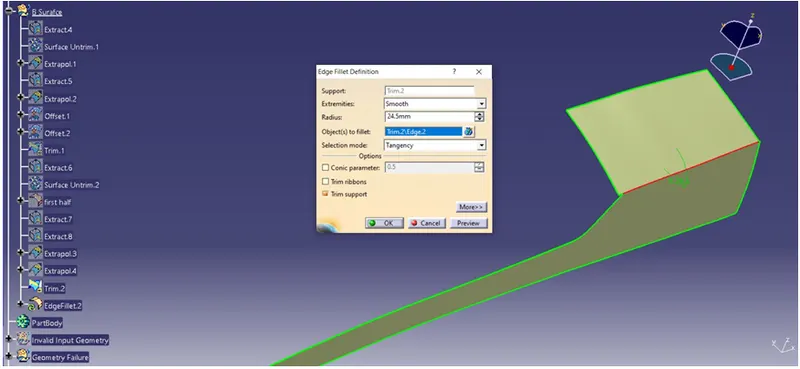
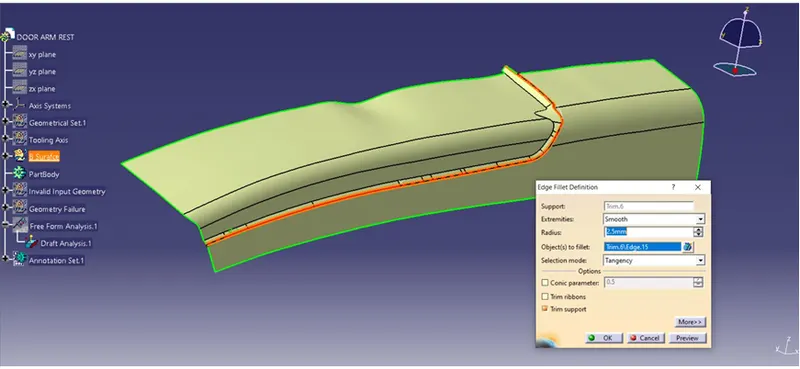
The extrapolated surface are offset for 2.5 thickness and the edges are filleted for 14.5 radius to get the smooth surface. As shown below.
Step: 3
Trimming the Side wall of the bin part to the main surface to get exact component as class A surface. And edges are again fillet to get aesthetic component.
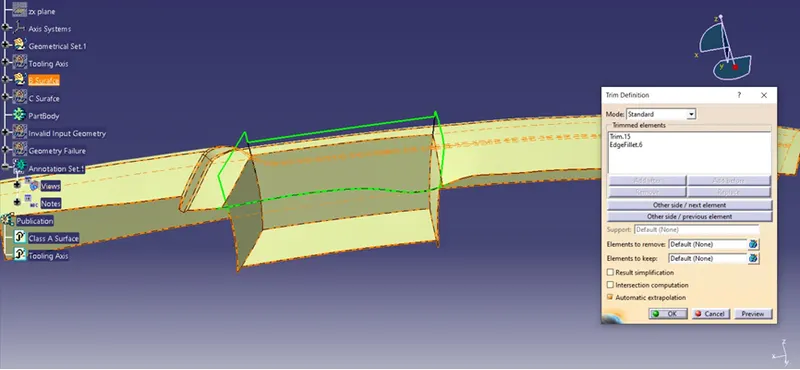
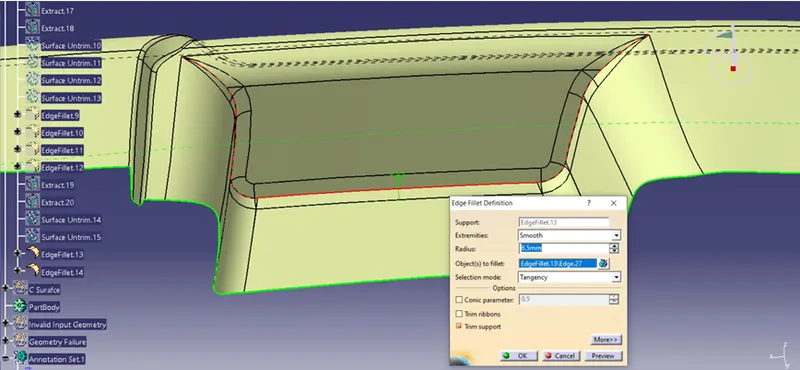
Finally we achieved the B class surface by extracting in the Class A surfaces.
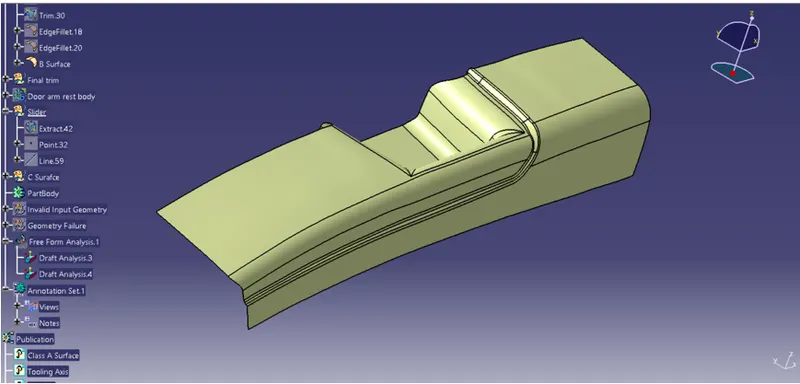
- Creation of C Surfaces:
Step: 1
Extracting the boundary of Class A surface and it is make into smooth curves to sweep the curves by using support surface to the 90 degree respectively.
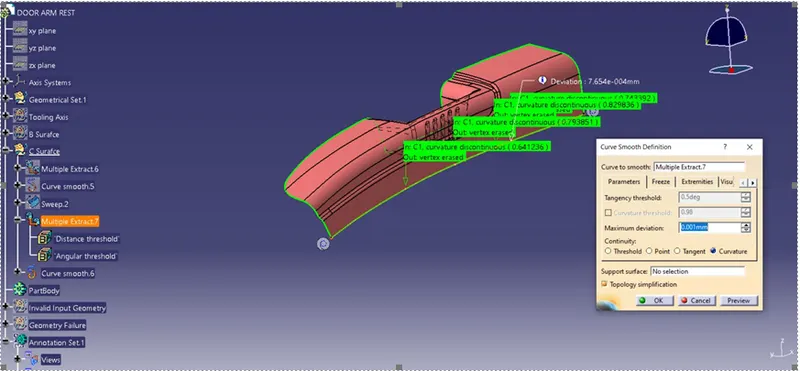
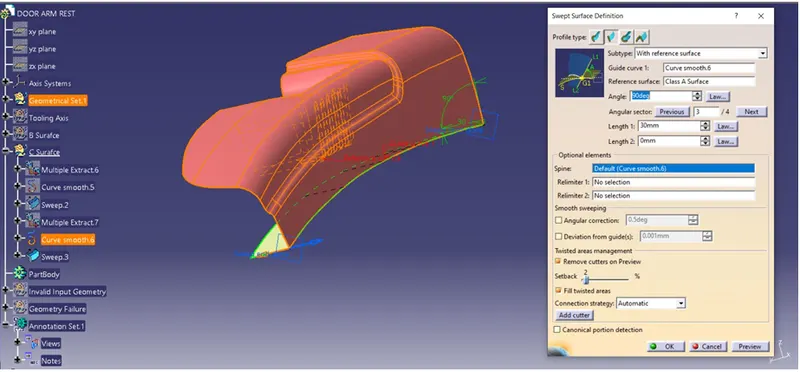
Step: 2
The sweep surface are not properly created at the edges of bin walls, so it is re-created by using multi section surface. It is created by splitting the surface for making two surfaces connect each other.
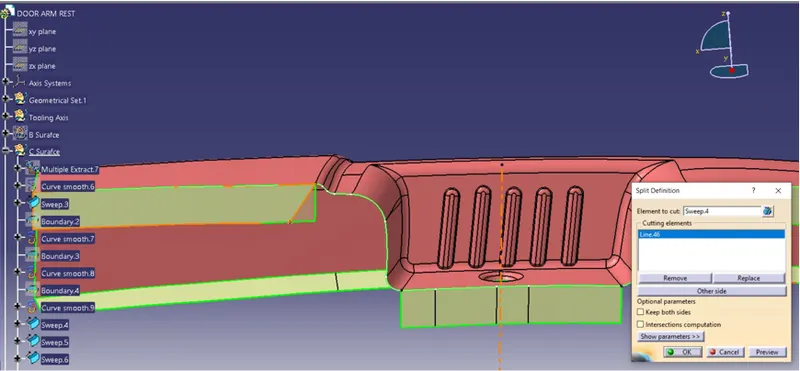
The boundary at bin walls are bit twisted area so it separated by boundary curve it multi sectioned and it is joined together to make single surface.
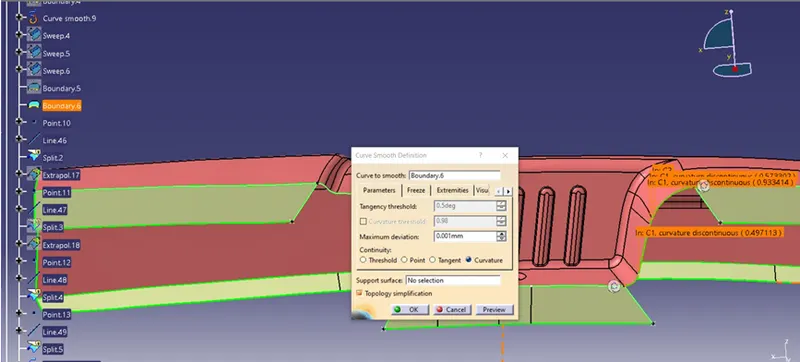
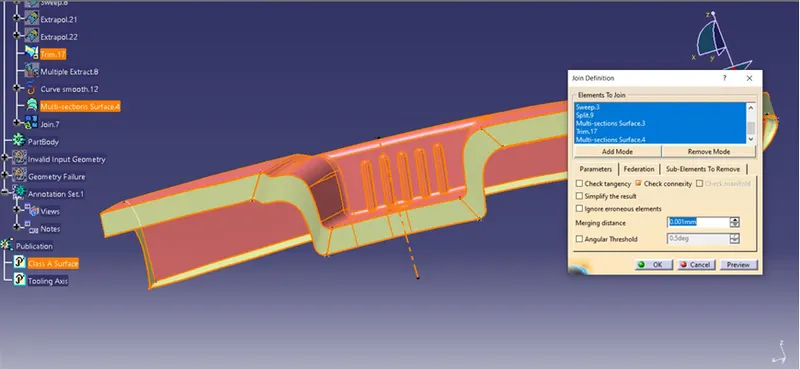
Once the all surface joined together it extrapolated to certain distance to trim with Class surface to C surface. Finally we created Class C surface.
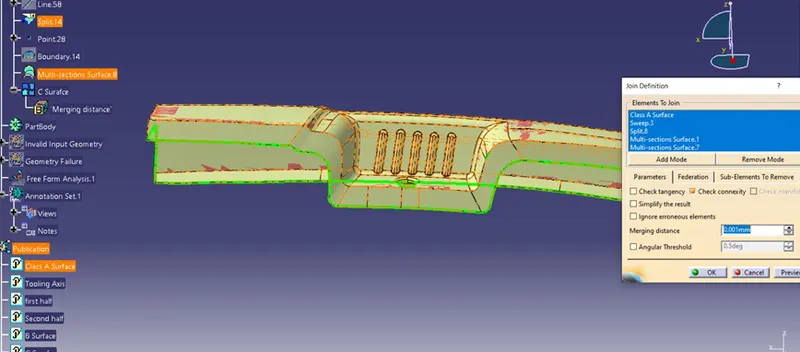
Making the Final plastic Component:
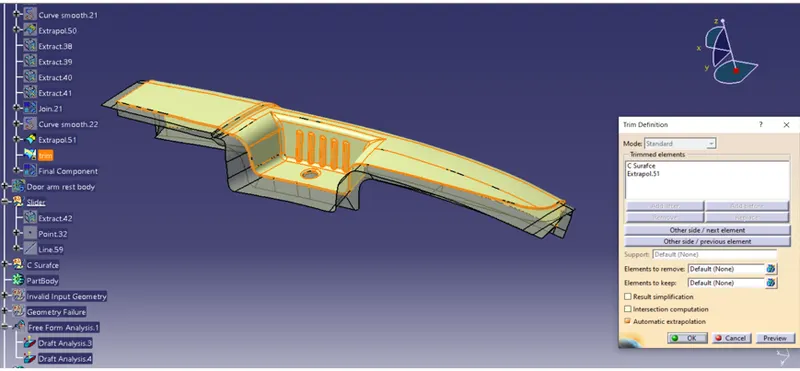
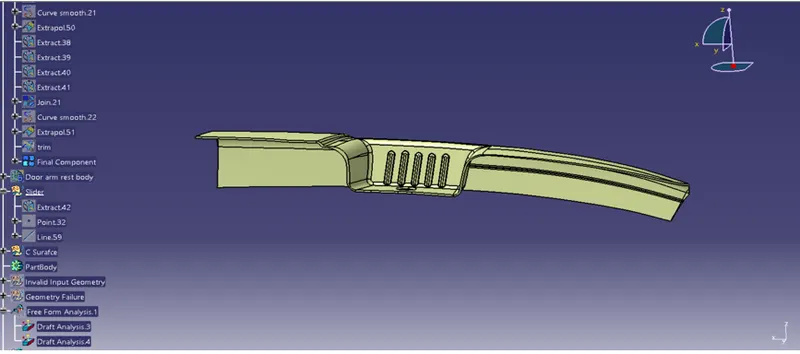
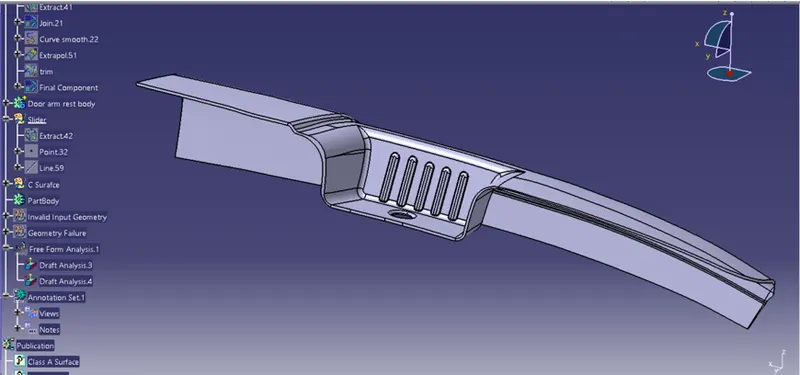
To make the final component the Class C surface is trimmed with Class B surface, the output will get the component with 2.5 mm thickness of surface and it is converted into solid body using insert body option in part design as shown below.
- Performing Draft Analysis:
The Draft Analysis command enables you to detect if the part you drafted will be easily removed. This type of analysis is performed based on colour ranges identifying zones on the analysed component where the deviation from the draft direction at any point, corresponds to specified values. This rule of thumb applies to parts with mold depths of up to 2 inches. At this size, draft as low as 1½ degrees will allow for an easy, non-damaging release from the mold when the expected shrinkage of the thermoplastic material occurs.
It’s also important to remember that draft angles are just one component of an effectively designed injection molded piece. Design for manufacture is one of the easiest ways to improve the quality and efficiency of your injection molding process, and it never hurts to stay up to speed on all injection molding best practices.
- Draft Analysis for Class A surface:
Step: 1
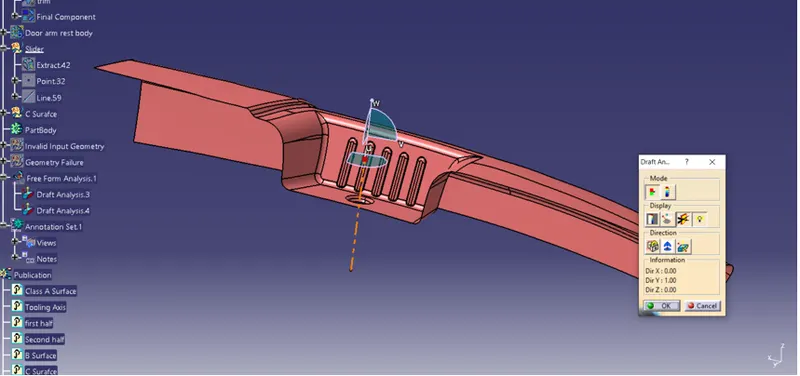
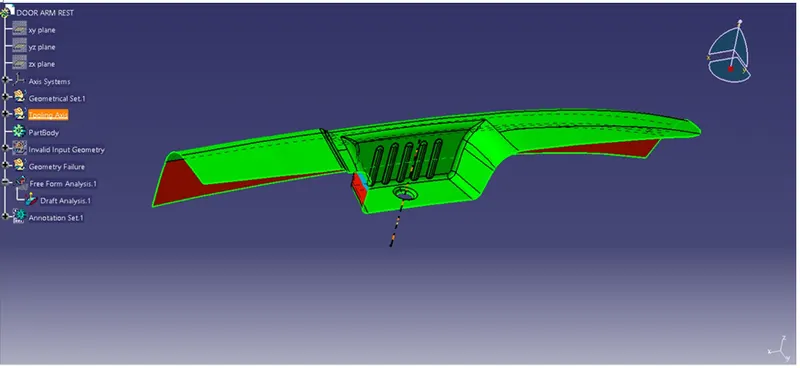
Initially we perform the draft analysis to the class a surface to ensure that we have good quality of surface to make Class B and C surface to achieve the same kind of quality surface. First we have to set the compass on the main tooling axis to get the direction of core and part moves along as shown below.
Step: 2
Once compass is locked in the axis, directly click on the surface it will appear quality of draft surface whether, it is pass or failed. Here the draft angle is given as 3 degree. Hence we achieved green colour on top surface. Hence it accepts the draft angle for the surface, so we build good quality component.
Step: 3
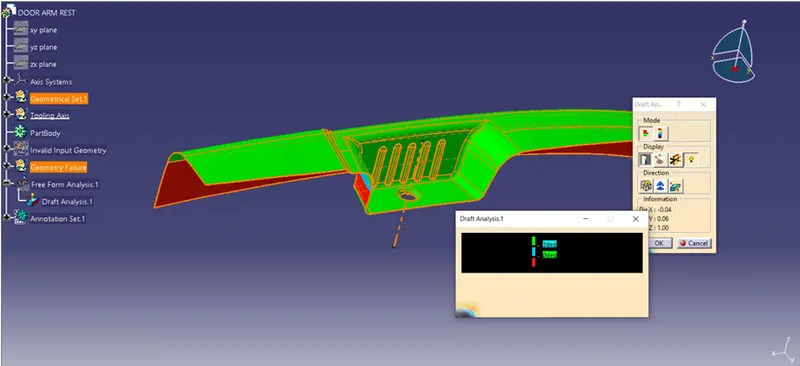
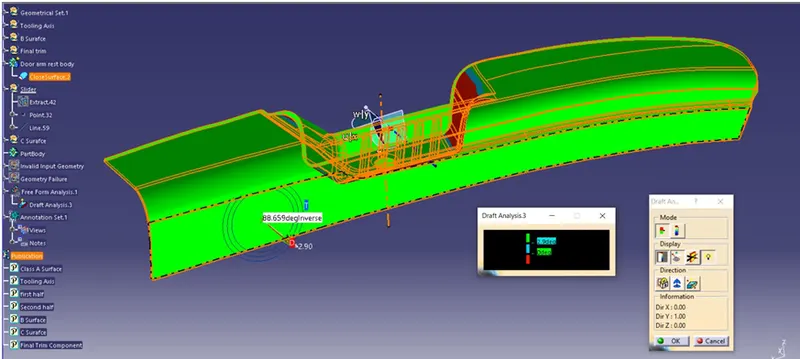
Now we check colour variant scale to ensure the maximum and minimum area draft angle is achieved by displaying by green, red and blue colour respectively. If the surface appears red in colour while analysing it is not accepted.
Step: 4
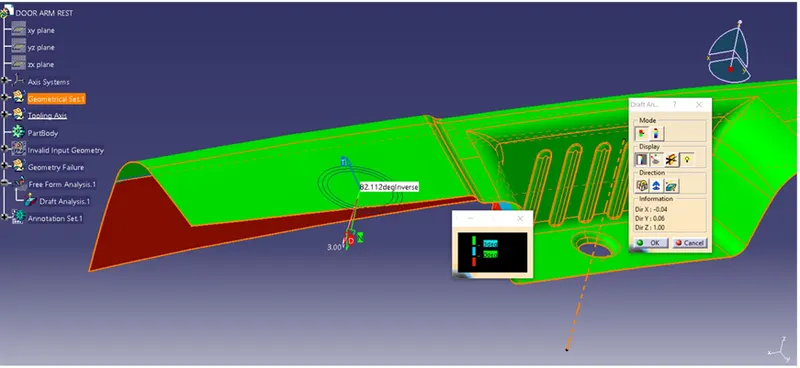
We can check the angle of draft given to surface by using draft tool analysis just point the over the surface where we have check angle of given draft to the component as shown below.
- Draft Analysis for Final Component:
Step: 1
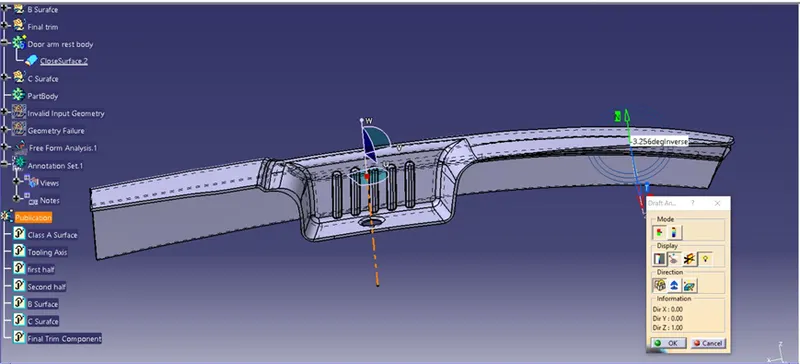
First we have to set the compass on the main tooling axis to get the direction of core and part moves along as shown below.
Step: 2
Once compass is locked in the axis, directly click on the surface it will appear quality of draft surface whether, it is pass or failed. Here the draft angle is given as 3 degree. Hence we achieved green colour on top surface. Hence it accepts the draft angle for the surface, so we build good quality component. Now we check colour variant scale to ensure the maximum and minimum area draft angle is achieved by displaying by green, red and blue colour respectively. If the surface appears red in colour while analysing it is not accepted.
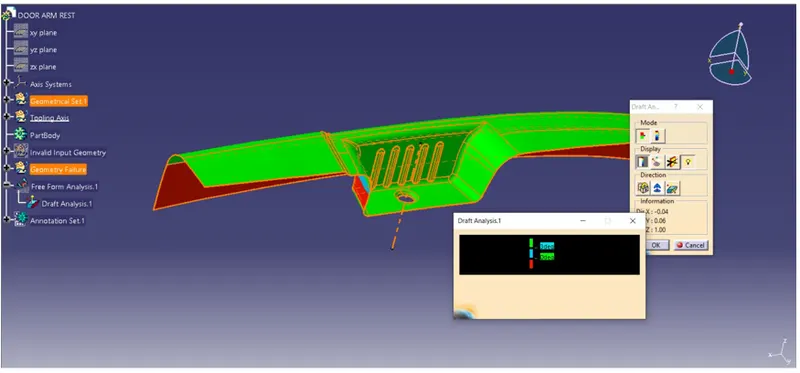
Step 3:
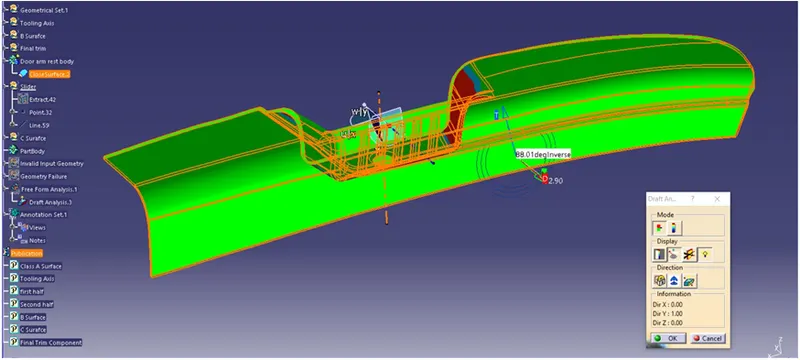
We can check the angle of draft given to surface by using draft tool analysis just point the over the surface where we have check angle of given draft to the component as shown below.
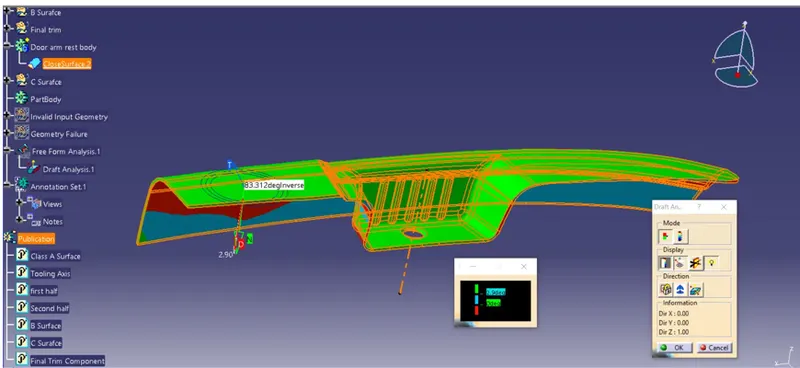
Step: 4
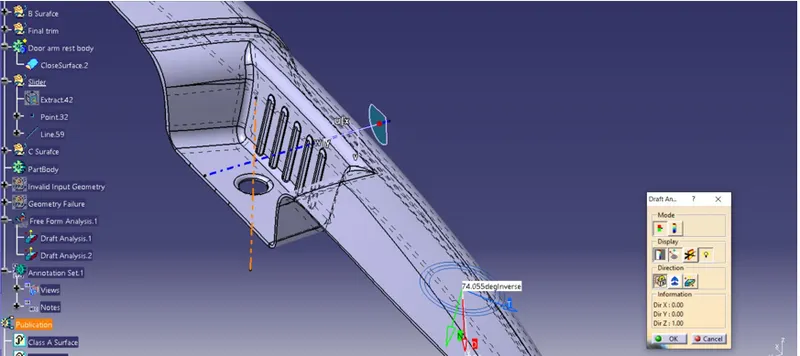
In order to check draft analysis to check at bin wall and front surface, we create the slider axis, by extracting the surface to required direction. The extracted surface is from the sliding angle from the door arm rest. Creating the point on the center of the surface to create the tooling axis to the Y direction as shown below.
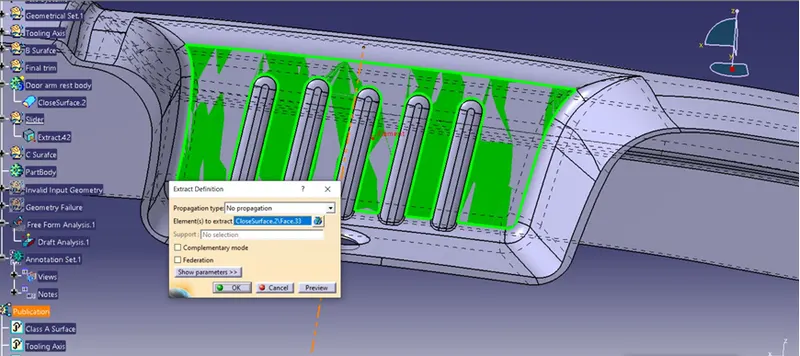
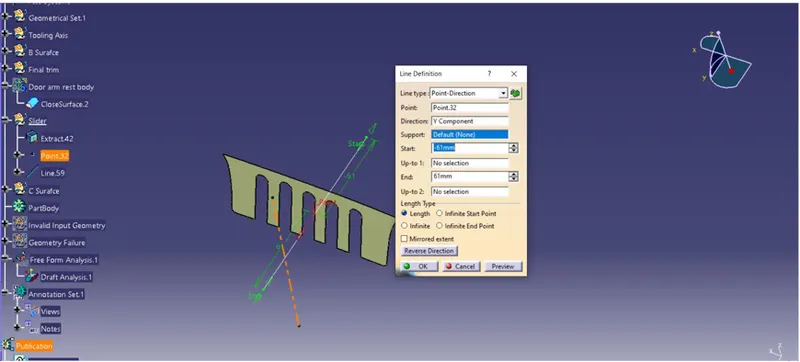
Step: 5
Once we get the sliding tooling axis, usually we gone set the compass on the axis. Hence it accepts the draft angle for the surface, so we build good quality component because it appears the green colour.
Step: 6
Now we check colour variant scale to ensure the maximum and minimum area draft angle is achieved by displaying by green, red and blue colour respectively. If the surface appears red in colour while analysing it is not accepted.
Step: 7
We can check the angle of draft given to surface by using draft tool analysis just point the over the surface where we have check angle of given draft to the component as shown below.
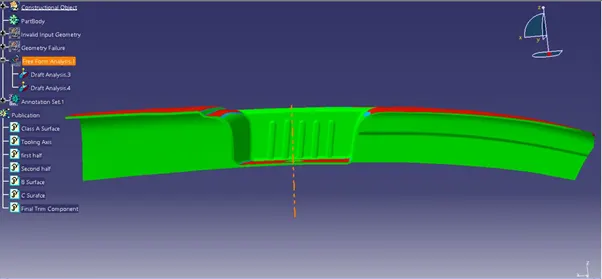
Screenshot view of Door Arm Rest with DRAFT analysis:
Front View:
Back View:
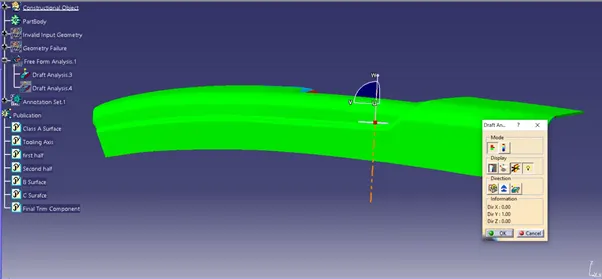
Side View:
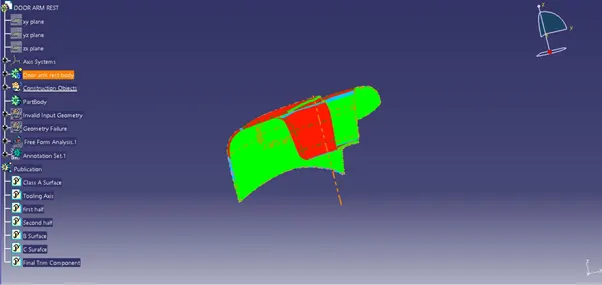
Top View:
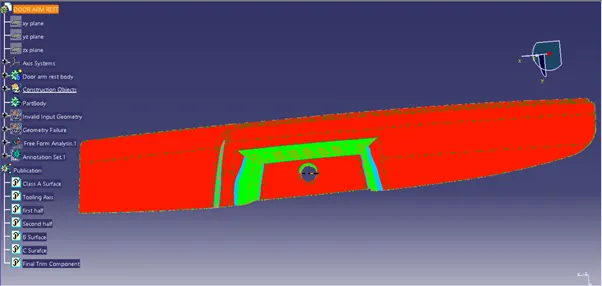
Isometric View:
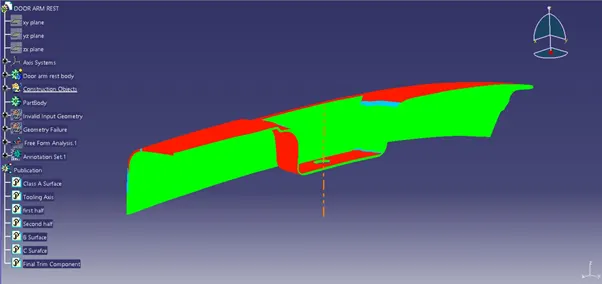
Publication:
Conclusion:
Creation of the door arm rest has been successful done for the thickness of 2.5 mm, it has been converted from surface into solid body. The tooling axis has been created according the OEM standard. Drafting Analysis has been performed and results has been updated in step by step methodology. Hence we created perfect final Door arm rest component for manufacturing.