Design of backdoor
Objective:
Development of back door using given styling surface.
Applying proper reinforcements at weaker portion.
Perform draft analysis on inner panel.
Software used: Simens NX 12.
Description:
In this project I’ve designed a Back door of a car (Hatch back) utilizing all the skills that I’ve learnt throughout this course (Automotive Sheet metal design).
Car back door is the rear most part of the Car BIW and this provides access to the boot of the car. The rear door design of the car varies form company to company, some companies make the door heavier, costlier and there are more such features. The car rear door consists of three parts Outer panel, Inner panel and Inner skin (trim portion).
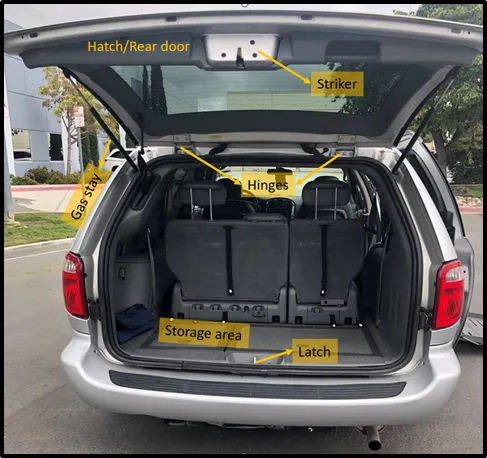
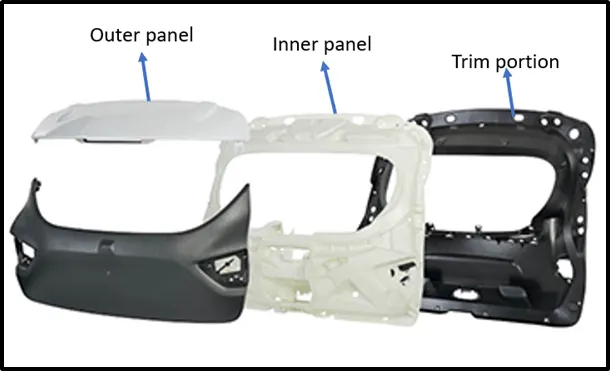
Most of the companies (Luxury car companies) are using aluminium because the weight is less and it can casted with varying thickness according to the requirement, but the cost is increased.
The materials mostly used in manufacturing the rear door are Aluminium & Steel.
Some companies use Steel because it is not as costly as aluminium and major drawback of using steel is increased weight.
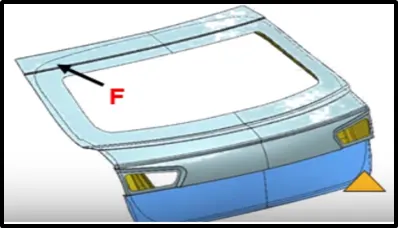
Tests performed on back door:
Bend test:
The four corners of the door are constrained and load is applied on the door, in this test the CAE team gets to know at what force the back door enters the plastic state.
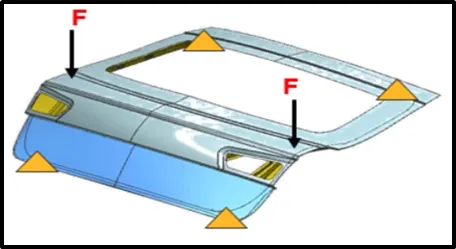
Torsion test:
In this test the hinges & Latch-striker are constrained and couple force is applied and measured at what force the back door tends to distort the shape.
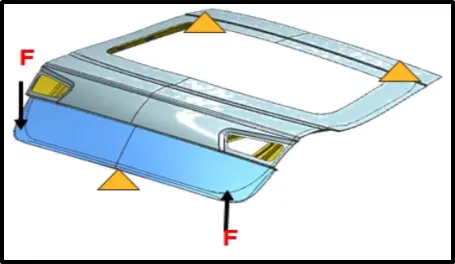
Abuse test:
This test is performed to check the condition of door on slamming, several cycles of door slamming is done to check whether any distortion caused in door.
Dent test:
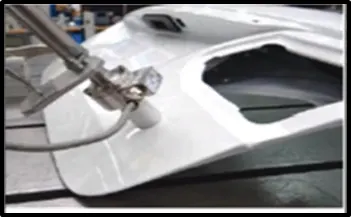
In this test using an external device dents are produced on the door surface and it is observed at what force the dents appear on the surface and what is the maximum force the door surface can prevent from entering the plastic state.
Design Methodology:
1.Improving the styling surface, if the surface quality is poor.
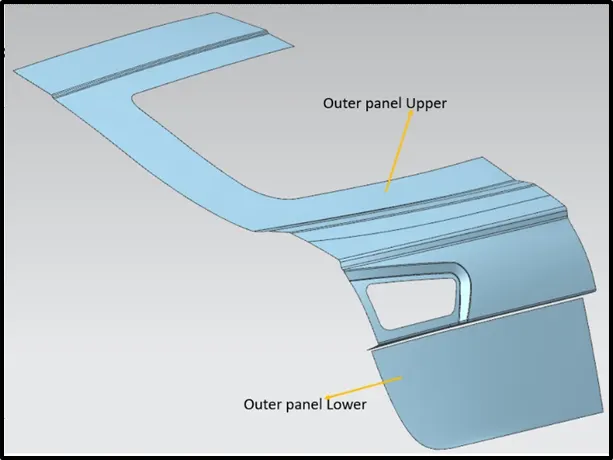
2.Splitting the Outer surfaces into Lower and Upper part.
3.Design of inner panel
4.Provide reinforcements at mounting areas and at weaker strength portion.
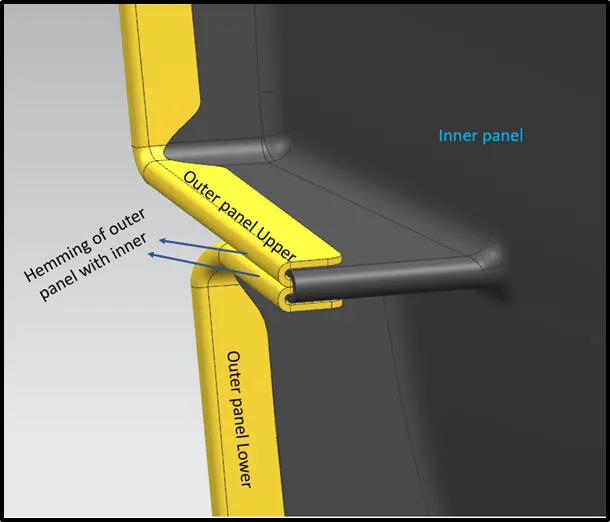
5.Hemming of outer panel with inner panel.
Input:
Class A surface of Back door is given as input, for which I have to create the inner panel, reinforcements, hems and design it so that it should be manufacturable.
Given Class A surface is inspected for the quality of surface, some deformities (gaps, patches) were seen, using some tools (like bridge curve, through curve mesh, sew) the surface was improved.
Given Class A surface.
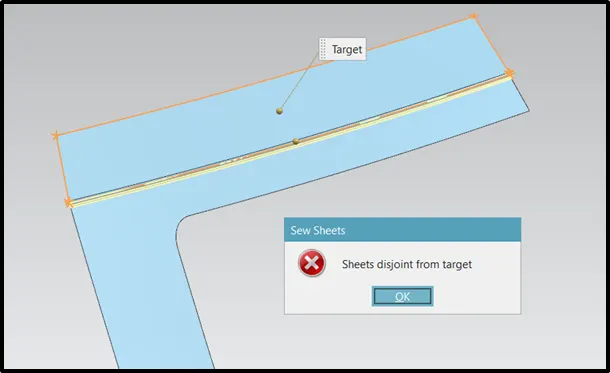
Poor surface quality
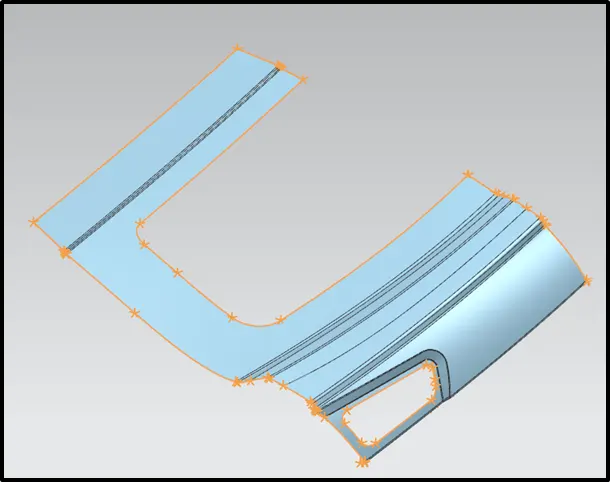
Improved Class A surface.
Outer Panel:
The entire outer panel is divided into Upper and Lower portion for easy designing.
The outer panel is the one which provides the aesthetic look and attracts most people.
Thickness = 0.75mm.
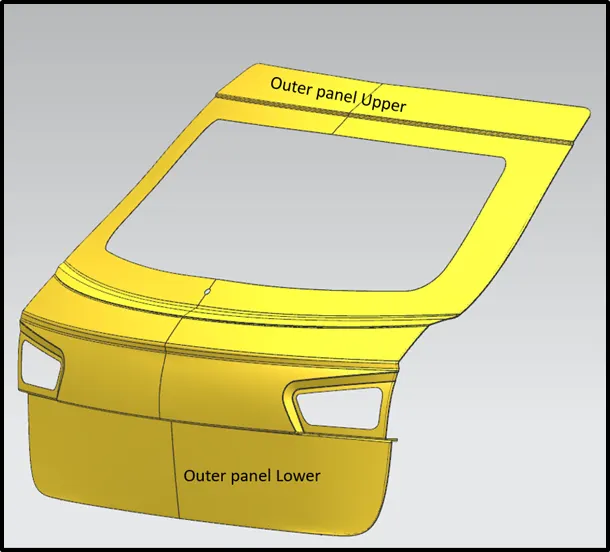
Inner Panel:
Inner panel provides strength to outer panel and also help in mounting motors, lights and other components.
The inner panel of the back door is created such that it follows DFA & DFM criteria.
Thickness = 0.75mm.
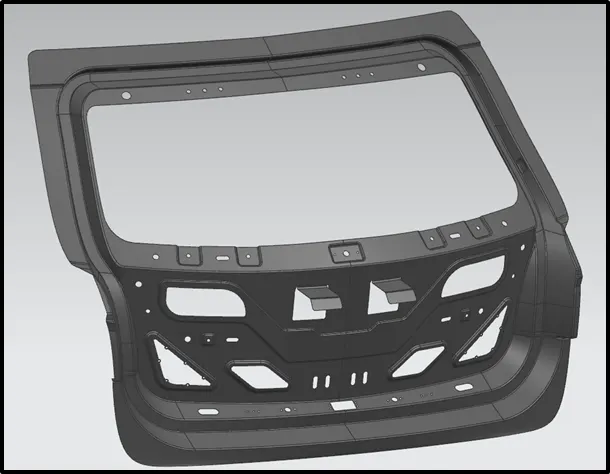
Sealing flange:
This is the portion where the sealant is placed so that it can prevent the entry of water inside the car.
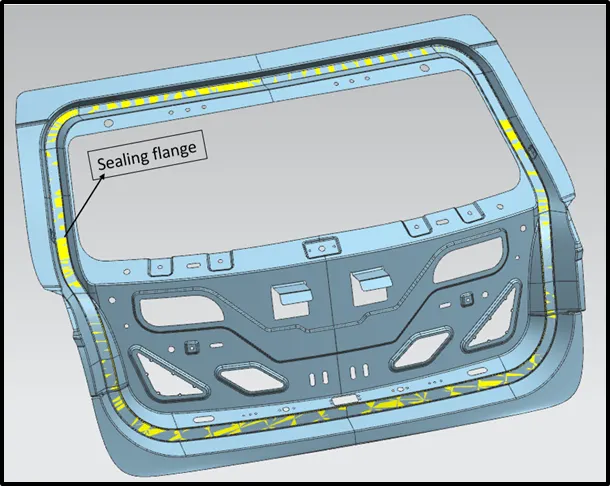
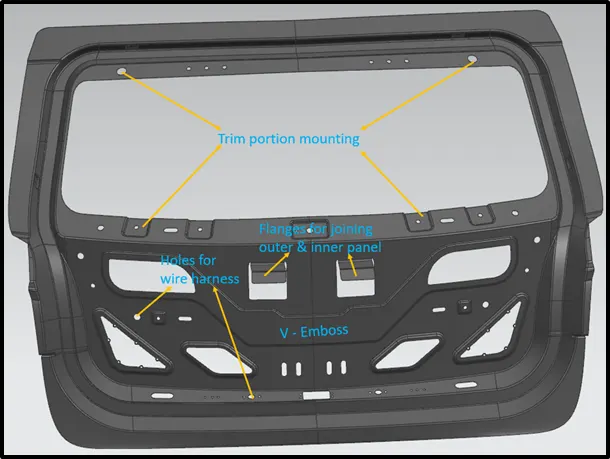
Cut-outs & Embosses:
To disperse the impact force the emboss on the inner panel is mostly made in ‘Y’ or ‘V’ shape, because these are the most evident shapes to disperse the force to sidewards before reaching the rear windshield. Considering this I’ve designed the emboss in ‘V’ shaped for force dispersion.
Few embosses are done in particular portion to provide local strength at that portion. Cut-out are made to reduce the overall weight of the door and this also helps in wire harness for electronic components.
MASTIC & SPOT WELDING
A flange portion can be seen on the inner panel, this helps in keeping the inner and outer panel together by applying the mastic sealant.
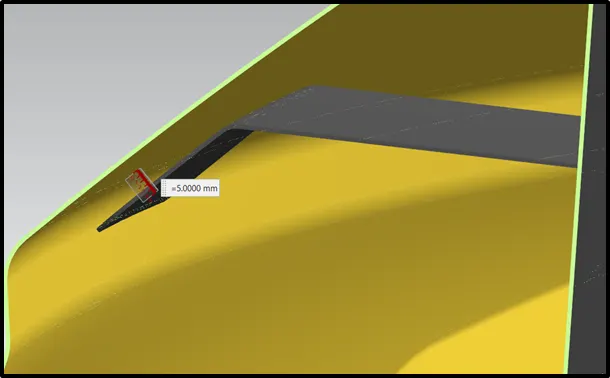
Mastic sealant is used for joining.
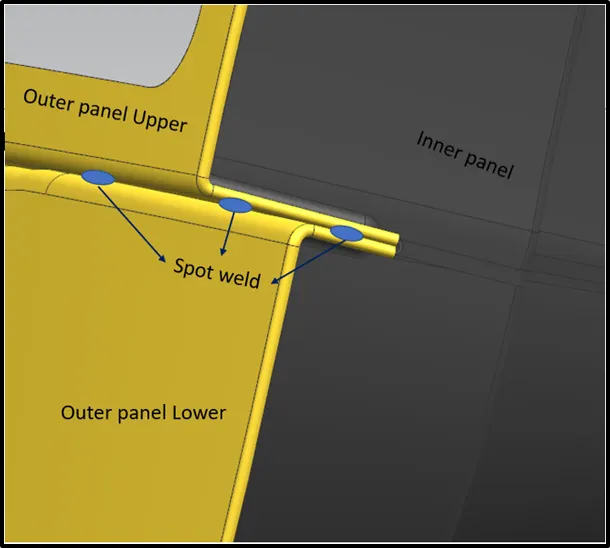
Spot welding is done for attaching the outer panel lower and upper portion.
Hinges:
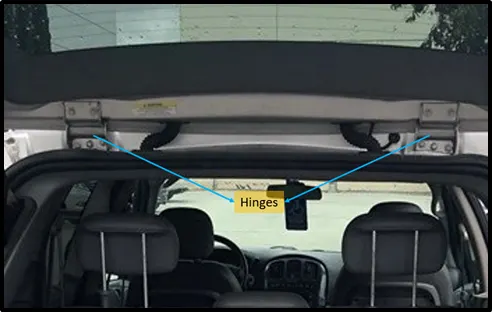
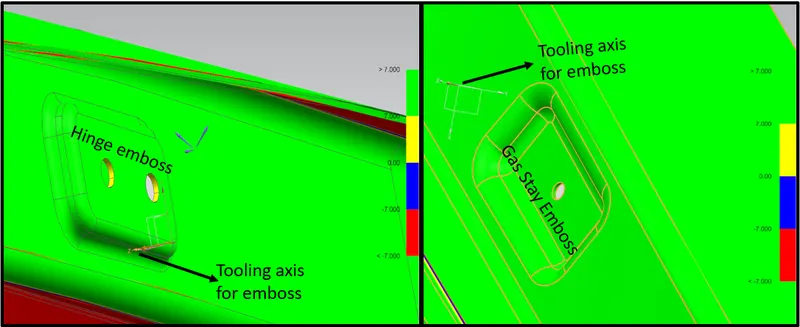
Hinges helps in opening and closing of the door and the opening angle of the door changes according to the country regulations. The axis of the hinge helps in placement of latch and striker. Mounting of the hinges need to be done on a flat surface for which embossing is done which also compensates the hole punched.
Gas stay (Gas spring):
Gas stay helps in easy opening and closing of the hatch with application of minimum force. When opening, car gas spring will automatically use its extension to support and fix the door.
Gas stays are used in Hood, trunks of the automobiles.
Embossing is done for mounting of gas stay on the inner panel.
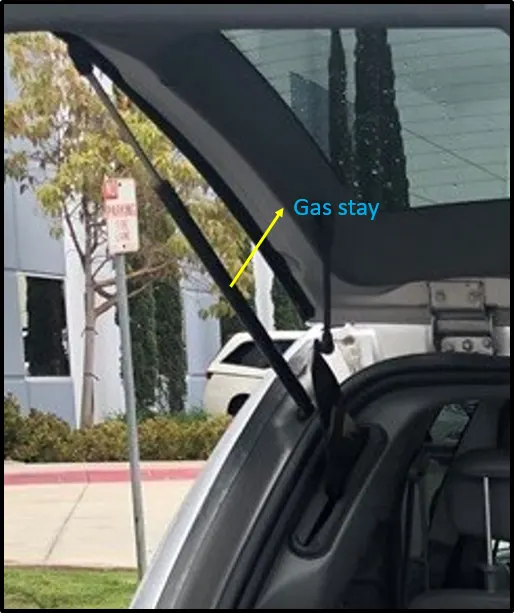
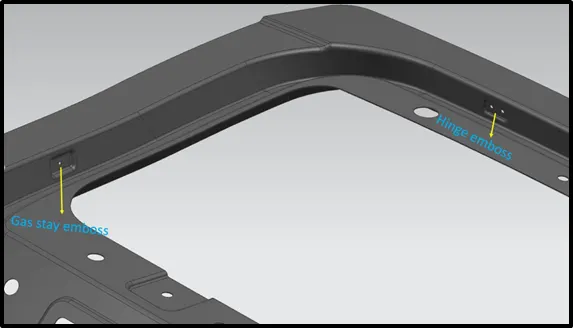
Emboss for mounting Honges ad Gas stay.
Latch & Striker:
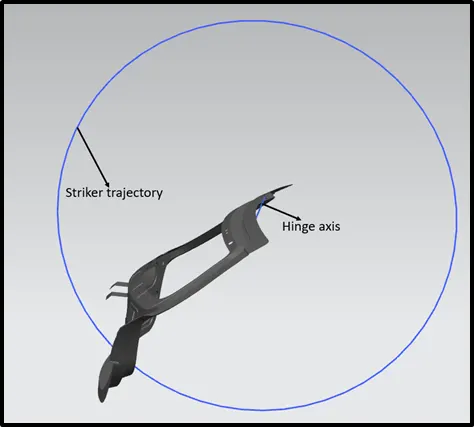
Latch and striker mechanism helps in keeping the door closed. The positioning of this is decided by the hinge axis, a line is drawn from rotating axis of the two hinges (this line is known as Hinge axis, but no data related to hinge was provided, so I’ve drawn an appropriate hinge axis) and considering the mid of the axis as the centre a circle is drawn which is called the Striker trajectory.
As we know that the design of the hatch for each company is different, so some companies mount the latch on the door inner panel and some mount striker.
Reinforcements:
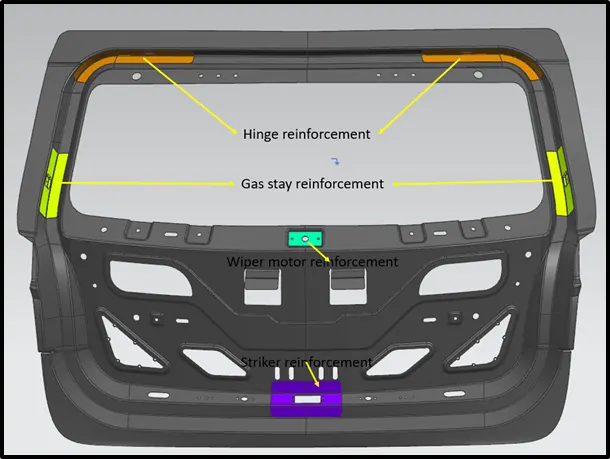
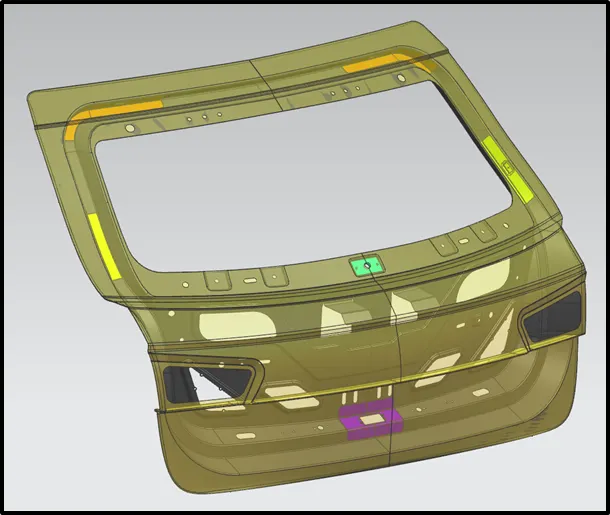
Reinforcements are provided in order to compensate the holes and cut-outs made on the inner panel and also to provide strength & prevents vibrations. Thickness of 1.25mm is maintained for reinforcements. I’ve used reinforcements at following positions on inner panel,
a.Hinge:
The hinge carries the entire load of the hatch when it is opened and the portion where the hinge is mounted on the inner panel is not so rigid to withstand, so reinforcements are added to provide external strength.
b.Gas stay:
The reason for providing reinforcement for the gas stay mounting is similar to that of hinge.
c.Wiper motor:
The weight of the wiper motor assembly may tend to damage the inner panel of the rear door due to weak strength and to prevent this reinforcement is added.
d.Striker reinforcement:
The slamming of the tail gate can damage the striker portion and may cause the failure of the locking mechanism sometimes, so reinforcement is added to provide strength.
Hemming:
Hemming is a metalworking process that involves rolling the edge of sheet metal over and onto itself, essentially creating an area of two layers. During this process, the edge of sheet metal is folded over. This holds the outer panel and the inner panel tight.
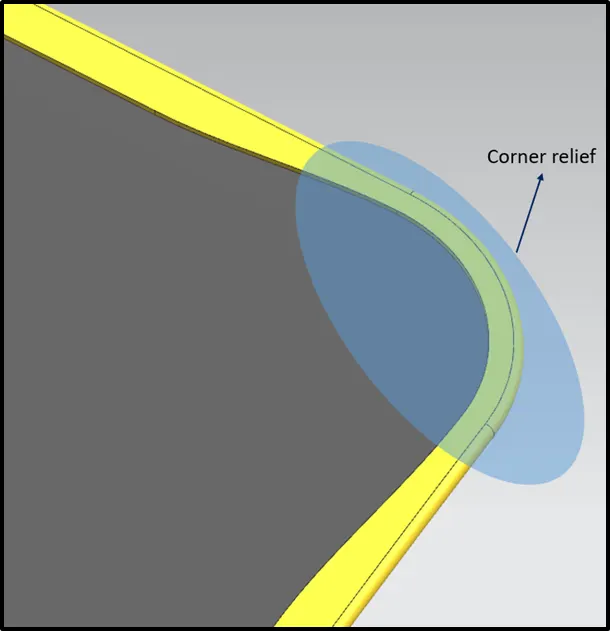
Hemming reliefs are provided at the corners to prevent the folding and distortion (sometimes) of the sheet.
Draft analysis
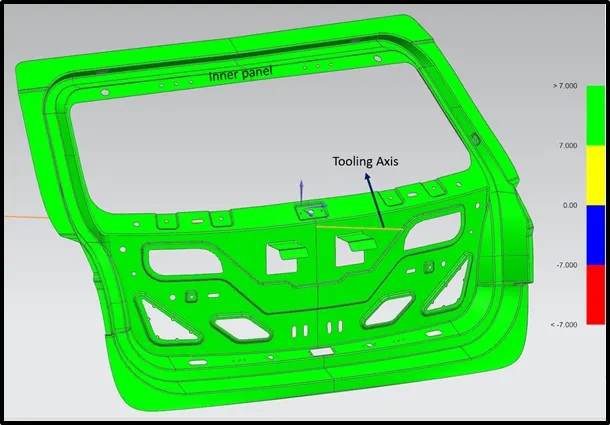
No component can be ejected at 90degree angle there should be some drat given for easy removal after performing the respective operation to form a Sheetmetal component. The minimum draft angle of 7degrees should be provided for the Sheetmetal components so that there shall be no deformation in the component after it is removed from the punching or any other appropriate operation.
Entire inner panel is cleared along main tooling axis, but the hinge and gas stay emboss are cleared along other axis.
Draft analysis is performed on the inner panel (with minimum 7degrees draft angle) and the results are satisfied.
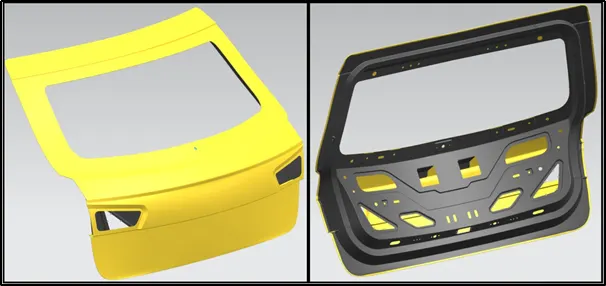
Complete assembly of the Rear door
Conclusion:
The back door is designed using the given styling surface and with proper reinforcements and embosses.
The Draft analysis performed on the design of the back door is satisfied.