Creation of Column Schedule and Drawing Template using AutoCad
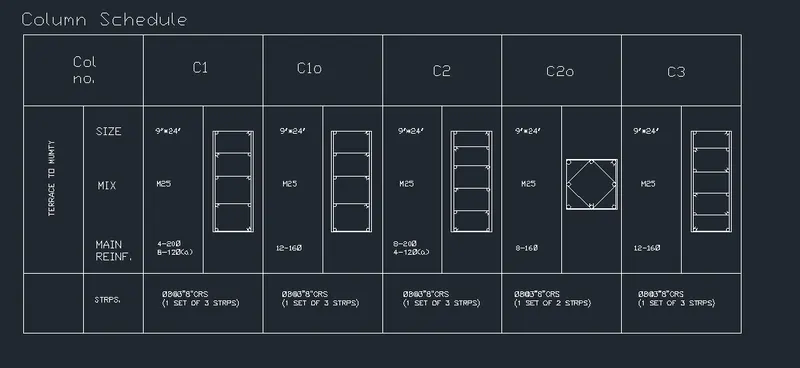
Aim:- To draw the given drawing by using AutoCad software.
Procedure:-
STEP 1: In the command prompt type Rec>dimension.
Assume dimension of rectangle
STEP 2: In the command prompt type offset and make the partition in the rectangle as per your assumption.
STEP 3: In the command prompt type Dtext>single line and text as per given drawing.
STEP 4: In the command prompt type Rec> dimension and draw the columns section.
STEP 5: In the command prompt type Circle and draw the circle as shown in drawing.
RESULT:-
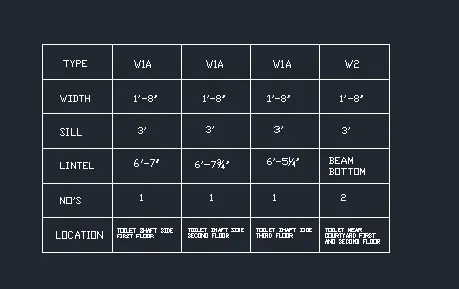
Aim:- To draw the given drawing by using AutoCad software.
Procedure:-
STEP 1: In the command prompt type Rec>dimension.
Assume dimension of rectangle
STEP 2: In the command prompt type offset and make the partition in the rectangle as per your assumption.
STEP 3: In the command prompt type Dtext>single line and text as per given drawing.
RESULT:-
Aim:- To draw the given drawing by using AutoCad software.
Procedure:-
STEP 1: In the command prompt type Rec>dimension.
Assume dimension of rectangle
STEP 2: In the command prompt type Dtext>single line and text as per given drawing.
RESULT:-
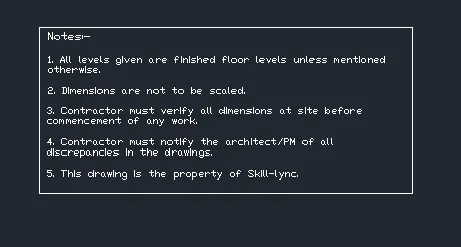
Aim:- To draw the given drawing by using AutoCad software.
Procedure:-
STEP 1: In the command prompt type Rec>dimension.
Assume dimension of rectangle
STEP 2: In the command prompt type line and make the partition in the rectangle as per your assumption.
STEP 3: In the command prompt type Dtext>single line and text as per given drawing.
RESULT:-
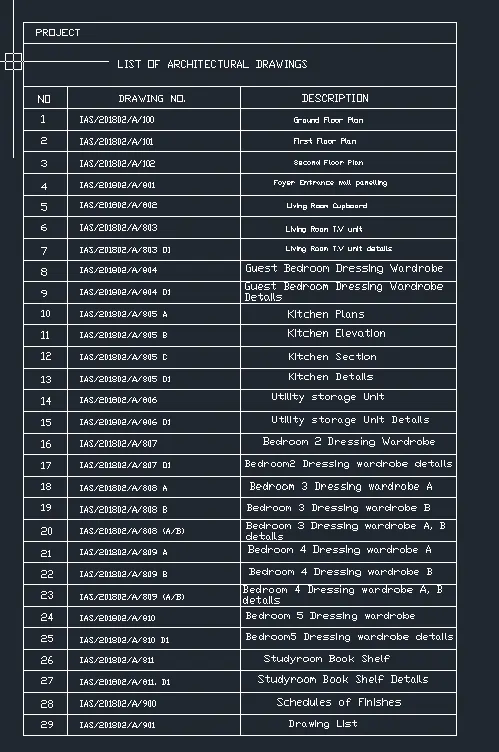
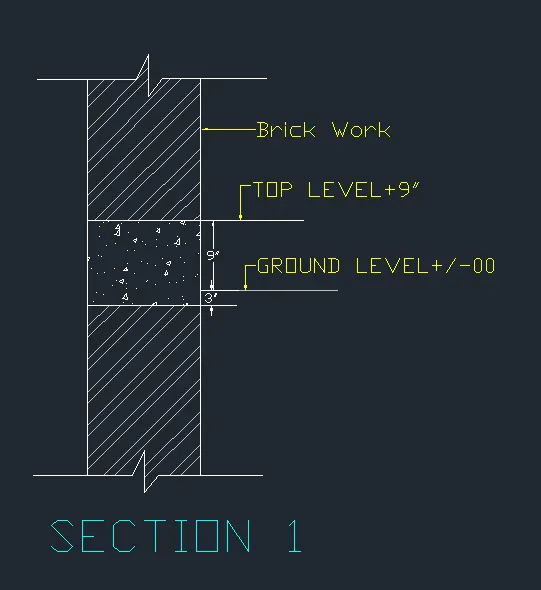
Aim:- To draw the given drawing by using AutoCad software.
Procedure:-
STEP 1: In the command prompt type line.
Assume dimension of the line
STEP 2: In the command prompt type Dtext>single line and text as per given drawing.
STEP 3: In the command prompt type Dimlinear and measure the dimension as per given drawing.
STEP 4: Colour the given text from menu bar.
RESULT:-