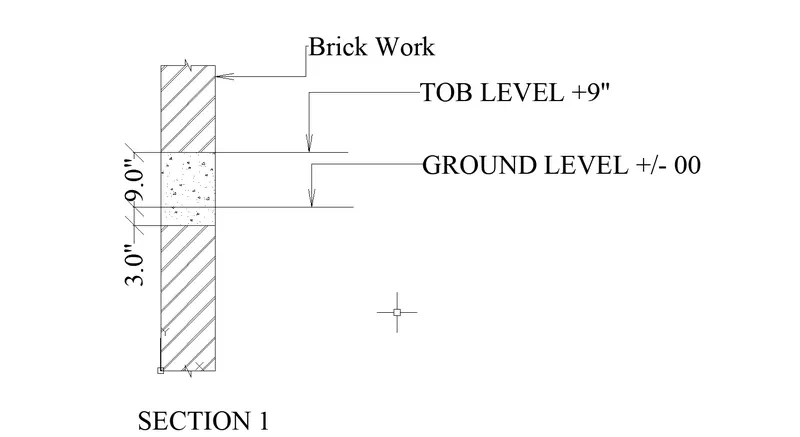
Creation of Column Schedule and Drawing Template using AutoCad
Introduction: Autocad is a commercial Computer Aided Design(CAD), It is marked and developed as Autodesk. It was first released on december 1982. Autocad derived from a program, which was beganed in 1977 and then released in 1979 called as Interact CAD, and also called in early documents od autocad as microCAD, Auto desk cofounder was Michael Riddle.
The first version of cad was released in december 1982 and was supported on CP/M-80 computers, By march 1986 Aotocad has became most uniquitous cad program worldwide. The file format of autocad was .dwg, and its interchange file format to DXF, have become a standard. Autocad was included support for .dwf, a format developed and promoted by Autodesk, for publishing CAD date. In year 2022 the Autocad 36th major version was released and the 12th consecutive year of Autocad foe Mac.
CAD is a technology which replaces manual drawing with automated process, if you are a drafter, desingner, architect or engineer you have been used 2D or 3D CAD programs i.e., Autocad or Autocad LT software. Autocad helps you in draft construction documentation, explore ideas for design, viaualise concepts through photorealistic renderings and gives how a design performs in real world.
Autocad mailnly used by industries, architects, engineers, city planners, project managers, graphic designers and other professionals.
1.
Aim: To Create a column schedule as given, using autocad.
Steps:
1.Open new file in Autocad 2023, Type UNITS, use Engineering and take inches
2.Then LIMITS, Limits of lower left corner give (0,0) and limits of upper right corner (50,50)
3.Type DS (drafting settings) and go to snap and grid ON snap and grid, give snap X and Y spacing as 0.1, and Grid X and Y spacing as 0.1 and major lines are taken at every 5 minor lines.
4.Go to Tables in the annotation panel and create a Table with No.of Columns 12 and No.of Rows are 5 ( take all rows as Data type) and we get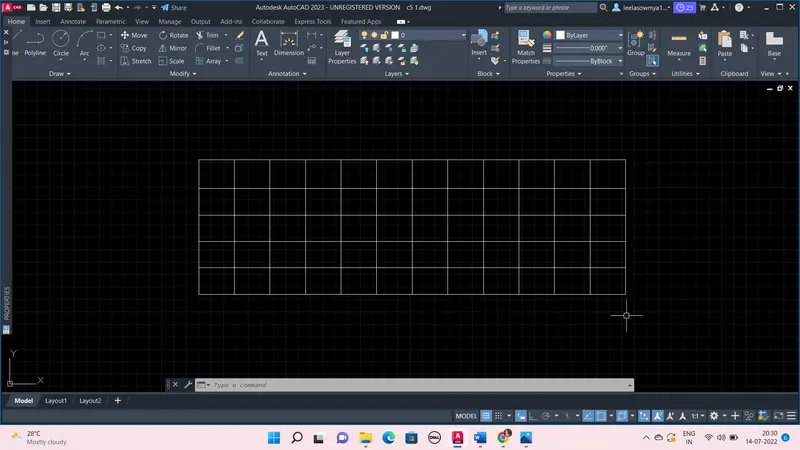
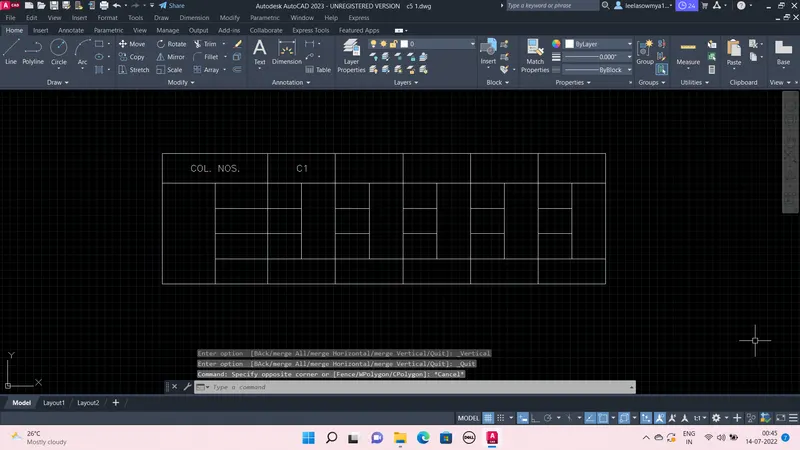
5. Now select the 1st row of 1st and 2nd column and using the Merge by Row merge as per required, similarly use merge by Column and merge by Row to get required table style.
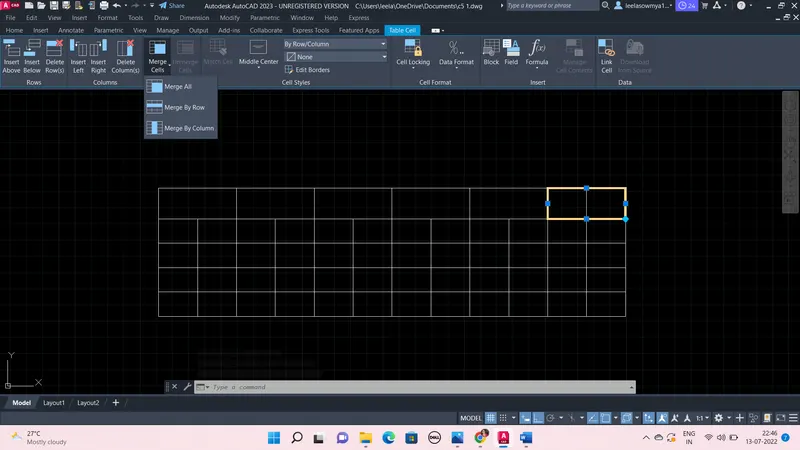
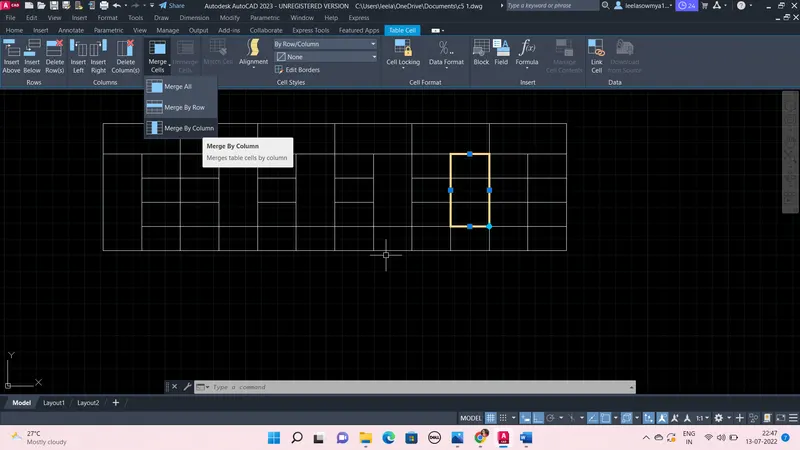
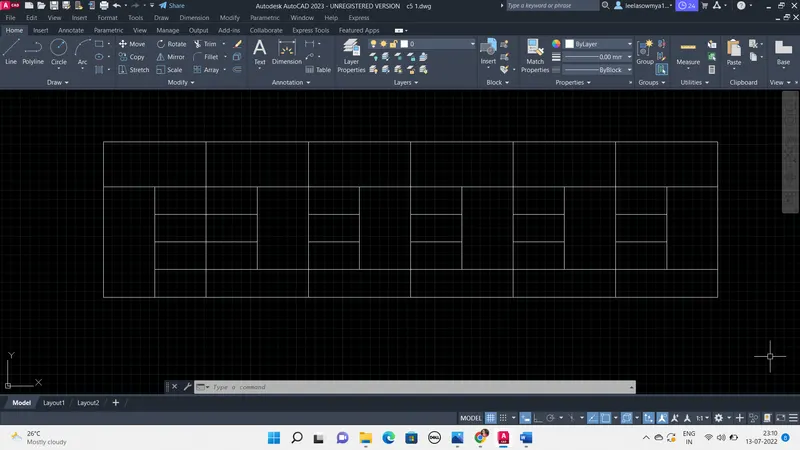
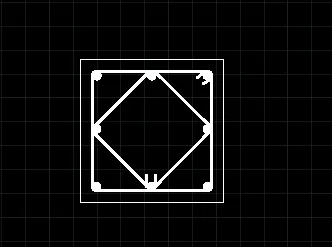
6. Now take rectangle of size 5'x15' and offset it to a distance of 5" and increase the thickness of inner rectangle, Then use circle command to represent reinforcement and use fillet of 2" at the corners of inner rectangle, and use offset towards inward for reinforcement and then use mirror, Then silimarly draw the others
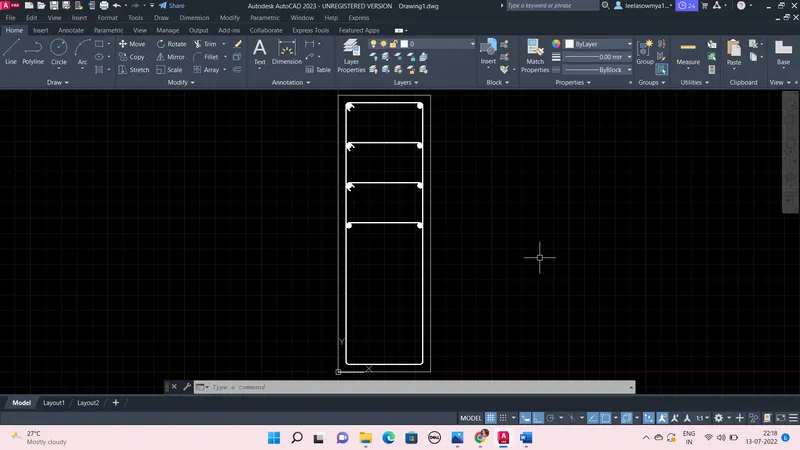
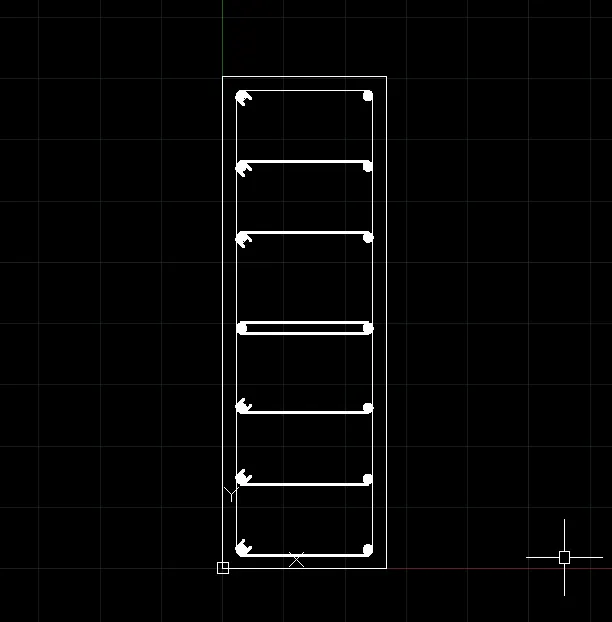
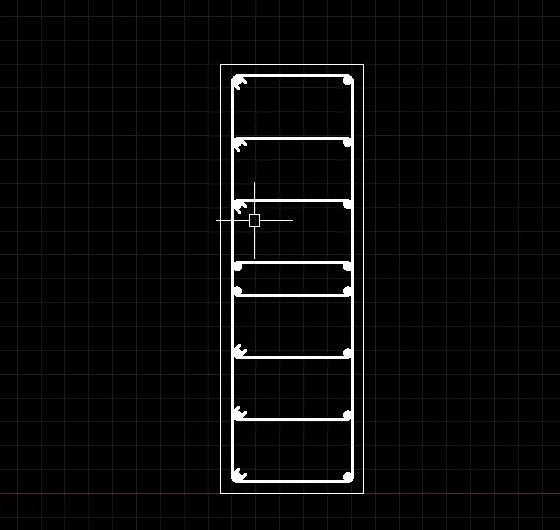
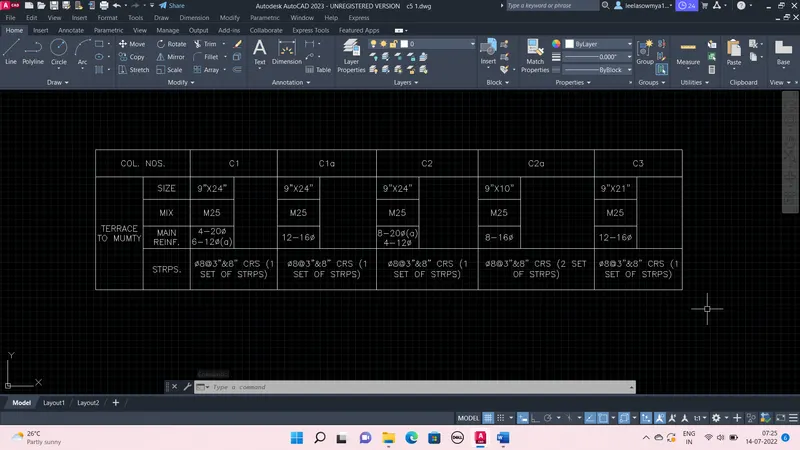
7.Then using DTEXT command and write the required text using romans.shx- font style, Height- 8” and Justify- Left
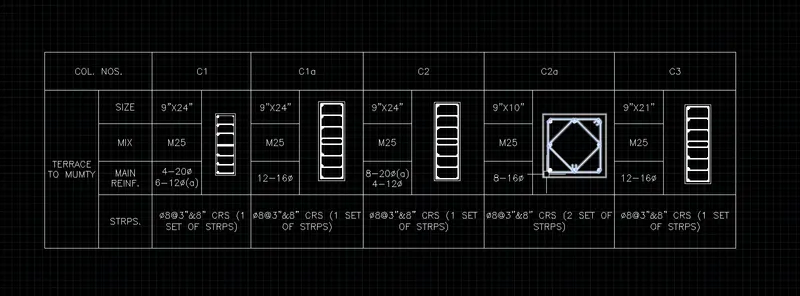
8. And insert the column detailing, use Scale command to enlarge or decrease the size of object.
2.
Aim: To create a window schedule as shown in the given figure using Autocad
Steps:
1. Open new file in Autocad 2023, Type UNITS, use Engineering and take inches
2. Then LIMITS, Limits of lower left corner give (0,0) and limits of upper right corner (50,50)
3. Type DS (drafting settings) and go to snap and grid ON snap and grid, give snap X and Y spacing as 0.1, and Grid X and Y spacing as 0.1 and major lines are taken at every 5 minor lines.
4. Go to Tables in the annotation panel and create a Table with No.of Columns 5 and No.of Rows are 6 ( take all rows as Data type) and give column width as 7' and row height 2, and we get
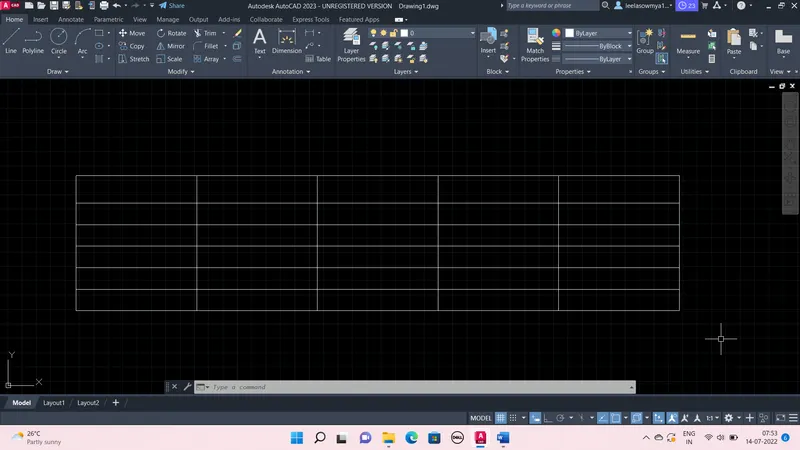
5. And double click on the table cell and write the required text using font size as 8" and font style used is Yu gothic.
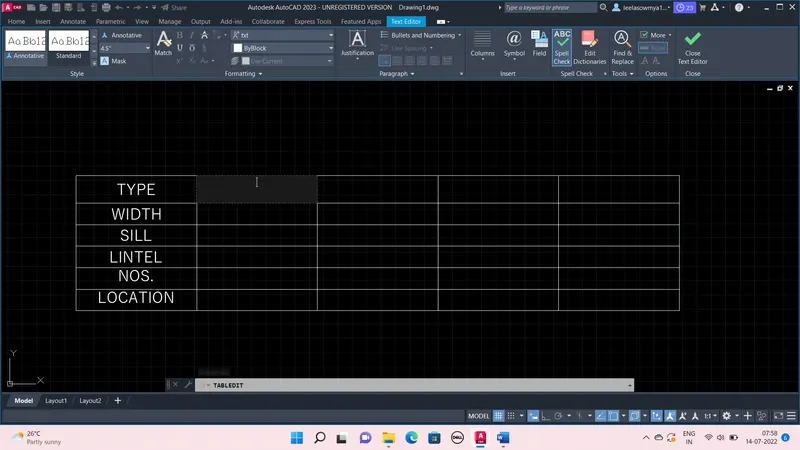
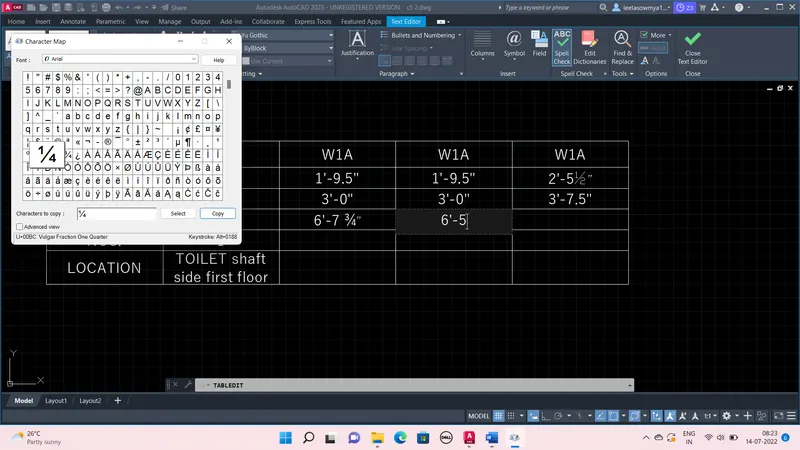
6. Use Symblos from the Insert panel, and insert 1/2, 3/4 and 1/4
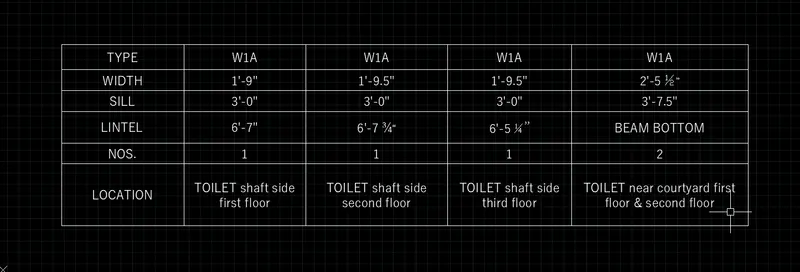
7. After the writing the required text, in order to adjust the size of the cell just select cell and drag the grips in order to change the size of the cell as per required text we get
3.
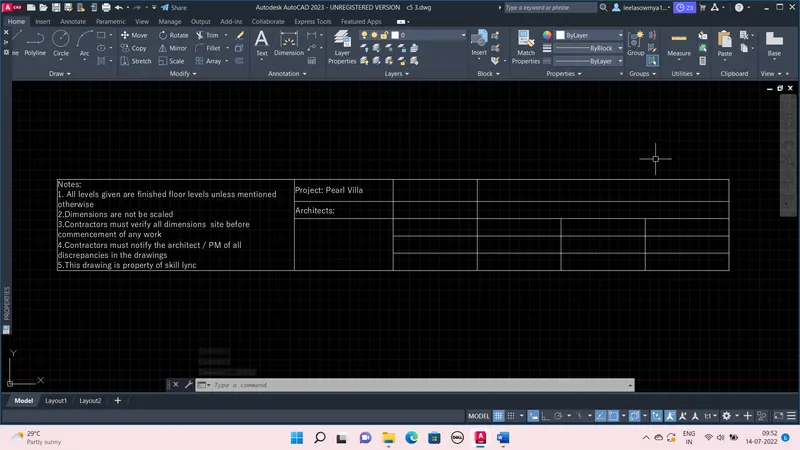
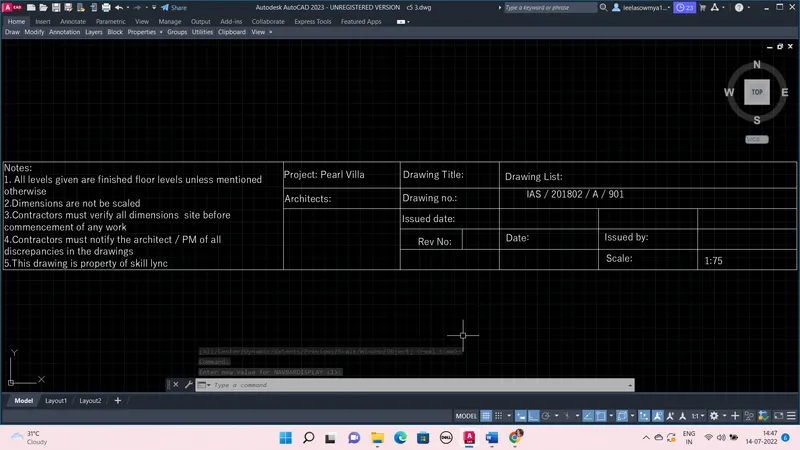
Aim: To Create the drawing template as shown in the given figure using Autocad
Steps:
1. Open new file in Autocad 2023, Type UNITS, use engineering and take inches
2. Then LIMITS, Limits of lower left corner give (0,0) and limits of upper right corner (50,50)
3. Type DS (drafting settings) and go to snap and grid ON snap and grid, give snap X and Y spacing as 0.1, and Grid X and Y spacing as 0.1 and major lines are taken at every 5 minor lines.
4. Go to Tables in the annotation panel and create a Table with No.of Columns 6 and No.of Rows are 5 ( take all rows as Data type) and give column width as 7' and row height 2, and we get
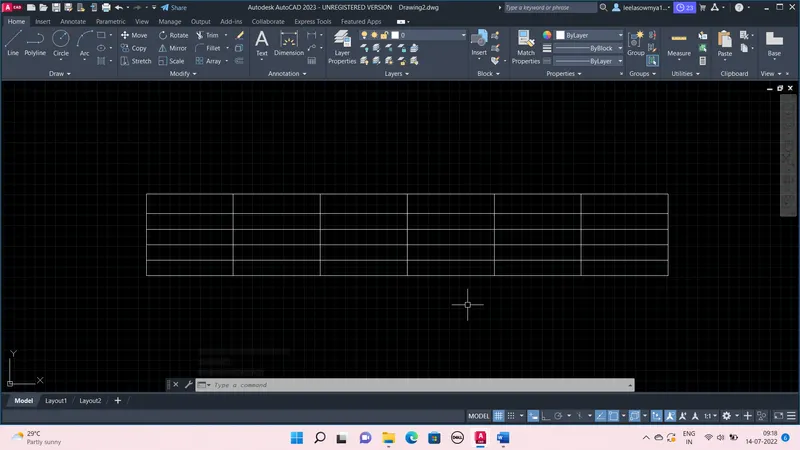
5. Select 1st column and use Merge All, then select 2nd column bottom 3 rows and use Merge All and select 4th to 6th column top 2 row and use Merge By Row, then the required table format is formed.
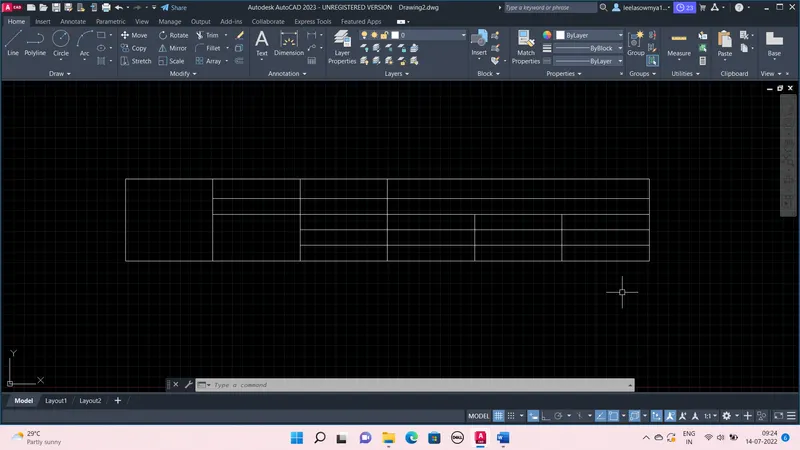
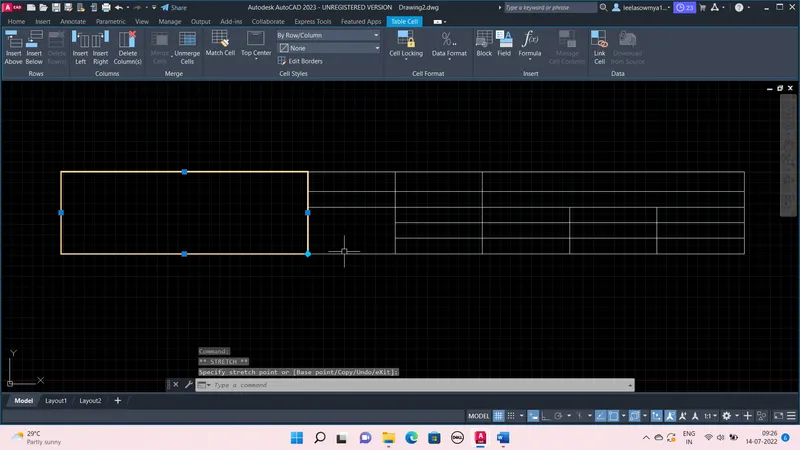
6. To adjust the size of the cell just select cell and drag the grips in order to change the size of the cell as per required text
7. And double click on the table cell and write the required text using font size as 8" and font style used is Yu gothic.
4.
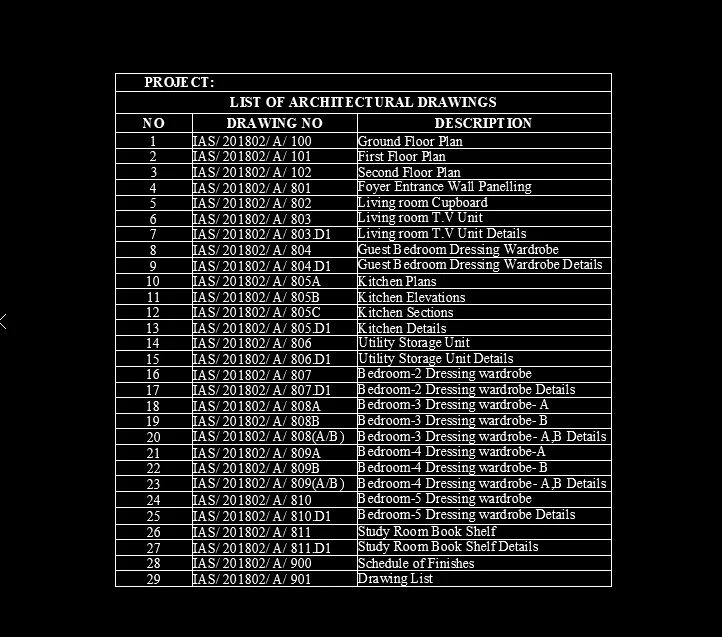
Aim: To create the list of drawing schedule as given in the figure, using Auto cad
Steps:
1.Open new file in Autocad 2023, Type UNITS, use Engineering and take inches
2.Then LIMITS, Limits of lower left corner give (0,0) and limits of upper right corner (50,50)
3.Type DS (drafting settings) and go to snap and grid ON snap and grid, give snap X and Y spacing as 0.1, and Grid X and Y spacing as 0.1 and major lines are taken at every 5 minor lines.
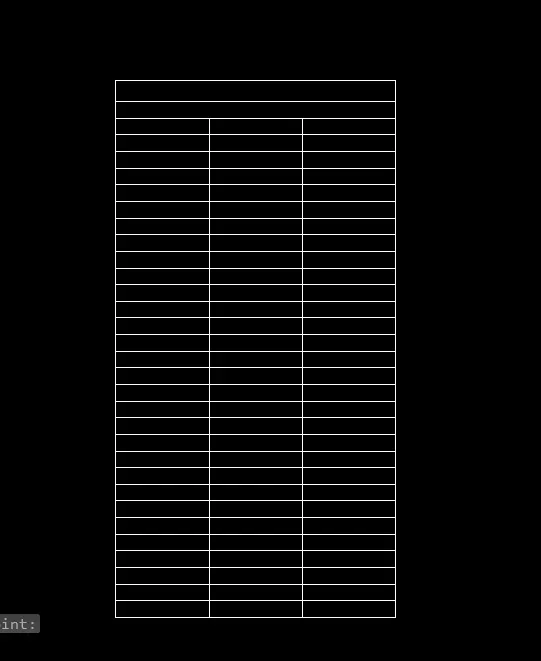
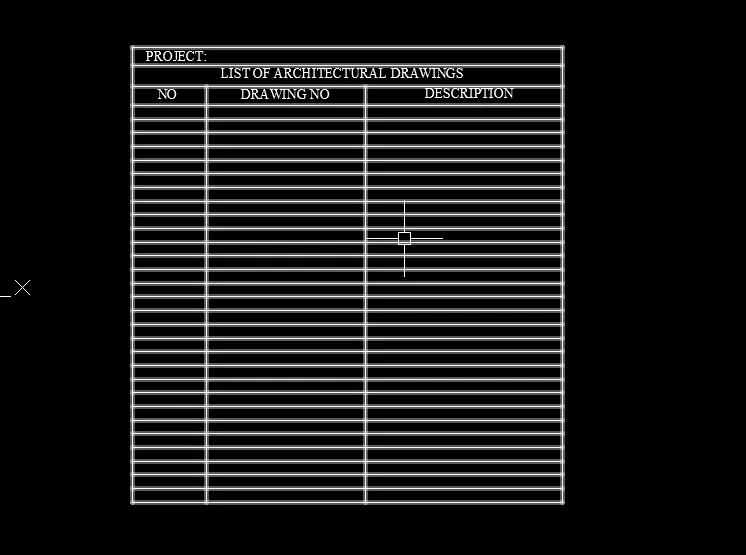
4.Go to Tables in the annotation panel and create a Table with No.of Columns 3 and No.of Rows are 32 ( take all rows as Title type) and we get
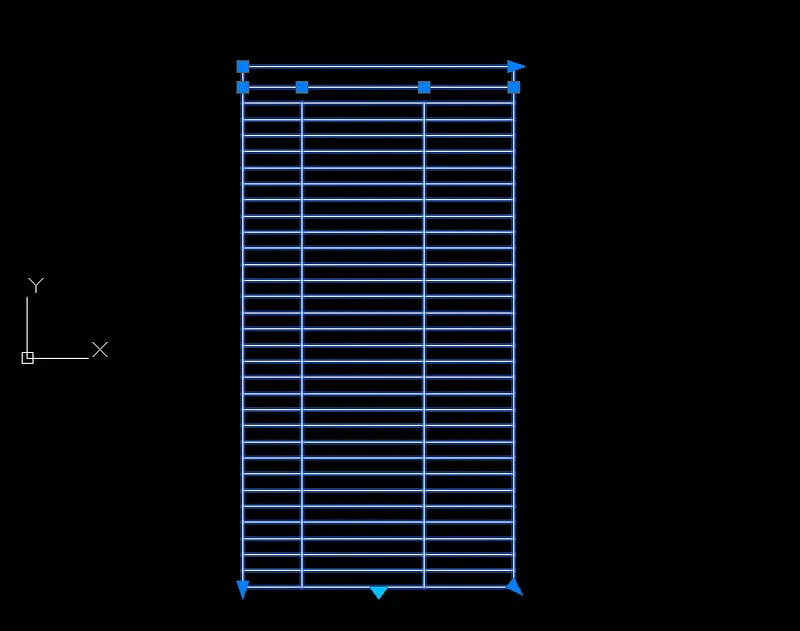
5. In order to adjust the size of the cell, just select cell and drag the grips in order to change the size of the cell as per required text we get
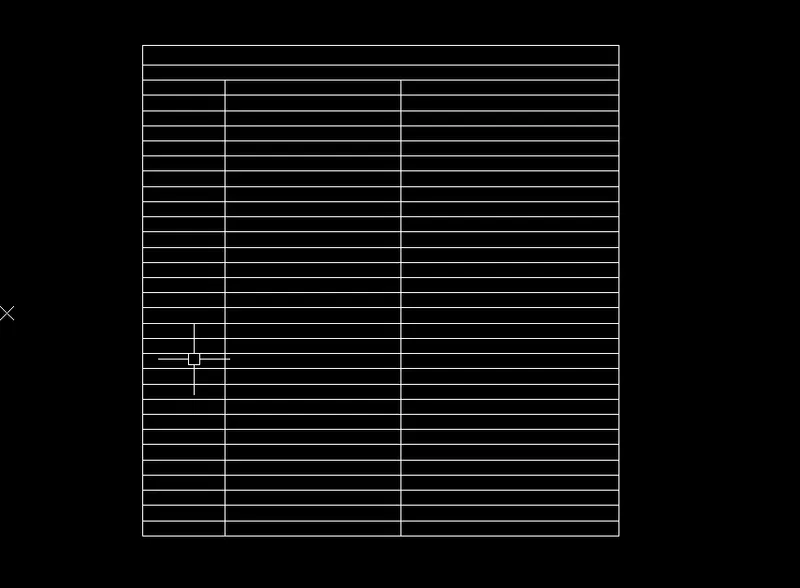
6. And double click on the table cell and write the required text using font size as 10 and font style used is Times New Roman Greek, and we get
5.
Aim: To create the Beam detail as given in the figure, using Auto cad
Steps:
1.Open new file in Autocad 2023, Type UNITS, use Engineering and take inches
2.Then LIMITS, Limits of lower left corner give (0,0) and limits of upper right corner (50,50)
3.Type DS (drafting settings) and go to snap and grid ON snap and grid, give snap X and Y spacing as 0.1, and Grid X and Y spacing as 0.1 and major lines are taken at every 5 minor lines.
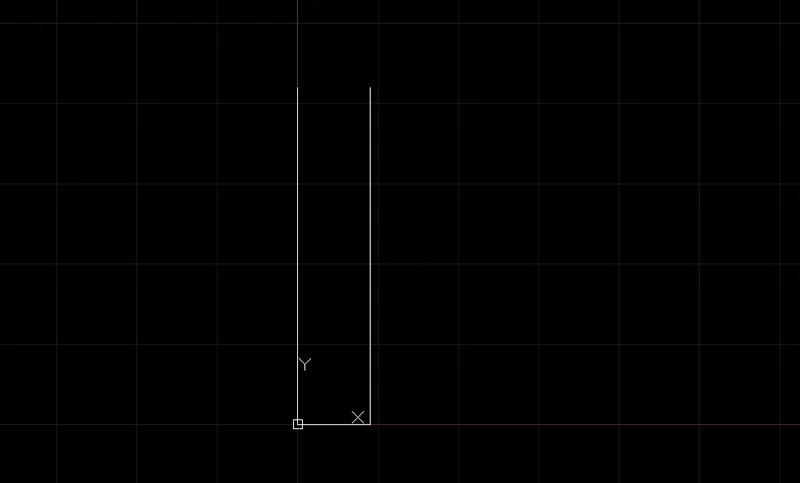
4. Now take Line command and draw a line from (0,0) to (0,4.2') and Offset the line at a distance of 0.9", and join the vertical lines with Line at bottom
5. Now Offset the bottom horizontal line in upward direction at a distances od 2', 3", 9" and 1.2', we get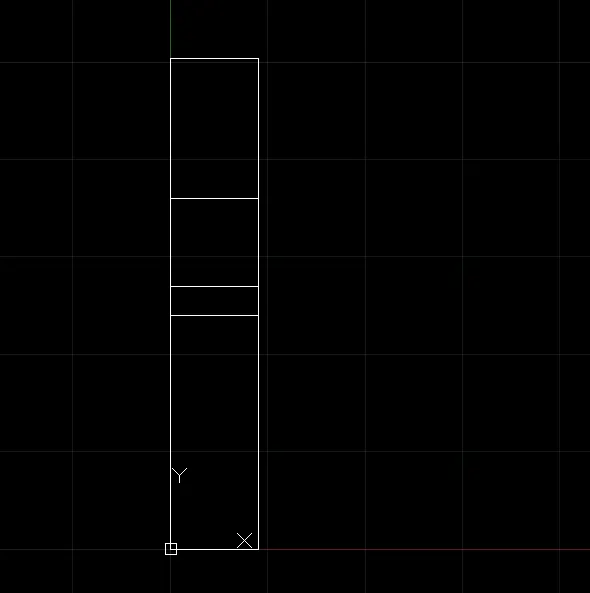
6. Now at midpoint of top and bottom horizontal lines draw small line and offset it bth sides and join as per required and trim the extra lines. Now using Hatch command, Hatch with different styles as per requirement.
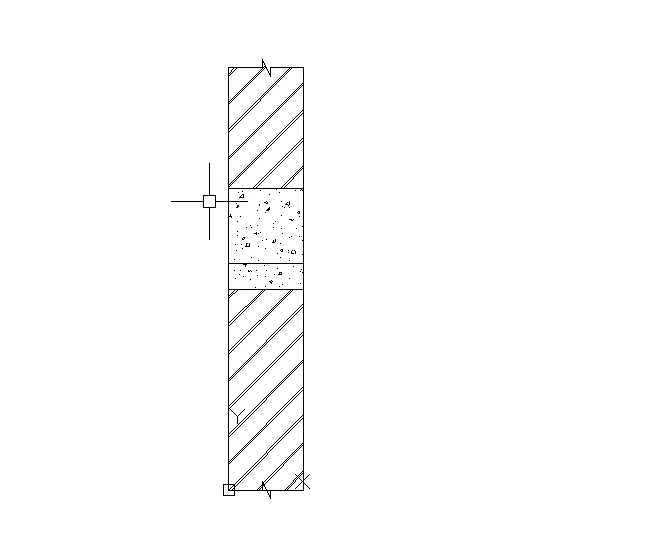
7. Now using Leader from the Annotate panel and write the required text by selecting it, Use MLS ( Muilti Leader Style) to modify the leader here i used Open type Arrow and size of arrow is 3" and the text font style is Times New Roman Greek with 3" size and by using Dimlinear provide the Dimensions.