Creation of Column Schedule and Drawing Template using AutoCad
- Create a column schedule as shown in the figure.
Note: Create a column schedule with the help of lines. Also, insert text with the help of Dtext command or Single Line text.
Hint: Use font name: romans.shx; Height: 8”, Justify: Left
AIM:
Do draw an column as per the dimension and specification.
INTRODUCTION:
- All Dimension spacing and center disstance of the column are in mm so we couldchange the dimension at inches.
|
Values in mm |
Values in Inches |
|
20 |
0.7874 |
|
16 |
0.6299 |
|
12 |
0.4725 |
|
8 |
0.3150 |
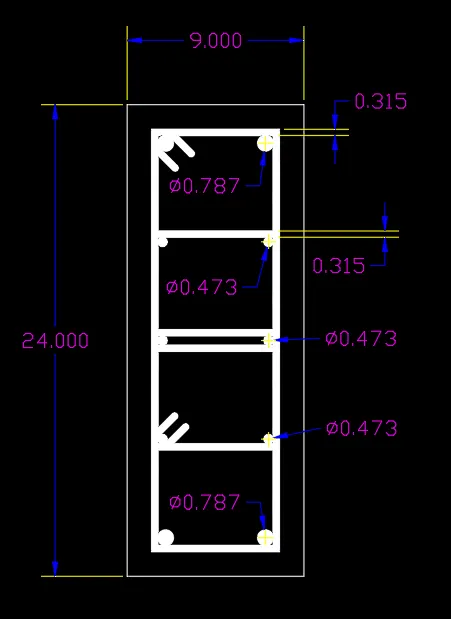
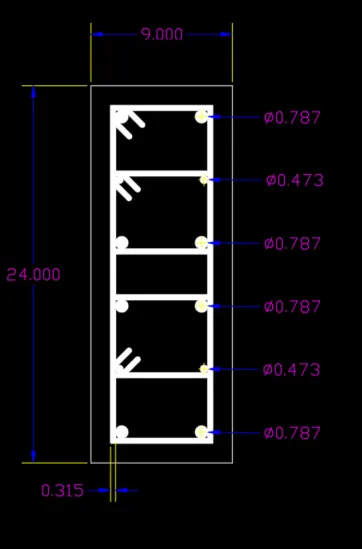
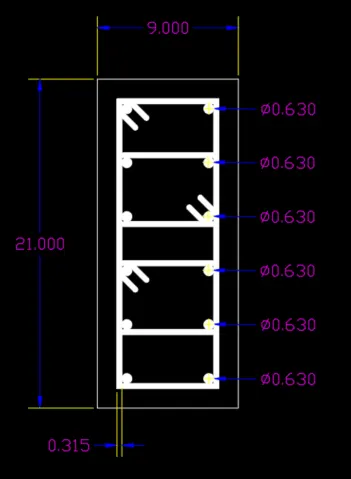
- Column C1 is provided with 4 bars of 20 mm dia. and 6 bars of 12 mm dia. The 12 mm dia bars are marked with 'a'.
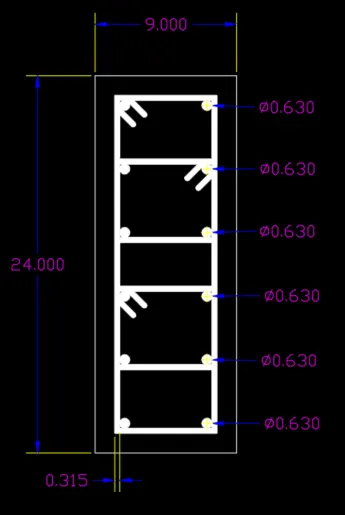
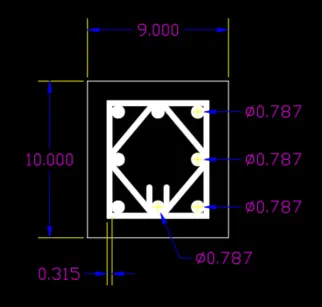
- Column C1a and Column C3 are provided with 12 bars of 16 mm dia bars.
- Column C2 is provided with 8 bars of 20 mm dia and 4 bars of 12 mm dia. The 20 mm dia bars are marked with 'a'.
- Column C2a is provided with 8 bars of 16 mm dia.
- All columns are provided with 8 mm dia stirrups with 3" spacing c\c near the ends and 8" c\c in mid-length.
- The clear cover for all the columns is assumed to be 1.5" (approx 40 mm). As per IS 256, the minimum cover to the column should not be less than 40 mm
PROCEDURE:
- First we draw an layout of C1, C1a , C2 , C2a, C3 are same measurement of 9"x24"
- And we draw the bar of 4 bars of 20mm and 6 bars of 12mm for C1
- C1a have 12 bars of 16mm
- C2 are b bars of 20mm and 4 bars of 12mm
- C2a are 8 bars of 16mm
- C3 are 12 bars of 16mm
To Set of the font name roman and text height 8" and justify to left
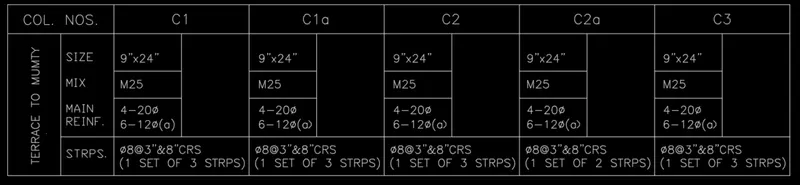
To copy the all section of column to the table
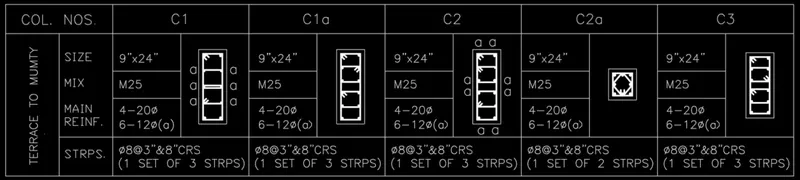
RESULT:
Finally draw the column schedule as per specification.
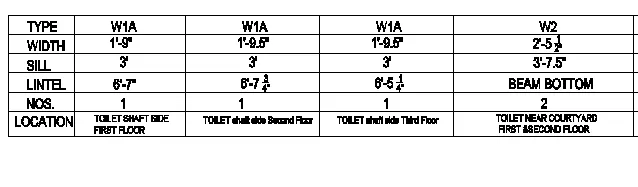
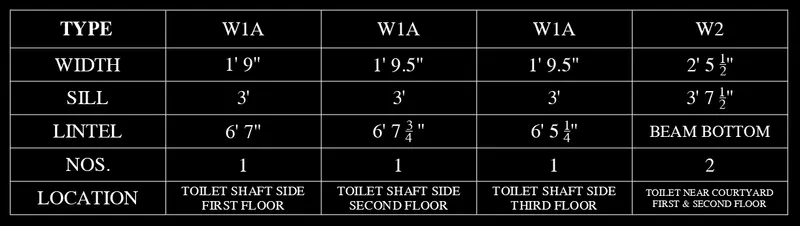
2. Create a window schedule as shown in the figures:
Window Schedule:
AIM:
To draw an window schedule at the figure uing of autocad
PROCEDURE:
- Make a table at 5 row and 6 column
- To take an text over the table
RESULT:
Finally we get an window schedule drawing
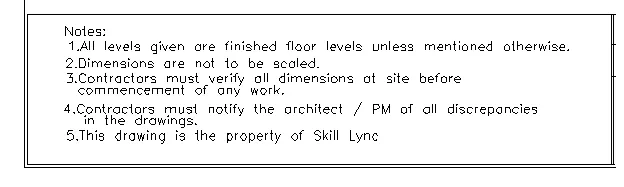
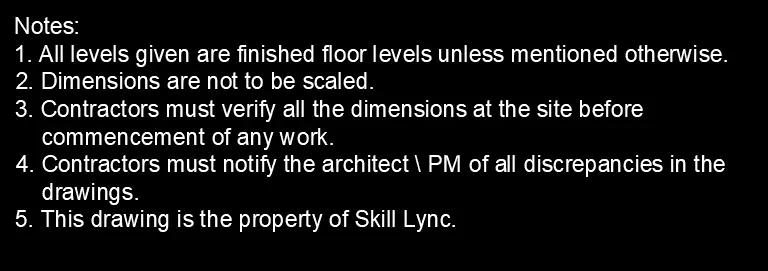
3. Create the drawing template as shown in the figure:< Use the Notes as in the figure>

AIM:
To draw an drawing template as per the notes
PROCEDURE:
- Make a table 4 rows and 5 columns
- To remove the unwanted rows and columns
- Take an multiline command and text the notes
RESULT:
Finaly we get the note as oer the drawing

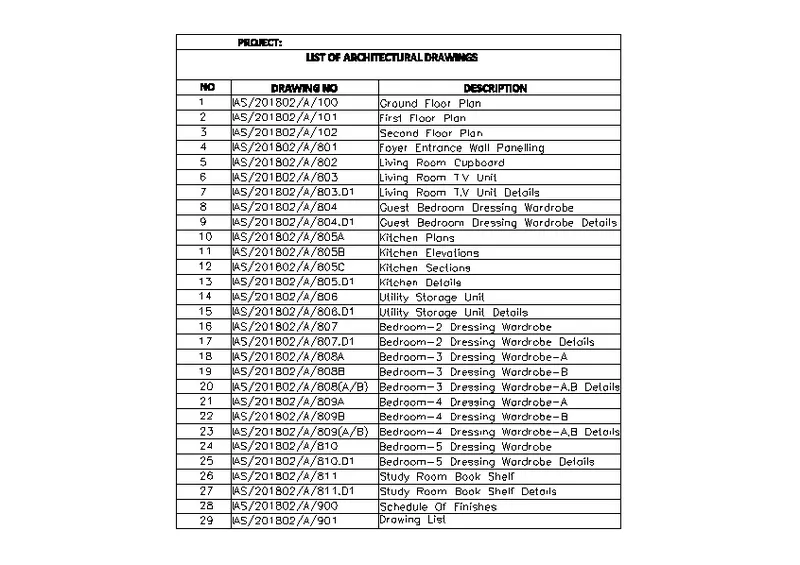
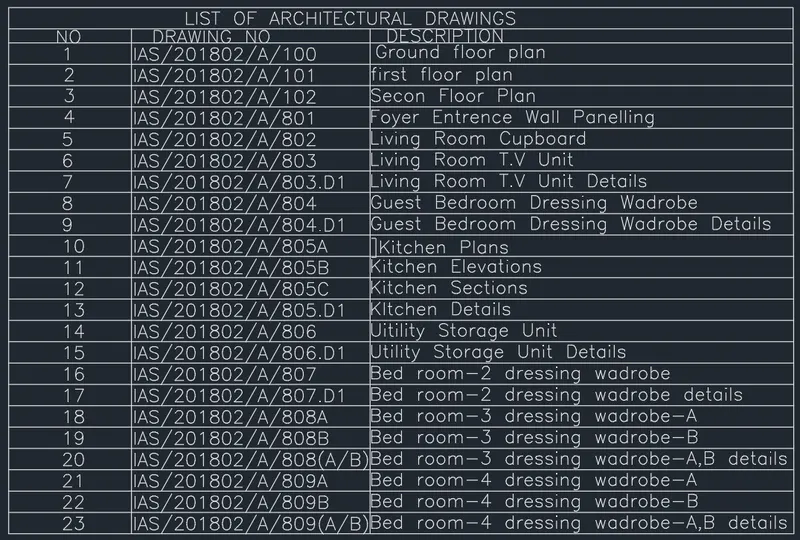
4. Create the list of drawing schedule as shown in the figure:
AIM:
Sketch a list of drawing schedule as per the drawing
PROCEDURE:
- Open the table command.
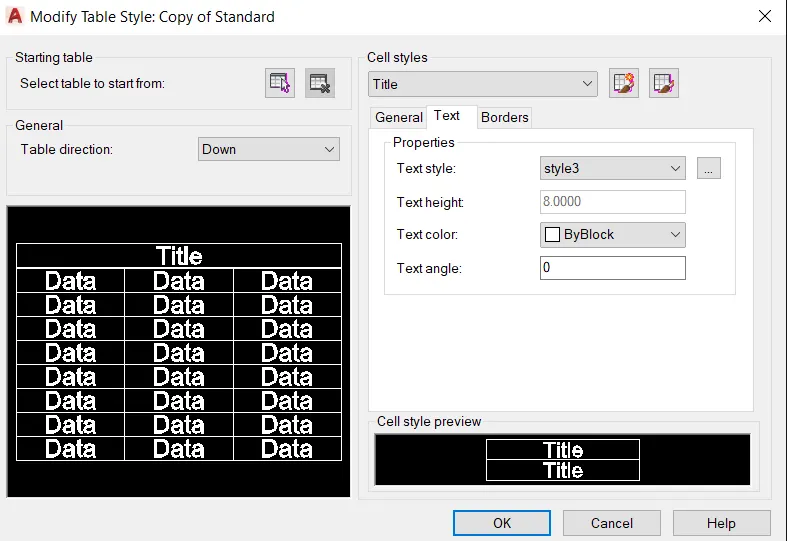
- Create a new table style by selecting the required text style, text height, etc. for all the cell styles.
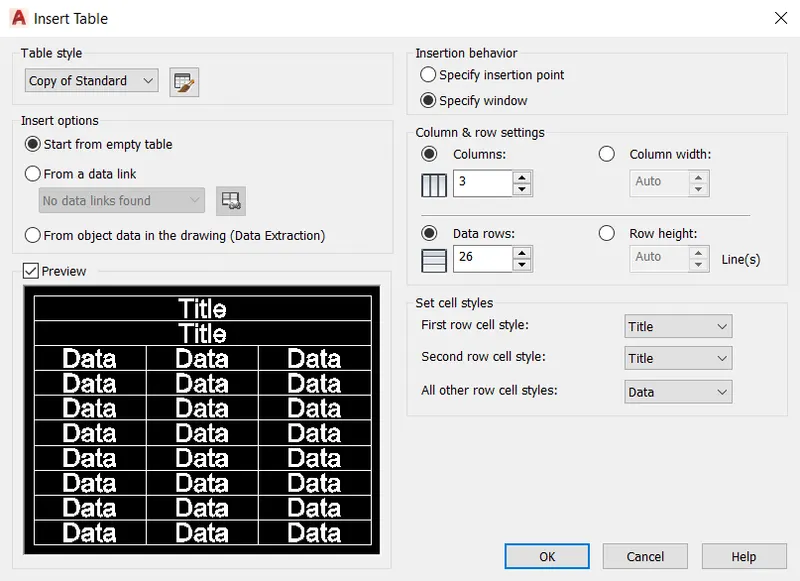
- Enter the number of rows and columns, set the cell styles and using any insertion behaviour, insert the table.
- Enter the data.
- Make the contents of title and header rows as Bold.
- Give the required justification to the cells and adjust the cell sizes if require
RESULT:
Finally we sketch the list of drawing as per the schedule.
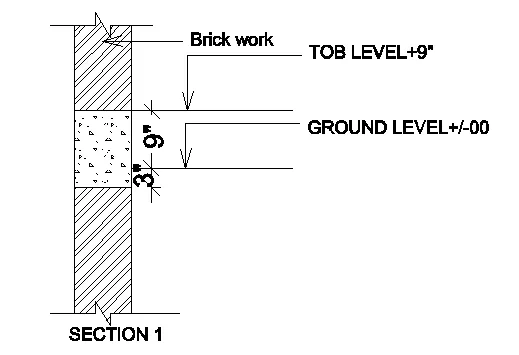
5. Create the Beam detail as shown in the figure and provide text wherever given.
AIM:
Sketch a beam drawing as per the specification.
PROCEDURE:
- Make two parallel lines 45" long at a distance of 6" from each other.
- Using the breakline command, make a breakline at the top and bottom.
- Make the horizontal lines.
- Give the required labeling using leader and multitext.
- Modify the dimension to match with that in the question.
- Give the hatching of brickwork and concrete as shown.
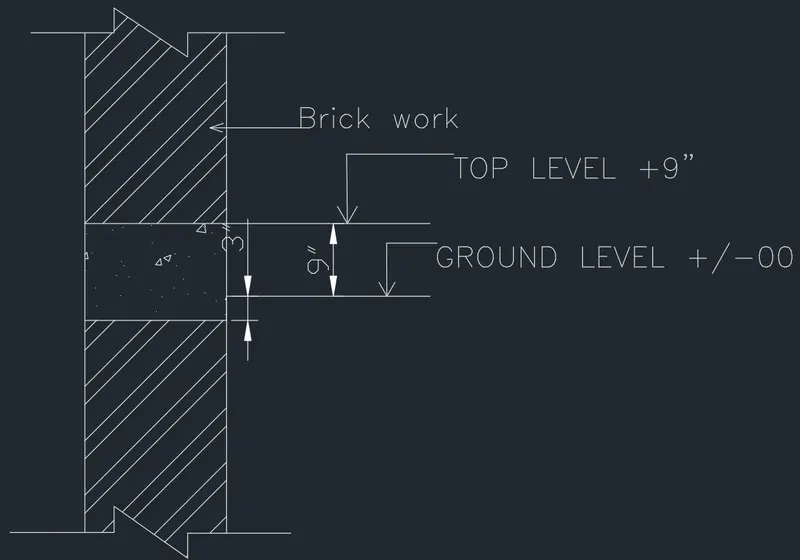
RESULT:
Get an beam drawing use of autocad