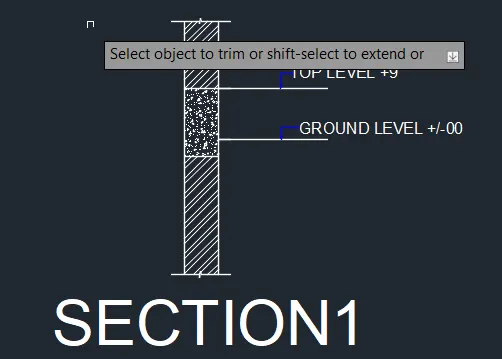
Creation of Column Schedule and Drawing Template using AutoCad
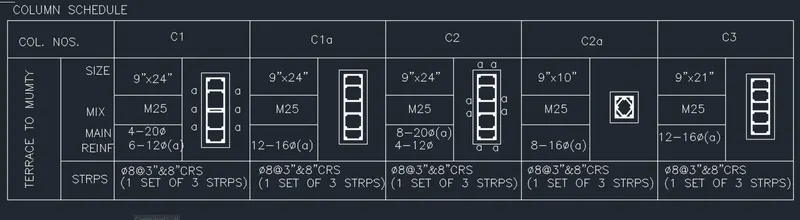
1.Creating a column schedule as shown in the figure:
INTRODUCTION:
1.Column C1 is provided with 4bars of 20mm dia and 6bars of 12mm dia,the 12mm dia are marked with a.
2.Column C1a and Column C3 are provided with 12bars of 16mm dia bars.
3. column C2 is provided with 8bars of 20mm dia and 4 bars of 12mm dia.the 20mm dia bars are marked with a,
4.column C2a is provided with 8bars of 16mm dia.
5.All columns are provided with 8mm dia stirrups with 3"spacing c/c near the ends and 8"cc in mid-length.
6.The clear cover for all the columns is assumed to be 1.5"(approx 40mm) as per is 256, the minimum cover to the column should not be less than 40mm.
PROCEDURE:
1.Open a new autocad file in imperial units.
2. convert the diameter of the bars into inches.The following table contains conversion (Divide by 25.4)
values in mm
values in inches
20
0.7874
16
0.6299
12
0.4725
8
0.3150
A. The dimensions for the bars on the left are the same as that of bars on the right.
B. The longitudinal and stirrups are hatched with a white solid fill.
3. Make the column C1 as shown.
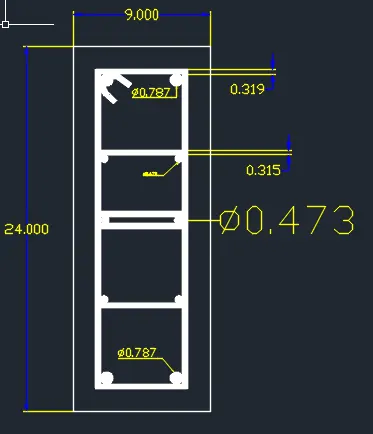
4.Make the column C1a as shown.
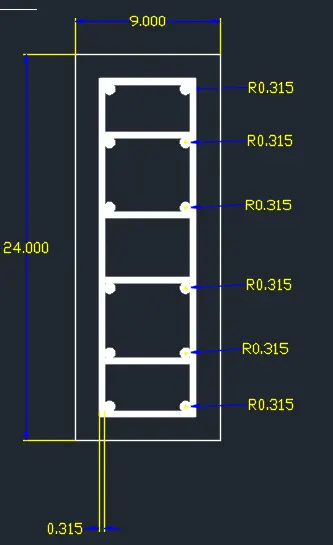
5. Make a column C2 as shown.
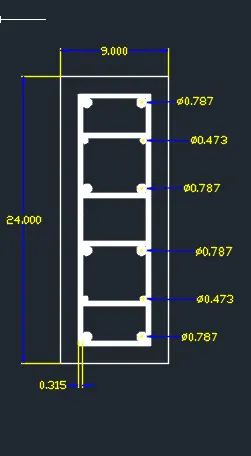
6.Make a column C2a as shown.
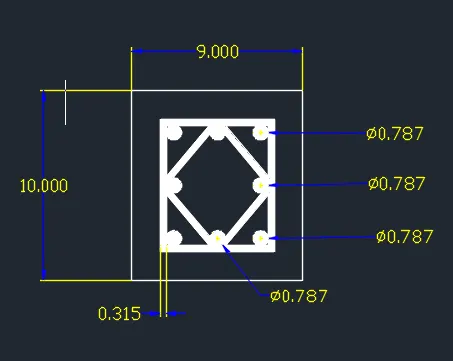
7. Make the column 3 as shown.
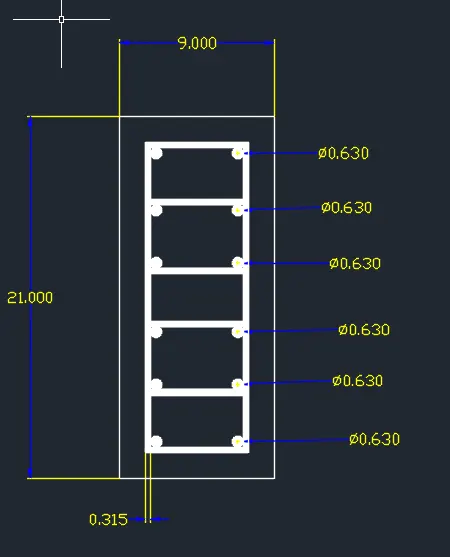
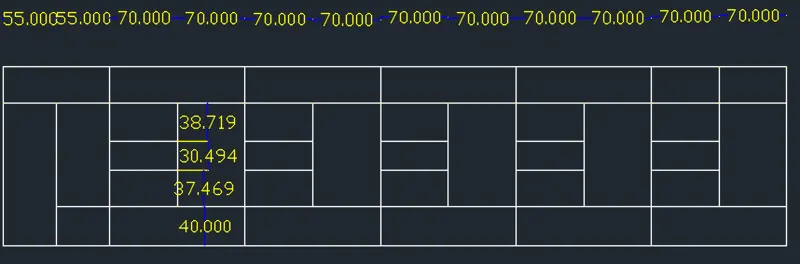
8.Make a table as shown.
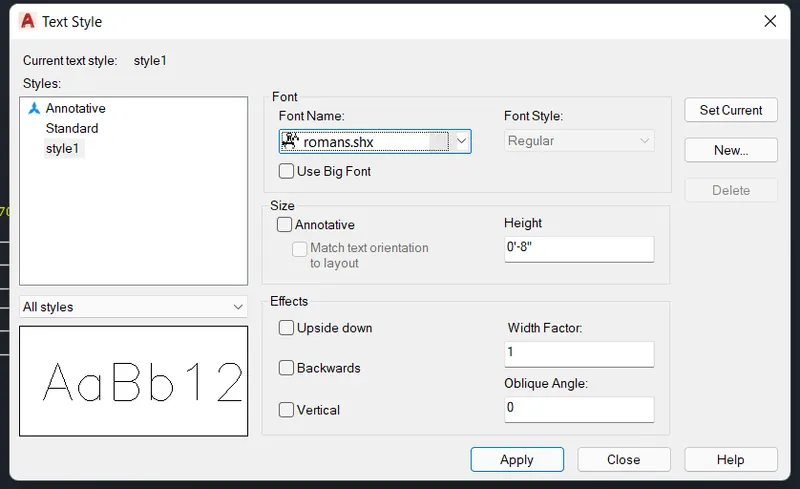
9. Make a new text style with the fontromans.shx and height 8"
10.Using this text style, fill the table using single line text as shown.(Rotate "Terrace to mumpty"by 90 degrees)
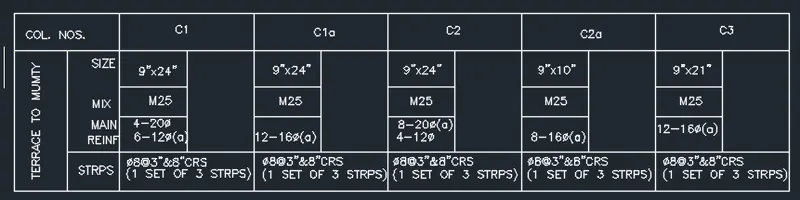
11. Scale the columns made in 3 -7 steps by a factor of 3.2 in order to fit them in their respective place.
12. Move the columns one by one to their respective places.
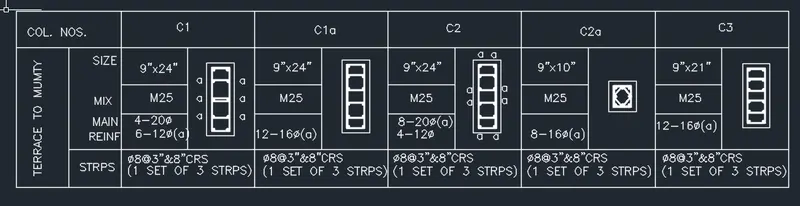
13.Give the heading column schedule using multi-line text and underline it.
RESULT:
2.Create a window schedule as shown in the figure
INTRODUCTION:
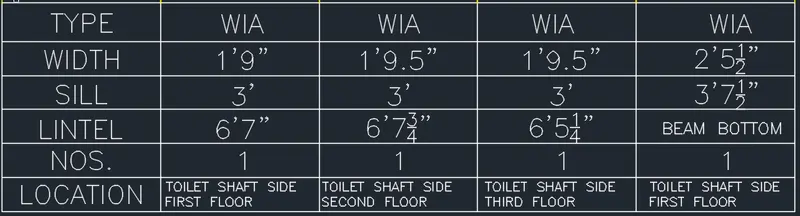
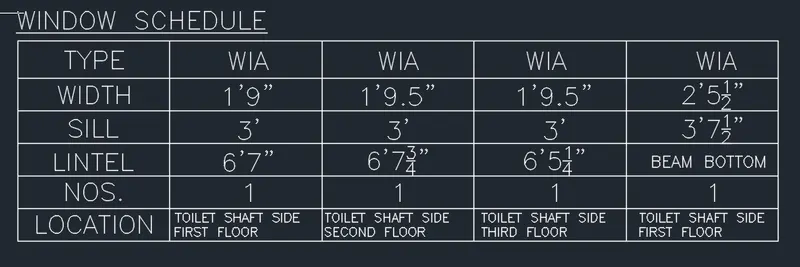
The table contains the width sill and lintel height,their numbers and respective locations for different types of beams.
PROCEDURE
1.Make the following table.
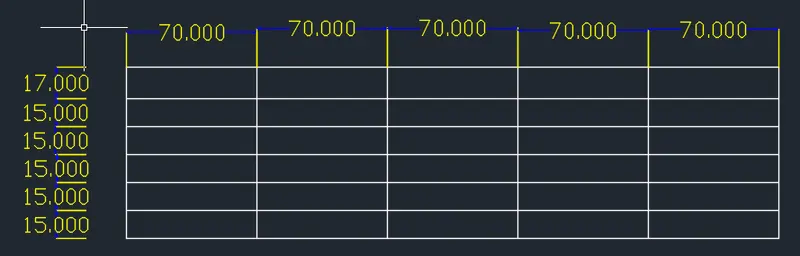
2. Using multitext ,fill in the following data with justification middle center MC
3.Using the multitext command give the heading window schedule and underline it.
3.Creating the drawing template as shown in the figure
PROCEDURE:
1.Make the following table.

2. Using multitext,type the following as shown and place it in the first column (height=2.5" and font =arial)
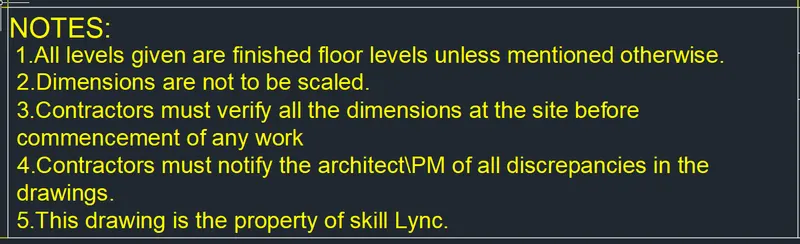
3.Type the following in rest of the cells as shown using multitext:(Making a vertical line after Rev.No:)(Text height =2.5" and font = arial)

RESULT:

4.Create the list of drawing schedule as shown
PROCEDURE
1.Open the table command.
2.Create a new table style by selecting the required text style ,text height,etc. for all the cell styles.
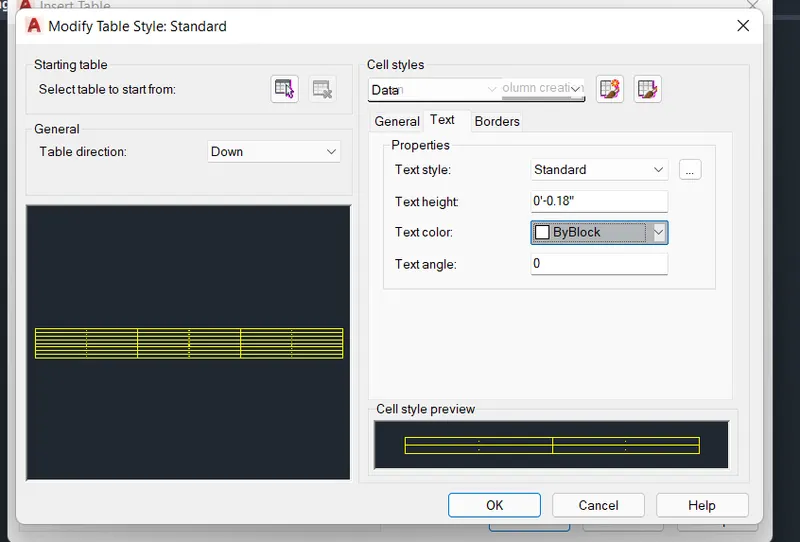
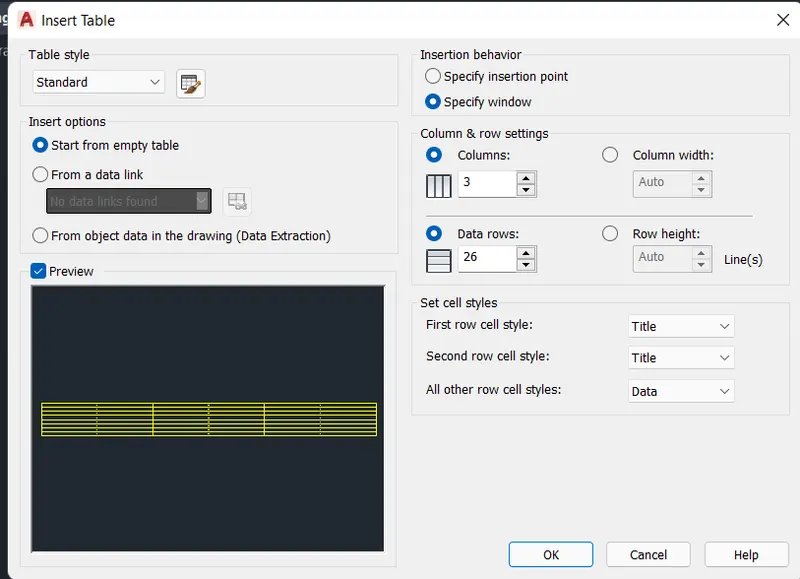
3.Enter the number of rows and columns,set the cell styles and using any insertion behaviour, insert the table.

4.Adjust the size of rows and columns.
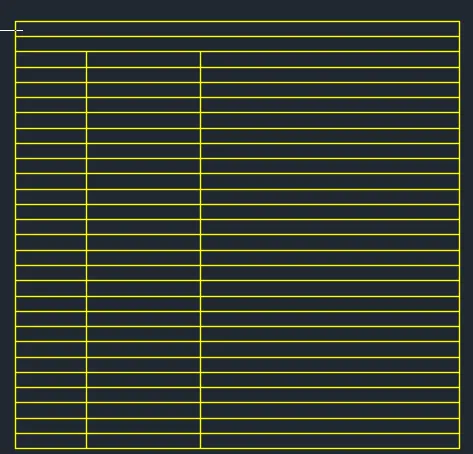
5. Enter the data.
6.Make the contents of title and header rows as bold
7.Give the required justification of the cells and adjust the cell sizes if required.
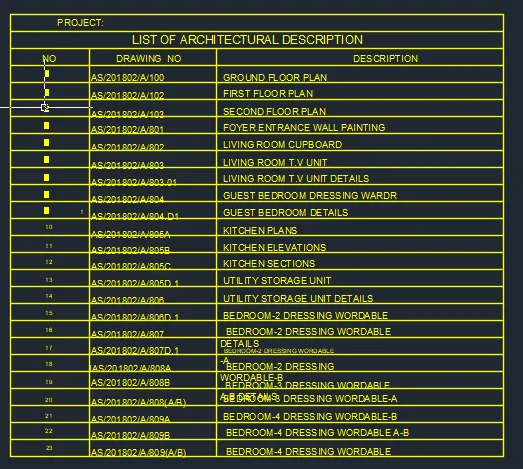
RESULT:
5.Create a beam detail as shown in the figure.
PROCEDURE:
1.Make two parallel lines 45" long at a distance of 6" from each other.
2.Using the breakline command , make the breakline at the top and bottom.
3.Make the horizontal lines as shown in figure B.
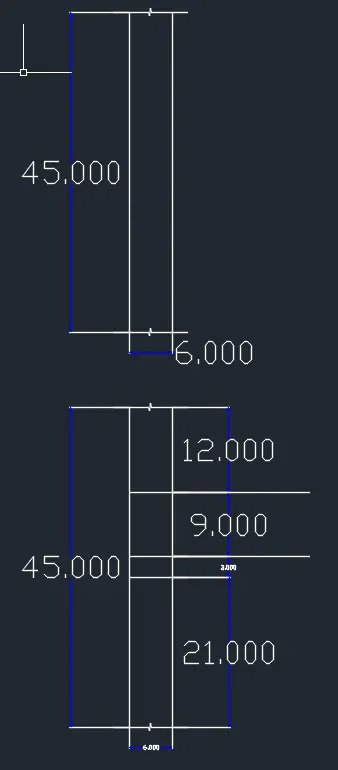
4.Give a required labelling using leader and multitext.
5.Modify the dimensions to match with that in the question.(arrowheads,suffix("),etc)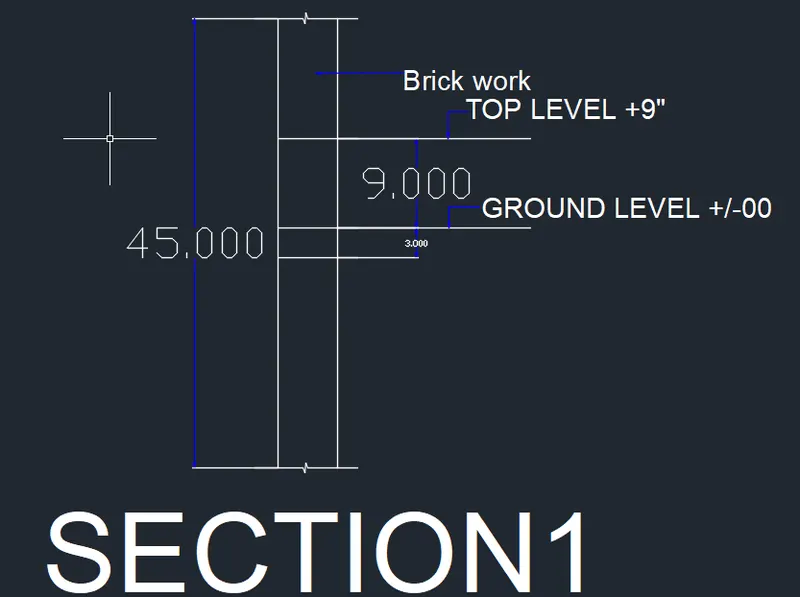
6. Give the hatching of brickwork and concreate as shown.
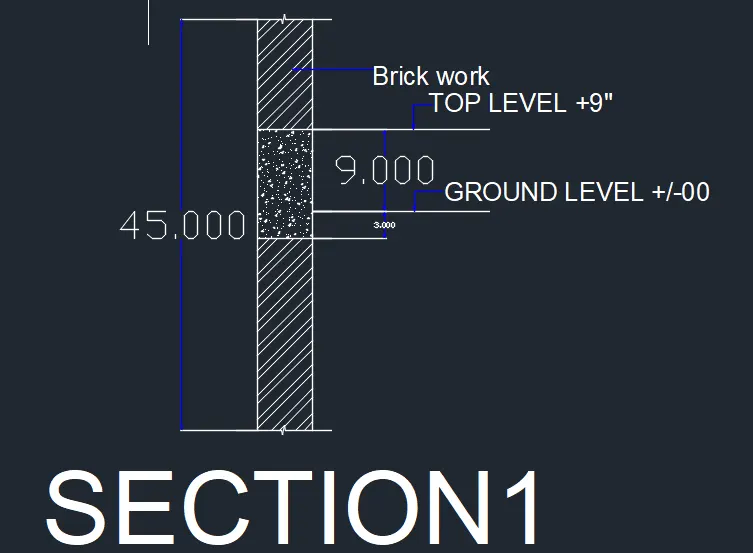
RESULT: