Creating Walls, Partition walls and Floors for a residential layout using REVIT
1.0
AIM:
To create a floor plan and need to apply the materials and thickness using the property browser and to align the floor plan with grids creation.
INTRODUCTION:
In this challenge drafting of floor, wall, multistory buildings, adding furnitures, adding other accesories is done with proper direction.
By using family category in revit software try to making best realistic view of 3D model of building.
Infomation regarding usage of different tool is done.
PROCEDURE:
STEP 1
First we select the floor.
After selecting the floor , click the edit type from the properties browser.
STEP 2
After clicking the edit type option, the type properties tab will be visible on the screen shown below.
Next we change the material type by clicking the edit option.
STEP 3:
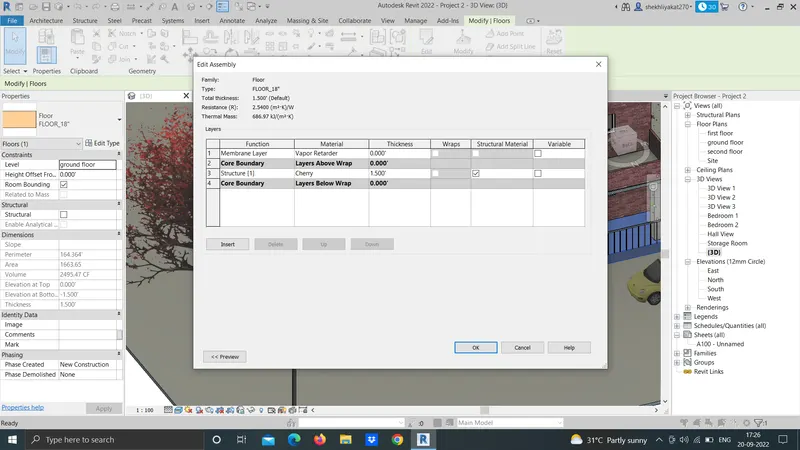
After clicking the edit option the edit assembly tab appears.
We select the material type as per our convience from material browser.
After clicking that the material browser appears,then select the material type as Timber and choose the colour as per our choice.
STEP 4:
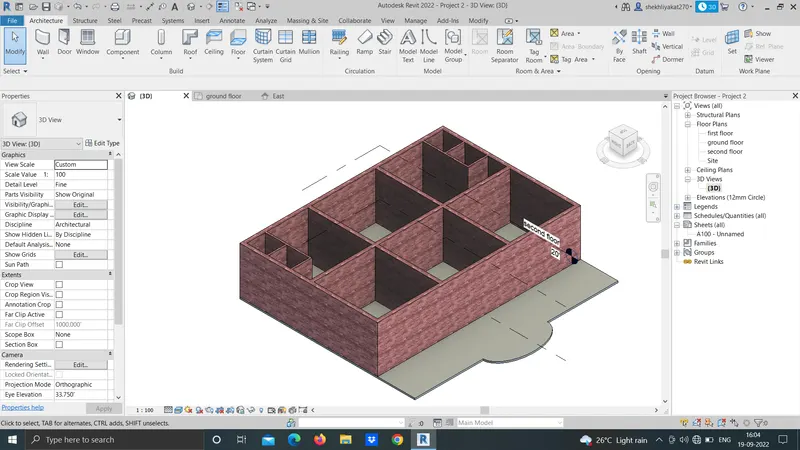
Finally the material is applied to the floor as shown below.
STEP 5:
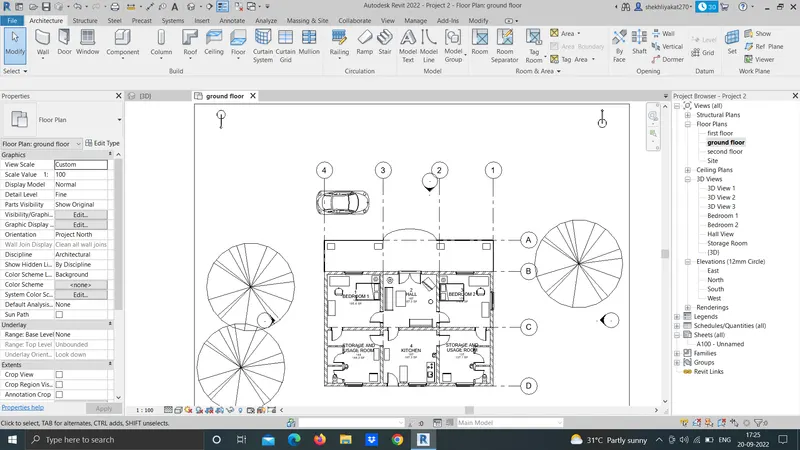
Floor plan with grids
RESULT: I understand how to edit floor and assign different materials to the floor.
2.0
AIM: To create a floor plan and need to apply the materials and thickness using the property browser for walls.
And check weather the properties related walls are proper or not.
INTRODUCTION:
In this challenge drafting of floor, wall, multistory buildings, adding furnitures, adding other accesories is done with proper direction.
By using family category in revit software try to making best realistic view of 3D model of building.
Infomation regarding usage of different tool is done.
PROCEDURE:
STEP 1
First we select the wall.
After selecting the wall, click the edit type from the properties.
STEP 2
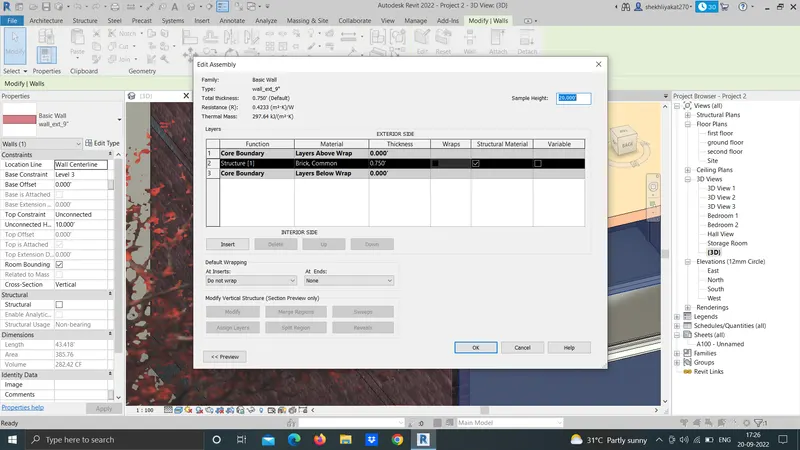
After clicking the edit option the edit assembly tab appears.
We select the material type.
After clicking that the material browser appears then select the material type as brick.
STEP 3
After applying the materials to the walls we need to zoom the wall to see the material type very closely.
STEP 4:
Finally the material have been applied to the walls.
STEP 5:
a. Based on your observation, what is beneficial for connecting walls with associated levels rather than being Unconnected
If we select the top constraint as up to level 2 , the height of the wall changes with the levels.
When we put the level height to the 20' then height of the wall is also changed to 20'.
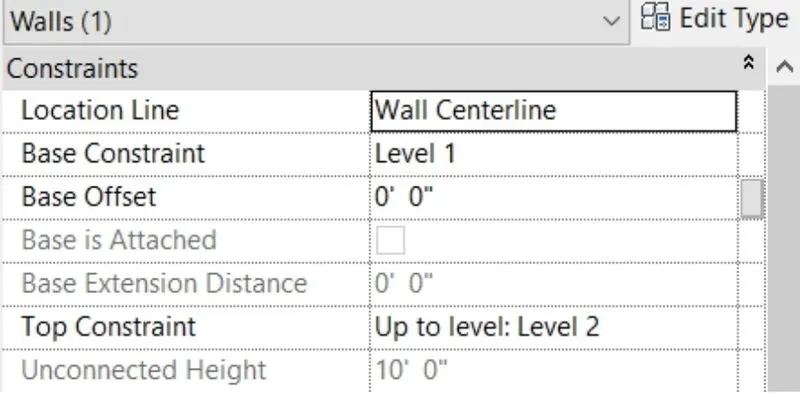
The height of level is changed and the height of the wall is also changed as shown in the figure.
If we select the top constraints as unconnected , The height of the wall doesnt changes with the levels
When we put the level height to the 20' the only level height is changed the wall height will not be changed.
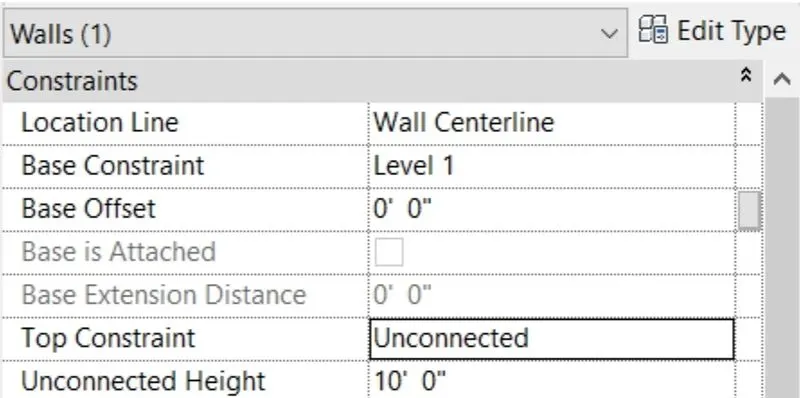
The height of level is changed and the height of the wall will not change.
Explaination of which of is better for by depth or by height:
When we select the height option for the wall,The wall will be created above the level.
When we select the depth option for the wall,The wall will be created below the level.
RESULT: I understood how to create wall, how to gave properties to the wall and by height option is suitable for wall creation.
3.0
AIM: Use of manange tab to create multiple floors and align it to previous floor using option aligned to the selected level.
INTRODUCTION:
In this challenge drafting of floor, wall, multistory buildings, adding furnitures, adding other accesories is done with proper direction.
By using family category in revit software try to making best realistic view of 3D model of building.
Infomation regarding usage of different tool is done.
PROCEDURE:
STEP 1
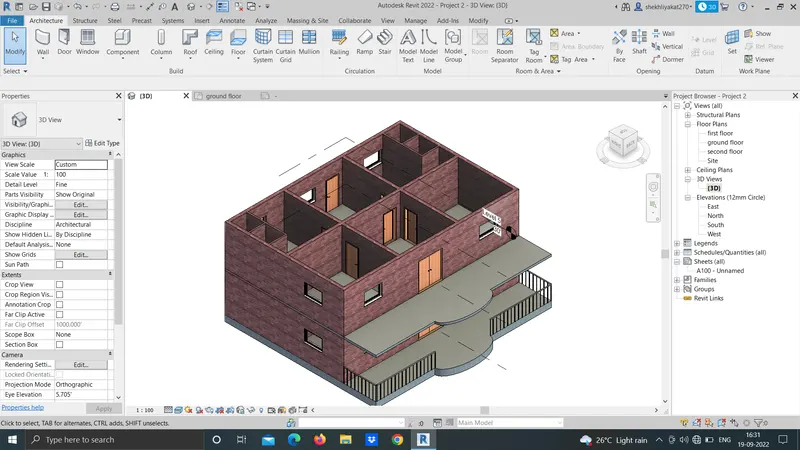
First we select the total groundfloor, then the groundfloor is copied to clipboard.
Then use the paste option to align elements to a different level.
STEP 2
Next use the paste option to align elements to a different level.
STEP 3
Finally the elements are aligned to the different level as shown in the below figure.
RESULT:
I understood how to create multi floor building using manage tab in revit software.
4.0
AIM: To create separate rooms within your residential unit using interior partition walls.
INTRODUCTION:
In this challenge drafting of floor, wall, multistory buildings, adding furnitures, adding other components is done with proper direction.
By using family category in revit software try to making best realistic view of 3D model of building.
Infomation regarding usage of different tool is done.
PROCEDURE:
STEP 1
First select the interior wall and change the wall type.
STEP 2
The interior partition walls are created.
RESULT:
I understood how to draw layout of residential building in revit software.
5.0
AIM: To understand how to add component to residential model such as TV desk, cabinets, table, chair, desk, beds, plants and other components.
INTRODUCTION:
In this challenge drafting of floor, wall, multistory buildings, adding furnitures, adding other components is done with proper direction.
By using family category in revit software try to making best realistic view of 3D model of building.
Infomation regarding usage of different tool is done.
PROCEDURE:
General procedure for adding components:
Go to architectural tab.
click on components.
Click on place components.
Click on laod families.
Select components.
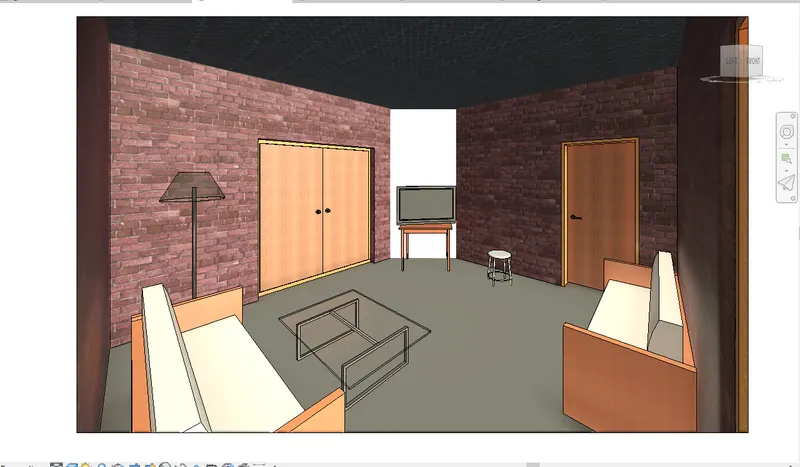
STEP 1
First we insert the furniture components in the hall.
STEP2
Next we insert the kitchen components.
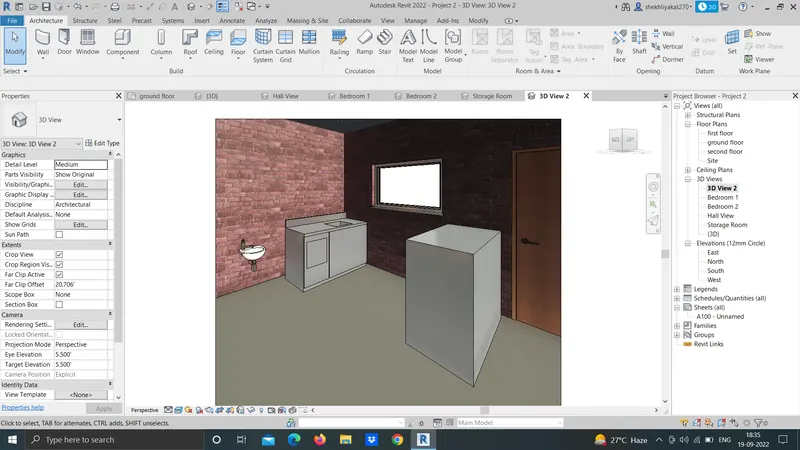
STEP 3
Now in the bedroom components.
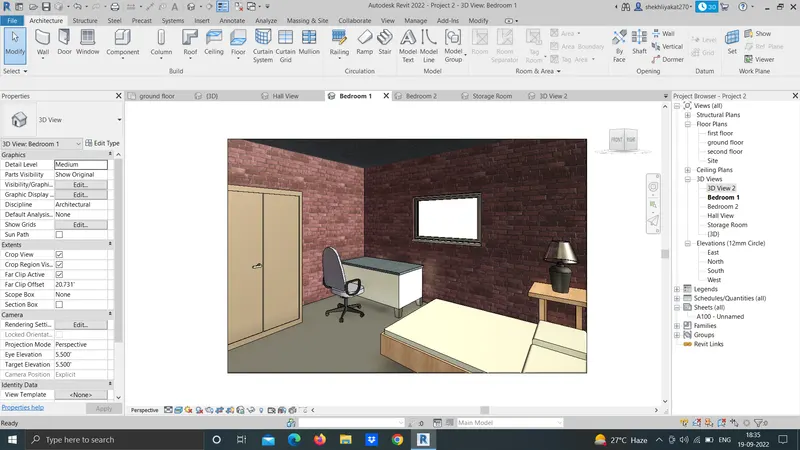
STEP4
Now insert the components in the storage and usage room.
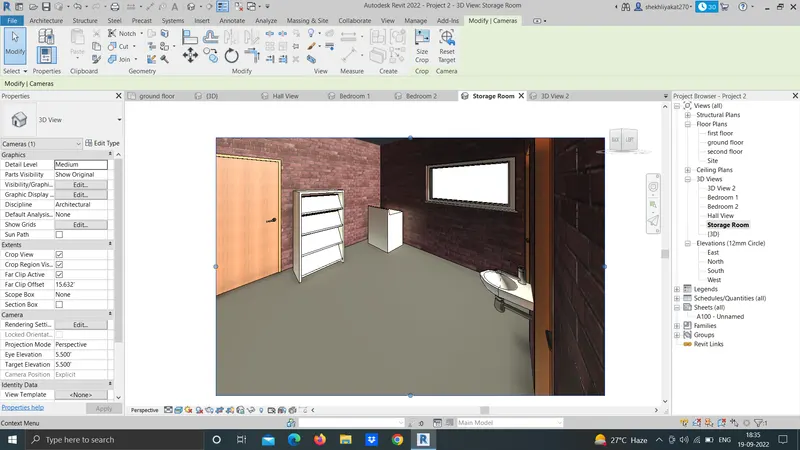
STEP 7:
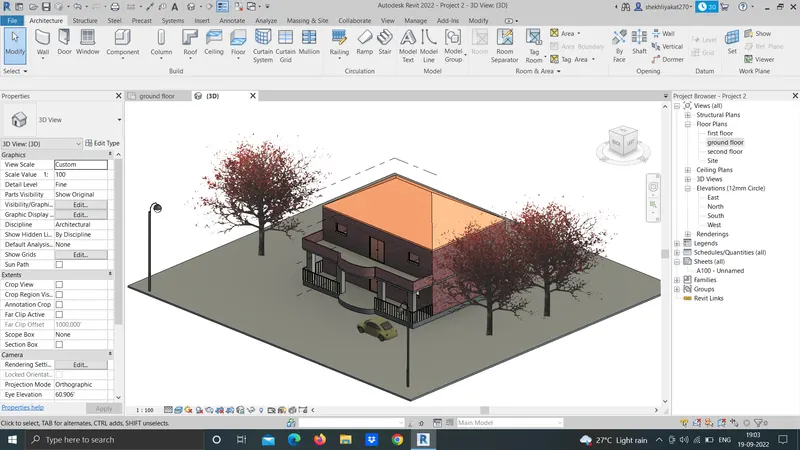
RENDERING
Rendering can offer a quick turnaround time, quality performance, and user friendliness. It can help drive efficiency and accuracy throughout the design process as updates to floor plans, elevations, and sections can be made as the model develops.
Go to VIEW> open the 3d view panel
Go to camera
Place the camera accordingly
Click on render
Click OK.
RESULT: I understood how to insert components in residential model.