Creating Walls, Partition walls and Floors for a residential layout using REVIT
1) Use the project file created from Week 2. Use it for this assignment. Based on your layout from week 2, using floor tool under architecture tab and select the floor with appropriate material and thickness using the property browser create a layout in the Ground floor Level. Align the floor plan with grids created from week 2
Aim: To create floor using floor tool anf to select the floor with appropriate material and thickness using the property browser.
Introduction: After the model layout creation floor creation is one of the mandatory step to be followed to provide the idea of flooring and the floor to floor level height and fixing of floor depth. In this the floor deoth is assumed as 12" and floor to be of concrete material.
Steps:
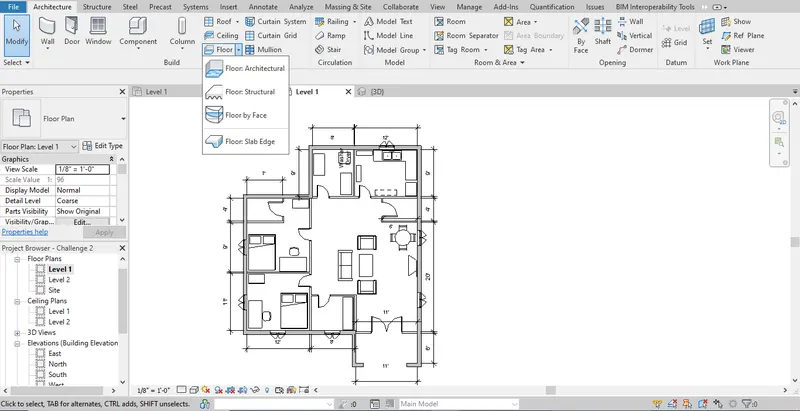
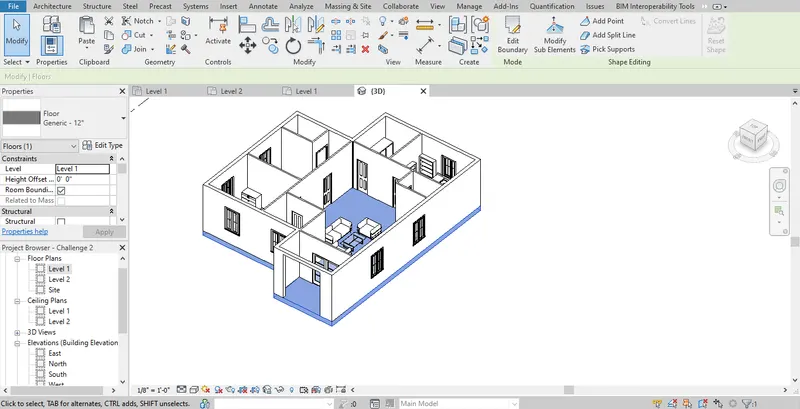
- To provide floors in the layout floor tool is selected from the ribbon and floor architectural option is selected in this case
- Then using the pick line option the boundaries of the floor is selected, the boundaries are external walls and the type of floor can be selected from the properties browser
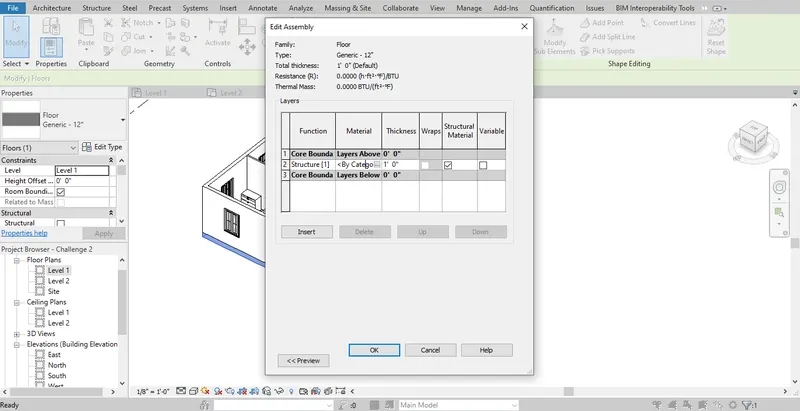
- Then after assigning the floor it can be edited by selecting the floor component and selecting the edit tool option from the propeties browser
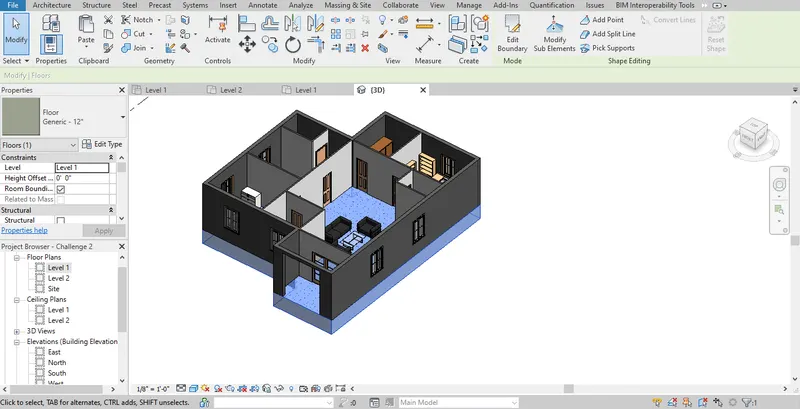
- In the edit type option the thickness and material of the selected particular component can be changed
- In this case the thickness of the floor is fixed as 12" and the material as concrete.
Results: Thus a floor component is added and assigned thickness and material sucessfully.
2) Add walls based on the floor layout. Pick lines or use the draw tool to modify the boundary of walls. Use the property browser to select appropriate material and thickness for walls. After creating the walls verify using the property browser to see if the top and bottom of the walls are constrained.
Aim: To add walls to the floor layout created using the draw tools and to assign materials and thickness to the walls.
Introduction: Walls are important component of the structure. They are the boundary edges of the layout. In revit various types of walls are available to add to the layout and the different types of materials can be added to the wall component along with required thickness.
Steps:
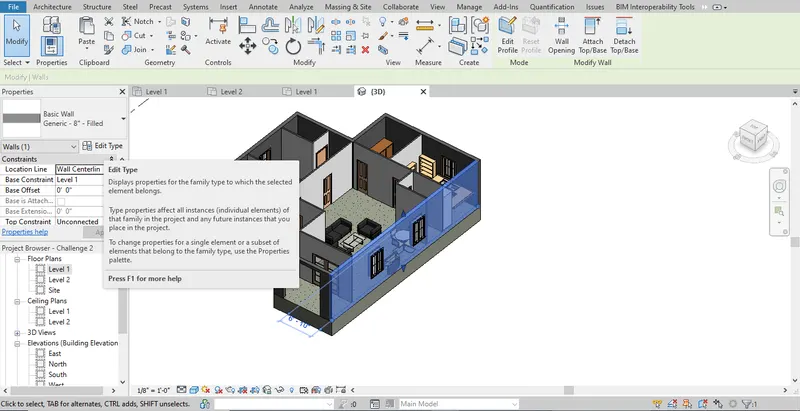
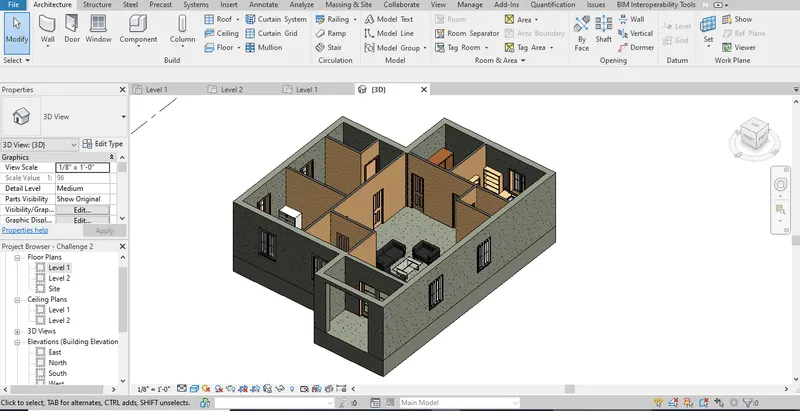
- For creation of walls, wall tool is selected from the ribbon tab and in this case architectural wall is selected
- Then using the draw toll line the wall is drawn as per the layout. walls can be added either by drawing the layout as line and assigning walls using the pickline command or draw layout using the walls by line tool and in this case the latter is followed.
- After drawing the walls as per layout the wall component is selected and the edit tool option is selected from the properties browser.
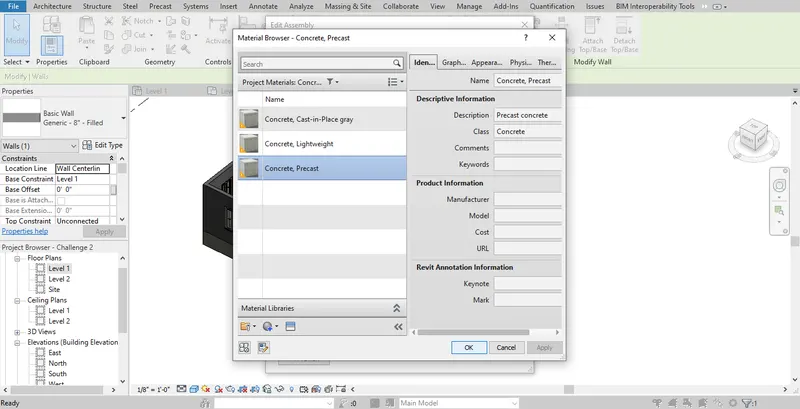
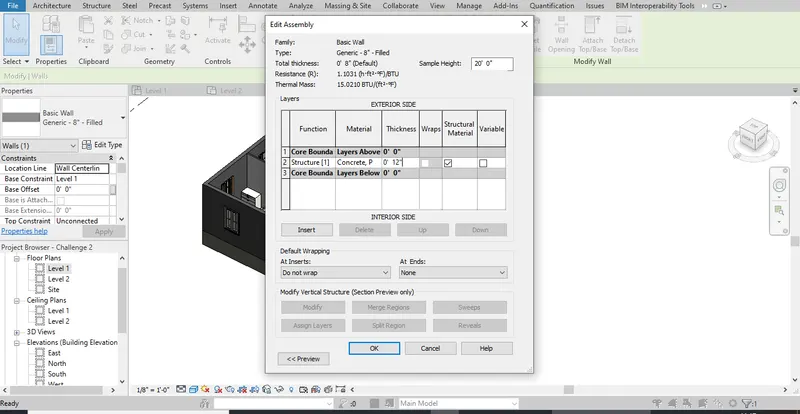
- In the edit type option the thickness and material of the wall is assigned. The thickness of the wall is fixed as 12" and the material is precast concrete in the layout created.
Results: Thus walls are created as per the layout and material, thickness are assigned to the wall sucessfully.
3) Copy the model elements ( wall, floor ) modelled to Ground Floor Level and paste it aligned to First Floor Level . Use modify tab to utilize copy and paste options to align
elements to a different level
Aim: To Copy the model elements ( wall, floor ) modelled to Ground Floor Level and paste it aligned to First Floor Level and to use modify tab to utilize copy and paste options to align elements to a different level
Introduction: For creation of multi-storey building with the same layout of the model copy and paste option is vital and also for the time constrain the elements which are created in one floor level like windows etc., can be copied and placed in the other floor levels.
Steps:
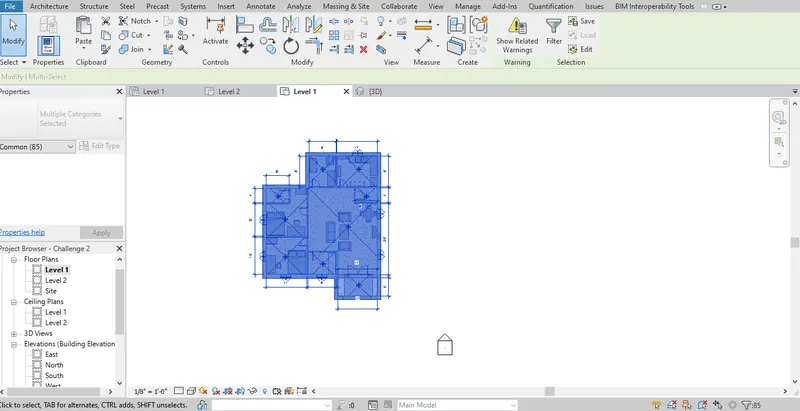
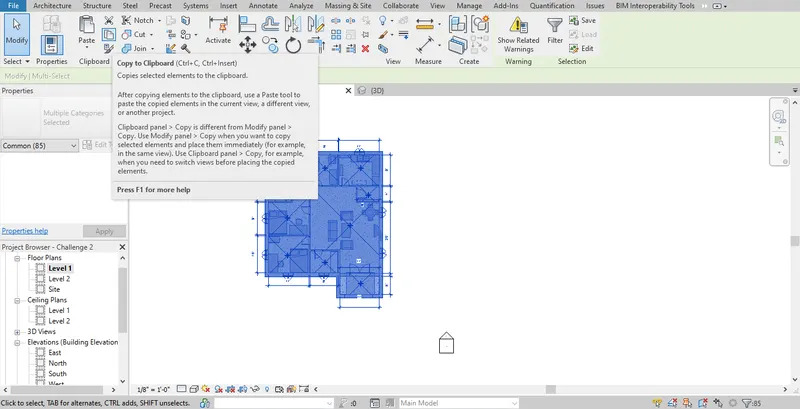
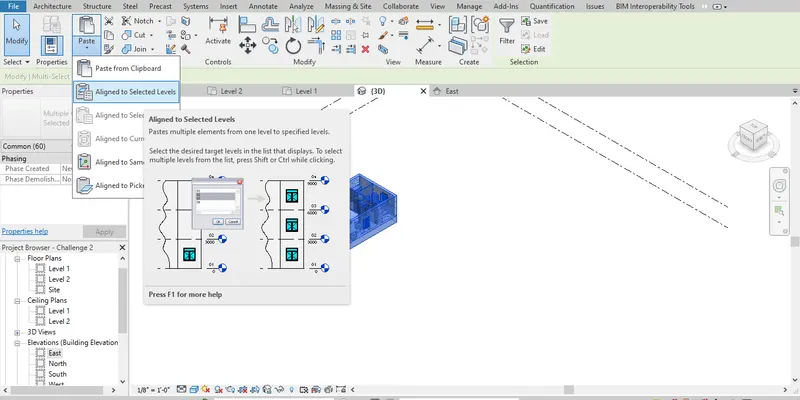
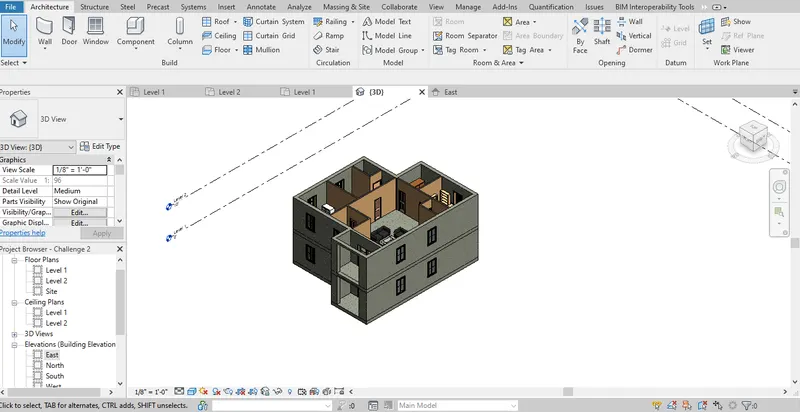
- In this model for creation of 2 storey building the ground floor layout with all the elements is copied by selecting everything in the level 1 in the window
- Then using the filter tool from the ribbon the unwanted selection are loosed like dimensions etc.,
- Then from the paste tool assign to select level option is selected
- In that level 2 is selected and the model layout of level 1 is pasted in level 2 and a multi-storey building is created.
- The selected wall,floor and the materials all are exhibited exactly like in the level 1
Results: Thus using copy and paste option model layoput elements like walls etc., are copied from one level to another level sucessfully.
4) Use interior partition walls to create separate rooms within your residential unit. The model must include the following rooms
a. Living Room/ Drawing Room ( 15’ X 18’)
b. Dining Room (9’ X 11’)
c. Bed Room ( 9’ X 12’ and 15’ X 11’)
d. Rest Room ( 10’ X 12’ )
e. Kitchen (8’ X 10’)
The above are for examples. You can use them or use your measured entities to create your model based on your layout. You may include entry walkway, Patios or Guest
rooms based on your creativity and purpose of modeling. Convert units if you are using metric system
Aim: To create partition interior walls in the layout created to provide rooms as per the requirement.
Introduction: The interior partition walls are intergral part of the model and it is of atmost importance in providing various rooms for different purposes. Interior walls are less is thickness as compared to the external walls. The external walls are boundary of the layout while the internal walls are boundaries inside the external walls to provide various areas for utilization in a large common area of the layout.
Steps:
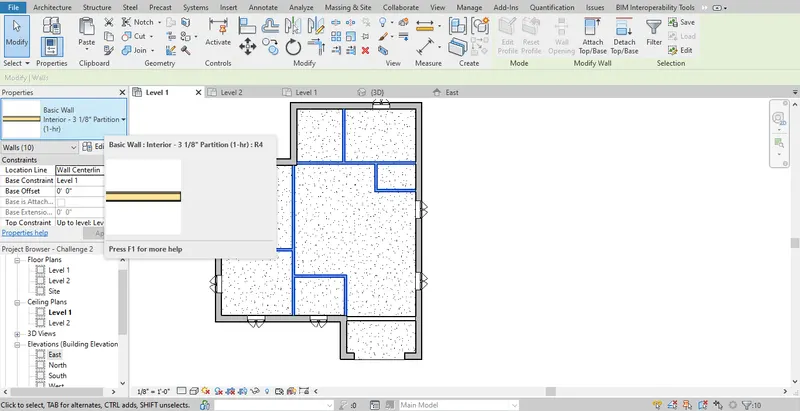
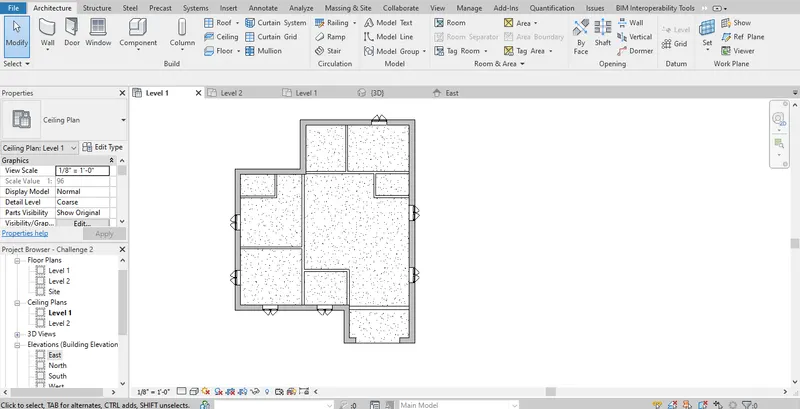
- For providing internal partition walls initially wall tool is selected from the ribbon tab
- After that from the properties browser interior wall component is selected
- Then using the line draw tool the interior wall is drawn as per the layout
- In this model the rooms are not drawn as per the given measurements and done by other layout which is already created
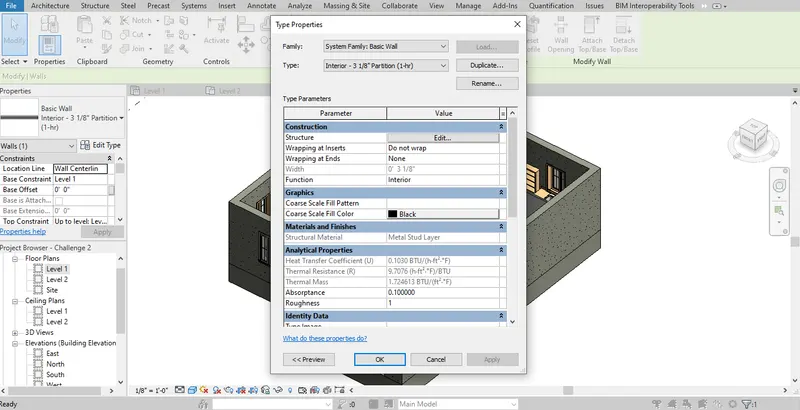
- After drawing the interior walls, the component is selected and edit type option is selected from the proprties browser
- Then the thickness and material of the wall is assumed as 6" and wood respectively
Results: Thus as per the layout the interior walls are created sucessfully.
5) Based on week 2 assignment, the components to be included in a residential unit were inserted to the Revit file. Place these components in appropriate locations to add details to your residential model
a. Place Doors and windows in the wall at appropriate locations
b. The Living Room must include furniture set, couch table and TV desk and shelf cabinets
c. The Dining Room must include a table and chairs serving the purpose of eating
d. Bed Room must include a bed set, shelf, lighting and individual study desk and chair
e. Rest room should include bath tub and plumbing fixtures discussed in class
f. Kitchen should include countertops, gas stove cabinet and shelves to store food items
g. The wash/storage room can include washing machines and shelves to store clothes
All the components are available in Revit Library. Use them to place at appropriate locations to add details to your model. Use 3D navigation to check the model and its authenticity on a real time basis to verify the model
Aim: To add components like door,windows and room essential components like bed, tables, sofa as per the specific room requirement for use.
Introduction: The adding of components makes the layout look lively and it is of atmost importance to provide components for detailing. It is for aesthetic purpose and adding of components provides user the clear view of the building with specific service of the building and mandatory as revit is a BIM software which is for minute detailing of the structure.
Steps:
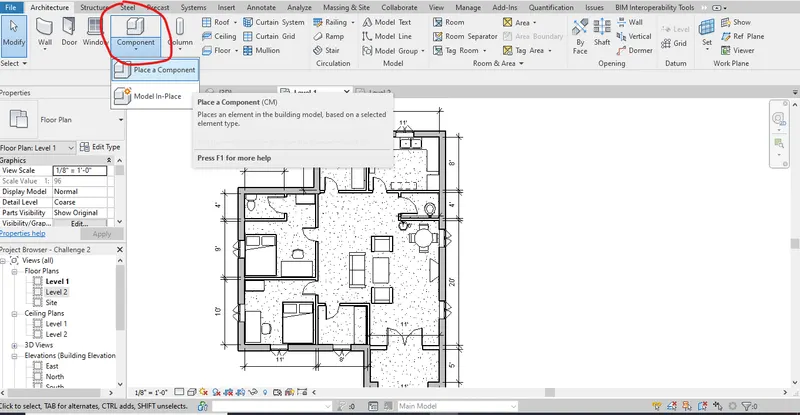
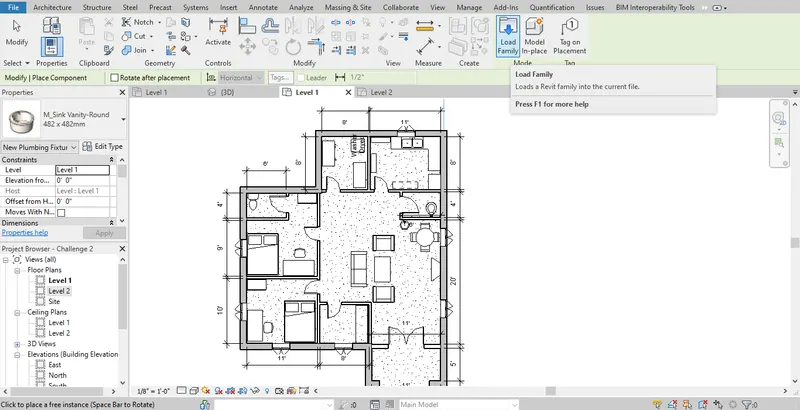
- The general step for providing components to the layout is component tool from the ribbon tab
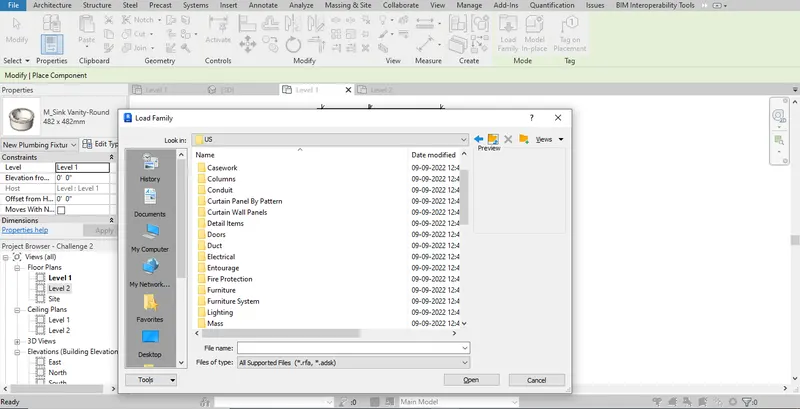
- In that place a component option is selected and followed by load family option in the ribbon
- The components are added based on the room purpose which they serve for eg: bed is provided in the bedroom and sofa set in the living room etc.,
- The components are selected from the load family option which contains different folders with different components doors for door components, plumbing for bathroom fixtures and furniture for furniture components etc.,
- After selecting the components open option is selected, loaded and placed in the model wherever needed in the layout.
- Doors, windows can also be provied by selecting door and window tool in the ribbon tab
Results: Thus the components are added to the model layout sucessfully.