Creating various 3D Models like Furniture, Footing, Girder, Column drop with panel and Gable Wall in AutoCad
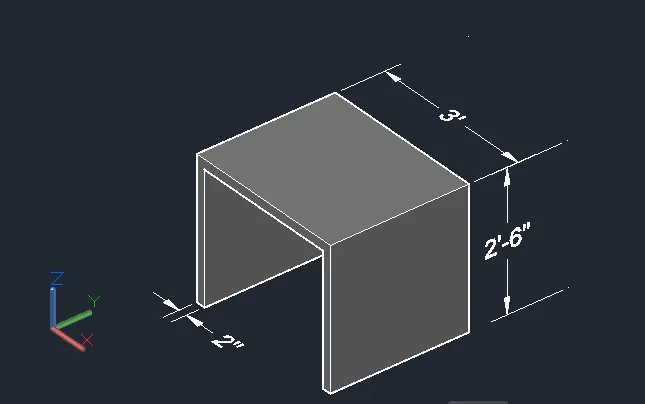
- Create a 3D Furniture element as shown in the Figure. Assume dimensions which are missing.
Aim:
To create a 3D model of the furniture element as per the given drawing
Introduction:
- 3D modelling in AutoCad includes 3D solids, surfaces, meshes and wireframe objects
- Type of 3D model:
- There are several types of 3D modellings are available in AutoCad, each of these 3D modelling technology is offers a different set of capabilities
- Why frame lord link is useful for identical design iterations and as reference geometry sowing as a 3D framework for subsequent modelling or modification
- Solid modelling is efficient to use, easy to combine perimeter and extruded profile and offers mass properties and sectioning capabilities
- Surface modelling office fine control over the curved surface for precise manipulation and analysis
- Mesh modelling provides free from sculptureing, creasing and smoothening capabilities
Command used:
- Units
- Limit
- Rectangle
- Line
- Extrude
- UCS
- Move
- Subtract
Procedure:
- Open the AutoCAD surface and click on the new drawing and select the models space into 3D modelling from the status bar
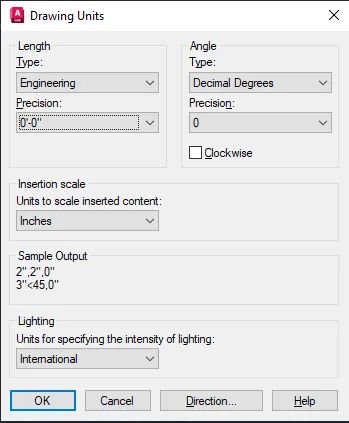
- Type you when and set the units as engineering and precision as 0'0"
- Set units as inches in the insertion scale
- Type the limit in the command box and the set the llower limit as 0 ,0 and upper limit as 50',50'
- Type Z enter for zoom enter and A enter for zoom all
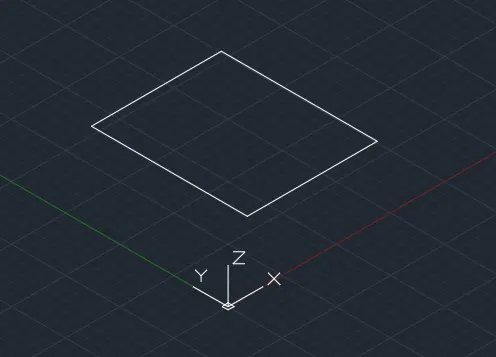
Step 1:
- In the top right corners select the UCS icon and convert the space into 3D view
- Select the rectangle tool by typing rectangle in the command box and raw rectangle of dimension 2'6" x 3'
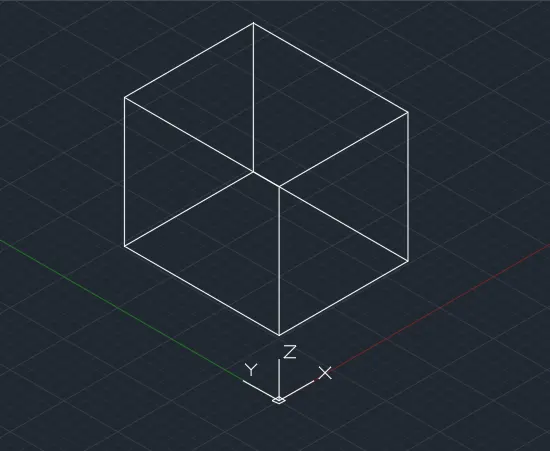
Step 2:
- Select the extrude tool by typing extrude in the command box
- Select the rectangle and extrud it upward direction
- Give extrude height of 2'6" and press enter
Step 3:
- Select the front view from the UCS icon and provide X and y coordinates in different phase using UCS command
- Select the line command and row line of length 2" from the right side of the front view
- Select the rectangle command and row rectangle of dimension 2'8"and 2'4"
- Move the rectangle to the line drawn earlier which is 2"
- After moving rectangle delete the previous line that we drawn earlier
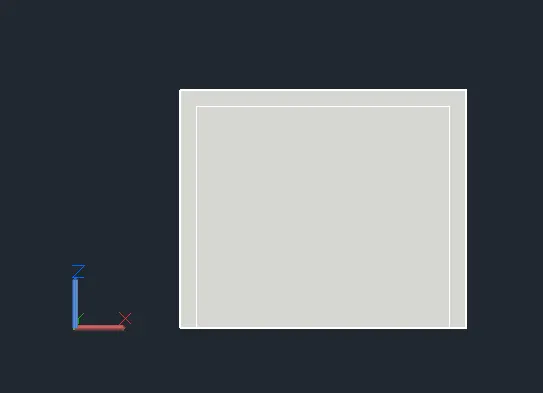
Step 4:
- Select the extrude tool by typing extrude and select the integral rectangle that we draw earlier
- Extrude rectangle with the height of 2'4" leaving thickness of 2"
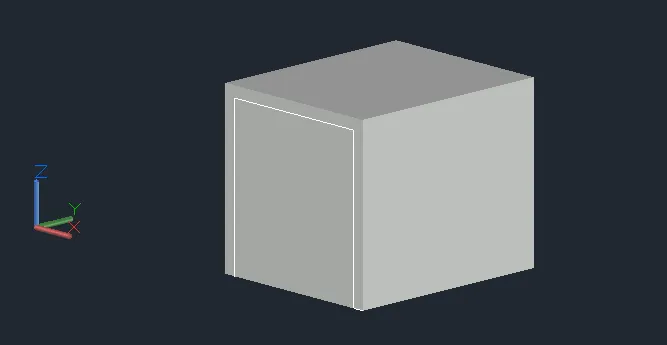
Step 5:
- Select this subtract tool by typing subtract in the command box
- Select the interior rectangle first and press enter
- Then select the interior rectangle and press enter to subtract the triangle from the exterior one
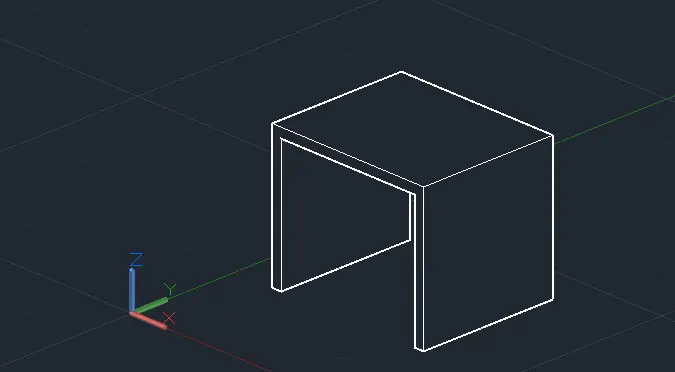
Result:
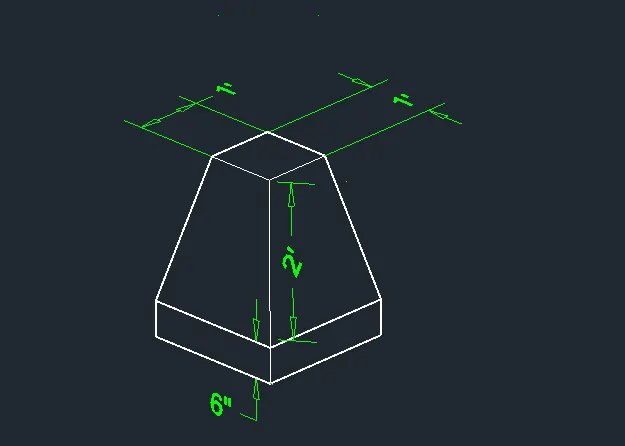
- Create the 3d Model of an Isolated footing as shown in Figure.
Aim:
To create the 3D model of an isolated footing as per the given drawing
Introduction:
- AutoCAD 3D is a powerful CAT software, which made used for architecture style and mechanical design .It has one of the best toolbox is and features to sustain 2D drawing .
- AutoCAD is a 3D dimension CAT software program that is made used for commercially throughout the globe.
- AutoCAD is additionally offered as a mobile and web app which is marketed as AutoCAD 360
Command used:
- Units
- Limit
- Rectangle
- Extrude
- UCS
- Move
- Loft
Procedure:
- Open the AutoCAD surface and click on the new drawing and select the models space into 3D modelling from the status bar
- Type you when and set the units as engineering and precision as 0'0"
- Set units as inches in the insertion scale
- Type the limit in the command box and the set the llower limit as 0 ,0 and upper limit as 100',100'
- Type Z enter for zoom enter and A enter for zoom all
Step 1:
- Go to the top view using UCS icon at the top right corner
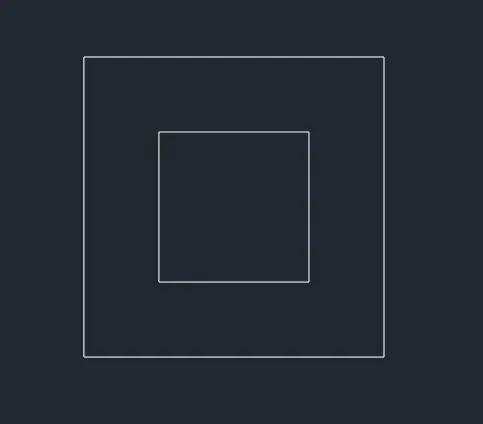
- Select the rectangle tool and draw a rectangle of 2'x 2'
- Singularly draw another rectangle with dimension 1' x1' at the centre considering the previous one
Step 2:
- Go to the default 3D view using UCS icon
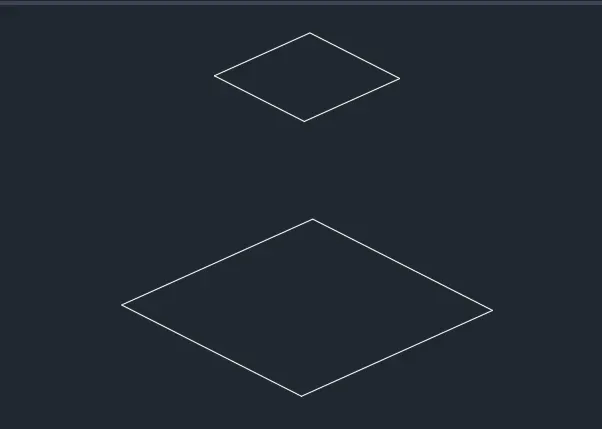
- Select the move tool and select the interior rectangle
- Move the rectangle upward towards it Z direction at distance of 2'
Step 3:
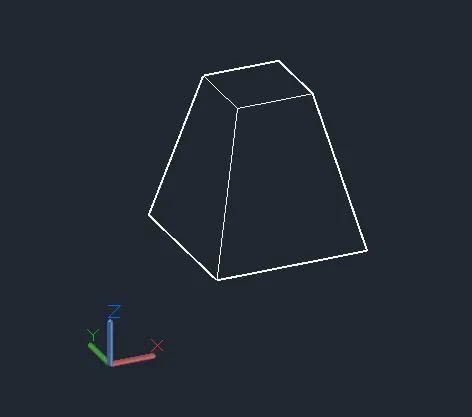
- Select the law of tool from the ribbon tab or typing loft in the command box
- Select the two rectangles and press enter to loft
Step 4:
- Now go to the top view again using UCS icon
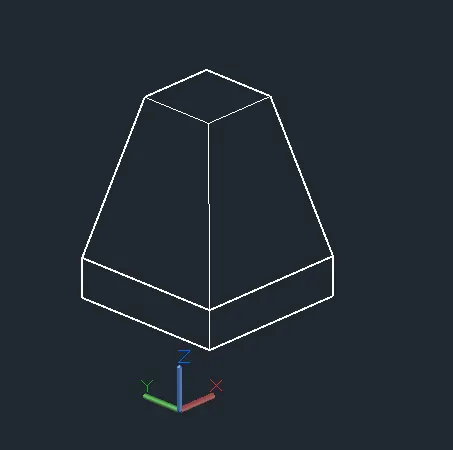
- Select the rectangle and Rose similar rectangle of 2'x 2' at the same position
- Go to the default 3 few and select the extrude
- Extrude the previous creative rectangle to the negative Z direction and with the height of 6" as shown in figure
Result:
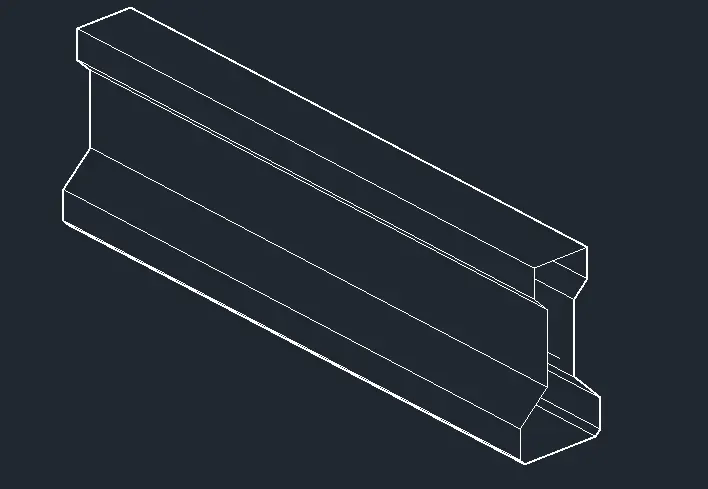
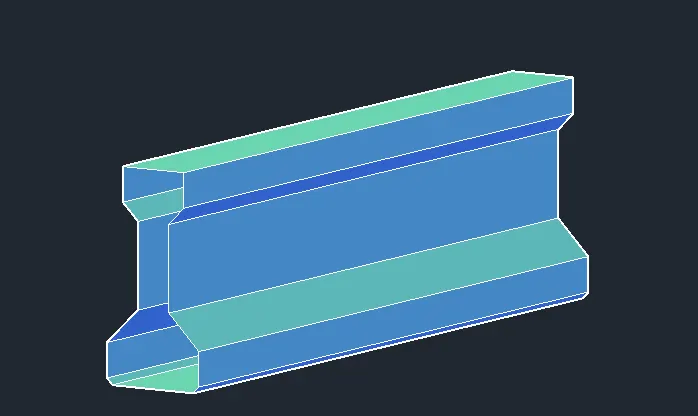
- Create the 3D view of the AASTHO Type Girder.
Aim:
To create 3D view of AASTHO type of garder as per the given drawing
Introduction:
A garden is a sport beam used in construction it is the main horizontal support of the structure that sports smaller beams. Go does offered ton have and I been cross section correspond to load bearing flanges separated by a stabilized web,but mayalso have a box shape that shaped or other forms. Girdera are commonly used in building bridges
Command used:
- Units
- Limit
- UCS
- Line
- Sweep
- Erase
Procedure:
- Open the AutoCAD surface and click on the new drawing and select the models space into 3D modelling from the status bar
- Type you when and set the units as engineering and precision as 0'0"
- Set units as inches in the insertion scale
- Type the limit in the command box and the set the llower limit as 0 ,0 and upper limit as 100',100'
- Type Z enter for zoom enter and A enter for zoom all
Step 1:
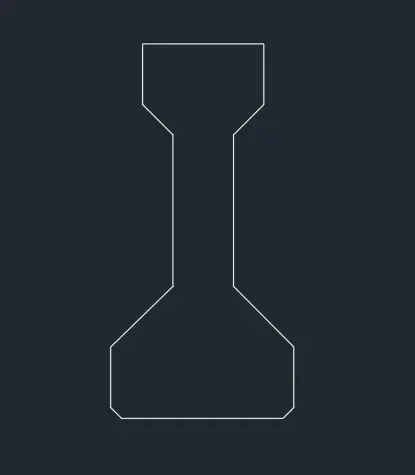
- Go to the front view using UCS icon
- Select the line tool by typing line in the command box
- Specify the starting point as 0, 0,0
- Draw the girder per the given dimensions
Step 2:
- Now go to the default 3D view using the UCS icon
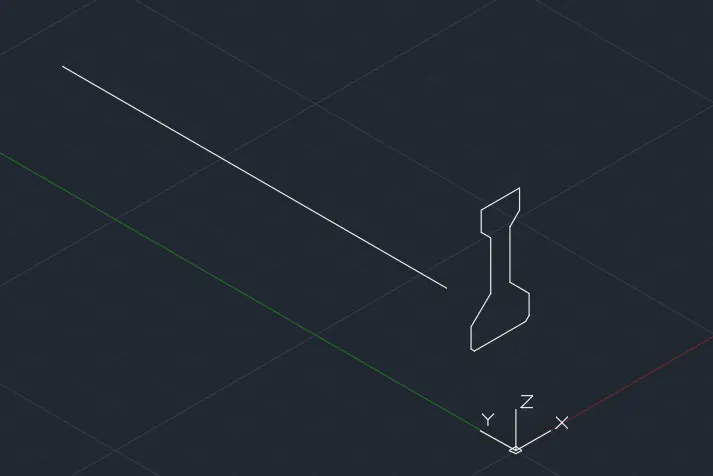
- Select the line command by typing line in the command
- Draw the line of length 10' in the XY plane as shown in figure
Step 3:
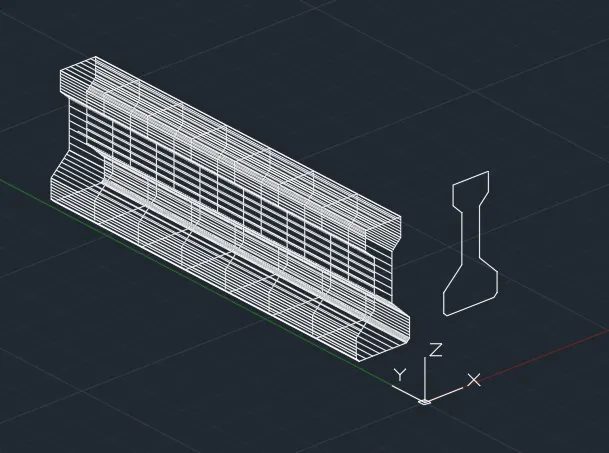
- Select this week tool on the ribbon tab
- Select the object to sweep as the orthoorgarh that we created earlier and press enter
- Now select the path has the line that we created earlier and press entre
Step 4:
- After creating this week from the front view of the girder delete the previous one
- Now we can create the wireframe sketch of the earth's AASTHO girder
Result:
- Create a 3d Model of a drop column with panel as shown in section and isometric view
Aim:
To create the 3D model of a drop column with the panel as shown in the section and isometric view
Introduction:
- Drop panel are the rectangle portion provided above the column and below the slap to resist the slap from getting the shaded and undergoing ruptures
- The reason behind the drop panel construction are as given below:
- Increase in the flexibility of planning the layout for the room
- Easy installation of framework and reinforcement
- The building height is reduce through the provision of extra support
- Construction time needed for large table framework is reduced
- The main uses of the drop panel are as below:
- Drop panel stands to improve the competence to r resist the shear failure which can happen in the flat slab
- Drop panel stands to enhance the negative movement capacity of the flat slab
- Drop panel stands to minimise the deflection through the fabrication of the flat slab
Command used:
- Units
- Limit
- Circle
- Region
- Rectangle
- Extrude
- Move
- Cone
Procedure:
- Open the AutoCAD surface and click on the new drawing and select the models space into 3D modelling from the status bar
- Type you when and set the units as engineering and precision as 0'0"
- Set units as inches in the insertion scale
- Type the limit in the command box and the set the llower limit as 0 ,0 and upper limit as 100',100'
- Type Z enter for zoom enter and A enter for zoom all
Step 1:
- Go to the default 3D view using the UCS icon
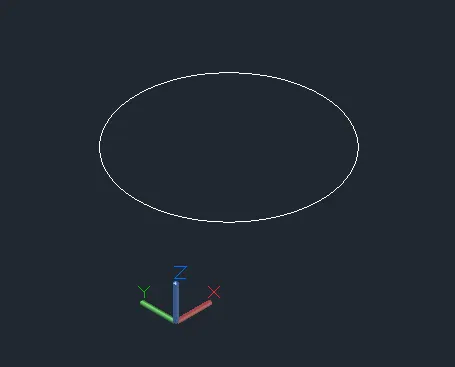
- Select the circle tool and create a circle of diameter 1'6" as shown in figure
- Select the reason tool and create the region of the circle that we created earlier
Step 2:
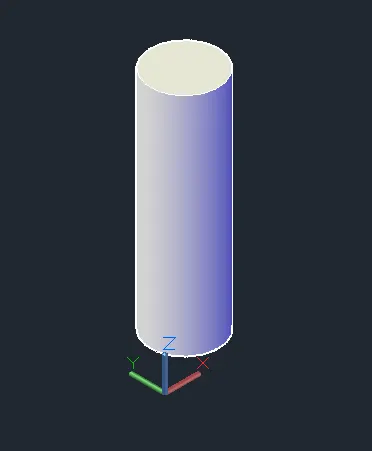
- Select the extrude tool by typing extrude the command box
- Select the circle and excluded into the +Z direction
- Give the extrude height as 10' and sketch the column
Step 3:
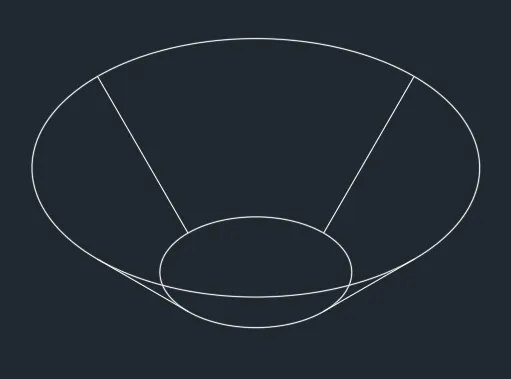
- Select the cone tool from the home ribbon tab
- Sketch the cone with the base diameter 1'6"
- Now click on the top radius option and give the 3'6"
- Then provide the height of the cone as 1' and sketch the cone has shown in figure below
Step 4:
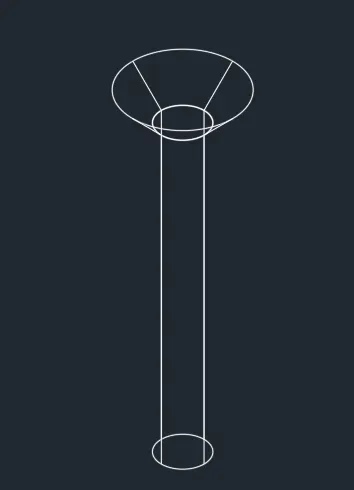
- Go to the top view using the UCS icon at the top right corner
- Select the cone that we created earlier and move it into the extruded circle
- Now go to the default 3D view and move the cone from the bottom to the top left at the distance of 10'
- The frustum with the cone has been sketch as shown in figure
Step 5:
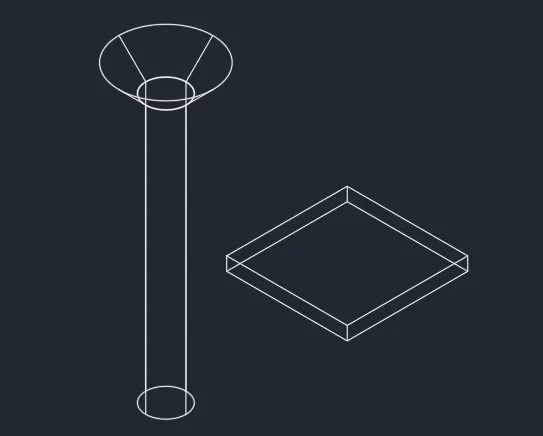
- Go to the top view again using the UCS icon
- Select the rectangle tool and draw the rectangle with the dimension of 4'6" x 4'6"
- Select the extrude tool and extend the rectangle into the Z direction at the height of 6" as shown in figure
Step 6:
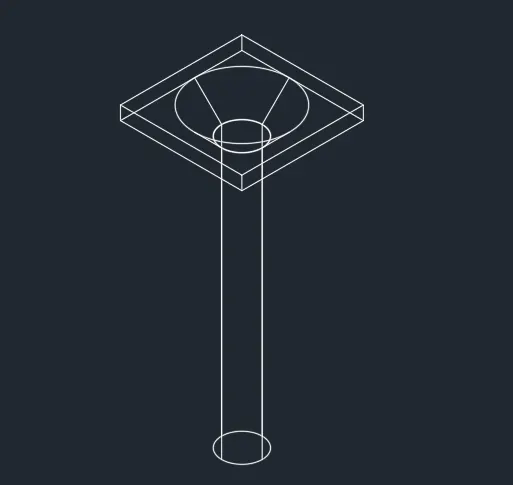
- Go to the top view again using the UCS icon
- Select the extruded rectangle and move it into the exuded circle at the centre
- Go to the default 3D view and move the extogate rectangle from the bottom to the top at distance of 10'
Step 7:
- After moving the excluded Tangled go to the default 3D view
- Change the viewing style model from the 2D wireframe to the hidden
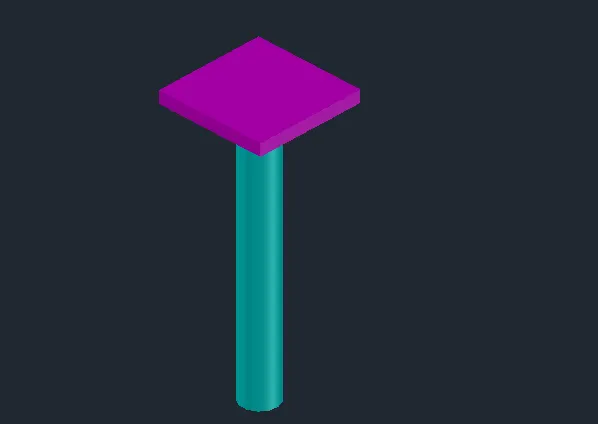
- Now we can see it dropped colour with the panel as shown figure
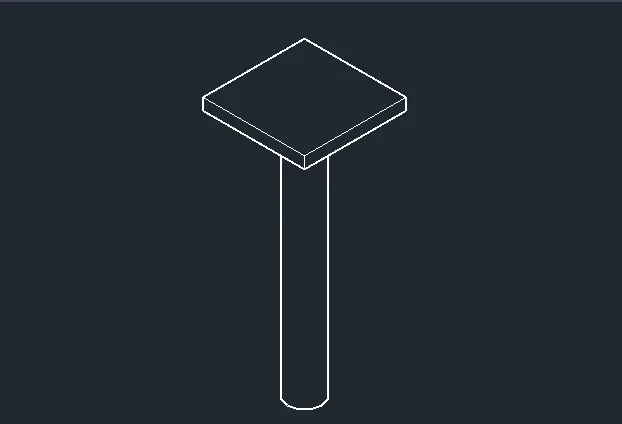
Result:
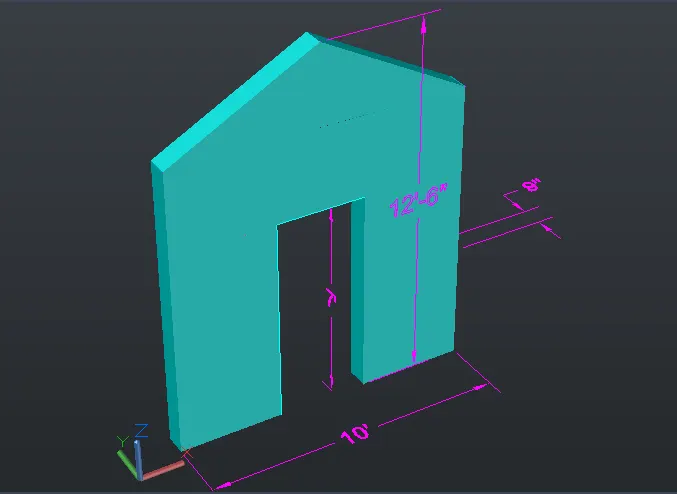
- Create the 3d model of a wall as shown in Figure. Consider wall thickness as 9”.
Aim:
To create the 3D model of a wall with the thickness of 9" as per the given drawing
Introduction:
Bol are constructed in different forms and of various material to serve several functions. Exterior wall protects the building interior wall from external environmental effect such as heat and cold sunlight, ultraviolet radiations in and snow and sound while containing disable interior environmental conditions.
Polysolids are like 3D polynes that come with thickness.
Prodi 2D floor plan with lines or polynes. Use architecture units you should be in the 3D modelling workspace
Command used:
- Units
- Limit
- Rectangle
- Line
- Offset
- Extrude
- Move
- Join
- Trim
- Union
Procedure:
- Open the AutoCAD surface and click on the new drawing and select the models space into 3D modelling from the status bar
- Type you when and set the units as engineering and precision as 0'0"
- Set units as inches in the insertion scale
- Type the limit in the command box and the set the llower limit as 0 ,0 and upper limit as 100',100'
- Type Z enter for zoom enter and A enter for zoom all
Step 1:
- Go to the front view using the UCS icon at the top right corner
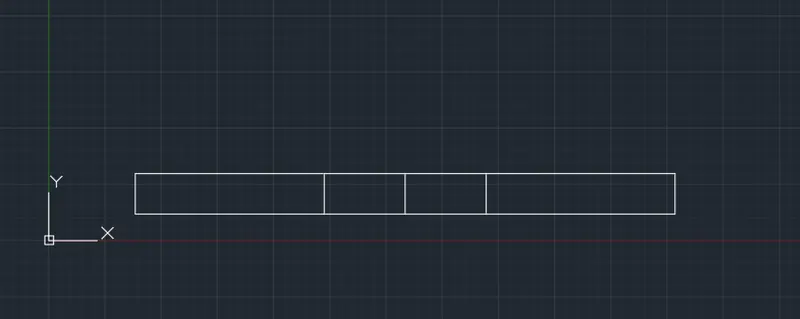
- Select the rectangle tool and row rectangle of dimension 10' x 9"
- Select the line tool and raw a line at the centre of the rectangle to cut into two parts
- Select the option and offset the line on each side with an offset distance of 1'6" as shown in figure
Step 2:
- Select the boundary tool by typing BO in the command box
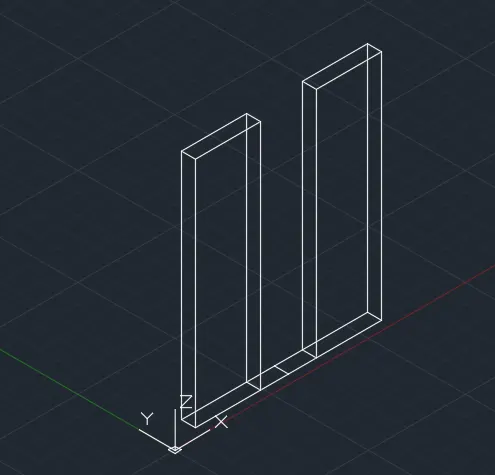
- Pick the interior point of the rectangle to create the region except the door opening
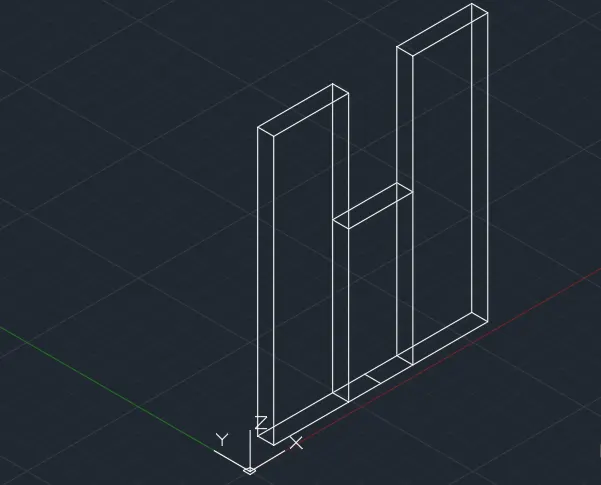
- Select the extrude tool and extrude it in Z direction with height of 12'6" as shown in the figure
Step 3:
- Select the Twinkle tool again and raw rectangle at the door opening
- Now select the move tool and move the rectangle in the upward direction at distance of 7' from the bottom
Step 4:
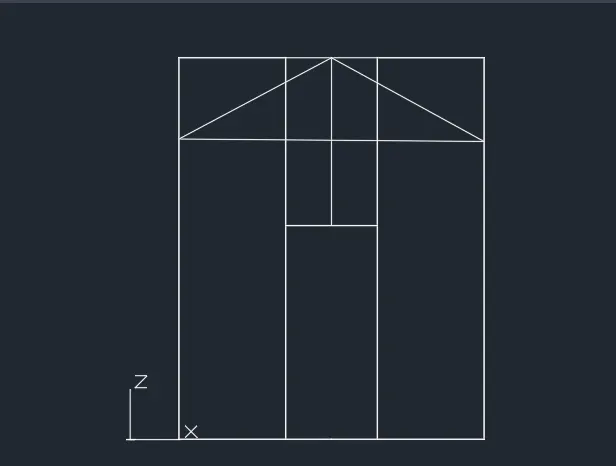
- Go to the front view using the UCS icon at the top right corner
- Type UCS in the command box to provide X and Y plane in the front view
- By using the line command and draw a triangle at the top of the section as shown in the figure below
- Join the line using the joint command
- By using the trim command trimmed and necessary lines as show in figure
Step 5:
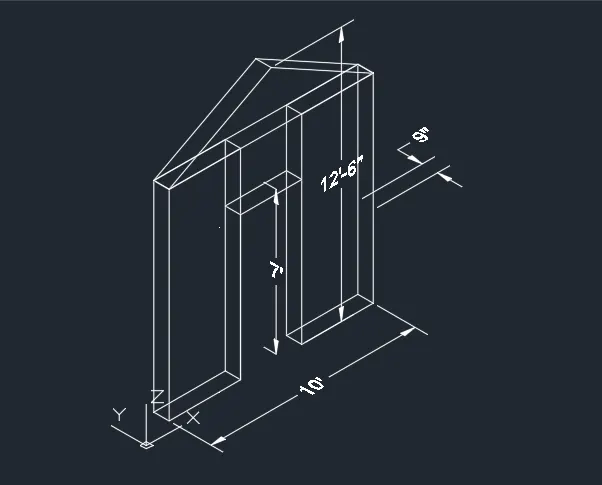
- Select the extrude tool and extrude the triangle section into positive Y direction at the distance of 9"
- Adjust the extrude portion of the triangle by using grips to feet into the wall
- Select the tangle of the door opening and extrude it into the top surface
- Select the union command in the ribbon tab or by typing union in the command box
- Select the extruded portion and press enter to create the union section of the wall
- Give the dimension using the Dimlinear command as per the drawing
Result: