Creating Levels, Grids, Layout and model elements for a residential unit using REVIT
1)
Revit Building elements are of three types
* View elements
* Model elements
* Annotate elements
- Annotate element
- Datum element
Building Information Modeling
BIM is a visual representation of the physical and functional characteristics of a facility from inception onwards. As such, it serves as a shared information responsibility for collaboration throughout a facility's life cycle.
Features of BIM
* Easy access to information
* Making the process more expenssive
* Comprehensive view of the project
Benefits of BIM
* Complete representation
* Instant updates
* Time constraint
* Resource tracking
2)
Category :-
It is one of the Revit element hyracky. Actually it controls the organisation of disability, graphical representation.
Family :-
It is a group of 2D or 3D information that serves to representation discreate building or documentation element in the project. Actually it defines parametrical, graphical and documentation requirement also.
Element :-
It is a specific representation in afamily defined by these parametric, graphical and documentaion charecteristics which makes it uniq from types in the family.
Instances :-
It is an individual representation of type project define by unic parametric, graphical and documentation characteristics which makes unic from other instances of the project.
3)
Aim :-
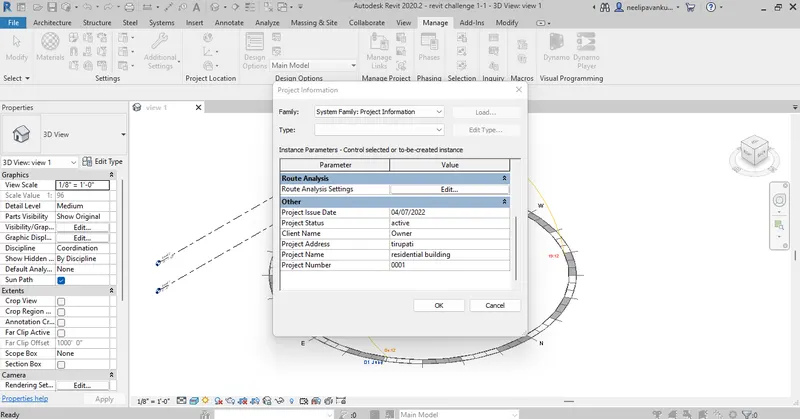
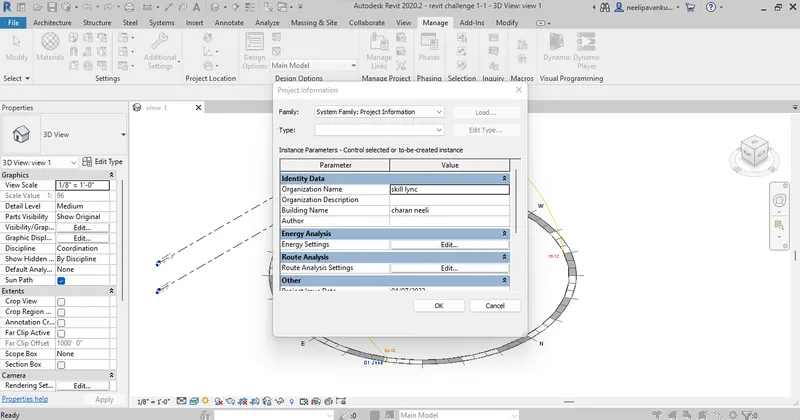
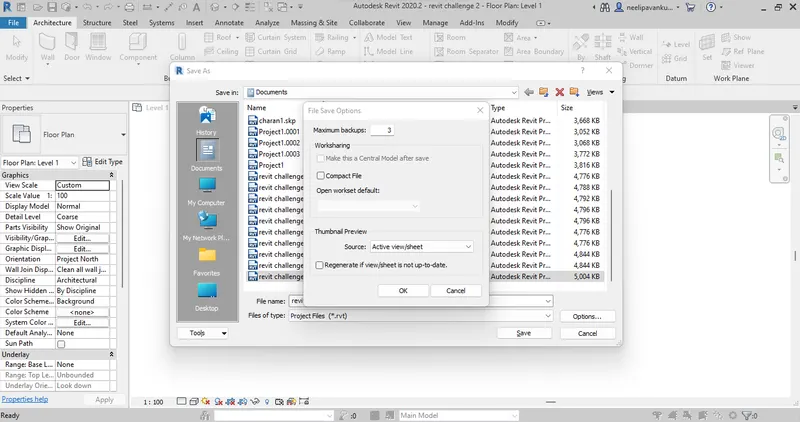
Setting up a Project – Open a project file with architectural template. Save the file with appropriate name. Set up the project units to Imperial / Metric based on your convenience of modelling. Complete the project information under Manage tab. Set up the maximum backups for project file to 3.
Procedure :-
* Open the revit software.
* Next we select model-new project.
* Template file select as Architectural template.
* Next click on OK.
* In top left corner click on file menu it showing save or shortcut key as control+s.
* We click on save,type the project name click the save option.
* Next we can create the rectangular layout of wall option under the achitecture tab.
* Unit set as feet.
* In the above separate manage tab is there.
* In this manage tab project information tool is there clikck on this insert the details.
* Next go to file click on project.
* After click on the project click on options.
* Set max backups as 5.
Result :-
Complete the setting up a Project – Open a project file with architectural template. Save the file with appropriate name. Set up the project units to Imperial / Metric based on your convenience of modelling. Complete the project information under Manage tab. Set up the maximum backups for project file to 3.
4)
Aim :-
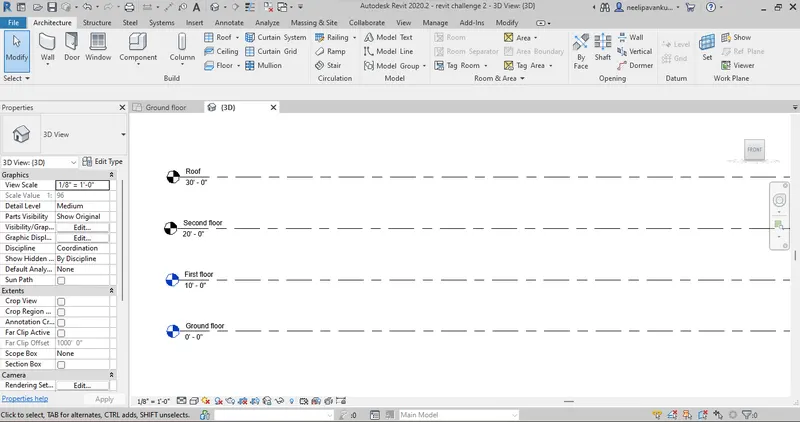
Create the following Levels: ( Convert to metric equivalents if metric is your units)
Ground Floor @ 0’
First Floor @ 10’
Second Floor @ 20’
Roof @ 30’
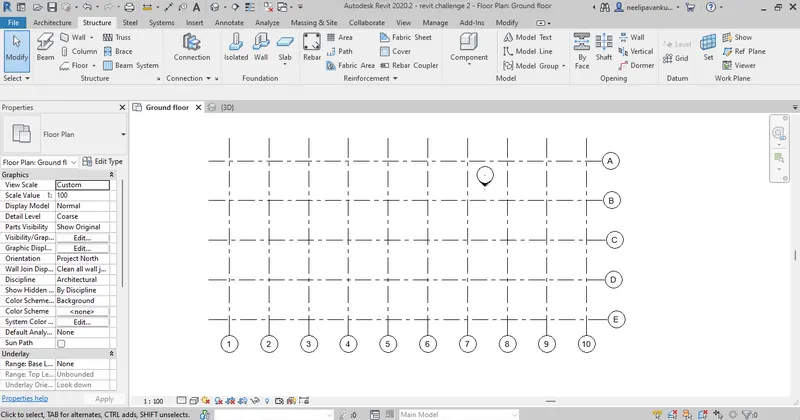
Grids Transverse Grids A, B,C,D, E @ 10’ spacing
Longitudinal Grids from 1 to 10 @ 20’ spacing.
Procedure :-
* Open the revit software.
* Next we select model-new project.
* Template file select as Architectural template.
* Next click on OK.
* In top left corner click on file menu it showing save or shortcut key as control+s.
* We click on save,type the project name click the save option.
* Unit set as feet.
* We can goto architectural tab.
* Select level tool. Placed the level at 10' distance.
Ground Floor @ 0’
First Floor @ 10’
Second Floor @ 20’
Roof @ 30’
* Next we select grids
Grids placed Transverse Grids A, B,C,D, E @ 10’ spacing
Longitudinal Grids from 1 to 10 @ 20’ spacing
Result :-
Complete create the following Levels: ( Convert to metric equivalents if metric is your units)
Ground Floor @ 0’
First Floor @ 10’
Second Floor @ 20’
Roof @ 30’
Grids Transverse Grids A, B,C,D, E @ 10’ spacing
Longitudinal Grids from 1 to 10 @ 20’ spacing.
5)
Aim :-
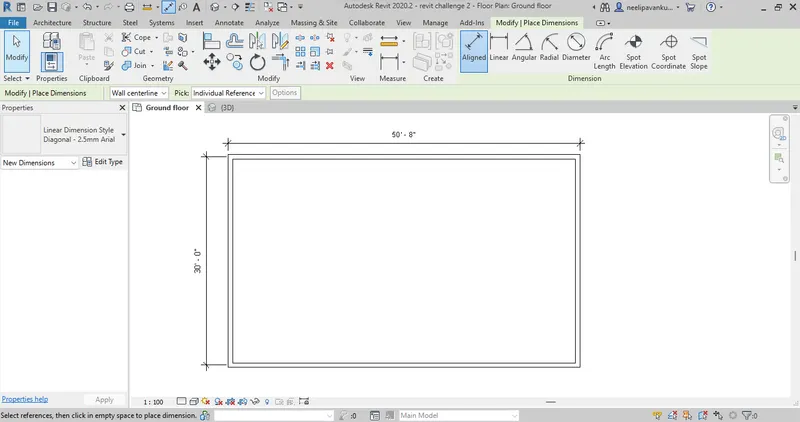
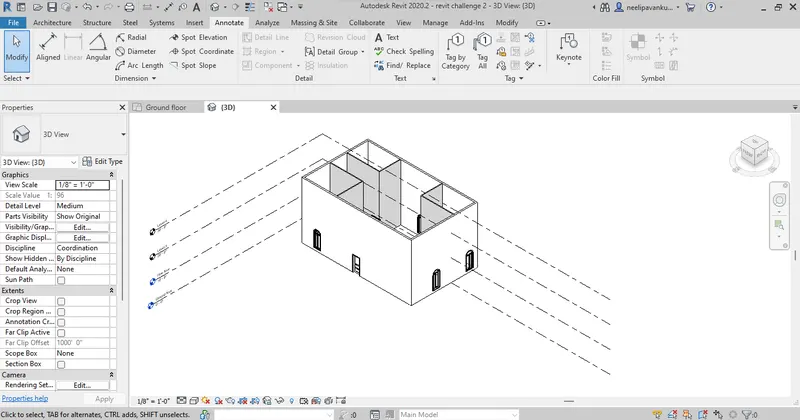
3D modelling of residential unit – From looking at your house / or a place you aspire. Create a conceptual layout of the residential unit. You can measure using a tape or
you can access your residential plan to create a similar layout.
Procedure :-
* Open the revit software.
* Next we select model-new project.
* Template file select as Architectural template.
* Next click on OK.
* In top left corner click on file menu it showing save or shortcut key as control+s.
* We click on save,type the project name click the save option.
* Next we can create the residential plan layout of wall option under the achitecture tab.
* Unit set as feet.
* In the annotate tab select measure tool.
* Use this measure tool to measure the residential unit.
Result :-
Complete 3D modelling of residential unit – From looking at your house / or a place you aspire. Create a conceptual layout of the residential unit. You can measure using a tape or you can access your residential plan to create a similar layout.
6)
Aim :-
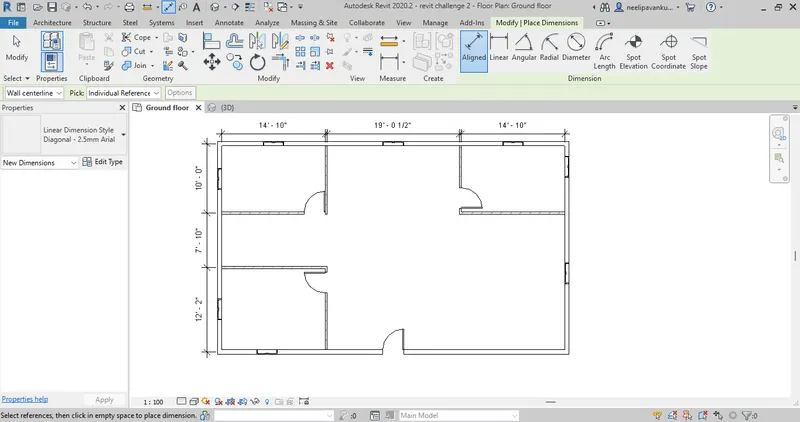
In the layout created draft the level of details you are planning to include – Dimensions of room, components you plan to add in the residential unit.
Procedure :-
* Open the revit software.
* Next we select model-new project.
* Template file select as Architectural template.
* Next click on OK.
* In top left corner click on file menu it showing save or shortcut key as control+s.
* We click on save,type the project name click the save option.
* Next we can create the residential plan layout of wall option under the achitecture tab.
* Unit set as feet.
* In the annotate tab select measure tool.
* Use this measure tool to measure the residential unit.
Result :-
Complete in the layout created draft the level of details you are planning to include – Dimensions of room, components you plan to add in the residential unit.
7)
Aim :-
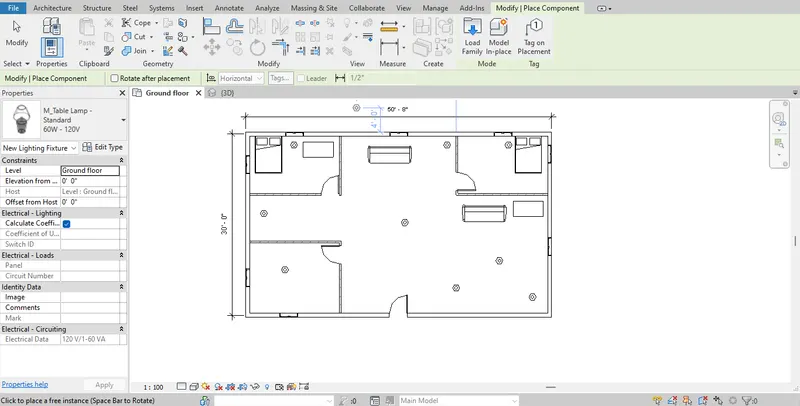
Identify the residential model elements such as Door, Windows, Tables, Chair, Couch, Bed, Lamps from the library and insert them to the model . Save the project for use
for Assignment 3.
Procedure :-
* Open the revit software.
* Next we select model-new project.
* Template file select as Architectural template.
* Next click on OK.
* In top left corner click on file menu it showing save or shortcut key as control+s.
* We click on save,type the project name click the save option.
* Next we can create the residential plan layout of wall option under the achitecture tab.
* Unit set as feet.
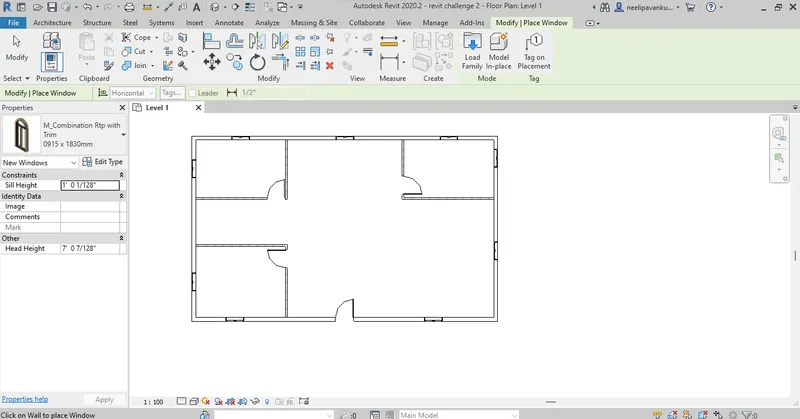
* In the architecture tab click on component then select place on component.
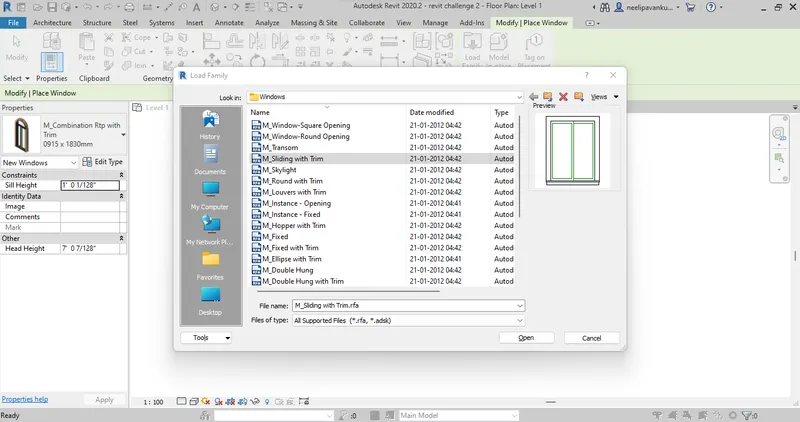
* After click on place on component then click load family.
* After click on load family then insert door,windows,tables,chairs,couch,bed,lamps from the library.
* Save the project Assignment 3.
Result :-
Complete identify the residential model elements such as Door, Windows, Tables, Chair, Couch, Bed, Lamps from the library and insert them to the model . Save the project for use for Assignment 3.