Creating Levels, Grids, Layout and model elements for a residential unit using REVIT
1) What is BIM? Summarize the features of BIM and benefits of using BIM over 2D CAD tools.
BIM is Building Information Modeling. It is an integrated workflow built on coordinated, reliable information about a project from design through construction and into operation. CAD is Computer-Aided Design. ... CAD is simply the use of computer systems to assist with design
BIM integrates multi-disciplinary data to create detailed digital representations that are managed in an open cloud platform for real-time collaboration. Using BIM gives you greater visibility, better decision-making, more sustainable options, and cost-savings on AEC projects.
- Intuitive interface.
- Customizable templates.
- Multiple board views.
- Project scheduling.
- Real-time collaboration.
- Resource management.
- Automations.
- Mobile support.
2) Understand the concept of Categories, Families, Elements, Instances in Revit. Go to Insert Tab, choose a category. Pick a family and element. Understand the instances and insert it to Revit model
Aim-to use insert a tab and choose a category pick a family element and understand the instances and insert it to Revit model
tools used
1. insert tab
2.load family .
3.component .
4. property browser
procedure-
1. go to insert a from the toolbar
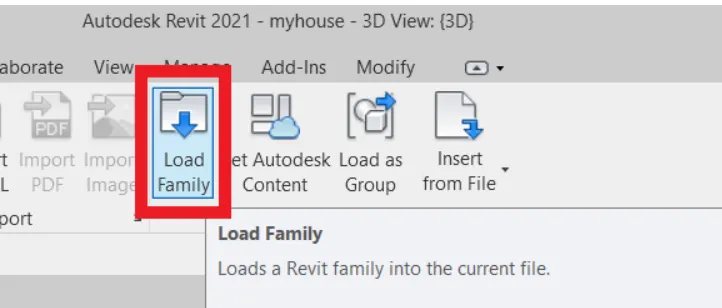
2.click on the load family from the important section.
3. from the dialogue box select the required a family to be loaded.
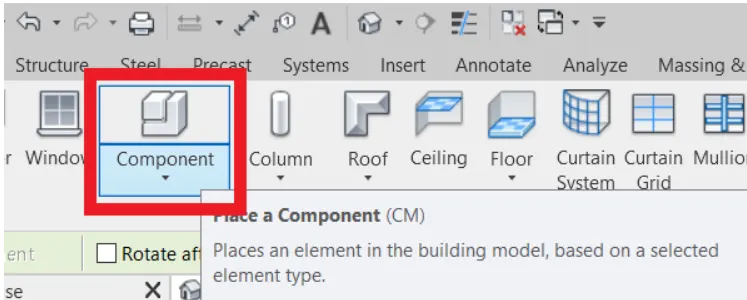
4. from the architectural toolbar click the component to use the model element selected from the insert
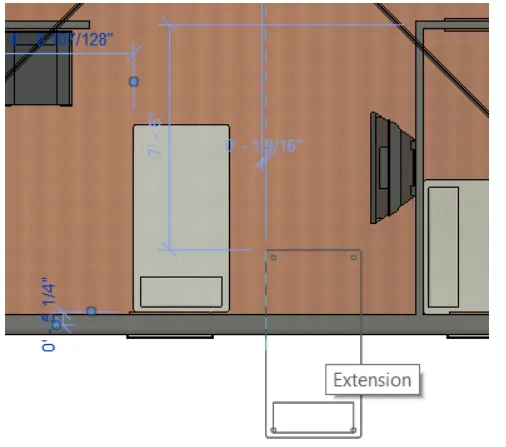
result- element is successfully inserted
3) Setting up a Project – Open a project file with architectural template. Save the file with appropriate name. Set up the project units to Imperial / Metric based on your convenience of modelling. Complete the project information under Manage tab. Set up the maximum backups for project file to 3
aim-to Open a project file with an architectural template. toSave the file with appropriate name. to Set up the project units to Imperial / Metric based on your convenience of modelling. Complete the project information under Manage tab. Set up the maximum backups for project file to 3
Procedure-
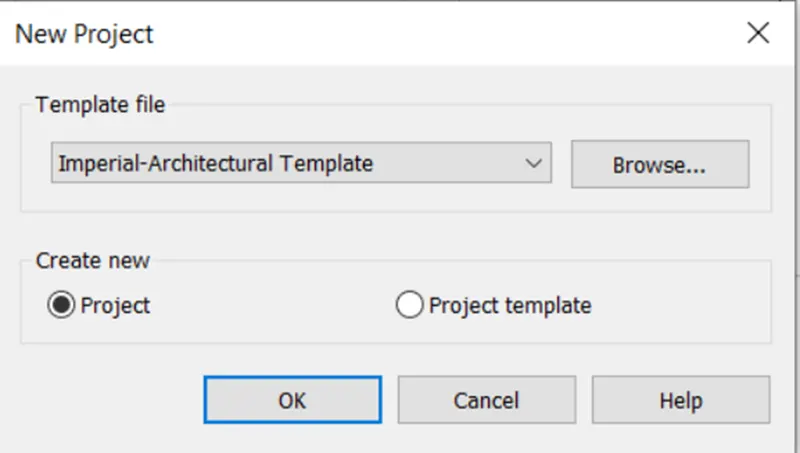
step 1- to open a project file with architectural template the save the file with appropriate name .
1.click on a new and in the dialogue box select architectural template
2.click on the file and then click on save name the project and select the location of the project to be saved
step 2- to setup the project you need to imperial or metric based on your convenience of Modelling and complete the project information under the manage tab.
1. go to the manager and click project units .
2. a dialogue box open change the units as desired .
3.click on a project of information in the manage toolbar.
4.fill in the information and click ok .
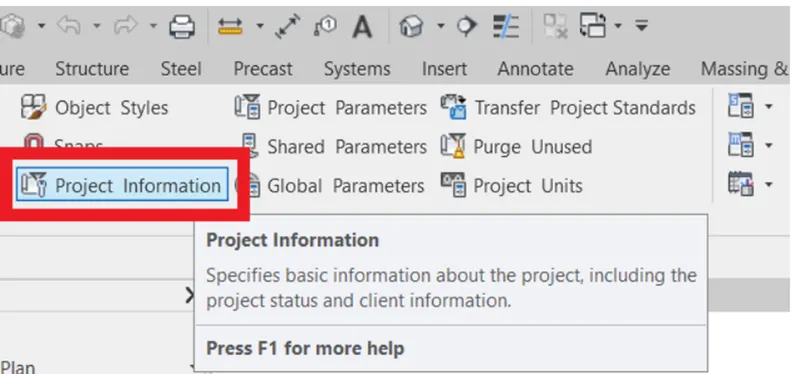
step 3- to last set of the maximum backups for the project file to 3 .
1.in the file go to save as and click in the project.
2. in the dialogue box opened click on option .
3.in file save option enter the maximum backup plan for project file as 3 .
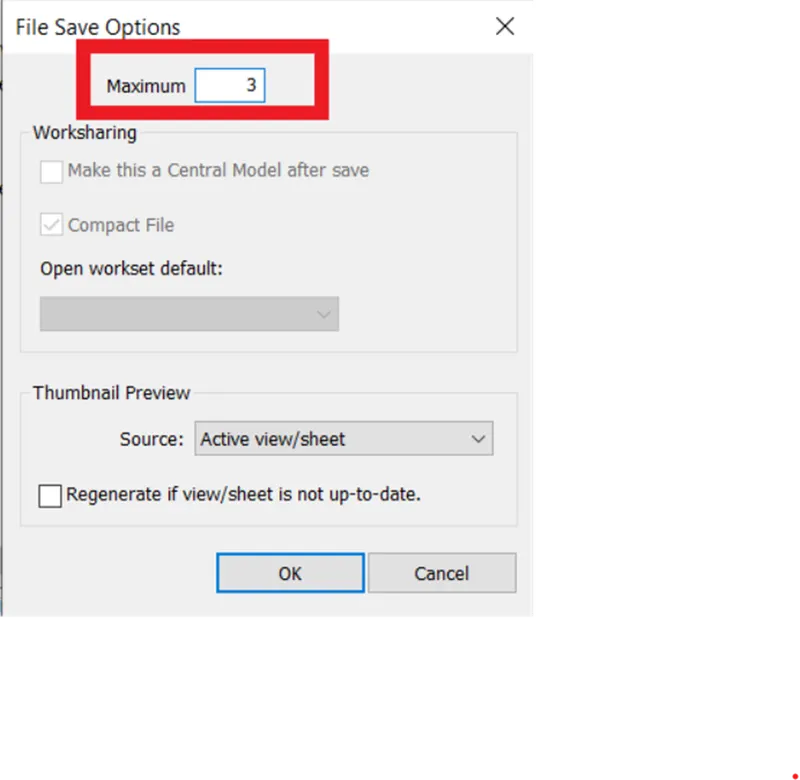
result-all tasks are successfully completed using revit 2022.
4) Understand the concept of Levels and Grids. Follow the naming and conventions. Create the following Levels: ( Convert to metric equivalents if metric is your units)
Ground Floor @ 0’
First Floor @ 10’
Second Floor @ 20’
Roof @ 30’
Grids Transverse Grids A, B,C,D, E @ 10’ spacing
Longitudinal Grids from 1 to 10 @ 20’ spacing
Aim- to understand the concept of levers and grids and create the following levels
Ground Floor @ 0’
First Floor @ 10’
Second Floor @ 20’
Roof @ 30’
procedure -
step 1 -the concept of levels
1. from the architectural menu in the date term section click on a level to add levels.
2. to add levels one must open elevation view.
3.enter the desired distance below the level where the distance between level is shown to change is Resistance .
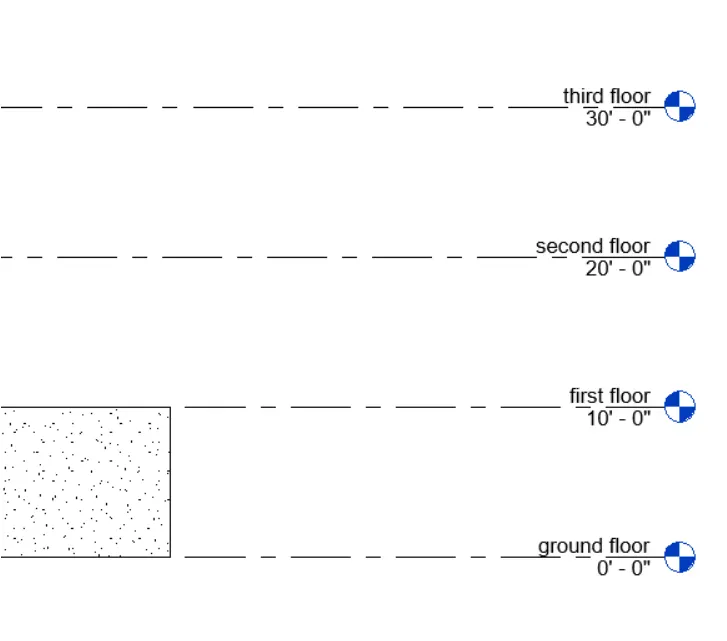
step 2. -the concept of grades.
1. from the architecture menu in the datum section click on Grids to add grids.
2.horizontal grids are tagged with alphabet and vertical as number.
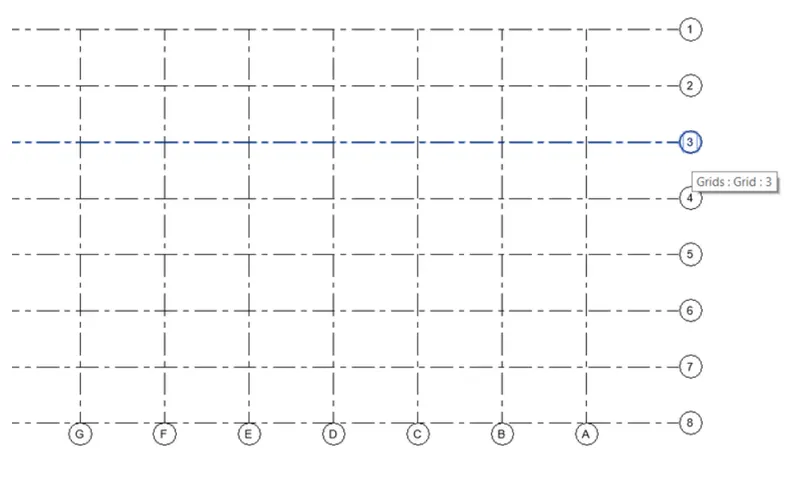
result-
given grades and levels made by revit 2022
5) 3D modelling of residential unit – From looking at your house / or a place you aspire. Create a conceptual layout of the residential unit. You can measure using a tape or
you can access your residential plan to create a similar layout.
Aim-to create a 3D modelling of the residential unit layout .
tools used -
1.wall tool
2. properties browser
3.room.
procedure-
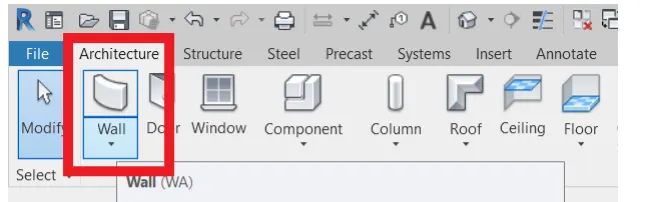
1.from the architectural toolbar select tools .
2.draw the desired word layout.
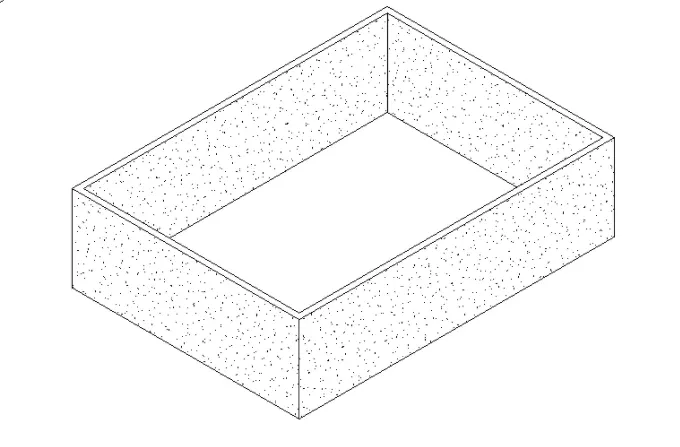
result -created residential unit layout
6) In the layout created draft the level of details you are planning to include – Dimensions of room, components you plan to add in the residential unit.
aim-to include dimension of layout
tool used-
1.wall
2.dimension
3.door
4.room
procedure-
1.Open the rivet .
2.open the layout created early .
3.align the dimension to the layout.
4. put the doors as required .
5.click on the room command under architectural toolbar .
select rooms and tag rooms to do tagging
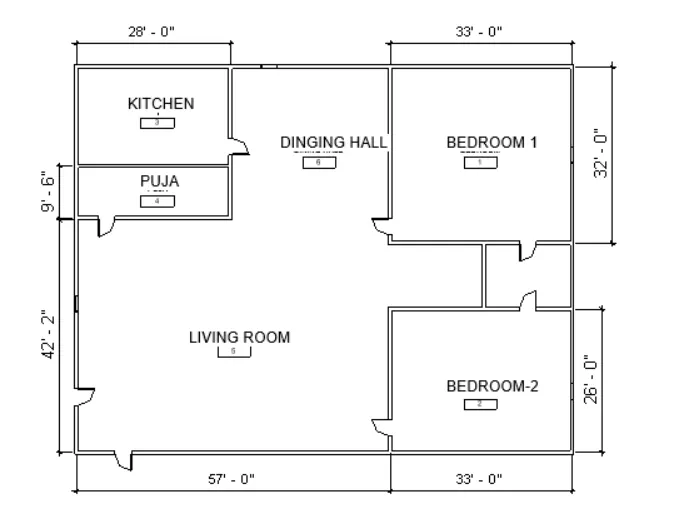
result- dimension are aligned to layout
7) Identify the residential model elements such as Door, Windows, Tables, Chair, Couch, Bed, Lamps from the library and insert them to the model
Aim- to insert a different element like doors, Windows ,chair ,bed etc.
Tool used -
1.open
2.insert
3.load families .
4.elements
procedure-
1. open a file that has been created early.
2. click on insert .
3. click on load family .
4.select the element like chairs ,doors, Windows bed etc.
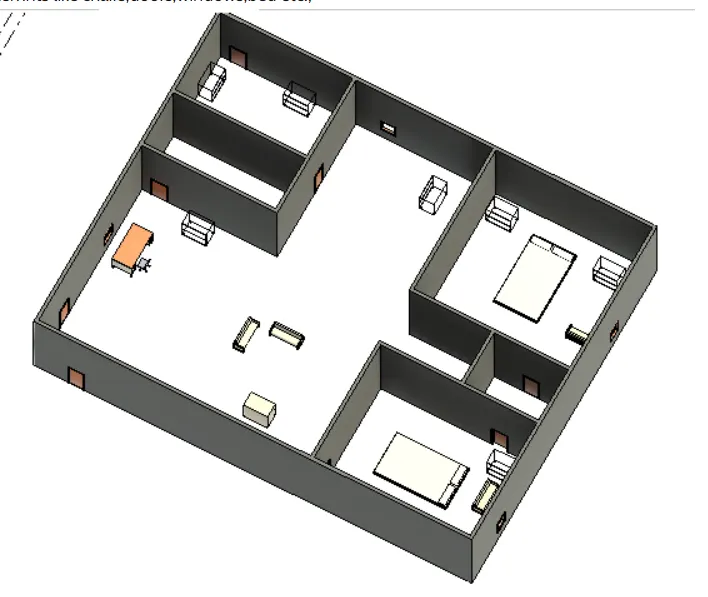
result -
different type of element like door Windows of our storage bed table chair has been inserted in the model layout