Creating Levels, Grids, Layout and model elements for a residential unit using REVIT
CHALLENGE WEEK - 2
REVIT
Question no. 1: What is BIM? Summarize the features of BIM and benefits of using BIM over 2D CAD tools.
- Aim:
- To explain about BIM.
- To Summarize the features of BIM.
- To List the benefits of using BIM over 2D CAD tools.
- Procedure:
- BIM simply is abbreviated as " Building Information Modelling.
- BIM is now the most efficient, important and vital tool used all over the world in many field of works.
- The BIM is not a specific software but comprises of many tools.
- BIM can be said as a concept that comprises of various tools used in modelling, drafting , Designing or informating on a building.
- BIM integrates multi-disciplinary data to create detailed digital representations that are managed in an open cloud platform for real-time collaboration
- When speaking of the featured of BIM, it is a vast space to help in each and every way in a building informations.
- BIM can give a clear note each and evrything created throught it.
- Where BIM is easy to access and work.
- BIM provides a huge space for connecting, sharing and creating ideas by allowing new connection 3rd party tool in teh softwares etc.,
- This concept is an interesting stuff where one can learn and work on it with ease.
- The creation of models in a more lively way and informative way is the spoeciality of this BIM.
- In BIM we can "Plan, Design, Build and Operate.
- Which is said to be the key feature of BIM.
- When coming to its benefits:
- This BIM lets the industries work much more smarter with the daily raise in workloads.
- And specially to meet the global demads with ease.
- BIM specially allows the users to link, connect or collaborate and work easily and to keep acontrolled environment the projects.
- This concept not only allows the users to connect and work but also to capture the datastore it.
- Monitor teh process and production and much more.
- Result:
- Thus the BIM concept was explained.
- Features of BIM was explained
- Benefits of the BIM concept was listed.
Question no. 2: Understand the concept of Categories, Families, Elements, Instances in Revit. Go to Insert Tab, choose a category. Pick a family and element. Understand the instances and insert it to Revit model
- Aim:
- To Understand the concept of Categories, Families, Elements, Instances in Revit.
- Procedure:
- Revit is a very smooth and an important tool in BIM.
- Revit has several elements that builds importance to its easy usage.
- Such elements are.
- Categories, Families, Elements, Instances which add additional values while drafting and also helps in controlling the model.
- Categories:
- Categories are an import tool within Revit for identifying the inferred type of an element.
- Such as anything in the Walls category should be considered as a wall.
- Categories is considered as a set of elements in a single usage column.
- Elements:
- Elements are the components and different materials of the revit.
- Many elements with similar modle is said to be a category.
- Families:
- Families are termed as building blocks in Building Information Modeling.
- These families helps in adding different elements such as doors, windows etc.
- Instances:
- The families created will ahve different parameter that supports the setting of the family.
- When an element is needed to be changed in its parameter then it needed to be changed with instance.
- But when the families complete behavious need to be changed then we go for changing the type properties.
- Instances helps in easy accessing the parameter of a element.
- So when understanding the family.
- We selected door family.
- And selected a door.
- Furthure exploring on the door is shown below.
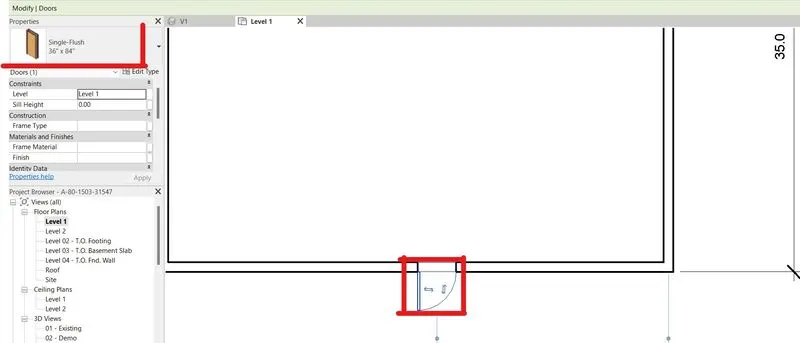
- The image shown above shows the usage of the door element from the door family.
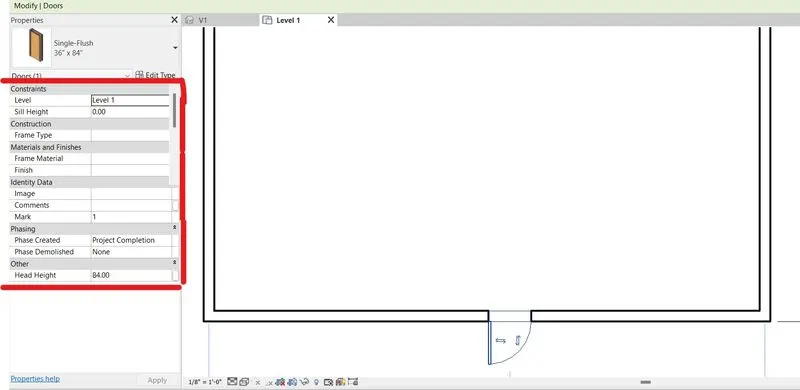
- The image below shows the instance that is used to control over the door paramteres for the instance.
- Result:
- Thus the the concept of Categories, Families, Elements, Instances in Revit was understood.
- Differnt Catergories, Families adn their instances where understood.
Question no. 3: Setting up a Project – Open a project file with architectural template. Save the file with appropriate name. Set up the project units to Imperial / Metric based on your convenience of modelling. Complete the project information under Manage tab. Set up the maximum backups for project file to 3
- Aim:
- To set up a project file
- To satisfy above said condiotions.
- Procedure:
- A project with architectural template was opened successfully.
- The file was saved with a proper name.
- The project units werre set to proper units as required.
- Then the project units were set as required.
- Then teh project informations were updated by using the manage tab in the interface.
- Then the maximum backup were set accordingly.
- Result:
- Thus the project file was created.
- The above said conditions were satisfied.
Question no. 4: Understand the concept of Levels and Grids. Follow the naming and conventions. Create the Levels
- Aim:
- To understand the concept of levels and grids.
- To Follow the naming and conventions.
- To Create the Levels.
- Procedure:
- The concept of levels anf grids are very important in a proper modelling field.
- The levels are the different height or levels with respect to the starting floor or the ground level or some fixed levels of teh building.
- The levels are useful is drafting diiferent floor or model at different heights.
- While grids are annotative distance shoing elements
- These elements are very much useful in showing the varied distances.
- To maintain the measurements from a standard distance to all places.
- Then using Revit the levels and grids as said were created.
- Thus created grids and levels are shown below.
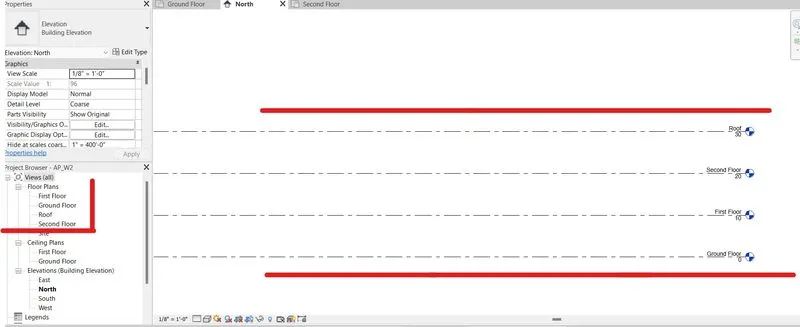
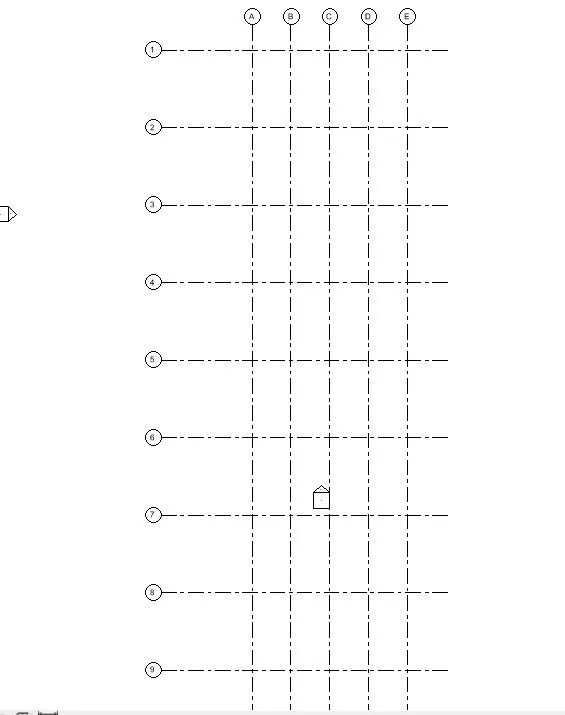
- Result:
- Thus the concept of levels and grids were understood.
- The said conditions were folloed on revit
Question no. 5: 3D modelling of residential unit – From looking at your house / or a place you aspire. Create a conceptual layout of the residential unit. You can measure using a tape or
you can access your residential plan to create a similar layout.
- Aim:
- to create a 3d modelling residential unit
- To satisfy the above said conditions.
- Procedure:
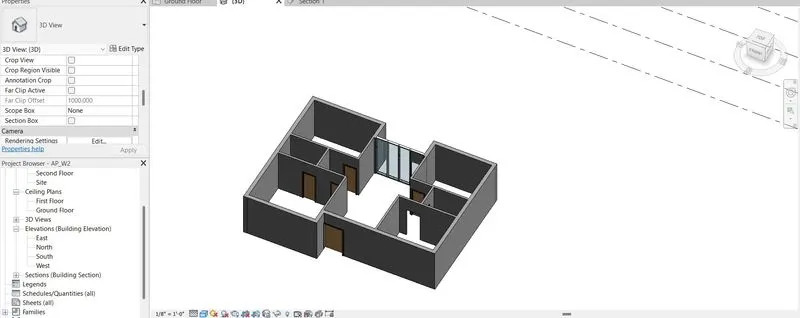
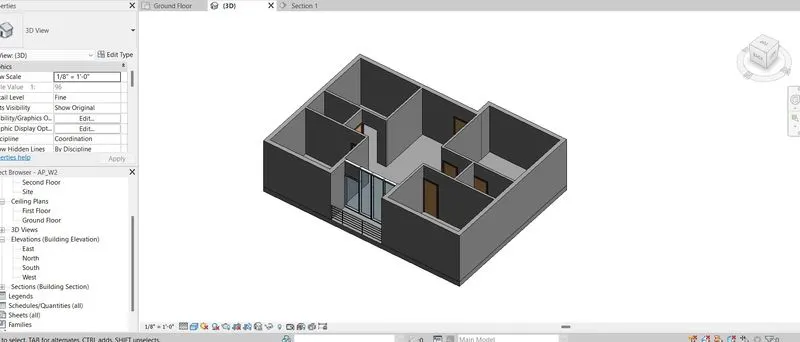
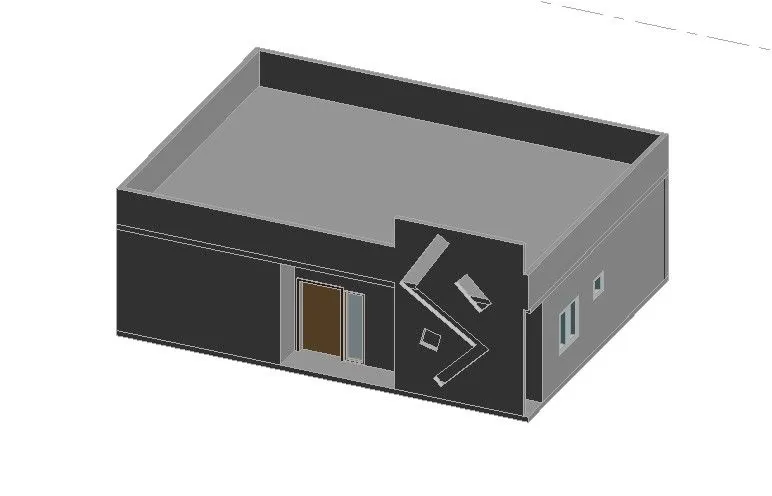
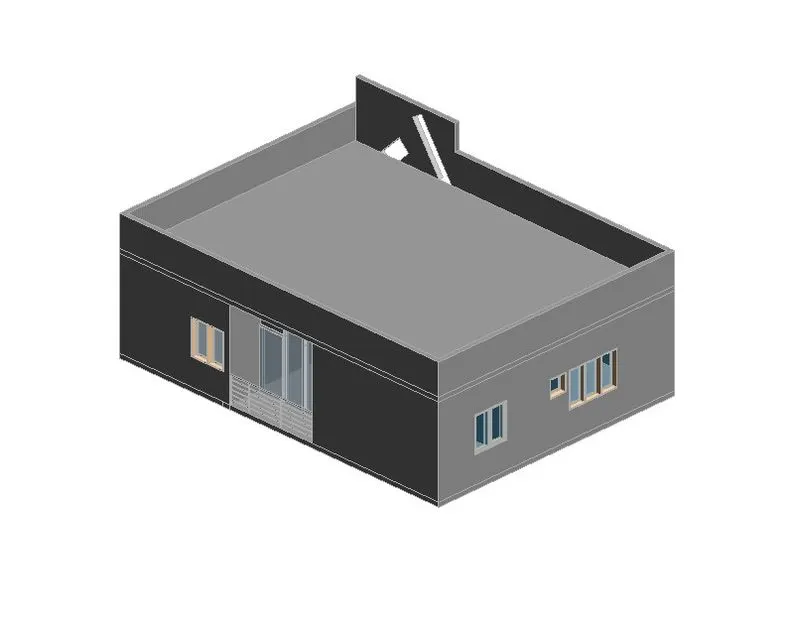
- A plan of my desire was drafted at first.
- Then the plan was converted to 3d model by drafteing walls on the opn.
- The walls were of 9" and 4.5" walls.
- Thne the windows and doors of required sizes were placed.
- The building also contains some curtain walls and railings.
- The model drafted is a simple model with simple available elments and families
- The drafted model is shown below
- Result:
- Thus the 3d model is drafted
- Said conditions were followed and satisfied.
Question no. 6: In the layout created draft the level of details you are planning to include – Dimensions of room, components you plan to add in the residential unit.
- Aim:
- Todraft the level of details
- To satisfy above said condiotions.
- Procedure:
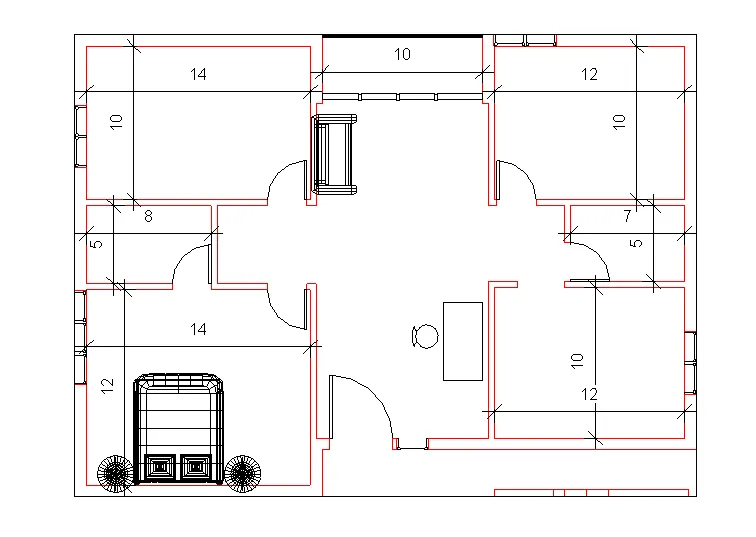
- The drafting had a level of detail of 100.
- The dimesions were marked .
- Thus created conditions are shown below.
- Result:
- The dimesioned plan is shown
- The above said conditions were satisfied.
Question no. 7: Identify the residential model elements such as Door, Windows, Tables, Chair, Couch, Bed, Lamps from the library and insert them to the model . Save the project for use
for Assignment 3
- Aim:
- To Identify the residential model elements such as Door, Windows, Tables, Chair, Couch, Bed, Lamps from the library and insert them to the model
- To Save the project for future use.
- Procedure:
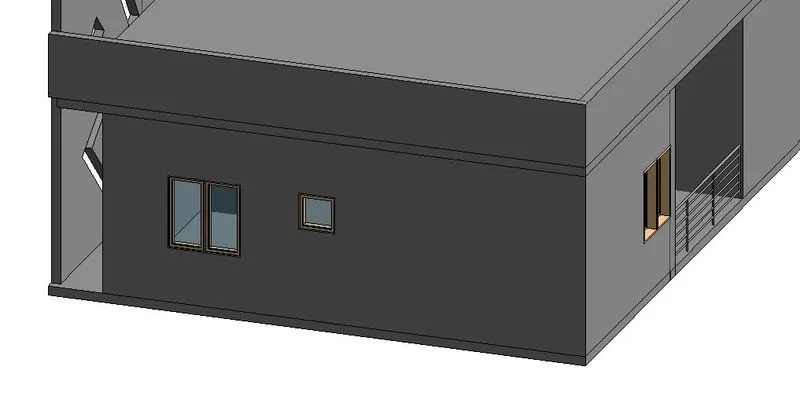
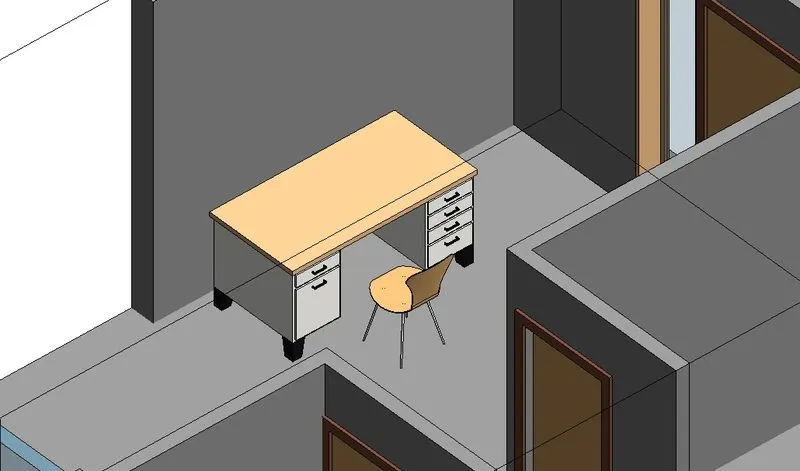
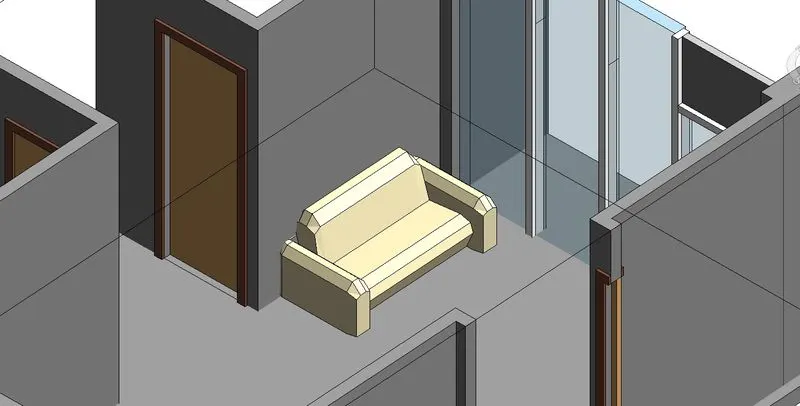
- The residential model eleements were identified and then place in the reisdential building model.
- Each of the elements said above are placed adn shown below.
- Door and Window:
- Tables and Chair:
- Couch:
- Lamp and Bed:
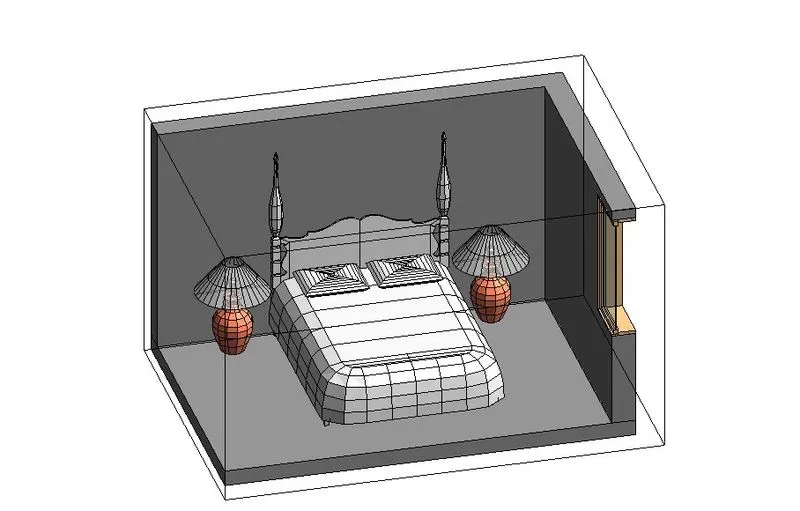
- And the project was saved after the models were inserted.
- Result:
- Thus the model elements wer
- Said conditions were followed and satisfied.