Creating Kitchen layout, Hatching of Architectural elements and sectional view of an Industrial Building in AutoCad
AIM:
To create:
A. Layouts of the Kitchen and provide hatches pattern as shown.
B. Elevation of the plan created in the Challenges 7 and apply proper hatch to this elevation.
C. The section view of an industrial building.
Used tools in Auto Cad:-
a. Line - To draw horizontal and vertical line of known distance- Command "L" -select the start point and end point.
b. Rectangle - To draw rectangle .Command "REC" - select the frist point - click on dimension then enter the value of length,press enter then value breadth of rectangle, press enter.
c. Offset - To darw lateral distance from a specified line. Command "O" - select the line (specified line) then give the offset distance - click on the desired side where we need to make offset.
d. Trim - To delete the unwanted portion of a line/object. Command "TR" - select the line/object from which to be deteleted -enter -select the line/object to be deleted -enter.
e. Extend - To extend the line to another line at a distance. Command "EX" - select the line to which it has to be extended -enter - select the line to be extended -enter
f. Fillet - To join the corners or to curve the corners. Command"F" - give fillet radius,if zero, it will from corner or it will form a curved shape with specified radius - select the two lines.
g. Horizontal construction line - Horizontal line which extends to infinity .Command "XL enter -H enter - click where we need to place the line.
h. Vertical construction line - Vertical line which extends to infinity. Command "XL enter V" - enter - click where we need to place the line.
i. Explode - To make a single selection object into diferent line segments. Command "EXPLODE" - select the object-enter.
j. Circle- to create a circle. Command "C" - select the centre point and give the diameter. By tan-tan -radius- select circle from tool bar and select tan-tan -radius methos - here two tangents and radius is given as input for creating circle.
k. Mirror- to crete the mirror object. Command "MI" - select the source object -select the base point- draw the mirror plane,the mirror object will be created in opp side of the object with respect to the mirror plane. If we need
to retain the source object click on 'no' for erase source object option.
I. Copy- To copy an object.Command"CO", select the source object then select the base point -then copy the object to the required point .Click on "no" for erase source object ,if we need to retain the source object.
m. Divide - To divide a line into different line segments. Command "DIV" - select the line and give the number of line segments to obtain. enter
n. Point - To show the points for eg: to show the divided points after using Divide tool. Command "DDPTYPE" - select the style of point we want to display.
o. Text - To write the specification or information. Select from toolbar -single line - specify height only oneline text can be inputted - multi line text - create the text box -specify height and insert the text.
p. Hatch - To hatch inside an object so that its functionor what material it is made is known from the hatch for eg: hatching with brick symbol,we can know that the wall is made with brick. Command "H" - pick a point inside the object - adjust the scale to required.
q. Dimension - To show the measurements.From the tool bar select the dimension tool and pick the 2 points between we need measurements.
Create the layouts of the Kitchen and provide hatches pattern as shown. Also, use blocks wherever required. Provide appropriate dimensions in the plan. Assume the size of doors, appliances and others as per the standards.
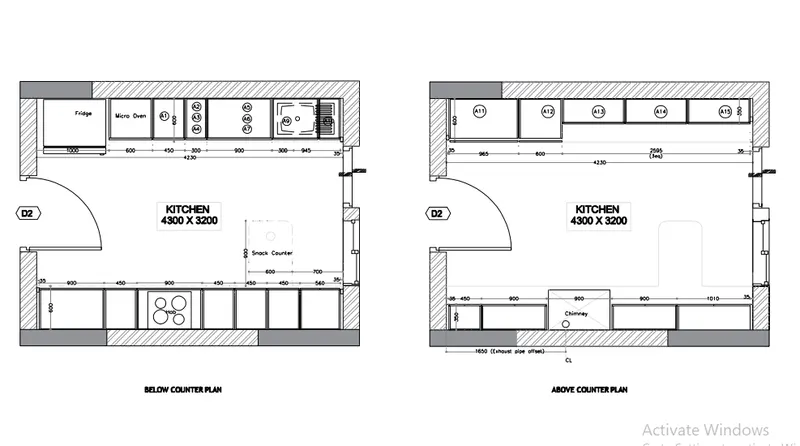
AIM:
a. To create a layout of kitchen.
b. Provide hatch pattern to wall as shown in image.
a. To create a layout of kitchen.
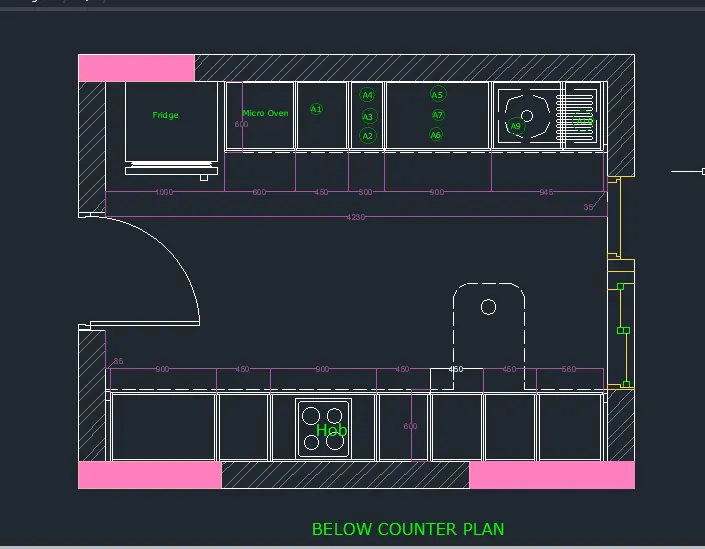
1) Below counter plan:
- Drawing the wall
- Draw a rectangle of 4300 and 3200mm
- Draw offset 230mm as wall thickness towards outside.
Drawing left cabinet and fridge:
- Fridge is drawn on leftmost side by rectangle tool.
- Take an offset of 1000mm and start drawing slab showing cabinet below Offset 600mm for cabinet below for microwave oven give an offset of 20mm to show the partition of cabinet below.
- For width of cabinet give 600mm offset, give 20mm inside offset and 10mm offset for thickness.
- From 600mm offset of microwave cabinet ,give an offset of 450mm for A1.
- From that give 300mm offset A2,A3,A4.
- From 300mm offset give another offset of 900mm for A5,A6,A7.
- Draw 35mm offset from the right side for the hinge and give thickness of 20mm.
- From the 35mm draw an offfset of 300mm towards left for the cabinet below sink drain and rest will be cabinet below sink. (assumed 300mm from right).
- For all the divisions of cabinet,take 20mm on both side to show the thickness.
- To create doors, extend the line of all the divisions and give 10mm offset on both sides in the 10mm offset given for thickness.
- Erase the extended line and trim the horizontal line for opening of doors.
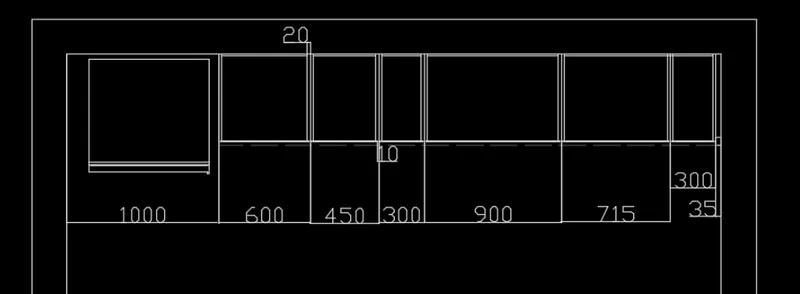
Drawing right cabinets and hob:
- Give 35mm offset from the left and create a hinge.
- For width of cabinet give 600mm offset, give 20mm inside offset and 10mm offset for thickness.
- From 35mm give 900mm offset
- Give an offset of 450mm from the 900mm offset. Again offset a distance of 900mm.
- Offset a distance of 450mm three times from the respective preceeding offset
- From right side offset 35mm for hinge and rest distance will be 630mm which shows the top of cabinet.
- Offset a distance of 20mm on both sides of all offseted lines (from all divisions).
- To create doors, extend the line of all the divisions and give 10mm offset on both sides in the 10mm offset given
for thickness.
- Erase the extended line and trim the horizontal line for opening of doors.
- Extend the centre line to the thickness for 3 cabinet from the left.
- Hob is drawn by rectangle and circle tool in the plan of third cabinet from the left.
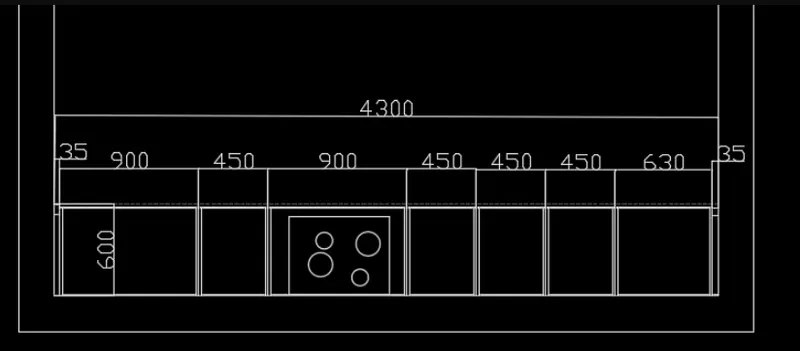
Drawing snack counter:
- Offset a distance of 700mm from the left side of wall and 900mm from the 600mm width of cabinet.
- Fillet the end of the snack counter with fillet radius 75mm.
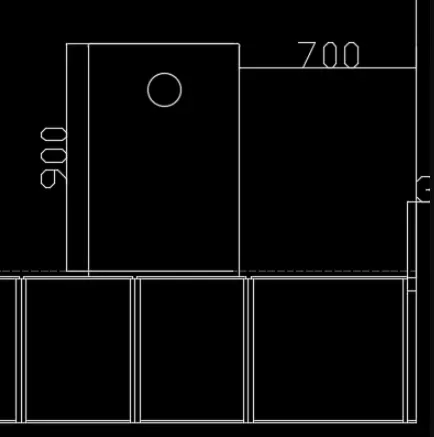
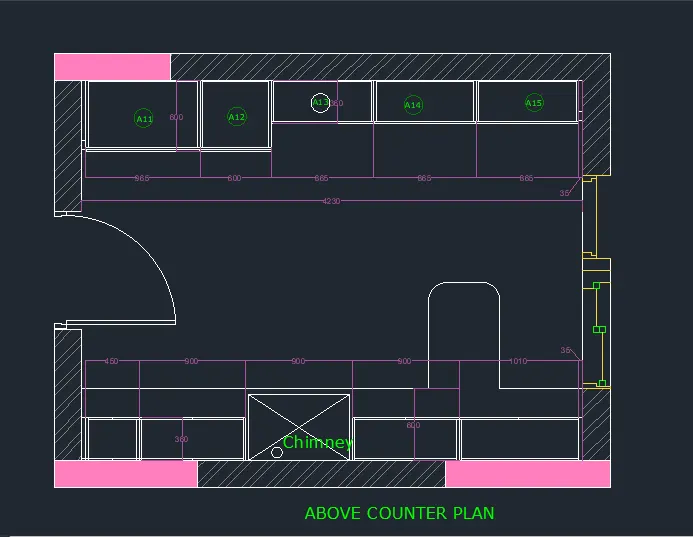
2) Above counter plan:
- Copy the wall of the below counter plan as the dimesions are same.
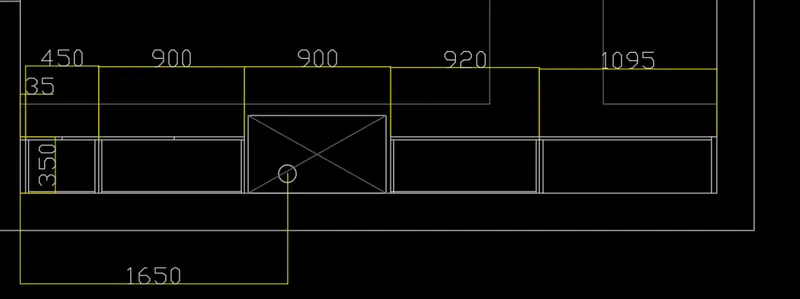
Drawing right side counter:
- Draw a width of 350mm from the wall, to inside offset 20mm to show the thickness.
- Offset a distance of 35mm from the left side of wall.
- Next offset 450mm for the top of the cabinet
- Offset 900mm 3 times for the next cabinets.
- From the right side offset 35mm,the rest distance of 1095mm will be the cabinet.
- For the second 900mm offset,draw rectangle and from a
distance of 1650mm from the left side of wall,draw a circle for the chimney.
- For rest of the offset ,offset 20mm on both sides for the thickness.
- From the plan, the below counter and snack counter will be also seen, draw that and show it in light colour as same distance as in the below counter plan.
Drawing left side counter:
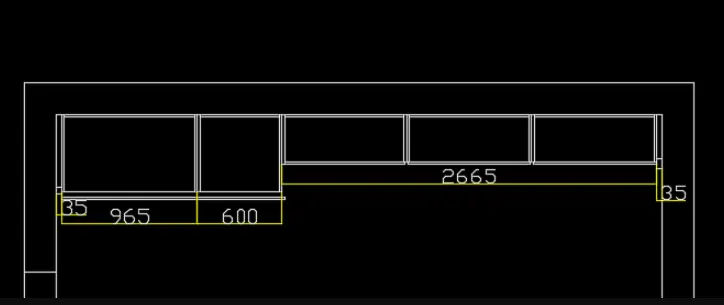
- From the left side wall take 35mm offset to draw the hinge.
- Draw 600mm offset as width from the horizontal wall.
- Draw 10mm offset to show the door.
- Draw an offset of 38 mm from the 10mm door for the cabinet.
- From 35mm hinge offset 965mm to the right. A11
- From that offset 600mm for the next cabinet A12.
- Take offset of 350mm from the horizontal wall as width of next cabinets.
- Offset a distance of 35mm from the right
- The rest distance is 2665mm which is divided into 3 equal parts .A13,A14,A15.
- Then offset 20mm on both sides of divisions and also 20mm in front for doors Offset 10mm in backside for showing thickness.
Drawing doors, sliding doors and windows:
- Create door on the left wall of the kitchen on both the plan.
- Consider door of 1000mm width. Trim 1000mm from the wall thickness.
- Draw a hinge of 20mm, and draw circle from centre of one hinge to another
- Draw vertical line from one hinge to the circle to show the opening.
- Trim off the rest of circle.
- To draw the window,consider window of width 900mm
- From the 600mm width of cabinet,take an offset of 900mm ( in line with the snack counter).
- Draw the hinges and shutters of windows by using line tool.
- Copy it to the above counter plan
- To draw sliding doors take 200mm offset from the window.
- Give an opening of 900mm take offset of 900mm from the 200mm offset.
- Draw the shutters of the sliding door.
- Copy it in the other plan also.
Text and dimensioining:
- Dimension all the objects by dimension tool in the toolbar.
- For text, select multiline text size -75mm style romans.shx.Command "ST".
- Write all the text in respective places like fridge, hob, cabinet number etc.
b. Provide hatch pattern to wall as shown in image.
Hatching:
- Create a region for hatching as required size by using poly line and rectangle
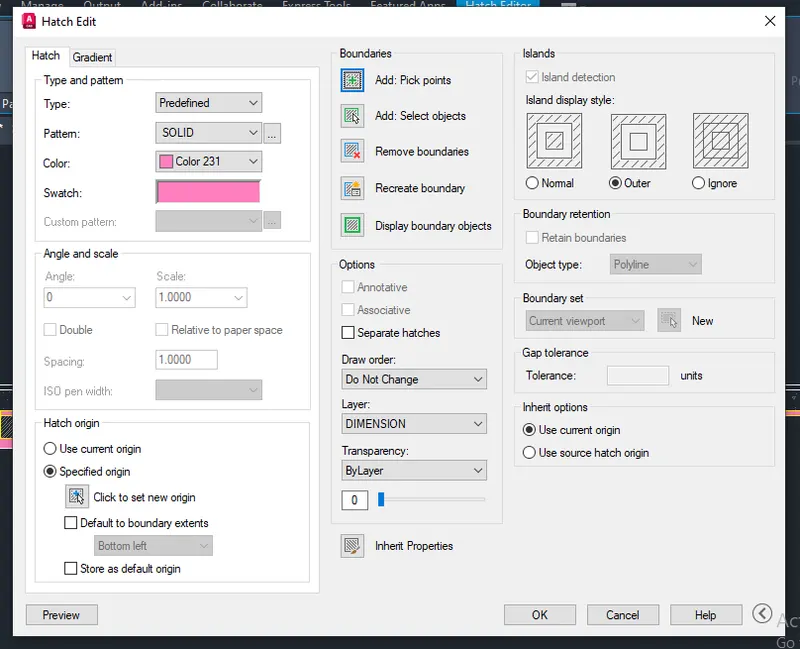
- Then For hatch give command "H" - setting- select type, pattern,colour, and hatch origin - ok - select object - select internal point of this region - adjust the scale to required - enter
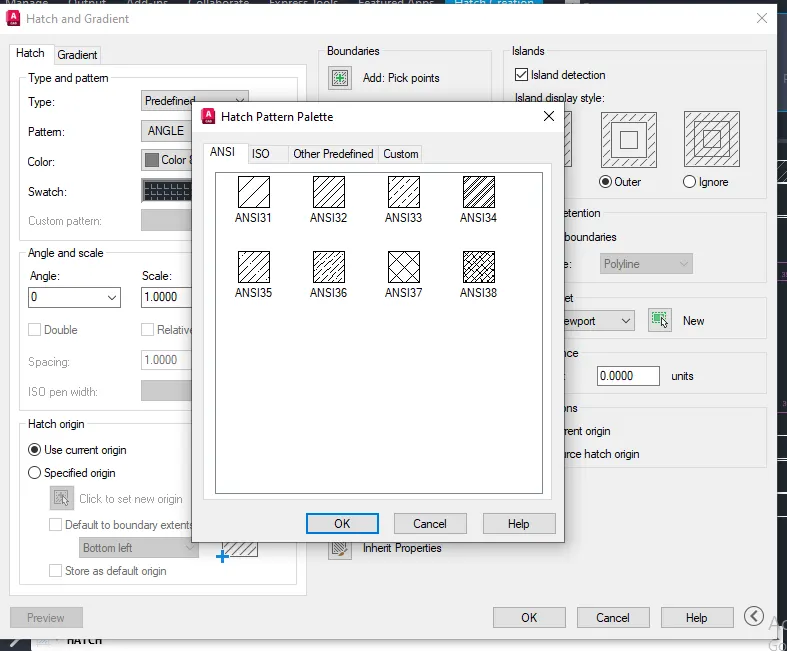
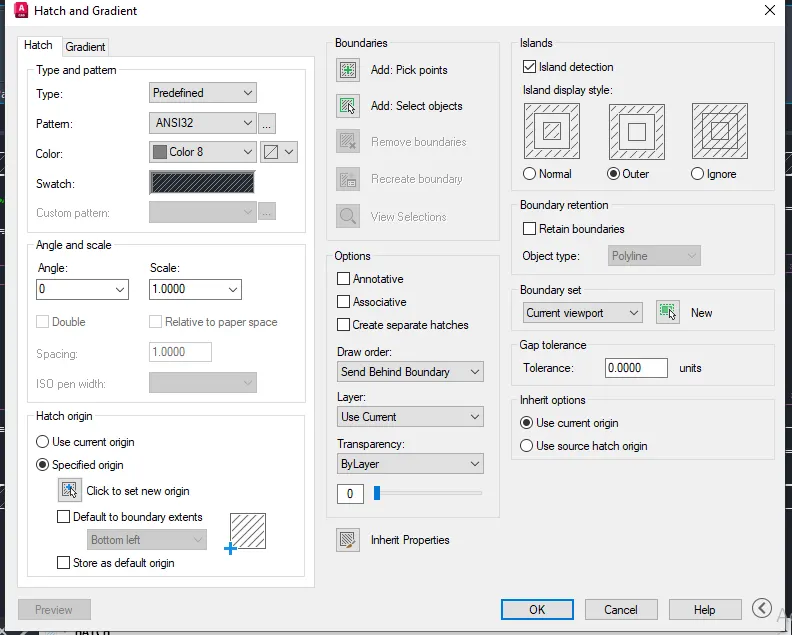
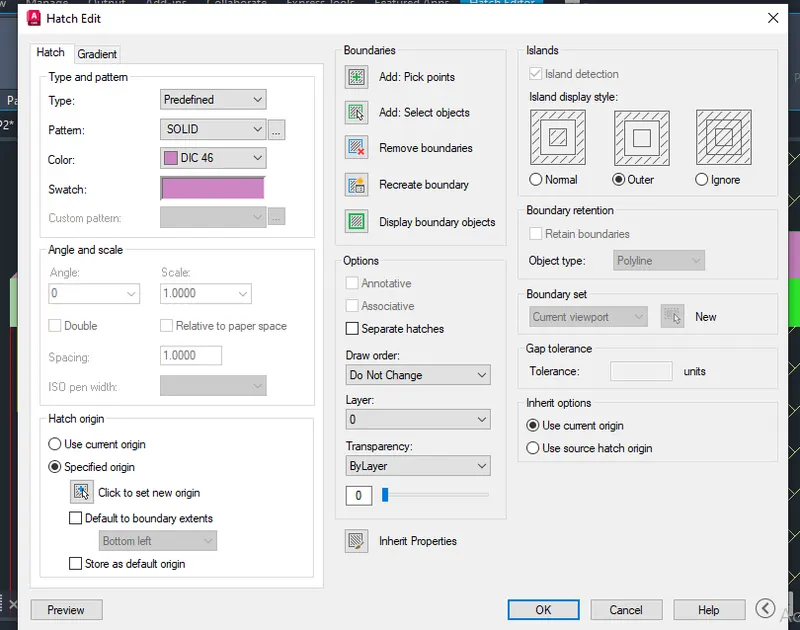
- Use similar method for solid pattern only in this pattern solid pattern type is used.
Type: Predefine
Pattern: soild
Colour: 231 (From select colour)
RESULT:
1.Below countour plan:
2.Above counter plan:
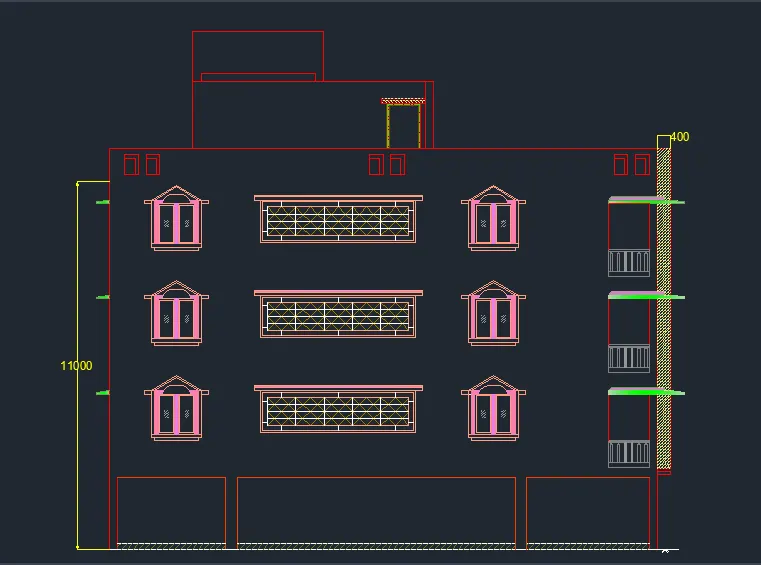
2. Create the elevation of the plan created in the Challenges 7 and apply proper hatch in the walls, doors, windows, and other architectural elements. Refer to the dimensions in Plans and sections in Challenges 7.
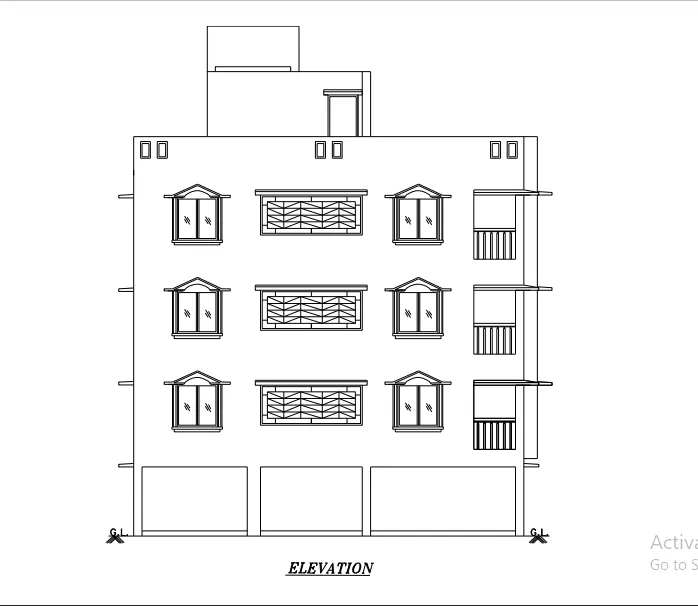
AIM:
To create :
a. The elevation of the plan created in the Challenges 7
b. Provide proper hatch in different elements
Procedure:
a. The elevation of the plan created in the Challenges 7
- Open the file of week & where plan is made.
- Extend the constrcution line from every wall,windows,staircase,ventilators chajja(elevation is from section BB). Copy this section BB
- Trim all unwanted lines.
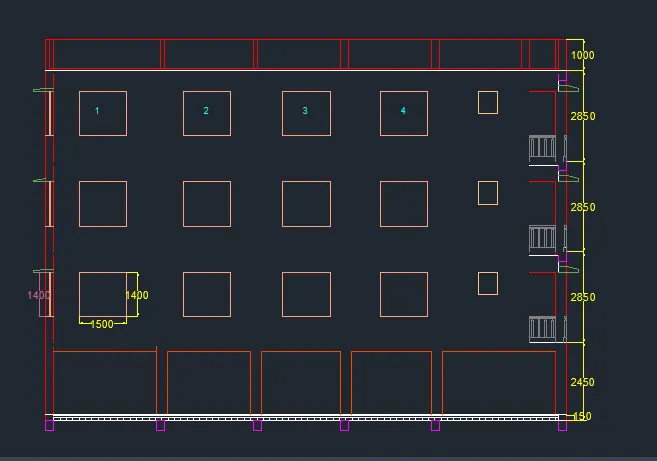
1) To draw Window I and III:
- Draw the rectangle 1400 x 1500mm (Window 1 and 4)
- Give offset horizontally 100mm 3 times (from both side of inner side of rectangle) and vertically ( from bottom and top in downward and upward direction of line ) for making chajja slab thikness
- Again offset horizontally 50mm from last offset. Extend this line upto chajja thikness.
- Give offset 165mm 400mm and 100mm vertically from thikness of chajja.
- Draw vertical line from midpoint of line upto chajja thikness. Offset 50mm from both side. for making frame.
- Trim last offset line from above chajja thikness which is not required.
- Now, draw the arc which is join chajja corners points and last trim corner
- Draw incline line which is join ending corner of lines.
- join ending points of lines and centre of line for making a traingle thickness.
- Give offset 150mm horizontally from oustside direction of rectangle for making chajja projection.
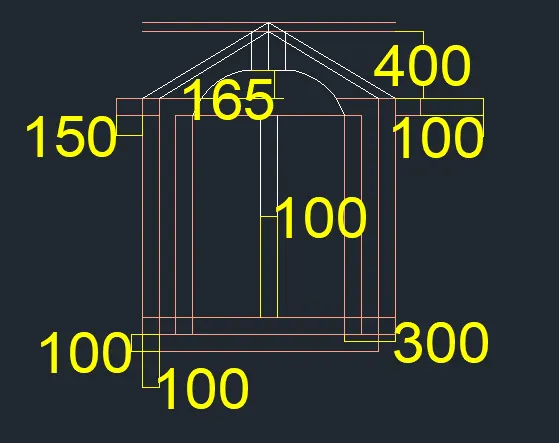
- Trim unwanted lines.
- Give offset 50mm for making glass frame.
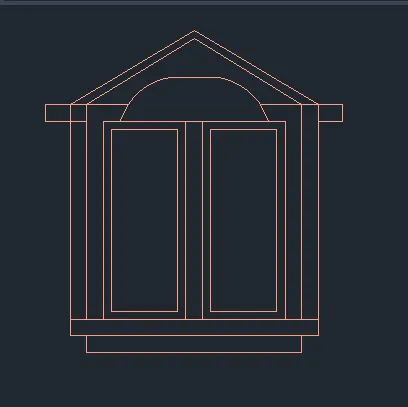
Hatch for frame :
- Create a region for hatching as required size by using poly line and rectangle.
- Then For hatch give command "H" - setting- select type, pattern,colour, and hatch origin - ok - select object - select internal point of this region - adjust the scale to required - enter
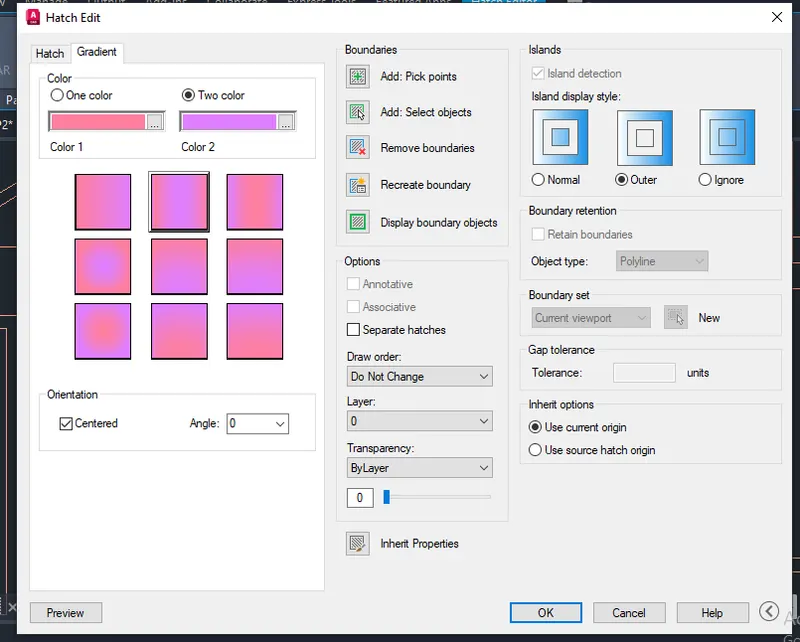
Result:

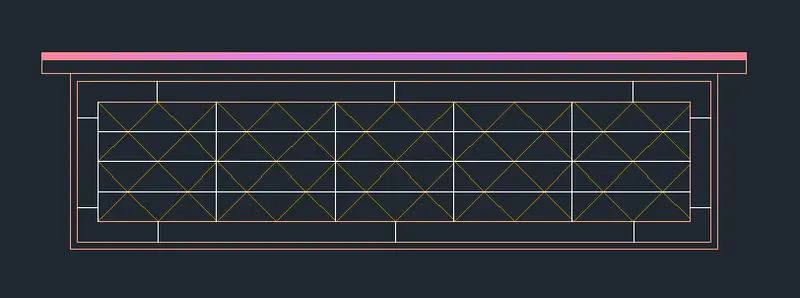
2) To draw Window II:
- Draw the rectangle 4650 x 1250 mm ( join Window 2 and 3)
- Offset 50mm and 150mm inside of rectangle.
- Explode rectangle 4225 x 850mm. Divide by "div" command in 5 part horizontally and 3parts in vertically.
- Explode rectangle 4650 x 1250 mm. Give offset 200 mm both outer side horizontally and 150mm at top in upward direction
- Offset 50mm from last offset in downward direction.
- Trim unrequired lines by "tr" command.
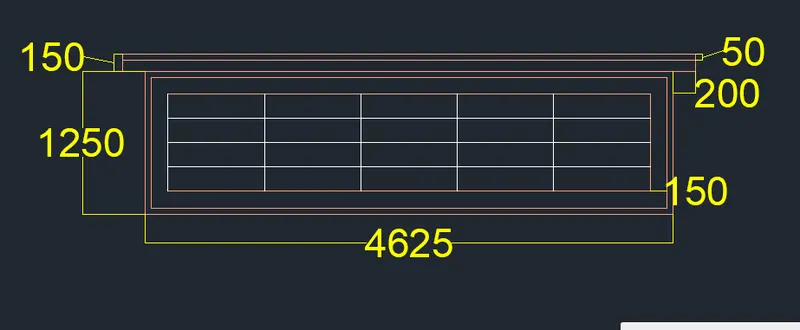
Hatch for frame :
- Create a region for hatching as required size by using poly line and rectangle.
- Then For hatch give command "H" - setting- select type, pattern,colour, and hatch origin - ok - select object - select internal point of this region - adjust the scale to required - enter
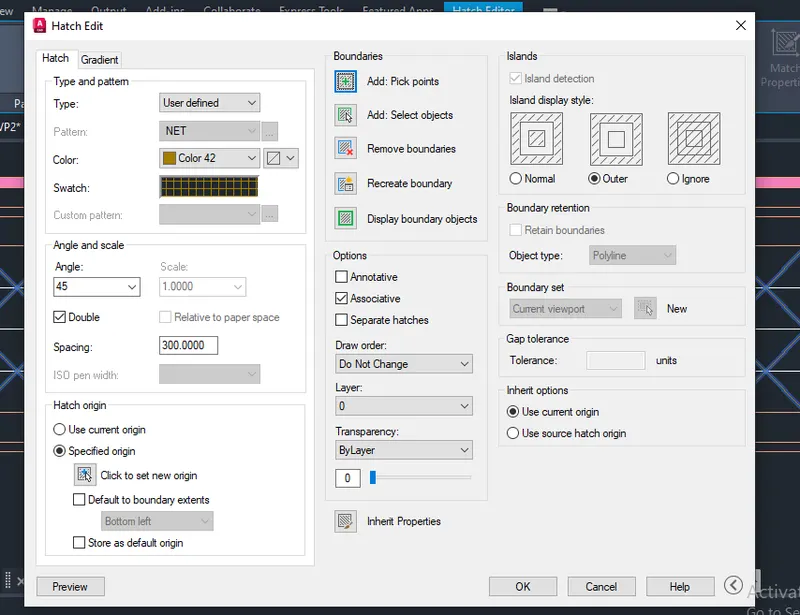
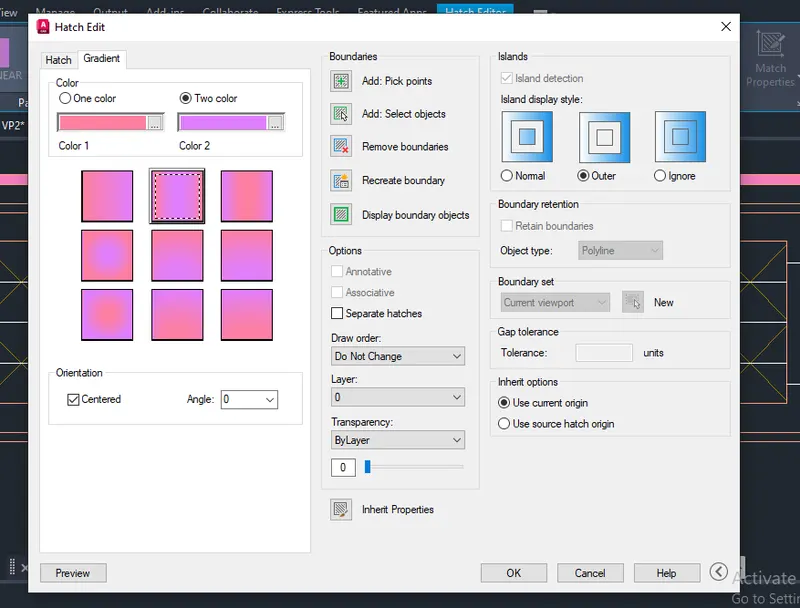
- Draw lines where required.
RESULT :
3) Draw of balconey:
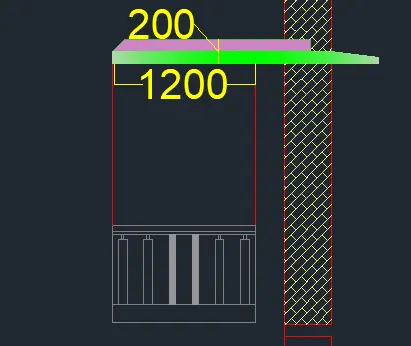
- Extend balocney size in horizontally having total size 1200mm
- Give offset 100mm (2 times) from top of blaconey in upward direction which is make chajja thikness.
- copy to balusters and place it required position. use solid hatching to these two balusters.
Hatching to thikness of chajja:
- For hatch give command "H" - setting- select type, pattern,colour, and hatch origin - ok - select object - select internal point of this region - adjust the scale to required - enter
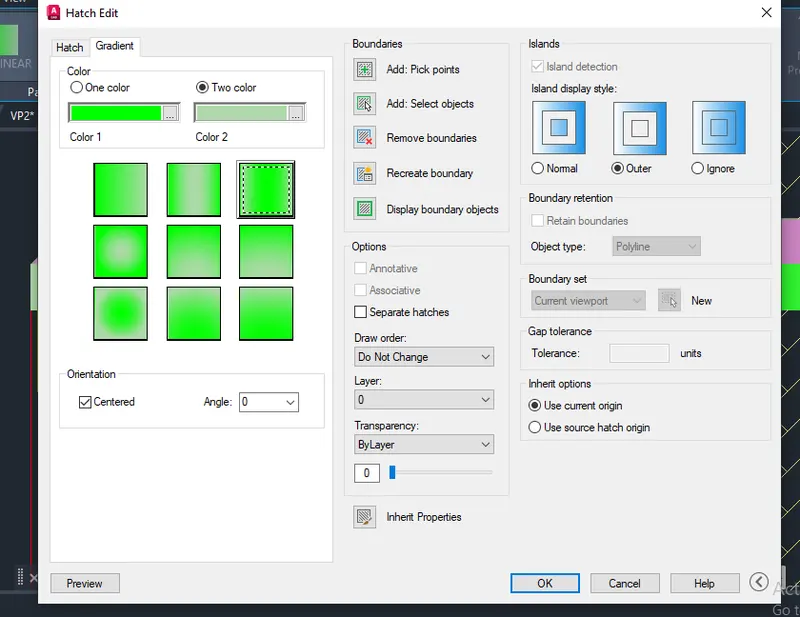
RESULT:
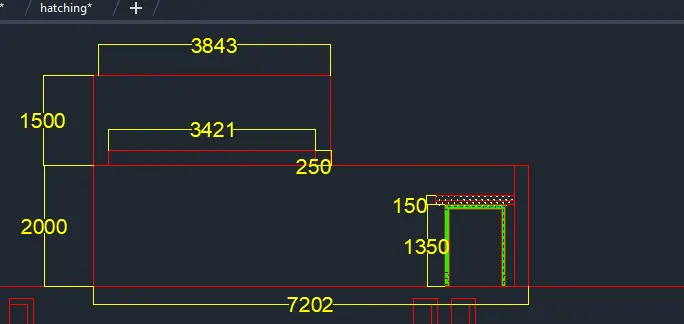
Draw stair rooms:
- Give offset from top of parapet wall in upward direction. offsetes are 2000mm, 1500mm.
- Give offset 2492mm and 7202mm in horizontally. join lines by using of fillet.
- Draw rectangle 3421 x250mm in top rectangle at required position
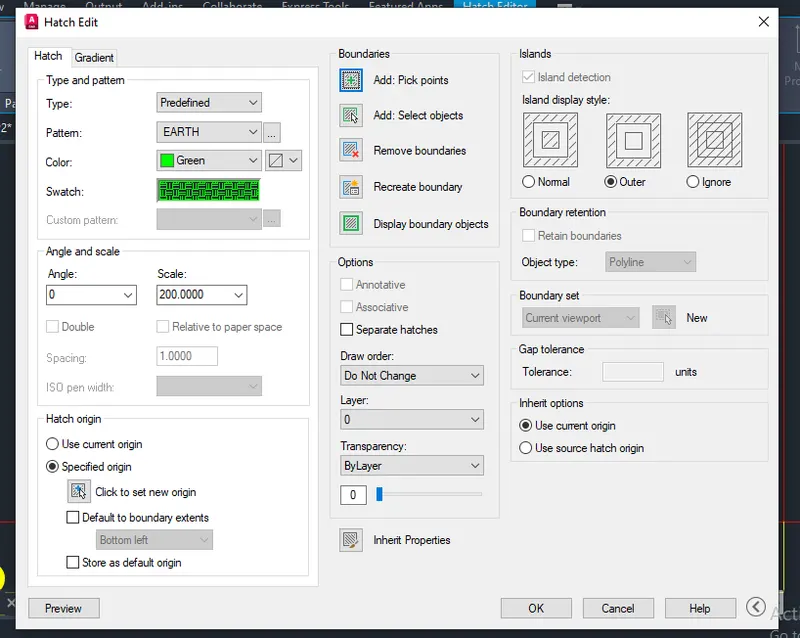
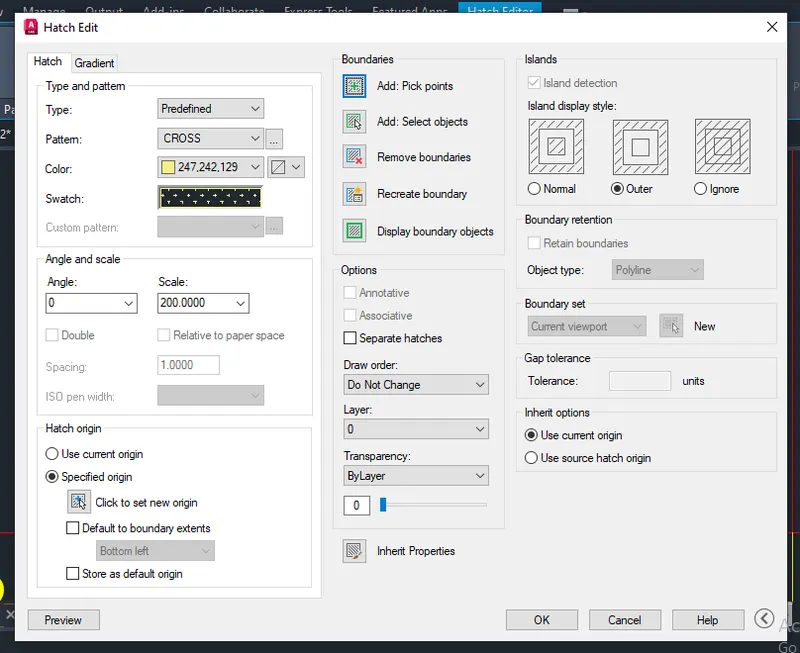
- Draw door - offset 1350mm, 150mm vertically - offset 230mm,150mm, 1017mm ,150mm from right side in horizontal direction
- Hattch used in door frame:
RESULT:
- Now place the windows at required place and also provide hatch at required elements
- Provide rectangle 600 x 400mm, offset 100mm and copy by "co" it and then using rectangular array and place it proper place.
RESULT:
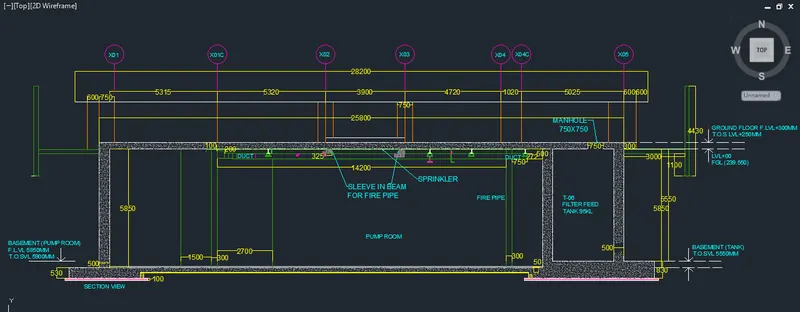
3. Create the section view of an industrial building as shown in Figure. Provide appropriate hatches and dimensions wherever required. Also, provide annotations to the drawing.
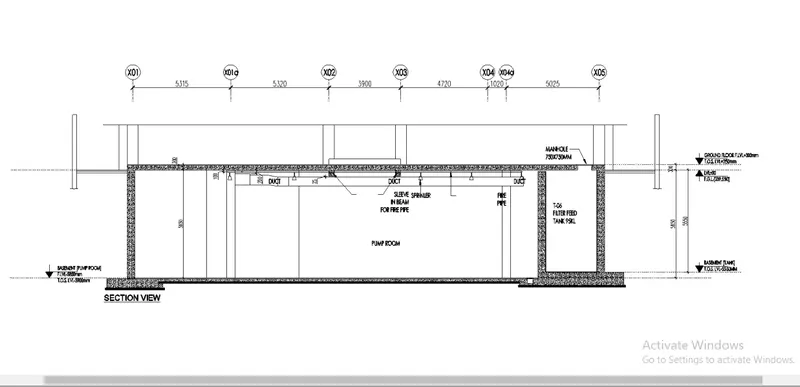
AIM:
a. To draft the section view of industrial building plan.
b. Use appropriate hatches where it required.
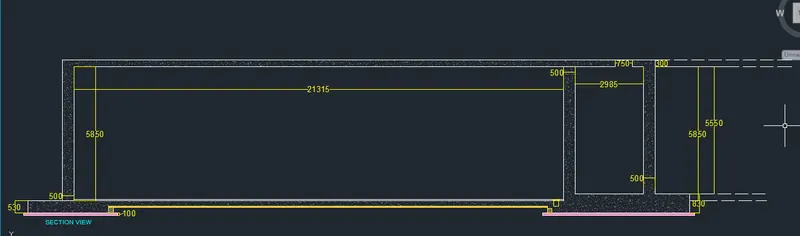
1) Draw outer wall and basement:
- Draw lines by "XL" and "XV"
- Offset 50mm, 5850mm(height of slab thickness from bottom ) and 300mm(thickness of slab) in upward direction from "XL" line
- Offset 25800mm from "XV" line in horizontal direction.
- fillet all required corners by fillet.
- Then offset horizontally 500mm,21315mm,500mm and 2985mm which is make vertical walls.
- For making base - Offset 230mm and 530mm in downward direction from "XL" line. and 100mm from last offset.
- trim unrequired lines.
- Offset 5550mm from inner side of slab which is make top base of basment slab.
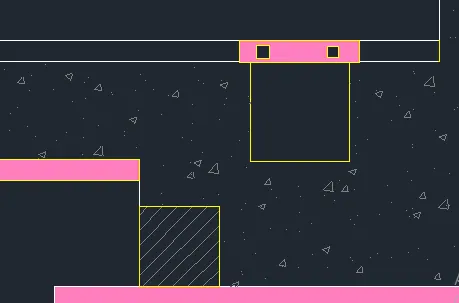
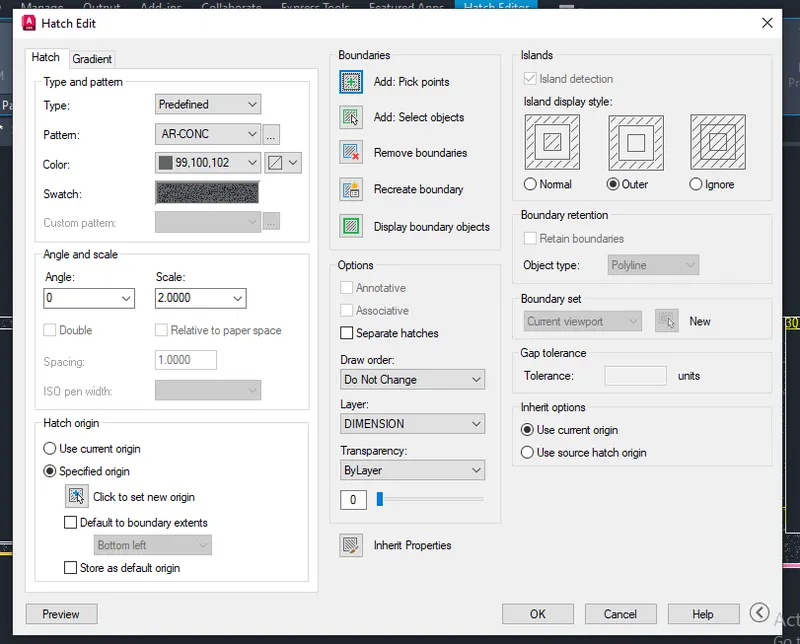
- Draw a rectangle 200 x 250mm in left hand side. using "USER" hatch type angle is 45 degree and scale is 25
- similarly Draw a rectangle 233 x 233mm having give offset 25mm both side and height is 50mm. also draw the 2 small rectangle in it.
- Using solid hatch pattern for it.
- Again draw reactangle 188 x 188mm. provide "USER" hatch type angle is 45 degree and scale is 25.
- Place this rectangles in right side basements.
- Make a manhole from right side at a distance of 500mm. Having size is 750 x 750mm.
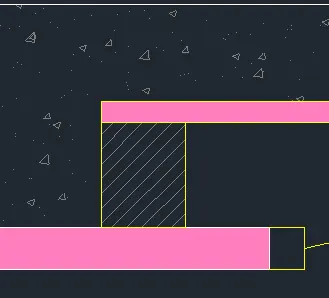
- HATCH:
- For hatch give command "H" - setting- select type, pattern,colour, and hatch origin - ok - select object - select internal point of this region - adjust the scale to required - enter.
RESULT:
2) Draw top section of industrial building:
- Offset 2000mm from top slab in upward direction.
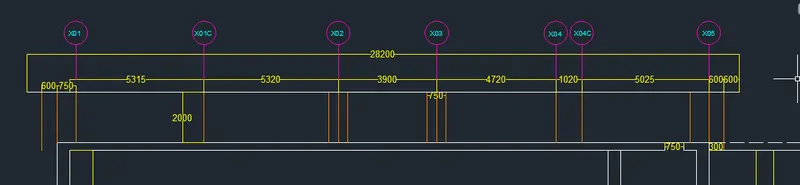
- Make Offset horizontally 5315mm, 5320mm, 3900mm, 4720mm, 1020mm, 5025mm, 600mm, 600mm from left inner side of wall to right side direction.
-Give Offset horizontally750mm, 600mm from left side of 5315mm.
- Trim unwanted lines by "tr" command.
- Give dimension and text i.e. X01,X01C, X02, X03, X04, X04C, X05 in circles.
- Provide offset 375mm both side of line at "X02" and "X03"
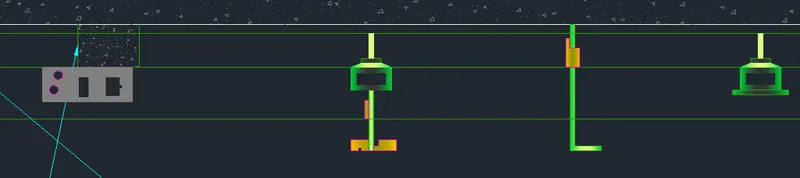
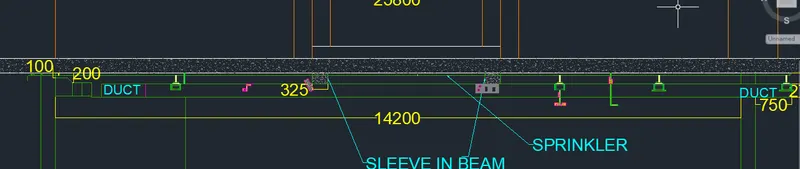
3) Pump room:
- Give offset 500mm from top slab bottom in bottom direction.
At left side: - This 500mm divide in 50mm( sprinkler), 100mm, 200mm at one side from top
- for make duct to divide the beam by using draw lines vertically.
At right side: - Offset 272mm from line in upward direction.
- Offset 750mm to left direction
- Make a hole to sprinkler for by using ellips.
- Give offset horizontally 750mm and 300mm from right end of sprinkler pipe
- Give offset horizontally 2700 at one side and 300mm and 1500mm at other side.
- Now Create valve by using rectangle and join this reactangle join by using line.
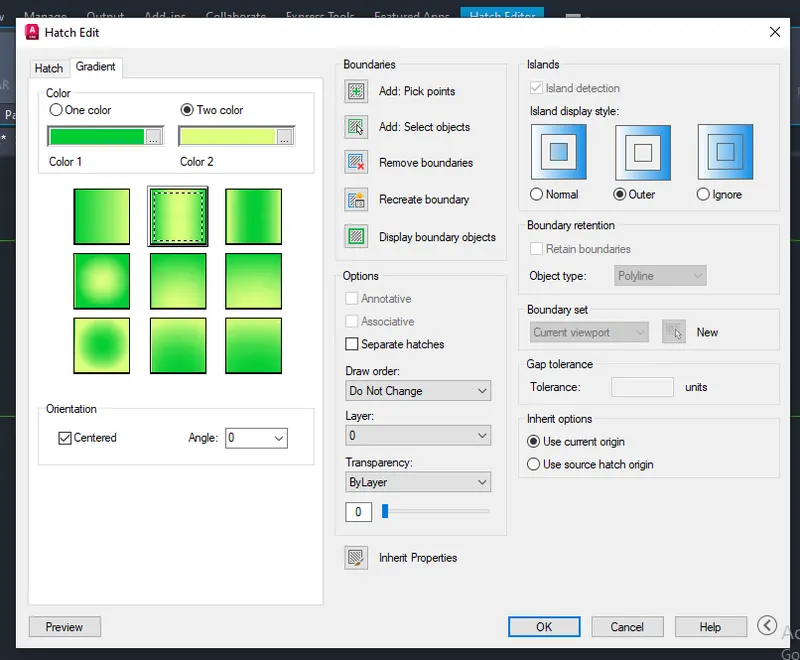
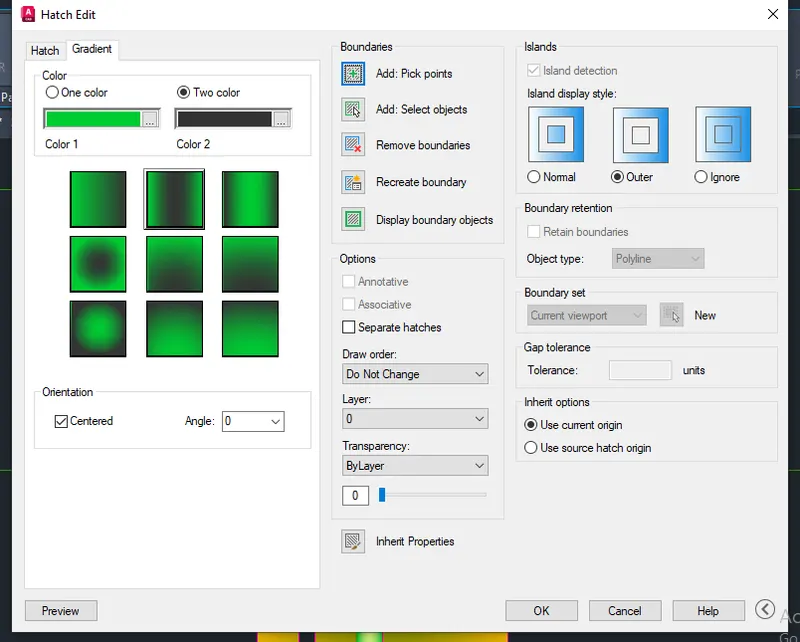
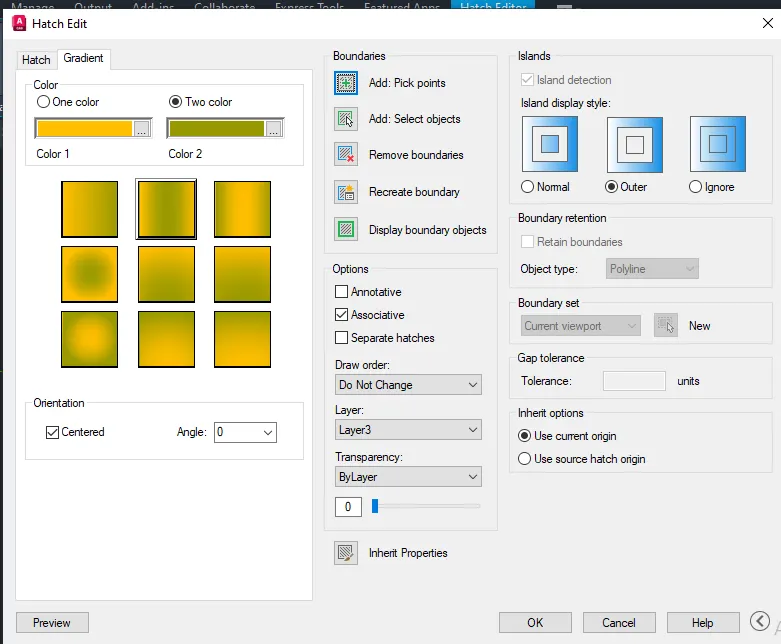
- Use gardient hatch pattern to sheaded valve and other things.
RESULT:
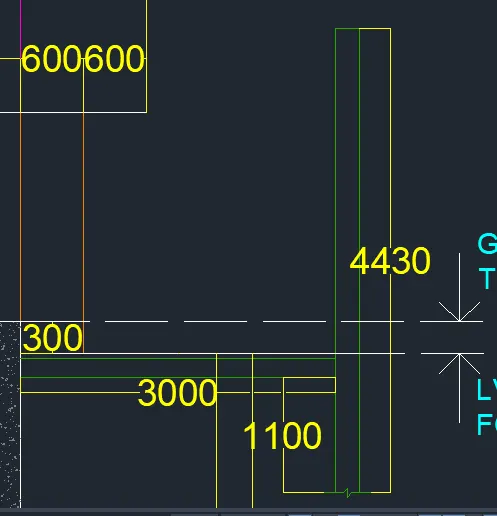
- Now draw rectangles 3000 x 230mm and 4430 x 230mm and join them perpendicular to both this then join this figure to
- Write text by using multitext and multileader hsving height is 250mm.
RESULT:
RESULT:
To create:
A. Layouts of the Kitchen and provide hatches pattern as shown.
B. Elevation of the plan created in the Challenges 7 and apply proper hatch to this elevation.
C. The section view of an industrial building.