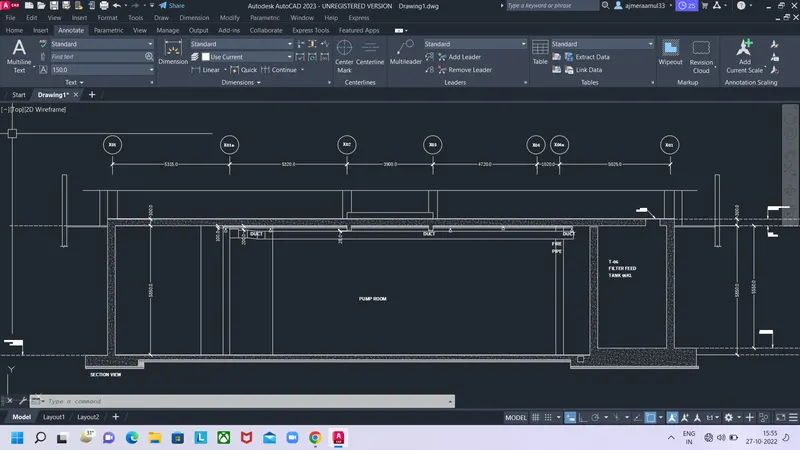
Creating Kitchen layout, Hatching of Architectural elements and sectional view of an Industrial Building in AutoCad
Q1.
Aim: Creating a layout of kitchen and hatching is provided where it is needed. The layout and hatching is done with the help of autocad.
Introduction: The hatching shows the which object it is. For example the brick wall masonary is hatched with the inclined lines. the hatching gives the good looking for the diagram. Differnt types of hatching patterns are available in the autocad like ANS131,ANS132,ANS133,ANS134 and ect., The hatching is done in the three models Normal,outer and fully.
Procedure creating the layout of the kitchen and providing hatching:
Type UN in the command line and set the units as decimal form
Now enter limits in the command line
Set lower limit as 0,0 and upper limit as 10000,10000
Type Z enter and A enter to fit the screen
Draw a rectangle by using line command with a size of 4300*3200
Give a offset of 250 for the thickness wall
Draw a single door panel for the kitchen entrance
Now a give offset of 600 for furniture drawing
The offset is given on both side same as shown in the question
Now drawing the furniture like firdge,micro owen,hub and other with the given dimensions in the question
The windows are drawn same as shown in the drawing
The unwanted lines are trimmed by using the TRIM command
The dimensions are given to drawing by using the DIMLIN command
And also we can use the DIMCONTINUE
Enter the text where it is needed. Select the height of the text with the rotation angle zero
Now after completion of drawing now is provided to the diagram where it is needed
Type hatch in the command line
The hatch tool will open
Go to option settings the dialog box is opend
Select the type of hatch that which we wanna give to the diagram
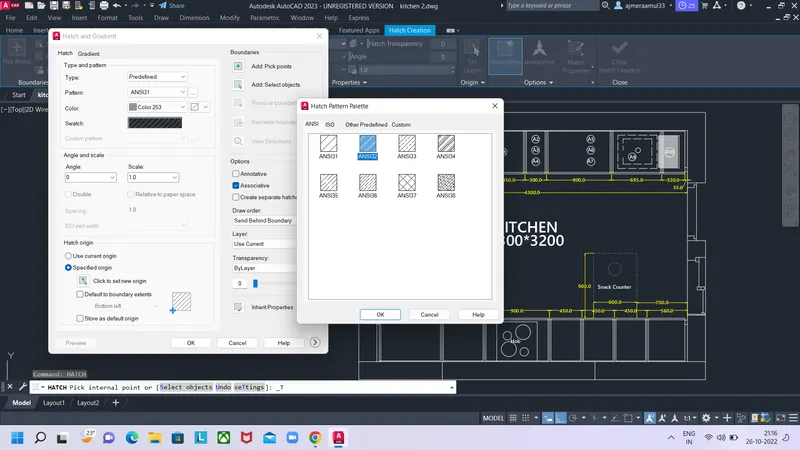
After selecting the hatch select add pick point
Add hatch to the diagram
Again go to the hatch command and provide hatch to the remaing parts of the diagram
Select the solid type hatch
Select the greyish colour to the solid hatch
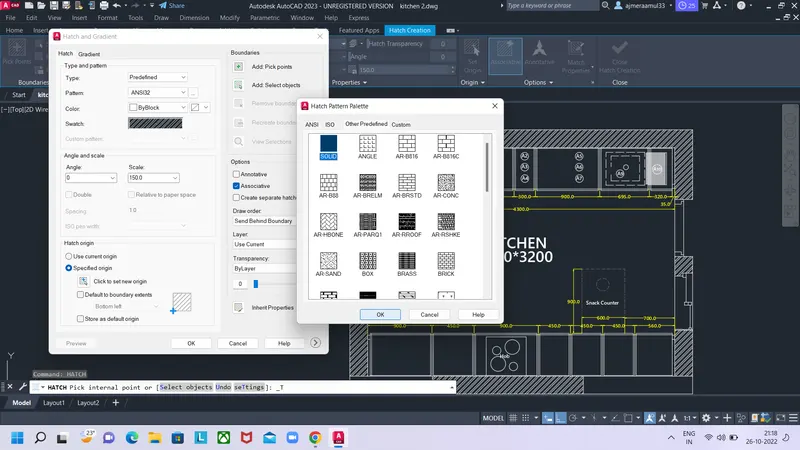
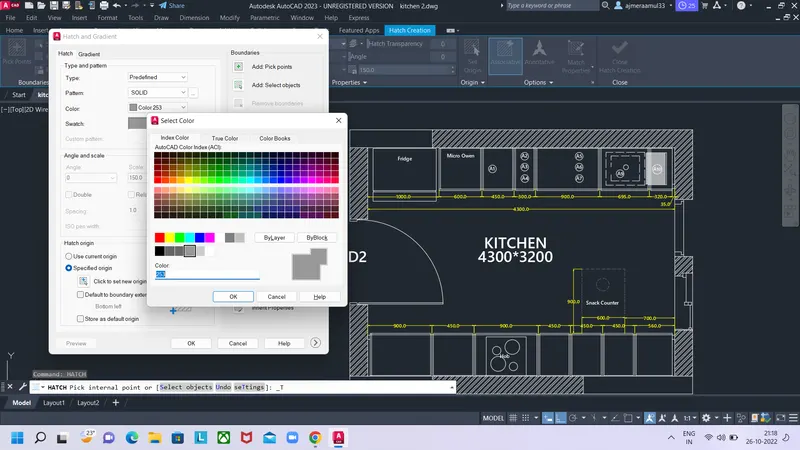
Now select the add pick point
And select the remaining area where we give hatch to the diagram
After providing the hatch the diagram will appear like as below
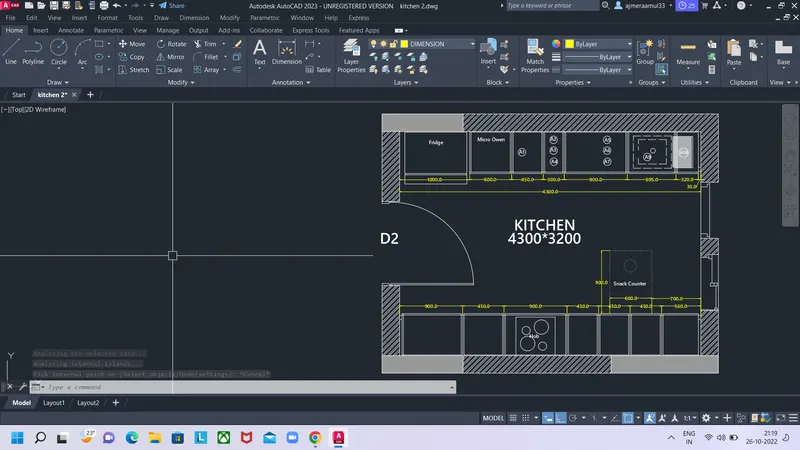
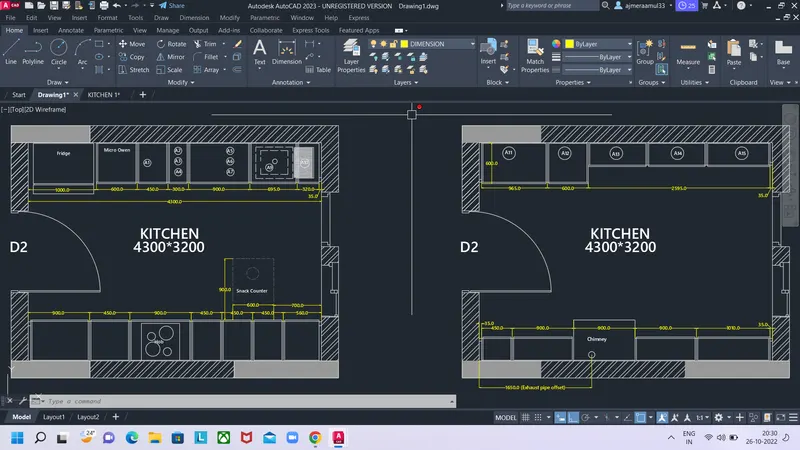
Now copy the first diagram and do it same as 1st drawing
Enter the hatch in the command line
Add hatch which we wanna give to the drawing
Result:
Q2.
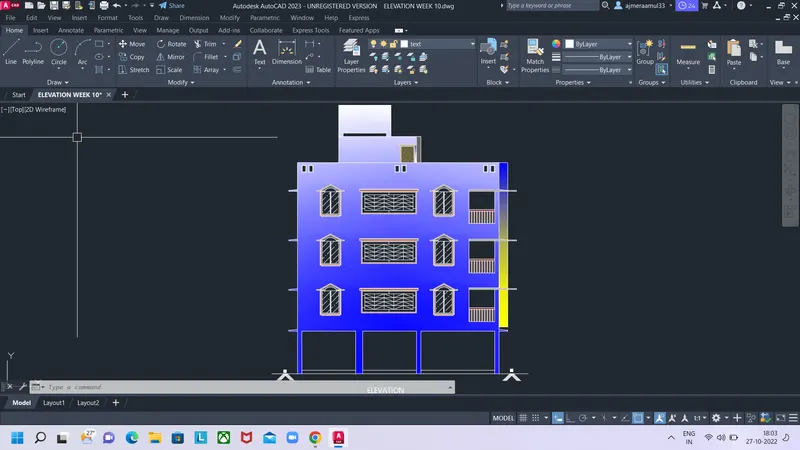
Aim: Creating the elevation plan of the challenge 7. And providing hatching to the drawing for walls,windows,doors etc.,
Introduction: The hatching is provided by using gradient type also. The hatching is done by combined of any two colours. The gradient type hatching is done in the drawing.
Procedure:
Type UN in the command line and set the units as decimal form
Now enter limits in the command line
Set lower limit as 0,0 and upper limit as 20000,20000
Type Z enter and A enter to fit the screen
First refer the drawing of the challenge 7 plan of the building
We can see the two windows and one verandah and bolcony of the each floor
Consider the height of the buildings that available in the drawing in challenge 7
Draw a line with the help of line tool
The height of the floor is drawn by offsetting the line of 2450
The sunshed is provided with a height of 2200
The 3 floors height is given
The ground floor height is given 2450
First floor height is given as 2850
Second floor height is given 2850
Third floor heoght is given 2850
The parapet wall height is given as 1000
The height of window is given from the slab is 1000
Now the window is designed same as in the question
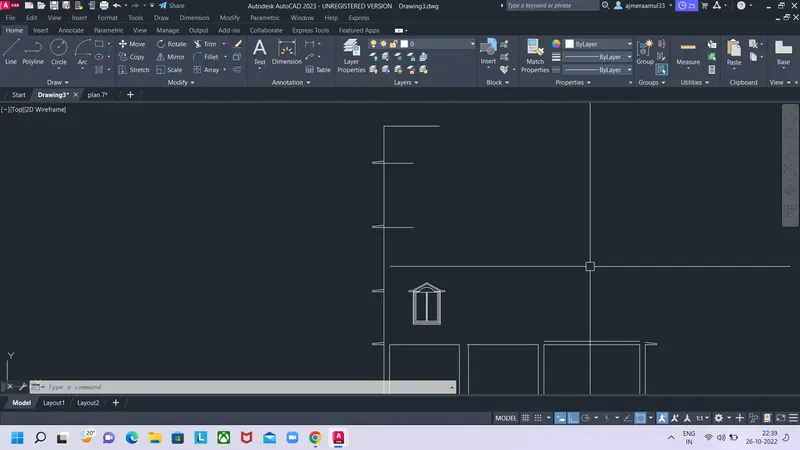
Now after drawing the window the window drawing is copied and placed same as in the question
Each floor the one window is provided
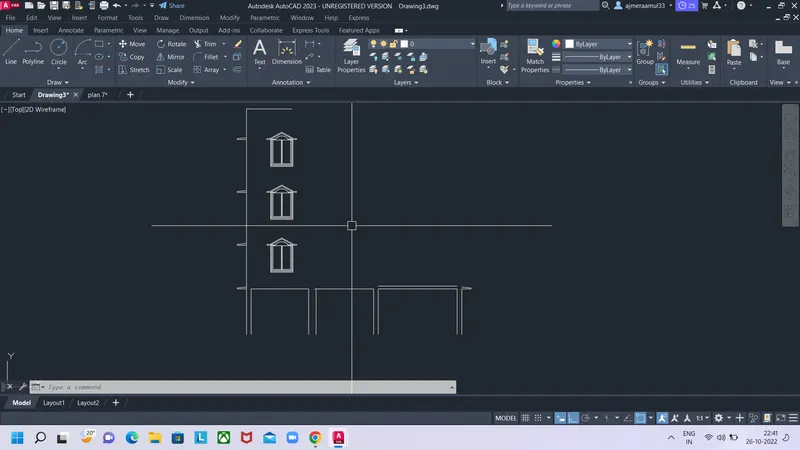
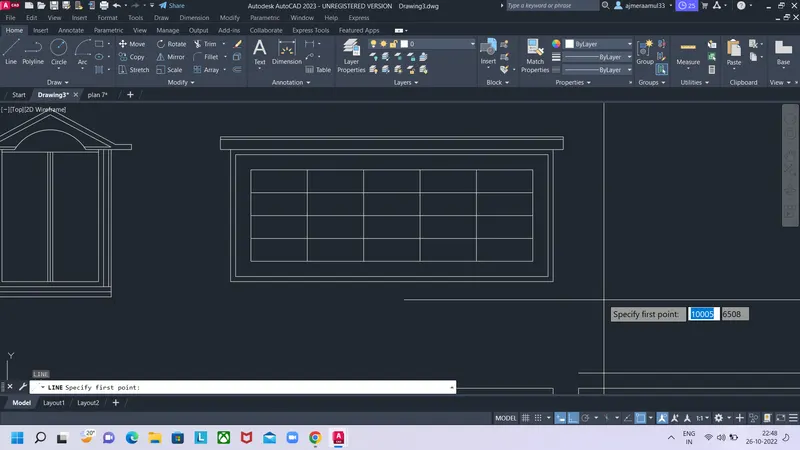
After providing the window now the verandah is drawn
Drawing the rectangle by using line tool
The internal design is provided same as in the question
The bellow drawing shows the verandah drawing
Now copy the drawing and place in the 2nd floor and 3rd floor
The below drawing the shows the drawing
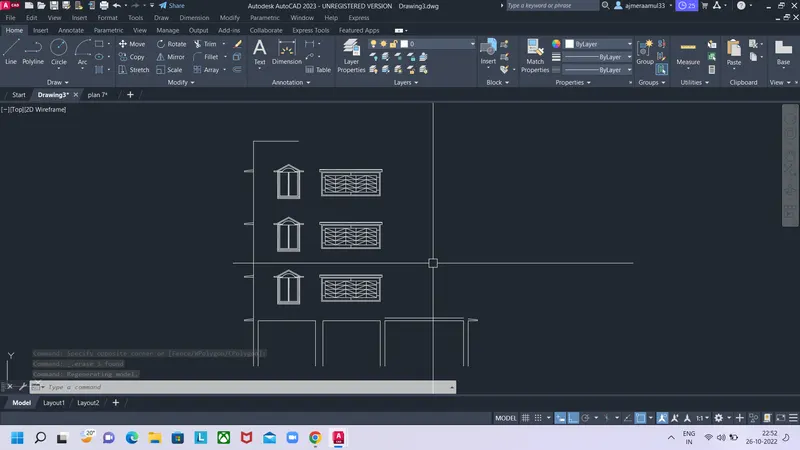
Same the windows are copied on other side of tjhe drawing same as on the question
Now for bolcony
The bolcony is provided on the slab its slef
The support is drawn for the bolcony
The sunshade is also provided for the bolcony also
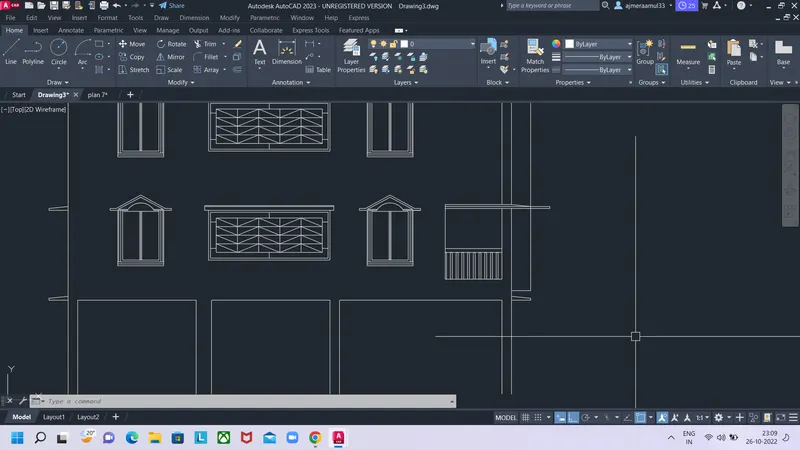
The bolcony drawing is copied and placed same as in the qestion
The below diagram is comes after placing the all the windows and verandah and bolcony\
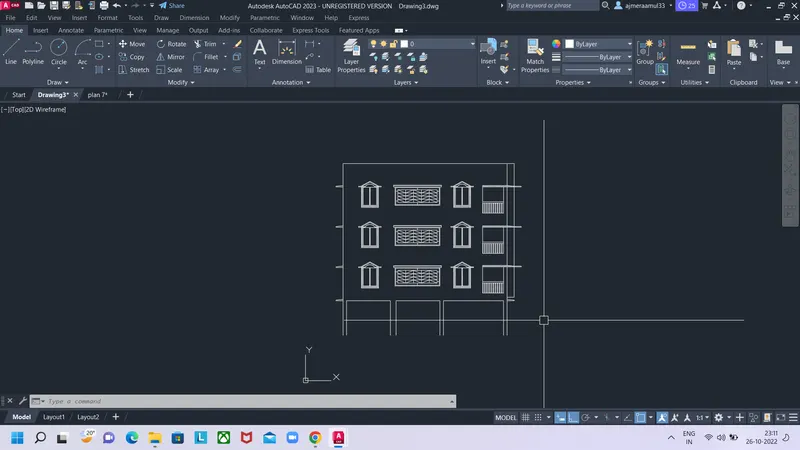
The awning structure is drawn for the staircases
The stucture height is given as 2500
And the over head tank is provided on the structure
The door is drawn with a door frame
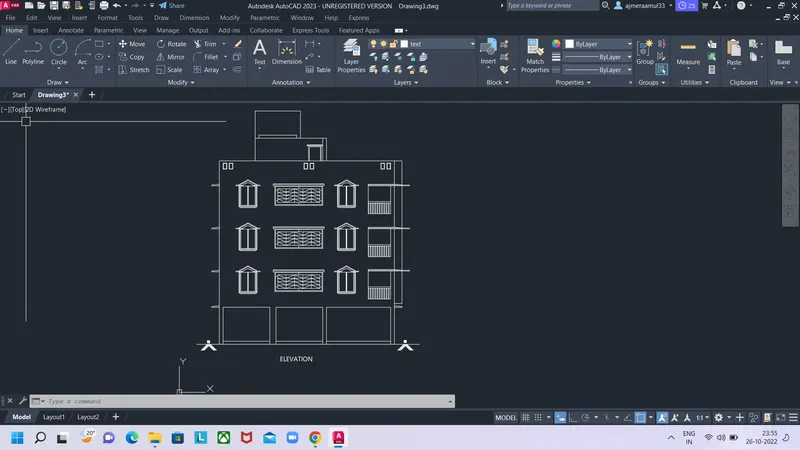
After completion of drawing now its time for hatching
Type hatch in the command line
And go to the option setting
It opens the dialog box of the hatching
Select the gradient option and select the colour 1 & 2 thatwhich give to the drawing of elevation
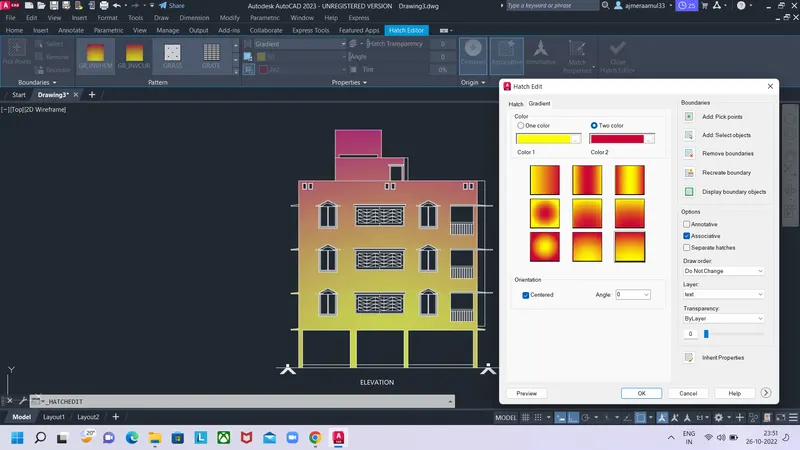
Now after hatching the wall of the building
The hatching is done to the window frames
Again go to the hatching command
select the solid pattern
Select the colour of lighten brown
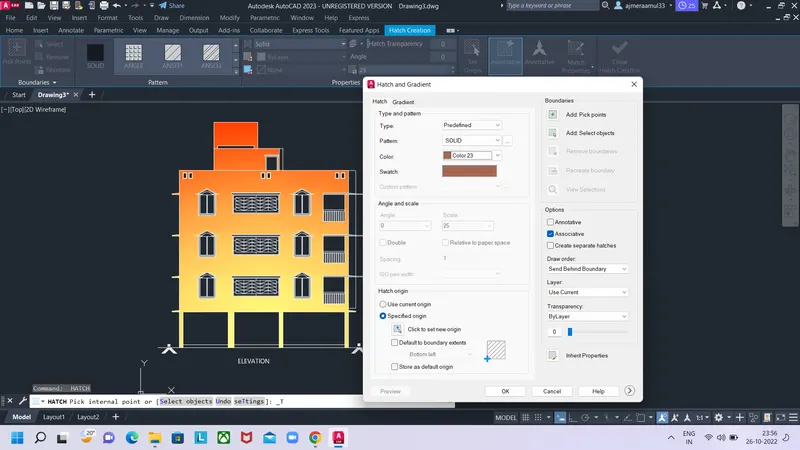
After selecting the colour and pattern of the hatch click on the add pick point
Select the area to which we gonna hatch
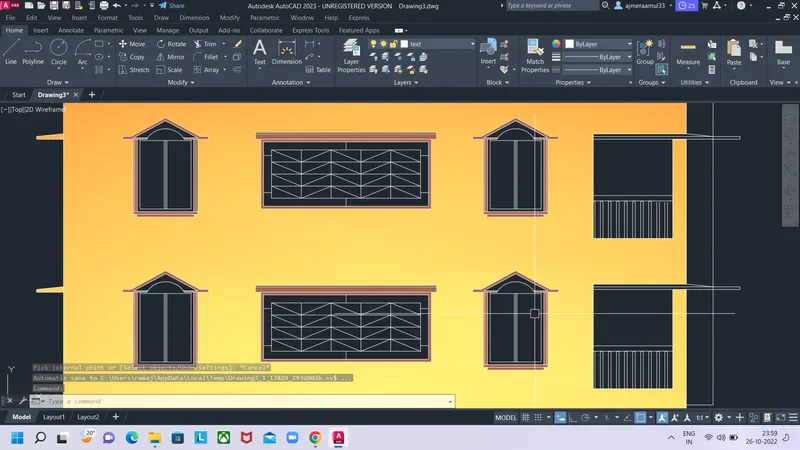
We can also edit the hatch colour and selected suitable colour for it
Result:
Q3.
Aim: Creating the sectional view of industrial building and providing proper hatch to the drawing
Procedure:
Type UN in the command line and set the units as decimal form
Now enter limits in the command line
Set lower limit as 0,0 and upper limit as 50000,50000
Type Z enter and A enter to fit the screen
Draw a vertical line of height 5850 using line command
Give a offset of 350 for column width
Draw a horizontal line and give a offset of 300 which means depth of the slab
For vertical line give a offset of 5315
Again give a offset of 350 and again 400 and again 400 and 400 and 300
Give a offset 5320 and 3900
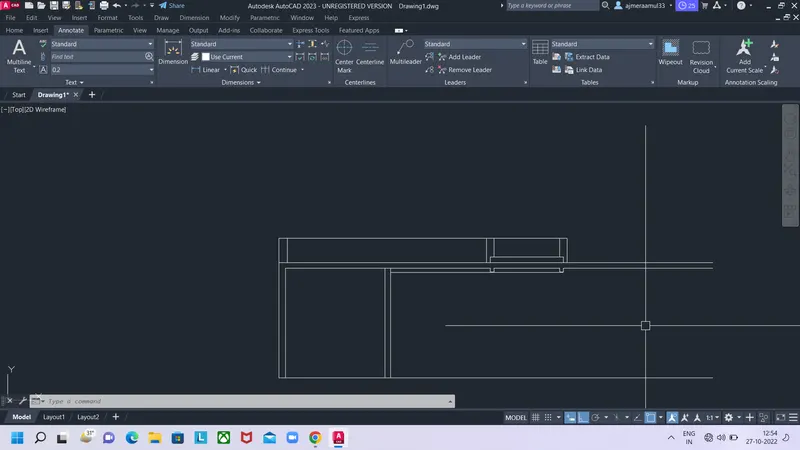
Draw a drawing as per the dimension given in the question
The dimensions which are not given in the question are assumed
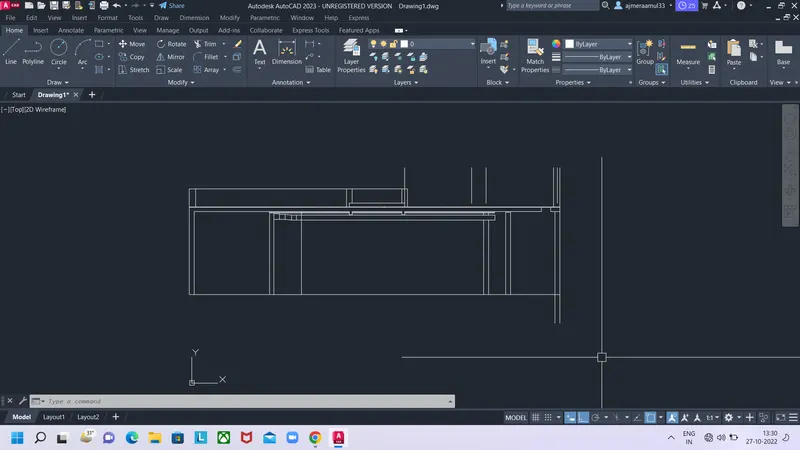
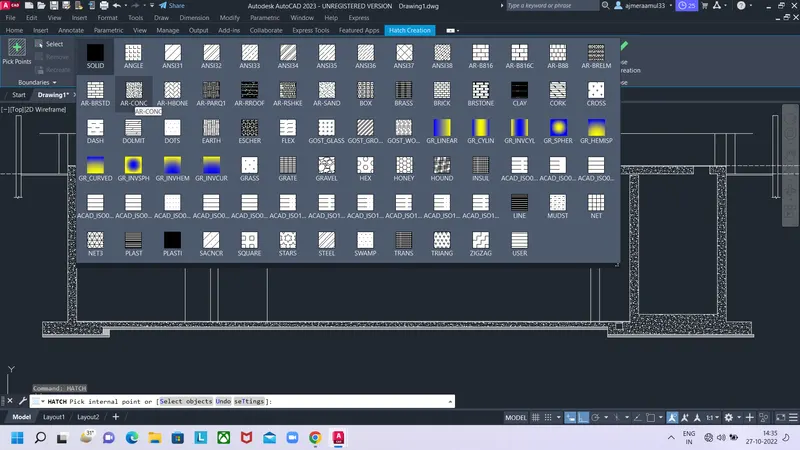
The hatch is provided to the concrete structures
The concrete hatch is provided to the drawing
The solid hatch is also added where it is needed
Type DTEXT in the command line to activate text tool
The text is written where it is required
The tool leader is used for specifying the objects in the drawing
Result: