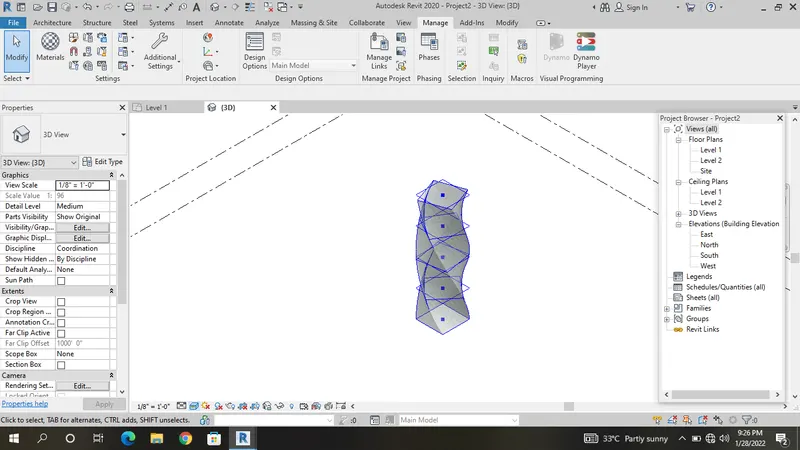
Creating Conceptual mass in REVIT and Creation of Sinusoidal curve and a Parametric stadium using Dynamo
1.
Aim:
To draw the dynamo using in Revit
Procedure:
Step 1
Go to the new project
select the architectural templates
Step 2
select the manage tab
select the dynamo
Step 3
select the new file
Step 4
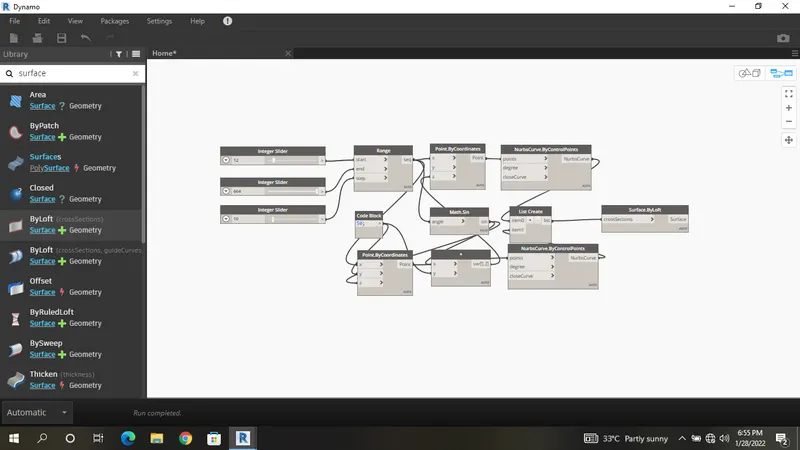
select the integer slider
select the range
select the code block
select the point.by coordinates
select the point.by coordinates
select the math.sin
select the product
select the nurbscurve.by coordinates
select the list create
select the surface.by loft
Step 5
connect by slider to range,start
connect by slider to range,end
connect by slider to range,step
Step 6
connect by list to point X
connect by list to point Y
connect bypoint to math angle
Step 7
connect by code to product Y
connect by point Z to point X
Step 8
connect by point Z to words
connect by double to product X
Step 9
connect by point to nurbs point
connect by nurbs to items0
connect by nurbs to items1
Step 10
connect by list to surface.by left
Step 11
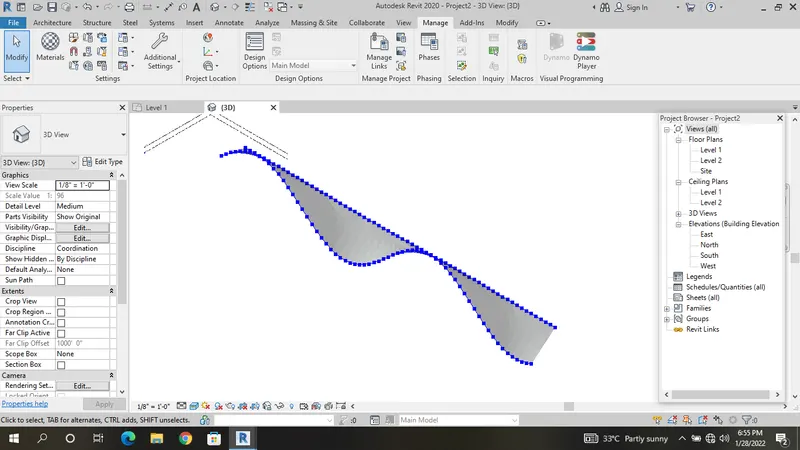
Go to the Revit and diagram
2.
Aim:
To draw the Dynamo using in Revit
Procedure:
Step 1
Go to the new project
select the architectural templates
Step 2
select the manage tab
select the dynamo
Step 3
select the new file
Step 4
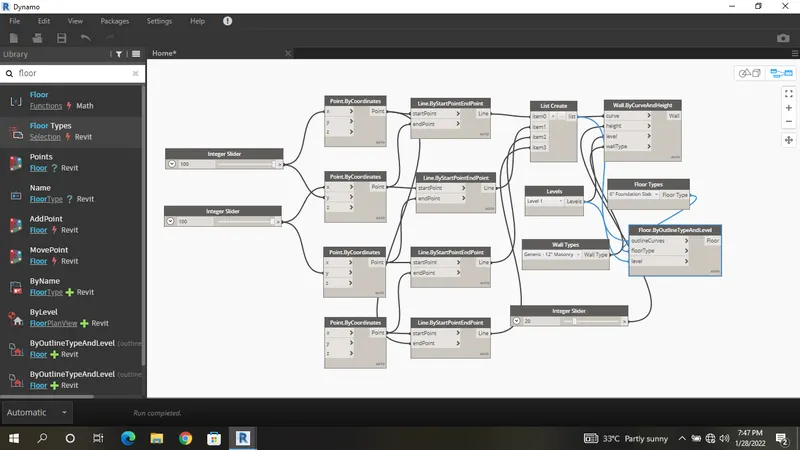
select the integer slider
select the point.by coordinates
select the line.bystartpoint endpoint
select the list create
select the levels
select the wall types
select the integer slider
select the wall.by curve and height
select the floor type
select the floor.by outline type and levels
Step 5
connect by slider to point X
connect by slider to point X
connect by slider to point Y
connect by slider to point Y
Step 6
connect by point to start point
connect by point to end point
connect by point to start point
connect by point to end point
connect by point to start point
connect by point to end point
connect by point to start point
Step 7
connect by line to item0
connect by line to item1
connect by line to item2
connect by line to item3
Step 8
connect by list to curve
connect by levels to level
connect by wall type to wall type
connect by slider to height
Step 9
connect by list to list
connect by floor to floor
connect by level to outfit
Step 10
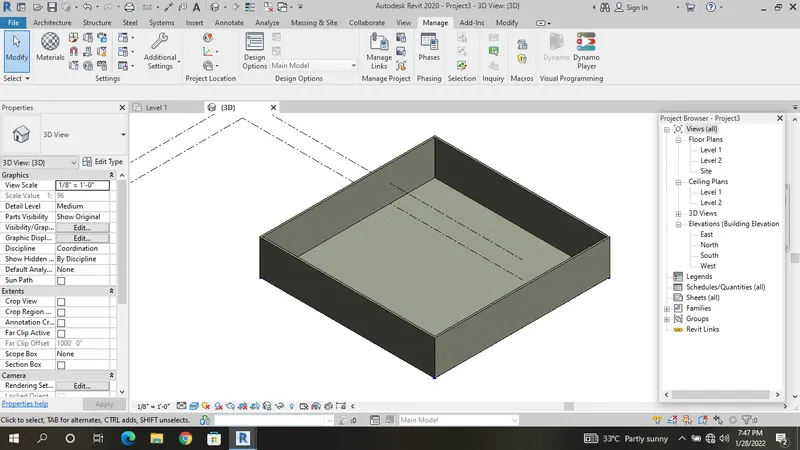
Go to the revit and digram
3.
Aim:
To draw the dynamo using in Revit
Procedure:
Step 1
Go to the new project
select the architectural templates
Step 2
select the manage tab
select the dynamo
Step 3
select the new file
Step 4
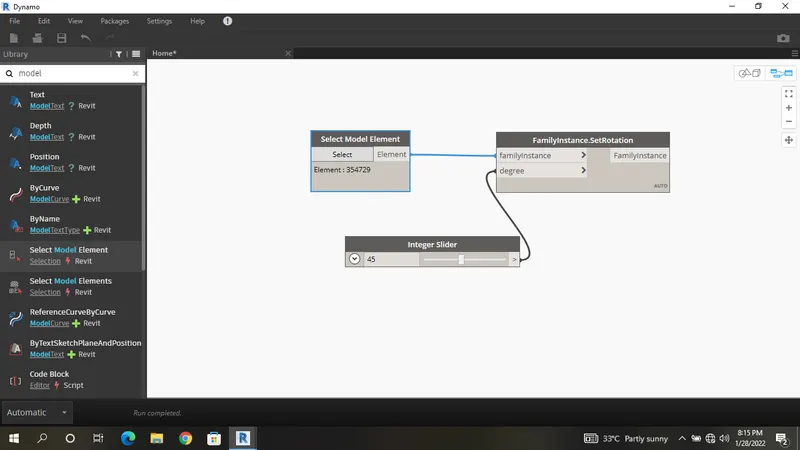
select the select model element
select the integer slider
select the family instance.set rotation
Step 5
connect by element to family instance
connect by slider to rotation
Step 6
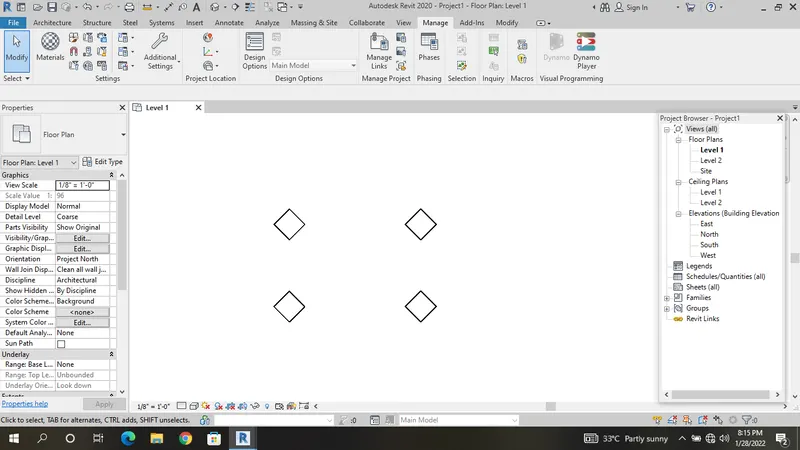
Go to the revit and diagram
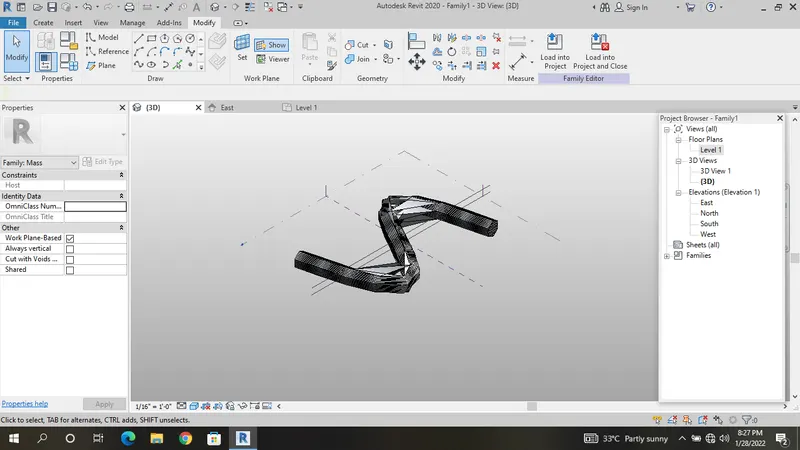
4.
Aim:
To draw the dynamo using in Revit
Procedure:
Step 1
Go to the family file
select the architectural templates
Step 2
select the conceputal model
select the metric
Step 3
draw the curve line
Step 4
select the set
select the shower
Step 5
select the point through the set
select at all point
Step 6
Select the polygon
select at all the point
through the polygon
Step 7
select the create the loft
5.
Aim:
To draw the dynamo using in Revit
Procedure:
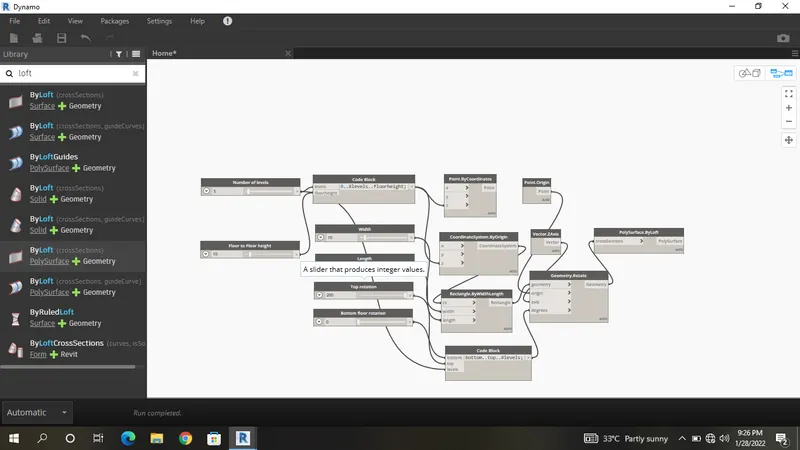
Step 1
Go to the new project
select the architectural templates
Step 2
select the manage tab
select the dynamo
Step 3
select the new file
Step 4
select the integer slider
select the code block
select the point.bt coordinate
select the coordinate system.by origin
select the rectangular.by widthlength
select the point.origin
select the vector.zaxis
select the geometery.rotate
select the polysurface.by loft
Step 5
connect by slider to level
connect by slider to floorheight
Step 6
connect by levelsfloor to point Z
connect by levelsfloor to origin Z
Step 7
connect by slider to origin Z
connect by slider to length
connect by width to width
Step 8
connect by level to level
connect by top to top
connect by bottom to bottom
Step 9
connect by point to point origin
connect by vector to CS
connect by bottom top to rotation
Step 10
connect by geometery to polysurface.by loft